1
PIO-D144
User’s Manual
Warranty
All products manufactured by ICP DAS are warranted
against defective materials for a period of one year from the
date of delivery to the original purchaser.
Warning
ICP DAS assume no liability for damages consequent to
the use of this product. ICP DAS reserves the right to change
this manual at any time without notice. The information
furnished by ICP DAS is believed to be accurate and reliable.
However, no responsibility is assumed by ICP DAS for its use,
nor for any infringements of patents or other rights of third
parties resulting from its use.
Copyright
Copyright © 1999 by ICP DAS. All rights are reserved.
Trademark
The names used for identification only maybe registered
trademarks of their respective companies.
Version: 2.1
Date:1999/10
Page 1
PIO-D144 User’s Manual
Tables of Contents
1.
INTRODUCTION ......................................................................................................................... 3
2.
HARDWARE CONFIGURATION............................................................................................... 4
3.
2.1
BOARD LAYOUT............................................................................................................................ 4
2.2
I/O PORT LOCATION .................................................................................................................... 5
2.3
ENABLE I/O OPERATION .............................................................................................................. 5
2.4
D/I/O ARCHITECTURE ................................................................................................................. 6
2.5
INTERRUPT OPERATION ............................................................................................................... 7
2.6
DAUGHTER BOARDS .................................................................................................................. 12
2.7
PIN ASSIGNMENT ....................................................................................................................... 18
I/O CONTROL REGISTER....................................................................................................... 20
3.1 HOW TO FIND THE I/O ADDRESS ................................................................................................. 20
4.
3.1.1
PIO_DriverInit............................................................................................................... 22
3.1.2
PIO_GetConfigAddressSpace........................................................................................ 23
3.1.3
Show_PIO_PISO ........................................................................................................... 24
3.2
THE ASSIGNMENT OF I/O ADDRESS ............................................................................................ 25
3.3
THE I/O ADDRESS MAP ............................................................................................................. 27
3.3.1
RESET\ Control Register ............................................................................................... 27
3.3.2
AUX Control Register .................................................................................................... 28
3.3.3
AUX data Register.......................................................................................................... 28
3.3.4
INT Mask Control Register ............................................................................................. 28
3.3.5
Aux Status Register ........................................................................................................ 29
3.3.6
Interrupt Polarity Control Register ............................................................................... 29
3.3.7
Read/Write 8-bit data Register ...................................................................................... 30
3.3.8
Active I/O Port Control Register.................................................................................... 30
3.3.9
I/O Selection Control Register....................................................................................... 31
DEMO PROGRAM ..................................................................................................................... 32
4.1
PIO-D144.H ............................................................................................................................ 33
4.2
DEMO1: USE D/O OF CN1 ....................................................................................................... 34
4.3
DEMO2: USE D/O OF CN1~CN6 .............................................................................................. 36
4.4
DEMO3: INTERRUPT DEMO1 ...................................................................................................... 38
4.5
DEMO4: INTERRUPT DEMO2 ...................................................................................................... 40
4.6
DEMO5: INTERRUPT DEMO3 ...................................................................................................... 42
4.7
DEMO 6: OUTPORT OF CN1-CN6............................................................................................ 44
4.8
DEMO10: FIND CARD NUMBER ................................................................................................. 47
Page 2
Version: 2.1
Date: 1999/10
PIO-D144 User’s Manual
1.
Introduction
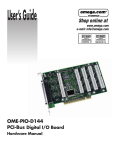
The PIO-D144 consists of one DB-37 & five 50-pin flat-cable connectors.
There are three 8-bit port, PA, PB & PC in each connector. Every port consists of 8bit programmable D/I/O. So the PIO-D144 can provide 144 channels of TTLcompatible D/I/O.
1.1
•
•
•
•
•
•
•
•
•
•
•
•
specifications
PC compatible PCI bus
One DB-37 connector and five 50-pin flat-cable connectors
Each port consists of three 8-bit port, PA, PB & PC in every connector
Each port can be programmed as D/I or D/O independently.
Each board = 6 connector = 6×3 port = 6×3×8 bit =144 bit
4 interrupt sources: PC0,PC1,PC2,PC3
All signals are TTL compatible
Operating Temperature: 0°C to 60°C
Storage Temperature: -20°C to 80°C
Humility: 0 to 90% non-condensing
Dimension: 180mm X 105mm
Power Consumption: +5V @ 1100mA
1.2
Product Check List
In addition to this manual, the package includes the following items:
• PIO-D144 card
• Demo program diskette
Attention !
If any of this items is missing or damaged, contact the dealer
from whom you purchased the product. Save the shipping
materials and carton in case you want to ship or store the
product in the future.
Version: 2.1
Date: 1999/10
Page 3
PIO-D144 User’s Manual
CN1_PA
CN1
CN2_PA
CN2
CN3_PA
CN3
CN4_PA
CN4
CN5_PA
CN5
CN6_PB
CN6_PA
CN6
CN6_PC
CN5_PB
CN5_PC
50-PIN
CN4_PB
CN4_PC
50-PIN
CN3_PB
CN3_PC
50-PIN
CN2_PB
CN2_PC
50-PIN
CN1_PB
CN1_PC
50-PIN
PIO-D144
DB-37 PIN
PCI BUS
Date: 1999/10
Version: 2.1
Page 4
Board Layout
2.1
Hardware configuration
2.
PIO-D144 User’s Manual
2.2
I/O Port Location
There are eighteen 8-bit I/O ports in the PIO-D144. Every I/O port can be
programmed as D/I or D/O port. When the PC is first power-on, all eighteen ports are
used as D/I port. The I/O port location is given as following:
Connector of PIO-D144
PA0 to PA7
PB0 to PB7
PC0 to PC7
CN1
CN1_PA
CN1_PB
CN1_PC
CN2
CN2_PA
CN2_PB
CN2_PC
CN3
CN3_PA
CN3_PB
CN3_PC
CN4
CN4_PA
CN4_PB
CN4_PC
CN5
CN5_PA
CN5_PB
CN5_PC
CN6
CN6_PA
CN6_PB
CN6_PC
Refer to Sec. 2.1 for board layout & I/O port location.
Note: PC0, PC1, PC2, PC3 of CN1 can be used as interrupt signal source. Refer
to Sec. 2.5 for more information.
2.3
Enable I/O Operation
When the PC is first power-on, all operation of D/I/O port are disable. The
enable/disable of D/I/O is controlled by the RESET\ signal. Refer to Sec. 3.3.1 for
more information about RESET\ signal. The power-on states are given as following:
• All D/I/O operations are disable
• All eighteen D/I/O ports are configured as D/I port
• All D/O latch register are undefined.(refer to Sec. 2.4)
The user has to perform some initialization before using these D/I/O. The
recommended steps are given as following:
Step 1: Make sure which ports are D/O ports.
Step 2: Enable all D/I/O operation.(refer to Sec. 3.3.1).
Step 3: Select the active port (refer to Sec. 3.3.8).
Step 4: Send initial-value to the D/O latch register of this active port.
(Refer to Sec. 2.4 & Sec. 3.3.7)
Step 5: Repeat Step3 & Step4 for all D/O ports
Step 6: Configure all eighteen D/I/O ports to their expected D/I or D/O state.
(Refer to Sec. 3.3.9)
Refer to DEMO1.C for demo program.
Version: 2.1
Date: 1999/10
Page 5
PIO-D144 User’s Manual
2.4
D/I/O Architecture
I/O select (Sec. 3.3.9)
D/I/O
RESET\ (Sec. 3.3.1)
disable\
Data
input
Latch
(Sec. 3.3.7)
Clock input
D/O latch CKT
disable
Data
Buffer
input
(Sec. 3.3.7)
Clock input
D/I buffer CKT
•
•
•
•
•
The RESET\ is in Low-state ! all D/I/O operation is disable
The RESET\ is in High-state ! all D/I/O operation is enable.
If D/I/O is configured as D/I port ! D/I=external input signal
If D/I/O is configured as D/O port ! D/I = read back of D/O
If D/I/O is configured as D/I port ! send to D/O will change the D/O latch
register only. The D/I & external input signal will not change.
Page 6
Version: 2.1
Date: 1999/10
PIO-D144 User’s Manual
2.5
Interrupt Operation
The PC0, PC1, PC2, PC3 of CN1_PC can be used as interrupt signal source. Refer
to Sec. 2.1 for PC0/1/2/3 location. The interrupt of PIO-D144 is level-trigger &
Active_High. The interrupt signal can be inverted or non-inverted
programmable. The procedures of programming are given as follows:
1. make sure the initial level is High or Low
2. if the initial state is High ! select the inverted signal (Section. 3.3.6)
3. if the initial state is Low ! select the non-inverted signal (Section. 3.3.6)
4. enable the INT function (Section. 3.3.4)
5. If the interrupt signal is active ! program will transfer into the interrupt
service routine ! if INT signal is High now ! select the inverted input
! if INT signal is Low now ! select the non-inverted input
Refer to DEMO3.C & DEMO4.C for single interrupt source. Refer to
DEMO5.C for four interrupt sources.
If only one interrupt signal source is used, the interrupt service routine does not
have to identify the interrupt source. (Refer to DEMO3.C & DEMO4.C)
If there are more than one interrupt source, the interrupt service routine has to
identify the active signals as following: (refer to DEMO5.C)
1. Read the new status of the interrupt signal source
2. Compare the new status with the old status to identify the active signals
3. If PC0 is active, service CN1_PC0 & non-inverter/inverted the CN1_PC0 signal
4. If PC1 is active, service CN1_PC1 & non-inverted/inverted the CN1_PC1 signal
5. If PC2 is active, service CN1_PC2 & non-inverted/inverted the CN1_PC2 signal
6. If PC3 is active, service CN1_PC3 & non-inverted/inverted the CN1_PC3 signal
7. Save the new status to old status
Limitation: if the interrupt signal is too short, the new status may be as same as
old status. So the interrupt signal must be hold-active until the interrupt service
routine is executed. This hold time is different for different O.S. The hold time
can be as short as micro-second or as long as second. In general, 20ms is enough
for all O.S.
Version: 2.1
Date: 1999/10
Page 7
PIO-D144 User’s Manual
Example 1: assume initial level=Low, PC0 is used as interrupt source:
Initial=Low
Iniaial_sub()
{ now_int_state=0
_outpd(wBase+0x2a,0)
/*(select the non-inverted signal)*/
ISR_sub()
{
If (now_int_state==0) /* old state=low ! change to high now */
{
now_int_state=1;
/* now int_signal is High
*/
/*** application codes are given here ***/
_outpd(wBase+0x2a,1);
/* select the inverted signal
*/
}
else
/* old state=high! change to low now */
{
now_int_state=0;
/* now int_signal is Low
*/
/*** application codes are given here ***/
_outpd(wBase+0x2a,0);
}
/* select the non-inverted signal */
if (wIrq>=8) outp(A2_8259,0x20);
outp(A1_8259,0x20);
/*
/*
EOI
EOI
}
Refer to DEMO3.C for source code.
Page 8
Version: 2.1
Date: 1999/10
*/
*/
PIO-D144 User’s Manual
Example 2: assume initial level=High, PC0 is used as interrupt source:
Initial=High
Inverted=Low
Iniaial_sub()
{ now_int_state=1
_outpd(wBase+0x2a,1)
/*(select the inverted signal)*/
ISR_sub()
{
If (now_int_state==0) /* old state=low ! change to high now */
{
now_int_state=1;
/* now int_signal is High
*/
/*** application codes are given here ***/
_outpd(wBase+0x2a,1);
/* select the inverted signal
*/
}
else
/* old state=high! change to low now */
{
now_int_state=0;
/* now int_signal is Low
*/
/*** application codes are given here ***/
_outpd(wBase+0x2a,0);
}
/* select the non-inverted signal */
if (wIrq>=8) outp(A2_8259,0x20);
outp(A1_8259,0x20);
/*
/*
EOI
EOI
*/
*/
}
Refer to DEMO4.C for source code.
Version: 2.1
Date: 1999/10
Page 9
PIO-D144 User’s Manual
Example 3: assume CN1_PC0 is initial Low, active High,
CN1_PC1 is initial High, active Low
CN1_PC2 is initial Low, active High
CN1_PC3 is initial High, active Low
As follows:
CN1_PC0
CN1_PC1
CN1_PC2
CN1_PC3
CN1_PC0 &
CN1_PC1 are
active at the same
time.
CN1_PC0 &
CN1_PC1 are
return to normal
at the same time.
CN1_PC2 &
CN1_PC3 are
active at the same
time.
CN1_PC2 &
CN1_PC3 are
return to normal
at the same time.
Refer to DEMO5.C for source program. All these four falling-edge & rising-edge
can be detected by DEMO5.C.
Note: when the interrupt is active, the user program has to identify the active
signals. These signals maybe active at the same time. So the interrupt
service routine has to service all active signals at the same time.
Page 10
Version: 2.1
Date: 1999/10
PIO-D144 User’s Manual
void interrupt irq_service()
{
char cc;
int_num++;
/* 1. Read interrupt signal status */
new_int_state=inp(wBase+0x07)&0xff;
/* 2. Find the active signal
*/
int_c=new_int_state ^ now_int_state;
/* 3. IF PC0 is active
*/
if ((int_c&0x01) != 0)
{
cc=new_int_state&0x01;
if (cc !=0) CNT_H1++; else CNT_L1++;
invert=invert ^ 1;
}
/* 4. IF PC1 is active
*/
if ((int_c&0x02) != 0)
{
cc=new_int_state&0x02;
if (cc !=0) CNT_H2++; else CNT_L2++;
invert=invert ^ 2;
}
/* 5. IF PC2 is active
*/
if ((int_c&0x04) != 0)
{
cc=new_int_state&0x04;
if (cc !=0) CNT_H3++; else CNT_L3++;
invert=invert ^ 4;
}
/* 6. IF PC3 is active
*/
if ((int_c&0x08) != 0)
{
cc=new_int_state&0x08;
if (cc !=0) CNT_H4++; else CNT_L4++;
invert=invert ^ 8;
}
now_int_state=new_int_state;
outp(wBase+0x2a,invert);
if (wIrq>=8) outp(A2_8259,0x20);
outp(A1_8259,0x20);
}
Version: 2.1
Date: 1999/10
Page 11
PIO-D144 User’s Manual
2.6
Daughter Boards
2.6.1
DB-37
The DB-37 is a general purpose daughter board for D-sub 37 pins. It is designed
for easy wire connection.
37-PIN cable
DB-37
2.6.2
DN-37 & DN-50
The DN-37 is a general purpose daughter board for DB-37 with DIN-Rail
Mounting. The DN-50 is designed for 50-pin flat-cable header. They are designed for
easy wire connection. Both have Din-Rail mounting.
37-PIN cable
DN-37
2.6.3
DB-8125
The DB-8125 is a general purpose screw terminal board. It is designed for easy
wire connection. There are one DB-37 & two 20-pin flat-cable header in the DB-8125.
37pin cable
Page 12
Version: 2.1
DB-8125
(for DB-37 or
20-pin flat-cable header)
Date: 1999/10
PIO-D144 User’s Manual
2.6.4
ADP-37/PCI & ADP-50/PCI
The ADP-37/PCI & ADP-50/PCI are extender for 50-pin header. One side of
ADP-37/PCI & ADP-50/PCI can be connected to a 50-pin header. The other side can
be mounted on the PC chassis as following:
ADP-37/PCI: 50-pin header to DB-37 extender.
ADP-50/PCI: 50-pin header to 50-pin header extender.
Version: 2.1
Date: 1999/10
Page 13
PIO-D144 User’s Manual
2.6.5
DB-24P, DB-24PD Isolated Input Board
The DB-24P is a 24-channel isolated digital input daughter board. The optically
isolated inputs of the DB-24P consists of a bi-directional optocoupler with a resistor
for current sensing. You can use the DB-24P to sense DC signal from TTL levels up
to 24V or use the DB-24P to sense a wide range of AC signals. You can use this
board to isolated the computer from large common-mode voltage, ground loops and
transient voltage spike that often occur in industrial environments.
V+
PIO-D144
VOpto-Isolated
PIO-D144
CN2
CN6
50-Pin cable
DB-24P
AC or DC Signal
0V to 24V
DB-24P
DB-24PD
50-pin flat-cable header
Yes
Yes
D-sub 37-pin header
No
Yes
Other specifications
Page 14
Same
Version: 2.1
Date: 1999/10
PIO-D144 User’s Manual
2.6.6
DB-24R, DB-24RD Relay Board
The DB-24R, 24-channel relay output board, consists of 24 form C relays for
efficient switch of load by programmed control. The relay are energized by apply
12V/24V voltage signal to the appropriated relay channel on the 50-pin flat
connector. There are 24 enunciator LED’s for each relay, light when their associated
relay is activated.
From C Relay
Normal Open
Normal Close
Com.
DB-24R
PIO-D144
Note:
50-Pin cable
Channel: 24 From C Relay
Relay: Switching up to 0.5A at 110ACV
or 1A at 24DCV.
DB-24R
DB-24RD
50-pin flat-cable header
Yes
Yes
D-sub 37-pin header
No
Yes
Other specifications
Same
DB-24R, DB-24RD
24 × Relay (120V, 0.5A)
DB-24PR,DB-24PRD
24 × Power Relay (250V, 5A)
DB-24POR
24 × Photo MOS Relay (350V, 01.A)
DB-24SSR
24 × SSR (250VAC, 4A)
DB-24C
24 × O.C. (30V, 100 mA)
DB-16P8R
16 × Relay (120V, 0.5A) + 8 × isolated input
Version: 2.1
Date: 1999/10
Page 15
PIO-D144 User’s Manual
2.6.7
DB-24PR, DB-24POR, DB-24C
DB-24PR
24 × power relay, 5A/250V
DB-24POR
24 × Photo MOS relay, 0.1A/350VAC
DB-24C
24 × open collector, 100mA per channel, 30V max.
The DB-24PR, 24-channel power relay output board, consists of 8 form C and
16 form A electromechanical relays for efficient switching of load programmed
control. The contact of each relay can control a 5A load at 250ACV/30VDCV. The
relay is energized by applying a 5 voltage signal to the appropriate relay channel on
the 20-pin flat cable connector(just used 16 relays) or 50-pin flat cable
connector.(OPTO-22 compatible, for DIO-24 series). Twenty - four enunciator LEDs,
one for each relay, light when their associated relay is activated. To avoid overloading
your PC’s power supply , this board needs a +12VDC or +24VDC external power
supply.
Normal Open
From A Relay
COM.
50-Pin cable
DB-24PR
PIO-D144
50-Pin cable
Note: 50-Pin connector(OPTO-22 compatible), for DIO-24, DIO-48, DIO-144,
PCI-D144, PIO-D144, PIO-D96, PIO-D56, PIO-D48, PIO-D24
20-Pin connector for 16 channel digital output, A-82X, A-62X, DIO-64, ISO-DA16/DA8
Channel: 16 Form A Relay , 8 Form C Relay.
Relay: switching up to 5A at 110ACV / 5A at 30DCV.
Page 16
Version: 2.1
Date: 1999/10
PIO-D144 User’s Manual
2.6.8
Daughter Board Comparison Table
20-pin flat-cable
50-pin flat-cable
D-sub 37-pin
DB-37
No
No
Yes
DN-37
No
No
Yes
ADP-37/PCI
No
Yes
Yes
ADP-50/PCI
No
Yes
No
DB-24P
No
Yes
No
DB-24PD
No
Yes
Yes
DB-16P8R
No
Yes
Yes
DB-24R
No
Yes
No
DB-24RD
No
Yes
Yes
DB-24C
Yes
Yes
Yes
DB-24PR
Yes
Yes
No
Db-24PRD
No
Yes
Yes
DB-24POR
Yes
Yes
Yes
DB-24SSR
No
Yes
Yes
Version: 2.1
Date: 1999/10
Page 17
PIO-D144 User’s Manual
2.7
Pin Assignment
CN1: 37-PIN of D-type female connector.
Pin Number Description
Pin Number Description
1
N. C.
20
VCC
2
N. C.
21
GND
3
PB7
22
PC7
4
PB6
23
PC6
5
PB5
24
PC5
6
PB4
25
PC4
7
PB3
26
PC3
8
PB2
27
PC2
9
PB1
28
PC1
10
PB0
29
PC0
11
GND
30
PA7
12
N.C.
31
PA6
13
GND
32
PA5
14
N.C.
33
PA4
15
GND
34
PA3
16
N.C.
35
PA2
17
GND
36
PA1
18
VCC
37
PA0
19
GND
XXXXXXX This pin not available
All signals are TTL compatible.
Page 18
Version: 2.1
Date: 1999/10
PIO-D144 User’s Manual
CN2/CN3/CN4/CN5/CN6: 50-PIN in of flat-cable connector
Pin Number Description
Pin Number Description
1
PC7
2
GND
3
PC6
4
GND
5
PC5
6
GND
7
PC4
8
GND
9
PC3
10
GND
11
PC2
12
GND
13
PC1
14
GND
15
PC0
16
GND
17
PB7
18
GND
19
PB6
20
GND
21
PB5
22
GND
23
PB4
24
GND
25
PB3
26
GND
27
PB2
28
GND
29
PB1
30
GND
31
PB0
32
GND
33
PA7
34
GND
35
PA6
36
GND
37
PA5
38
GND
39
PA4
40
GND
41
PA3
42
GND
43
PA2
44
GND
45
PA1
46
GND
47
PA0
48
GND
49
VCC
50
GND
Version: 2.1
Date: 1999/10
Page 19
PIO-D144 User’s Manual
3.
I/O Control Register
3.1 How to Find the I/O Address
The plug&play BIOS will assign a proper I/O address to every PIO/PISO series
card in the power-on stage. The fixed IDs of PIO/PISO series card are given as
following:
• Vendor ID = E159
• Device ID = 0002
The sub IDs of PIO-D144 are given as following:
• Sub-Vendor ID= 80
• Sub-Device ID = 01
• Sub-Aux ID = 00
We provide all necessary functions as following:
1. PIO_DriverInit(&wBoard, wSubVendor, wSubDevice, wSubAux)
2. PIO_GetConfigAddressSpace(wBoardNo,*wBase,*wIrq, *wSubVendor,
*wSubDevice, *wSubAux, *wSlotBus, *wSlotDevice)
3. Show_PIO_PISO(wSubVendor, wSubDevice, wSubAux)
All functions are defined in PIO.H. Refer to Chapter 4 for more information. The
important driver information is given as following:
1. Resource-allocated information:
• wBase : BASE address mapping in this PC
• wIrq: IRQ channel number allocated in this PC
2. PIO/PISO identification information:
• wSubVendor: subVendor ID of this board
• wSubDevice: subDevice ID of this board
• wSubAux: subAux ID of this board
3. PC’s physical slot information:
• wSlotBus: hardware slot ID1 in this PC’s slot position
• wSlotDevice: hardware slot ID2 in this PC’s slot position
The utility program, PIO_PISO.EXE, will detect & show all PIO/PISO cards
installed in this PC.
Page 20
Version: 2.1
Date: 1999/10
PIO-D144 User’s Manual
The Sub IDs of PIO/PISO series card are given as follows:
PIO/PISO series
card
Description
Sub_vendor
Sub_device
Sub_AUX
PIO-D144
144 × D/I/O
80
01
00
PIO-D96
96 × D/I/O
80
01
10
PIO-D64
64 × D/I/O
80
01
20
PIO-D56
24 × D/I/O +
16 × D/I + 16*D/O
80
01
40
PIO-D48
48 × D/I/O
80
01
30
PIO-D24
24 × D/I/O
80
01
40
PIO-823
Multi-function
80
03
00
PIO-821
Multi-function
80
03
10
PIO-DA16
16 × D/A
80
04
00
PIO-DA8
8 × D/A
80
04
10
PIO-DA4
4 × D/A
80
04
20
PISO-C64
64 × isolated D/O
80
08
00
PISO-P64
64 × isolated D/I
80
08
10
PISO-P32C32
32 + 32
8 × isolated D/I +
8 × 220V relay
80
08
20
80
08
30
PISO-P8R8
PISO-P8SSR8AC
8 × isolated D/I +
8 × SSR /AC
80
08
30
PISO-P8SSR8DC
8 × isolated D/I +
8 × SSR /DC
80
08
30
PISO-730
16 × DI +
16 ×D/O +
16 × isolated D/I +
80
08
40
16* isolated D/O
PISO-813
32 × isolated A/D
80
0A
00
PISO-DA2
2 × isolated D/A
80
0B
00
Version: 2.1
Date: 1999/10
Page 21
PIO-D144 User’s Manual
3.1.1
PIO_DriverInit
PIO_DriverInit(&wBoards, wSubVendor,wSubDevice,wSubAux)
•
•
•
•
wBoards=0 to N ! Number of boards found in this PC
wSubVendor
! SubVendor ID of board to find
wSubDevice
! SubDevice ID of board to find
wSubAux
! SubAux ID of board to find
This function can detect all PIO/PISO series card in the system. It is
implemented based on the PCI Plug&Play mechanism-1. It will find all PIO/PISO
series cards installed in this system & save all their resource in the library.
Find all PIO/PISO in this PC
/* Step 1:Detect all PIO/PISO series in this PC */
wRetVal=PIO_DriverInit(&wBoards, 0xff, 0xff, 0xff);
printf("\nThrer are %d PIO_PISO Cards in this PC",wBoards);
if (wBoards==0 ) exit(0);
/*Find all PIO_PISO*/
/* Step2: Save resource of all PIO/ISO cards installed in this PC */
printf("\n-----------------------------------------------------");
for(i=0; i<wBoards; i++)
{
PIO_GetConfigAddressSpace(i, &wBase, &wIrq, &wSubVendor, &wSubDevice, &wSubAux,
&wSlotBus, &wSlotDevice);
printf("\nCard_%d:wBase=%x,wIrq=%x,subID=[%x,%x,%x],
SlotID=[%x,%x]",i,wBase,wIrq,wSubVendor,wSubDevice,
wSubAux,wSlotBus,wSlotDevice);
printf(" --> ");
ShowPioPiso(wSubVendor,wSubDevice,wSubAux);
}
Find all PIO-D144 in this PC
/* Step1: Detect all PIO-D144 cards first */
wSubVendor=0x80; wSubDevice=0x01; wSubAux=0x00; /* for PIO_D144 */
wRetVal=PIO_DriverInit(&wBoards, wSubVendor, wSubDevice, wSubAux);
printf("Threr are %d PIO-D144 Cards in this PC\n",wBoards);
/* Step2: Save resource of all PIO-D144 cards installed in this PC */
for (i=0; i<wBoards; i++)
{
PIO_GetConfigAddressSpace(i, &wBase, &wIrq, &wID1, &wID2, &wID3, &wID4, &wID5);
printf("\nCard_%d: wBase=%x, wIrq=%x", i, wBase, wIrq);
wConfigSpace[i][0]=wBaseAddress;
/* save all resource of this card */
wConfigSpace[i][1]=wIrq;
/* save all resource of this card */
}
Page 22
Version: 2.1
Date: 1999/10
PIO-D144 User’s Manual
3.1.2
PIO_GetConfigAddressSpace
PIO_GetConfigAddressSpace(wBoardNo,*wBase,*wIrq, *wSubVendor,
*wSubDevice, *wSubAux,*wSlotBus,*wSlotDevice)
•
•
•
•
•
•
•
•
wBoardNo=0 to N ! totally N+1 boards found by PIO_DriveInit(...)
wBase
! base address of the board control word
wIrq
! allocated IRQ channel number of this board
wSubVendor
! subVendor ID of this board
wSubDevice
! subDevice ID of this board
wSubAux
! subAux ID of this board
wSlotBus
! hardware slot ID1 of this board
wSlotDevice
! hardware slot ID2 of this board
The user can use this function to save resource of all PIO/PISO cards installed in
this system. Then the application program can control all functions of PIO/PISO
series card directly.
Find the configure address space of PIO_D144
/* Step1: Detect all PIO-D144 cards first */
wSubVendor=0x80; wSubDevice=0x01; wSubAux=0x00;
/* for PIO-D144 */
wRetVal=PIO_DriverInit(&wBoards, wSubVendor,wSubDevice,wSubAux);
printf("Threr are %d PIO-D144 Cards in this PC\n",wBoards);
/* Step2: Save resource of all PIO-D144 cards installed in this PC */
for (i=0; i<wBoards; i++)
{
PIO_GetConfigAddressSpace(i,&wBase,&wIrq,&t1,&t2,&t3,&t4,&t5);
printf("\nCard_%d: wBase=%x, wIrq=%x", i,wBase,wIrq);
wConfigSpace[i][0]=wBaseAddress;
/* save all resource of this card */
wConfigSpace[i][1]=wIrq;
/* save all resource of this card */
}
/* Step3: Control the PIO-D144 directly */
wBase=wConfigSpace[0][0];
outp(wBase,1);
/* get base address the card_0 */
/* enable all D/I/O operation of card_0 */
wBase=wConfigSpace[1][0];
outp(wBase,1);
/* get base address the card_1 */
/* enable all D/I/O operation of card_1 */
Version: 2.1
Date: 1999/10
Page 23
PIO-D144 User’s Manual
3.1.3
Show_PIO_PISO
Show_PIO_PISO(wSubVendor, wSubDevice, wSubAux)
• wSubVendor ! subVendor ID of board to find
• wSubDevice ! subDevice ID of board to find
• wSubAux ! subAux ID of board to find
This function will show a text string for this special subIDs. This text string is the
same as that defined in PIO.H
The demo program is given as follows:
wRetVal=PIO_DriverInit(&wBoards,0xff,0xff,0xff); /* find all PIO_PISO series card*/
printf("\nThrer are %d PIO_PISO Cards in this PC",wBoards);
if (wBoards==0 ) exit(0);
printf("\n-----------------------------------------------------");
for(i=0; i<wBoards; i++)
{
PIO_GetConfigAddressSpace(i,&wBase,&wIrq,&wSubVendor,
&wSubDevice,&wSubAux,&wSlotBus,&wSlotDevice);
printf("\nCard_%d:wBase=%x,wIrq=%x,subID=[%x,%x,%x],
SlotID=[%x,%x]",i,wBase,wIrq,wSubVendor,wSubDevice,
wSubAux,wSlotBus,wSlotDevice);
printf(" --> ");
ShowPioPiso(wSubVendor,wSubDevice,wSubAux);
}
Page 24
Version: 2.1
Date: 1999/10
PIO-D144 User’s Manual
3.2 The Assignment of I/O Address
The Plug&Play BIOS will assign the proper I/O address to PIO/PISO series
card. If there is only one PIO/PISO board, the user can identify the board as card_0.
If there are two PIO/PISO boards in the system, the user will be very difficult to
identify which board is card_0 ? The software driver can support 16 boards max.
Therefore the user can install 16 boards of PIO/PSIO series in one PC system. How
to find the card_0 & card_1 ?
It is difficult to find the card NO. The simplest way to identify which card
is card_0 is to use wSlotBus & wSlotDevice as follows:
1. Remove all PIO-D144 from this PC
2. Install one PIO-D144 into the PC’s PCI_slot1, run PIO_PISO.EXE & record the
wSlotBus1 & wSlotDevice1
3. Remove all PIO-D144 from this PC
4. Install one PIO-D144 into the PC’s PCI_slot2, run PIO_PISO.EXE & record the
wSlotBus2 & wSlotDevice2
5. Repeat (3) & (4) for all PCI_slot?, record all wSlotBus? & wSlotDevice?
The records may be as follows:
PC’s PCI slot
WslotBus
WslotDevice
Slot_1
0
0x07
Slot_2
0
0x08
Slot_3
0
0x09
Slot_4
0
0x0A
Slot_5
1
0x0A
Slot_6
1
0x08
Slot_7
1
0x09
Slot_8
1
0x07
PCI-BRIDGE
The above procedure will record all wSlotBus? & wSlotDevice? in this PC.
These values will be mapped to this PC’s physical slot. This mapping will not be
changed for any PIO/PISO cards. So it can be used to identify the specified PIO/PISO
card as following:
Step1: Record all wSlotBus? & wSlotDevice?
Step2: Use PIO_GetConfigAddressSpace(…) to get the specified card’s wSlotBus
& wSlotDevice
Version: 2.1
Date: 1999/10
Page 25
PIO-D144 User’s Manual
Step3: The user can identify the specified PIO/PISO card if he compare the
wSlotBus & wSlotDevice in step2 to step1.
The simplest way to find the card number is to use DEM10.EXE given in
DOS or WINDWS demo program.
This demo program will send a value to D/O of CN2 and read back from D/I of
CN3. If the user install a 50-pin flat-cable between CN2 & CN3, the value read from
D/I will be the same as D/O. The operation steps are given as follows:
1. Remove all 50-pin flat-cable between CN2 and CN3
2. Install all PIO-D144 cards into this PC system
3. Power-on and run DEM10.EXE
4. Now all D/I value will be different from D/O value
5. Install a 50-pin flat cable into CN2 & CN3 of any PIO-D144 card
6. There will be one card’s D/I value = D/O value, the card number is also
show in screen
Therefore the user can find the card number very easy if he install a 50-pin flatcable into PIO-D144 one-by-one.
Page 26
Version: 2.1
Date: 1999/10
PIO-D144 User’s Manual
3.3
The I/O Address Map
The I/O address of PIO/PISO series card is automatically assigned by
the main board ROM BIOS. The I/O address can also be re-assigned by user.
It is strongly recommended not to change the I/O address by user. The
Plug&Play BIOS will assign proper I/O address to each PIO/PISO series
card very well. The I/O address of PIO-D144 are given as follows:
Address
Read
Write
WBase+0
RESET\ control register
Same
WBase+2
Aux control register
Same
WBase+3
Aux data register
Same
WBase+5
INT mask control register
Same
WBase+7
Aux pin status register
Same
WBase+0x2a INT polarity control register Same
WBase+0xc0 Read 8-bit data from D/I port Write 8-bit data to D/O port
WBase+0xc4 Reserved
Select the active I/O port
WBase+0xc8 Reserved
I/O Port 0-5 direction control
WBase+0xcc Reserved
I/O Port 6-11 direction control
WBase+0xd0 Reserved
I/O Port 12-17 direction control
Note. Refer to Sec. 3.1 for more information about wBase.
3.3.1
RESET\ Control Register
(Read/Write): wBase+0
Bit 7
Bit 6
Bit 5
Bit 4
Bit 3
Bit 2
Bit 1
Bit 0
Reserved Reserved Reserved Reserved Reserved Reserved Reserved RESET\
Note. Refer to Sec. 3.1 for more information about wBase.
When the PC is first power-on, the RESET\ signal is in Low-state. This will disable
all D/I/O operations. The user has to set the RESET\ signal to High-state before any
D/I/O command.
outp(wBase,1);
/* RESET\=High ! all D/I/O are enable now */
outp(wBase,0);
/* RESET\=Low ! all D/I/O are disable now */
Version: 2.1
Date: 1999/10
Page 27
PIO-D144 User’s Manual
3.3.2
AUX Control Register
(Read/Write): wBase+2
Bit 7
Bit 6
Bit 5
Bit 4
Bit 3
Bit 2
Bit 1
Bit 0
Aux7
Aux6
Aux5
Aux4
Aux3
Aux2
Aux1
Aux0
Note. Refer to Sec. 3.1 for more information about wBase.
Aux?=0! this Aux is used as a D/I
Aux?=1! this Aux is used as a D/O
When the PC is first power-on, All Aux? signal are in Low-state. All Aux? are
designed as D/I for all PIO/PISO series. Please set all Aux? in D/I state.
3.3.3
AUX data Register
(Read/Write): wBase+3
Bit 7
Bit 6
Bit 5
Bit 4
Bit 3
Bit 2
Bit 1
Bit 0
Aux7
Aux6
Aux5
Aux4
Aux3
Aux2
Aux1
Aux0
Note. Refer to Sec. 3.1 for more information about wBase.
When the Aux is used as D/O, the output state is controlled by this register. This
register is designed for feature extension, so don’t control this register now.
3.3.4
INT Mask Control Register
(Read/Write): wBase+5
Bit 7
Bit 6
Bit 5
Bit 4
Bit 3
Bit 2
Bit 1
Bit 0
0
0
0
0
CN1_PC3 CN1_PC2 CN1_PC1 CN1_PC0
Note. Refer to Sec. 3.1 for more information about wBase.
PC0=0! Disable PC0 of CN1 as a interrupt signal (Default).
PC0=1! Enable PC0 of CN1 as a interrupt signal
outp(wBase+5,0); /* Disable interrupt
*/
outp(wBase+5,1); /* Enable interrupt CN1_PC0
*/
outp(wBase+5,0x0f);/* Enable interrupt CN1_PC0,CN1_PC1,CN1_PC2,CN1_PC3 */
Page 28
Version: 2.1
Date: 1999/10
PIO-D144 User’s Manual
3.3.5
Aux Status Register
(Read/Write): wBase+7
Bit 7
Bit 6
Bit 5
Bit 4
Bit 3
Bit 2
Bit 1
Bit 0
Aux7
Aux6
Aux5
Aux4
Aux3
Aux2
Aux1
Aux0
Note. Refer to Sec. 3.1 for more information about wBase.
Aux0=CN_PC0, Aux1=CN1_PC1, Aux2=CN1_PC2, CN1_Aux3=PC3,
Aux7~4=Aux-ID. Refer to DEMO5.C for more information. The Aux0~3 are used as
interrupt source. The interrupt service routine has to read this register for interrupt
source identification. Refer to Sec. 2.5 for more information.
3.3.6
Interrupt Polarity Control Register
(Read/Write): wBase+0x2A
Bit 7
Bit 6
Bit 5
Bit 4
Bit 3
Bit 2
Bit 1
Bit 0
0
0
0
0
CN1_PC3 CN1_PC2 CN1_PC1 CN1_PC0
Note. Refer to Sec. 3.1 for more information about wBase.
PC0=0! select the non-inverted signal from PC0 of CN1_PC.
PC0=1! select the inverted signal from PC0 of CN1_PC.
outp(wBase+0x2a,0);
/* select the non-inverted input CN1_PC0/1/2/3
outp(wBase+0x2a,0x0f); /* select the inverted input of CN1_PC0/1/2/3
*/
*/
outp(wBase+0x2a,1);
/* select the inverted input of CN1_PC0
/* select the non-inverted input CN1_PC1/2/3
*/
*/
outp(wBase+0x2a,3);
/* select the inverted input of CN1_PC0/1
/* select the non-inverted input CN1_PC2/3
*/
*/
Refer to Sec. 2.5 for more information.
Refer to DEMO5.C for more information.
Version: 2.1
Date: 1999/10
Page 29
PIO-D144 User’s Manual
3.3.7
Read/Write 8-bit data Register
(Read/Write): wBase+0xc0
Bit 7
Bit 6
Bit 5
Bit 4
Bit 3
Bit 2
Bit 1
Bit 0
D7
D6
D5
D4
D3
D2
D1
D0
Note. Refer to Sec. 3.1 for more information about wBase.
There are eighteen 8-bit I/O port in the PIO-D144. Every I/O port can be
programmed as D/I or D/O port. Refer to Sec. 3.3.9 for D/I or D/O selection. When
the PC is first power-on, all eighteen ports are used as D/I port.
outp(wBase+0xc0,Val);
Val=inp(wBase+0xc0);
3.3.8
/* write to D/O port */
/* read from D/I port */
Active I/O Port Control Register
(Read/Write): wBase+0xc4
Bit 7
Bit 6
Bit 5
Bit 4
Bit 3
Bit 2
Bit 1
Bit 0
D7
D6
D5
D4
D3
D2
D1
D0
Note. Refer to Sec. 3.1 for more information about wBase.
There are eighteen 8-bit I/O port in the PIO-D144. Only one I/O port can be active at
the same time.
outp(wBase+0xc4,0);
/* I/O port_0 is active now */
outp(wBase+0xc4,1);
/* I/O port_1 is active now */
outp(wBase+0xc4,17);
/* I/O port_17 is active now */
Refer to Sec. 2.2 for I/O port location.
Page 30
Version: 2.1
Date: 1999/10
PIO-D144 User’s Manual
3.3.9
I/O Selection Control Register
(Write): wBase+0xc8
Bit 7
Bit 6
Bit 5
Bit 4
Bit 3
Bit 2
Bit 1
Bit 0
0
0
CN2_PC CN2_PB CN2_PA CN1_PC CN1_PB CN1_PA
(Write): wBase+0xcc
Bit 7
Bit 6
Bit 5
Bit 4
Bit 3
Bit 2
Bit 1
Bit 0
0
0
CN4_PC CN4_PB CN4_PA CN3_PC CN3_PB CN3_PA
(Write): wBase+0xd0
Bit 7
Bit 6
Bit 5
Bit 4
Bit 3
Bit 2
Bit 1
Bit 0
0
0
CN6_PC CN6_PB CN6_PA CN5_PC CN5_PB CN5_PA
Note. Refer to Sec. 3.1 for more information about wBase.
For example:
CN1_PA=1! This port is used as a D/I port.
CN1_PA=0! This port is used as a D/O port.
There are eighteen 8-bit I/O port in the PIO-D144. Every I/O port can be
programmed as D/I or D/O port. When the PC is first power-on, all eighteen ports are
used as D/I port. The I/O port location is given as follows:
Connector of PIO-D144
PA0 to PA7
PB0 to PB7
PC0 to PC7
CN1
CN1_PA
CN1_PB
CN1_PC
CN2
CN2_PA
CN2_PB
CN2_PC
CN3
CN3_PA
CN3_PB
CN3_PC
CN4
CN4_PA
CN4_PB
CN4_PC
CN5
CN5_PA
CN5_PB
CN5_PC
CN6
CN6_PA
CN6_PB
CN6_PC
outp(wBase+0xc8,0);
/* CN1_PA/PB/PC to CN2_PA/PB/PC are all D/O port */
outp(wBase+0xcc,0x3f);
/* CN3_PA/PB/PC to CN4_PA/PB/PC are all D/I port */
outp(wBase+0xd0,0x38); /* CN5_PA/PB/PC are all D/O port */
/* CN6_PA/PB/PC are all D/I port */
Refer to Sec. 2.2 for I/O Port Location.
Version: 2.1
Date: 1999/10
Page 31
PIO-D144 User’s Manual
4.
Demo Program
There are about 5 demo program given in the DOS floppy disk or CD- ROM.
The program sources of library & demo program are all given in the disk. These demo
program will help the user to solve their real world problem more easy.
•
•
•
•
\TC\*.*
\TC\LARGE\*.*
\TC\LARGE\LIB\*.*
\TC\LARGE\DEMO?\*.*
! for Turbo C 2.xx or above
! for large model
! for library source code
! demo program source code
•
•
•
•
•
\TC\LARGE\LIB\PIO.H
\TC\LARGE\LIB\PIO.C
\TC\LARGE\LIB\A.BAT
\TC\LARGE\LIB\B.BAT
\TC\LARGE\LIB\PIO.LIB
! library header file
! library source file
! compiler file
! link file
! library file
•
•
•
•
•
•
\TC\LARGE\DEMO1\PIO.H
! library header file
\TC\LARGE\DEMO1\DEMO1.C
! demo1 source file
\TC\LARGE\DEMO1\DEMO1.PRJ ! TC project file
\TC\LARGE\DEMO1\IOPORTL.LIB ! I/O port library file
\TC\LARGE\DEMO1\PIO.LIB
! library file
\TC\LARGE\DEMO1\DEMO1.EXE ! demo1 execution file
Page 32
Version: 2.1
Date: 1999/10
PIO-D144 User’s Manual
4.1
PIO-D144.H
/* The header file for PIO-D144 card */
#define Disable
0
#define Enable
1
#define D144
wBase+0x00
#define IO_SCR0
wBase+0xc8
#define IO_SCR1
wBase+0xcc
#define IO_SCR2
wBase+0xd0
#define AUX_CR
wBase+0x02
#define AUX_DR
wBase+0x03
#define INT_MCR
wBase+0x05
#define AUX_SR
wBase+0x07
#define INT_PCR
wBase+0x2a
#define RW_8BitDR
wBase+0xc0
#define ACT_IOPCR
wBase+0xc4
#define CN1_PA
0
#define CN1_PB
1
#define CN1_PC
2
#define CN2_PA
3
#define CN2_PB
4
#define CN2_PC
5
#define CN3_PA
6
#define CN3_PB
7
#define CN3_PC
8
#define CN4_PA
9
#define CN4_PB
10
#define CN4_PC
11
#define CN5_PA
12
#define CN5_PB
13
#define CN5_PC
14
#define CN6_PA
15
#define CN6_PB
16
#define CN6_PC
17
Version: 2.1
Date: 1999/10
Page 33
PIO-D144 User’s Manual
4.2 Demo1: Use D/O of CN1
/*
/*
/*
/*
/*
/*
----------------------------------------------------------demo 1 : D/O demo
step 1 : connect a DB-24C to CN1 of PIO-D144
step 2 : run DEMO1.EXE
step 3 : check the LEDs of DB-24C will turn on sequentially
-----------------------------------------------------------
*/
*/
*/
*/
*/
*/
#include "PIO.H"
int main()
{
int i;
WORD wBoards;
WORD wBase,wIrq,wSubVendor,wSubDevice,wSubAux,wSlotBus,wSlotDevice;
char c;
clrscr();
PIO_DriverInit(&wBoards,0x80,0x01,0x00);
/* for PIO-D144 */
printf("\n(1) Threr are %d PIO-D144 Cards in this PC",wBoards);
if ( wBoards==0 )
{
putch(0x07); putch(0x07); putch(0x07);
printf("(1) There are no PIO-D144 card in this PC !!!\n");
exit(0);
}
printf("\n(2) The Configuration Space ->
wBase");
for(i=0; i<wBoards; i++)
{
PIO_GetConfigAddressSpace(i,&wBase,&wIrq,&wSubVendor,&wSubDevice,
&wSubAux,&wSlotBus,&wSlotDevice);
printf("\nCard_%d:wBase=%x,wIrq=%x,subID=[%x,%x,%x],SlotID=[%x,%x]"
,i,wBase,wIrq,wSubVendor,wSubDevice,wSubAux,wSlotBus,wSlotDevice);
}
/* select card_0 */
PIO_GetConfigAddressSpace(0,&wBase,&wIrq,&wSubVendor,&wSubDevice,
&wSubAux,&wSlotBus,&wSlotDevice);
printf("\n(3) *** Card_0 D/O test, wBase=%x ***",wBase);
/* step 1: make sure which ports are D/O ports
*/
/* in this demo --> only CN1_PA, CN1_PB, CN1_PC are D/O port */
/* step 2: enable all D/I/O port
outp(wBase,1);
/* enable D/I/O
*/
*/
/* step 3: select the active port
outp(wBase+0xc4,0);
/* select CN1_PA
*/
*/
/* step 4: send initial-value to D/O latch register of active port */
outp(wBase+0xc0,0);
/* set CN1_PA0 to CN1_PA7 to 0 */
/* step 5: repeat for all D/O ports
*/
outp(wBase+0xc4,1);
/* select CN1_PB
*/
outp(wBase+0xc0,0);
/* set CN1_PB0 to CN1_PB7 to 0 */
outp(wBase+0xc4,2);
/* select CN1_PC
*/
outp(wBase+0xc0,0);
/* set CN1_PC0 to CN1_PC7 to 0 */
/* step 6: configure all I/O port
*/
outp(wBase+0xc8,0x00);
/* CN1 to CN2 port are all output */
Page 34
Version: 2.1
Date: 1999/10
PIO-D144 User’s Manual
outp(wBase+0xcc,0x00);
outp(wBase+0xd0,0x00);
/* CN3 to CN4 port are all output */
/* CN5 to CN6 port are all output */
for (;;)
{
printf("\nCN1 : PA=0x55, PB=0xAA, PC=0x5A, press Q to stop");
outp(wBase+0xc4,0);
/* select CN1_PA
*/
outp(wBase+0xc0,0x55); /* set CN1_PA=0x55 */
outp(wBase+0xc4,1);
outp(wBase+0xc0,0xaa);
/* select CN1_PB
*/
/* set CN1_PB=0xaa */
outp(wBase+0xc4,2);
/* select CN1_PC
*/
outp(wBase+0xc0,0x5a); /* set CN1_PC=0x5a */
c=getch(); if ((c=='Q') || (c=='q')) break;
printf("\nCN1 : PA=0xAA, PB=0x55, PC=0xA5, press Q to stop");
outp(wBase+0xc4,0);
/* select CN1_PA
*/
outp(wBase+0xc0,0xAA); /* set CN1_PA=0xAA */
outp(wBase+0xc4,1);
outp(wBase+0xc0,0x55);
/* select CN1_PB
*/
/* set CN1_PB=0x55 */
outp(wBase+0xc4,2);
/* select CN1_PC
*/
outp(wBase+0xc0,0xa5); /* set CN1_PC=0xA5 */
c=getch(); if ((c=='Q') || (c=='q')) break;
}
PIO_DriverClose();
}
Version: 2.1
Date: 1999/10
Page 35
PIO-D144 User’s Manual
4.3
/*
/*
/*
/*
/*
/*
Demo2: Use D/O of CN1~CN6
-----------------------------------------------------------demo 2 : D/O demo for CN1 ~ CN6
step 1 : connect a DB-24C to CN1 ~ CN6 of PIO-D144
step 2 : run DEMO2.EXE
step 3 : check the LED's of DB-24C will turn on sequentially
------------------------------------------------------------
*/
*/
*/
*/
*/
*/
#include "PIO.H"
int main()
{
int i,j,k,jj;
WORD wBoards,wRetVal;
WORD wBase,wIrq,wSubVendor,wSubDevice,wSubAux,wSlotBus,wSlotDevice;
char c;
clrscr();
PIO_DriverInit(&wBoards,0x80,0x01,0x00); /* for PIO-D144 */
printf("\n(1) Threr are %d PIO-D144 Cards in this PC",wBoards);
if ( wBoards==0 )
{
putch(0x07); putch(0x07); putch(0x07);
printf("(1) There are no PIO-D144 card in this PC !!!\n");
exit(0);
}
printf("\n(2) The Configuration Space ->
wBase");
for(i=0; i<wBoards; i++)
{
PIO_GetConfigAddressSpace(i,&wBase,&wIrq,&wSubVendor,&wSubDevice,
&wSubAux,&wSlotBus,&wSlotDevice);
printf("\nCard_%d: wBase=%x,wIrq=%x,subID=[%x,%x,%x],SlotID=[%x,%x]"
,i,wBase,wIrq,wSubVendor,wSubDevice,wSubAux,wSlotBus,wSlotDevice);
}
/* select card_0 */
PIO_GetConfigAddressSpace(0,&wBase,&wIrq,&wSubVendor,&wSubDevice,
&wSubAux,&wSlotBus,&wSlotDevice);
/* step 1: make sure which ports are D/O ports
/* in this demo --> all D/O ports are output port
/* step 2: enable all D/I/O port
outp(wBase,1);
/* enable D/I/O
*/
*/
*/
*/
/* step 3: select the active port
*/
/* step 4: send initial-value to D/O latch register of active port */
/* step 5: repeat for all D/O ports
*/
for (i=0; i<18; i++)
{
outp(wBase+0xc4,i); /* select CN1 to CN6 port
*/
outp(wBase+0xc0,0); /* set 8-bit D/O latch register
*/
}
/* step 6: configure all I/O port
outp(wBase+0xc8,0x00); /* CN1 to
outp(wBase+0xcc,0x00); /* CN3 to
outp(wBase+0xd0,0x00); /* CN5 to
/*
K=PA/PB/PC
Page 36
*/
CN2 port are all output
CN4 port are all output
CN6 port are all output
*/
Version: 2.1
Date: 1999/10
*/
*/
*/
PIO-D144 User’s Manual
/*
/*
/*
/*
/*
/*
CN1
CN2
CN3
CN4
CN5
CN6
:
:
:
:
:
:
K=0/1/2
K=3/4/5
K=6/7/8
K=9/10/11
K=12/13/14
K=15/16/17
-->
-->
-->
-->
-->
-->
key
key
key
key
key
key
in
in
in
in
in
in
0
3
6
9
12
15
*/
*/
*/
*/
*/
*/
printf("\nk="); scanf("%d",&k);
for (jj=k; jj<(3+k); jj++)
{
outp(wBase+0xc4,jj);
printf("\nSelect Port-%d",jj);
outp(wBase+0xc0,0x55);
printf(", D/O=0x55"); getch();
outp(wBase+0xc0,0xAA);
printf(", D/O=0xAA"); getch();
/* PA/PB/PC
outp(wBase+0xc0,0x1); getch();
outp(wBase+0xc0,0x2); getch();
outp(wBase+0xc0,0x4); getch();
outp(wBase+0xc0,0x8); getch();
outp(wBase+0xc0,0x10); getch();
outp(wBase+0xc0,0x20); getch();
outp(wBase+0xc0,0x40); getch();
outp(wBase+0xc0,0x80); getch();
}
/*
/*
/*
/*
/*
/*
/*
/*
*/
/* select the active port */
/* D/O=0x55
*/
/* D/O=0xAA
*/
PA0/PB0/PC0
PA1/PB1/PC1
PA2/PB2/PC2
PA3/PB3/PC3
PA4/PB4/PC4
PA5/PB5/PC5
PA6/PB6/PC6
PA7/PB7/PC7
*/
*/
*/
*/
*/
*/
*/
*/
PIO_DriverClose();
}
This demo program is designed for CN1 ~ CN6. The user can install a DB-24C
into CN1 ~ CN6 of PIO-D144. This demo will request the user to input a number K as
following:
If the DB-24C is installed in CN1 ! key in 0
If the DB-24C is installed in CN2 ! key in 3
If the DB-24C is installed in CN3 ! key in 6
If the DB-24C is installed in CN4 ! key in 9
If the DB-24C is installed in CN5 ! key in 12
If the DB-24C is installed in CN6 ! key in 15
Then this demo program will test D/O of PA, PB, PC sequentially.
Version: 2.1
Date: 1999/10
Page 37
PIO-D144 User’s Manual
4.4
/*
/*
/*
/*
/*
Demo3: Interrupt demo1
----------------------------------------------------------demo 3 : count high pulse of CN1_PC0
(initial Low & active High)
step 1 : run demo3.exe
-----------------------------------------------------------
*/
*/
*/
*/
*/
#include "PIO.H"
#define A1_8259 0x20
#define A2_8259 0xA0
#define EOI 0x20
WORD init_low();
static void interrupt irq_service();
int COUNT,irqmask,now_int_state;
WORD wBase,wIrq;
int main()
{
int i,j;
WORD wBoards,wRetVal;
WORD wSubVendor,wSubDevice,wSubAux,wSlotBus,wSlotDevice;
char c;
DWORD dwVal;
clrscr();
PIO_DriverInit(&wBoards,0x80,0x01,0x00);
printf("\n(1) Threr are %d PIO-D144 Cards in this PC",wBoards);
if ( wBoards==0 )
{
putch(0x07); putch(0x07); putch(0x07);
printf("(1) There are no PIO-D144 card in this PC !!!\n");
exit(0);
}
printf("\n(2) Show the Configuration Space of all PIO-D144:");
for(i=0; i<wBoards; i++)
{
PIO_GetConfigAddressSpace(i,&wBase,&wIrq,&wSubVendor,&wSubDevice,
&wSubAux,&wSlotBus,&wSlotDevice);
printf("\nCard_%d: wBase=%x,wIrq=%x,subID=[%x,%x,%x],SlotID=[%x,%x]"
,i,wBase,wIrq,wSubVendor,wSubDevice,wSubAux,wSlotBus,wSlotDevice);
}
/* select card_0 */
PIO_GetConfigAddressSpace(0,&wBase,&wIrq,&wSubVendor,&wSubDevice,
&wSubAux,&wSlotBus,&wSlotDevice);
printf("\n(3) *** Card_0, wBaseAddr=%x ***",wBaseAddr);
COUNT=0;
outp(wBase+0xc8,0xff);
/* port_0 to port_5 are all input */
printf("\n(4) *** show the count of High_pulse **\n");
init_low();
for (;;)
{
printf("\nCOUNT=%d",COUNT);
if (kbhit()!=0) {getch(); break;}
}
Page 38
Version: 2.1
Date: 1999/10
PIO-D144 User’s Manual
outp(wBase+5,0);
PIO_DriverClose();
}
/* disable all interrupt */
/* --------------------------------------------------------------- */
/* Use PC0 as external interrupt signal
*/
WORD init_low()
{
DWORD dwVal;
disable();
outp(wBase+5,0);
/* disable all
if (wIrq<8)
{
irqmask=inp(A1_8259+1);
outp(A1_8259+1,irqmask & (0xff ^ (1
setvect(wIrq+8, irq_service);
}
else
{
irqmask=inp(A1_8259+1);
outp(A1_8259+1,irqmask & 0xfb);
outp(A1_8259+1,irqmask & (0xff ^ (1
irqmask=inp(A2_8259+1);
outp(A2_8259+1,irqmask & (0xff ^ (1
setvect(wIrq-8+0x70, irq_service);
}
outp(wBase+0x2a,0);
now_int_state=0;
outp(wBase+5,1);
enable();
}
interrupt */
<< wIrq)));
/* IRQ2 */
<< wIrq)));
<< (wIrq-8))));
/* select the non-inverte input */
/* now int_signal is low
*/
/* enable interrupt
*/
void interrupt irq_service()
{
if (now_int_state==0)
{
COUNT++;
/* find a high_pulse
*/
outp(wBase+0x2a,1);
/* select the inverte input */
now_int_state=1;
/* now int_signal is High
*/
}
else
{
/* find a low_pulse here
*/
outp(wBase+0x2a,0);
/* select the non-inverte input */
now_int_state=0;
/* now int_signal is High
*/
}
if (wIrq>=8) outp(A2_8259,0x20);
outp(A1_8259,0x20);
}
Refer to Sec. 2.5.1 for more information.
Version: 2.1
Date: 1999/10
Page 39
PIO-D144 User’s Manual
4.5
/*
/*
/*
/*
/*
Demo4: Interrupt demo2
-----------------------------------------------------------*/
demo 4 : count low pulse of PC0
*/
(Initial High & active Low)
*/
step 1 : run demo4.exe
*/
---------------------------------------------------------- */
#include "PIO.H"
#define A1_8259 0x20
#define A2_8259 0xA0
#define EOI 0x20
WORD init_high();
WORD wBase,wIrq;
static void interrupt irq_service();
int COUNT,irqmask,now_int_state;
int main()
{
int i,j;
WORD wBoards;
WORD wSubVendor,wSubDevice,wSubAux,wSlotBus,wSlotDevice;
char c;
DWORD dwVal;
clrscr();
PIO_DriverInit(&wBoards,0x80,0x01,0x00);
printf("\n(1) Threr are %d PIO-D144 Cards in this PC",wBoards);
if ( wBoards==0 )
{
putch(0x07); putch(0x07); putch(0x07);
printf("(1) There are no PIO-D144 card in this PC !!!\n");
exit(0);
}
printf("\n(2) Show the Configuration Space of all PIO-D144:");
for(i=0; i<wBoards; i++)
{
PIO_GetConfigAddressSpace(i,&wBase,&wIrq,&wSubVendor,&wSubDevice,
&wSubAux,&wSlotBus,&wSlotDevice);
printf("\nCard_%d: wBase=%x,wIrq=%x,subID=[%x,%x,%x],SlotID=[%x,%x]"
,i,wBase,wIrq,wSubVendor,wSubDevice,wSubAux,wSlotBus,wSlotDevice);
}
/* select card_0 */
PIO_GetConfigAddressSpace(0,&wBase,&wIrq,&wSubVendor,&wSubDevice,
&wSubAux,&wSlotBus,&wSlotDevice);
printf("\n(3) *** Card_0, wBaseAddr=%x ***",wBaseAddr);
COUNT=0;
outp(wBase+0xc8,0xff);
/* CN1 to CN2 port are all input
printf("\n(4) *** show the count of High_pulse **\n");
init_high();
for (;;)
{
printf("\nCOUNT=%d",COUNT);
if (kbhit()!=0) {getch(); break;}
}
Page 40
Version: 2.1
Date: 1999/10
*/
PIO-D144 User’s Manual
outp(wBase+5,0);
PIO_DriverClose();
}
/* disable all interrupt */
/* ------------------------------------------------------------ */
/* Use PC0 as external interrupt signal
*/
WORD init_high()
{
DWORD dwVal;
disable();
outp(wBase+5,0);
/* disable all
if (wIrq<8)
{
irqmask=inp(A1_8259+1);
outp(A1_8259+1,irqmask & (0xff ^ (1
setvect(wIrq+8, irq_service);
}
else
{
irqmask=inp(A1_8259+1);
outp(A1_8259+1,irqmask & 0xfb);
outp(A1_8259+1,irqmask & (0xff ^ (1
irqmask=inp(A2_8259+1);
outp(A2_8259+1,irqmask & (0xff ^ (1
setvect(wIrq-8+0x70, irq_service);
}
outp(wBase+5,1);
now_int_state=1;
outp(wBase+0x2a,1);
enable();
}
interrupt */
<< wIrq)));
/* IRQ2 */
<< wIrq)));
<< (wIrq-8))));
/* enable interrupt
*/
/* now int_signal is low
*/
/* select the inverte input */
void interrupt irq_service()
{
if (now_int_state==0)
{
/*
outp(wBase+0x2a,1);
/*
now_int_state=1;
/*
}
else
{
COUNT++;
/*
outp(wBase+0x2a,0);
/*
now_int_state=0;
/*
}
find a high_pulse here
*/
select the inverte input */
now int_signal is High
*/
find a low_pulse
*/
select the non-inverte input */
now int_signal is High
*/
if (wIrq>=8) outp(A2_8259,0x20);
outp(A1_8259,0x20);
}
Refer to Sec. 2.5.2 for more information.
Version: 2.1
Date: 1999/10
Page 41
PIO-D144 User’s Manual
4.6 Demo5: Interrupt demo3
/*
/*
/*
/*
/*
/*
/*
/*
----------------------------------------------------------demo 5 : four interrupt source
CN1_PC0: initial Low, active High
CN1_PC1: initial High, active Low
CN1_PC2: initial Low, active High
CN1_PC3: initial High, active Low
step 1 : run demo5.exe
-----------------------------------------------------------
*/
*/
*/
*/
*/
*/
*/
*/
#include "PIO.H"
#define A1_8259 0x20
#define A2_8259 0xA0
#define EOI 0x20
WORD init_low();
WORD wBase,wIrq;
static void interrupt irq_service();
int irqmask,now_int_state,invert,new_int_state,int_c,int_num;
int CNT_L1,CNT_L2,CNT_L3,CNT_L4;
int CNT_H1,CNT_H2,CNT_H3,CNT_H4;
int main()
{
int i,j;
WORD wBoards,wRetVal;
WORD wBase,wIrq,wSubVendor,wSubDevice,wSubAux,wSlotBus,wSlotDevice;
char c;
DWORD dwVal;
clrscr();
PIO_DriverInit(&wBoards,0x80,0x01,0x00);
printf("\n(1) Threr are %d PIO-D144 Cards in this PC",wBoards);
if ( wBoards==0 )
{
putch(0x07); putch(0x07); putch(0x07);
printf("(1) There are no PIO-D144 card in this PC !!!\n");
exit(0);
}
printf("\n(2) Show the Configuration Space of all PIO-D144:");
for(i=0; i<wBoards; i++)
{
PIO_GetConfigAddressSpace(i,&wBase,&wIrq,&wSubVendor,&wSubDevice,
&wSubAux,&wSlotBus,&wSlotDevice);
printf("\nCard_%d: wBase=%x,wIrq=%x,subID=[%x,%x,%x],SlotID=[%x,%x]",
i,wBase,wIrq,wSubVendor,wSubDevice,wSubAux,wSlotBus,wSlotDevice);
}
/* select card_0 */
PIO_GetConfigAddressSpace(0,&wBase,&wIrq,&wSubVendor,&wSubDevice,
&wSubAux,&wSlotBus,&wSlotDevice);
printf("\n(3) *** Card_0, wBaseAddr=%x ***",wBaseAddr);
outp(wBase+0xc8,0xff);
/* CN1 to CN2 port are all input */
printf("\n(4) *** show the count of High_pulse **\n");
init_low();
Page 42
Version: 2.1
Date: 1999/10
PIO-D144 User’s Manual
for (;;)
{
printf("\n(CNT_L, CNT_H) = (%d,%d) (%d,%d) (%d,%d) (%d,%d) %x",
CNT_L1,CNT_H1,CNT_L2,CNT_H2,CNT_L3,CNT_H3,CNT_L4,CNT_H4,
int_num);
if (kbhit()!=0) {getch(); break;}
}
outp(wBase+5,0);
PIO_DriverClose();
}
/* disable all interrupt */
/* ------------------------------------------------------------ */
/* Use PC0 as external interrupt signal
*/
WORD init_low()
{
DWORD dwVal;
disable();
outp(wBase+5,0);
/* disable all
if (wIrq<8)
{
irqmask=inp(A1_8259+1);
outp(A1_8259+1,irqmask & (0xff ^ (1
setvect(wIrq+8, irq_service);
}
else
{
irqmask=inp(A1_8259+1);
outp(A1_8259+1,irqmask & 0xfb);
outp(A1_8259+1,irqmask & (0xff ^ (1
irqmask=inp(A2_8259+1);
outp(A2_8259+1,irqmask & (0xff ^ (1
setvect(wIrq-8+0x70, irq_service);
}
interrupt */
<< wIrq)));
/* IRQ2 */
<< wIrq)));
<< (wIrq-8))));
invert=0x05;
outp(wBase+0x2a,invert);
/*
CN1_PC0 = non-inverte input */
/*
CN1_PC1 =
inverte input */
/*
CN1_PC2 = non-inverte input */
/*
CN1_PC3 = non-inverte input */
now_int_state=0x0a;
/* Now CN1_PC0 = low
*/
/*
CN1_PC1 = high
*/
/*
CN1_PC2 = low
*/
/*
CN1_PC3 = high
*/
CNT_L1=CNT_L2=CNT_L3=CNT_L4=0; /* low pulse count */
CNT_H1=CNT_H2=CNT_H3=CNT_H4=0; /* high pulse count */
int_num=0;
outp(wBase+5,0x0f);
/* enable interrupt PC0,PC1,PC2,PC3 of CN1 */
enable();
}
void interrupt irq_service()
{
char cc;
int_num++;
new_int_state=inp(wBase+0x07)&0xff;
int_c=new_int_state ^ now_int_state;
Version: 2.1
Date: 1999/10
Page 43
PIO-D144 User’s Manual
if ((int_c&0x01) != 0)
{
cc=new_int_state&0x01;
if (cc !=0) CNT_H1++; else CNT_L1++;
invert=invert ^ 1;
}
if ((int_c&0x02) != 0)
{
cc=new_int_state&0x02;
if (cc !=0) CNT_H2++; else CNT_L2++;
invert=invert ^ 2;
}
if ((int_c&0x04) != 0)
{
cc=new_int_state&0x04;
if (cc !=0) CNT_H3++; else CNT_L3++;
invert=invert ^ 4;
}
if ((int_c&0x08) != 0)
{
cc=new_int_state&0x08;
if (cc !=0) CNT_H4++; else CNT_L4++;
invert=invert ^ 8;
}
now_int_state=new_int_state;
outp(wBase+0x2a,invert);
if (wIrq>=8) outp(A2_8259,0x20);
outp(A1_8259,0x20);
}
4.7 DEMO 6: Outport of CN1-CN6
/* -----------------------------------------------------------/* demo 6 : D/O demo
/* step 1 : connect a DB-24C to CN1 of PIO-D144
/* step 2 : run DEMO6.EXE
/* step 3 : check the LED's of DB-24C will turn on sequentially
/* -----------------------------------------------------------#include "PIO.H"
Page 44
Version: 2.1
Date: 1999/10
*/
*/
*/
*/
*/
*/
PIO-D144 User’s Manual
#include "PIO-D144.H"
int main()
{
int i;
char c;
WORD wBoards;
WORD wBase,wIrq,wSubVendor,wSubDevice,wSubAux,wSlotBus,wSlotDevice;
clrscr();
PIO_DriverInit(&wBoards,0x80,0x01,0x00); /* for PIO-D144 */
printf("\n(1) Threr are %d PIO-D144 Cards in this PC",wBoards);
if ( wBoards==0 ) {
putch(0x07); putch(0x07); putch(0x07);
printf("(1) There are no PIO-D144 card in this PC !!!\n");
exit(0);
}
printf("\n(2) The Configuration Space ->
wBase");
for(i=0; i<wBoards; i++)
{
PIO_GetConfigAddressSpace(i,&wBase,&wIrq,&wSubVendor,&wSubDevice,
&wSubAux,&wSlotBus,&wSlotDevice);
printf("\nCard_%d: wBase=%x,wIrq=%x,subID=[%x,%x,%x],SlotID=[%x,%x]"
,i,wBase,wIrq,wSubVendor,wSubDevice,wSubAux,wSlotBus,wSlotDevice);
}
PIO_GetConfigAddressSpace(0,&wBase,&wIrq,&wSubVendor,&wSubDevice,
&wSubAux,&wSlotBus,&wSlotDevice);
printf("\n(3) *** Card_0 D/O test, wBase=%x ***",wBase);
outp(D144,Disable);
/* Reset DIO of D144 */
outp(D144,Enable);
outp(IO_SCR0,0x00);
while(1) {
printf("\n");
for(i=1;i<=0x80;i=i<<1) {
printf("\nCN1: PA=%02xH, PB=%02xH, PC=%02xH, press Q to stop",i,i,i);
outp(Act_IOPCR,CN1_PA);
outp(RW_8BitDR,i);
outp(Act_IOPCR,CN1_PB);
outp(RW_8BitDR,i);
outp(Act_IOPCR,CN1_PC);
outp(RW_8BitDR,i);
sleep(1);
}
printf("\n");
for(i=1;i<=0x80;i=i<<1) {
printf("\nCN2: PA=%02xH, PB=%02xH, PC=%02xH, press Q to stop",i,i,i);
outp(Act_IOPCR,CN2_PA);
outp(RW_8BitDR,i);
outp(Act_IOPCR,CN2_PB);
outp(RW_8BitDR,i);
outp(Act_IOPCR,CN2_PC);
outp(RW_8BitDR,i);
sleep(1);
}
outp(IO_SCR1,0x00);
printf("\n");
for(i=1;i<=0x80;i=i<<1) {
printf("\nCN3: PA=%02xH, PB=%02xH, PC=%02xH, press Q to stop",i,i,i);
outp(Act_IOPCR,CN3_PA);
outp(RW_8BitDR,i);
outp(Act_IOPCR,CN3_PB);
outp(RW_8BitDR,i);
outp(Act_IOPCR,CN3_PC);
outp(RW_8BitDR,i);
sleep(1);
Version: 2.1
Date: 1999/10
Page 45
PIO-D144 User’s Manual
}
printf("\n");
for(i=1;i<=0x80;i=i<<1)
{
printf("\nCN4: PA=%02xH, PB=%02xH, PC=%02xH, press Q to stop",i,i,i);
outp(Act_IOPCR,CN4_PA);
outp(RW_8BitDR,i);
outp(Act_IOPCR,CN4_PB);
outp(RW_8BitDR,i);
outp(Act_IOPCR,CN4_PC);
outp(RW_8BitDR,i);
sleep(1);
}
outp(IO_SCR2,0x00);
printf("\n");
for(i=1;i<=0x80;i=i<<1) {
printf("\nCN5: PA=%02xH, PB=%02xH, PC=%02xH, press Q to stop",i,i,i);
outp(Act_IOPCR,CN5_PA);
outp(RW_8BitDR,i);
outp(Act_IOPCR,CN5_PB);
outp(RW_8BitDR,i);
outp(Act_IOPCR,CN5_PC);
outp(RW_8BitDR,i);
sleep(1);
}
printf("\n");
for(i=1;i<=0x80;i=i<<1) {
printf("\nCN6: PA=%02xH, PB=%02xH, PC=%02xH, press Q to stop",i,i,i);
outp(Act_IOPCR,CN6_PA);
outp(RW_8BitDR,i);
outp(Act_IOPCR,CN6_PB);
outp(RW_8BitDR,i);
outp(Act_IOPCR,CN6_PC);
outp(RW_8BitDR,i);
sleep(1);
}
if(i==0x80) { i=0x01; break; }
if (kbhit()!=0) {
c=getch();
if ((c=='q') || (c=='Q') || c==27 )
return;
}
} /* end of while */
PIO_DriverClose();
}
Page 46
Version: 2.1
Date: 1999/10
PIO-D144 User’s Manual
4.8
/*
/*
/*
/*
/*
/*
Demo10: Find Card Number
------------------------------------------------------------demo 10: Find card number
step 1 : run demo10.exe
step 2 : connect a 50-pin flat-cable to CON2 & CON3 of card_?
step 3 : The card number is shown in screen as TEST OK
-------------------------------------------------------------
*/
*/
*/
*/
*/
*/
#include "PIO.H"
WORD wBase,wIrq;
WORD wBoards,wRetVal;
WORD wBase,wIrq,wSubVendor,wSubDevice,wSubAux,wSlotBus,wSlotDevice;
int main()
{
int i,j,k;
char c;
clrscr();
PIO_DriverInit(&wBoards,0x80,0x01,0x00); /* for PIO-D144 */
printf("\n(1) Threr are %d PIO-D144 Cards in this PC",wBoards);
if ( wBoards==0 )
{
putch(0x07); putch(0x07); putch(0x07);
printf("(1) There are no PIO-D144 card in this PC !!!\n");
exit(0);
}
printf("\n(2) The Configuration Space ->
wBase");
for(i=0; i<wBoards; i++)
{
PIO_GetConfigAddressSpace(i,&wBase,&wIrq,&wSubVendor,&wSubDevice,
&wSubAux,&wSlotBus,&wSlotDevice);
printf("\nCard_%d: wBase=%x,wIrq=%x,subID=[%x,%x,%x],SlotID=[%x,%x]"
,i,wBase,wIrq,wSubVendor,wSubDevice,wSubAux,wSlotBus,wSlotDevice);
}
PIO_GetConfigAddressSpace(0,&wBase,&wIrq,&wSubVendor,&wSubDevice,
&wSubAux,&wSlotBus,&wSlotDevice);
for (;;)
{
printf("\n------------- press any key to stop -------------");
for (i=0; i<wBoards; i++) test_card(i);
delay_ms(1000); /* delay 1 sec */
if (kbhit()!=0) {getch(); break;}
}
PIO_DriverClose();
}
/* ----------------------------------------------------------- */
test_card(int card)
{
int i,j,k,ok,val;
PIO_GetConfigAddressSpace(card,&wBase,&wIrq,&wSubVendor,&wSubDevice,
&wSubAux,&wSlotBus,&wSlotDevice);
outp(wBase,1);
/* enable D/I/O
Version: 2.1
*/
Date: 1999/10
Page 47
PIO-D144 User’s Manual
ok=1;
outp(wBase+0xc8,0x00);
outp(wBase+0xcc,0x01);
/* CN2_PA is output */
/* CN3_PA is input */
outp(wBase+0xc4,3);
outp(wBase+0xc0,0x55);
outp(wBase+0xc4,6);
val=inp(wBase+0xc0)&0xff;
if (val != 0x55) ok=0;
/*
/*
/*
/*
select CN2_PA
CN2_PA=0x55
select CN2_PA
read CN3_PA
*/
*/
*/
*/
outp(wBase+0xc4,3);
outp(wBase+0xc0,0xAA);
outp(wBase+0xc4,6);
val=inp(wBase+0xc0)&0xff;
if (val != 0xaa) ok=0;
/*
/*
/*
/*
select CN2_PA
CN2_PA=0xAA
select CN3_PA
read CN3_PA
*/
*/
*/
*/
printf("\nCard Number=%d, wBase=%x",card,wBase);
if (ok==1) printf(", Test OK"); else printf(", Test ERROR");
}
/* ----------------------------------------------------------- */
delay_ms(int t)
{
int i,j,k,l,m;
for (i=0; i<t; i++)
for (j=0; j<100; j++)
{
m=0;
for (k=0; k<100; k++) {l=(j+t)*i; m+=l;}
}
}
Page 48
Version: 2.1
Date: 1999/10