1
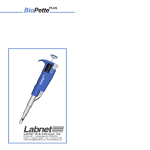
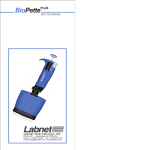
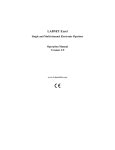
LP-DV/01/2005 OK WZOR OK
02/08/2006
18:53
Labnet International, Inc.
Page 1
LP-DV/01/2005 OK WZOR OK
02/08/2006
18:53
Page 2
A
N
A1
A2
B
F
G
J
I
C
D
L
C
D
E
A
B
C
D
E
F
LP-DV/01/2005 OK WZOR OK
02/08/2006
18:53
Page 4
LP-DV/01/2005 OK WZOR OK
02/08/2006
18:53
Page 6
Model
Volume range [µl]
LP2
0.1 - 2
LP10
0.5 - 10
LP20
2 - 20
LP100
10 - 100
LP200
20 - 200
LP1000
100 - 1000
LP5000
1000 - 5000
LP10000
1000 - 10000
LP2, LP10
Measurement and transfer of micro-volumes,
DNA sequencing and enzyme-assay applications.
LP20, LP100, LP200,
LP1000
Measurement and transfer of general
aqueous solution, acids and bases
LP5000, LP10000
Measurement and transfer of large volumes.
CONTENTS
1 - INTRODUCTlON
2 - SETTING THE VOLUME
3 - ASPIRATING AND DISPENSING LIQUIDS
4 - PRE-RINSING
5 - DENSE AND VISCOUS LIQUIDS
6 - LABNET PIPETTE TIPS
7 - RECOMMENDATIONS
8 - RECALIBRATION
9 - TROUBLESHOOTING
10 - CLEANING AND STERILIZATION
11 - PIPETTE KIT AND ACCESSORIES
12 - SPARE PARTS
The liquid is aspirated into disposable tips attached to
the pipette shaft. Disposable tips ensure maximum safety
and eliminate possibility of crosscontamination of the liquid
samples.
To protect the user from contaminated tips the Labpette™
DISCOVERY is equipped with a built-in tip ejector, (Fig. 1D).
The construction of the ejector enables the user to adjust
the length. This allows for proper fit and ejection of nearly
every tip type available. When using narrow tubes, it may
be necessary to remove the tip ejector. It is simply
removed by pulling down.
1 - INTRODUCTION
The Labpette™ DISCOVERY is a volumetric instrument
designed to measure and transfer liquids precisely and
safely. It can measure and transfer volumes from 0.1 µl
to 10000 µl depending on the model.
The Labpette™ DISCOVERY pipettes are equipped with
a digital counter which shows the pipetting volume.
The set volume is visible in the window on the handle.
The setting of the volume is done by turning of the pipetting pushbutton knob (Fig. 1A2) or by turning of the
black knurled adjustment knob (Fig. 1B) in the right
direction. The range of the volume of the aspired liquid is
shown on the pipetting pushbutton (Fig. 1A1).
The Labpette™ DISCOVERY pipettes are produced in 8
models, covering the volume range from 0.1 µl to 10000 µl.
Adjusting of the Tip Ejector Length
- in 2-1000 µl pipettes (Fig. 6A).
The adjusting ”H” spacers, included in the box allow for
adjusting the length of tip ejector by +1mm or +2mm.
An ”H0” spacer is inserted on a standard basis. The outside shape of the spacer identifies the size change.
- in 5000 and 10000 µl pipettes (Fig. 6B).
The length of tip ejector is adjusted by screwing in or
screwing out the tip ejector stem with a screwdriver. Turn
the screwdriver counter clockwise to increase the length
of tip ejector, and clockwise to reduce the length of tip
ejector. The ejector can be adjusted in the range of 5 mm.
If above described method of ejector adjustment is not
sufficient or the diameter of the ejector opening is too
large to eject the tip it is necessary to put the ejector cap
“M” onto the ejector, (Fig. 6C).
The Labpette™ DISCOVERY is a high quality instrument
which offers excellent accuracy and precision.
1
2
LP-DV/01/2005 OK WZOR OK
02/08/2006
18:53
Page 8
The accuracy and precision (repeatability) of liquid volume depend on the quality of tips used. The values for
accuracy and precision given in the table below were
obtained using Labnet tips. Only those tips guarantee
correct operation of the pipettes and ensure accuracy
and precision of liquid sampling.
Model
Volume
[µl]
LP2
Max
Min
LP10
Max
Min
LP20
Max
Min
LP100
Max
Min
LP200
Max
Min
LP1000
Max
Min
LP5000
Max
Min
LP10000
Max
0.2
1.0
2.0
0.5
5.0
10.0
2
10
20
10
50
100
20
100
200
100
500
1000
1000
2500
5000
1000
5000
10000
Accuracy
[%]
Precision
[%]
± 12.0
± 2.7
± 1.5
± 4.0
± 1.0
± 0.5
± 3.0
± 1.0
± 0.8
± 1.6
± 0.8
± 0.8
± 1.2
± 0.8
± 0.6
± 1.6
± 0.7
± 0.6
± 0.6
± 0.6
± 0.5
± 2.5
± 0.8
± 0.5
± 6.0
± 1.3
± 0.7
± 2.8
± 0.6
± 0.4
± 1.5
± 0.5
± 0.3
± 0.80
± 0.24
± 0.20
± 0.60
± 0.25
± 0.20
± 0.40
± 0.20
± 0.15
± 0.25
± 0.20
± 0.15
± 0.6
± 0.3
± 0.2
Fit to tips
µl
10
Pipettes LP2
Red figures at the bottom = 1/100 µl
Increment = 0.002 µl
Pipettes LP10, LP20,
Red figures at the bottom = 1/10 µl
Increment = 0.02 µl
200
Pipettes LP100, LP200
Black figures only = 1 µl
Increment = 0.2 µl
1000
5000
Pipettes LP1000, LP5000,
Red figures at the top - ml
Increment =
2 µl
10 µl
10000
These specifications are obtained in forward mode,
using a gravimetric method with the temperature of the
distilled water, tips and all other conditions stabilized
between 19°C and 21°C. Number of measurements minimum 10. The values given include all components of
error due to both normal handwarming and the changing
of the tip.
Performance test: The pipette is calibrated in accordance
with EN ISO 8655. Performance can be verified by
checking the pipette using the procedures outlined in the
EN ISO 8655 standard.
The pipette design enables the user to perform the recalibration process according to the rules presented in section 8.
3
2 - SETTING THE VOLUME
The volume display shown by the counter has three digits, which should be read from top to bottom. In addition
the lowest counter drum is printed in a scale which
enables the setting of the volume in the minimum graduation range. Examples of the meanings of the black and
red digits:
Pipettes LP10000
Red figures at the top - ml
Increment = 20 µl
The volume of the pipette is set by the knob in the pipetting pushbutton (Fig. 1A2) or by the black adjustment
knob (Fig. 1B).
To attain the maximum accuracy, set volume must be
approached from a higher value. If the desired value is
lower than the previous value, simply use the knob in the
pushbutton (Fig. 1A2) or the black adjustment knob (Fig.
1B) to adjust the value down to 1/3 turn above the
required setting. If the desired value is higher than the
previous value, use the knob in the pushbutton or the
black adjustment ring to adjust the value to 1/3 turn
4
LP-DV/01/2005 OK WZOR OK
02/08/2006
18:53
Page 10
above the required value. The setting should then be
performed in the following manner:
With the volume set to 1/3 above the required setting,
slowly turn the pipetting pushbutton knob or the black
adjustment knob to the required volume.
If the knob is accidentally turned too far, ie is set lower
than the required value, the process must be repeated.
The approach to the set volume must always be made in
the order of decreasing value.
3 - ASPIRATING AND DISPENSING LIQUIDS
Place a tip on the shaft of the pipette. See Section 6 for
the appropriate tip. Press the tip on firmly using a slight
twisting motion. This will ensure an airtight seal.
Important: Never aspirate liquids into the Labpette™
DISCOVERY without a tip attached.
Aspiration
Press the pushbutton to the first positive stop, (Fig. 2A).
Holding the pipette vertically, immerse the tip into the
sample liquid. The depth to which the tip is immersed in
the sample liquid depends on the model.
Model
LP2
LP10
Immersion depth (mm)
≤1
≤1
LP20, LP100
2–3
LP200, LP1000
2–4
LP5000
3–6
LP10000
5–7
Release the pushbutton slowly and smoothly to aspirate
the sample, (Fig. 2B). Wait one second and then withdraw the tip from the liquid. When the pipette tip is
immersed not as deeply as the recommended depth or
when the pipetting pushbutton is rapidly released air
may enter the disposable tip.
Avoid touching the orifice of the tip.
Dispensing
• Place the end of the tip against the inside wall of the
vessel at an angle of 10 to 40 degrees.
• Press the pushbutton smoothly to the first stop, (Fig. 2C).
Wait one second.
• Press the pushbutton to the second stop to expel any
remaining liquid, (Fig. 2D).
• Keeping the pushbutton depressed to the very end,
remove the pipette by drawing the tip against the inside
surface of the receiving vessel.
• Release the pushbutton to its starting position, (Fig. 2E).
• Eject the tip by pressing the tip ejector button, (Fig. 2F).
Remember to change the tip whenever a different liquid
is to be sampled or the volume setting is changed.
Filters
A replaceable filter installed in a seat in the bottom part of
the shaft is used in 5000 µl and 10000 µl pipettes (Fig. 3L).
The filter prevents the aspirated liquid from entering into
the shaft and thus from polluting the inside of the shaft
and the piston. Using the filter is especially important
when aspirating and dispensing large volumes of liquid.
If the filter becomes wet during liquid aspiration it should
be replaced with a new one.
4 - PRE-RINSING
When pipetting liquids of higher viscosity or lower surface tension than water (e.g. sera or organic solvents),
a film of liquid is formed on the inside wall of the pipette
tip. This film can create an error. Since the film remains
relatively constant in successive pipetting operations
with the same tip, this error can be avoided by forming
the film before transferring the first sample. This is done by
aspirating a sample and dispensing it back into the same
vessel. Since the film is already formed, all of the following
samples will have better accuracy and repeatability.
This pre-rinsing operation should be repeated when the
volume to be aspirated is changed or when a new tip is
used.
5 - DENSE AND VISCOUS LIQUIDS
The Labpette™ DISCOVERY specifications of accuracy
and precision are based on pipetting distilled water. The
5
6
LP-DV/01/2005 OK WZOR OK
02/08/2006
18:53
Page 12
handling of liquids with physical qualities of density, viscosity and surface tension differing extremely from water
may need a gravimetrically checked compensation of the
volume setting. Normally the degree of error resulting
from heavy or viscous liquids is negligible if the pipetting
is done slowly and carefully. It is most important to give
the liquids some time to follow the change of pressure
by holding the pipette tip in its position for at least 2 sec.
after the aspiration and the blow out stroke.
If in extreme cases this method of operation does not
result in accurate values, a compensation could be
achieved as follows:
Weigh the liquid pipetted when the Labpette™ DISCOVERY
is set to the nominal value. Then calculate the offset from
the nominal value:
m
Corr: val. = 2 x nom. val. - γ
m
- weight of the sample
γ - density of liquid
Check this operation once again and correct if necessary. Note the corrected value for further pipetting the
same kind of liquid.
6 - LABNET PIPETTE TIPS
Labnet tips are made from high performance polypropylene and their quality guarantees the precision and accuracy associated with the Labpette™ DISCOVERY. Strict
control is maintained throughout the manufacturing
process to ensure the highest quality.
The accuracy and precision figures for the Labpette™
DISCOVERY are only guaranteed when Labnet tips are
used. The use of inferior quality tips will seriously degrade the performance of the Labpette™ DISCOVERY.
Tips 10
These tips are used for volumes between 0.1 µl and 10 µl.
They are used with the LP2 and the LP10 models.
Tips 200
These tips are used for volumes between 2 µl and 200 µl.
They are used with the LP20, LP100 and the LP200
models, which are equipped with the yellow label on the
pushbutton.
7
Tips 1000
These tips are used for volumes between 100 µl and
1000 µl. They are used with the LP1000 models, which
are equipped with the blue label on the pushbutton.
Tips 5000
These tips are used for volumes between 1000 µl and
5000 µl. They are used with the LP5000 models.
Tips 10000
These tips are used for volumes between 1000 and
10000 µl. They are used with the LP10000 models.
7 - RECOMMENDATIONS
Observing the following recommendations will ensure
maximum possible accuracy and precision of liquid sampling.
• Make sure to operate the Labpette™ DISCOVERY
slowly and smoothly.
• The depth of immersion in the sample liquid should be
the minimum necessary and should remain constant
during aspiration.
• The Labpette™ DISCOVERY should be held in a vertical position.
• Change the tip when volume setting is changed or when
a different liquid is to be aspirated.
• Change the tip if a droplet remains on the end of the tip
from the previous pipetting operation.
• Each new tip should be pre-rinsed with the liquid to be
pipetted.
• Liquid should never enter the Labpette™ DISCOVERY
shaft. To prevent this:
- Press and release the pushbutton slowly and smoothly.
- Never turn the pipette upside down.
- Never lay the pipette on its side when there is liquid in
the tip.
• Never force the volume setting beyond its recommended limits.
• When pipetting liquids with temperatures different from
the ambient temperature, it is recommended to prerinse the tip several times before use.
• Do not pipette liquids with temperatures above 70°C.
8
LP-DV/01/2005 OK WZOR OK
02/08/2006
18:53
Page 14
• When pipetting acids or corrosive solutions which emit
vapors, it is recommended to disassemble the shaft
and to rinse the piston and seal with distilled water after
finishing the pipetting operation.
8 - RECALIBRATION
Labnet pipettes are calibrated by gravimetric method,
using Labnet tips and distilled water, at the temperature
20±1°C, according to EN ISO 8655 standard.
If during pipette operation you find that the accuracy
error (the difference between the real aspirated volume
and the preset volume) exceeds the permissible value
given in the table in section 1, the pipette recalibration
procedure should be carried out.
Before starting the recalibration it is necessary to check
whether the following requirements have been fulfilled
during error determination:
• the ambient temperature, and the temperature of the
pipette, tips and water was identical
• the density of the liquid used is close to that of distilled
water
• a balance with appropriate sensitivity has been used.
Volume checked [µl]
Balance sensitivity [mg]
0.1 - 10
≤ 0.001
10 - 100
≤ 0.01
> 100
≤ 0.1
• mg/µl conversion factor has been taken into account
• the requirements given in sections 3 and 7 have been
fulfilled
If the above conditions are satisfied and the accuracy
error for selected volume given in section 1 exceeds the
permissible value, the pipette recalibration procedure
should be carried out.
The recalibration can be performed within one full
turn of the key to the right or to the left only.
Recalibration conditions:
• Ambient temperature and the temperature of the pipette, tips and liquid should be within the range 20-25°C
and stabilized during weighing within ±0.5°C
• Measurements should be conducted using distilled water
• Balance sensitivity should be suitable for the volume to
be controlled
9
Recalibration procedure:
• Set the dose volume depending on the pipette volume
according to the following table:
Range
of the pipette
volumes
[µl]
Preset
volume
[µl]
Permissible
volumes
[µl]
Volume change
∆V for full turn
of the calibration
key [µl]
(24 increments)
LP2
0.1 - 2
0.2
0.176 - 0.224
0.06
LP10
0.5 - 10
0.5
0.48 - 0.52
0.33
LP20
2 - 20
2
1.94 - 2.06
0.63
LP100
10 - 100
10
9.84 - 10.16
2.50
LP200
20 - 200
20
19.76 - 20.24
6.30
LP1000
100 - 1000
100
98.4-101.6
25.00
LP5000
1000 - 5000
1000
994 - 1006
125.00
LP10000
1000 - 10000
1000
975 - 1025
250.00
Model
• Perform 5 aspirations, weigh each one and calculate
the average value of the aspirations
• Calculate average aspirated volume in µl multiplying
the average aspiration amount [mg] by the distilled
water density coefficient [µl/mg], which depends on
temperature and pressure according to the following
table:
Temperature [°C]
Pressure [kPa]
95.0
101.3
105.0
20
1.0028
1.0029
1.0029
21
1.0030
1.0031
1.0031
22
1.0032
1.0033
1.0033
23
1.0034
1.0035
1.0036
24
1.0037
1.0038
1.0038
25
1.0039
1.0040
1.0040
If the average aspirated volume exceeds the permissible
value, the following should be done:
• Remove the pipetting pushbutton, (Fig. 4A),
Warning: The pipetting pushbutton consists of 2 parts:
the knob (Fig. 1A2) and the pushbutton (Fig. 1A1). After
removal of the pushbutton, both parts are separated.
• Holding the black knurled volume adjustment knob to
protect it against rotation, insert the calibration key into
the cuts of the calibration screw, (Fig. 4B),
10
LP-DV/01/2005 OK WZOR OK
02/08/2006
18:53
Page 16
• Turn the key clockwise to reduce the aspirated volume,
or counter-clockwise to increase the volume. One full
turn of the calibration key changes the pipette aspiration volume by the amount given in the table, (Fig. 4C),
• Take out the key and fix the pipetting pushbutton (Fig. 4D).
The pipetting pushbutton should be fixed by placing the
knob on the arbor first (Fig. 1A2) and then the pushbutton
(Fig. 1A1).
Determine the average aspirated volume. The average
volume should be within the permissible range given in
the table. If the volume exceeds the values stated, the
recalibration procedure should be repeated.
When pipetting liquids with physical properties considerably different from those of water, follow the rules given
in section 5.
9 - TROUBLESHOOTING
If you notice an improper pipette operation, identify the
cause and eliminate the fault. To do this, follow the
instructions in the sequence provided. Replacement of
parts should be required only occasionally, and should
not occur under normal pipette use.
Droplets of liquid remain in the pipette tip.
• The tip is emptied too fast.
Decrease the speed of pressing the pipette pushbutton.
• The tip wettability has increased due to extensive use.
Replace the tip with a new one.
Droplets of air appear in the liquid aspirated into the tip.
• The pipette tip immersion is too shallow.
Immerse the tip deeper according to the instructions.
• The pipette tip is incorrectly pressed onto the pipette
shaft.
Press the pipette firmly.
• The tip is damaged or worn out due to extensive use.
Replace the tip with a new one.
The pipette incorrectly aspirates the liquid or liquid
drops out from the tip.
• The pipette tip is incorrectly pressed onto the pipette
shaft.
Press the pipette tip firmly.
• The shaft nut is loose (Fig. 3F) in the models LP2-LP1000
Tighten the shaft nut.
11
• The sealing surface of the shaft is cracked or scored.
Remove the tip ejector. Unscrew the shaft nut,
inspect the shaft and the piston assembly. Replace
the damaged parts (see Section 12). When reasembling
the pipette, the nut should be hand tightened.
In the models LP2, LP10 and LP20, the damage of the
shaft may also cause a damage of the piston assembly. Replace the damaged parts (see Section 12).
When reasembling the pipette, the nut should be
hand tightened.
To remove the tip ejector in models LP5000 and
LP10000, remove the ejector pushbutton (Fig. 3N)
and using a screwdriver unscrew the tip ejector by
turning the screwdriver counter-clockwise.
• Damage to the piston or seal due to prolonged use
with the aggressive liquids.
Disassemble the pipette as described above.
Replace the piston, seal and O-ring (see Section 12).
Rinse the inside of the shaft in distilled water and dry.
Lubricate the seal and O-ring with the lubricant, that
has been included with each pipette.
The replacement of the piston requires conducting
of calibration procedure.
Note: The parts of LP2 and LP10 pipette should be
lubricated evenly with a minimum amount of lubricant.
• The pipette is reassemled improperly.
Disassemble the pipette and reassemble it, observing the proper sequence of steps (Fig. 3).
• No lubricant on the sealing elements.
Remove the tip ejector. Unscrew the shaft nut,
remove the shaft, piston assembly, seal and O-ring.
Rinse the removed parts in distilled water and dry
thoroughly. Lightly lubricate the inside surfaces of
the seal and the O-ring with the included lubricant.
Reassemble the pipette in the reverse order.
• Contamination of the inside of the pipette caused by
extensive aspiration of chemically aggressive liquids or
because liquid got inside the pipette.
Remove the tip ejector. Unscrew the nut, remove
the shaft, piston assembly, seal and O-ring. Rinse
the removed parts with distilled water and dry thor
oughly. Lightly lubricate the inside surfaces of the
seal and the O-ring with the lubricant. Reassemble
the pipette in the reverse order.
12
LP-DV/01/2005 OK WZOR OK
02/08/2006
18:53
Page 18
If you find an increase in the pipetting force, which may
happen after repetitive autoclaving of the pipette:
Remove the tip ejector. Unscrew the shaft nut, and
then remove the shaft, piston assembly, seal and
O-ring. Rinse the removed parts in distilled water and
dry. Lubricate the internal surfaces of the seal and
O-ring with lubricant that has been included with each
pipette. Reassemble the pipette in opposite order.
Note: All parts of the pipette can be autoclaved (see
Section 10)
The shaft of the 5000 and 10000 models should be
autoclaved without the filter.
If the problem continues after carrying out the above
steps, contact your Labnet representative.
Before returning the pipette, please ensure that the
pipette is completely free of any chemical, radioactive or
microbiological contamination which could pose a threat
during transport and repair. As far as it is possible, clean
the pipette.
10 - CLEANING AND STERILIZATION
Cleaning
External surfaces of the pipetting pushbutton, the ejector
pushbutton, the handgrip, the shaft nut and the adjustment knob may be cleaned using a cloth dampened in
isopropyl alcohol. The remaining parts removed from the
pipette during pipette disassembly may be washed with
distilled water or isopropyl alcohol.
Sterilization:
The pipette can be sterilized in an autoclave at 121°C for
20 minutes. After sterilization, the pipette should be dried
and cooled to room temperature.
It is recommended:
- to sterilize the pipettes in autoclave with an initial vacuum and drying cycle,
- prior to sterilization unscrew the shaft nut slightly in the
LP2-LP1000 pipettes, and unscrew the shaft slightly in
the LP5000 and LP10000. After autoclaving these parts
should be screwed tight again.
The precision of the results should not alter if the pipetting process and autoclaving are carried out as
described in this manual. Because a slight change in the
accuracy of the dosage may occur, it is recommended to:
- check the calibration of the pipette after the initial first,
third and fifth autoclaving cycles and then after every 10
autoclaving cycles.
11 - PIPETTE KIT AND ACCESSORIES
Pipette kit:
The pipettes are delivered in the kits including:
• Pipette
• Instruction manual
• Calibration key
• Pipette stand
• Ejector regulation spacers
(for pipette models LP2 - LP1000)
• Ejector cap (for pipette models LP5000, LP10000)
• Tips
• Identification labels
• Filters (for pipette models LP5000, LP10000)
• Lubricant
The stand assembly diagram is shown in Fig. 5.
Accessories:
13
Cat. No.
Description
P3984
10 µl tips, racked
P3991
200 µl tips, racked
P3996
1000 µl tips, racked
P3998
5000 µl tips, bulk pack
K943
10000 µl tips, bulk pack
P3985
Carousel stand for 6 pipettes
P3989
Linear stand for 6 pipettes
14
LP-DV/01/2005 OK WZOR OK
02/08/2006
18:53
Page 20
12 - SPARE PARTS
The spare parts indicated in Fig. 3, 4 and 6 that is:
A: Pipetting pushbutton A1: Pushbutton A2: Knob
B: Adjustment knob
C: Shaft
D: Ejector
F: Shaft nut
G: Piston assembly
H: Spacer
I: O-ring
J: Seal
K: Calibration key
L: Filter
M: Ejector cap
N: Ejector pushbutton
can be ordered from your Labnet representative (type of
pipette and name of the part for this pipette should be
specified).
Warning: The replacement of the piston requires conducting of calibration procedure according to section 8.
Before returning a pipette to a Labnet representative
please ensure that the pipette is completely free of any
contamination (chemical, microbial or radioactive).
Contact Labnet at 732-417-0700
fax: 732-417-1750
email: [email protected]
LP-DV/08/2006
15