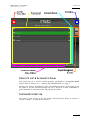
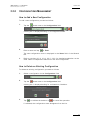
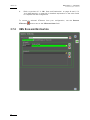
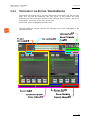
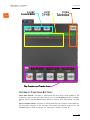
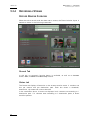
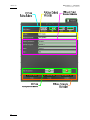
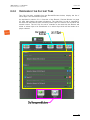
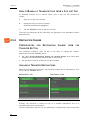
1
User’s Manual
Version 1.1 - October 2010
Studio Ingest Software
INSIO Version 1.1 – User Manual
EVS Broadcast Equipment – October 2010
Issue 1.1.B
C OPYRIGHT
EVS Broadcast Equipment – Copyright © 2009-2010. All rights reserved.
D ISCLAIMER
The information in this manual is furnished for inform ational use only and subject
to change without notice. While every effort has been made to ensure that the
information contained in this user manual is accurate, up-to-date and reliable,
EVS Broadcast Equipment cannot be held responsible for inaccuracies or errors
that may appear in this publication.
I MPROVEMENT R EQUESTS
Your comments will help us improve the quality of the user documentation. Do not
hesitate to send improvement requests, or report any error or inaccuracy on this
user manual by e-mail to [email protected].
R EGIONAL C ONTACTS
You will find the full list of addresses and phone numbers of the EVS headquarters
and local offices either at the end of this user manual or on the EVS website on
the following page: http://www.evs.tv/contacts
U SER M ANUALS ON EVS W EBSITE
The latest version of the user manual, if any, and other user manuals on EVS
products can be found on the EVS download center, on the following webpage:
http://www.evs.tv/downloadcenter
I
Issue 1.1.B
II
INSIO Version 1.1 – User Manual
EVS Broadcast Equipment – October 2010
INSIO Version 1.1 – User Manual
EVS Broadcast Equipment – October 2010
Issue 1.1.B
Table of Contents
TABLE OF CONTENTS ................................................................................................... III WHAT’S NEW? ................................................................................................................ VI 1. 1.1 1.2 INTRODUCTION....................................................................................................... 1 TYPICAL WORKFLOW ................................................................................................................2 PROJECT STRUCTURE .............................................................................................................3 2. START-UP ................................................................................................................ 4 3. SETUP ...................................................................................................................... 7 3.1 USER INTERFACE ......................................................................................................................7 3.1.1 Opening the Setup Windows ...................................................................................................7 3.1.2 Overview of the Setup Windows .............................................................................................8 3.2 USER GENERAL SETTINGS ....................................................................................................10 3.3 PREDEFINED CONFIGURATIONS SETTINGS ........................................................................12 3.3.1 Prerequisites .........................................................................................................................12 3.3.2 Configurations Management .................................................................................................13 3.3.3 General Tab ..........................................................................................................................15 3.3.4 Format, Name & Destination Tab ..........................................................................................17 3.3.5 Record Setup Tab .................................................................................................................23 3.3.6 Review Setup Tab .................................................................................................................27 3.4 METADATA SETTINGS .............................................................................................................30 3.4.1 Metadata Types ....................................................................................................................31 3.4.2 Take Rating...........................................................................................................................31 3.4.3 Take Acceptance ..................................................................................................................31 3.5 SYSTEM GENERAL SETTINGS ...............................................................................................32 3.6 VIDEO SERVER SETTINGS .....................................................................................................34 3.7 XTACCESS SETTINGS .............................................................................................................35 3.7.1 XTAccess Definition ..............................................................................................................35 3.7.2 XML Scan and Destination....................................................................................................36 3.7.3 Avid AAF/Interplay ................................................................................................................38 3.7.4 Final Cut Pro .........................................................................................................................39 3.8 VIDEO PLAYER SETTINGS ......................................................................................................41 3.9 DATABASE SETTINGS .............................................................................................................41 4. DEFINING PROJECT, EPISODES AND SCENES ................................................ 42 4.1 INTRODUCTION ........................................................................................................................42 4.2 PROJECT MANAGEMENT ........................................................................................................42 4.2.1 Overview of the Projects / Productions window.....................................................................42 4.2.2 Navigating Within a Window .................................................................................................44 4.2.3 How to Add a New Project ....................................................................................................44 4.2.4 How to Update Project Setup Configuration ..........................................................................45 4.2.5 How to Delete a Project ........................................................................................................45 4.3 EPISODES MANAGEMENT ......................................................................................................47 4.3.1 Introduction ...........................................................................................................................47 III
Issue 1.1.B
INSIO Version 1.1 – User Manual
EVS Broadcast Equipment – October 2010
4.3.2 Overview of the Programs / Episodes window ......................................................................47 4.3.3 How to Add a Program / Episode ..........................................................................................49 4.3.4 How to Update Episode Information......................................................................................50 4.3.5 How to Delete an Episode.....................................................................................................50 4.4 DEFINING SCENES ..................................................................................................................51 4.4.1 How to Define Scenes from the Programs / Episodes Window .............................................51 4.4.2 How to Update Scenes Information from the Programs / Episodes Window .........................52 4.4.3 How to Delete Scenes Information from the Programs / Episodes Window ..........................53 4.4.4 How to Define a Scene for an Episode in the Record/Review Window .................................53 5. RECORDING AND REVIEWING MEDIA ............................................................... 54 5.1 INTRODUCTION ........................................................................................................................54 5.2 USER INTERFACE ....................................................................................................................54 5.2.1 Opening the Record/Review Window....................................................................................54 5.2.2 Overview of the Record / Review Window ............................................................................55 5.3 RECORDING MEDIA .................................................................................................................58 5.3.1 Introduction ...........................................................................................................................58 5.3.2 Overview of the Record Tab .................................................................................................58 5.3.3 Recording a Take ..................................................................................................................61 5.3.4 Recording a Stream ..............................................................................................................64 5.4 REVIEWING MEDIA ..................................................................................................................66 5.4.1 Introduction ...........................................................................................................................66 5.4.2 Overview of the Review Tab .................................................................................................67 5.4.3 Loading Media ......................................................................................................................68 5.4.4 Playing Clip(s) Back ..............................................................................................................78 5.4.5 Editing Media ........................................................................................................................81 5.5 ASSIGNING METADATA ...........................................................................................................83 5.5.1 Metadata Information and Overview of the Metadata Tab ....................................................83 5.5.2 How to Assign Metadata from the Record Tab......................................................................85 5.5.3 How to Assign or Modify Metadata from the Clip-List Tab ....................................................87 5.5.4 Filtering Takes on Take Rating and/or Take Acceptance ......................................................88 5.6 VIEWING RECORD TRAINS .....................................................................................................88 6. TRANSFERRING MEDIA ....................................................................................... 90 6.1 INTRODUCTION ........................................................................................................................90 6.2 USER INTERFACE ....................................................................................................................90 6.2.1 Overview of Transfer Status Windows ..................................................................................90 6.2.2 Overview of the Clip List Tabs .............................................................................................. 93 6.3 TRANSFER PARAMETERS ......................................................................................................94 6.3.1 Transfer Modes .....................................................................................................................94 6.3.2 Transfer Destinations ............................................................................................................94 6.4 AUTOMATIC TRANSFER ..........................................................................................................95 6.5 MANUAL TRANSFER ................................................................................................................95 6.5.1 Manual Transfer of Just Recorded Clips ...............................................................................96 6.5.2 Manual Transfer of a Clip During Review..............................................................................96 6.5.3 Manual Transfer of One or Several Clips at the End of a Recording Session .......................96 6.5.4 Destination Change...............................................................................................................98 6.6 TRANSFER STATUS ...............................................................................................................100 6.6.1 Transfer Color Code............................................................................................................100 6.6.2 Transfer Status Information .................................................................................................100 IV
INSIO Version 1.1 – User Manual
EVS Broadcast Equipment – October 2010
Issue 1.1.B
6.6.3 Failed Transfers ..................................................................................................................102 7. 7.1 7.2 7.3 CLEANING UP THE SYSTEM AND DELETING MEDIA ..................................... 103 INTRODUCTION ......................................................................................................................103 OVERVIEW OF THE CLEANUP WINDOW .............................................................................103 DELETING TAKES ..................................................................................................................104 INDEX ............................................................................................................................ 107 REGIONAL CONTACTS ............................................................................................... 110 V
Issue 1.1.B
INSIO Version 1.1 – User Manual
EVS Broadcast Equipment – October 2010
What’s New?
The following table describes the sections updated to reflect the new and updated
features on INSIO version 1.1.
In the user manual, the icon
has been added on left margin to highlight
information on new and updated features.
Click the section number (or the description) in the table to jump directly to the
corresponding section.
Section
Description
General items
Whole manual
Update XT server to EVS video server to take all the EVS video
servers into account. EVS video server is sometimes simply
called EVS server.
3.1.2
Setup page: new or updated settings are available.
3.3.5
Setup – Record: New button to move a recorder channel directly
to the Unused group.
3.6
The Setup page used to define EVS video server parameters is
now called Video Server.
Project Definition
5.2.2, 5.3.3,
5.3.4
Possibility to select the episode number from the Record/Review
window.
4.4.1
A series of new buttons is available to organize the scene order.
Record
3.2, 5.3.2
The Locator button can be used during recording process.
5.2.2, 5.3.3,
5.3.4
Episodes can now be selected from the Record/Review window.
Review
VI
1, 3.3.6, 5.1,
5.2.2, 5.4.1,
5.4.2, 5.4.3
Possibility to use not only Software Player channels but also
server player channels to load and review recorded clips.
5.4.3
Presets of player channels configurations can be done with
server player channels, not only on Software player channels.
5.4.3
New button for the Preset: it is now called Display Preset.
5.4.4
Possibility to set a temporary cue point to review several clips
INSIO Version 1.1 – User Manual
Issue 1.1.B
EVS Broadcast Equipment – October 2010
Section
Description
simultaneously from these points. (Synchronize the Playback of
Clips on a Temporary C ue Point)
Metadata
3.4, 5.2.2,
5.5.1
Two types of metadata can be used: fixed metadata linked to the
take identification within the project and free text metadata. Take
Rating and Take Acceptance can be defined and are considered
as take metadata.
A Metadata tab is now available from the Record/Review window.
3.5, 5.5
Timecode information is displayed in the Metadata tab. The
position of the timecode fields can be set in Setup – System –
General.
0, 6.2.2
The Take Rating level and Tale Acceptance status are displayed
in the Clip List tabs and a new filter is available from the Clip
List tabs to filter takes on their Take Rating and Tale Acceptance
status.
Transfer
3.3.4
Transfer destinations are configured through the Destination
Configuration tab and some of them are selected through the
Selection Destination tab.
3.3.4, 6.1
Possibility to transfer the metadata files associated to MXF
OPAtom files.
3.7.3
Avid AAF and Interplay parameters are defined from the Setup –
System - XTAccess tab.
3.3.4, 6.1
Possibility to transfer the metadata files associated to FCP QT
files.
3.7.4
FCP destinations are defined from the Setup – System XTAccess tab.
3.3.4
Possibility to transfer files in folders created based on a dynamic
parameter.
6.3.2, 6.5.4
Possibility to select another transfer destination than those
selected in the Setup to transfer files.
6.2.1
The expanded Transfer Status window displays the metadata
destination for each transferred file.
VII
INSIO Version 1.1 – User Manual
Issue 1.1.B
EVS Broadcast Equipment – October 2010
1. Introduction
INSIO is a software application created for multi-camera studio productions.
INSIO is specifically engineered for studios that are transitioning to, or using, file
based production workflows. It has been developed with an easy-to-use interface,
specially designed for fast turnaround of studio production and integration with
postproduction workflows.
INSIO is easily integrated into production workflows for programs like soap series,
dramas, game/quiz shows, debates and other multi-camera studio production, with
or without audiences.
In combination with EVS production servers, INSIO enables
•
the recording of takes from several camera angles at a time,
•
the instant review of recorded takes through the Software Player or by loading
the clips on server player channels,
•
the editing of takes with the possibility of modifying the start and stop times
thanks to the EVS servers’ loop recording process,
•
the possibility to choose the camera angles you want to keep and transfer,
•
the manual or automatic transfer of recorded takes to pre-defined destinations
such as local drives, fixed, removable or shared drives, EVS archiving/storage
solutions,
•
the streaming of the recorded media, through the Gigabit Ethernet connection,
to post-production tools, such as EVS Xedio Suite, Apple Final Cut Pro, Avid
Media Composer for instant non-linear editing.
In addition, INSIO is available for use with standard keyboard, mouse and screen,
but also with touch-screen interface, including virtual keyboard. Refer to the touch
screen manual for complete information.
An additional module, called ProNotes, enables the logging of comments directly
associated with the recorded scenes. This module is described in a separate
document.
1
Issue 1.1.B
1.1
INSIO Version 1.1 – User Manual
EVS Broadcast Equipment – October 2010
TYPICAL WORKFLOW
A typical workflow involving INSIO can look like the one below.
2
INSIO Version 1.1 – User Manual
EVS Broadcast Equipment – October 2010
1.2
Issue 1.1.B
PROJECT STRUCTURE
Within INSIO, a project, or production, is made up of a series of episodes, or
programs, themselves composed of several scenes. The project must be created
before the beginning of the first recording session. This is detailed in section 4
‘Defining Project, Episodes and Scenes’ on page 42.
During the recording session, cameras will record one or several takes within a
scene. Each camera makes a clip. In this manual, the term ‘clip’ is used to
designate a take recorded by a camera. As many cameras record the same take a t
the same time, a take will contain as many recorded clips as there are active
cameras. They can be called ‘linked clips’. Refer to section 5 ‘Recording and
Reviewing Media’ on page 54.
3
Issue 1.1.B
INSIO Version 1.1 – User Manual
EVS Broadcast Equipment – October 2010
2. Start-Up
Click on the IN SIO Launcher icon
to start the application. This will
launch all the modules set as active in the Launcher Setup, check their status, and
return a message in case one application does not launch correctly.
This can be viewed on the displayed INSIO Launcher window:
For more information about the Launcher Setup, please refer to the Technical
Reference manual.
The Projects/Productions window will open when INSIO is started. From this
window, you can manage projects or access the System Setup configuration
windows or the Project Setup configuration window specific to each project.
All these functionalities are described in the different chapters of this manual.
The Projects/Productions window contains six main areas highlighted in the
screenshot below:
4
INSIO Version 1.1 – User Manual
EVS Broadcast Equipment – October 2010
Issue 1.1.B
P ROJECTS L IST & A LPHABETIC P ANEL
This gives the list of all the existing projects, preceded by the Project Setup
button. Refer to section 3.1.1 ‘Opening the Setup Windows’ on page 7.
Projects are listed in alphabetical order. An alphabetical panel, on the right of the
list helps to quickly navigate through the list of projects: a letter highlighted in
green indicates an existing project starting with this letter.
S YSTEM S ETUP B UTTON
This button gives access to all the system setup windows. Refer to section 3
‘Setup’ on page 7 for detailed information.
5
Issue 1.1.B
INSIO Version 1.1 – User Manual
EVS Broadcast Equipment – October 2010
E XIT B UTTON
This button is used to exit the application.
P ROJECT M ANAGEMENT B UTTONS
These buttons allow the creation and deletion of projects. Refer to section 4.2
‘Project Management’ on page 42.
C ONDENSED T RANSFER S TATUS W INDOW
This area gives quick information on the jobs transfer status. Refer to section 6
‘Transferring Media’ on page 90.
6
INSIO Version 1.1 – User Manual
Issue 1.1.B
EVS Broadcast Equipment – October 2010
3. Setup
Before the beginning of a project, user and system configurations must be set
through the Setup windows.
Setup parameters can be defined at three different levels:
•
System level: to define or modify INSIO settings
•
Project level: to define settings specific to a project
•
Episode level: to define settings specific to an episode.
Refer to sections 4.2 ‘Project Management’ on page 42 and 4.3 ‘Episodes
Management’ on page 47 for more details on project specific and episode specific
setup windows.
3.1
USER INTERFACE
3.1.1
OPENING THE SETUP WINDOWS
The System Setup button is available in the upper left corner of the Project /
Production window.
It gives access to all the Setup windows.
The Project Setup button is available on the left of the project name in the list of
projects displayed in the Projects/Productions window .
It gives access to some of the Setup windows, to define settings specific to the
corresponding project. These windows correspond to the User General window and
the User Predefined Configurations window of the System Setup.
The Episode Setup button is available on the left of the episode name in the list
of episodes displayed in the Programs/Episodes window.
It gives access to some of the Setup windows, to define settings specific to the
corresponding episode. These windows correspond to the User General window
and the User Predefined Configurations window of the System Setup.
7
Issue 1.1.B
3.1.2
INSIO Version 1.1 – User Manual
EVS Broadcast Equipment – October 2010
OVERVIEW OF THE SETUP WINDOWS
When you tap / click the System Setup button, eight setting
categories can be accessed by selecting an option on the left
pane of the window.
The following table briefly explains the windows which can be accessed by tapping
(touch screen) or clicking (mouse) the corresponding button:
Button
Description of the Corresponding Window
User - General
Allows the selection of the active mode, i.e. the windows
which will be displayed on the interface, to define
whether streams or clips will be recorded, or whether the
Review only mode will be enabled.
User - Predefined
Configurations
Allows the user to define predefined configurations:
• recording: selecting recorder channels available from
each EVS server present on the network; giving a
camera name to each recorder;
• reviewing: selecting Video Player channels and server
player channels;
8
INSIO Version 1.1 – User Manual
Issue 1.1.B
EVS Broadcast Equipment – October 2010
Button
Description of the Corresponding Window
• transferring: defining transfer destinations and
selecting file form at for transferred files.
User - Metadata
Allows the user to define metadata columns for additional
information.
System - General
Allows the user to define general system functions
relative to
• timecode fields position and jog wheel default option in
the Review window,
• the use of guardbands for the recorded clips,
• the use of touch screen
• alarm triggers and messages.
System - Video
Server
Allows the user to define EVS servers configuration.
System - XTAccess
Allows the user to define XTAccess configuration (XML
scan folder, destination file folder) as well as Avid AAF or
Interplay destinations if needed.
System - Video
Player
Allows the user to select a Software Player.
System - Database
Allows the connection to the database
Refer to the following sections for a detailed description of the different windows.
At any time, the Setup window can be exited by tapping the Exit button
.
9
Issue 1.1.B
3.2
INSIO Version 1.1 – User Manual
EVS Broadcast Equipment – October 2010
USER GENERAL SETTINGS
The User General Settings window is available when you tap the
User General Settings button on the left pane...
This window allows you to define the active mode which will be used during the
session. No user rights are used within INSIO. However, different user frameworks
can be defined through the Setup options: clip record and review, review only,
streaming,…
S ELECTION OF THE A CTIVE M ODE
Record Mode – Stream
This option allows you to stream to another destination without creating and
saving clips on the EVS server. Selecting this option will result in a limited view
and lim ited available buttons in the Record window.
10
INSIO Version 1.1 – User Manual
Issue 1.1.B
EVS Broadcast Equipment – October 2010
Record Mode – Clip
This option allows you to record clips on the EVS server.
Clip Options
Option
Description
Transfer
Enables the transfer of a clip from the Record/Review
window or Clip List tabs.
Review
Activates the display of the Review tab in the
Record/Review window. Enables the review of a clip in
the Review window.
Default Auto Actions
Option
Description
Auto Save
Activates the Auto Save mode in the Record/Review
window.
Auto Transfer
Activates the Auto Transfer mode in the Record/Review
window.
Auto Review
Activates the Auto Review mode in the Record/Review
window.
Review Only Mode
This option only allows the review of clips. Clip recording and clip transfer are not
allowed.
The usual Record/Review window will display the left Clip List tab and the Review
tab.
L OCATOR
Enables the Locator button, i.e. displays it on the Record window. It is used to
insert flags, for example in case of successive repetitions of the same sentence
within an ongoing take. Locator inform ation is transferred as metadata with the
clip.
This function is available when the ProNotes module is present and active.
In the Locator text field, you can enter the text message that will be displayed
each time it is used.
11
Issue 1.1.B
3.3
INSIO Version 1.1 – User Manual
EVS Broadcast Equipment – October 2010
PREDEFINED CONFIGURATIONS
SETTINGS
This window is available when you tap the User Predefined
Configurations Settings button on the left pane.
It allows you to define pre-defined configurations, i.e. selecting the EVS server
recorder channels to be used for recording, the player channels to be used for
review (EVS server player channels or Software Player), and the destinations and
parameters to be used to transfer clips.
Four tabs are available from this window:
3.3.1
•
General
•
Format, Name and Destination
•
Record Setup
•
Review Setup
PREREQUISITES
Some parameters from the System Settings must have been configured prior to be
able to complete the Predefined Configurations settings.
12
Complete…
Before completing…
System
> XTAccess
> XML Scan & Destination tab
XTAccess Destination field in Format, Name &
Destination > Configure Destinations tab.
System
> XTAccess
> Avid AAF/Interplay tab
AAF Destination or Interplay Destination field
in Format, Name & Destination > Configure
Destinations tab.
System
> XTAccess
> Final Cut Pro tab
FCP XML Destination FCP QT Local Path fields
in Format, Name & Destination > Configure
Destinations tab.
System
> Video Server
EVS Server selection in Record Setup tab.
System
> Video Server
SDI channel selection in Review Setup tab.
System
> Video Player
Video Player selection in Review Setup tab.
INSIO Version 1.1 – User Manual
Issue 1.1.B
EVS Broadcast Equipment – October 2010
3.3.2
CONFIGURATIONS MANAGEMENT
How to Add a New Configuration
To add a new configuration, proceed as follows:
1.
Tap the
button next to the Configuration field:
A dialog box is displayed asking for a configuration name.
2.
Enter a name and tap
or Enter.
The new configuration name is displayed in the Name field of the General
tab.
3.
Refer to sections 3.3.3, 3.3.4, 3.3.5, 3.3.6 for detailed explanation on the
other fields to complete the definition of the new configuration.
How to Delete an Existing Configuration
To delete an existing configuration, proceed as follows:
1.
2.
Select a configuration in the Configuration field:
Tap the
button next to the Configuration field
A dialog box is displayed asking for confirmation of deletion.
3.
Tap
to validate the deletion or
to cancel the operation.
If validated, the configuration nam e disappears from the list.
13
Issue 1.1.B
INSIO Version 1.1 – User Manual
EVS Broadcast Equipment – October 2010
How to Rename or Edit an Existing Configuration
To rename or edit an existing configuration, proceed as follows:
1.
Select a configuration from the Configuration field:
2.
To rename the configuration:
In the Name field of the Name & Description pane in the General tab, enter
the new name.
The configuration name is automatically updated in the Configuration field.
3.
To edit any other parameter, change it.
This is automatically updated.
14
INSIO Version 1.1 – User Manual
EVS Broadcast Equipment – October 2010
3.3.3
Issue 1.1.B
GENERAL TAB
From this area, you can set the default configuration and define the clip name
format.
Default Configuration
When the Default Configuration box is selected, the system considers the selected
configuration as the default configuration.
Note
The default configuration can only be modified from the System Setup
window, not from the Project or Episode Setup windows.
Name & Description
Those fields display the name of the selected configuration. They allow you to
change the name of the selected configuration and to enter a description.
15
Issue 1.1.B
INSIO Version 1.1 – User Manual
EVS Broadcast Equipment – October 2010
Clip Display Name
The clip name format is user-defined and can be modified as described in section
‘How to Modify the Clip Display Name Format String’ on page 16.
The user can reset the default filename by tapping the Reset button
.
How to Modify the Clip Display Name Format String
To modify this default name format string, proceed as follows:
1.
To add an inform ation type specified in the Available Items list, select the
item in the drop-down list and tap the Add button
item at the end of the filename string.
to add the selected
Available Items
Meaning
%CLIP_LOUTH_ID
Clip Louth ID on the Server
%PROJECT_NAME
Project Name
%EPISODE_NAME
Episode N am e
%SCENE_NAME
Scene Name
%TAKE_NO
Take Num ber
%CHANNEL
Recorder Channel
%CHANNEL_NAME
Recorder
Channel
Name
as
configured in the Record Setup tab.
%TCIN
Timecode IN
%TCOUT
Timecode OUT
%DEST_NAM E1
Transfer Destination Path Name 1
%DEST_NAM E2
Transfer Destination Path Name 2
2.
In the Full Name field, delete the part of the string you do not want to keep
in the filename, if any.
3.
To add a generic text in the Full Name string, type the text in the field.
Timecode Display
This setting allows you to display NTSC timecode as Drop Frame or Non Dro p
Frame.
16
INSIO Version 1.1 – User Manual
Issue 1.1.B
EVS Broadcast Equipment – October 2010
3.3.4
FORMAT, NAME & DESTINATION TAB
From this area, you can select the destination paths used to transfer clips and
define the file form at for transferred clips. Two subtabs are available: one for
destination configuration and one for destination selection.
C ONFIGURE D ESTINATIONS T AB
This tab is used to define several transfer destinations.
Destination Configuration
This field displays the name of the configuration of a destination.
Use the
button to configure a new destination.
Use the
button to delete the selected destination configuration.
17
Issue 1.1.B
INSIO Version 1.1 – User Manual
EVS Broadcast Equipment – October 2010
Use the
button to edit the nam e of a destination configuration.
Format
This setting makes it possible to choose the default file format in which the
transferred file will be generated.
The following formats are available:
•
EVS MXF
•
MXF OP1a
•
Quick Time Movie
•
Quick Time Reference
•
Transfer to Avid
•
Avid MXF OPAtom
Name
The name of the transferred files is user-defined and can be modified as described
in section ‘How to Modify the Clip Display Name Format String’ on page 16.
The user can reset the default filename by tapping the RESET button
.
Available items for the filename of transferred files are listed in the following
table. The list also contains the metadata which have been activated.
18
Available Items
Meaning
%CLIP_LOUTH_ID
Clip Louth ID on the Server
%PROJECT_NAME
Project Name
%EPISODE_NAME
Episode N am e
%SCENE_NAME
Scene Name
%TAKE_NO
Take Num ber
%CHANNEL
Channel
%CHANNEL_NAME
Channel Name
%TCIN
Timecode IN
%TCOUT
Timecode OUT
%M _TAKE_RATING
Take rating
%M_TAKE_ACCEPTA(NCE)
Take Acceptance
INSIO Version 1.1 – User Manual
EVS Broadcast Equipment – October 2010
Issue 1.1.B
The Sample fields give an example of the name that will be given to a transferred
file, based on the items selected in the Available Items list and listed in the Full
Name field. In case the association of items would result in names not unique for
each clip, the sample text is displayed in red to warn the users to use an
additional item to differentiate the clip names.
AAF / Interplay for MXF OP-Atom (Avid) format
This group box is only available when the MXF OPAtom file format has been
selected.
AAF
This radio button is selected when you want to transfer the MXF OPAtom metadata
files to standalone drives or to unity without Interplay.
AAF destination must have been defined in Setup > System > XTAccess. Refer to
section 3.7.3 ‘Avid AAF/Interplay’ on page 38.
Interplay
This radio button is selected when you want to transfer the MXF OPAtom metadata
files to unity with Interplay. Fill in the User and Password fields.
Interplay destination must have been defined in Setup > System > XTAccess.
Refer to section 3.7.3 ‘Avid AAF/Interplay’ on page 38.
Final Cut Pro for QuickTime (Ref) format
This group box is only available when the Quick Time (mov) file format or Quick
Time Ref file format has been selected.
No Final Cut Pro XML
This radio button is selected when you do not want to transfer the QT XML
metadata files.
With Final Cut Pro XML
This radio button is selected when you want to transfer the QT XML metadata
files.
Destinations must have been defined in Setup > System > XTAccess. Refer to
section 3.7.4 ‘Final Cut Pro’ on page 39.
19
Issue 1.1.B
INSIO Version 1.1 – User Manual
EVS Broadcast Equipment – October 2010
Destination Path & XML Scan
This setting allows you to select the destination path to transfer the files to. This
can be local drives, SAN or storages with MAM.
XTAccess
This column lists all the XTAccess available.
The XTAccess, or the list of XTAccess, must have been defined in Setup >
System > XTAccess. Refer to section ‘XTAccess Settings’ on page 35.
Choose one XTAccess, which will be used to transfer files, by selecting the
checkbox in the Use column.
Destination path
This option allows the selection of one destination folder which will be used to
transfer the files to.
The list of destination paths must have been defined in Setup > System >
XTAccess.
When several destination paths have been defined, one of them can be chosen by
selecting the Destination Path field and then viewing the list with the drop-down
arrow which will appear.
XML Scan
XTAccess is triggered by INSIO via XML files. It scans pre-defined folders to
check for new XML jobs to process. XTAccess automatically creates the scan
folder C:\XTAccess_XML\ during XTAccess installation process.
XML scan folders are defined in Setup > System > XTAccess.
AAF Destination
This field is only available when the AAF option has been selected in the ‘AAF /
Interplay for MXF OPAtom (Avid) format’ group box.
It is used to select one destination folder which will be used to transfer the MFX
OPAtom m etadata files to.
Tap on the field and, with the drop-down arrow, select one of the destinations
which have previously been defined in Setup > System > XTAccess > Avid
AAF/Interplay > Avid AAF destinations.
20
INSIO Version 1.1 – User Manual
Issue 1.1.B
EVS Broadcast Equipment – October 2010
Interplay Destination
This field is only available when the Interplay option has been selected in the
‘AAF / Interplay for MXF OPAtom (Avid) format’ group box.
It is used to select one destination folder which will be used to transfer the MFX
OPAtom m etadata files to.
Tap on the field and, with the drop-down arrow, select one of the destinations
which have previously been defined in Setup > System > XTAccess > Avid
AAF/Interplay > Avid Interplay destinations.
FCP XML Destination and FCP QT Local Path
These fields are only available when the With Final Cut Pro XML option has been
selected in the ‘Final Cut Pro for QuickTime (Ref) format’ group box.
The FCP XML Destination field is used to select one destination folder which will
be used to transfer the QT XML metadata files to.
The FCP QT Local Path field is used to select the local destination folder which
will be used to transfer the QT files to.
Tap on the field and, with the drop-down arrow, select one of the destinations
which have previously been defined in Setup > System > XTAccess > Final Cut
Pro.
Dynamic Destination
This setting is used to select an item to add to the destination directory path.
Folders labeled with the selected item will be created and the transferred files will
be saved in these folders.
The available items are:
Available Items
Meaning
%PROJECT
Project Name
%EPISODE
Episode Name
%SCENE
Scene Name
%SCENE_NO
Scene Number
%TAKE
Take Number
Activated metadata fields are available as well.
21
Issue 1.1.B
INSIO Version 1.1 – User Manual
EVS Broadcast Equipment – October 2010
Select one of the parameters from the Available Items field and tap
then added to the Destination field.
. It i s
Example:
In case the %SCENE option is selected, a folder with the scene name will be
created when a transfer is done and the corresponding takes will be saved inside
their corresponding folder.
D ESTINATION S ELECTION T AB
This tab is used to select up to two transfer destinations, defined in the Configure
Destinations tab, that you want to use to transfer your clips to.
Allow Destination Change via Transfer Button
When selected, this option allows the users to change the transfer destination
from the Transfer button. Refer to section 6.3.2 ‘Transfer Destinations’ on page
94.
Destination – Use - Destination Config
Choose to use up to two destinations to transfer files by selecting the
corresponding checkboxes in the Use colum n.
Then, for Destination and/or Destination2, the Destination Config column lists all
the available transfer destinations configured in the Configure Destination tab.
Refer to section ‘Configure Destinations Tab’ on page 17. One of them can be
chosen by selecting the Destination Config field and then by viewing the list with
the drop-down arrow which will appear.
22
INSIO Version 1.1 – User Manual
EVS Broadcast Equipment – October 2010
3.3.5
Issue 1.1.B
RECORD SETUP TAB
This tab allows the selection of recorder channels from the EVS servers present
on the network and configured through Setup > System > Video Server . Refer to
section 3.6 ‘Video Server Settings’ on page 34.
It allows you to give a camera name to each recorder.
23
Issue 1.1.B
INSIO Version 1.1 – User Manual
EVS Broadcast Equipment – October 2010
How to Select EVS Server Recorder Channels
To be able to select recorder channels from EVS server, proceed as follows:
1.
Tap the EVS Server button.
A dialog box opens:
2.
Select an EVS server from the drop-down list as well as a configuration.
Note
Configuration corresponds to the configuration defined in the
Setup > System > Video Server tab.
3.
Tap
or Enter.
The recorder channels, representing cameras, are displayed in the list.
How to Rename Recorder Channels with Camera Names
You may rename the recorder channels with the camera names as you want them
to appear in the Record window. To do so, proceed as follows:
1.
In the Name column, select the recorder field.
2.
Enter the name of the camera, e.g. Camera A, MixOut,…, and tap Enter.
The field is updated with the camera name.
24
INSIO Version 1.1 – User Manual
Issue 1.1.B
EVS Broadcast Equipment – October 2010
How to Group Cameras
When many cameras are used, it may be interesting to display them as groups of
cameras in the Record window, e.g. all the cameras dedicated to audience. To do
so, proceed as follows:
1.
Tap the Group button.
A dialog box opens:
2.
Enter a name for the group, as it will appear in the Record window, and tap
or Enter.
The group line is displayed in the cameras list.
3.
Organize your cameras and/or groups by
• tapping the
button to move the camera or group to the next line
• tapping the
button to move the camera or group to the previous line
Note that the camera name needs to be indented from the group nam e to be
included within the group.
4.
Move the cameras that you do not want to use under the Unused group.
Unused cameras
When you are sure that you will not use some of the cameras, move them in the
Unused group by tapping the
Record window to record take.
button. So, they will not be available in the
To remove the recorder channels from a server from the list of cameras displayed
on the Setup window, place all the channels from this server in the Unused group.
Then, tap the
button.
To remove a group name, it must be free of camera. Then, tap the
button.
25
Issue 1.1.B
INSIO Version 1.1 – User Manual
EVS Broadcast Equipment – October 2010
Review Audio
When a clip is loaded on the Software Player for review, you will only be able to
hear two audio channels. You can select the output audio channels among all the
audio channels associated to a recorder channel.
How to Select Review Audio Channels
To select the two audio channels which will be used during playout of a clip,
proceed as follows:
1.
For each of the recorder channels, tap in the Review A udio column.
2.
Tap the drop-down arrow next to the Review Audio field.
The list of Audio Left channels and Audio Right channels are displayed.
3.
Select one left audio channel, or Mute, and one right audio channel, or
Mute.
4.
Tap outside the box to close it and save the selection.
The selection is displayed in the Review Audio column for the selected
recorder channel.
5.
26
Repeat all the steps for each recorder channel.
INSIO Version 1.1 – User Manual
EVS Broadcast Equipment – October 2010
3.3.6
Issue 1.1.B
REVIEW SETUP TAB
This setting specifies the available channels which can be used to review clips in
the Review window.
Those channels can be
•
Server player channels from the EVS servers present on the network and
previously configured through Setup > System > Video Server. Refer to
section ‘Video Server Settings’ on page 34.
•
Software Player channels, from the Video Players, which will be used to review
clips with the Software Player. Video Players must first be configured through
Setup > System > Video Player. Refer to section ‘Video Player Settings’ on
page 41.
27
Issue 1.1.B
INSIO Version 1.1 – User Manual
EVS Broadcast Equipment – October 2010
How to Select EVS Server Player Channels
To be able to select player channels from EVS server, proceed as follow s:
1.
In the Review Setup tab of the User > Predefined Configurations window, tap
the SDI channel button.
A dialog box opens:
2.
Select an EVS server from the drop-down list as well as a configuration and
an output channel.
Note
Configuration corresponds to the configuration defined in the
Setup > System > Video Server tab.
3.
Tap
.
The server player channel is displayed in the list.
4.
Repeat steps 1 to 3 for all the player channels.
5.
Organize your server player channels by
• tapping the
button to move the channel to the next line
• tapping the
button to move the channel to the previous line.
To remove a server player channel, select it and tap the
28
button.
INSIO Version 1.1 – User Manual
Issue 1.1.B
EVS Broadcast Equipment – October 2010
How to Select Software Player Channels
To select Software Player channels from Video Players, proceed as follows:
1.
Tap the Video Player button.
A dialog box opens:
2.
3.
Select a Video Player from the drop-down list.
Tap
or Enter.
The Software Player channels are displayed in the list.
4.
Organize your Software Player channels by
• tapping the
button to move the channel to the next line
• tapping the
button to move the channel to the previous line.
To remove a Software Player channel, select it and tap the
button.
How to Rename Player Channels
You may give a name to a server player channel or to a group of Software Player
channels coming from the same Video Player. To do so, proceed as follows:
1.
In the Name column, select the field corresponding to the player channel or
to the group of Video Player channels.
2.
Enter the name.
The field is updated with the name.
The name of the server player channels will appear in the Review window.
29
Issue 1.1.B
3.4
INSIO Version 1.1 – User Manual
EVS Broadcast Equipment – October 2010
METADATA SETTINGS
This section is available when the user taps the User Metadata
Settings button on the left pane.
Metadata are user fields which can be associated with all the clips from a
recorded take.
The Metadata Settings window allows you to select which user fields you want to
associate with your clips.
30
INSIO Version 1.1 – User Manual
EVS Broadcast Equipment – October 2010
3.4.1
Issue 1.1.B
METADATA TYPES
Two types of metadata can be used:
•
•
Predefined metadata fields related to
o
‘Project/Production’, ‘Episode/Program’, ‘Scene’ and ‘Take’, for which the
field values are fixed and cannot be modified by the user.
o
‘Take Rating’ and ‘Take Acceptance’, appearing as buttons in the Metadata
tab of the Record/Review window.
Free text metadata fields which can be named by the user and for which the
field values could be attributed to the clips by entering specific values in the
user fields from the Record/Review window.
For any metadata type, users can change the metadata name from the Name field.
The Use column is used to select the metadata fields, or buttons, that users want
to display in the Metadata tab of the Record/Review window.
3.4.2
TAKE RATING
Four levels of take rating can be used to define a take. By default, they are ‘No
Rating’, ‘Ok’, ‘Good’ and ‘Best.
The text associated to the four Take Rating buttons can be defined in each
Display Value field. This text will be displayed in the Metadata tab from the
Record/Review window.
The export values are the values put in the metadata XML file when clips are
transferred.
The default take rating level associated to a take can be changed from the Default
radio buttons.
Unselecting the Use box next to Take Rating field will remove all the information
related to Take Rating in the Metadata tab and in the Clip List tabs from the
Record/Review window. Refer to section 5.5 ‘Assigning Metadata’ on page 83.
3.4.3
TAKE ACCEPTANCE
From the Record/Review window, a take could be flagged as ‘Accepted’ or ‘Not
accepted’. By default, the ‘Not accepted’ flag is selected. However, this can be
changed from the Default radio buttons.
The text associated to the two Take Acceptance buttons can be defined in each
Export Value field.
Unselecting the Use box next to Take Acceptance field will remove all the
information related to Take Acceptance in the Metadata tab and in the Clip List
tabs from the Record/Review window. Refer to section 5.5 ‘Assigning Metadata’ on
page 83.
31
Issue 1.1.B
3.5
INSIO Version 1.1 – User Manual
EVS Broadcast Equipment – October 2010
SYSTEM GENERAL SETTINGS
This window is available when the user taps the System General
Settings button on the left pane.
From this window, you can define general system functions.
T IMECODE D ISPLAY
This specifies the relative position of the TC In (Tim ecode IN), TC Out (Timecode
OUT) and Duration (Timecode Duration) fields in all the windows where they
appear, which means the Record tab, the Review tab and the Metadata tab.
J OG W HEEL
A jog wheel can be used in the Review window to move through the loaded media.
32
INSIO Version 1.1 – User Manual
EVS Broadcast Equipment – October 2010
Issue 1.1.B
Three jog wheel modes are available:
•
Jog: enables to move in the loaded media frame by frame.
•
Vari-speed: enables to move in the loaded media at a selected constant review
speed.
•
Shuttle: enables to fast-forward or fast rewind the loaded media.
This setting option is to select the jog wheel mode used by default in the Review
window. The mode can be changed afterw ards directly in the Review window.
A LARM T RIGGERS
This setting enables alarms to be triggered:
•
when the difference between the timecodes from tw o different servers is
greater than or equal to the value specified here.
•
when the storage capacity of a server is below the threshold defined here, in
hh:mm:ss:ff.
G UARDBANDS / H ANDLES
This option is to enable the use of guardbands and to define their duration. The
guardbands are A/V material which is added on both sides of the clip boundaries
when the clip is created.
When a new clip is saved, the guardband duration, defined in seconds in this
setup page, will automatically be added before the IN point of the clip and after
the OUT point of the clip.
Values can range from 1 to 9 sec.
A BORT C LIP C ONFIRMATION
When selected, this option enables the display of a confirmation message when
the Abort Clip button is tapped in the Record window.
T OUCH K EYBOARD
The users can activate a virtual on-screen keyboard to be used with a touch
screen. The virtual keyboard is displayed when they tap in an editable field where
text needs to be entered or modified. Users can choose between three keyboard
layouts: QWERTY, AZERTY and QWERTZ.
33
Issue 1.1.B
3.6
INSIO Version 1.1 – User Manual
EVS Broadcast Equipment – October 2010
VIDEO SERVER SETTINGS
This section is available when the user taps the System Video
Server Settings button on the left pane.
This window is used to specify EVS servers configuration. Refer to the XS
Software Technical Reference and XT Software Technical Reference manuals for
more information.
To select a server, proceed as follows:
1.
2.
34
Tap the Add Video Server
configuration.
button to add an additional server to your
Enter a server name in the EVS Server Name field.
INSIO Version 1.1 – User Manual
Issue 1.1.B
EVS Broadcast Equipment – October 2010
3.
4.
5.
Complete each field of the Video and Control group boxes with the selected
server parameters.
In the Configuration field, tap the Get Server Configuration
button.
Select a configuration from the Configuration list.
Use the Remove Video Server
button next to the EVS Server N ame field to
remove a selected server from your configuration.
3.7
XTACCESS SETTINGS
This section is available when the user taps the System XTAccess
Settings button on the left pane.
Three tabs are available
•
XML Scan & Destination
•
Avid AAF/Interplay
•
Final Cut Pro
The first window is used to specify the XTAccess scan folder and processed file
destination. XTAccess is used to transfer files to selected destinations. Refer to
the XTAccess user manual for more information.
When users transfer files in Avid MXF OPAtom file format, the transfer destination
of the associated metadata files is defined in the Avid AAF/Interplay tab.
When users transfer files in FCP QT format, the transfer destinations of the video
file and the associated metadata file are defined in the Final Cut Pro tab.
3.7.1
XTACCESS DEFINITION
One or several XTAccess can be used with INSIO.
To add a new XTAccess, proceed as follows:
1.
2.
Tap the Add XTAccess
button at the extreme right of the window to add
an additional XTAccess to your configuration.
Enter a name in the XTAccess name field and tap Enter.
An additional XTAccess group box is displayed. Use the Up Arrow and
Down Arrow buttons to move from one configuration to another.
The new configuration name is displayed in the Name field of the General
tab.
35
Issue 1.1.B
INSIO Version 1.1 – User Manual
EVS Broadcast Equipment – October 2010
3.
Refer to sections 3.7.2 ‘XML Scan and Destination’ on page 36 and 3.7.3
‘Avid AAF/Interplay’ on page 38 for detailed explanation on the other fields
to complete the new configuration.
To remove a selected XTAccess from your configuration, use the Remove
XTAccess
3.7.2
36
button next to the XTAccess Name field.
XML SCAN AND DESTINATION
INSIO Version 1.1 – User Manual
Issue 1.1.B
EVS Broadcast Equipment – October 2010
XML Scan(s)
This setting is used to define the folder which will be scanned by XTAccess.
To use this option, proceed as follows:
1.
Tap the Add XML Scan
button in the XM L Scan(s) group box.
A dialog box opens.
2.
3.
Enter the name of the XML scan and tap
Tap the
or Enter.
button next to the XML scan name.
A window opens allowing you to browse for the XML scan folder or enter a
folder path.
4.
Specify the local folder that will receive XM L files. The default local folder
is C:\XTAccess_XML .
XTAccess will handle all XML files stored in this folder.
To remove a XML Scan, tap the Remove XML Scan
group box.
To edit a XML Scan folder, tap the
select another XML scan folder.
button in the XML Scan
button next to the XML scan name and
Destination(s)
This specifies the destination path to save the transferred files to.
To use this option, proceed as follows:
1.
Tap the Add Destination
button in the Destination(s) group box.
A window opens allowing you to browse for the Destination folder or enter a
Destination path.
2.
Specify the folder that will receive the transferred files and tap OK.
To remove a destination , tap the Remove Destination
Destination(s) group box.
To edit a destination, tap the
another Destination folder.
button in the
button next to the Destination folder and select
37
Issue 1.1.B
3.7.3
INSIO Version 1.1 – User Manual
EVS Broadcast Equipment – October 2010
AVID AAF/INTERPLAY
A VID AAF D ESTINATION ( S )
This setting is used to define the folder where the MXF OPAtom metadata files will
be transferred to when Interplay is not used.
To add a new destination, proceed as follows:
1.
Tap the Add Destination
box.
button in the Avid AAF Destination(s) group
A window opens allowing you to browse for the destination folder or enter a
folder path.
2.
Tap
.
To remove a destination name, tap the Remove Destination
Avid AAF Destination(s) group box.
To edit a destination name folder, tap the
Destination name and select another folder.
38
button in the
button next to the Avid AAF
INSIO Version 1.1 – User Manual
Issue 1.1.B
EVS Broadcast Equipment – October 2010
A VID I NTERPLAY D ESTINATION ( S )
This setting is used to define the folder where the MXF OPAtom metadata files will
be transferred to when Interplay is used.
To add a new destination, proceed as follows:
1.
2.
In the Avid Web Services Host field, enter the name of the Host.
Tap the Add Destination
group box.
button in the Avid Interplay Destination(s)
A window opens allowing you to browse for the destination folder or enter a
folder path.
3.
Tap
.
To remove a destination name, tap the Remove Destination
Avid Interplay Destination(s) group box.
To edit a destination name folder, tap the
Destination name and select another folder.
3.7.4
button in the
button next to the Avid Interplay
FINAL CUT PRO
39
Issue 1.1.B
INSIO Version 1.1 – User Manual
EVS Broadcast Equipment – October 2010
F INAL C UT P RO XML D ESTINATION ( S )
This setting is used to define the folder where the FCP XML metadata files will be
transferred to.
To add a new destination, proceed as follows:
1.
Tap the Add Destination
Destination(s) group box.
button
in
the
Final
Cut
Pro
XML
A window opens allowing you to browse for the destination folder or enter a
folder path.
2.
Tap
.
To remove a destination name, tap the Remove Destination
Final Cut Pro XML Destination(s) group box.
button in the
button next to the Final Cut Pro
To edit a destination name folder, tap the
XML Destination name and select another folder.
F INAL C UT P RO QT L OCAL P ATH ( S )
This setting is used to define the folder where the FCP QT files will be transferred
to. This must be a local path on the destination machine.
Note that the FCP XML file contains the path to the FCP QT file, as a local
reference to the video file. For example, if the video file is sent to the path ‘\\FCP
Machine\Netw Drop FCP\’ on the FCP machine, the local path mentioned in the
FCP XML file must be ‘/Netw Drop FCP/’ (written for use in MAC computers).
To add a new destination, proceed as follows:
1.
Tap the Add Destination
group box.
button in the Final Cut Pro QT Local Path(s)
A window opens allowing you to browse for the destination folder or enter a
folder path.
2.
Tap
.
To remove a destination name, tap the Remove Destination
Final Cut Pro QT Local Path(s) group box.
To edit a destination name folder, tap the
Local Path name and select another folder.
40
button in the
button next to the Final Cut Pro QT
INSIO Version 1.1 – User Manual
Issue 1.1.B
EVS Broadcast Equipment – October 2010
3.8
VIDEO PLAYER SETTINGS
This section is available when the user taps the System Video
Player Settings button on the left pane.
This window is used to specify Video Player configuration. Video Player is also
called Software Player.
One or several Video Players can be connected to INSIO.
Use the Add Video Player
configuration.
button to add an additional Video Player to your
Use the Remove Video Player
button next to the Video Player Name field to
remove a selected Video Player from your configuration.
3.9
DATABASE SETTINGS
This section is available when the user taps the System Database
Settings button on the left pane.
This allows you to access the database with a username and password.
41
Issue 1.1.B
INSIO Version 1.1 – User Manual
EVS Broadcast Equipment – October 2010
4. Defining Project,
Episodes and Scenes
4.1
INTRODUCTION
Before the beginning of a first recording session, you will have to define your
project/production structure, which will be made up of a series of episodes,
themselves composed of several scenes.
4.2
PROJECT MANAGEMENT
4.2.1
OVERVIEW OF THE PROJECTS / PRODUCTIONS WINDOW
The Projects/Productions window will open when INSIO is started. When you open
INSIO for the first time or after having deleted all the existing projects, the
Projects/Productions window is empty. Otherwise, the list of projects saved in the
INSIO database is displayed.
From this window, you can create a new project, select an existing project for a
recording session, edit or delete an existing project. You can also access the
System Setup configuration windows or the Project Setup configuration window
specific to each project.
The Projects/Productions window contains six main areas highlighted in the
screenshot below:
42
INSIO Version 1.1 – User Manual
EVS Broadcast Equipment – October 2010
Issue 1.1.B
P ROJECTS L IST & A LPHABETIC P ANEL
This gives the list of all the existing projects, preceded by the Project Setup
button. Refer to section 3.1.1 ‘Opening the Setup Windows’ on page 7.
Projects are listed in alphabetical order. An alphabetical panel, on the right of the
list helps to quickly navigate through the list of projects: a letter highlighted in
green indicates an existing project starting with this letter.
P ROJECT M ANAGEMENT B UTTONS
These buttons allow the creation and deletion of projects.
43
Issue 1.1.B
4.2.2
INSIO Version 1.1 – User Manual
EVS Broadcast Equipment – October 2010
NAVIGATING WITHIN A WINDOW
A window sometimes displays a list of items longer than the screen height.
It can happen with:
•
the list of projects in the Projects/Productions window
•
the list of episodes in the Programs/Episodes window
•
the list of clips in the Clip List tabs of the Record/Review window
When you use classic keyboard, mouse and screen, you can move through the list
by using mouse scroll wheel or by tapping somewhere in the list and holding the
left button of the mouse while moving up and down.
When you use a touch screen, you can move through the list by moving your finger
up and down on the screen and the list will scroll accordingly. Then lift your finger
off to be able to select an item.
4.2.3
HOW TO ADD A NEW PROJECT
To define a new project, proceed as follows:
1.
From the Projects/Productions window, tap the Add a Project/Production
button
.
The Edit Project/Production window opens and the settings defined in the
System Setup windows for the active mode (Setup > User > General) and
for the configuration (Setup > User > Predefined Configurations) are
displayed.
44
2.
Enter a name for the whole project/production in the Name field.
3.
If you want to apply Active Mode setting specific to this new project, open
the Active Mode tab and modify the selected options. Refer to section 3.2
‘User General Settings on page 10 for a detailed explanation of the setting.
INSIO Version 1.1 – User Manual
Issue 1.1.B
EVS Broadcast Equipment – October 2010
4.
Select the configuration for your project: open the Configuration tab where
you can
• select an existing configuration from the Configurations list,
• add a new configuration with the Add New Configuration button
• copy and edit the selected configuration by tapping the Copy Current
Configuration and Edit button
.
Refer to section 3.3 ‘Predefined Configurations Settings’ on page 12 for a
detailed explanation of the options.
5.
Tap the Exit button
to save your new project.
The new project appears in the Projects list.
4.2.4
HOW TO UPDATE PROJECT SETUP CONFIGURATION
To edit the setup configuration relative to an existing project, or to rename it,
proceed as follows:
1.
In the Projects/Productions window, tap on the project you want to edit
The project line is highlighted.
2.
Tap the Project Setup button located on the project line.
The Edit Project/Production window opens and the settings selected at
project creation for the active mode and for the predefined configuration are
displayed.
3.
4.
4.2.5
Update the required information.
Tap the Exit button
to save your modifications.
HOW TO DELETE A PROJECT
To delete a project from the Projects/Productions list, as well as the episodes it
eventually contains, proceed as follows:
1.
In the Project/Production window , tap on the project you want to delete.
The project line is highlighted.
2.
Tap the Delete the Selected Project/Production button
.
A dialog box is displayed asking for confirmation.
3.
Tap the Validate button
.
45
Issue 1.1.B
INSIO Version 1.1 – User Manual
EVS Broadcast Equipment – October 2010
The project disappears from the Projects/Productions list and is therefore no more
accessible.
Note
This will not remove the recorded media, but only the project
information. To remove media, refer to section 7 ‘Cleaning Up the
System and Deleting Media’ on page 103.
46
INSIO Version 1.1 – User Manual
Issue 1.1.B
EVS Broadcast Equipment – October 2010
4.3
EPISODES MANAGEMENT
4.3.1
INTRODUCTION
Once your project/production
episode/program.
4.3.2
has
been
created,
you
can
define
an
OVERVIEW OF THE PROGRAMS / EPISODES WINDOW
You can access the Programs/Episodes window by tapping the
button on the
right of the line corresponding to your project. When episodes have already been
created for the selected project, they are listed in that window.
The Programs/Episodes window contains four main areas highlighted in the
screenshot below:
Episodes List
Condensed Transfer
Status Window
Alphabetic Panel
Episode Management
Buttons
47
Issue 1.1.B
INSIO Version 1.1 – User Manual
EVS Broadcast Equipment – October 2010
It is possible to go back to the Project/Production window by tapping the Go Back
button
.
E PISODES L IST & A LPHABETIC P ANEL
This gives the list of all the existing episodes for the selected project, preceded
by the Episode Setup button. Refer to section 3.1.1 ‘Opening the Setup Windows’
on page 7.
Episodes are listed in alphabetical order. An alphabetical panel, on the right of the
list helps to quickly navigate through the list of episodes: a letter highlighted in
green indicates an existing episode starting with this letter.
E PISODE M ANAGEMENT B UTTONS
These buttons allow the creation and deletion of episodes.
C ONDENSED T RANSFER S TATUS W INDOW
This area gives quick information on the jobs transfer status. Refer to section 6
‘Transferring Media’ on page 90.
48
INSIO Version 1.1 – User Manual
Issue 1.1.B
EVS Broadcast Equipment – October 2010
4.3.3
HOW TO ADD A PROGRAM / EPISODE
To define a program/episode for a project, proceed as follows:
1.
Tap the Add a Program/Episode
button.
The Edit Episode/Program window is displayed and the settings applicable
to the project for the active mode ( Setup > User > General) and the
configuration ( Setup > User > Predefined Configurations) are displayed.
The project name is displayed in the Project/Production field but cannot be
edited.
2.
Enter a name for the episode/program in the Episode/Program Name field.
3.
If you want to apply Active Mode setting specific to this new episode, open
the Active Mode tab and modify the selected options. Refer to section 3.2
‘User General Settings on page 10 for a detailed explanation of the setting.
4.
Select the configuration for your episode: open the Configuration tab where
you can
• select an existing configuration from the Configurations list,
• add a new configuration with the Add New Configuration button
• copy and edit the selected configuration by tapping the Copy Current
Configuration and Edit button
.
Refer to section 3.3 ‘Predefined Configurations Settings’ on page 12 for a
detailed explanation of the options.
49
Issue 1.1.B
INSIO Version 1.1 – User Manual
EVS Broadcast Equipment – October 2010
5.
6.
Scenes can be defined at that time or later on. Refer to section 4.4
‘Defining Scenes’ on page 51 for detailed explanation on how to define
scenes.
Tap the Exit button
to save your new episode.
The new episode appears in the Programs/Episodes list for the project.
4.3.4
HOW TO UPDATE EPISODE INFORMATION
To edit the information relative to an episode, or to rename it, proceed as follows:
1.
In the Programs/Episodes window for your project, tap on the episode you
want to edit.
The episode line is highlighted.
2.
Tap the Episode Setup button located on the episode line.
The Edit Episode/Program window opens and the settings selected at
episode creation for the active mode and for the predefined configuration
are displayed.
3.
4.
4.3.5
Update the required information.
Tap the Exit button
to save your modifications.
HOW TO DELETE AN EPISODE
To delete an episode from the Program s/Episodes list, as well as the scenes it
eventually contains, proceed as follows:
1.
Select the episode you want to delete
The episode line is highlighted.
2.
Tap the Delete the Selected Program/Episode button
.
A dialog box is displayed asking for confirmation.
3.
Tap the Validate button
.
The episode disappears from the Programs/Episodes list and is therefore no more
accessible.
Note
This will not remove the recorded media, but only the episode and
relative scenes inform ation. To remove media, refer to section 7
‘Cleaning Up the System and Deleting Media’ on page 103.
50
INSIO Version 1.1 – User Manual
EVS Broadcast Equipment – October 2010
4.4
Issue 1.1.B
DEFINING SCENES
The list of scenes composing an episode can be created at the same time as the
episode or later on.
The list of scenes can be created in different ways:
4.4.1
•
by direct entry in the Programs/Episodes window
•
by direct entry in the Record/Review window
HOW TO DEFINE SCENES FROM THE PROGRAMS / EPISODES
WINDOW
To define scenes for an episode from the Programs/Episodes window, proceed as
follows:
1.
From the Project/Production window, tap the
line corresponding to your project.
button on the right of the
The Programs/Episodes window is displayed.
2.
If you define scenes for an episode at the same time as the episode
creation, create a new episode as described in steps 1 to 4 of section 4.3.3
‘How to Add a Program / Episode’ on page 49.
OR
If you define scenes for an episode later than the episode creation: select
an existing episode and tap the Episode Setup button located on the
episode line.
The Edit Episode/Program window opens.
3.
Select the Scenes tab.
51
Issue 1.1.B
INSIO Version 1.1 – User Manual
EVS Broadcast Equipment – October 2010
Adding a Single Scene
1.
Tap the Add Scene button
.
A dialog box opens.
2.
3.
4.
Enter a name for the scene.
Tap the Validate button
or Enter.
Repeat steps 1 to 3 as many times as you want to add scenes.
Adding a List of Scenes at Once
1.
Tap the Easy Create Scenes button
.
A dialog box opens:
2.
3.
4.4.2
Use the arrows to define the range of scenes you want to create.
Tap the Validate button
or Enter.
HOW TO UPDATE SCENES INFORMATION FROM THE
PROGRAMS / EPISODES WINDOW
To update scenes information for an episode from the Programs/Episodes window,
proceed as follows:
1.
Tap the Episode Setup button located on the selected episode line.
The Edit Episode/Program window is displayed.
2.
Select the Scenes tab.
3.
• To update the scene name: tap in the Scene Name field, update the name
and tap Enter.
• To change the order of the scene, tap on the scene nam e and use the
Move Down or Move Up buttons.
52
INSIO Version 1.1 – User Manual
Issue 1.1.B
EVS Broadcast Equipment – October 2010
4.4.3
HOW TO DELETE SCENES INFORMATION FROM THE
PROGRAMS / EPISODES WINDOW
To delete scenes information for an episode from the Programs / Episodes
window, proceed as follows:
1.
Tap the Episode Setup button located on the selected episode line.
The Edit Episode/Program window is displayed.
2.
Select the Scenes tab.
3.
To remove a scene from the list, select the scene and tap the Remove
Scene button
4.4.4
.
HOW TO DEFINE A SCENE FOR AN EPISODE IN THE
RECORD/REVIEW WINDOW
To define scene for an episode in the Record/Review window, proceed as follows:
1.
Tap the
button in the Scene field.
A contextual menu with the list of existing scenes is displayed.
2.
Tap the
button
A dialog box opens.
3.
4.
Enter a name for the scene.
Tap Enter or the Validate button
.
53
Issue 1.1.B
INSIO Version 1.1 – User Manual
EVS Broadcast Equipment – October 2010
5. Recording and
Reviewing Media
5.1
INTRODUCTION
The Record/Review window is an integrated window from which it is possible to
manage the recording process, to preview and edit recorded takes, to initiate the
transfer of recorded media to predefined destinations and to have a quick
overview of the transfer jobs status.
During the recording session, takes will be recorded for a selected scene.
The recording of a take can be acceptable at once or several takes will be needed
for the same scene before it is considered as correct.
A take may be recorded by several cameras, from various viewing angles, which
would have been defined in the Setup > User > Predefined Configurations >
Record Setup window.
In this manual, the term ‘clip’ is used to designate a take recorded by a camera.
As many cameras record the same take at the same time, there will be as many
recorded clips for a take as there are active cameras. They can be called ‘linked
clips’.
Recorded takes may be loaded on server player channels or Software Player
channels and reviewed on screen. If required, they can be trimmed.
5.2
USER INTERFACE
5.2.1
OPENING THE RECORD/REVIEW WINDOW
Once the project has been defined, as well as its episodes and scenes, you can
access the Record/Review window as follows:
1.
From the Projects/Productions window, tap the
the line corresponding to your project.
button on the right of
The Programs/Episodes window is displayed.
2.
54
Tap the
button on the right of the line corresponding to the
selected episode. The Record/Review window opens.
INSIO Version 1.1 – User Manual
EVS Broadcast Equipment – October 2010
5.2.2
Issue 1.1.B
OVERVIEW OF THE RECORD / REVIEW WINDOW
The window can present up to five tabs: Record tab, Review tab, Left Clip List tab,
Right Clip List tab and Metadata tab. The layout of this window will differ
depending on the Active Mode defined in the settings: record stream, record clip
and transfer, record clip and review, review only.
Differences will be highlighted within the text.
The Record/Review window contains the following main areas highlighted in the
screenshot below:
55
Issue 1.1.B
INSIO Version 1.1 – User Manual
EVS Broadcast Equipment – October 2010
P ROJECT I NFORMATION AREA (1)
This area displays the project/production name, the episode/program name and
the scene name.
Episodes can be selected from the list in the Episode field or with the
buttons, provided that they belong to the same project and that they use the same
settings.
Scenes can be selected from the list in the Scene field or with the
New scenes can be defined.
buttons.
A Take number is incremented by one unit each time a take is recorded for a
scene. Each time a new scene name is entered, the take number is reset to 001.
T ABS
Up to five tabs can be displayed in this window, depending on the Active mode
selected in Setup > User > General.
Record Tab (2)
It is used for the recording of a take, or stream. Refer to section 5.3.2 ‘Overview
of the Record Tab’ on page 58 for a detailed description of this tab.
It is displayed if the Record mode has been selected.
Right Clip List Tab (3)
This is the Clip List Tab located on the right of the window. It is intended to be
used when the Record tab is opened, during a recording session. Clips can then
be manually selected for transfer and the transfer status can be visualized. Refer
to section 6.2.2 ‘Overview of the Clip List Tabs’ on page 93 for a detailed
description of this tab.
It is displayed if the Record Clip mode has been selected.
Status Tab
It is used to display information and thumbnails of the different stream s. Refer to
section 5.3.4 ‘Recording a Stream’ on page 64 for more details on this tab.
It is displayed if the Record Stream mode has been selected.
Review Tab (4)
It is used for reviewing a recorded clip. Refer to section 5.4 ‘Reviewing Media’ on
page 66 for a detailed description of this tab.
It is displayed if the Review Only mode or the Record Clip mode with Review
option has been selected.
56
INSIO Version 1.1 – User Manual
EVS Broadcast Equipment – October 2010
Issue 1.1.B
Left Clip List Tab (3)
This is the Clip List Tab located on the left of the window. It is intended to be
used together with the Review Tab either to select clips to be transferred or to
select clips which will be loaded on a player channel. Refer to section 6.2.2
‘Overview of the Clip List Tabs’ on page 93 for a detailed description of this tab.
It is displayed if the Review Only mode or the Record Clip mode has been
selected.
Metadata Tab (5)
This area displays the metadata linked to the recorded clips. It allows you to enter
metadata values for the free text user fields defined in Setup > User > Metadata.
From this tab, you can flag the take as accepted or not, as well as associate a
rating to the take. Refer to section 5.5 ‘Assigning Metadata’ on page 83 for more
details.
It is displayed if the Review Only mode or the Record Clip mode has been
selected.
S ERVER T IMECODE A REA (6)
This area displays the current timecode position of the server and gives access to
the list of servers with their respective timecode position.
C ONDENSED T RANSFER S TATUS W INDOW (7)
This area gives quick information on the transfer job status. Refer to section 6.2.1
‘Overview of Transfer Status Windows’ on page 90 for more information.
S ERVER S TATUS A REA (8)
This area displays the remaining recording capacity available on the server and
gives access to the list of servers with their respective remaining recording
capacity.
The display is red when remaining capacity is under the threshold limit defined in
Setup > System > General.
57
Issue 1.1.B
INSIO Version 1.1 – User Manual
EVS Broadcast Equipment – October 2010
Tap on the area to display the servers from the setup:
The display is green when remaining capacity is higher than the defined threshold
limit.
5.3
RECORDING MEDIA
5.3.1
INTRODUCTION
Recording a sequence will be possible via the Record tab of the Record/Review
window. Users are able to select the cameras which will record a take and to
select the cameras angles which will be kept for the transfer of a take.
Time can be saved by using automatic functions to save, transfer and/or review
clips.
The recording of a stream is performed from this tab as well. Specificities of the
window are described in section 5.3.4 ‘Recording a Stream’ on page 64.
5.3.2
OVERVIEW OF THE RECORD TAB
When the active mode is set to Clip, with Review and Transfer options, in Setup >
User > General, the Record tab looks like the following screenshot:
58
INSIO Version 1.1 – User Manual
EVS Broadcast Equipment – October 2010
Issue 1.1.B
A UTOMATIC F UNCTIONS B UTTONS
Auto Save button : activates or deactivates the Auto Save mode related to the
automatic saving of the recorded clip as soon as the Stop/Out button is tapped,
without need to tap the Save button. Refer to section ‘Auto Save Mode’ on page
61.
Auto Transfer button : activates or deactivates the Auto Transfer mode related to
the automatic transfer of the recorded and saved clip without need to tap the
Transfer button. Refer to section 6.4 ‘Automatic Transfer’ on page 95.
59
Issue 1.1.B
INSIO Version 1.1 – User Manual
EVS Broadcast Equipment – October 2010
Auto Review button : activates or deactivates the Auto Review mode related to
the automatic loading of the recorded clip on the Software Player channel selected
in the Review tab. Refer to section ‘Auto Review Mode’ on page 71.
One or several of these buttons can be activated at a time.
These functions can be activated or deactivated either in the Setup > User >
General > Default Auto actions section or in the Record window.
Note
These buttons are not present in the interface when the system is used
for streaming.
L IST OF C AMERAS AND C AMERA S ELECTION A REA
The list of cameras displays the server recorder channels, seen as camera, as
named in Setup > User > Predefined C onfigurations > R ecord Setup. When
cameras have been grouped together, the camera view can be expanded by
tapping the
button or collapsed by tapping the
button.
The Camera Selection button and check boxes allow the selection of some or all
the cameras for the recording of the take or, once the takes have been recorded,
for the saving of takes.
C LIP C REATION AND T RANSFER A REA
Time Information
TC IN field: displays the timecode of the IN point for the linked clips being
recorded.
Duration field: displays the time interval between the IN and OUT points, i.e. clip
duration.
TC OUT field: displays the timecode of the OUT point for the recorded linked clips.
Clip Management Buttons
This area provides the buttons required to start, stop or abort the recording of a
take and buttons to save and transfer the recorded takes. The guardband
durations, as defined in Setup > System > General, are displayed at the top of
the Start and Stop buttons.
Note
Only the Start/In and the Stop/Out buttons are available when using the
stream mode.
Start/In button : starts the recording of a take and sets an IN point. The timecode
of the IN point is then displayed in the TC IN field.
60
INSIO Version 1.1 – User Manual
EVS Broadcast Equipment – October 2010
Issue 1.1.B
Stop/Out button : stops the recording of the take and sets an OUT point. The
timecode of the OUT point is then displayed in the TC OUT field.
Save button : saves the clips recorded by all the selected cameras on the server.
Transfer button : transfer the clips recorded by all the selected cameras to
predefined transfer destination(s).
Abort Clip button : aborts the recording of the take by all the selected cameras.
Locator button : inserts flags within a take to indicate, for example, when the
actors start again their lines, in case of successive repetitions within an ongoing
take.
5.3.3
RECORDING A TAKE
This section explains how to proceed to record a take with or without the Auto
Save mode activated. It provides information on how to abort the recording of a
take when, for example, something wrong happens, or how to place tags within a
take when, for example a sentence is repeated several times by an actor but you
do not want to stop and re-start the recording.
A UTO S AVE M ODE
Before, or during, the recording of a take, you can activate the Auto Save mode by
tapping the Auto Save button. In this case, you will not have to tap the Save
button at the end of the take recording and the clips recorded from all the selected
cameras will automatically be saved on the server after you have tapped the
Stop/Out button.
When the Auto Save mode is activated, the background color of the Auto Save
button is blue:
and an ‘Auto’ flag is present on the top of the Save button:
The Auto Save mode can be deactivated by tapping the Auto Save button again.
The background color of the Auto Save button then turns grey. When the Auto
Save mode is not activated, you will be able to deselect cameras before saving
them.
61
Issue 1.1.B
INSIO Version 1.1 – User Manual
EVS Broadcast Equipment – October 2010
H OW TO R ECORD A T AKE
To record a take for a scene with or without the Auto Save mode, proceed as
follows:
1.
Select the episode you want to work on from the drop-down list in the
Episode field or with the Episode
buttons.
2.
Select the scene you want to work on from the drop-down list in the Scene
field or with the Scene
buttons.
3.
You can select which cameras will be active when recording a clip.
From the list of cameras:
• deselect the cameras you do not want to record the take by clearing the
check box on the corresponding line(s),
• select the cameras you want to record the take by selecting the check box
on the corresponding line(s)
OR
• tap the Check All button to select all the cameras.
4.
Tap the Start/In button to start recording the take.
A clip is being recorded by each of the selected cameras and the clip
names, as defined in Setup > User > Predefined Configurations >
General, are displayed next to the camera names:
5.
In case the actors need to repeat their lines within an ongoing take, tap the
Locator button each time they start again, provided that the Locator button
function has been enabled in the Setup > User > General tab.
Refer to section 3.2 ‘User General Settings’ on page 10.
6.
Tap the Stop/Out button when the take is done to stop recording the clips.
7.
If the Auto Save mode has been activated , the clips are automatically saved
on the server for all the previously selected cameras. The Start/In button is
available again for a new take and the take number is increased by 1 unit.
If the Auto Save mode has not been activated , you will then be able to
deselect cameras from which you do not want to keep the recorded clip, if
any, by clearing the check box on the corresponding camera line(s).
8.
If the Auto Save mode has not been activated, tap the Save button to save
the selected recorded clips for the take.
The clips from all the selected cameras are then saved on the server. The
Start/In button is available again for a new take and the take number is
increased by 1 unit.
The recorded clips are displayed in the Clip List tabs.
62
INSIO Version 1.1 – User Manual
EVS Broadcast Equipment – October 2010
Issue 1.1.B
Note
If the Auto Transfer mode has been activated, the recorded clips are
autom atically transferred to the transfer destination defined in Setup >
User > Predefined Configurations as soon as they have been saved.
Otherwise, refer to section 6.5 ‘Manual Transfer’ on page 95 for later
transfer operation.
H OW TO A BORT THE R ECORDING OF A T AKE
You can decide not to keep any clip from a take being recorded at two different
times:
•
the take recording has not yet been stopped when something wrong happens:
tap the Abort C lip button to abort the recording and to delete the clips from
the current take.
OR
•
the recording of the take has been stopped with the Stop/Out button but not
yet saved with the Save button or by the Auto Save mode, and you then decide
not to keep the take:
tap the Abort Clip button to delete the clips from the current take.
In both cases, the Start/In button becomes available again, the take number does
not increase and the clip names are removed from the list of cameras.
Note
When the Auto Save function is activated, you will only be allowed to
abort clip before tapping the Stop/Out button.
63
Issue 1.1.B
5.3.4
INSIO Version 1.1 – User Manual
EVS Broadcast Equipment – October 2010
RECORDING A STREAM
R ECORD W INDOW O VERVIEW
When the active record mode has been set to stream, the Record window layout is
limited as shown in the following screenshot:
Record Tab
In this tab, no automatic function button is available, as well as no Locator
button, Save, Transfer and Abort Clip buttons.
Status tab
The Status tab displays information on the stream transfer status. It contains one
box per camera and per destination path. Each box shows a thumbnail,
destination, clip name and current timecode.
In the screenshot above, 4 boxes are displayed as 4 cameras are stream ing to 1
destination path. If 4 cameras were stream ing to 2 destination paths, 8 boxes
would be present.
64
INSIO Version 1.1 – User Manual
EVS Broadcast Equipment – October 2010
Issue 1.1.B
H OW TO R ECORD A S TREAM
To record stream(s), proceed as follows:
1.
Select the episode you want to work on from the drop-down list in the
Episode field or with the Episode
buttons.
2.
Select the scene you want to work on from the drop-down list in the Scene
field or with the Scene
buttons.
3.
You can select which cameras will be active when recording a take.
From the list of cameras,
• deselect the cameras you do not want to record the take by clearing the
check box on the corresponding line(s)
• select the cameras you want to record the take by selecting the check box
on the corresponding line(s)
OR
• tap the Check All button to select all the cameras.
4.
Tap the Start/In button to start recording the stream(s).
The stream is not saved on the server and is directly sent to the transfer
destination defined in Setup > User > Predefined Configurations >
Format, Name & Destination.
5.
Tap the Stop/Out button to stop the recording of the stream(s).
65
Issue 1.1.B
INSIO Version 1.1 – User Manual
EVS Broadcast Equipment – October 2010
5.4
REVIEWING MEDIA
5.4.1
INTRODUCTION
The loading of a recorded clip on a server player channel or on a Software Player
channel is possible via the Review tab of the Record/Review window.
Users are enabled to review the different takes, to select and transfer the best
takes to post-production systems, but also to modify the TC In and/or the TC Out
points of a clip before transfer.
The Review tab can be used together with the Record tab to review just recorded
clips, or with the Left Clip List tab to review clips recorded earlier. So, the
selection of clips is performed on the left part of the screen and the selection of
channels to load the clips on is performed from the Review tab.
Review operations can be carried out rapidly thanks to the use of the Auto Review
function and to the Presets function, to automatically load clips from predefined
cameras on predefined Software Player channels.
Note
This tab is not available when using the Stream mode or when the Clip
mode without Review option has been selected.
66
INSIO Version 1.1 – User Manual
EVS Broadcast Equipment – October 2010
5.4.2
Issue 1.1.B
OVERVIEW OF THE REVIEW TAB
The Review tab contains the follow ing areas highlighted in the screenshot below:
L IST OF S OFTWARE P LAYER C HANNELS
The list of Software Player channels displays the channels from the Video Player
selected in Setup > User > Predefined Configurations > Review Setup.
67
Issue 1.1.B
INSIO Version 1.1 – User Manual
EVS Broadcast Equipment – October 2010
L IST OF S ERVER P LAYER C HANNELS
The list of server player channels displays the channels from the EVS server
selected in Setup > User > Predefined Configurations > Review Setup.
C LIP R EVIEW B UTTONS
A series of buttons allows the manual loading of clips, the definition of player
channels presets to quickly load clips onto, or the selection of the video screen
display between single screen, dual split screen or quad split screen modes.
C LIP T RANSPORT , E DIT AND T RANSFER F UNCTIONS
This area provides the functions required to play a clip and move within the
material. A jog wheel allows you to move through the loaded media in three
different modes. Buttons used for clip editing and transfer are available as well.
It also contains time information fields:
TC IN field : displays the IN point timecode of the clip being reviewed.
Duration field : displays the time interval between the IN and OUT points, i.e.
duration of the clip being reviewed.
TC OUT field : displays the OUT point timecode of the clip being review ed.
TC Current : when the clip is being played, displays the current timecode position.
This field can also be used to enter a timecode value to jump to.
5.4.3
LOADING MEDIA
To review a recorded clip, you need to load it on a player channel.
Player channels can be
•
Server player channels from the EVS servers present on the network. Clips will
then be viewed on the SDI output display.
•
Software Player channels, from the Video Players. Clips will then be viewed on
the Software Player display.
A clip can be loaded just after its recording from the Record tab, or, later on, from
the Left Clip List tab. The operation can be performed manually or automatically.
68
INSIO Version 1.1 – User Manual
EVS Broadcast Equipment – October 2010
Issue 1.1.B
L OADING L AST R ECORDED C LIPS ON P LAYER C HANNELS
FROM THE R ECORD T AB
You have the possibility to visualize the take you have just recorded in the Record
tab, even if the take has not yet been saved on the server. You can do this in
three different ways:
•
manually, by selecting the clips and the Software Player or server player
channels one by one
•
manually, by selecting a preset configuration of Software Player or server
player channels
•
automatically, by selecting the Auto Review mode and a preset configuration of
Software Player channels or server player channels.
Preset configurations of Software Player channels are intended to automatically
load a selection of camera angles in a single tap.
Loading Clips Manually One by One
When the Auto Review function is not activated and you want to load some of the
clips you have just recorded, proceed as follows:
1.
From the Record tab, select the clip you want to review.
The corresponding camera/clip line is highlighted.
2.
From the Review tab, select the player channel you want to load the clip
onto. This can be a server player channel or a Software Player channel.
The corresponding player channel line is highlighted.
3.
Tap the Load Clip button
The clip is loaded on the SDI output display or the Software Player display.
The clip names are displayed on the respective player channel lines, in the
Review tab.
4.
Repeat steps 1 to 3 for each clip you want to load.
5.
You can unload a clip by selecting the line in the Review tab and tapping
the Unload Clip button
69
Issue 1.1.B
INSIO Version 1.1 – User Manual
EVS Broadcast Equipment – October 2010
Loading Clips Manually on a Preset Configuration of Player
Channels
How to Define Preset Configuration of Player Channels
Once you have loaded clips on player channels in a specific way, which means,
the clip coming from a specific camera onto a specific player channel, you can
save this configuration as a preset to be able to use it later without having to
reload each clip one after each other. Up to 8 preset player channel configurations
can be saved. This can be done with server player channels or with Software
Player channels.
To define a preset player channel configuration based on the order in which clips
have been loaded, proceed as follows:
1.
Tap the Display Preset button
.
A menu with the list of existing Presets, if any, and empty Presets fields are
displayed.
2.
Tap the Save button.
3.
• Select an empty line
or
• select an existing line if you want to replace an existing preset by the
current selection.
A dialog box opens.
4.
5.
Enter a name for the Preset in the Preset Name field.
Tap the Validate button
or Enter.
The new Preset name is displayed over the Display Preset button.
70
INSIO Version 1.1 – User Manual
Issue 1.1.B
EVS Broadcast Equipment – October 2010
How to Load Clips on Preset
Once preset configurations have been defined, you can load recorded clips on a
selection of Software Player or server player channels, even if the Auto Review
mode is not activated. To do so, proceed as follows:
1.
Tap the Display Preset button
.
The list of existing preset configurations is displayed.
2.
Select one of the Preset configurations from the list.
Clips recorded by the cameras defined in the selected preset player channel
configuration are loaded on the player channels defined in the preset.
3.
If required, you can repeat steps 2 and 3 to load clips on another preset
player channel configuration.
4.
You can unload a clip by selecting the line in the Review tab and tapping
the Unload Clip button.
Loading Clips Automatically
Auto Review Mode
Before or during the recording of a take you can activate the Auto Review mode by
tapping the Auto Review button in the Record tab. In this case, as soon as the
recording stops, the clips recorded by the cameras defined in the current preset
configuration will automatically be loaded for review on the Player channels
defined in the preset. Refer to section ‘How to Define Preset Configuration of
Player Channels’ on page 70 for more information on the options.
When the Auto Review mode is activated, the background color of the Auto
Review button is blue:
The Auto Review mode can be deactivated by tapping the button again. The
background color of the Auto Review button then turns grey.
How to Load Clips Automatically
To automatically load clips from a take you have just recorded on a selection of
Software Player or server player channels, even if the take has not yet been saved
on the server, proceed as follows:
1.
2.
Tap the Auto Review button to activate the Auto Review mode.
Tap the Display Preset button
.
71
Issue 1.1.B
INSIO Version 1.1 – User Manual
EVS Broadcast Equipment – October 2010
3.
Select one of the Preset configurations from the list.
4.
Record the take by tapping the Start/In button then the Stop/Out button.
As soon as the Stop/Out button is tapped, clips recorded by the cameras
defined in the selected preset player channel configuration are loaded on
the Software Player channels or on the server player channels defined in
the preset.
5.
If required, tap the Display Preset button after the automatic loading of
clips and select another preset configuration.
Clips recorded by the cameras defined in the newly selected preset player
channel configuration are loaded on the player channels defined in the
second preset.
6.
72
You can unload a clip by selecting the line in the Review tab and tapping
the Unload Clip button.
INSIO Version 1.1 – User Manual
Issue 1.1.B
EVS Broadcast Equipment – October 2010
L OADING C LIPS R ECORDED E ARLIER ON P LAYER C HANNELS
FROM A C LIP L IST T AB
You have the possibility to review takes later on during the recording session, by
selecting clips from the Left Clip List tab.
You can do this in two different ways:
•
manually, by selecting the clips and the player channels (from server or
Software Player) one by one
•
manually, by selecting a preset configuration of Software Player channels or
server player channels.
How to Manually Load Previously Recorded Clips
When you want to load clips previously recorded on player channels, you can
select clips from different takes or scenes. Proceed as follows:
1.
From the Left Clip List tab, select the clip you want to review from the
Scene>Take>Clip view.
The corresponding line is highlighted.
2.
From the Review tab, select the player channel you want to load the clip
onto. This can be a server player channel or a Software Player channel.
The corresponding player channel line is highlighted.
or
3.
Tap the Load Clip button
.
The clip is loaded on the SDI output display or the Software Player display.
The clip name is displayed on the player channel line, in the Review tab.
or
4.
Repeat steps 1 to 3 for each clip you want to load. Clips may come fro m
different takes or scenes.
73
Issue 1.1.B
INSIO Version 1.1 – User Manual
EVS Broadcast Equipment – October 2010
5.
You can unload a clip by selecting the line in the Review tab and tapping
the Unload Clip button.
How to Manually Load Previously Recorded Clips on a Preset
Configuration of Player Channels
Once preset configurations have been defined, you can load clips on a selection of
Software Player channels or server player channels. In this case, you cannot load
clips coming from different takes or scenes.
Select a Clip in the Clip List Tab
You know which linked clips you want to load and you select one of them in the
Clip List. To do so, proceed as follows:
1.
From the Left Clip List tab, select one of the clips you want to review from
the Scene>Take>Clip view.
The corresponding line is highlighted.
2.
In the Review tab, tap the Display Preset button
.
The list of existing preset configurations is displayed.
3.
Select one of the Preset configurations from the list.
Clips recorded by the cameras defined in the selected preset player channel
configuration and linked to the selected clip are loaded on the player
channels defined in the preset.
4.
74
You can unload a clip by selecting the line in the Review tab and tapping
the Unload Clip button.
INSIO Version 1.1 – User Manual
Issue 1.1.B
EVS Broadcast Equipment – October 2010
Select a Take in the Clip List Tab
To load all the clips from a take at once, proceed as follows:
1.
From the Left Clip List tab, select a Take line.
All the clip lines from the corresponding take are highlighted.
2.
In the Review tab, tap the Display Preset button
.
The list of existing preset configurations is displayed.
3.
Select one of the Preset configurations from the list.
Clips from the selected take and recorded by the cameras defined in the
selected preset player channel configuration are loaded on the player
channels defined in the preset.
4.
To load clips from another take, select another take line from the Clip List
tab and tap the Load Take button.
75
Issue 1.1.B
INSIO Version 1.1 – User Manual
EVS Broadcast Equipment – October 2010
S ELECTING THE S CREEN V IEW
Once you have loaded clip(s) on Software Player channel(s), you can select the
Video Player configuration to display clips in single screen, dual split screen or
quad split screen views.
To select which clip to view in single screen view , proceed as follows:
1.
2.
Load clip(s) on Software Player channel(s).
From the Review tab, tap the Single Screen View button
.
The background color of the button turns blue:
3.
Tap the line corresponding to the loaded clip you want to view on screen.
The clip is displayed in single screen view:
In the Review tab, only the line corresponding to the selected clip is
displayed.
4.
To go back to the list of the loaded clips and the four Software Player
channels in the Review tab, tap the Quad Split Screen View button
.
The four clips loaded on the player channels are autom atically displayed on
the four quarters of the screen.
5.
To view another clip in single screen view, repeat steps 2 and 3.
To select which clips to view in dual split screen view , proceed as follows:
1.
2.
Load at least two clips on Software Player channels.
From the Review tab, tap the Dual Split Screen View button
The background color of the button turns blue:
.
3.
Tap the line corresponding to one of the loaded clips you want to view on
the screen.
4.
Tap the line corresponding to the second loaded clip you want to view on
the screen.
The clips are displayed on screen:
76
.
INSIO Version 1.1 – User Manual
EVS Broadcast Equipment – October 2010
Issue 1.1.B
5.
To view one of the two clips in single screen view, tap the Single Screen
View button and then the line corresponding to the loaded clip you want to
view on screen.
6.
To go back to the list of the loaded clips and the four Software Player
channels in the Review tab, tap the Quad Split Screen View button.
The four clips loaded on the player channels are automatically displayed on
the four quarters of the screen.
7.
To view other clips in dual split screen view, repeat steps 2 to 4.
77
Issue 1.1.B
5.4.4
INSIO Version 1.1 – User Manual
EVS Broadcast Equipment – October 2010
PLAYING CLIP(S) BACK
I NTRODUCTION
Once a clip has been loaded on a player channel, it can be played back for review.
Use the transport buttons:
to play the clip,
to stop the clip playback, or
to go back to the first frame of the clip.
When clips have been loaded on several player channels, transport buttons apply
to all the clips at the same time.
M OVING THROUGH THE M EDIA
You can move through a loaded media by using the jog wheel or jump to a specific
timecode by entering a value in the TC Current field.
Moving with the Jog Wheel
Jog Wheel Display
The jog wheel displayed in the Review window can be used in three different
modes.
Jog Wheel Function
Description
Jog (green cursor)
Moving the wheel to the left or to the right allows you to
move in the media frame by frame.
Tapping at the end of the wheel it will only move 1 frame
forward or backward, depending on if you tap at the right
or left of the wheel.
Vari-Speed
cursor)
(orange
Moving the wheel to the left or to the right allows you to
select a set constant speed to review the media, from
0.1 to 10 times, either backward or forward.
• move the wheel to select the speed
• release the wheel and the media will be played at the
set speed.
Shuttle (red cursor)
78
Moving the wheel to the left or to the right allows the
user to respectively fast-rewind or fast-forward within
the media. When the wheel is released, the playback
stops.
INSIO Version 1.1 – User Manual
Issue 1.1.B
EVS Broadcast Equipment – October 2010
The jog wheel responds to movement on the screen when using touch screen and
it also responds to the movements of the mouse wheel when the jog wheel has
been selected.
Changing the Function of the Jog Wheel
You can change the function of the wheel from Jog to Vari-Speed then to Shuttle
and then back to Jog by proceeding as follows:
Tap the Jog Wheel button at the right of the wheel to change the jog wheel
function.
The color at the centre of the button reflects the selected function.
The new mode is displayed below the wheel and the color of the Jog Wheel button
has changed.
Jumping to a Specific Timecode
To jump to a specific timecode within the loaded clip limits, proceed as follows:
1.
Tap the TC Current field
.
A virtual numeric keypad is displayed:
2.
Enter a timecode value (in hhmmssff format)
3.
Tap Enter.
All the linked clips jump to the specific timecode.
S YNCHRONIZE THE P LAYBACK OF C LIPS ON A T EMPORARY
C UE P OINT
Principle
The Temporary Cue Point functionality allows you to synchronize the playout of
several clips on a specific point in time.
This feature is interesting when several takes have been recorded for the same
scene and you want to review a clip from each take to compare them . As the
duration or the TC IN of the takes varies, setting Temporary Cue Points allows you
to synchronize the playout of several clips on a specific point in time.
These cue points are temporary, which means that once another clip is loaded on
one Software Player channel, the cue point is lost.
79
Issue 1.1.B
INSIO Version 1.1 – User Manual
EVS Broadcast Equipment – October 2010
As each clip is played from its TC IN point, the playback of each clip starts at
different moments to ensure that the temporary cue point of each clip will be
played at the same time.
Example:
2 clips have a TC Duration of 24 seconds.
Temporary Cue Point of clip 1 is set at ‘TC IN + 8 s’.
Temporary Cue Point of clip 2 is set at ‘TC IN + 11 s’.
When tapping the Play button, the playout of clip 2 starts 3 seconds before the
playout of clip 1; so, their temporary Cue Points are played at the same time.
Note
This function can only be used with Software Player channels, not with
server player channels.
How to Play Clips from Different Takes
To set a temporary cue point, proceed as follows:
1.
Load up to 4 clips on Software Player channels.
2.
Select the line corresponding to a loaded clip in the Review tab.
3.
Move through the clip until you reach the image you want to set as
temporary cue point.
4.
Tap the Temporary Cue Point button
at the end of the line.
The button turns blue when activated:
.
5.
Repeat steps 2 and 4 for the other clips.
6.
Tap the Cue button to load each of the clips on their TC IN point.
7.
Tap the Play button.
The playback of each clip is synchronized on all the temporary cue points.
80
INSIO Version 1.1 – User Manual
EVS Broadcast Equipment – October 2010
Issue 1.1.B
P LAYING C LIP A UDIO DURING R EVIEW
A clip can be recorded with up to 16 audio channels. When clips are played out
from the Video Player, only two audio channels will be used for the audio. The two
audio channels associated to each recorder channel are selected in Setup > User
> Predefined Configurations > Record Setup as described in section ‘How to
Select Review Audio Channels’ on page 26.
In dual split screen or quad split screen modes, several clips are viewed at the
same time. So the users can select from which clip the audio will be played out by
simply selecting the loaded clip line in the Review tab. The line highlighted
corresponds to the clip from which the audio is played out.
5.4.5
EDITING MEDIA
P RINCIPLE
When the take has been recorded, one can imagine that the Start/In button has
been tapped too late or the Stop/Out button has been tapped too early and that
you missed some action you would like to keep. Thanks to the loop recording
function of the EVS servers, it is possible to go back to the media and retrieve
material before the IN point or after the OUT point of the recorded clip to add
media to the recorded clip, provided that A/V material is still available.
The Edit Clip function can also be used to shorten a clip.
Note
This function can only be used with Software Player channels, not with
server player channels.
S AVE AND T RANSFER S TATUS OF E DITED C LIPS
In case the edited take had not yet been saved before editing, you will not be able
to start editing.
In case the edited take had been saved but not transferred before editing, updated
clips replace the original ones when the Edit Clip TC button is tapped and the
take number remains unchanged.
In case the edited take had been transferred before editing, updated clips are
saved as new clips when the Edit Clip TC button is tapped. So the original clips
are not overwritten or deleted. The new clips are saved with a new take number.
Important
If the edited take is not the last recorded one, e.g. take 1 to 5 exist and
take 2 is edited, updated clips will be saved under take number 6.
Pay attention that there is no way to see on which original clips updated
clips are based.
81
Issue 1.1.B
INSIO Version 1.1 – User Manual
EVS Broadcast Equipment – October 2010
H OW TO E DIT A C LIP (TC IN/OUT)
To modify the TC IN and/or the TC OUT of a recorded clip, proceed as follows:
1.
Load the clip on a player channel as explained in section 5.4.3 ‘Loading
Media’ on page 68.
2.
Tap the Edit Clip TC button
.
It becomes active and its background color turns blue
.
In and Out additional buttons appear at the bottom of the Review tab:
3.
To edit the IN point, move through the clip until you find the position you
want to mark as new IN point.
The TC Current field reflects the actual position of the cursor, after moving.
4.
When the cursor is on the selected timecode, tap the In button
.
The modified IN point is displayed in the TC IN field and both TC IN and
Duration fields are surrounded by a blue line.
5.
To edit the OUT point, move through the clip until you find the position you
want to mark as new OUT point.
The TC Current field reflects the actual position of the cursor, after moving.
6.
When the cursor is on the selected timecode, tap the Out button
.
The modified OUT point is displayed in the TC OUT field and this field is
surrounded by a blue line.
7.
Tap the Edit Clip TC button
to save the changes.
A dialog box opens and asks whether you want to apply the changes. Note
that changes will be applied to all the clips of the take.
8.
Tap
.
All the clips of the take not yet transferred are updated or new clips are created
for the take already transferred.
82
INSIO Version 1.1 – User Manual
EVS Broadcast Equipment – October 2010
Issue 1.1.B
5.5
ASSIGNING METADATA
5.5.1
METADATA INFORMATION AND OVERVIEW OF THE METADATA
TAB
Metadata are data associated to all the clips of a take. This is done from the
Metadata tab of the Record/Review window.
Metadata may be of different types:
•
Metadata linked to the project, episode, scene and take name or number
(labelled as 1 in the Overview of the tab). Their values are defined by the
system and cannot be changed by the users.
•
Additional metadata defined at the setup system level in Setup > User >
Metadata (labelled as 2). They appear as empty fields in which the users can
enter free text.
•
Take Rating displayed as four buttons (labelled as 3). Users can select one of
these buttons to associate a rating to the Take. By default, buttons correspond
to No rating, OK, Good, Best but this can be changed in the Setup.
•
Take Acceptance, displayed as two buttons (labelled as 4). Users can select
one of these buttons to flag the take as Accepted or Not Accepted.
•
The TC IN, TC OUT and TC duration values of the take are saved as metadata
as well (labelled as 5).
The Metadata tab only displays the metadata fields/buttons selected in Setup >
User > Metadata. However, timecode information display cannot be disabled from
the Setup. It is always displayed in the tab.
83
Issue 1.1.B
84
INSIO Version 1.1 – User Manual
EVS Broadcast Equipment – October 2010
INSIO Version 1.1 – User Manual
EVS Broadcast Equipment – October 2010
5.5.2
Issue 1.1.B
HOW TO ASSIGN METADATA FROM THE RECORD TAB
To assign metadata prior to the recording of a take, proceed as follows:
1.
Open the Record tab and the Metadata tab.
Only the metadata fields selected in Setup > User > Metadata are shown.
No metadata value is displayed. The default values for Take Rating and
Take Acceptance are selected and seen as green background buttons.
2.
You can enter metadata values for the current take in the free text metadata
fields at this point in time or later on.
3.
Tap the Start/In button to start the recording.
The project-related fields are automatically filled in.
4.
Tap a Take Rating button if you want to. This step may be done later.
5.
If you want to, flag a take as accepted or not by tapping the corresponding
Take Acceptance button. This step may be done later.
6.
Tap the Stop/Out button to stop the recording of the current take.
Timecode information is automatically displayed.
85
Issue 1.1.B
86
INSIO Version 1.1 – User Manual
EVS Broadcast Equipment – October 2010
INSIO Version 1.1 – User Manual
EVS Broadcast Equipment – October 2010
5.5.3
Issue 1.1.B
HOW TO ASSIGN OR MODIFY METADATA FROM THE CLIPLIST TAB
To assign or modify metadata after the recording of a take, proceed as follows:
1.
Open the left Clip List tab and the Metadata tab.
2.
Select a clip or a take.
The corresponding metadata values are displayed in the Metadata tab.
3.
Update the requested values.
Metadata values entered for a clip are automatically assigned to all the clips from
the take.
87
Issue 1.1.B
5.5.4
INSIO Version 1.1 – User Manual
EVS Broadcast Equipment – October 2010
FILTERING TAKES ON TAKE RATING AND/OR TAKE
ACCEPTANCE
The Filter button available from both Clip List tabs allows to filter the recorded
takes based on their Take Rating value and Take Acceptance value. Tapping this
button displays a contextual menu with the following different options:
By default, all the Take Rating and Take Acceptance options are selected (green
background). Several options can be selected at a time.
5.6
VIEWING RECORD TRAINS
Record trains can be loaded on Software Player channels and viewed on the
Software Player display, such as the recorded clips. They can also be loaded on
server player channels and viewed on the SDI output display.
To load and view record trains, proceed as follows:
88
INSIO Version 1.1 – User Manual
Issue 1.1.B
EVS Broadcast Equipment – October 2010
1.
Tap the Administrative Tasks button
Record/Review window.
in the upper left corner of the
The Administrative Tasks dialog box opens.
2.
3.
4.
Tap the View Input button. It becomes active:
Tap the Exit button
to exit the window.
Load the trains on Software Player channels in the same way as the loading
of clips.
Load the trains one by one by selecting the camera/recorder channel line in
the Record tab, then the Software Player channel line in the Review tab and
finally tap the Load Input button
5.
.
Load the trains on preset of Software Player channels by tapping the
Display Preset button
list.
and selecting a Preset configuration from the
Trains are loaded on the Software Player channels from the Preset
configuration.
6.
You can unload a train by selecting the line in the Review tab and tapping
the Unload Input button.
7.
To de-activate the View Input function, repeat steps 1 to 3.
89
Issue 1.1.B
INSIO Version 1.1 – User Manual
EVS Broadcast Equipment – October 2010
6. Transferring Media
6.1
INTRODUCTION
Recorded clips, once saved on EVS server, can be sent to predefined transfer
destinations, which can be local drives, fixed, removable or shared drives, EVS
archiving/storage solutions, storages with MAM like Unity with Interplay and
FinalCutServer with XSAN.
Clip transfer to predefined destinations may occur after each take has been
recorded or at the end of a recording session. An automatic transfer mode can
also be activated.
Information on the transfer job status is permanently available from the Transfer
Status window at the bottom of the screen. In addition, clips can be filtered based
on their transfer status from the Clip List tabs.
When initiated, transfer tasks are performed in the background without interfering
with the operator’s other duties or with the functionality of the recording server.
The transfer progress can be monitored within INSIO.
6.2
USER INTERFACE
6.2.1
OVERVIEW OF TRANSFER STATUS WINDOWS
The Transfer Status window can be displayed in two forms: condensed or
expanded. It gives information on the status of the different transfer jobs which
have been requested during the session.
O VERVIEW OF THE C ONDENSED T RANSFER S TATUS WINDOW
The condensed Transfer Status window is permanently present at the bottom of
the INSIO window. It cannot be customized. The following information is displayed:
90
Item
Description
Current Transfer
Number of current transfer jobs and percentage of
completion for the current transfer.
# Transferred (green)
Number of successful transfer jobs for the active session.
# Failed (red)
Number of failed transfer jobs for the active session.
# Remaining (white)
Number of remaining transfer jobs in the queue.
INSIO Version 1.1 – User Manual
Issue 1.1.B
EVS Broadcast Equipment – October 2010
Item
Description
Video to transfer
Estimation of the remaining time needed to complete all
the required transfer jobs.
O VERVIEW OF THE E XPANDED T RANSFER S TATUS WINDOW
The expanded Transfer Status window can be accessed and exited by tapping in
the condensed Transfer Status window.
It is displayed above the condensed Transfer Status window and the different
transfer statuses are presented into different tabs.
Transfer Job Status Information
Each tab provides the follow ing information for each of the transfer jobs from the
active session:
Column Header
Description
Clip ID
ID of the clip on the server.
Format
File format in which the transferred file will be generated.
Video Destination
Identification of the transfer destination as defined in
Setup > User > Predefined Configurations. Refer to
section ‘Format, Name & Destination Tab’ on page 17.
Metadata Destination
Identification of the metadata transfer destination as
defined in Setup > User > Predefined Configurations.
Refer to section ‘Format, Name & Destination Tab’ on
page 17.
Filename
Filename given to the file transferred to the selected
destination. The filename is user-defined as described in
91
Issue 1.1.B
INSIO Version 1.1 – User Manual
EVS Broadcast Equipment – October 2010
Column Header
Description
Setup > User > Predefined Configurations. Refer to
section ‘Format, Name & Destination Tab’ on page 17.
% Complete
Percentage of completion for the transfer of each clip.
Current TC
In stream mode, timecode corresponding to the progress
status of the transfer.
Video to Transfer
Estimated remaining time to complete each transfer job.
Status
Status of the transfer job for each
processing, error, cancelled or done.
clip:
queued,
Transfer Job Status Buttons
The different buttons available on the right of the expanded Transfer Status
window are or are not active, depending on the transfer tab which is displayed.
See All the Transfers button: in addition to the transfers from the current
recording session, displays transfers still pending from a previous
recording session. This button is available only from the Record / Review
window.
See the Transfers from Current Session button: after the See All the
Transfers button has previously been activated, this one only displays
transfers from the current recording session.
Retry Transfer button: re-starts the selected transfer job which had
transfer error status.
Highest Priority button: moves the selected transfer job to the first place
in the queue.
Higher Priority button: moves the selected transfer job to the previous
place in the queue.
Lower Priority button: moves the selected transfer job to the next place
in the queue.
Lowest Priority button: moves the selected transfer job to the last place
in the queue.
Cancel Request button: cancels the selected transfer job, if not yet done.
Hide button: hides the transfer job status selected in the Done tab.
For All Transfers button: allows the Retry, Cancel or Hide actions to be
performed for all the jobs displayed in the selected tab. When activated,
the background color turns red
and the Retry Transfer button, the
Cancel Request button and the Hide button are surrounded by a red line.
92
INSIO Version 1.1 – User Manual
EVS Broadcast Equipment – October 2010
6.2.2
Issue 1.1.B
OVERVIEW OF THE CLIP LIST TABS
Two Clip List tabs, available from the Record/Review window , display the list of
saved clips from the selected episode.
As explained in section 5.2.2 ‘Overview of the Record / Review Window’ on page
55, both tabs display the same information. The right Clip List tab is intended to
be used with the Record tab to manually select clips for transfer and visualize the
transfer status. The left Clip List tab is intended to be used with the Review tab
either to select clips to be transferred or to select clips which will be loaded on a
player channel.
93
Issue 1.1.B
INSIO Version 1.1 – User Manual
EVS Broadcast Equipment – October 2010
Clip Selection Buttons
A series of buttons allows the multiselection of clips to be transferred as well as
filter to sort clips on their transfer status, their take rating level or take
acceptance status.
List of clips
This area displays the list of all the scenes, takes and clips for the episode
selected in the Episode/Program field.
The take rating and take acceptance status are displayed at the end of each take
line.
When transfer has been initialized, one or two colored icons are displayed at the
end of each line and give direct inform ation on the transfer status of each clip.
Clip Management Buttons
Transfer button: initiates the transfer of the selected clip(s).
Delete button: delete the selected clip(s).
6.3
TRANSFER PARAMETERS
The ability to transfer clips must be enabled in Setup > User > General > Clip
Options. Otherwise, Transfer buttons are dimmed. Refer to section 3.2 ‘User
General Settings’ on page 10.
6.3.1
TRANSFER MODES
The transfer function can be performed manually by the operator or automatically.
Refer to sections 6.4 ‘Automatic Transfer’ on page 95 and 6.5 ‘Manual Transfer’
on page 95 for more details on both transfer modes.
6.3.2
TRANSFER DESTINATIONS
Transfer destinations must be defined beforehand in Setup > User > Predefined
Configurations > Format, Name & Destination > Configure Destinations.
As clips may be transferred to a maximum of two transfer destinations, the
destinations used for the project must be selected in Setup > User > Predefined
Configurations > Format, Name & Destination > Destination Selection . Refer to
section 3.3.1 ‘Prerequisites’ on page 12 for the list of steps involved in the
definition of transfer destinations.
However, under some conditions, users can change the selected destination(s)
from the Transfer button. Refer to section 6.5.4 ‘Destination Change’ on page 98.
94
INSIO Version 1.1 – User Manual
EVS Broadcast Equipment – October 2010
6.4
Issue 1.1.B
AUTOMATIC TRANSFER
The automatic transfer can only be performed from the Record tab, just after the
saving of recorded clip(s).
The Automatic Transfer mode can be activated in one of the following ways:
•
from Setup > User > General > Default Auto Actions
•
by tapping the Auto Transfer button in the Record tab of the Record/Review
window before or during the recording of a take.
The background color of the Auto Transfer button turns blue when the function is
activated:
An ‘Auto’ flag is present on the top of the Transfer button when the Auto Transfer
mode is activated:
The Auto Transfer mode can be deactivated by tapping the AutoTransfer button
again. The background color of the Auto Transfer button then turns grey and the
‘Auto’ flag is removed from the top of the Transfer button.
With the Auto Transfer mode activated, the linked clips of a recorded take will
autom atically be transferred to the predefined transfer destination(s) as soon as
they are saved. Refer to section 5.3.3 ‘Recording a Take’ on page 61 for more
information.
6.5
MANUAL TRANSFER
Manual transfer of clips can occur at different times:
•
just after the manual or automatic saving of a recorded clip. This is performed
from the Record tab, for all the clips saved from a take, when the Automatic
Transfer mode is not activated.
•
when reviewing a recorded clip. This is performed from the Review tab, for the
single selected clip.
•
at any times, by selecting clips in one of the Clip List tabs. In this case,
multiple clips can be selected.
Therefore, a Transfer button is present on the four tabs of the Record/Review
window, except the Metadata tab. The operator will have to tap the Transfer
button to initialize the transfer of clips to predefined transfer destinations.
95
Issue 1.1.B
6.5.1
INSIO Version 1.1 – User Manual
EVS Broadcast Equipment – October 2010
MANUAL TRANSFER OF JUST RECORDED CLIPS
When a take has just been recorded and saved, as described in section 5.3.3
‘Recording a Take’ on page 61, it can be transferred to the predefined transfer
destination(s) by tapping the Transfer button at the bottom of the Record tab.
The clips saved for the selected take will then be transferred.
6.5.2
MANUAL TRANSFER OF A CLIP DURING REVIEW
When a clip has been loaded on a player channel for review , as described in
section 5.4.3 ‘Loading Media’ on page 68, it can be transferred to the transfer
destination(s) by tapping the Transfer button at the bottom of the Review tab.
Only the selected (highlighted) clip will then be transferred.
6.5.3
MANUAL TRANSFER OF ONE OR SEVERAL CLIPS AT THE END
OF A R ECORDING SESSION
Clips are not always transferred just after their recording but can be transferred at
once after a recording session or at the end of the day. This can be performed
from one of the two Clip List tabs.
You can select a single clip or multiple clips to be transferred. You can also select
the line corresponding to a take or a scene, so, the clips from the entire take or
scene will be transferred respectively.
S ELECTING C LIPS FROM THE C LIP L IST T ABS
Tree View
The list of scenes or takes can be displayed in a collapsed or expanded view to
facilitate the selection of clips.
•
The Scene view can be expanded to show its takes by tapping the
or collapsed by tapping the
button.
button
In the same way, the Take view can be expanded to show its clips by tapping
the
button or collapsed by tapping the
button.
96
INSIO Version 1.1 – User Manual
Issue 1.1.B
EVS Broadcast Equipment – October 2010
•
The Collapse/Expand button
menu with the following options:
can be tapped to display a contextual
Clips Selection
The selection of clips from the Clip List tabs can be performed in different ways:
•
to select a single clip , tap the corresponding line in the Clip List
•
to select all the clips from the list, tap the Select All button
•
to select all the clips from one take, select the take line.
•
to select all the clips from one scene, select the scene line.
•
to select multiple elements :
o
tap the Multiselect Mode button,
The background button turns blue when it is active.
o
tap lines to select clips.
Tapping on a Scene line selects all the takes and clips from this scene.
Tapping on a Take line selects all the clips from this take.
•
to clear the selection, tap the Clear Selection button.
97
Issue 1.1.B
INSIO Version 1.1 – User Manual
EVS Broadcast Equipment – October 2010
H OW TO M ANUALLY T RANSFER C LIPS FROM A C LIP L IST T AB
To manually transfer one or several clip(s) from a Clip List tab, proceed as
follows:
1.
Open one of the Clip List tabs.
2.
Select the clips you want to transfer.
Selected clips become highlighted.
3.
Tap the Transfer button on the Clip List tab.
The clips are transferred in the order they are displayed in the extended Transfer
Status window.
6.5.4
DESTINATION CHANGE
P REREQUISITES FOR D ESTINATION C HANGE FROM THE
T RANSFER B UTTON
The following conditions must be met to be able to change the transfer
destinations from the Transfer button:
•
the option Allow destination change via transfer button must have been
selected in the Destination Selection tab of the settings.
•
the Automatic Transfer mode must not be activated.
A VAILABLE T RANSFER D ESTINATIONS
When those prerequisites are met, the following window will be displayed as soon
as you tap the Transfer button.
Destination 1 Tab
Destination 2 Tab
Actually, the selection is made not only on a transfer destination, but on a
complete destination configuration.
The two Destination tabs list all the destination configurations which have been
98
INSIO Version 1.1 – User Manual
EVS Broadcast Equipment – October 2010
Issue 1.1.B
defined in Setup > User > Predefined Configurations > Format, Name and
Destination > Configure Destination (refer to section ‘Configure Destinations
Tab’ on page 17).
In each tab, the highlighted line corresponds to the destination configuration
which has been selected in Setup > User > Predefined Configurations > Format,
Name and Destination > Destination Selection (refer to section ‘Destination
Selection Tab’ on page 22).
In each tab, the destination configuration which cannot be selected, because it is
used in the other Destination tab, is dimmed.
In the example above, the destination configuration 3.3 has been defined in the
Settings but not selected by default.
In each tab, the Use check box allows to use for transfer, or not, the destination
configuration selected in the list.
H OW TO C HANGE T RANSFER D ESTINATION FROM THE
T RANSFER B UTTON
When those conditions are met, proceed as follows:
1.
Tap the Transfer button, from the Record tab, the Review tab or a Clip List
tab.
The Transfer button is surrounded by a green line, indicating that ne w
destination configurations can be selected
The list of available transfer destination configurations is displayed
2.
Select a new destination configuration from the Destination 1 list and/or
from the Destination 2 list or clear the Use box to discard the corresponding
destination.
3.
Tap the Transfer button again.
The clip transfer occurs.
This is just a temporary selection and the default destinations selected in the
Settings will be displayed in case the Transfer button is tapped again. So, this
function can be used, for example, to transfer clips to more than two destinations.
99
Issue 1.1.B
INSIO Version 1.1 – User Manual
EVS Broadcast Equipment – October 2010
6.6
TRANSFER STATUS
6.6.1
TRANSFER COLOR CODE
Five job transfer statuses have been defined and are represented by different
colored icons as follows:
Queued: blue
Processing: yellow
Error: red
Cancelled: pink
Done: green
6.6.2
TRANSFER STATUS INFORMATION
Information on the transfer status is available from different areas:
•
in the expanded Transfer Status window, various tabs display the list of clips
with different transfer status.
Refer to section ‘Overview of the Expanded Transfer Status window’ on page
91.
•
in the Clip List tabs, colored icons are displayed at the end of each line. In
case two destinations have been defined in Setup > User > Predefined
Configurations > Format, Name & Destination, two icons will be displayed in
the Clip List.
•
in the Clip List tabs, the Filter button
transfer status.
allows you to filter on a specific
Tapping this button displays a contextual menu with different options allowing
the filters to be applied on the transfer job status. Only one status can be
selected at a tim e.
100
INSIO Version 1.1 – User Manual
Issue 1.1.B
EVS Broadcast Equipment – October 2010
The table below describes the different options:
Option
Description
All
Returns the list of all the clips with the colored icon
corresponding to the transfer status of each of them.
No Transfer
Returns the list of all the clips for which transfer has not
been requested yet.
Queued (Blue)
Returns the list of all the clips for which a transfer has
been requested and which are still pending. The list is
reduced as fast as transfer jobs are done.
Processing
(Yellow)
Returns the clips which are being transferred.
Error (Red)
Returns the list of all the clips for which the transfer has
failed.
Cancelled (Pink)
Returns the list of all the clips for which the transfer has
been cancelled.
Done (Green)
Returns the list of all the clips for which the transfer has
been completed. The list is growing as fast as transfer
jobs are done.
101
Issue 1.1.B
INSIO Version 1.1 – User Manual
EVS Broadcast Equipment – October 2010
Once a transfer status has been selected, the Filter button is surrounded by a line
colored with the selected status color:
6.6.3
FAILED TRANSFERS
When transfer jobs have failed, you can initiate a new transfer attempt from one of
the two Clip List tabs. To do so, proceed as follows:
1.
Tap the Filter button in the Clip List tab.
The Filter contextual menu opens.
2.
Select Error.
Only the clips with an ‘Error’ transfer job status are listed.
102
3.
Select all the clips.
4.
Tap the Transfer button.
INSIO Version 1.1 – User Manual
Issue 1.1.B
EVS Broadcast Equipment – October 2010
7. Cleaning Up the
System and Deleting
Media
7.1
INTRODUCTION
When the clips that you want to keep have been transferred and you are sure that
you do not need them anymore on the server, you can delete them from the server.
7.2
OVERVIEW OF THE CLEANUP WINDOW
The System Cleanup and Media Purge window can be accessed by tapping the
Administrative Tasks button
window.
in the upper left corner of the Record/Review
Then, when the Administrative Tasks dialog box opens, tap the Cleanup button.
You are only allowed to delete media for the episode which was selected in the
Record/Review window.
103
Issue 1.1.B
7.3
INSIO Version 1.1 – User Manual
EVS Broadcast Equipment – October 2010
DELETING TAKES
To delete takes from an episode, proceed as follows:
1.
Enter your search parameters. To do so, perform one of the following
operations:
• Enter the scene name in the Scene field and then enter the take numbers
between which you want to delete media by using the arrows in the Take
fields.
• If you search for a specific clip, enter its clip louth ID.
• To display all the clips from the episode, do not enter any criteria.
2.
Tap the Search button
.
All the clips corresponding to the search criteria are displayed in the list.
3.
Select the clips you want to delete in the Delete column or by tapping the
Select All button
4.
.
Tap the Cleanup Selected Clips button
.
Clips are deleted from the EVS video server and a Delete Status window
gives indication on the deletion process success:
104
INSIO Version 1.1 – User Manual
EVS Broadcast Equipment – October 2010
5.
Issue 1.1.B
Repeat the procedure for all the other episodes by accessing them one by
one from the Program/Episode window.
105
INSIO Version 1.1 – User Manual
Issue 1.1.B
EVS Broadcast Equipment – October 2010
Index
A AAF setup ...................................................................... 19 abort recording ............................................................. 61 audio channels used for review .................................... 81 auto review ................................................................... 71 auto save ....................................................................... 61 auto transfer ................................................................. 95 F failed jobs transfer ...................................................... 102 FCP setup ...................................................................... 19 filter on transfer status ............................................... 100 G C guardbands setup ......................................................... 33 camera configuration ............................................................ 23 group ........................................................................ 25 name ......................................................................... 24 selection ................................................................... 61 unused ...................................................................... 25 clip abort confirmation message ..................................... 33 abort recording ......................................................... 63 define name .............................................................. 16 delete ...................................................................... 103 edit ............................................................................ 82 load automatically from Record tab ......................... 71 load manually from Clip List tab ............................... 73 load manually from Clip List tab on preset player channels ............................................................... 74 load manually from Record tab ................................ 69 load manually from Record tab on preset player channels ............................................................... 71 play back ................................................................... 78 record ....................................................................... 61 review ................................................................. 69, 73 transfer automatically .............................................. 95 transfer manually ..................................................... 95 trim ........................................................................... 82 unload ....................................................................... 69 view on screen .......................................................... 76 Clip List tab .................................................................... 93 H D database ........................................................................ 41 dual split screen view .................................................... 76 E episode add ............................................................................ 49 delete ........................................................................ 50 edit ............................................................................ 50 rename ..................................................................... 50 107
handles setup ................................................................ 33 I Interplay setup .............................................................. 19 J jog ................................................................................. 78 jog mode setup ........................................................................ 32 jog wheel ....................................................................... 78 jump to timecode ......................................................... 79 K keyboard setup ............................................................. 33 L locator button ...................................................................... 61 insert ........................................................................ 62 setup ........................................................................ 11 M metadata assign ........................................................................ 83 edit ........................................................................... 87 filter .......................................................................... 88 setup ........................................................................ 30 Issue 1.1.B
P player channel configuration ............................................................ 27 define preset ............................................................ 70 presets ........................................................................... 70 production add ............................................................................ 44 delete ........................................................................ 45 edit ............................................................................ 45 rename ..................................................................... 45 program add ............................................................................ 49 delete ........................................................................ 50 edit ............................................................................ 50 rename ..................................................................... 50 Programs/Episodes window .......................................... 47 project add ............................................................................ 44 delete ........................................................................ 45 edit ............................................................................ 45 rename ..................................................................... 45 Projects/Productions window ....................................... 42 Q quad split screen view ................................................... 76 R Record tab ..................................................................... 58 record trains .................................................................. 88 Record/Review window .......................................... 54, 55 recorder channels configuration ............................................................ 23 review audio channels setup ................................................ 26 Review tab ..................................................................... 67 S scene add ...................................................................... 51, 53 delete information .................................................... 53 edit ............................................................................ 52 server setup ................................................................... 34 server timecode display ................................................ 57 setup AAF ........................................................................... 19 AAF destination ........................................................ 38 AAF metadata destination ........................................ 20 abort clip confirmation message .............................. 33 alarm triggers ........................................................... 33 audio channels used for review ................................ 26 camera configuration ............................................... 23 clip name .................................................................. 16 database ................................................................... 41 default jog mode ...................................................... 32 destination path ................................................. 20, 37 108
INSIO Version 1.1 – User Manual
EVS Broadcast Equipment – October 2010
episode specific ........................................................ 50 EVS server ................................................................. 34 FCP ........................................................................... 19 FCP metadata destination ........................................ 21 FCP QT destination ................................................... 40 FCP QT local path ..................................................... 40 file format ................................................................. 18 group cameras .......................................................... 25 guardbands............................................................... 33 Interplay ................................................................... 19 Interplay destination ................................................ 39 Interplay metadata destination ................................ 21 metadata configuration............................................ 30 NTSC timecode ......................................................... 16 player channels configuration .................................. 27 predefined configuration ......................................... 12 project specific ................................................... 44, 45 recorder channels configuration .............................. 23 review audio channels .............................................. 26 Software Player ........................................................ 41 storage capacity warning ......................................... 33 system general ......................................................... 32 timecode fields position ........................................... 32 transferred file name ............................................... 18 user general .............................................................. 10 Video player ............................................................. 41 Video Server ............................................................. 34 XML scan folder .................................................. 20, 37 XTAccess ............................................................. 20, 35 Setup window ................................................................. 7 shuttle ........................................................................... 78 single screen view ......................................................... 76 Software Player setup ........................................................................ 41 storage capacity display ................................................ 57 stream record ............................................................... 64 T take abort recording ........................................................ 63 delete ..................................................................... 103 record ....................................................................... 61 temporary cue point ..................................................... 79 timecode server timecode display ........................................... 57 timecode fields position setup ........................................................................ 32 transfer auto transfer ............................................................ 95 change destination ................................................... 98 destination path ................................................. 20, 37 failed jobs ............................................................... 102 file format ................................................................. 18 filename ................................................................... 18 manual transfer ........................................................ 95 parameters ............................................................... 94 status icons ............................................................. 100 transfer configuration add ........................................................................... 13 default ...................................................................... 15 delete ....................................................................... 13 INSIO Version 1.1 – User Manual
Issue 1.1.B
EVS Broadcast Equipment – October 2010
transfer status filter .................................................... 100 Transfer Status window................................................. 90 condensed ................................................................ 90 expanded .................................................................. 91 V vari‐speed ...................................................................... 78 Video Player setup ......................................................................... 41 view record trains.......................................................... 88 virtual keyboard setup .................................................. 33 W warning abort clip .................................................................. 33 storage capacity treshold ......................................... 33 timecode servers gap ............................................... 33 X XTAccess setup........................................................ 20, 35 109
INSIO Version 1.1 – User Manual
Issue 1.1.B
EVS Broadcast Equipment – October 2010
Regional Contacts
AM ERICA (NORTH & LATIN)
EVS Americas
East Coast
Tel: +1 818 846 9600
Fax: +1 818 846 9601
[email protected]
EVS Americas
West Coast
Tel: +1 973 575 7811
Fax: +1 973 575 7812
Tech. line: +1 973 575 7813
[email protected]
Tel: +1 514 750 7544
Fax: +1 514 750 7518
Tech. line: +1 973 575 7813
[email protected]
EVS Australia
Tel: +61 02 9452 8600
Fax: +61 02 9975 1368
Mobile: +61 420 307 387
[email protected]
EVS China
Tel: +86 10 6808 0248
Fax: +86 10 6808 0246
Tech. line: +86 139 1028 9860
[email protected]
EVS Hong-Kong
Tel: +852 2914 2501
Fax: +852 2914 2505
Tech. line: +852 9401 2395
[email protected]
EVS India
Tel: +91 22 6697 2999
Fax: +91 22 2673 2092
Mobile: +91 98 9017 5958
[email protected]
EVS Canada
[email protected]
[email protected]
ASIA & PACIFIC
EUROPE, MIDDLE EAST & AFRICA
110
EVS Belgium
Headquarters
Tel: +32 (0) 4 361 7000
Fax: +32 (0) 4 361 7099
Tech. line: +32 (0) 495 284 000
[email protected]
[email protected]
[email protected]
EVS Brussels
Tel: +32 (0) 2 421.78.70
Fax: +32 (0) 2 421.78.79
[email protected]
EVS Deutschland
Tel: +49 (0) 89 4111 949 00
Fax: +49 (0) 89 4111 949 99
Tech. line: +49 (0) 89 4111 949
77
[email protected]
EVS France
Tel: +33 1 46 99 9000
Fax: +33 1 46 99 9009
Tech. line: +33 1 46 99 9003
[email protected]
INSIO Version 1.1 – User Manual
Issue 1.1.B
EVS Broadcast Equipment – October 2010
EUROPE, MIDDLE EAST & AFRICA
EVS Iberica
Tel: +34 91 490 3930
Fax: +34 91 490 3939
Tech. line: +34 91 490 3933
[email protected]
EVS Italy
Tel: +39 030 296 400
Fax: +39 030 294 3650
Tech. line: +39 334 631 1493
[email protected]
EVS Middle East
Tel: +971 4 365 4222
Fax: +971 4 425 3501
Mobile: +971 50 887 8758
[email protected]
EVS UK
Tel: +44 (0) 1372 387 250
Fax: +44 (0) 1372 387 269
Tech. line: +44 (0) 1372 387 266
[email protected]
111
EVS Broadcast Equipment
Liège Science Park
16, rue Bois St Jean
B-4102 Ougrée
Belgium
Corporate
Headquarters
North & Latin America
Headquarters
Asia & Pacific
Headquarters
Other regional offices
available on
+32 4 361 7000
+1 973 575 7811
+852 2914 2501
www.evs.tv/contact
To learn more about EVS go to www.evs.tv