1
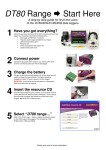
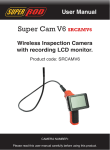
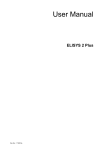
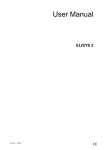
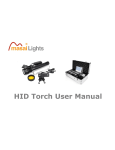
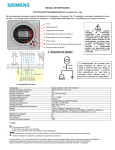
DT80 Range Start Here A step by step guide for first time users of the following data logger models: DT80/80G/80L/80LM/80GL/85/85G/85L/85LM/85GL/85GLM 1 Have you got everything? 2 Connect power 3 Check that you have received all of the items that come with your data logger. You should have received the following items: • Data logger (DT80 shown in pictures) • Plug pack power supply • USB communications cable • DataTaker USB stick- Resource files & DPLOT software • Index card with DPLOT licence number • Screw driver • Power terminal block with battery link (DT80/80G/85/85G only) • Antenna, with attached cable (DT80LM/85LM/85GLM only) Connect the plug pack power supply to your mains power outlet and then connect the power jack into the data logger. IMPORTANT: General Safety Standards require that the logger is Earthed/ Grounded. An Earthing/ Grounding point exists on all Loggers, located on side panel. Refer to Grounding section in product user manual Charge the battery DT80/85/85G models only Connect the terminal block with battery link into the power terminal socket to charge the internal battery. The battery should be charged for at least 12 hours. IMPORTANT: Avoid storing the internal battery in a discharged state as this will reduce its capacity. 4 Explore Resource Files 5 Select “DT80 range…” Insert the USB stick into your computer. Your computer must be running Windows XP, Windows Vista or Windows 7. Explore Resource Files folder and run the program “dtautorun.exe” to start the menu. Click on the “DT80 range…” button to display the relevant options for the DT80 range of data loggers. Please turn over for more instructions… TF_DT80_DatatakerSheet.indd 1 17/01/14 12:28 PM 6 6 Select “Install USB driver” Click on the “Install USB driver…” button to install the USB drivers for use with the logger. The installer will guide you through this process. Once fully installed proceed to the next step. Select “Install USB driver” Click on the “Install USB driver…” button to install the USB drivers for use with the logger. The installer will guide you through this process. Once fully installed proceed to the next step. 7 7 Connect USB cable Connect the USB communications cable to the logger and your Connect USB cable computer. 8 8 dEX starts automatically Shortly after connecting the USB communications cable the built-in dEX starts automatically logger software, dEX, will start automatically. Connect the USB communications cable to the logger and your computer. Shortly after connecting the USB communications cable the built-in logger dEX, will start automatically. Pleasesoftware, refer to the User’s Manual, available on the help pages in dEX or on the supplied dataTaker USB stick, to learn more about using Please refer to theExplore User’s the Manual, available the helpfiles pages dEX your data logger. help pages andonresource for in further or on the supplied dataTaker USB stick, to learn more about using information and resources. your data logger. Explore the help pages and resource files for further information and resources. © 2011 Thermo Fisher Scientific Australia Pty. Ltd. ABN 058 390 917 IS-0051-B3 © 2014 Thermo Fisher Scientific Australia Pty. Ltd. ABN 058 390 917 IS-0051-B3 TF_DT80_DatatakerSheet.indd 2 17/01/14 12:28 PM