1
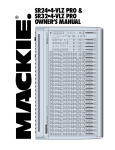
High Resolution Series In-Wall Subwoofer Amplifier HRSIW8 User's Manual Important Safety Instructions 1. Read Instructions 2. Keep these Instructions 3. Heed all Warnings. 4. Follow all Instructions 5. Do not use this apparatus near water. 6. Clean only with dry cloth. 7. Do not install near any heat sources such as radiators, heat registers, stoves, or other apparatus (including amplifiers) that produce heat. 8. Unplug this apparatus during lightning storms or when unused for long periods of time. 9. Refer all servicing to qualified service personnel. Servicing is required when the apparatus has been damaged in any way, such as a power-supply cord or plug is damaged, liquid has been spilled or objects have fallen into the apparatus, the apparatus has been exposed to rain or moisture, does not operate normally, or has been dropped. 10. Ventilation — The apparatus should be situated so that its location or position does not interfere with its proper ventilation. For example, the apparatus should not be situated on a bed, sofa, rug, or similar surface that may block any ventilation openings; or placed in a built-in installation such as a bookcase, cabinet, or closed equipment rack that may impede the flow of air through ventilation openings. 11. Power Sources — The apparatus should be connected to a power supply only of the type described in these operation instructions or as marked on the apparatus. 12. Power Cord Protection — Power-supply cords should be routed so that they are not likely to be walked upon or pinched by items placed upon or against them, paying particular attention to cords at plugs, convenience receptacles, and the point where they exit the apparatus. 13. Non-use Periods—The power cord of the apparatus should be unplugged from the outlet when unused for a long period of time. 14. Object and Liquid Entry — Care should be taken so that objects do not fall into and liquids are not spilled into the inside of the apparatus. 15. Servicing — The user should not attempt to service the apparatus beyond those means described in this operating manual. All other servicing should be referred to qualified service personnel. 16.This apparatus has been equipped with an AC mains power switch. This switch is located on the front panel and should remain readily accessible to the user. 17.The mains plug or an appliance coupler is used as the disconnect device, so the disconnect device shall remain readily operable. 18. To Prevent Electric Shock, do not use this polarized plug with an extension cord, receptacle or other outlet unless the blades can be fully inserted to prevent blade exposure. Pour préevenir les chocs électriques ne pas utiliser cette fiche polariseé avec un prolongateur, un prise de courant ou une autre sortie de courant, sauf si les lames peuvent être insérées à fond sans laisser aucune pariie à découvert. 19. Grounding or Polarization — Precautions should be taken so that the grounding or polarization means of the apparatus is not defeated. 20. This apparatus does not exceed the Class A/Class B (whichever is applicable) limits for radio noise emissions from digital apparatus as set out in the radio interference regulations of the Canadian Department of Communications. User's Manual ATTENTION — Le présent appareil numérique n'émet pas de bruits radioélectriques dépassant las limites applicables aux appareils numériques de class A/de class B (selon le cas) prescrites dans le règlement sur le brouillage radioélectrique édicté par les ministere des communications du Canada. 21. This equipment has been tested and found to comply with the limits for a Class B digital device, pursuant to Part 15 of the FCC Rules. These limits are designed to provide reasonable protection against harmful interference in a residential installation. This equipment generates, uses and can radiate radio frequency energy and, if not installed and used in accordance with the instructions, may cause harmful interference to radio communications. However, there is no guarantee that interference will not occur in a particular installation. If this equipment does cause harmful interference to radio or television reception, which can be determined by turning the equipment off and on, the user is encouraged to try to correct the interference by one or more of the following measures: Reorient or relocate the receiving antenna. Increase the separation between the equipment and receiver. Connect the equipment into an outlet on a circuit different from that to which the receiver is connected. Consult the dealer or an experienced radio/TV technician for help. 22.Caution: Changes or modifications not expressly approved by Sunfire could void the user's authority to operate this equipment. WARNING:THIS SUBWOOFER SYSTEM IS CAPABLE OF PRODUCING VERY HIGH SOUND PRESSURE LEVELS. YOU MUST TAKE EVERY PRECAUTION TO PROTECT YOUR HEARING FROM PERMANENT DAMAGE. This amplifier is designed to power only the Sunfire HRSIW8 in-wall subwoofer. No other subwoofer or speaker should be connected to the amplifier, as this may lead to serious damage to your equipment. Contents Safety Instructions............... 2 Introduction......................... 4 Unpacking........................... 4 Amplifier Features............... 6 Remote Control Features.... 9 Amplifier Installation............ 10 System Configuration.......... 11 DSP Controls...................... 12 Specifications...................... 18 Limited Warranty................. 18 Service Assistance...............18 For more information on this and other Sunfire products, please visit our website: www.sunfire.com User's Manual Introduction Thank you for purchasing this Sunfire High Resolution Series HRSIW8 in-wall subwoofer amplifier. We hope you enjoy it and the music it makes as much as we have enjoyed creating it for you. The amplifier is designed to supply speaker-level power to the Sunfire HRSIW8 in-wall subwoofer, to produce stunning low frequency effects for your home theater. This guide gives an overview of the features of your amplifier. Further details of the system are supplied in the manual provided with the Sunfire HRSIW8 in-wall subwoofer. Unpacking Your Sunfire amplifier should reach you in perfect condition. If you do notice any shipping damage, please contact your Sunfire Dealer immediately. Gently lift out the unit and remove all the packing material. It is important to save all the packing materials and the box in case your amplifier ever needs to be moved or shipped for repair. Make sure that you keep your sales receipt. It is the only way to establish the duration of your Limited Warranty and it may come in useful for insurance purposes. Features • Amplifier designed exclusively for the Sunfire HRSIW8 in-wall subwoofer • 500 Watt, all-discrete Class-D switching amplifier for maximum robustness • DSP system equalization for perfect frequency response • DSP adjustable crossover with 40-160 Hz range and your choice of 12-36 dB/octave slopes • DSP adjustable subsonic filter adjustable from flat to 40 Hz • DSP adjustable phase • DSP soft limiter prevents any clipping at the speaker and limits to 1.5% THD • Two line-level XLR balanced inputs • Two line-level RCA unbalanced inputs • Five-way gold-plated speaker binding posts • DSP settings can be locked/unlocked • DSP display includes graphic volume display • DSP menus and settings can be scrolled through and selected by the front panel knob and IR remote control • Storage and recall of DSP settings • SUB/LFE mode control • Smart standby power supply that servo-controls the main amplifier power for less than a half watt draw from the household mains during standby Please take a moment to fill out and mail the Sunfire Customer Response card. Also read the serial number located on the control panel and record it here: Serial Number: Purchased from: Date: User's Manual • Oversized heatsink for cool operation with any music • Discrete analog power supply with a large toroidal transformer for best reliability and least noise. • Front panel and remote control adjustable volume control • Five EQ mode presets to enhance all types of media • Night mode for reduced interference to other housemates when playing movies late into the night • 12V trigger for advanced home system control • Remote Infrared sensor jack for the custom home installer • Audio sense timeout is adjustable from 5-30 minutes Care To maintain the amplifier's finish, first unplug the power cord and then use a soft dry cloth to clean the surfaces. Move the cloth with the grain of the front panel's finish. Be careful not to scratch the display window. If your Sunfire amplifier needs servicing, please contact your nearest authorized Sunfire Dealer. User's Manual Amplifier Features 1 23 1. Power Switch Press the power switch in to turn on the amplifier. As a general rule, turn it on after your preamplifier or receiver is turned on. When you have finished listening for the night, turn it off before your preamplifier or receiver are turned off. These precautions will help prevent turn-on and turn-off thumps in the subwoofer. After a period with no input signal, the amplifier will automatically turn itself to standby mode, where it is effectively off. It can however, turn back on automatically when an audio input signal is present, or if a 12 VDC trigger voltage is applied to the Trigger inputs. 2. IR Receiver The area in front of this IR Receiver window should be kept clear and unobstructed, so the amplifier can receive IR commands from the remote control. 3. Power LED This LED will turn blue when the amplifier is on, and red when it is in standby mode. 4 5 6 5. DSP Control This control allows selection and adjustment of the amplifier's parameters. It can be turned clockwise, counterclockwise, and pressed-in to navigate through the DSP menus. Turning the control counterclockwise will move the display backwards through its menus, and allow values to be decreased. Turning the control clockwise will move the display forwards through the available menus, and allow values to be increased. Pressing the control in will allow the selection of a parameter. 6. Rack Ears The amplifier comes with two rack ears that allow it to be mounted in a standard 19 inch rack. Allow one rack space for the amplifier, and one rack space minimum above and one below it for ventilation. The rack ears are easily removed using three existing screws as shown. 4. DSP Display This vacuum fluorescent display (VFD) shows the status of the amplifier's controls. Multiple menus allow full control of the amplifier's parameters and performance. Screws User's Manual 10 11 HRSIW8AMP 7 8 8 7 9 12 To remove the rack ears, first turn off the amplifier and remove the power cord. Undo the three screws holding each rack ear in place. Remove the rack ears and keep them in a safe place in case you need them in future. Replace the three screws back into the amplifier and tighten securely. 7. Balanced (XLR) Input Connect these identical balanced inputs to the balanced line-level sub/LFE output of a Home Theater preamplifier, receiver, or other source. Balanced connections offer superior noise cancellation over unbalanced connections. You can use either XLR balanced, or RCA unbalanced inputs, with XLR preferred if you have a choice. If your preamplifier or receiver has a single sub/LFE balanced output, connect it to either of these inputs, leaving the other one unused. 8. Line Level (RCA) Inputs Connect these identical unbalanced inputs with RCA type patch cords to the line-level sub/LFE outputs of your Home Theater preamplifier, receiver, or other source. If your preamplifier or receiver has a single sub/LFE output, connect it to either of these inputs, leaving the other one unused. 13 14 15 16 If your preamplifier or receiver does not have a sub/LFE output, use “Y” adapters at the preamplifier outputs. In this way, you can send the preamplifier’s output signals to your main amplifier and to the subwoofer amplifier at the same time. 9. Trigger Inputs This input can be used to automatically turn on the amplifier. To do this, connect a 12 VDC source as follows: Input voltage range: 2.2 - 13 VDC Impedance: approximately 2800 ohm (4.2 mA @ 12V) 3.5 mm mono mini-jack, tip positive Some Home Theater preamplifiers and receivers, such as the Sunfire Theater Grand series, have matching 12 VDC Trigger outputs. When they are turned on, the amplifier will turn on. 10. Ground Terminal This screw terminal is provided in order to ground the amplifier. In some cases, grounding may eliminate noise due to a ground loop in the system. 11. IR Input This IR input can be connected to the output of an optional external IR receiver. The amplifier can then be controlled in the same way as using the remote control and pointing at the internal IR receiver on the front panel. 12. Service This connector is provided for use by Sunfire service technicians only. User's Manual HRSIW8AMP 13 13. Speaker Level Outputs 14 15 16 15. Line Fuse This is the connection to the Sunfire HRSIW8 in-wall subwoofer. Use highquality Class-2 speaker wiring. The subwoofer is supplied with a conservative slow-blow type fuse to protect the electronics. The red post is the positive output, and connects to the positive (red) post of the HRSIW8 subwoofer. The black post is the negative, and connects to the negative (black) post of the HRSIW8 subwoofer. The five-way, gold-plated posts can accept bare wire, pins, spade terminals, and dual or single banana connectors. Always unplug the power cord before inspecting or changing the fuse. Never use a fuse with a larger current rating than shown on the markings next to the fuseholder. Use a small flat screwdriver to pry out the fuseholder and replace the fuse. The amplifier is designed to power only the Sunfire HRSIW8 in-wall subwoofer. No other subwoofer or speaker should be connected, or this may lead to serious damage to your equipment. 14. Voltage Select Switch This switch allows the amplifier to be set to the local AC mains voltage, either 115 VAC or 230 VAC. Always unplug the power cord and all other connections, before moving this switch. Undo the two small screws and remove the protective plate covering the switch. Set the switch to the local AC mains voltage. Replace the protective cover. 16. IEC Linecord socket The amplifier comes with a detachable linecord which connects here. US (120 VAC) MODEL: Connect the linecord to the amplifier before connecting the other end to a 120 Volt, 60 Hz AC outlet. The outlet must have a circuit rating of 8 amps or more (a typical home circuit is rated at 15 amps). Never plug the US (120 VAC) Model amplifier directly into 220240 Volts AC as this will cause catastrophic circuit failure. European (230 VAC) MODEL: Connect the linecord to the amplifier before connecting the other end to a 230 Volt, 50 Hz AC outlet. The outlet must have a circuit rating of 4 amps or more. HRSIW8AMP User's Manual Remote Control Features A. Power B A C D F E Turns the amplifier on, or puts it into standby mode where it is effectively off. B. Mute Mutes the subwoofer output. C. Menu Navigation/Volume These controls allow you to navigate within the DSP menus, select parameters, and adjust them up or down through the available options. D. Exit Press this to exit from the DSP menus. All settings are left as they are. E. Night On/Off This turns on or off the Night mode, suitable for late night listening F. EQ Presets These five buttons allow quick selection of EQ presets: Impact, Movie, Music, Dynamic, and Flat. These EQ presets have been carefully designed for optimum performance. User's Manual Amplifier Installation Before using your subwoofer amplifier, please observe the following general precautions and read the safety instructions on page 2. Also read the manual that came with your Sunfire HRSIW8 in-wall subwoofer. • The amplifier may be rack mounted using the supplied rack ears. It will fit into a standard 1U, 19 inch rack space. Allow a minimum of 1 free rack space above and below for ventilation. This is very important. • The amplifier may also be placed on a shelf, supported on its feet. Make sure it is not placed on carpeting or similar that may obscure its ventilation openings. • Never open the amplifier cabinet as this might result in an electrical shock to you, or damage to the unit. There are no user-servicable components inside. • Protect the amplifier from prolonged exposure to direct sunlight and other direct sources of heat, such as heating vents and radiators. • To prevent fire or shock, do not expose the amplifier or subwoofer to rain or moisture. If fluid or a foreign object should enter either unit, immediately turn off the power and contact your Sunfire Dealer. • Avoid excessive exposure to extreme cold or dust. • Do not place heavy objects on top of the amplifier. Heat rise 10 • Allow adequate ventilation around the top and sides of the amplifier. • Allow adequate ventilation if you are rack-mounting the amplifier. AC Power Considerations Ensure that the amplifier is plugged into an outlet capable of supplying the correct voltage specified for your model. Unplug your amplifier’s power cord from the electrical outlet if it will be left unused for a long period of time. Route the power-supply cord so it is not likely to be walked on or pinched by items placed upon or against it, especially at plugs, convenience receptacles, and the point where it exits from the unit. Before making or changing any connections, ALWAYS make sure that the amplifier and your other components are turned OFF. Also turn down the volume control of the subwoofer amplifier and your preamplifier or receiver. Speaker Level connections The amplifier’s speaker level outputs can accept speaker wires with banana, dual-banana, bare wire, pins or spade terminals. If you have banana type connectors on your speaker wire, make sure that you tighten the binding posts before inserting. Make sure that the negative speaker wires never touch the positive wires as this will short out and possibly damage your amplifier. Magnetic Fields We recommend that you place your subwoofer further than two feet away from your TV, VCR, tape deck or computer, so the speaker’s magnet won’t distort the colors of your TV picture or erase your video tapes, audio tapes or computer discs. User's Manual System Configuration HRSIW8 Amplifier HRSIW8AMP Connect balanced or unbalanced inputs to the SUB/LFE line-level output of your home theater preamplifier or receiver. HRSIW8 In-Wall Subwoofer User's Manual 11 DSP Controls The DSP section of the amplifier is controlled either by using the front panel DSP control knob, or by using the remote control. In the details below, these three icons are used, and their explanation is as follows: Turn DSP Control left, or press the LEFT button on the remote control. Turn DSP Control Right, or press the RIGHT button on the remote control. Press the DSP Control in, or press the ENTER button on the remote control. Main Screen EQ Mode Normal Not Muted Night Mode On Muted Volume Level Output Signal Level SUB or LFE Mode Enable External Trigger Enable Lock Setting Auto-Off Setting 12 User's Manual Volume Volume Level Adjust the volume of the subwoofer to match the main front speakers. dB Level Increase Decrease The volume is adjustable from -79 to 0 dB. Subsonic Frequency Adjust the lower cutoff frequency from 16 to 40 Hz in 1 Hz steps, including a FLAT setting. The subwoofer will play the frequency range above the cutoff frequency. Freq. Decrease Increase Crossover Frequency Adjust the higher cutoff frequency from 40 to 160 Hz in 1 Hz steps. The subwoofer will play the frequency range below the cutoff frequency. The current crossover slope is also displayed. Freq. Increase Decrease If LFE is chosen in the SUB/LFE menu, then the crossover frequency and slope are set flat and are not adjustable (the menus are hidden). Crossover Slope Select the crossover slope from -12, -18, -24, -30, or -36 dB/octave. The current crossover frequency is also displayed. If LFE is chosen in the SUB/LFE menu, then the crossover frequency and slope are set flat and are not adjustable. Slope Decrease User's Manual Increase 13 The EQ Mode allows you to choose from five preset EQ settings to suit your listening program: Movie Music Dynamic Impact Defeat (Flat) EQ Mode EQ Mode Next Phase Select the phase from 0, 45, 90, 135, 180, 225, 270, and 315 degrees. Phase Increase The phase setting is used to adjust the phase/polarity of the subwoofer to provide the best summing to the main speakers. The physical placement and distance of the subwoofer in relation to the main speakers may result in unwanted cancellation of some of the bass and can be compensated for by adjusting the phase setting. The phase setting can be adjusted while listening for maximum or best bass performance or by using a real time analyzer and measuring the actual response of the system as a whole. Night Mode This menu is used to enable or disable the night mode. This feature allows good performance from the subwoofer while not upsetting a sleeping household. Enabled or Disabled 14 Select User's Manual Auto-Off Time Decrease Time Increase Time The amplifier will automatically turn to standby mode if no audio is present for an amount of time set using this menu. The amplifier will turn back on whenever an audio signal is present again. The available time settings are 5, 10, 15, 20, 25, and 30 minutes, and "Disabled." If "Disabled" is selected, then the amplifier will not turn itself off. SUB/LFE Mode In SUB Mode, the Crossover Slope and Crossover Frequency can be adjusted, and so these menus are available. SUB or LFE Select In LFE mode, the Crossover Slope and Crossover Frequency cannot be adjusted, and so these menus are hidden. The crossover adjustment is then left to the Home Theater preamplifier. Auto-Off The amplifier will automatically turn on from standby if a trigger voltage is applied to the 12VDC trigger input on the rear panel. This menu allows you to turn this feature on or off. ON or OFF Select Lock Setting This menu allows you to lock the DSP settings so that they cannot be altered. If lock is enabled then no settings can be changed until lock is disabled. Disable or Enable Select User's Manual 15 Memory Store All the settings of the DSP can be saved as a snapshot in one of three memory locations. This will allow you to quickly save your favorite settings. When the amplifier DSP settings are to your liking, go to this menu and save in memory 1, 2, or 3. Memory 1, 2, or 3 Down Up The memory recall menu will allow you to easily recall these settings at any time. Memory Recall This menu allows you to recall a previously-saved memory preset. All DSP settings will be recalled. Memory 1, 2, or 3 Down 16 Up User's Manual Specifications Amplifier Output 520 watts rms into 4Ω High Cut Filter 40 Hz - 160 Hz adjustable, with an LFE bypass position 12 - 36 dB/octave adjustable slope 12 VDC Trigger Input Input voltage range: 2.2 -13 VDC Impedance: approx 2800Ω (4.2 mA @ 12 V) 3.5 mm mono minijack, tip positive. Frequency Response 33 Hz - 150 Hz (-3 dB) Power Line Voltage US model 120 VAC 50/60 Hz International model 230 VAC 50/60 Hz Dimensions (H x W x D) 1.75" (1U) x 19" x 11.2" 44.5 mm x 482.6 mm x 284.5 mm Weight 13.5 lb. (6.12 kg) AC Line Power Consumption: 75 watts average, 0.5 watts in standby 815 watts maximum Output Levels: Greater than 106 dB peak SPL (includes room gain) Measurement is at 1 meter, anechoic Total Harmonic Distortion (amplifier): Less than 0.5% at 500W into 4Ω Input Sensitivity (full output): 23 mV rms at 38 Hz with volume control set to maximum Input Impedance: 49 kΩ for Line-Level input 20 kΩ for XLR input XLR Input Pin 1 Pin 2 Pin 3 Ground Positive Negative © 2012 Sunfire Corporation. All rights reserved. Sunfire Corporation reserves the right to improve its products at any time. Therefore, specifications are subject to change without notice. Manual 9901231 Rev A User's Manual 17 18 User's Manual Sunfire Limited Warranty Sunfire, a division of The AVC Group, LLC, is proud of its products which have been built with care using advanced technology and premium component parts. Your unit has been crafted to perform properly for many years. Sunfire offers the following Warranty to you, the owner of a new Sunfire product: Sunfire warrants the HRSIW8 amplifier to be free from defects in materials and workmanship for the period of ONE year from the date of purchase. If within the applicable warranty period above purchaser discovers such item was not as warranted above and promptly notifies Sunfire in writing, Sunfire shall repair or replace the items at the company’s option. This warranty shall not apply: (a) to equipment not manufactured by Sunfire. THE FOREGOING WARRANTIES ARE EXCLUSIVE AND IN LIEU OF ALL OTHER EXPRESSED AND IMPLIED WARRANTIES EXCEPT WARRANTIES OF TITLE, INCLUDING BUT NOT LIMITED TO IMPLIED WARRANTIES OF MERCHANTABILITY AND FITNESS FOR A PARTICULAR PURPOSE. ATTENTION: TO OUR VALUED CONSUMERS To insure that consumers obtain quality pre-sale and after-sale support and service, Sunfire products are sold exclusively through authorized dealers. Sunfire products are not sold online. The warranties on Sunfire products are NOT VALID if the products have been purchased from an unauthorized dealer or an online E-tailer. (b) to equipment which shall have been installed by other than an authorized Sunfire installer. Service Assistance (c) to installed equipment which is not installed to Sunfire’s specifications. We suggest that you read the Limited Warranty completely to fully understand your Warranty/Service coverage. If your Sunfire product ever requires service, contact your nearest Sunfire authorized dealer first. If, for any reason, you are un(e) to equipment which shall have been sub- able to receive service from your dealer you may write to us:. jected to negligence, accident, or damSunfire, age by circumstances beyond Sunfire’s control, including, but not limited to, The AVC Group / Return Center, lightning, flood, electrical surge, tornado, 2040 Creative Drive, Ste. 100 earthquake, or any other catastrophic Lexington, events beyond Sunfire’s control, or to KY 40505-4304 improper operation, maintenance or You will be directed to an authorized Sunfire storage, or to other than normal use of Service Station or receive instructions to service. ship the unit to the factory. Please save the With respect to equipment sold by, but not original shipping carton and packing materimanufactured by Sunfire, the warranty als in case shipping is required. Please do obligations of Sunfire shall in all respects conform and be limited to the warranty actu- not ship Parcel Post. ally extended to Sunfire by its supplier. The NOTE: Before sending in your unit for repair, foregoing warranties do not cover reimyou must call Sunfire for return authorization. bursement for labor, transportation, removal, installation, or other expenses which may Include a complete description of the probbe incurred in connection with repair or lem, indicating how you have it connected, replacement. the associated equipment in your system Except as may be expressly provided and and a copy of your purchase receipt. Initial authorized in writing by Sunfire, Sunfire shall shipping costs are not paid by Sunfire; not be subject to any other obligations or return ground shipping costs will be prepaid liabilities whatsoever with respect to equipif repairs were covered by the scope of this ment manufactured by Sunfire or services Warranty. rendered by Sunfire. (d) to equipment which shall have been repaired or altered by others than Sunfire. User's Manual 19 HRSIW8AMP High Resolution Series In-Wall Subwoofer Amplifier HRSIW8 Sunfire 1969 Kellogg Ave., Carlsbad, CA 92008 www.sunfire.com Manual 9901231 Rev A