Transcript
ENGLISH
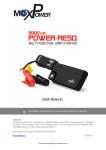
MAXPOWER WTP450 User’s Manual
IMPORTANT (Please read before using this product)
• Thank you for purchasing our product.
• To get the most from your WTP450, please read this manual
thoroughly.
BASICS
1.1 Universal Plugs
Select the appropriate plug in WTP450 [see Figure (1)] (Note:
WTP450 does not apply to voltage conversion).
1.2 USB Output
USB output (5V/2.1A) [see Figure (2)] for charging any of your
5V portable device.
Figure (5)
Figure (11)
USB
DC Output :
5VDC 2.1A
Figure (2)
Figure (1)
1.3 Status Indicator
Figure (6)
The status indicators on WTP450 [see Figure (3)] display
different operation conditions.
Figure (12)
2.4 Restore Factory Settings
Status
POWER
Illuminated: Connected with power supply
• Connect WTP450 with the power supply.
WAN/LAN
Illuminated: No signal is detected
• Use a paperclip to press the <RESET> button [see Figure (13)].
Flashing:
• Press for 6 seconds and release the <RESET> button.
WiFi
Network signal is detected
• Wait for about 8 seconds until both the WAN/LAN and WiFi
Status Indicators are off [see Figure (3)].
Illuminated: Wireless connection is ready
Flashing:
Wireless connection is activating
• While the WAN/LAN Status Indicator is on and the WiFi Status
Indicator starts flashing, the reset process is completed.
WAN/LAN Port
Status Indicator
Figure (7)
Figure (3)
Figure (13)
SET UP A WIRELESS CONNECTION
TECHNICAL SUPPORT AND CUSTOMER SERVICE
2.1 How to Add a New Wireless Connection
If you need any technical support or customer service, please
contact your local authorised dealers.
• Connect WTP450 with the power supply.
• Plug the network cable to the WAN/LAN Port [see Figure (3)].
Maxpower USA
• Search and connect the device “Travel_WiFi-XXXX” on your
consumer electronic device or computer (Note: “XXXX” denotes
the default product ID printed on WTP450) [see Figure (4)].
2033 Gateway Place, Suite 500
San Jose, CA 95110, USA
• Input WTP450 default password “12345678”.
Customer Service (US / Canada Toll Free):
• Connection set up completed and enjoy surfing the Internet.
1-800-390-0193
Default Product ID
www.maxpower.us.com
Figure (8)
Figure (4)
2.2 How to Change Service Set Identifier (SSID)
and Password
• Connect WTP450 with the power supply. (Note: please DO
NOT connect a network cable)
• Search and connect the device SSID “Travel_WiFi-XXXX” on
your consumer electronic device or computer. (Note: “XXXX”
denotes the default SSID printed on WTP450)
• Input WTP450 default password “12345678”.
• Start a web browser on your device and enter
http://192.168.16.254 in the URL to enter the Quick Setting
page.
• Press <Exit> and enter the Advanced Setting page [see
Figure (5)].
Figure (9)
• To change the SSID, press <Basic> on the Advanced Setting
page, and enter the new SSID in “Network Name (SSID)” field,
click <Apply> to proceed [see Figure (6)].
• To change the password, press <Security> on the Advanced
Setting page, and enter the new password in “Pass Phrase”
field, click <Apply> to proceed [see Figure (7)].
2.3 How to Extend the Range of Wireless Network
Coverage
• Connect WTP450 with the power supply. (Note: please DO
NOT connect a network cable)
• Search and connect the device SSID “Travel_WiFi-XXXX” on
your consumer electronic device or computer. (Note: “XXXX”
denotes the default SSID printed on WTP450)
• Input WTP450 default password “12345678”.
• Start a web browser on your device and enter
http://192.168.16.254 in the URL to enter the Quick Setting
page.
Figure (10)
• Enter WTP450 SSID and password (To change, please see
Section 2.2), press “Next” [see Figure (5)].
• Choose <Wireless Connection> and press <Next> [see
Figure (8)].
• Choose the SSID of the external wireless device that you
intend to extend the wireless network coverage and press
<Next> (if no external wireless device is found, press
<Re-Scan> to search again) [see Figure (9)].
• Input the password of the external wireless devices (if no
password is needed, skip this step) and press <Next> [see
Figure (10)].
• Wait about 60 seconds for setting [see Figure (11)].
• Press <OK> when the connection setup is completed [See
Figure (12)].
Version 1.0
Copyright © 2014 Maxpower. All Rights Reserved.
D13848-UM-ENG
