1
Numerical Distance Protection Relay
Commissioning and Testing
Hung Manh Tran
Henry Akyea
Thesis for the Degree of Master of Science, October 2005
Department of Energy and Environment
Division of Electric Power Engineering
Chalmers University of Technology
Göteborg, Sweden
Titel
Drift sättning och provning av ett numeriskt distansskydd
Title in English
Numerical Distance Protection Relay Commissioning and Testing
Författare/Author
Hung Manh Tran
Henry Akyea
Utgivare/Publisher
Chalmers tekniska högskola
Institutionen för Energi och Miljö Avdelningen för elteknik
412 96 Göteborg, Sverige
Ämne/Subject
Power Systems
Examinator/Examiner
Prof. Jaap Daalder
Datum/Date
2005-10-06
Tryckt av/Printed by
Chalmers tekniska högskola
412 96 GÖTEBORG
ii
iii
Acknowledgements
This work has been carried out at the Division of Electric Power Engineering,
Department of Energy and Environment, Chalmers University of Technology,
Göteborg, Sweden.
We would like to thank our examiner Prof. Jaap Daalder, our supervisors Dr. Daniel
Karlsson at Chalmers and Lars-Göran Andersson at ABB Company for their support
during the work.
Many thanks to Massimo Bongiorno at the Division of Electric Power Engineering for
all his help in running the line model. We also wish to thank Jan-Olof Lantto for his
network and computer support.
Hung Manh Tran would like to thank his parents, especially his sister, brother in-law,
and his girlfriend Tran Huong Lien for all their supports throughout the years.
Henry Akyea would like to extend my appreciation to my twin sister Henrietta Akyea
for her financial support.
iv
v
Acknowledgement
Contents
1
Introduction
1
2
Line Protection
2.1 Overcurrent protection…………………………..……………………….....
3
3
2.1.1 Definite current relays…………………………………………...…...
4
2.1.2 Definite time relays…………………………………..………….…...
5
2.1.3 Inverse time relays……………………………………..…………….
5
2.1.4 Setting for overcurrent protection………………………..…….…….
5
2.2 Differential protection…………………………………………...…….……
6
2.1.1 Longitudinal differential………………………………………….…….
8
2.1.2 Transverse balanced differential…………………………...….……….
8
2.1.3 Transverse differential directional protection………………..………...
9
2.14 Applications…………………………………………………..…….…...
10
2.3 Distance protection………………………………………………..……..….
12
2.2.1 Basic principles……………………………………….……….……….
12
2.2.2 Setting of the distance zones…………………………..…………….....
13
2.2.3 Relay characteristics……………………………..………...…………...
14
2.2.4 Distance relay types……………………………...…………………..…
15
2.2.5 Numerical relay……………………………………..……………….…
16
2.2.5.1 Structure of numerical relays…………………..…..………….
16
2.2.5.2 Relay algorithm…………………………………..……………
18
Results using Line distance protection REL 511*2.3
3.1 Laboratory set up………………………………….….……..………………
20
20
3.2 Line model…………………………………………..…………..…………..
21
3.3 Numerical relay REL 511*2.3……………………..……………..…………
22
3.4 Installation and set up for REL 511*2.3…………………………....…….…
23
3.4.1 Relay installation………………………………..…………...…………
23
3.4.2 Configuration and tools used………………...……………...………….
26
3.4.3 The initial set of the relay……………………………...……...………..
29
3.5 Parameter setting……………………………….……………..….…………
29
3
vi
4
3.5.1 Setting for analogue inputs modules… … … … … … … … … … … ..… .…
30
3.5.2 Setting for distance zones… … … … … … … … … … … … … … … ..… ..…
31
3.5.3 Setting for the general fault criteria GFC function block… ..… … .… .…
35
3.5.4 Setting for the fault locator FLOC function block… … … … ..… … … …
35
3.5.5 Setting for the miscellaneous function blocks… … … … … … … ..… .… .
36
3.6 Results using numerical relay REL 511*2.3… … … … … … … .… … … .… …
37
3.6.1 Three-phase faults… … … … … … … … … … … … … … … … … ...… … …
37
3.6.1.1 Zone 1… … … … … … … … … … … … … … … … … … ...… .… … .
38
3.6.1.2 Zone 2… … … … … … … … … … … … … … … … … … ..… ..… … .
39
3.6.1.3 Zone 3… … … … … … … … … … … … … … … … .… … ...… … … .
39
3.6.2 Single-phase to ground fault… … … … … … … … … … … … .… .… … … ..
40
3.6.2.1 Zone 1… … … … … … … … … … … … … … … … … .… … … ...… .
40
3.6.2.2 Zone 2… … … … … … … … … … … … … … … ...… .… … … … … .
42
3.6.2.3 Zone 3… … … … … … … … … … … … … … … … ...… .… … … … .
43
3.6.3 Double-phase to ground faults… … … … … … … … … … … ..… … … … ..
45
3.6.3.1 Zone 1… … … … … … … … … … … … ...… … … ...… … … … ...…
45
3.6.3.2 Zone 2… … … … … … … … … … … … … … ...… … … … ...… ...…
47
3.6.3.3 Zone 3… … … … … … … … … … … … … … ..… … … … … … ...…
48
3.6.4 Double-phase faults… … … … … … … … … … … … … ...… … … ..… … …
50
3.6.4.1 Zone 1… … … … … … … … … … … … … … ...… … ..… … ...… … .
50
3.6.4.2 Zone 2… … … … … … … … … … … … … ..… ...… … … ..… .… … .
52
3.6.4.3 Zone 3… … … … … … … … … … … … … … ..… … … … … ..… … .
53
Conclusions and further work
4.1 Conclusions… … … … … … … … … … … … … … … … .… … … … … … … ...…
55
55
4.2 Further work… … … … … … … … … … … … … … … ...… … … … … … ...… .....
56
References
57
Appendix A: Laboratory for undergraduate student
58
Appendix B: Relay set up manual
73
Appendix C: Relay configuration
78
vii
Chapter 1
Introduction
The diploma work proposal is entitled “Numerical Distance Protection Relay
Commission and Testing” with the aims to calculate appropriate settings for the
protection relay, configure the relay, install, commission and testing the entire
protection.
The numerical distance protection relay used is REL 511*2.3 of ABB Company,
which detects both phase-to-phase and phase-to-earth faults, and it has a quadrilateral
operating characteristics. The REL 511*2.3 has been connected to a network model
through three single-phase voltage transformers and three current transformers. A
three-phase resistive load of 9 kW has been connected to the line model.
The power line model operates at 400 V that is a three-phase model of a 400 kV
transmission system, thus the voltage scale of the model is 1: 1000. The line model
consists of six identical π-sections each corresponding to 150 km of 400 kV line. The
π-sections are made of series reactors and shunt capacitors, which can be connected
arbitrarily in series or in parallel. In this experiment the π-sections have been
connected in series.
The line impedances are proportional to the line lengths and this property has been
used to calculate the distance from the relay location to the fault. The relay has been
fed with the measured current and voltage signals from the primary side through the
current and voltage transformers, thus the secondary values have been used for the
settings of all parameters.
1
The following function blocks have been configured into the relay with their
appropriate parameter settings; distance protection function, overcurrent function,
voltage and supervision function, trip logic, internal signals, binary input and output,
human machine interface (HMI) LED, disturbance report and events for station
control system.
The test faults performed in zones 1, 2 and 3 are three-phase fault, single-phase to
ground fault, double-phase to ground fault, and double-phase fault. After each test, the
disturbance report has been uploaded into a PC for evaluation using the REVAL tool
made by ABB.
The relay has responded positively to all types of faults mentioned above and can be
configured to suit with the line model.
2
Chapter 2
Line protection
2.1
Overcurrent protection
It is common to use current magnitude to detect faults in distribution networks. Faults
on the system bring about very high current levels. It is possible to use these currents
to determine the presence of faults and trigger protective devices, which can vary in
design in relation to the complexity and accuracy required.
Overcurrent relays are the most common form of protection used to deal with
excessive currents on power systems. They should not be installed purely as a means
of protecting systems against overloads, which are associated with the thermal
capacity of machines or lines, since overcurrent protection is primarily intended to
operate only under fault conditions. However, the relay settings selected are often a
compromise in order to cope with both overload and overcurrent conditions.
Based on the relay operating characteristics, overcurrent relays can be classified into
three groups: definite current, definite time and inverse time. The characteristic curves
of these three types are shown in Figure 2.1 [1].
3
t
t
A
Definite current
Definite time
A
t
Inverse definite minimum time
A
Figure 2.1 Time / current operating characteristics of overcurrent relays
2.1.1 Definite current relays
This type of relays operates instantaneously when the current reaches a predetermined
value. The setting is chosen so that, at the substation furthest away from the source,
the relay will operate for a low current value and the relay operating currents are
progressively increased at each substation, moving towards the source. Thus, the relay
with the lower setting operates first and disconnects load at the point nearest to the
fault.
This type of protection has the drawback of having little selectivity at high values of
short-circuit current. Another disadvantage is the difficulty of distinguishing between
the fault current at one point and another when the impedance between these points is
small in comparison to the impedance back to the source, leading to the possibility of
poor discrimination.
Definite current relays are not used as the only overcurrent protection, but their use as
an instantaneous unit is common where other types of protection are in use [1].
4
2.1.2 Definite-time relays
This type of relay enables the setting to be varied to cope with different levels of
current by using different operating times. The settings can be adjusted in such a way
that the breaker nearest to the fault is tripped in the shortest time and then the
remaining breakers are tripped in succession, using longer time delays, moving back
towards the source. The difference between the tripping times for the same current is
called the discrimination time.
Since the operating time for definite time relays can be adjusted in fixed steps, the
protection is more selective. The disadvantage with this method of discrimination is
that faults close to the source, which result in bigger currents, may be cleared in a
relatively long time. These relays are used a great deal when the source impedance is
large compared to that of the power system element being protected, when fault levels
at the relay position are similar to those at the end of the protected element [1].
2.1.3 Inverse time relays
The fundamental property of inverse time relays is that they operate in a time that is
inversely proportional to the fault current. Their advantage over definite time relays is
that, for very high currents, much shorter tripping times can be obtained without risk
to the protection selectivity. Inverse time relays are generally classified in accordance
with their characteristic curve, which indicates the speed of operation; based on this
they are defined as being inverse, very inverse or extremely inverse [1]
2.1.4 Setting for overcurrent protection
The principles for setting instantaneous units differ relative to the location and on the
type of system component being protected. Three groups of component can be defined
– lines between substations, distribution lines and transformers [1].
Lines between substations
The setting of instantaneous units is carried out by taking at least 125% of the
symmetrical root mean square (rms) current for the maximum fault level at the next
substation. The procedure must start from the furthest substation, then continued by
moving back towards the source.
5
When the characteristics of two relays cross at a particular system fault level, thus
making it difficult to obtain correct coordination, it is necessary to set the
instantaneous unit of the relay at the substation which is furthest away from the source
to such a value that the relay operates for a slightly lower level of current, thus
avoiding loss of coordination. The 25% margin avoids overlapping the down-stream
instantaneous unit if a considerable DC component is present. In high voltage systems
operating at 220 kV or above, a higher value should be used since the X/R ratio
becomes larger, as does the DC component.
Distribution lines
The setting of the instantaneous elements of relays on distribution lines, which supply
only pole-mounted MV/LV transformers, is dealt with differently to the previous case,
since these lines are at the end of the MV system. They therefore do not have to fulfil
the coordination conditions that have to be met by the lines between substations.
Therefore, the setting for these units is 50% of the maximum short-circuit current at
the relay location, or between six and ten times the rated current.
Transformer units
The instantaneous units of the overcurrent relays installed on the primary side of the
transformer should be set at a value between 125 and 150 per cent of the fault current
existing on the low-voltage side. This value is set higher than the transformer
magnetic in rush current when energising the transformer in order to avoid lack of
coordination. If the instantaneous units of the transformer secondary winding
overcurrent protection and the feeder relays are subjected to the same short-circuit
level, then the transformer instantaneous units need to be overridden to avoid loss of
selectivity. This applies unless there are communication links between these units,
which can permit the disabling of the transformer instantaneous overcurrent
protection for faults detected by the feeder instantaneous overcurrent protection.
2.2
Differential protection
Differential protection operates when the vector difference of two or more similar
electrical magnitudes exceeds a predetermined value.
An example of differential arrangements is shown in Figure 2.2 [1]. The secondaries
of current transformers (CTs) are interconnected, and the coil of an overcurrent relay
6
is connected across these. Although the currents I1 and I2 may be different, provided
that both sets of CTs have appropriate ratios and connection then, under normal load
conditions or when there is a fault outside the protection zone of the element,
secondary currents will circulate between the two CTs and will not flow through the
overcurrent relay.
If a fault, however, occurs in the section between the two CTs the fault current would
flow towards the short-circuit point from both sides and the sum of the secondary
currents would flow through the differential relay. In all cases the current in the
differential relay would be proportional to the vector difference between the currents
that enter and leave the protected element; if the current through the differential relay
exceeds the threshold value then the relay will operate.
I1
CT1
CT2
Protected Element
I1
NR
I2
I2
NR = Restraint coil
NOP = Operating coil
NOP
Figure 2.2 Differential relay with variable-percentage characteristics
The differential protection has the following advantages [2]
•
Differential current protection does not react in principle to external short-circuits
and therefore does not require the time lags to be coordinated with the protection
of the adjacent sections of the line.
•
Differential current protection does not react to peak currents caused by overload
or swings and therefore it has high sensitivity.
The main types of differential current protection are [2]:
•
Longitudinal differential current protection of lines comparing the currents at the
beginning and end of the protected section,
•
Transverse differential protection of parallel lines, balanced or directional
comparing the currents in the parallel circuits,
•
Differential current protection of bus bars.
7
2.2.1 Longitudinal differential
This is used on sections of small length (up to 5km in 35kV networks and up to 10km
in 110kV networks) in those cases where the currents cut-offs or distance protection
does not conform to requirements in speed, selectivity and sensitivity. The pilot
conductors along the track of the transmission line carry out current comparison at the
end of the protected section.
Phase currents are not usually compared, but rather the currents at the output
terminals of summators or combined filters at the end of the protected section, which
transform the three-phase system of currents into a single-phase system.
Types of longitudinal differential current protection for transmission lines are:
•
Circulating currents – In a scheme with circulating currents under normal
conditions and with an external short-circuit, a current circulates in the pilot
conductors. The differential relays at both ends of the protected section are so
connected that when there is no fault in the protected zone, braking torques arise
there which prevent the relay from tripping. In the presence of short-circuit in the
protected zone, the equality of the ampere-turns of the primary winding of the
differential current transformer is disturbed and the relay working winding
becomes energised.
•
Balanced voltages – In a scheme with balanced voltages, under normal conditions
and in the presence of an external short-circuit there is no current in the pilot
conductors. In the presence of a short-circuit within the zone of protection, the
equilibrium of the secondary winding voltages of the isolating transformer is
disturbed, the secondary winding carries current and the impedance between the
terminals of the primary winding is reduced. The working winding of the
differential relay then takes the current of the summation, the working torque
exceeds the braking torque and the relay causes tripping.
2.2.2 Transverse balanced differential
Balanced current protection is a type of transverse differential protection of parallel
lines. It is based on a comparison of the magnitudes of the currents passing through
the lines. It is established at that end of the line, which is constantly connected to the
source.
8
For equal impedance parallel lines, under normal conditions, or in the presence of an
external short-circuit, the balanced relays will not operate due to the similar
distributed currents. In the presence of a short-circuit on one of the parallel lines, the
larger part of the current from the source passes along the faulty line, while the
smaller part passes along the undamaged lines. In this circumstance, the balanced
relay will trip the faulty line.
At the receiving end of the parallel lines, without an additional feed source, the
currents in the presence of short-circuit on one of these lines are equal in magnitude
but opposite in direction. A balanced relay that reacted to the ratio of the current
magnitudes and not to their direction would, in this case not operate.
2.2.3 Transverse differential directional protection
It is a type of high-speed protection of parallel lines. It can be established at any end
of the parallel lines. The principle of transverse differential directional protection is
illustrated in Figure 2.3 [2]. The secondary windings of the current transformers are
connected cross-wise, that is, the beginning of the windings of one current
transformer are connected to the end of the windings of the second current
transformer. As a result we have the series connection of the windings of both current
transformers as a ‘figure eight’. A current relay (starting device) and a power
directional relay (directional device) are connected in series between the same
terminals. Thus, the relays are connected to the current difference of the protected
parallel lines.
I1
I1-I2
I2
I2
2I2
I2
Figure 2.3 Principle of transverse differrential and directional protection
Under normal conditions or in the presence of an external short-circuit; the secondary
currents along the parallel lines are the same in magnitude and direction. Thus, the
9
resulting current in the relay is zero; the currents only circulate in the current
transformer windings.
When there is short-circuit on one of the parallel lines, the equality of the current is
disturbed and a current begins to pass through the relay equal to the difference of the
secondary currents. If it exceeds the setting of the current relay, then the latter starts
the protection, closing the voltage circuit of the power directional relay. If one of the
parallel lines is taken out of service or faulted, only one power directional relay will
operate, the contacts of the second directional relay remaining open.
2.2.4 Applications
Differential Protection for Bus bars
Short-circuit on bus bars can have very serious consequences for the operation of the
power system. The most widely used and acceptable type of protection for 35 –
220kV bus bars is high-speed differential protection. It is based on Kirchhoff’s current
law that requires the sum of all currents entering the bus to sum to zero. Should an
internal fault occur, however, the sum currents measured at current transformer
locations will not be zero, and tripping should occur. This type of bus protection for
one phase is shown in Figure 2.4 [3].
The current transformer secondaries are added together to give the sum of the currents
in all four lines; and the sum is sent to the differential relay. In case a fault occurs that
is external to the CT connections, say at the point 1 in the Figure 2.4, the total current
flowing to that fault will be exactly equal to the total current entering the bus on lines
2, 3, 4 and no current will flow to the differential relay. However, if a fault occurs on
the bus, between phases or from phase to ground, the sum of the line currents will
equal the total bus fault current and the relay will correctly measure this quantity.
Differential relay
1
2
3
Figure 2.4 Bus differential protection
10
4
Differential Protection for Transformer
A transformer suffers from different types of stresses; overheating and short-circuit.
Short-circuit protection includes internal short-circuit, such as turn-to-turn faults and
turn-to-ground faults. It also includes external short circuits for example bushing
flashovers that are also within the protection zone of the relays. The most common
form of transformer protection is differential relaying, which treats the transformer as
a unit making measurements at all of the transformer terminals.
In applying the principles of differential protection to three-phase transformers, the
CT connections should be such that, the relay does not operate for normal load or for
external faults and the relay must operate for internal faults of a given severity.
A rule of thumb often applied to the connection of CTs for power transformer
protection is as follows:
•
CTs on a wye-connected winding should be connected delta
•
CTs on a delta-connected winding should be connected in wye.
Making the connection in this way ensures that, for external faults, the CT secondary
currents are equal and the differential protection will not trip the transformer [3].
Differential Protection for Generators
Differential protection for generators is similar to that for transformers in many ways.
Internal generator winding faults include phase-to-phase short circuits, short-circuited
turns, open circuits and faults to earth and should be disconnected by opening the
circuit as quickly as possible, the neutral of the generator should be well earthed,
either solidly or via a resistor or a reactor. The differential protection should satisfy
the following requirements, it should [1]:
•
Be sensitive enough to detect damage in the winding of the generator stator, and
yet not operate for faults outside the machine
•
Operate quickly in such a way that the generator is disconnected before any
serious damage can result
•
Be designed so that the main breaker is opened as well as the neutral breaker and
the field-circuit breaker.
11
Line Differential Protection
The form of differential protection using only one set of relays is not suitable for long
overhead lines since the ends of a line are too far apart to be able to interconnect the
CT secondaries satisfactorily. It is therefore necessary to install a set of relays at each
end of the circuit and interconnect them by some suitable communication link. Pilot
protection (indicates that there is an interconnecting channel between the ends of the
lines through which information can be transmitted) is an adaptation of the principles
of differential protection that can be used on such lines.
The principle of operation of pilot differential protection is similar to the differential
systems for protecting generators and transformers, but the relays have different
settings because the breakers at the ends of the line are more widely separated and a
single relay should not be used to operate two tripping circuits. For this method of
protection both ends of the line should open instantaneously for faults wherever they
occur on the line. In addition, the system should not operate for faults outside the
section and is therefore inherently selective [1].
2.3
Distance protection
2.3.1 Basis principles
The distance protection relay measures the line voltage and line current at the relay
location and evaluates the ratio between these quantities. We consider the relay at the
station A in Figure 2.5,
C
Relay
A
fault
B
Figure 2.5 Fault occurs in a power system
When a fault occurs on the protected line the fault current I f and voltage U f is fed
into the relay. The relay should trip for faults within a fractional distance k, which is
called “the reach setting ” of the distance relay, of the total distance between buses A
and B. The reach given in distance unit, thus, is a tripping threshold.
12
Considering a solid fault at the threshold point C, we calculate the voltage drop along
the line,
U f = kZ L I f
(2.1)
where Z L = total line impedance from A to B
The impedance Z k seen by the relay is computed as follow,
Zk =
Uf
If
= kZ L
(2.2)
Equation (2.2) expresses the threshold or the impedance characteristic of the relay.
During normal system operation, the impedance seen by the relay is approximately
equal to the load impedance that is much larger than the line impedance.
If the fault is within the fraction k, then the measured impedance at the relay is,
Z < Z k = kZ L
(2.3)
The impedance to the fault point is now within the impedance protection
characteristic and the relay will operate. Obviously, the relay will not trip for the fault
beyond the fraction k.
The impedance characteristic of the relay can be chosen so that the reach is different
for different phase angles of the apparent impedance.
2.3.2 Setting of the distance zones
Line impedances are proportional to the line lengths and this property is used to
calculate the distance from the relay location to the fault. The relay, however, is fed
with the current and voltage measured signals from the primary system via instrument
transformers CT and VT. Therefore, the secondary value used for the setting is
obtained as the following expression,
13
I pri
Z sec =
where
I pri
I sec
and
U pri
U pri
U sec
I sec
Z pri
(2.4)
U sec
are the transformation ratios of the current and voltage
transformers, respectively.
In order to cover a section of the line and to provide back-up protection to remote
sections, three main protection zones, see Figure 2.6, are set up with the following
criteria:
•
Zone 1: this is set to protect between 80% and 85% of the line length AB and
operates without any time delay.
•
Zone 2: this is set to protect 100% of the line length AB, plus at least 20% of the
shortest adjacent line BC and operates with time delay t2.
•
Zone 3: this is set to protect 100% of the two lines AB, BC, plus about 25% of the
third line CD and operates with time delay t3.
Zone 3
Zone 2
Zone 1
t
t3
t2
x
Relay
B
A
C
D
Figure 2.6 Distance-relay protection zones
2.3.3 Relay characteristics
The shape of the operation zones has developed throughout the years. Figure 2.7 [4]
gives an overview of relay characteristic. Originally the operating characteristic was a
circle located in the origin of the co-ordinates in the R-X plane of the impedance
relay. This type of relay, however, is non-directional and sensitive to power swings
and load encroachment due to the large impedance circle. Therefore, the circle
14
diameter was reduced and its origin passed through the origin of the co-ordinates
resulting in the mho relay.
Relays with combined characteristics are obtained by added a mho circle with lines
parallel to the resistive and reactive axes which cross each other at the setting
point Z k .
Modern distance relays, especially the numerical types, offer quadrilateral
characteristic, whose resistive and reactive reach can be set independently.
X
X
R
R
Mho
Impedance
X
X
Zk
Zone 3
Zone 2
Zone 1
R
Combined characteristic
R
Quadrilateral characteristic
Figure 2.7 Relay characteristics
2.3.4 Distance relay types
Distance relays are categorized in two major schemes; switched scheme and full
scheme. The block schemes for a switched scheme and full scheme are illustrated in
Figure 2.8 [5]. In a switched relay, the start elements detect a fault. These elements
15
together with logic blocks determine the correct input signals with respect to the fault
type. Zones of operation are decided by timer block. Measuring elements and
directional elements decide if the impedance is inside a certain zone and the direction
to the fault, respectively. The full scheme relay does not have the start elements. It has
measuring elements for each phase, each zone and both phase to phase and phase to
ground faults. The operation is faster than that of switched relays.
Start elements
R
S
T
0
R-S
S-T
T-R
R-0
S-0
T-0
Timer zones (1,2,3)
Logic
Timers
Measuring elements
And
Directional elements
Tripping
relay
Full scheme
Tripping
relay
Switched scheme
Figure 2.8 Block shemes for a switched and full scheme distance relay
2.3.5 Numerical relay
2.3.5.1
Structure of numerical relays
A numerical relay consists of the following main subsystems:
•
Microprocessor
•
Analog input system
•
Digital output system
•
Power supply
16
Figure 2.9 [6] shows a block scheme of a typical numerical relay
Input signal
Relay Output
Analog Input System
Digital Output System
Surge filter
Independent Power Supply
Anti-aliasing Filter
Power Supply
Digital Output
Pre-set Threshold
A/D Sample/Hold
Relay Algorithm
(Digital Filter)
Processor
Figure 2.9 Block diagram of a numerical relay
Numerical relays operate on sampled signals and adopt digital computations.
Sampling is the process of converting analog input signals, such as current and
voltage, into digital input signals. These analog input signals, in case of
electromechanical and static relays, are directly fed into the electromagnetic winding
or electronic circuits. In order to protect the relay from large transients of the input
signals a surge filter is used.
An anti-aliasing filter is used to avoid possible errors in reconstructing the input signal
carried out after the A/D Sample/Hold section. Any signal having harmonic
components of order N ± 1, 2N ± 1, … , x N ± 1, where N is the number of samples per
cycle, can exhibit aliasing. Perfectly, an anti-aliasing filter has to cut off all signal
components above the Nyquist rate of N/2. In practical, however, such a filter can not
cut off all out of band frequencies, so the anti-aliasing filter cut off frequency is set at
about N/3.
The A/D converts the sample values that represent the analog input signals into the
digital input signals. However, the conversion is not instantaneous, and for this
reason, the A/D system typically includes a sample-and-hold circuit. The sample-andhold circuit provides ideal sampling and holds the sample values for quantization by
the A/D converter.
17
The microprocessor containing the relay algorithm is the controller of the numerical
relay. The microprocessor most often performs all control, computation, self-test, and
communication functions. The algorithm functions as a digital filter to extract the
fundamental component of the input signal, based on which the relay operation is
carried out.
The signal from the digital filter is compared with the pre-set threshold in the digital
output system. The relay operation is decided based on this comparison.
2.3.5.2
Relay algorithm
The algorithm is designed to remove as much as possible all of unwanted components
from the input signals such as harmonic, DC, etc. Two common algorithms will be
discussed here, the Discrete Fourier Transform (DFT) and the Root Mean Square
(RMS) algorithm [7].
Discrete Fourier Transform (DFT)
The Discrete Fourier Transform is a discrete time version of the Fourier Transform
and shown as follow,
N −1
X (n) DFT = ∑ x[k ]e
− j 2πk
n
N
(2.5)
k =0
where n is the harmonic number, k is the sample, N is the number of samples per
cycle, and j means it is imaginary number.
In Equation (2.5), the exponential term is,
e
− j 2πk
n
N
= cos(2πk
n
n
) − j sin( 2πk )
N
N
(2.6)
The magnitude of the DFT is computed by squared root the total of the real part
squaring and the imaginary part squaring. The angel of the phasor is computed by
taking the arc tangent of the imaginary part over the real part.
18
The DFT can extract any frequency from the signal. Since the DFT is capable of
rejecting everything except the frequency being measured, it has a good response to
transient overshoot.
Root Mean Square (RMS)
The Root Mean Square is a method of calculating the magnitude of a periodically
varying quantity. It can be calculated for a series of discrete values or for a
continuously varying function.
The RMS for a collection of N values {x1, x2, ..., xN} is,
X RMS =
1
N
N
∑X
k =1
2
k
(2.7)
and the corresponding formula for a continuous function x(t) defined over the interval
T1 ≤ t ≤ T2 is,
T
X RMS =
2
1
x 2 (t ) dt
T2 − T1 T∫1
(2.8)
The RMS algorithm is useful for applications where measuring energy content to
approximate heating characteristics is desirable.
19
Chapter 3
Results using Line distance protection
REL 511*2.3
3.1
Laboratory set up
A single-line diagram of the laboratory setup of the testing is shown in Figure 3.2.
The REL511*2.3 has been connected to the network model through three single-phase
voltage transformers and three current transformers. A three-phase resistive load of
9 kW has been connected to the line model. A fault in the line can be made through a
variable fault resistance by closing a contactor controlled by a timer. The timer and
the contactor is also used to clear the fault. Figure 3.1 is a picture of the real setup in
the laboratory.
Figure 3.1 Photo of laboratory setup
20
Timer
Fault resistor
Contactor
Line model
STRONG
GRID
Load
REL 511*2.3
Optical wire
Figure 3.2 Single-line diagram of the laboratory setup
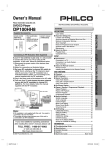
3.2
Line model
The power line model is a three-phase model of a 400 kV transmission system. The
entire model operates at 400 V consequently the voltage scale is 1:1000 [8]. As can be
seen in Figure 3.3, the line model can be fed using the local distribution line denoted
as strong grid, or a synchronous generator.
Line model
STRONG
GRID
Rm
Cm
Rm
Lm
Cm
Cm
Synchronous
generator
Lm
Cm
Figure 3.3 Single-line diagram of the line model
The line model consists of six identical π-sections, each corresponding to 150 km of a
400 kV line. Each section includes series reactors (denoted by Rm and Lm ) and shunt
capacitors (denoted by C m ). The sections can be connected arbitrarily in series or in
parallel. In these experiments, the π-sections have been connected in series, and the
line model has been supplied by a strong grid.
21
The data for the real 150 km section of the 400 kV line are,
X r = 50.4 Ω
Rr = 4.17 Ω
C r = 0.065767 µF
An impedance scale of 1:53.2 gives the corresponding values of the line model.
3.3
Numerical relay REL 511*2.3
Numerical relay REL 511*2.3 shown in Figure 3.4 is based on a full scheme distance
protection function. REL 511*2.3 detects both phase-to-phase and phase-to-earth
faults and it has quadrilateral operating characteristics. A separate general fault
criterion with advanced characteristics is used for phase selection and as an overall
measuring function, which increases the total operating security and facilitates remote
backup applications.
The numerical REL 5xx line distance protection terminals are designed for the main
and backup protection, monitoring and control of power lines, cables and other
primary objects. They can be used in systems with simple or complex network
configurations regardless of the type of system grounding.
Figure 3.4 Photo of REL 511*2.3
22
3.4
Installation and set up for REL 511*2.3
3.4.1 Relay installation
DC supply
The relay uses 48V-250VDC supply. Therefore, a converter having input of 200VAC240VAC and output of 0VDC-120VDC is used to energize the relay. The connection
is shown in Figure 3.5. As shown in the figure, the converter output is connected to
the relay through the terminals 11 and 13.
Figure 3.5 Terminal diagram for DC supply
23
CTs
connection
VTs
connection
DC
connection
Figure 3.6 Connection on the rear side of the relay
CTs and VTs
Three single-phase voltage transformers (VTs) are connected to the line model as
shown in Figure 3.1. The voltage transformer input is 230V and four outputs are 69V,
115V, 161V and 230V. Since the relay input is Ur =100-120V phase to phase, the VTs
output of 69V is used.
Three current transformers (CTs) having ratio of 100/1 have already been connected
in the line model, see Figure 3.7. The signals from the secondary outputs of the CTs
are available in the control panel P.2.1 of the line model.
Figure 3.7 Photo of the CTs
CTs secondary
signals
Figure 3.8 Photo of the P.2.1 control panel
24
Figure 3.9 Terminal diagram for CTs and VTs connection.
PC – relay connection
The optical wire is used to make the connection between PC and the relay. Figure
3.10 shows the human-machine interface (HMI) module in which the optical wire is
connected to.
Optical wire
terminal
Figure 3.10 Photo of the (HMI) module
25
3.4.2 Configuration and tools used
The terminal REL 511*2.3 is configured using the configuration and programming
tool CAP 531. This tool enables configuration management, programming and error
detection and correction for the REL 5xx terminals. CAP 531 is started from within
the CAP 540 [10].
CAP 531 comprise these views:
•
Project tree: Organize terminal and work sheets.
•
Work sheet: Create the configuration.
•
Page layout: Create drawing forms for printed pages.
A new project tree can be created from within the CAP 540 [10]. A project tree in
CAP 531 shown in Figure 3.11 can only have the terminal and work sheets. The
graphical configuration is made in the work sheets.
Figure 3.11 Project tree
It is important that you use the correct set of functions to work with the configuration
of a terminal from the beginning. These functions are selected in the Function
Selector in the Edit menu. There are many available function blocks for the same
function and the Function Selector is used to choose them.
For example, I/O module01 in the CAP/REL511 program module can be configured
to be either as:
•
BIM Binary Input Module
•
BOM Binary Output Module
•
IOM Input Output Module
•
IOPSM Input Output Position System Module
•
DCM Differential Communication Module
26
A choice of these modules gives different shape of the function block for the I/O
module01. For instance, the logical I/O module01 (IO01-) BIM can be compared to
BOM as shown in Figure 3.12.
Figure 3.12 Compare the I/O module as BIM (left) or as a BOM (right)
The library is updated with a new function block when you select a module in the
Function Selector tool and only that selected module can be used in the configuration.
The Function Selector can be started as follows:
•
Select the terminal in the Project Tree.
•
Select the ‘Function Selector’ in the Edit menu.
Figure 3. 13 Function Selector
27
The Function Selector contains the Set Value, which you use to change the function
values, and the Selected Values, which give you an overview of all function.
The configuration is done in the work sheets as shown in Figure 3.14. The normal
mode used when you work with the configuration in the work sheet and the debug
mode is used to test the work sheet configuration.
Figure 3.14 Work sheet called Test
To open a work sheet:
•
Select a work sheet in the Project Tree.
•
Double-click the left mouse button or press < Enter >.
Function blocks, variables, setting and text comments are considered as objects in a
work sheet. In CAP 531, function blocks represent all the available functions in a
terminal. The function block can be one of the following:
•
Protection function.
•
Control function.
•
Monitoring function.
•
Logic function.
The function block includes input and output parameters, a type name and function
block name as shown in Figure 3.15 below.
28
Figure 3.15 Function block in the CAP 531 work sheet
The function blocks in the work sheet can be connected together by using the
connection mode [11].
Figure 3.16 Two objects are connected
When the configuration preparation is completed, it should be compiled in order to
check errors and to prepare the configuration for downloading into the terminal [11].
3.4.3 The initial set up of the relay
Initially, the relay has its default configuration and default parameters. The relay has
been configured for three phase trip with the following function blocks: distance
protection (five zones were set), current functions, scheme communication, voltage
and supervision functions, trip logic, auto-reclosing and breaker-failure functions,
internal signals, binary inputs and outputs, disturbance report and events for Station
Control System (SCS).
For detailed default configuration refer to [15].
3.5
Parameter setting
The parameters can be set using the Parameter Setting Tool (PST). PST is a tool for
monitoring, service values, protection and control terminal and relays. From CAP 540
29
the PST can be started from the project tree or from a function block within the
configuration worksheet as follows:
•
From the project tree in CAP 540:
¾In the project tree, select the wanted terminal instance.
¾With a right click select Parameter Setting.
•
From a function block within a worksheet in CAP 531:
¾Open a worksheet for the wanted terminal instance.
¾With the right or left mouse button, double-click the wanted function
block. The Function Block dialog appears.
¾Click Parameter Settings.
When the parameter tool starts, the main window according to Figure 3.17 appears.
Figure 3.17 The main window of the parameter tool.
The terminal tree being on the left side of the window shows the structure in which
the parameters for a terminal instance are organized. When a parameter is selected in
the terminal tree, a list of parameters is shown. For each parameter the window will
display its name, its value in the terminal, its value in PST and its unit. The parameter
value can be edited directly in the PST Value field. A changed value is shown in bold
and in the colour blue.
3.5.1 Setting for Analogue Inputs Modules
The analogue signals fed into the relay should be set in order to get the real values of
the primary side of the line model. These setting values are the secondary base values
and nominal primary to secondary scale values of the current transformers and voltage
30
transformers. In this test, the base values of current and voltage are 1A and 69V,
respectively. The nominal scale values for current transformers and voltage
transformers are 100 and 3.347, respectively.
Figure 3.18 Analogue Inputs Modules parameters
3.5.2 Setting for distance zones
The fundamental rules have been discussed in the earlier chapter. The following
values, see Figure 3.19, have been used for the settings,
•
Zone 1: covers 85%AB, forward direction.
•
Zone 2: covers 100%AB + 30%BC, forward direction.
•
Zone 3: covers 100%AB + 100%BC + 25%CD, reverse direction.
Zone 2
Zone 1
t1
STRONG
GRID
t3
A
Relay
t2
B
C
D
Load
Zone 3
Figure 3.19 Grading chart of setting zones for testing
31
The data of the line model AB, BC, CD for positive sequence is given in Table 3.1.
Line
Reactance X1 [:/phase]
Resistance R1 [:/phase]
AB
2.84
0.23
BC
0.95
0.08
CD
0.95
0.08
Table 3.1 Data for lines AB, BC, CD
Zero sequence impedance Z0 is three times larger than that of the positive sequence
Z1. The setting values are calculated by using the expression (2.4).
32
Zone 1
Zone 2
Zone 3
Parameter
Unit
Description
Table 3.2 Parameter setting for zones
33
Primary
Secondary
Primary
Secondary
Primary
Secondary
X1PP
2.42
73.52
3.12
95.15
4.03
122.54
Ω/ph
R1PP
0.20
6.08
0.26
7.87
0.33
10.14
Ω/ph
RFPP
5.00
152.17
5.00
152.17
5.00
152.17
Ω/loop
X1PE
2.42
73.52
3.12
95.15
4.03
122.54
Ω/ph
Positive sequence reactive reach
of distance protection zone n for
Ph-E faults
R1PE
0.20
6.08
0.26
7.87
0.33
10.14
Ω/ph
Positive sequence line reactance
included in distance protection
zone n for Ph-E faults
X0PE
7.25
220.56
9.36
285.45
12.09
367.62
Ω/ph
Zero sequence line reactance
included in distance protection
zone n for Ph-E faults
R0PE
6.08
18.24
0.78
23.61
0.99
30.42
Ω/ph
Zero sequence line resistance
included in distance protection
zone n for Ph-E faults
RFPE
5
152.17
5.00
152.17
5.00
152.17
Ω/loop
Resistive reach of distance
protection zone n for Ph-E
faults
s
Time delayed trip operation of
the distance protection zone n
for Ph-Ph / Ph-E faults
tPP/ tPE
0.00/ 0.00
0.15/ 0.15
0.25/ 0.25
Positive sequence reactive reach
of distance protection zone n for
Ph-Ph faults
Positive sequence line
resistance reach of distance
protection zone n for Ph-Ph
faults
Resistive reach of distance
protection zone n for Ph-Ph
faults
Figure 3.20 Load and impedance zone characteristics
Impedance Zone 1 [ZM1] Ph-E Loop
Impedance Zone 1 [ZM1] Ph-Ph Loop
Impedance Zone 2 [ZM2] Ph-E Loop
Impedance Zone 2 [ZM2] Ph-Ph Loop
Impedance Zone 3 [ZM3] Ph-E Loop
Impedance Zone 3 [ZM3] Ph-Ph Loop
General Fault Criteria [GFC] Ph-E Loop
General Fault Criteria [GFC] Ph-Ph Loop
Directional angles Ph-E Ph-Ph Loop Phase
Load
Load
Load
Load
34
3.5.3 Setting for the general fault criteria GFC function block
Parameter
Setting value
Unit
Description
ARGLd
25
degrees
Load angle determining the load impedance
area
RLd
270.50
Ω/loop
Limitation of resistive reach within the load
impedance area
X1RvPP
122.54
Ω/Ph
Positive sequence reactive reach in reverse
direction for Ph-Ph faults
X1FwPP
122.54
Ω/Ph
Positive sequence reactive reach in forward
direction for Ph-E faults
RFPP
152.17
Ω/loop
Resistive reach (forward and reverse) for
Ph-Ph measurement
X1RvPE
122.54
Ω/Ph
Positive sequence reactive reach in reverse
direction for Ph-E faults
X1FwPE
122.54
Ω/Ph
Positive sequence reactive reach in forward
direction for Ph-E faults
X0RvPE
367.62
Ω/Ph
Zero sequence reactance of reach in reverse
direction for Ph-E faults
X0FwPE
367.62
Ω/Ph
Zero sequence reactance reach in forward
direction for Ph-Ph faults
RFPE
152.17
Ω/loop
Resistive reach (forward and reverse) for
Ph-E measurement
INReleasePE
10
3I0 limit for releasing Ph-E measuring
loops
INBlockPP
20
% of
IphMax
% of
IphMax
3I0 limit for blocking Ph-Ph measuring
loops
IP>
20
% of I1b
Set operate value for measured phase
currents
IN>
10
% of I1b
Set operate value for measured residual
currents
tPP/ tPE
0/ 0
s
Time delay of trip for Ph-Ph/ Ph-E faults
Table 3.3 Parameter setting for GFC
3.5.4 Setting for the fault locator FLOC function block
Parameter
Secondary
Unit
Description
Line length
900
km
Line length value
X1
173.00
Ω/Ph
Positive sequence line reactance
R1
14.31
Ω/Ph
Positive sequence line resistance
X0
519.00
Ω/Ph
Zero sequence line reactance
R0
42.93
Ω/Ph
Zero sequence line resistance
Table 3.4 Parameter setting for FLOC
35
3.5.5 Setting for the miscellaneous function blocks
Function block
Parameter
Set value
Unit
Description
IOC
IP>>
65
% of I1b
Operating phase current
IN>>
50
% of I1b
Operating residual current
IP>
30
% of I1b
Operating phase overcurrent
tP
10
s
Time delay of phase
overcurrent function
IN >
100
% of I4b
Operating residual current
tN
10
s
UPE<
120
% of U1b
t
5
s
3U0>
30
% of U1b
t
5
s
Time delay of residual
overcurrent function
Operate value for the phase
overvoltage function
Time delay of the phase
overvoltage function
Operate value for the neutral
overvoltage function
Time delay of the neutral
overvoltage function
UPE<
80
% of U1b
Operate phase voltage
t
5
s
Time delay
IN>
5
% of I1b
Start current for TEF function
Imin
100
% of IN
Minimum operating current
t1
0
s
Independent time delay
I Base
15
% of I1b
Base current
T Base
50
°C
Temperature rise at base
tau
5
min
Thermal time constant
TAlarm
80
°C
Alarm level
TTrip
120
°C
Trip level
U<
50
% of U1b
Operating phase voltage
IP<
10
% of I1b
Operating phase current
Instantaneous
overcurrent
protection
TOC
Time delayed
overcurrent
protection
TOV
Time delayed
overvoltage
protection
TUV
Time delayed
undervoltage
protection
TEF
Definite and
inverse timedelayed residual
overcurrent
protection
THOL
Thermal overload
protection
DLD
Dead line detection
Table 3.5 Parameter setting for miscellaneous function
36
3.6
Results using numerical relay REL 511*2.3
In the following figures, the upper part shows analog input signals coming from the
line model, whereas the lower one displays the binary output signals of numerical
relay. These output signals will be used to activate circuit breakers or fault clearing
equipment.
Measured phase voltages as denoted in the figures are U1, U2, U3 and that of currents
are I1, I2, I3. Ground current I4 appears when there is a fault between phase and
ground.
During a fault, the current in the faulted phases increases. The current becomes larger
when the fault is closer to the source. Phase voltages are always unchanged since they
are measured at the strong grid point.
Distance protection zone outputs such as, ZM1-TRIP, ZM2-TRIP, ZM3-TRIP, operate
when the corresponding pre-set times are reached.
3.6.1 Three-phase faults
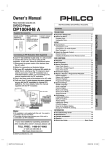
In this section, the response of the relay to three-phase faults is studied. Figures 3.21,
3.22, and 3.23 show the responses with an applied three-phase fault in zone 1, zone 2
and zone 3, respectively.
As shown in Figures 3.21, at t = 0 ms a three-phase fault occurs in zone 1, the
corresponding measured impedance of loops are within the set boundaries of the
characteristic, thus GFC-TRIP signal and all of general fault criteria-forward
operation signals, GFC-STFWL1, GFC-STFWL2, GFC-STFWL3, are activated
instantaneously. Then at t = 15 ms the general trip signal TRIP-TRIP, zone 2 start
signal ZM2-START and trip signal from zone 1 ZM1-TRIP are activated. At t = 165
ms, time delayed trip operation of zone 2 is reached, thus trip signal by distance
protection zone 2 ZM2-TRIP is activated. These signals have normally different reset
times. They, however, reset approximately at the time of fault clearance (at t =
400 ms). Figure 3.22 shows the case of a fault applied in zone 2. In the figure the only
difference is that ZM1-TRIP is not activated.
37
Figure 3.23 shows another result where the fault is applied in reverse direction. As
seen, the fault is applied at t = 0 ms, and the general fault criteria-reverse operation
signals, GFC-STRVL1, GFC-STRVL2, GFC-STRVL3, are activated instead of the
activation of the general fault criteria-forward direction. After 250 ms activation of
ZM3-START signal, trip signal by distance protection zone 3 ZM3-TRIP is sent out.
3.6.1.1
Zone1
Figure 3.21 Three-phase fault in zone 1
38
3.6.1.2
Zone 2
Figure 3.22 Three-phase fault in zone 2
3.6.1.3
Zone 3
Figure 3.23 Three-phase fault in zone 3
39
3.6.2 Single-phase to ground faults
In this section, the operation of the relay in the case of single-phase to ground faults is
shown.
Figures 3.24, 3.25 and 3.26 show the presence of a single-phase to ground fault within
the first zone of protection in forward direction. The application of a ground fault
results in not only the activation of the general fault criteria-forward operation of PhE loop GFC-STFWPE but also the corresponding general fault criteria-forward
operation in phase L1 (GFC-STFWL1), or L2 (GFC-STFWL2), or L3 (GFC-STFWL3)
is operated, as well. The Figures 3.27, 3.28 and 3.29 show the operation of relay in
zone 2 with the presence of fault in phase L1, L2, L3 to ground, respectively. The
Figures 3.30, 3.31 and 3.32 illustrate the cases of a fault in zone 3 where the
corresponding general fault criteria-reverse operation in phase L1 (GFC-STRVL1), or
L2 (GFC-STRVL2), or L3 (GFC-STRVL3) is operated.
3.6.2.1
•
Zone 1
Phase L1 to ground
Figure 3.24 Phase L1 to ground fault in zone 1
40
•
Phase L2 to ground
Figure 3.25 Phase L2 to ground fault in zone 1
•
Phase L3 to ground
Figure 3.26 Phase L3 to ground fault in zone 1
41
3.6.2.2
•
Zone 2
Phase L1 to ground
Figure 3.27 Phase L1 to ground fault in zone 2
•
Phase L2 to ground
Figure 3.28 Phase L2 to ground fault in zone 2
42
•
Phase L3 to ground
Figure 3.29 Phase L3 to ground fault in zone 2
3.6.2.3
•
Zone 3
Phase L1 to ground
Figure 3.30 Phase L1 to ground fault in zone 3
43
•
Phase L2 to ground
Figure 3.31 Phase L2 to ground fault in zone 3
•
Phase L3 to ground
Figure 3.32 Phase L3 to ground fault in zone 3
44
3.6.3 Double-phase to ground faults
In this section, the operation of the relay in the case of double-phase to ground faults
is shown.
Figures 3.33, 3.34 and 3.35 show the relay response for double-phase L1-L2, L1-L3
and L2-L3 to ground faults, respectively. Again, the general fault criteria-forward
operation of Ph-E loop GFC-STFWPE is activated. Due to the double-phase fault
occurrence, the corresponding general fault criteria-forward operation in double-phase
L1-L2 (GFC-STFWL1, GFC-STFWL2), or L1-L3 (GFC-STFWL1, GFC-STFW-L3), or
L2-L3 (GFC-STFWL2, GFC-STFWL3) is fulfilled and activated simultaneously. The
Figures 3.36, 3.37 and 3.38 show the operation of relay in zone 2 with the presence of
a fault in double-phase L1-L2, L1-L3, L2-L3 to ground, respectively. The
Figures 3.39, 3.40 and 3.41 illustrate the cases of a fault in zone 3. Instead of the
operation of general fault criteria-forward operation outputs, the corresponding
general fault criteria-reverse operation in double-phase L1-L2 (GFC-STRVL1, GFCSTRVL2), or L1-L3 (GFC-STRVL1, GFC-STRVL3), or L2-L3 (GFC-STRVL2, GFCSTRVL3) is operated.
3.6.3.1 Zone 1
• Phase L1-L2 to ground
Figure 3.33 Double-phase L1-L2 to ground in zone 1
45
•
Phase L1-L3 to ground
Figure 3.34 Double-phase L1-L3 to ground in zone 1
•
Phase L2-L3 to ground
Figure 3.35 Double-phase L2-L3 to ground in zone 1
46
3.6.3.2
•
Zone 2
Phase L1-L2 to ground
Figure 3.36 Double-phase L1-L2 to ground in zone 2
•
Phase L1-L3 to ground
Figure 3.37 Double-phase L1-L3 to ground in zone 2
47
•
Phase L2-L3 to ground
Figure 3.38 Double-phase L2-L3 to ground in zone 2
3.6.3.3
•
Zone 3
Phase L1-L2 to ground
Figure 3. 39 Double-phase L1-L2 to ground in zone 3
48
•
Phase L1-L3 to ground
Figure 3.40 Double-phase L1-L3 to ground in zone 3
•
Phase L2-L3 to ground
Figure 3.41 Double-phase L2-L3 to ground in zone 3
49
3.6.4 Double-phase faults
In this section the relay response to double-phase faults is demonstrated. In
Figures 3.42, 3.43 and 3.44, results are shown where double-phase faults L1-L2, L1L3 and L2-L3 are applied in zone 1, respectively. The faults occur between phase to
phase, so only the corresponding general fault criteria-forward operation in phase is
activated, i.e., double-phase L1-L2 (GFC-STFWL1, GFC-STFWL2), or L1-L3 (GFCSTFWL1,
GFC-STFW-L3),
or
L2-L3
(GFC-STFWL2,
GFC-STFWL3).
The
Figures 3.45, 3.46 and 3.47 show the operation of the relay in zone 2 with the
presence of a fault in double-phase L1-L2, L1-L3, L2-L3, respectively. The
Figures 3.48, 3.49 and 3.50 illustrate the cases of a fault in zone 3 where the
corresponding general fault criteria-reverse operation in double-phase L1-L2 (GFCSTRVL1, GFC-STRVL2), or L1-L3 (GFC-STRVL1, GFC-STRVL3), or L2-L3 (GFCSTRVL2, GFC-STRVL3) is operated.
3.6.4.1 Zone 1
• Phase L1-L2
Figure 3.42 Double-phase L1-L2 fault in zone 1
50
•
Phase L1-L3
Figure 3.43 Double-phase L1-L3 fault in zone 1
•
Phase L2-L3
Figure 3.44 Double-phase L2-L3 fault in zone 1
51
3.6.4.2
•
Zone 2
Phase L1-L2
Figure 3.45 Double-phase L1-L2 fault in zone 2
•
Phase L1-L3
Figure 3.46 Double-phase L1-L3 fault in zone 2
52
•
Phase L2-L3
Figure 3.47 Double-phase L2-L3 fault in zone 2
3.6.4.3
•
Zone 3
Phase L1-L2
Figure 3.48 Double-phase L1-L2 fault in zone 3
53
•
Phase L1-L3
Figure 3.49 Double-phase L1-L3 fault in zone 3
•
Phase L2-L3
Figure 3.50 Double-phase L2-L3 fault in zone 3
54
Chapter 4
Conclusions and further work
4.1
Conclusions
In this thesis, the calculation of the setting values has been included and all types of
faults that may occur in the power system have been tested. The proper operation of
the numerical distance relay has also been demonstrated.
In presence of a fault within the zone protection, the measured impedance of the GFC
function block is within the set boundaries of the characteristic. This results in the
operation of the GFC start condition (STCND) output that activates the selected loop
of the distance protection measuring zones. When the corresponding delay time is
reached, these zones send out the trip signal.
In case of a three-phase fault in forward or reverse direction, all the general fault
criteria-forward operation signals, GFC-STFWL1, GFC-STFWL2, GFC-STFWL3, or
general fault criteria-reverse operation signals, GFC-STRVL1, GFC-STRVL2, GFCSTRVL3 in all the three phases are activated. With the double-phase fault, both in
forward and reverse direction, it has been shown that only the general fault criteriaforward operation signals or general fault criteria-reverse operation signals of the
involved phases are activated.
In the presence of a ground fault, beside the activation of the general fault criteria
operation output in phases, the general fault criteria operation of Ph-E loop output has
also been activated. The operation of the numerical relay when the single-phase to
55
ground fault occurs has also been investigated. It has been shown that successful
activation of the general fault criteria operation output of the involved phase and
general fault criteria operation of Ph-E loop output, in both directions, are achieved.
The same result has been obtained with the case of double-phase to ground fault.
Problems experienced
When everything was done and we started to test the relay, the relay was not picking
any of the earth faults because the fault resistor was not connected to the ground. This
problem was rectified when we connected the fault resistor to ground.
Then also the relay did not calculate the distance to fault on the disturbance report.
We realised that the setting parameters of the Fault locator function block (FLOC)
were wrong because we had omitted to multiply the reactance and resistance values of
the line model by a factor of six. The factor of six should be multiplied to the
reactance and the resistance values of the line model because the line model is divided
into six equal π-sections. After we had done the multiplication, the relay recorded the
distance to fault in the disturbance report.
4.2
Further work
The following problems should be implemented as the further woks:
•
Use the output signals sent out by the functional blocks to control the circuit
breaker or fault clearing equipment.
•
Study evolving faults, e.g., faults starting as phase to ground fault, but developing
to double-phase to ground fault.
•
Study power system oscillations.
•
Test the relay with source impedance variations.
56
References
[1]
J.M. Gers, E. J. Holmes, ”Protection of Electricity Distribution Networks”, The
Institution of Electrical Engineers, London, U.K. 1998
[2]
G.I. Atabekov, “The Relay Protection of High Voltage Networks”, Pergamon
Press Ltd, London, 1960
[3]
P.M. Anderson, “Power System Protection”, The Institute of Electrical and
Electronics Engineers Inc, New York, U.S.A, 1999
[4]
M. Jonsson. Line Protection and Power System Collapse. Licentiate thesis,
Chalmers University of Technology, Department of Electric Power Engineering,
Göteborg, Sweden, 2001
[5]
J. Daalder. Power System Analysis. Unpublished lecture material, Chalmers
University of Technology, Department of Electric Power Engineering, Göteborg,
Sweden, Spring 2005
[6]
S.H. Horowitz, A.G. Phadke, “Power System Relaying”, 2nd edition, Reaserch
Studies Press Ltd, 1996
[7]
M. P. Ransick, “Numeric protective relay basics”, Proceedings of the 33rd IAS
Annual Meeting (The IEEE 1998 Industry Applications Conference), 1998. Vol. 3,
12-15 Oct 1998, pp(s): 2342 -2347
[8]
M. Gustafson, N. Krantz. Voltage Collapse in Power Systems. Licentiate thesis,
Chalmers University of Technology, Department of Electric Power Engineering,
Göteborg, Sweden, 1995
[9]
Technical reference manual. [Online].
Available: http://www.abb.com/substationautomation
[10] Cap 540 Navigator, User’s Manual.
[11] Cap 531 (Configuration and Programming Tool), User’s Manual.
[12]
PST (Parameter setting tool), User’s Manual.
[13]
Disturbance Evaluation REVAL, User’s Manual.
[14]
SVT (Setting Visualisation Tool), User’s Manual.
[15] Line Protection, Practical, Panorama Training Course LP5p.
57
Appendix A
Laboratory for undergraduate student
58
TESTING A NUMERICAL DISTANCE PROTECTION
RELAY
by
Tran Manh Hung
Henry Akyea
All questions marked with H should be answered before attending the laboratory
exercise.
Participant:
…………………………
Date:
…………………
Approved by:
…………………………
59
1
Introduction
Any kind of power system shunt fault results in customers being disconnected if not
cleared quickly. Distance protection meets the requirements of speed and reliability
needed to protect electric circuits, thus distance protection is used to a large extend on
power-system networks.
It is a universal short-circuit protection. Its mode of operation is based on the
measurement of electrical quantities (current and voltage) and evaluation of the
impedance towards the fault, which basically is proportional to the distance to the
fault.
Numerical distance protection is utilization of microprocessor technology with
analogue to digital conversion of the measured values (current and voltage), computed
(numerical) distance determination and digital processing logic.
2
Aim of the Exercise
The objective of this exercise is to test a modern numerical relay for various faults
within the distance zones under consideration.
Three zones are set; zone one is an under-reaching instantaneous tripping zone set in
the forward direction, zone two is an over-reaching zone with single time-delay also
set in the forward direction and zone three is an over-reaching zone with double timedelay set in the reverse direction.
3
Power system model description
The power system model used in this exercise is a three-phase model of a 400 kV
transmission, and two loads (two 9 kW three phase resistive loads). The entire model
operates at 400 V.
The line model consists of six identical π-sections; each corresponds to 150 km of a
400 kV line. The sections can be connected arbitrarily in series or parallel.
The data for a real 150 km section are:
X1 = 50.4Ω/phase,
R1 = 4.17Ω/phase.
60
Zero sequence impedance Z0 = 3Z1
The impedance scale of the line model is given as 1:53.2.
The numerical relay used in this laboratory is the Line distance protection relay
REL 511*2.3 from ABB. The REL 511*2.3 is based on a full scheme distance
protection function that detects both phase-to-phase and phase-to-earth faults and has
a quadrilateral operating characteristics. A separate general fault criterion with
advanced characteristics is used for phase selection and as an overall measuring
function, which increases the total operating security and facilitates remote backup
applications.
The numerical relay REL 511*2.3 line distance protection terminal is designed for
main and backup protection, monitoring and control of power lines, cables and other
primary objects. It can be used in systems with simple or complex network
configurations regardless of the type of system grounding.
Relay parameters:
Current:
Rated Ir = 1A
Nominal range: (0.2 -30) * Ir
Operative range: (0.004 - 100)*Ir
Permissive overload: 4*Ir continuous, 100*Ir for 1 s
Voltage:
Rated Ur = 110V,
Nominal range: (80 -120)% of Ur
Operative range: (0.001 – 1.5)* Ur
Permissive overload: 1.5* Ur continuous, 2.5* Ur for 1 s
DC supply for relay: 48 – 250 V.
Figure A1 shows the line model used for the laboratory.
61
62
Timer
Line model
Fault resistor
Contactor
STRONG GRID
Load
Figure A1: Power system model of the laboratory exercise
4
Distance zones
Zone 2
Zone 1
STRONG
GRID
F1
Relay
A
F2
B
C
D
Load
Zone 3
Figure A2 Grade distance zones
Zone 1:
85% AB, time delayed = 0, forward direction.
Zone 2:
AB + 30% BC, time delayed = 0.25 s, forward direction.
Zone 3:
AB + BC + 25% CD, time delayed = 0.35 s, reverse direction.
Load P = 9 kW
AB = 3 π-sections
BC = CD = 1 π-section
F1, F2: Faults locations in Zone 1 and Zone 2, respectively.
Fault resistor Rf = 5Ω.
Timer is set to be 0.5 s.
Setting for zone parameters can be done on the local human-machine interface (HMI)
unit under the menu:
Setting / Functions / Group 1 / Impedance / ZM n
n = 1,2,3.
H: Calculate the setting values for the impedance fault detection of the three zones,
according to Figure 2 and the given data.
Note: All of the setting values are calculated for the secondary side based on the
following expression:
I pri
Z sec =
where
I pri
I sec
and
U pri
U pri
U sec
I sec
Z pri
U sec
are the transformation ratios of the current and voltage
63
transformers, with nominal values of 100/1 and 230/69, respectively.
…………………………………………………………………………………………
…………………………………………………………………………………………
…………………………………………………………………………………………
…………………………………………………………………………………………
…………………………………………………………………………………………
…………………………………………………………………………………………
…………………………………………………………………………………………
…………………………………………………………………………………………
…………………………………………………………………………………………
…………………………………………………………………………………………
…………………………………………………………………………………………
…………………………………………………………………………………………
…………………………………………………………………………………………
…………………………………………………………………………………………
…………………………………………………………………………………………
5
Setting for General Fault Criteria (GFC)
The general fault criteria serve as an overall fault detection and phase selection
element in all kinds of networks. The signals produced by the GFC measuring
elements serve for different parts of the distance protection. These are indication of
the faulty phases, phase selection for the zone measuring elements, general criteria for
the operation of the trip logic and time delayed trip as a backup function to the zone
measuring elements.
As can be seen in Figure A3, the zone measuring element characteristics is within that
of the GFC, thus to get a trip signal the GFC must be fulfilled.
64
GFC
Figure A3 Operating characteristics of the GFC and zone measuring elements
H: Calculate and set the parameters of the GFC. (For definition of the parameters
refer to page 71)
RLd… … … … … … … … … … … … … … … … … … … … … … … … … … … … … … … … ...
X1RvPP… … … … … … … … … … … … … … … … … … … … … … … … … … … … … … …
X1FwPP… … … … … … … … … … … … … … … … … … … … … … … … … … … … … … …
RFPP… … … … … … … … … … … … … … … … … … … … … … … … … … … … … … … … .
X1RvPE… … … … … … … … … … … … … … … … … … … … … … … … … … … … … … …
X1FwPE… … … … … … … … … … … … … … … … … … … … … … … … … … … … … … ...
X0RvPE… … … … … … … … … … … … … … … … … … … … … … … … … … … … … … …
X0FwPE… … … … … … … … … … … … … … … … … … … … … … … … … … … … … … ...
RFPE… … … … … … … … … … … … … … … … … … … … … … … … … … … … … … … …
The default values are used for the following parameters: ARGLd, INReleasePE,
INBlockPP, IP>, IN>.
The following values should be used:
tPP = 0 s, tPE = 0 s.
Note: The setting range of GFC should cover all of the zone characteristics.
65
Setting of the GFC parameters can be done on the local human-machine interface
(HMI) unit under the menu:
Setting / Functions / Group 1 / Impedance / GenFltCriteria.
6
Setting of line reference for the Fault Locator (FLOC)
The FLOC provides the distance to the fault together with information about the
measuring loop that has been used in the calculation.
H: Calculate the setting values for the FLOC. (For definition of the parameters refer
to page 72)
X1… … … … … … … … … … … … … … … … … … … … … … … … … … … … … … … … …
………………………………………………………………………………………….
X0… … … … … … … … … … … … … … … … … … … … … … … … … … … … … … … … …
………………………………………………………………………………………….
R1… … … … … … … … … … … … … … … … … … … … … … … … … … … … … … … … …
………………………………………………………………………………………….
R0… … … … … … … … … … … … … … … … … … … … … … … … … … … … … … … … …
………………………………………………………………………………………….
The following values should be used:
X1SA = 0.001 Ω, R1SA = 0.001 Ω, X1SB = 1500 Ω, R1SB = 1500 Ω, Xm0 = 0Ω,
Rm0 = 0 Ω.
Setting of the FLOC parameters can be done on the local human-machine interface
(HMI) unit under the menu:
Setting / Functions / Group 1 / Line Reference.
7
Exercise in the Laboratory
Carry out the following tests:
i.
Three-phase fault
ii.
Double-phase fault
iii.
Double-phase-ground fault
iv.
Single-phase-ground fault
Faults are applied by closing the contactor, according to Figure A1.
66
Observe the LED on the relay during the tests and upload disturbance reports from the
relay to the PC after each type of fault by using CAP 540, under the menu:
Programs / Disturbance Handling / Terminal list
Note: To upload the disturbance report from the terminal to the PC the procedure
below must be followed:
•
Plug the cable to the optical contact under the local HMI of the terminal.
•
Plug the other end of the cable to the COM port of the PC. The COM port of the
PC are two, therefore if you plug the cable to COM port 1 or COM port 2 it must
be then set on the PC as COM 1 or COM 2 respectively. This can be done by
opening the CAP 540 project Test_lab, highlight the Stn1 then set it at:
Settings / Communication settings / Communication parameters
•
Set the slave number and the baud rate to 30 and 9600, respectively in the
terminal. The slave number and the baud rate settings in the terminal can be done
on the local HMI at:
Configuration / TerminalCom / SPACom / Front
•
Set the slave number and the baud rate in the PC by opening the CAP 540 project
Test_lab. Highlight the Stn1 then set it at:
Settings / Communication settings / Communication parameters
The slave number and the baud rate must be the same for both the PC and the relay.
Describe and explain the results.
…………………………………………………………………………………………
…………………………………………………………………………………………
…………………………………………………………………………………………
…………………………………………………………………………………………
…………………………………………………………………………………………
…………………………………………………………………………………………
…………………………………………………………………………………………
…………………………………………………………………………………………
…………………………………………………………………………………………
…………………………………………………………………………………………
…………………………………………………………………………………………
…………………………………………………………………………………………
…………………………………………………………………………………………
… … … … … … … … … … … … … … … … … … … … … … … … … … … … … … .… … … … .
67
… … … … … … … … … … … … … … … … … … … … … … … … … … … … … … .… … … .…
… … … … … … … … … … … … … … … … … … … … … … … … … … … … … … .… … … .…
… … … … … … … … … … … … … … … … … … … … … … … … … … … … … … .… … … .…
… … … … … … … … … … … … … … … … … … … … … … … … … … … … … … … … … ..…
… … … … … … … … … … … … … … … … … … … … … … … … … … … … … … … … ..… …
… … … … … … … … … … … … … … … … … … … … … … … … … … … … … … … … … ..…
… … … … … … … … … … … … … … … … … … … … … … … … … … … … … … … … ..… …
… … … … … … … … … … … … … … … … … … … … … … … … … … … … … … … … ..… …
… … … … … … … … … … … … … … … … … … … … … … … … … … … … … … … … … ..…
… … … … … … … … … … … … … … … … … … … … … … … … … … … … … … … … .… … .
… … … … … … … … … … … … … … … … … … … … … … … … … … … … … … … … … ..…
… … … … … … … … … … … … … … … … … … … … … … … … … … … … … … … ..… … …
… … … … … … … … … … … … … … … … … … … … … … … … … … … … … … … .… … … .
v.
Switch-on the Dead line detection (DLD), remove one of the three-phase lines
that used to connect the relay to the voltage transformers and observe the
LED. Then switch-off the DLD.
Operating mode for DLD can be changed on the local HMI under the menu:
Setting / Functions / Group 1 / DeadlineDet
vi.
Increase the load to 18 kW and observe the LED.
The following manuals provide complementary information:
1. Cap 540 Navigator, User’ s Manual
2. Cap 531 (Configuration and Programming Tool), User’ s Manual
3. PST (Parameter setting tool), User’ s Manual
4. Technical reference manual
All of the manuals are available online: http://www.abb.com/substationautomation
68
Setting parameters, zone 1-3
Parameter
X1PP
R1PP
X1PE
RIPE
X0PE
R0PE
Description
Positive sequence reactive reach of distance protection zone n for PhPh faults
Positive sequence line resistance reach of distance protection zone n
for Ph-Ph faults
Positive sequence reactive reach of distance protection zone n for PhE faults
Positive sequence line reactance included in distance protection zone n
for Ph-E faults
Zero sequence line reactance included in distance protection zone n
for Ph-E faults
Zero sequence line resistance included in distance protection zone n
for Ph-E faults
RFPP
Resistive reach of distance protection zone n for Ph-Ph faults
RFPE
Resistive reach of distance protection zone n for Ph-E faults
tnPP
tnPE
Time delayed trip operation of the distance protection zone n for PhPh faults
Time delayed trip operation of the distance protection zone n for Ph-E
faults
The ZM distance protection function provides fast and reliable protection for
overhead lines and power cables in all kinds of power networks. For each independent
distance protection zone, full scheme design provides continuous measurement of
impedance separately in three independent phase-to-phase measuring loops as well as
in three independent phase-to-earth measuring loops.
Phase-to-phase distance protection is suitable as a basic protection function against
two-and three-phase faults in all kinds of networks, regardless of the treatment of the
neutral point. Independent setting of the reach in the reactive and the resistive
direction for each zone separately, makes it possible to create fast and selective short
circuit protection in power systems.
Phase-to-earth distance protection serves as basic earth fault protection in networks
with directly or low impedance earthed networks. Together with independent phase
preference logic, it also serves as selective protection function at cross-country faults
in isolated or resonantly earthed networks.
69
Independent reactive reach setting for phase-to-phase and for phase-to-earth
measurement secures high selectivity in networks with different protective relays used
for short-circuit and earth-fault protection.
The distance protection zones can operate, independently of each other, in directional
(forward or reverse) or non-directional mode. This makes it suitable, together with
different communication schemes, for the protection of power lines and cables in
complex network configurations, such as double-circuit, parallel lines and
multiterminal lines. Zone 1, 2 and 3 can issue phase selective signals, such as start and
trip.
Basic distance protection function is generally suitable for use in non-compensated
networks. A special addition to the basic functions is available optionally for use on
series compensated and adjacent lines where voltage reversals might disturb the
correct directional discrimination of a basic distance protection.
The figure below shows the operating characteristic for one distance protection zone
in the forward direction.
Figure A4 Schematic presentation of the operating characteristics
for one distance protection zone in the forward direction
Where:
Xph-e
= reactive reach for Ph-E faults
Xph-ph = reactive reach for Ph-Ph faults
70
Rph-e
= resistive reach for Ph-E faults
Rph-ph = resistive reach for Ph-Ph faults
Zline
= line impedance
Setting parameters, GFC
Parameter
ARGLd
RLd
Description
Load angle determining the load impedance area
Limitation of resistive reach within the load impedance area
X1RvPP
Positive sequence reactive reach in reverse direction for Ph-Ph faults
X1FwPP
Positive sequence reactive reach in forward direction for Ph-Ph faults
RFPP
Resistive reach (forward and reverse ) for Ph-Ph measurement
X1RvPE
Positive sequence reactive reach in reverse direction for Ph-E faults
X1FwPE
Positive sequence reactive reach in forward direction for Ph-E faults
X0RvPE
Zero sequence reactance of reach in reverse direction for Ph-E faults
X0FwPE
Zero sequence reactance reach in forward direction for Ph-E faults
RFPE
Resistive reach ( forward and reverse ) for Ph-E measurement
IP>
Set operate value for measured phase currents
IN>
Set operate value for measured residual currents
INReleasePE 3I0 limit for releasing Ph-E measuring loops
INBlockPP
3I0 limit for blocking Ph-Ph measuring loops
tPP
Time delayed of trip for Ph-Ph faults
tPE
Time delayed of trip for Ph-E faults
71
Setting parameters, FLOC
Parameter
72
Description
X1
Positive sequence line reactance
X0
Zero sequence line reactance
R1
Positive sequence line resistance
R0
Zero sequence line resistance
X1SA
Positive sequence source reactance, near end
R1SA
Positive sequence source resistance, near end
X1SB
Positive sequence source reactance, far end
R1SB
Positive sequence source resistance, near end
Xm0
Mutual reactance from parallel line
Rm0
Mutual resistance from parallel line
Appendix B
Relay set up manual
1
Energising the terminal
After checking the connection to the external circuitry, when the terminal is energised
the window on the local HMI remains dark. After a few seconds the green LED starts
flashing and then the window lights up. Then after some seconds the window displays
‘Terminal Startup’ and the main menu is displayed. The upper row should indicate
‘Ready’ . A steady green light indicates a successful start-up.
If the upper row in the window indicates ‘Fail’ instead of ‘Ready’ and the green LED
is flashing, an internal failure in the terminal has been detected. Refer to the Selfsupervision function in the Installation and Commissioning manual pages 40 – 42 to
investigate the fault.
For a successful start-up the appearance of the local HMI should be as shown in the
figure below:
73
2
Log on and build a new project tree
When starting CAP 540 the following dialog appears:
You should fill in User Name and Password and click OK as follows:
User Name: systemadministrator
Password: a10
When you have logged on, you can create a new project tree by selecting
File/New Project. After typing the file name in the New Project dialog box and
clicking OK, a project structure down to Bay level will be created with default names.
Right click on the nodes and select Add to add more nodes to your project.
The last level is the Terminal level. Right click on a Bay and select Add. In the
Terminal Modules dialog select REL 511 V2.3 Line Protection.
Type in a vacant slave number (it must be unique for each terminal that belongs to the
same SPA loop) and click OK. In our case, we use the number 30.
3
Setting and configuring the terminal
The specific values for each setting parameter and the configuration file have to be
available before the terminal can be set and configured.
74
Each function included in the terminal has several setting parameters that have to be
set in order to make the terminal behave as intended. The setting file can be prepared
using the parameter setting (PST), which is available in the CAP 540. All settings can
be entered manually through the local HMI or downloaded from a PC. Front port
communication has to be established before the settings can be downloaded. The
configuration can only be downloaded through the front connector on the local HMI.
4 Communication settings.
Click on Settings menu or right click on a station node and select Communication
Settings. The dialog can only be opened if a station node is selected.
The Serial Port number depends on the configuration of the PC. The Baud Rate must
be 9600 so that it corresponds to the setting of the front port of the terminal.
The Slave Number and the Baud Rate settings must be equal in the PC program and
the terminal. The Slave Number and the Baud Rate settings in the terminal are done
on the local HMI at: Configuration / TerminalCom / SPACom / Front
Before start communicating to a terminal, make sure the communication setup in CAP
540 is correct. Terminal Emulator is used for fault tracing. Start the Terminal
Emulator by selecting a terminal in the project structure and then select Terminal
Emulator in the Tools menu.
75
If “ Repeat” and TimeOut” appear in the Respond Time field after clicking Send as
shown in the above figure, the communication set up is incorrect and it should be
checked again.
5
Upload configuration
The entire configuration is stored in the terminal and it can be upload to the PC. For
back-up purposes and off-line engineering, a copy of the terminal configuration
should be kept on the PC system. Start the Upload Configuration by selecting the
terminal in the project tree and then select Upload Configuration in the On-line menu.
6
Download the configuration
To download the configuration to the terminal:
• Select the terminal that you want to download in the Project Tree.
• Select Download Configuration in the On-line menu, and the Download
configuration dialog appears.
• Select Download PST configuration if relevant, click Yes, and downloading starts
by uploading the list of available functions.
The Compare Configuration function starts automatically. If the downloading has
been successful and there are no differences between the function libraries in the
terminal and in the configuration, no differences will be detected in the comparison
process. If differences appear in the comparison list, then start the downloading
procedure again.
76
7
Disturbance handling
The disturbance report stored in the terminal provides the network operator with
proper information about disturbance in the primary network. To upload the
disturbance report to the PC:
• Select the Terminal level and right click.
• Continue with Disturbance Handling and with Terminal Disturbance List.
77
Appendix C
Relay configuration
78
1
2
3
4
5
6
Configuration for laboratory exercise using
numerical relay REL511-2.3
A
Work sheet name
OVERVIEW
IMP_PROT
CUR_PRO
VOL_PROT
TRIP
INT
I_O
HMI_LED
DRP
EV
B
Description
List of content
Distance protection functions
Current functions
Voltage functions
Trip logic
Internal signals
Binary inputs and outputs
Indications on local HMI LED
Disturbance report
Events for SCS
A
Sheet
1
2
3-4
5
6
7
8-9
10-11
12
13-14
B
C
C
D
D
Prepared T.M.Hung, H. Akyea
Approved Daniel Karlsson
Rev Ind
Based on
Power System Protection
Reg nr
Pcl
1
20/09/05
28/09/05
2
3
Configuration diagram
REL 511*2.3
OVERVIEW
Resp dep
Chalmers University of Technology
4
Rev Ind
Laboratory exercise
5
Sheet 1/14
6
1
2
3
4
PSD--(370,6)
PSD
BLOCK
START
GFC-STPE
FALSE
BLKI01
ZIN
BLKI02
ZOUT
5
6
PSD-START
BLK1PH
A
REL1PH
A
BLK2PH
TRUE
FALSE
REL2PH
I0CHECK
TRSP
EXTERNAL
ZM1--(470,6)
ZM1
BLOCK
TRIP
B
FALSE
FALSE
GFC-STCND
BLKTR
TRL1
VTSZ
TRL2
STCND
ZM1-TRIP
TRL3
START
B
ZM1-START
STL1
STL2
STL3
STND
ZM2--(471,6)
ZM2
BLOCK
TRIP
FALSE
BLKTR
VTSZ
STCND
ZM2-TRIP
TRL1
TRL2
TRL3
START
ZM2-START
STL1
STL2
STL3
STND
C
C
ZM3--(472,6)
ZM3
BLOCK
TRIP
FALSE
BLKTR
TRL1
VTSZ
TRL2
STCND
* ZM3 SET IN REVERSE DIRECTION
ZM3-TRIP
TRL3
START
ZM3-START
STL1
STL2
STL3
STND
D
D
Prepared T.M.Hung, H. Akyea
Approved Daniel Karlsson
Rev Ind
Based on
Power System Protection
Reg nr
Pcl
1
20/09/05
28/09/05
2
3
Configuration diagram
REL 511*2.3
IMP_PROT
Resp dep
Chalmers University of Technology
4
Rev Ind
Laboratory exercise
5
Sheet 2/14
6
1
2
A
3
FALSE
4
5
GFC--(460,6)
GFC
BLOCK
TRIP
6
GFC-TRIP
STFWL1
GFC-STFWL1
STFWL2
GFC-STFWL2
STFWL3
GFC-STFWL3
STFWPE
GFC-STFWPE
A
STRVL1
STRVL2
STRVL3
STRVPE
STNDL1
STNDL2
STNDL3
STNDPE
STFW1PH
STFW2PH
STFW3PH
B
STPE
GFC-STPE
STPP
STCND
GFC-STCND
B
FLOC-(1125,6)
FLOC
DISTH8
PSL1
SELECTIVE_TRIP==O034-OUT
PSL2
DISTH4
PSL3
DISTH2
RELEASE
DISTH1
DISTL8
DISTL4
DISTL2
DISTL1
DISTOK
C
C
FALSE
DLD--(210,6)
DLD
BLOCK START
DLD-START
STIL1
STIL2
STIL3
STUL1
STUL2
STUL3
STPH
DLD-STPH
D
D
Prepared T.M.Hung, H. Akyea
Approved Daniel Karlsson
Rev Ind
Based on
Power System Protection
Reg nr
Pcl
1
20/09/05
28/09/05
2
3
Configuration diagram
REL 511*2.3
CUR_PROT
Resp dep
Chalmers University of Technology
4
Rev Ind
Laboratory exercise
5
Sheet 3/14
6
1
2
3
4
5
6
A
A
FALSE
IOC--(390,6)
IOC
BLOCK TRIP
IOC-TRIP
TRP
IOC-TRP
TRL1
TRL2
TRL3
TRN
IOC-TRN
TOC--(340,6)
TOC
BLOCK TRIP
FALSE
BLKTR
B
TOC-TRIP
TRP
TRN
STP
STL1
B
STL2
STL3
STN
EF_BLOCK==IO03-BI6
FALSE
BC==IO03-BI1
TOC-STN
TEF--(230,6)
TEF
BLOCK
TRIP
TEF-TRIP
BLKTR
TEF-TRSOFT
BC
TRSOTF
START
TEF-START
STFW
STRV
C
C
FALSE
THOL-(358,6)
THOL
BLOCK ALARM
THOL-ALARM
TRIP
THOL-TRIP
START
D
D
Prepared T.M.Hung, H. Akyea
Approved Daniel Karlsson
Rev Ind
Based on
Power System Protection
Reg nr
Pcl
1
20/09/05
28/09/05
2
3
Configuration diagram
REL 511*2.3
CUR_PROT
Resp dep
Chalmers University of Technology
4
Rev Ind
Laboratory exercise
5
Sheet 4/14
6
1
2
3
FALSE
A
4
TOV--(350,6)
TOV
BLOCK
TRIP
BLKTR
5
6
TOV-TRIP
TRPE
A
TRN
STPE
TOV-STPE
STL1
STL2
STL3
CB_OPEN==IO02-BI1
FALSE
FALSE
STN
TOV-STN
TUV--(360,6)
TUV
BLOCK
TRIP
TUV-TRIP
BLKTR
VTSU
STL1
STL2
STL3
B
START
TUV-START
B
C
C
D
D
Prepared T.M.Hung, H. Akyea
Approved Daniel Karlsson
Rev Ind
Based on
Power System Protection
Reg nr
Pcl
1
20/09/05
28/09/05
2
3
Configuration diagram
REL 511*2.3
VOL_PROT
Resp dep
Chalmers University of Technology
4
Rev Ind
Laboratory exercise
5
Sheet 5/14
6
1
2
3
4
ZM2-TRIP
O001-(155,6)
OR
INPUT1
OUT
ZM3-TRIP
INPUT2
GFC-TRIP
INPUT3
TOC-TRIP
5
6
NOUT
INPUT4
INPUT5
FALSE
A
A
INPUT6
O002-(156,6)
OR
INPUT1
OUT
TEF-TRIP
TUV-TRIP
INPUT2
TOV-TRIP
INPUT3
THOL-TRIP
INPUT4
NOUT
INPUT5
FALSE
B
INPUT6
ZM1-TRIP
O003-(157,6)
OR
INPUT1
OUT
ZM2-TRIP
INPUT2
ZM3-TRIP
INPUT3
SELECTIVE_TRIP==O034-OUT
B
NOUT
INPUT4
IOC-TRIP
FALSE
INPUT5
INPUT6
O004-(170,6)
OR
INPUT1
OUT
INPUT2
FALSE
NOUT
INPUT3
INPUT4
INPUT5
INPUT6
C
C
TR01-(729,6)
TRIP
BLOCK
TRIP
INT-FAIL
TRIN
TRL1
TRINL1
TRL2
TRINL2
TRL3
TRINL3
TR1P
GFC-STFWL1
PSL1
TR2P
GFC-STFWL2
PSL2
TR3P
GFC-STFWL3
PSL3
FALSE
FALSE
TRIP-TRIP
1PTRZ
1PTREF
P3PTR
D
D
Prepared T.M.Hung, H. Akyea
Approved Daniel Karlsson
Rev Ind
Based on
Power System Protection
Reg nr
Pcl
1
20/09/05
28/09/05
2
3
Configuration diagram
REL 511*2.3
TRIP
Resp dep
Chalmers University of Technology
4
Rev Ind
Laboratory exercise
5
Sheet 6/14
6
1
2
3
4
5
6
A
A
INT--(221,1000)
InternSignals
FAIL
INT-FAIL
WARNING
CPUFAIL
CPUWARN
ADC
SETCHGD
B
FIXD-(0,0)
FixedSignals
OFF
ON
B
FALSE
TRUE
INTZERO
INTONE
C
C
D
D
Prepared T.M.Hung, H. Akyea
Approved Daniel Karlsson
Rev Ind
Based on
Power System Protection
Reg nr
Pcl
1
20/09/05
28/09/05
2
3
Configuration diagram
REL 511*2.3
INT
Resp dep
Chalmers University of Technology
4
Rev Ind
Laboratory exercise
5
Sheet 7/14
6
1
2
3
A
4
5
6
IOP1-(222,1000)
I/OPosition
S11
A
S13
S15
IOP1-S15
S17
IOP1-S17
S19
S21
S23
S25
S27
S29
B
B
IO02-(804,6)
I/O-module
POSITION
ERROR
BLKOUT
BI1
TRIP-TRIP
BO1
BI2
ZM1-TRIP
BO2
BI3
ZM2-TRIP
BO3
BI4
ZM3-TRIP
BO4
FALSE
C
#TRIP-TRIP
BONAME01
#ZM1-TRIP
BONAME02
#ZM2-TRIP
BONAME03
#ZM3-TRIP
BONAME04
#IO02-BI1
BINAME01
#IO02-BI2
BINAME02
#IO02-BI3
BINAME03
#IO02-BI4
BINAME04
CB_OPEN==IO02-BI1
C
D
D
Prepared T.M.Hung, H. Akyea
Approved Daniel Karlsson
Rev Ind
Based on
Power System Protection
Reg nr
Pcl
1
20/09/05
28/09/05
2
3
Configuration diagram
REL 511*2.3
I_O
Resp dep
Chalmers University of Technology
4
Rev Ind
Laboratory exercise
5
Sheet 8/14
6
1
2
3
4
5
6
A
A
IOP1-S15
IO03-(805,6)
I/O-module
POSITION
FALSE
IOP1-S17
ERROR
BLKOUT
BI1
TRIP-TRIP
BO1
BI2
GFC-STFWL1
BO2
BI3
GFC-STFWL2
BO3
BI4
GFC-STFWL3
BO4
BI5
GFC-STFWPE
BO5
BI6
BO6
BI7
BO7
BI8
B
FALSE
IO04-(806,6)
I/O-module
POSITION
ERROR
BC==IO03-BI1
#CLR_LEDS
EF_BLOCK==IO03-BI6
BO8
BO9
BO10
BO11
BO12
#TRIP-TRIP
BONAME01
#GFC-STFWL1
BONAME02
#GFC-STFWL2
BONAME03
#GFC-STFWL3
BONAME04
#GFC-STFWPE
BONAME05
C
#IO03-B06
BONAME06
#IO03-BO7
BONAME07
#IO03-BO8
BONAME08
#IO03-BO9
BONAME09
#IO03-BO10
BONAME10
#IO03-BO11
BONAME11
#IO03-BO12
BONAME12
#IO03-BI1
BINAME01
#IO03-BI2
BINAME02
#IO03-BI3
BINAME03
#IO03-BI4
BINAME04
#IO03-BI5
BINAME05
#IO03-BI6
BINAME06
#IO03-BI7
BINAME07
#IO03-BI8
BINAME08
BINAME01
BI1
#IO04-BI2
BINAME02
BI2
#IO04-BI3
BINAME03
BI3
#IO04-BI4
BINAME04
BI4
#IO04-BI5
BINAME05
BI5
#IO04-BI6
BINAME06
BI6
#IO04-BI7
BINAME07
BI7
#IO04-BI8
BINAME08
CLR_LEDS==IO04-BI1
BI8
#IO04-BI9
BINAME09
BI9
#IO04-BI10
BINAME10
BI10
#IO04-BI11
BINAME11
BI11
#IO04-BI12
BINAME12
BI12
#IO04-BI13
BINAME13
BI13
#IO04-BI14
BINAME14
BI14
#IO04-BI15
BINAME15
BI15
#IO04-BI16
BINAME16
BI16
B
C
D
D
Prepared T.M.Hung, H. Akyea
Approved Daniel Karlsson
Rev Ind
Based on
Power System Protection
Reg nr
Pcl
1
20/09/05
28/09/05
2
3
Configuration diagram
REL 511*2.3
I_O
Resp dep
Chalmers University of Technology
4
Rev Ind
Laboratory exercise
5
Sheet 9/14
6
1
2
3
4
5
6
A
A
HLED-(1400,6)
HMI_LED
ACK_RST NEWIND
CLR_LEDS==IO04-BI1
FALSE
BLOCK
FAIL
LEDTEST
HL01-(1401,6)
HMI_LEDs
RED
TRIP-TRIP
FALSE
YELLOW
GREEN
B
A001-(165,6)
AND
INPUT1
OUT
ZM1-TRIP
INPUT2
TRUE
FALSE
NOUT
INPUT3
B
HL02-(1402,6)
HMI_LEDs
RED
YELLOW
FALSE
GREEN
INPUT4N
ZM1-START
A002-(166,6)
AND
INPUT1
OUT
ZM2-TRIP
INPUT2
TRUE
FALSE
HL03-(1403,6)
HMI_LEDs
RED
NOUT
INPUT3
YELLOW
FALSE
GREEN
INPUT4N
C
C
ZM2-START
A003-(167,6)
AND
INPUT1
OUT
ZM3-TRIP
INPUT2
TRUE
FALSE
HL04-(1404,6)
HMI_LEDs
RED
NOUT
INPUT3
YELLOW
FALSE
GREEN
INPUT4N
ZM3-START
D
D
Prepared T.M.Hung, H. Akyea
Approved Daniel Karlsson
Rev Ind
Based on
Power System Protection
Reg nr
Pcl
1
20/09/05
28/09/05
2
3
Configuration diagram
REL 511*2.3
HMI_LED
Resp dep
Chalmers University of Technology
4
Rev Ind
Laboratory exercise
5
Sheet 10/14
6
1
2
3
4
A004-(185,6)
AND
INPUT1
OUT
TRIP-TRIP
TOC-TRIP
INPUT2
TRUE
A
FALSE
6
HL05-(1405,6)
HMI_LEDs
RED
NOUT
INPUT3
5
YELLOW
FALSE
GREEN
A
INPUT4N
TOC-STN
A005-(186,6)
AND
INPUT1
OUT
TEF-TRIP
INPUT2
TRUE
FALSE
NOUT
HL06-(1406,6)
HMI_LEDs
RED
FALSE
YELLOW
INPUT3
GREEN
INPUT4N
B
B
A006-(187,6)
AND
INPUT1
OUT
IOC-TRIP
INPUT2
TRUE
FALSE
NOUT
HL07-(1407,6)
HMI_LEDs
RED
FALSE
INPUT3
GREEN
INPUT4N
A007-(510,6)
AND
INPUT1
OUT
THOL-TRIP
INPUT2
TRUE
FALSE
C
YELLOW
HL08-(1408,6)
HMI_LEDs
RED
NOUT
INPUT3
YELLOW
FALSE
GREEN
INPUT4N
C
THOL-ALARM
O005-(171,6)
OR
INPUT1
OUT
DLD-STPH
FALSE
INPUT2
NOUT
HL09-(1409,6)
HMI_LEDs
RED
FALSE
INPUT3
YELLOW
GREEN
INPUT4
INPUT5
INPUT6
D
D
Prepared T.M.Hung, H. Akyea
Approved Daniel Karlsson
Rev Ind
Based on
Power System Protection
Reg nr
Pcl
1
20/09/05
28/09/05
2
3
Configuration diagram
REL 511*2.3
HMI_LED
Resp dep
Chalmers University of Technology
4
Rev Ind
Laboratory exercise
5
Sheet 11/14
6
1
2
3
FALSE
TRIP\6-O
TRIP-TRIP
INPUT1
FALSE
A
5
RECMADE
INPUT3
MEMUSED
INPUT4
CLEARED
GFC-STFWL1
INPUT5
CUR_PROT\3-O
GFC-STFWL2
INPUT6
CUR_PROT\3-O
GFC-STFWL3
INPUT7
CUR_PROT\3-O
GFC-STFWPE
CUR_PROT\4-O
IOC-TRIP
INPUT9
CUR_PROT\4-O
IOC-TRN
INPUT10
IMP_PROT\2-O
ZM1-TRIP
INPUT11
IMP_PROT\2-O
ZM2-START
INPUT12
IMP_PROT\2-O
ZM2-TRIP
INPUT13
IMP_PROT\2-O
ZM3-START
IMP_PROT\2-O
ZM3-TRIP
INPUT15
IMP_PROT\2-O
PSD-START
INPUT16
#TRIP-TRIP
NAME01
FALSE
INPUT18
INPUT19
DRP1-MEMUSED
INPUT20
GFC-TRIP
INPUT21
INPUT22
THOL-TRIP
FALSE
INPUT8
INPUT24
TOC-STN
INPUT25
TUV-TRIP
INPUT26
TOV-TRIP
INPUT27
DLD-STPH
INPUT28
NAME02
#Input03
NAME03
#Input04
NAME04
#GFC-STFWL1
NAME05
#GFC-STFWL2
NAME06
#GFC-STFWL3
NAME07
#GFC-STFWPE
NAME08
#IOC-TRIP
NAME09
#IOC-TRN
NAME10
#ZM1-TRIP
NAME11
#ZM2-START
NAME12
#ZM2-TRIP
NAME13
#ZM3-START
NAME14
#ZM3-TRIP
NAME15
#PSD-START
NAME16
#0
FuncT01
#0
FuncT02
#0
FALSE
INPUT29
FALSE
INPUT30
FALSE
INPUT31
FALSE
INPUT32
#TEF-TRIP
NAME17
#Input18
NAME18
#Input19
NAME19
#Input20
NAME20
#GFC-TRIP
NAME21
#THOL-TRIP
NAME22
FuncT04
#0
FuncT05
#0
FuncT06
#0
FuncT07
#0
FuncT09
#0
FuncT10
#0
FuncT11
#0
FuncT12
C
#0
FuncT15
FuncT16
#0
InfoNo01
NAME26
#TOV-TRIP
NAME27
#DLD-STPH
NAME28
#Input29
NAME29
#Input30
NAME30
#Input31
NAME31
#Input32
NAME32
InfoNo02
#0
InfoNo03
#0
InfoNo04
#0
InfoNo05
#0
InfoNo06
#0
InfoNo07
InfoNo08
#0
InfoNo09
#0
InfoNo10
#0
InfoNo11
#0
InfoNo12
#0
NAME25
#TUV-TRIP
FuncT14
#0
#0
NAME24
FuncT13
#0
#0
NAME23
#TOC-STN
FuncT08
#0
#0
#Input23
#TOC-TRIP
FuncT03
#0
InfoNo13
#0
InfoNo14
#0
InfoNo15
#0
InfoNo16
A
INPUT23
TOC-TRIP
INPUT14
#Input02
6
DRP2-(1130,6)
DisturbReport
INPUT17
TEF-TRIP
RECSTART
INPUT2
CUR_PROT\3-O
B
4
DRP1-(1129,6)
DisturbReport
CLRLEDS
OFF
#0
FuncT17
#0
FuncT18
#0
FuncT19
#0
FuncT20
#0
FuncT21
#0
FuncT22
#0
FuncT23
#0
FuncT24
#0
FuncT25
#0
FuncT26
#0
FuncT27
#0
FuncT28
#0
FuncT29
#0
FuncT30
#0
FuncT31
#0
FuncT32
#0
InfoNo17
#0
InfoNo18
#0
InfoNo19
#0
InfoNo20
#0
InfoNo21
#0
InfoNo22
#0
InfoNo23
#0
InfoNo24
#0
InfoNo25
#0
InfoNo26
#0
InfoNo27
#0
InfoNo28
#0
InfoNo29
#0
InfoNo30
#0
InfoNo31
#0
InfoNo32
B
C
D
D
Prepared T.M.Hung, H. Akyea
Approved Daniel Karlsson
Rev Ind
Based on
Power System Protection
Reg nr
Pcl
1
20/09/05
28/09/05
2
3
Configuration diagram
REL 511*2.3
DRP
Resp dep
Chalmers University of Technology
4
Rev Ind
Laboratory exercise
5
Sheet 12/14
6
1
A
2
IMP_PROT\2-O
ZM1-TRIP
IMP_PROT\2-O
3
EV01-(1146,6)
EVENT
INPUT1
ZM2-START
INPUT2
IMP_PROT\2-O
ZM2-TRIP
INPUT3
IMP_PROT\2-O
ZM3-START
INPUT4
IMP_PROT\2-O
ZM3-TRIP
INPUT5
CUR_PROT\3-O
GFC-STFWL1
INPUT6
CUR_PROT\3-O
GFC-STFWL2
INPUT7
CUR_PROT\3-O
GFC-STFWL3
INPUT8
CUR_PROT\3-O
GFC-TRIP
INPUT9
IMP_PROT\2-O
PSD-START
4
5
EV02-(1147,6)
EVENT
INPUT1
THOL-TRIP
THOL-ALARM
INPUT2
TEF-TRIP
INPUT3
TEF-START
INPUT4
TOC-TRIP
INPUT5
TOC-STN
INPUT6
IOC-TRIP
INPUT8
INPUT9
INPUT10
INPUT11
INPUT11
INPUT12
INPUT12
INPUT13
INPUT13
INPUT14
INPUT14
INPUT15
INPUT15
INPUT16
B
C
#0.000
T_SUPR01
#0.000
T_SUPR03
#0.000
T_SUPR05
#0.000
T_SUPR07
#0.000
T_SUPR09
#0.000
T_SUPR11
#0.000
T_SUPR13
#0.000
T_SUPR15
#ZM1-TRIP
NAME01
#ZM2-START
NAME02
#ZM2-TRIP
NAME03
#ZM3-START
NAME04
#ZM3-TRIP
NAME05
#GFC-STFWL1
NAME06
#GFC-STFWL2
NAME07
#GFC-STFWL3
NAME08
#GFC-TRIP
NAME09
#PSD-START
NAME10
#EV01-INPUT11
NAME11
#EV01-INPUT12
NAME12
#EV01-INPUT13
NAME13
#EV01-INPUT14
NAME14
#EV01-INPUT15
NAME15
#EV01-INPUT16
NAME16
#0
PrCol01
#0
FuncTEV1
#0
InfoNo01
#0
InfoNo02
#0
InfoNo03
#0
InfoNo04
#0
InfoNo05
#0
InfoNo06
#0
InfoNo07
#0
InfoNo08
#0
InfoNo09
#0
InfoNo10
#0
InfoNo11
#0
InfoNo12
#0
InfoNo13
#0
InfoNo14
#0
InfoNo15
#0
InfoNo16
A
INPUT7
FALSE
INPUT10
FALSE
6
INPUT16
#0.000
T_SUPR01
#0.000
T_SUPR03
#0.000
T_SUPR05
#0.000
T_SUPR07
#0.000
T_SUPR09
#0.000
T_SUPR11
#0.000
T_SUPR13
#0.000
T_SUPR15
#THERMAL-TRIP
NAME01
#THERMAL-ALARM
NAME02
#TEF-TRIP
NAME03
#TEF-START
NAME04
#TOC-TRIP
NAME05
#TOC-STN
NAME06
#IOC-TRIP
NAME07
#EV02-INPUT8
NAME08
#EV02-INPUT9
NAME09
#EV02-INPUT10
NAME10
#EV02-INPUT11
NAME11
#EV02-INPUT12
NAME12
#EV02-INPUT13
NAME13
#EV02-INPUT14
NAME14
#EV02-INPUT15
NAME15
#EV02-INPUT16
NAME16
B
#0
PrCol02
#0
FuncTEV2
#0
InfoNo01
#0
InfoNo02
#0
InfoNo03
#0
InfoNo04
#0
InfoNo05
#0
InfoNo06
#0
InfoNo07
#0
InfoNo08
#0
InfoNo09
#0
InfoNo10
#0
InfoNo11
#0
InfoNo12
#0
InfoNo13
#0
InfoNo14
#0
InfoNo15
#0
InfoNo16
C
D
D
Prepared T.M.Hung, H. Akyea
Approved Daniel Karlsson
Rev Ind
Based on
Power System Protection
Reg nr
Pcl
1
20/09/05
28/09/05
2
3
Configuration diagram
REL 511*2.3
EV
Resp dep
Chalmers University of Technology
4
Rev Ind
Laboratory exercise
5
Sheet 13/14
6
1
2
3
DLD-START
A
5
EV03-(1148,6)
EVENT
INPUT1
TOV-TRIP
INPUT2
TOV-STN
INPUT3
TOV-STPE
INPUT4
TUV-TRIP
INPUT5
TUV-START
INPUT6
FALSE
4
EV04-(1149,6)
EVENT
INPUT1
TRIP-TRIP
INPUT2
INPUT3
A
INPUT4
FALSE
INPUT5
INPUT7
INPUT6
INPUT8
INPUT7
INPUT9
INPUT8
INPUT10
INPUT9
INPUT11
INPUT10
INPUT12
INPUT11
INPUT13
INPUT12
INPUT14
INPUT13
INPUT15
INPUT14
INPUT16
INPUT15
#0.000
T_SUPR01
#0.000
T_SUPR03
#0.000
T_SUPR01
#0.000
T_SUPR05
#0.000
T_SUPR03
#0.000
T_SUPR07
#0.000
T_SUPR05
#0.000
T_SUPR09
#0.000
T_SUPR07
#0.000
T_SUPR11
#0.000
T_SUPR09
#0.000
T_SUPR13
#0.000
T_SUPR11
#0.000
T_SUPR15
#0.000
T_SUPR13
#DEAD LINE DETECT
NAME01
#0.000
T_SUPR15
B
C
6
INPUT16
#TOV-TRIP
NAME02
#GENERAL-TRIP
NAME01
#TOV-START N
NAME03
#EV04-INPUT2
NAME02
#TOV-START P
NAME04
#EV04-INPUT3
NAME03
#TUV-TRIP
NAME05
#EV04-INPUT4
NAME04
#TUV-START
NAME06
#EV04-INPUT5
NAME05
#EV03-INPUT07
NAME07
#EV04-INPUT6
NAME06
#EV03-INPUT08
NAME08
#EV04-INPUT7
NAME07
#EV03-INPUT09
NAME09
#EV04-INPUT8
NAME08
#EV03-INPUT10
NAME10
#EV04-INPUT9
NAME09
#EV03-INPUT11
NAME11
#EV04-INPUT10
NAME10
#EV03-INPUT12
NAME12
#EV04-INPUT11
NAME11
#EV03-INPUT13
NAME13
#EV04-INPUT12
NAME12
#EV03-INPUT14
NAME14
#EV04-INPUT13
NAME13
#EV03-INPUT15
NAME15
#EV04-INPUT14
NAME14
#EV03-INPUT16
NAME16
#EV04-INPUT15
NAME15
#0
PrCol03
#EV04-INPUT16
NAME16
#0
FuncTEV3
#0
PrCol04
#0
InfoNo01
#0
FuncTEV4
#0
InfoNo02
#0
InfoNo01
#0
InfoNo03
#0
InfoNo02
#0
InfoNo04
#0
InfoNo03
#0
InfoNo05
#0
InfoNo04
#0
InfoNo06
#0
InfoNo05
#0
InfoNo07
#0
InfoNo06
#0
InfoNo08
#0
InfoNo07
#0
InfoNo09
#0
InfoNo08
#0
InfoNo10
#0
InfoNo09
#0
InfoNo11
#0
InfoNo10
#0
InfoNo12
#0
InfoNo11
#0
InfoNo13
#0
InfoNo12
#0
InfoNo14
#0
InfoNo13
#0
InfoNo15
#0
InfoNo14
#0
InfoNo16
#0
InfoNo15
#0
InfoNo16
B
C
D
D
Prepared T.M.Hung, H. Akyea
Approved Daniel Karlsson
Rev Ind
Based on
Power System Protection
Reg nr
Pcl
1
20/09/05
28/09/05
2
3
Configuration diagram
REL 511*2.3
EV
Resp dep
Chalmers University of Technology
4
Rev Ind
Laboratory exercise
5
Sheet 14/14
6
1
BC==IO03-BI1
CB_OPEN==IO02-BI1
CLR_LEDS==IO04-BI1
DLD-START
DLD-STPH
A
EF_BLOCK==IO03-BI6
GFC-STCND
GFC-STFWL1
GFC-STFWL2
GFC-STFWL3
GFC-STFWPE
B
GFC-STPE
GFC-TRIP
INT-FAIL
IOC-TRIP
IOC-TRN
IOP1-S15
IOP1-S17
PSD-START
SELECTIVE_TRIP==O034-OUT
TEF-START
TEF-TRIP
THOL-ALARM
THOL-TRIP
C
TOC-STN
TOC-TRIP
TOV-STN
TOV-STPE
TOV-TRIP
TRIP-TRIP
D
TUV-START
TUV-TRIP
2
I_O\9-O
VOL_PROT\5-I
I_O\9-O
EV\14-I
DRP\12-I
HMI_LED\11-I
I_O\9-O
IMP_PROT\2-I
DRP\12-I
EV\13-I
I_O\9-I
TRIP\6-I
DRP\12-I
EV\13-I
I_O\9-I
TRIP\6-I
DRP\12-I
EV\13-I
I_O\9-I
TRIP\6-I
DRP\12-I
I_O\9-I
IMP_PROT\2-I
DRP\12-I
EV\13-I
TRIP\6-I
TRIP\6-I
DRP\12-I
EV\13-I
HMI_LED\11-I
TRIP\6-I
DRP\12-I
I_O\9-I
I_O\9-I
EV\13-I
IMP_PROT\2-O
TRIP\6-O
EV\13-I
DRP\12-I
EV\13-I
HMI_LED\11-I
TRIP\6-I
EV\13-I
HMI_LED\11-I
DRP\12-I
EV\13-I
HMI_LED\11-I
TRIP\6-I
DRP\12-I
EV\13-I
HMI_LED\11-I
DRP\12-I
EV\13-I
HMI_LED\11-I
TRIP\6-I
VOL_PROT\5-O
VOL_PROT\5-O
EV\14-I
TRIP\6-I
VOL_PROT\5-O
EV\14-I
HMI_LED\10-I
HMI_LED\11-I
I_O\8-I
I_O\9-I
TRIP\6-O
VOL_PROT\5-O
EV\14-I
TRIP\6-I
VOL_PROT\5-O
3
ZM1-START
ZM1-TRIP
ZM2-START
ZM2-TRIP
ZM3-START
ZM3-TRIP
1
2
6
A
C
D
20/09/05
28/09/05
Power System Protection
Reg nr
Pcl
5
B
Prepared T.M.Hung, H. Akyea
Approved Daniel Karlsson
Rev Ind
Based on
4
IMP_PROT\2-O
EV\13-I
HMI_LED\10-I
I_O\8-I
IMP_PROT\2-O
TRIP\6-I
EV\13-I
HMI_LED\10-I
IMP_PROT\2-O
EV\13-I
HMI_LED\10-I
I_O\8-I
IMP_PROT\2-O
TRIP\6-I (2)
EV\13-I
HMI_LED\10-I
IMP_PROT\2-O
EV\13-I
HMI_LED\10-I
I_O\8-I
IMP_PROT\2-O
TRIP\6-I (2)
3
Configuration diagram
REL 511*2.3
EV
Resp dep
Chalmers University of Technology
4
Rev Ind
Laboratory exercise
5
Sheet 15a/14
6