1
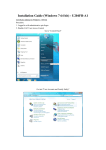
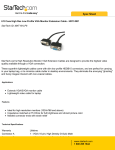
USER MANUAL
LCD Vision USB
V11.09
Delivery Content:
LCD modul, 2 superthin analogue temperature sensors,
fan header connector cable, internal USB cable
V1.2
[1]
1. How to connect the LCD
The HFX Vision LCD needs to be connected with USB (5V) and with a fan cable from the
motherboard (12V).
You can connect 2 fans with the LCD, which will be controlled and triggered by the
temperature sensors.
You can also use the 4 onboard blue LEDs and connect with your RAID controller or HDD
LED or POWER LED.
2. LCD Configuration
Please note, that the LCD can be connected only with one USB software. Please make sure,
that LCD Smartie is closed when using the HFX LCD configuration tool. Please choose the
right COM-Port and adjust to 19.200 Baud.
V1.2
[2]
To configure the LCD you need to close first other connections on the COM-Port (close LCD
Smarti). You can change the welcome message of the display.
You can change the settings of the fan controller. If you add or substract a value in the curve
mode, you can make the temperature curve earlier or later (starting to activate the fan at
lower or higher temperatures)
V1.2
[3]
You have to select the right Com-Port.
You can update the firmware.
We suggest to run LCD Smartie, which provides many plugins and information: Everest stats,
Speedfan stats, MBM stats (your CPU temp, fan/cooler speed, etc), BBC World News (or any
other RSS feed!), WinAmp stats (currently playing tracks title, length, position, etc), Network
stats (speed, total bytes, etc), CPU Speed, Disk available/free, memory usage, Email details,
game stats, and many more...
The LCD configuration must be closed before running LCD Smartie. Only one application
can access the LCD in the same time.
V1.2
[4]