Download Installation Guide (Windows 7 64 bit) - U204FB-A1
Transcript
Installation Guide (Windows 7 64 bit) - U204FB-A1
Certificate making for Windows 7 64 bits
Procedure
1. Logged in with administrative privileges.
2. Diasble UAC User Access Control
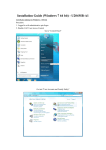
Go to "Control Panel"
Go into "User Accounts and Family Safety"
Go into "User Accounts"
Click "Change User Account Control settings"
Tune to "Never notify"
3. Unzip the LCD2USB.zip file (If CD-ROM is not provided).
4. Copy the folder "lcd2usbdriver" to any drives and folders you like.
5. Copy the folder "dseo13b - Driver Signature Enforcement Overrider" to any drives and folders
you like.
6. Double click to run the "Driver Signature Enforcement Overrider"
7. Click "Next".
8. Click "Yes".
9. Select "Sign a System File" and click "Next".
10. You need to sign the driver "libusb0_x64.sys" in folder of lcd2usbdriver. Insert a driver
filename "libusb0_x64.sys" including full path where it located and click "OK".
11. The driver has been singed and click "OK".
12. Select "Enabled Test Mode" and click "Next".
13. Test Mode has been ENABLED.
14. After restart your computer, you will see "Test Mode" at corner of screen.
15. Run "RemoveWatermarkX64" to remove those water mark.
16. Type "Y" and press enter.
17. Water marks have been removed.
18. Tune back
your UAC User Access Control level.
19. Click "Restart Now".
Driver and Hardware Installation for Windows 7 64 bit
Procedure
Please do "Certificate making for Vista 64 bits first".
1. Prepare the USB connection to U204MB-A1.
You can use internal USB connection (CN4)or external USB connection (CN2)
Plug in the internal USB cable to CN4 (Red-VBus/VCC, White-D-, Green-D+, Black-GND)
2. Filing the plastic cushion of your PC case by sand paper or file. That's can make the frame
can fit into bay drive.
3. Insert the frame into the bay drive.
4. Peel off the protective layer of LCD.
5. Stick the cover sheet on the front end of frame carefully.
6. Mount those bay drive screws.
7. Peel off the protective layer of cover sheet. Outlook like this.
8. Power off your PC first and then find your internal USB port in your mother board.
9. Plug the internal USB cable to your board. Please reference the pins configuration of mother
board user manual.
10. For internal USB cable has been connected, power up your PC.
11. Firmware message will be shown on the LCD.
12. "Device driver software was not sucessfully installed". will be popup on screen."
13. Go to Control Panel
14.Choose "Hardware and Sound"
15. Click "Device Manager" in "Devices and Printers"
16. Find "LCD2USB" in Other devices.
17. Right click to go into "Properties" and choose "Update Driver Software".
18. Click "Browse my computer for driver software"
19. Browse the folder "lcd2usbdriver" where the driver is located and click "OK".
20. Select the driver folder "lcd2usbdriver". and click "Next"
21. "Install this driver software anyway"
22. Wait for the driver installation, then click "Close".
23.The driver of this device has been successfully installed and device is ready to use.
Configuration in LCD Smartie
Procedure
1. Copy the whole folder "lcd.smartie-v5.4 " to any folder/driver of your PC and click into the
folder and run "LCDSmrtie".
2. Click in the setup and make sure Display Plugin is "LCD2USB.dll".
3. Set the screen according to your LCD. LCD contrast and backlight brightness can be tune
here.
3. Finished. LCD Smartie information is shown on the LCD now.


