1
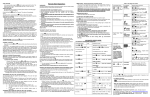
RLC ENTERPRISES, RACING DIVISION
RLC Race Analyzer Software User Manual
Copyright Notice. All materials copyright © 2009, R.L.C. Enterprises, Inc., all rights reserved.
Micro Pod and the Micro Pod Logo are Trademarks of R.L.C. Enterprises, Inc.
R.L.C. Enterprises Reserves the Right to Change Specifications without Notice.
Revision 1.0
September 23, 2009
Table of Contents
File Information Window With Two Cars
CHAPTER 1- INTRODUCTION
Sensor List Window With Two Cars
Opening a Log File
Graphing Window With Two Cars
Exporting Data
CHAPTER 7 – HELP MENU
CHAPTER 2 – TRACK MAP SECTION
Generic Track Map
Exact Track Map
Track Map Control Box
Additional Ways To View Your Data
Where Do I Save An Exact Track Map?
CHAPTER 3 – FILE INFORMATION
SECTION
File Info Tab
Sensor/Lap Info Tab
Sensor Information
Lap Information
Tachometer Tab
CHAPTER 4 – SENSOR LIST/VIDEO
SECTION
Sensor List
Video Window
Video Troubleshooting
CHAPTER 5 – GRAPHING SECTION
Creating A Graph
Data Averaging
Zooming In On A Graph
Multiple Graphs
Multiple Sensors Per Graph
CHAPTER 6 – COMPARING LOG
FILES
Track Map Window With Two Cars
Ch.1
Introduction
First and foremost, thank you for buying our products. You are a valued customer and R.L.C. looks forward to a
mutually beneficial relationship with you. In order to help insure your success, we have prepared this user manual
to use to get started for the first time and as a reference for future questions. The Race Analysis software from
RLC Racing is available for free from our website. The newest version of the PC software will always be posted
on the website under downloads in the technical info section of the website so make sure you are running the
most current version. Please use both this user manual and the help guide in the software for questions on how
the PC software works.
Opening a Log File
Double click on the RLC Race Analyzer software icon (Fig 1) located on your desktop; this was done when you
installed the PC software. The RLC Race Analyzer software will now launch.
Figure 1 – RLC Race Analyzer Icon
To open a valid log file click on ‘File’ then click on ‘Open Log File For Analysis’ (Fig 2).
Figure 2 – Opening a Log File
1
Ch.1
This will open a window where you will select which log file you wish to open (Fig 3). The RLC Race Analyzer
software comes with demo files so you can familiarize yourself with the software. If you are opening one of your
own log files you will have to navigate to the correct location on your computer to where they are located. Log
files that are able to be opened in the PC software are either .bin or .mpg (synchronized video) files. Select the log
file and click the ‘Open’ button.
Figure 3 – Log File Window
Your Log file will now open and look like the screen shot below (Fig 4). If you are opening a synchronized video
log file then it may take a few moments to load. The software needs to extract the data from the video file. There
is a progress bar on the bottom right of the screen to let you know the status of the extraction.
Sensor List/Video
Section
Track Map Section
Graph Section
File Information Section
Figure 4 – Log File Opened
2
Ch.1
The PC software is divided up into four sections. The top left is the track mapping section, the bottom left is the
file information section, the top right is the sensor data/video section, and the bottom right is the graphing
section.
When you are done with the current log file you can choose to open a new file, close the session, or exist the RLC
Race Analyzer. To open a different log file click ‘File’ and select ‘Open Log File For Analysis’. Select a different
file you want to analyze.
Exporting Data
The most common reason to export the data from a log file is that you want to use it in DashWare by Chase
CAM. DashWare allows you to overlay the data from your log file onto a video file. By using DashWare you can
add gauges, speedometer, track map, and other items to the video file. From there you can upload the video to
the internet or share it with friends. For more information about DashWare please visit the Chase Cam website
www.chasecam.com. The other reason for exporting the data is to use it in an alternative program or put it into
an Excel spread sheet for your own uses. To export your data click ‘File’, select ‘Export’ and select which way you
want to export your data (Fig 5). The data will be saved as a .txt file.
Figure 5 – Export Data
3
Ch.2
Track Map Section
The Track Map Section on the PC software is where the track map will appear (Fig 6). All the GPS track data is
directly linked to all video and sensor data taken by the RLC Racing data logger. You can click anywhere on the
track map and the car’s position will jump to that exact position along with the sensor data and video.
Figure 6 – Track Map Section
Generic Track Map
This track map is created by how much of the track you drove on during that log session (Fig 7). A generic track
map will change with each log session because you drove differently in each session. Even if you only drive one
lap you will get a track map. You will notice that some sections on the generic track map are wider than others.
The reason for this is that in the wider sections you drove on more of the track; you may have been passing a car
or experimenting with different lines. The sections that are more narrow mean you had a very similar line each
time you drove that section of track. Your lap lines from that session will load into the generic track map that was
created. You can see your individual lap lines within the confines of generic track map and you can zoom in to
analyze the lines better.
4
Ch.2
Exact Track Map
If an Exact Track Map is available the PC software will prompt you when you open that log file with the closet
matching Exact Track Map file (Fig 7). If the suggested Exact Track Map file matches the log file you are
opening, click on the track map to load it (Fig 8). If the Exact Track map that loads is not correct you can check
to see if the correct Exact Track map is available. Click on ‘GPS’, select ‘Load Map’, and all the Exact Track maps
loaded on your RLC Race Analysis software will be listed. If you see the correct Exact Track Map you can select
it and it will load. Now when you analyze your lap lines they fall within the confines of the actual track. The
benefit of analyzing your data with an Exact Track Map is you can tell exactly where you were on the track when
you stepped on the brakes, pressed on the throttle, or when you dove into a turn. You can zoom in on any part of
the map to more closely analyze your lap lines and the map will automatically pan with the car while playing the
log file.
Figure 8 – Exact Track Map
Figure 7 – Exact Track Map Available
5
Ch.2
Track Map Control Box
All controls for the track map section are in the track map controls box (Fig 9). Here you will find the controls to
start/stop, speed up or slow down the log file, zoom in/out on the track map, pan on the track map, or synch
together two log files (only used when you are analyzing two log files, covered in a later section). The speed up
and slow down buttons currently do not work on synchronized video log files. If the track map control box is in
the way you can click on of the tabs in the corner of the control box and it will move to the opposite side of the
track map section.
Figure 9 – Track Map Control Box
To start playing a log file click the ‘Play/Forward’ button. The red dot (your car) will start moving forward and
you will notice a red line behind it, this is your lap line (Fig 10 & 11). You can speed up or slow down the current
lap by pressing the appropriate buttons. To stop the lap click the ‘Stop’ button and to rewind the lap press the
‘Reverse’ button. The synch button is only used when two cars are being analyzed, this will be covered in a later
section. To zoom in on a part of the track map click on the ‘Zoom In’ button, looks like a magnify glass with a
plus sign in it. Now click and drag a box over any section of track (Fig 10). When you release the mouse the map
will zoom in on the selected section (Fig 11). You can press the play button again to resume and the screen will
automatically pan when the car reaches the edge of the screen. You can even pan around the different parts of the
track when you are zoomed in by clicking the ‘Pan’ button. By clicking on the track map and dragging the mouse
the zoomed section will move. If you want to zoom out to the original track map, click the ‘Zoom Out’ button.
6
Ch.2
Figure 11 – Zoom In Track Map
Figure 10 – Zoom In Box
Additional Ways To View Your Data
The default way your information will display on the track map is shown in Figure 10 & 11. The red dot
represents the car and the lap line appears behind it. You can also view it with the all lap lines drawn, the current
lap line drawn, or no lap lines at all. If you would like to change the view click ‘GPS’ and make your viewing
selection. You may want to experiment with each view to see which one you find the most beneficial.
Where Do I Save An Exact Track Map?
If you sent an Exact Track map file to RLC Racing we will create the track map for you. We will send the Exact
Track back to you in the form of a .map file. We also post all new Exact Track maps at our website under
technical support. You want to save the .map file in the Maps folder in the RLC Race Analysis software so that
you can use it to analyze your data. The way to locate the Maps folder is click on My Computer, Local Disk (C),
Program Files, RLC Enterprises, RLC Race Analyzer, Maps, and then save the .map file there. Now every time
you have a log file from that track it will load into the Exact Track map.
7
Ch.3
File Information Section
The File Information Section is where all the information for the loaded log session is contained (Fig 12). It is
separated into three different information areas by tabs; the File Info, Sensor/Lap Info, and Tachometer.
Figure 12 – File Information Section
File Info Tab
The File Info tab contains all the information about the current log file (Fig 13). It lists the time and date the
current log file was created, duration of the log file, how many completed laps in the log file, and the best lap time
of the log file. There is also a section below all the log file information where you can put notes. Click on the
‘Click Here To Edit’ button to add comments about the log file. For example, you could enter the weather that
day, information about your car setup, or any other details you may want to save with that log file.
Figure 13 – File Info Tab
8
Ch.3
Sensor/Lap Info Tab
The Sensor/Lap Info Tab contains information about all the sensors and completed laps of the current log file
(Fig 14).
Sensor Information
On the left side of the window you will see a list of all the sensors that are connected to your car. You can
organize the sensor data by click on either the ‘Current Data’, ‘Race Summary’, or ‘Lap Summary’ buttons on the
upper right side of the window. If you click on the ‘Current Data’ button the window looks like Figure 14. It lists
out all of the sensors connected to your car and their current data at that exact location on the track. While the log
file is playing the values of the sensors will change and read what the value was at that exact location on the track.
Figure 14 – Sensor/Lap Info Tab
If you click the ‘Race Summary’ button the window looks like Figure 15. Each sensor is listed with the High, Mid,
and, Low values over the entire session. If you click on the ‘Lap Summary’ button the window looks like Figure
15 but each sensor is listed with the High, Mid, and Low values over the current lap that is selected. You can click
on any High, Mid, Low sensor value and the GPS track position and data will jump to that exact location. An
example of when you might want to take advantage of this feature is if you over-revved your car and wanted to
find the exact location that this happened. You would click on the high value of the tachometer sensor and it
would take you to that exact location.
Figure 15 – Sensor/Lap Info Tab With Race Summary Selected
Lap Information
On the right side of the window all of the completed laps and their times are listed (Fig 14 & 15). The current lap
that is playing is highlighted in black, the fastest lap of the session is highlighted in red, if you have a lap overlaid
on the track map it is highlighted in green, and all other laps are in blue. If you want to quickly jump to a specified
lap or overlay a lap line on the track map it is easy to do. To jump to a particular lap right click on the desired lap,
9
Ch.3
and select ‘Jump To Lap’ (Fig 16). All of your sensor data and GPS track position will jump to that specified lap.
To overlay a lap line on the track map, right click on the desired lap and select ‘Overlay Lap Line on GPS Track
Map’ (Fig 16). This function will overlay the selected lap on the track map in a gray line. This will only show the
lap line on the track map section, you cannot view the sensor data for this lap. To view the sensor data of the
overlaid lap you need to import the log file as a comparison file, this is covered in a later section in the manual. To
remove the overlaid lap line right click on the lap and select ‘Remove This Lap From the GPS Map’.
Figure 16– Jump to or Overlay Lap
Tachometer Tab
The Tachometer tab (Fig 17) shows a graphical and digital representation of the RPM. It also shows the speed
and the gear position (if your car has different gears and you calibrated the gears with the gear calibration routine).
While the log file is playing you can view the real time values of the RPM, speed, and gear position. You will also
notice that this tab looks just like your race dash in the car.
Figure 17 – Tachometer Tab
10
Ch.3
Sensor List / Video Section
The Sensor List / Video section is where you find a list of all sensors that were connected to your race dash and
where the video will play if you had synchronized video set up with a Chase CAM camera (Fig 18).
Figure 18 – Sensor List / Video Section
Sensor List
If the ‘Sensor List’ tab is selected (Fig 19) you will see an entire list of all the sensors that were connected to your
RLC Race dash system, what type of sensor it was (analog or digital), and how many samples/second the sensor
was sampling data at. These sensors include the internal 3-Axis G-Force sensor and your GPS speed. Each axis is
individual; the Y-axis is the up and down movement (if you hit a bump, you would move up in your seat), the Xaxis is the lateral movement (side to side), and the Z-axis is the acceleration and deceleration. You will also notice
that next to the sensor type is says which car the sensor data comes from, in Figure 15 it comes from ‘Car 1’. This
reference comes in handy when you compare different sessions/cars. Each time you import a file for comparison
the car number will increment so you know which sensor data belonged to which car. This will be explained in a
later section. The Sensor List contains all the sensors that are available for graphing. You simply select which
sensor(s) you want to graph and drag and drop it into the graphing section below. Please read the Creating a
Graph section below on how to properly graph sensor data. To scroll through all the sensors click on the up or
down arrow on the top or bottom of the Sensor List window.
11
Ch.4
Figure 19 – Sensor List
Video Window
The Video Window tab is where your synchronized video will play if you had a Chase CAM camera connected to
your RLC Race dash (Fig 20). On the bottom right had corner there are controls for the volume and screen size
of the video. You can view the video at 50%, 100%, 200% and full screen. To play the video click the
‘Play/Forward’ button in the track map section. All data is completely linked together so if you click anywhere on
the track map both the sensor data and video will jump to that exact location.
Figure 20 – Video Window
Video Troubleshooting
If the video file does not come immediately you may need to install the codec needed for the video to play in the
RLC Race Analyzer software. If you are running a Windows XP computer you need to download the video
codec from our website located under Downloads in the Technical Support area of the website. Follow the
directions found in the readme.txt file in the zip file. If you are running a Windows Vista computer click Option,
Player, and Download Codes Automatically with the Windows Media player running.
12
Ch.5
Graphing Section
The Graphing Section is where you graph sensor data from the Sensor List section (Fig 21).
Figure 21 – Graph Section
The Graphing section will look like Figure 22 when you first open a log file. When you select a sensor from the
Sensor List and drag it down to the Graphing section it will look like Figure 23.
Figure 22 – Graphing Section
Figure 23 – G-Force Graph
When a sensor is dragged and dropped into the graphing section a graph of that sensor’s data over the entire
session will appear. You will notice in Figure 23 that there is a vertical cursor. This cursor indicates the position
13
Ch.5
of the data and is linked to the GPS track position. You can click anywhere on the graph and the cursor will jump
to that position and give you the sensor data
at the exact place (upper right hand corner of graph). The GPS track position and synchronized video (if a Chase
CAM was connected to the RLC race dash) will also jump to that exact position. In the upper right hand corner
of the graph, the sensor(s) that are being graphed are identified. Along with the sensor name the color in which
the sensor is graphed (helps to differentiate if multiple sensors are graphed) is displayed and so is the value of the
sensor data at that location. You can set up your graph and Graphing section in manner to your liking with the
options on the top right of the Graphing section (Fig 24).
Figure 24 – Graphing Options
The first option lets you scale your data either over the entire race or by an individual lap. The second option lets
you change the units of the X-axis. You can either choose to graph the data over time or distance. The third
option lets you select how many graphs you would like per graphing tab. The number of graphs will depend on
the resolution of your screen, the higher the resolution the more graphs you can display per tab. The maximum
number of graphs you can have per tab is five and you can have a total of five graphing tabs. That’s up to 25
graphs!
Creating a Graph
To create a graph, select a sensor from the Sensor List by clicking on it. It will highlight in blue (Fig 25). Simply
click on the sensor again (holding the mouse down) and drag and drop it into the Graphing section below.
Figure 25 – Sensor Selected For Graphing
A graph of that sensor will appear in the graphing window (Fig 26). The graph will be of the sensor data over the
entire log session. You can see from the graph below we graphed 3 different sensors, all three axis of the G-Force
sensor. In the top right each axis is identified with a different color and its data value according to the vertical
cursor.
14
Ch.5
Figure 26 – Sensor Graph
Data Averaging
When you graph your data you are going to want to apply some data averaging techniques in order to get smooth,
precise data. As in any data there is always some erroneous data. In order to get rid of the data points which
don’t fit you can average the data. Of course you do not need to apply data averaging but we do recommend it.
Click ‘Data’ select ‘Heavy Averaging’ and ‘Data Discard > 10% Different From Neighbors’. This will smooth out
your data and allow you to analyze your data easily.
Zooming In On A Graph
To analyze the sensor data even more closely you can zoom in on the graph. You can either choose to do a x-axis
zoom, y-axis zoom, or create a box over the section of the graph you would like to zoom in on. To do an x-axis
zoom click anywhere on the graph (usually somewhere close to the vertical cursor) hold the mouse down and drag
it horizontally. You will see a highlighted area in red on the graph. The highlighted area indicates the area in
which the data will be zoomed in on (Fig 27). When you release the mouse the graph will now zoom in on the
area highlighted (Fig 28). The smaller the highlighted area the more zoomed in the graph will be.
15
Ch.5
Figure 27 – X-Axis Zoom
Figure 28 – Zoomed In Graph
For a y-axis zoom, do the same thing only drag the mouse vertically and a highlighted section in
blue will appear (Fig 29). To create a box simply click the mouse and drag it both vertically and
horizontally, you will see the highlighted area in yellow (Fig 30).
Figure 29 – Y-Axis Zoom
Figure 30 – Box Zoom
When you want to zoom out simply click the (-) button in the bottom left hand corner. If you want to zoom in
even more, you can analyze your data at full screen. To do this click on the button in the upper right hand
corner of the graph. Doing this will make the graph full screen and take the place of all other windows. To exist
out of full screen click the button. If you do not want the current graph or want to replace it with different
sensor data click the button to close the graph.
Multiple Graphs
When you want to graph multiple graphs at once there are two ways to do this, you can either change the number
of graphs per page or create a new graphing page by clicking on the ‘New Graph Tab’. If you choose to change
the number of graphs per page the maximum number of graphs you can display at once is 5, but the number of
graphs displayed is limited to your screen resolution. The higher the resolution the more graphs you can display.
In Figure 31 you can see that there are 4 different graphs on the one graphing tab. All of the graphs have been
zoomed in on so you can better see the data. Each one of the graphs clearly identifies which sensor(s) is being
graphed.
16
Ch.5
Figure 31 – 4 Graphs Being Displayed
The other way to display multiple graphs is to create a new graphing page by clicking the ‘New Graph Tab’
button. You can create up to 5 different graphing windows (Fig 32) with up to 5 graphs per tab (depending on
your screens resolution) to give you a maximum of 25 graphs. Each graphing tab identifies which sensors are on
that particular graphing window. When you no longer want a certain graphing window, click the button to
close that graphing window. You can also print any graph by right clicking on it and selecting print. Printing out a
graph will allow you to take your data with you to analyze it or have someone else look at it for you.
Figure 32 – 5 Graph Tabs Displayed
17
Ch.5
Multiple Sensors Per Graph
When you want to graph multiple sensors per graph you simply select the sensors you wan to graph from the
Sensor List and drag and drop them into the graphing window below. Each sensor is identified with a different
color. Usually when you graph multiple sensors they have similar values, for example front and rear brakes. If
you graph sensors that don’t have similar values, like GPS speed and EGT, you get a graph that doesn’t make
much sense (Fig 33). The y-axis values are so different that it is difficult to analyze the data of the two different
sensors.
Figure 33 – 2 Sensors On Same Graph
Figure 34 – 2 Sensors On Same Graph With Second Y-Axis
To fix this problem you need to drag and drop the sensors in the graphing window at separate times. Select the
first sensors, GPS speed, from the Sensor List and drag and drop it into the graphing window below. You will get
a graph of the GPS speed. Now select the second sensor, EGT, and drag and drop it into the graphing window.
You will notice that a second y-axis will be created in red on the right hand side of the graph that corresponds to
the second sensors data (Fig 34). Now you can analyze both sensors on the same graph and you are able to read
both sensors data easily.
18
Ch.6
Comparing Log Files
Comparing log files is a crucial tool to any driver. By comparing your log file to another session file or to another
driver’s log file you can quickly figure out where you are losing time or who has the better line through a turn.
With a second log file loaded for comparison you can overlay different lap lines from different sessions, compare
the data between the different sessions, and easily find where you can improve your time around the track. To
open a log file for comparison, click on ‘File’ and select ‘Add Log File(s) for Comparison’ (Fig 35). This will open
a window where you will select which log file you wish to load for comparison. This is also the process you would
use to analyze different lap lines from the same session. You simply load the same log file you currently have
loaded so you can now analyze the data of each line separately.
Figure 35 – Add Log File For Comparison
With the comparison file loaded you will notice that the windows in the PC software will look different. The track
map will now have an additional dot representing the second car you just loaded, it will appear in blue. The File
Information section will have all the information from both log files and the Sensor List window will contain all
the sensors from both cars. The basic version of the RLC Race Analyzer Software allows you to compare 2 log
files at once; in a future release you will be able to compare multiple cars (more than 2).
Track Map Window With Two Cars
With a second log file loaded for comparison a second car will be loaded on the track map, it appears in blue. The
lap line for the second car also appears in blue (Fig 36). In Figure 37 we have zoomed in on the track map so you
can clearly see the two different lap lines. You can now play the log files and see exactly what the differences were
19
Ch.6
between the different lap lines. You can choose to play any lap, please see the track map section above on how to
load a lap, against each other but the most beneficial is probably selecting the fastest lap from each log file. You
can find where one driver was gaining time and who had the better line through a turn.
Figure 36 – 2 Cars On Track Map
Figure 37 – 2 Cars On Track Zoomed In
The Track Map Control Box is also different when you load a second file for comparison (Fig 38). Along with all
the controls, play/stop/fast forward, there is additional information for the two cars. At the top of the control
box it indicates which lap each car is currently on along with the running lap time and running session time.
Below this there are two new items, the Delta Time and Delta Distance. These indicate the difference between
time and distance between the two cars. You can instantly find which car is ahead and by how much (time or
distance). This way you can easily see which car goes through a turn faster and how much time they pick up with
a better lap line. If one car gets too far ahead, no longer in the zoom screen, or you want to analyze another turn
you can click the
button to synch to two cars together again. The car that is behind will ‘catch up’ to the car
in front. The Delta Time and Delta Distance will change to reflect this synch. You can also do the same thing by
simply clicking anywhere on the track map. Both cars will and their data will jump to that exact position. This is a
great tool if you want to replay a turn over and over again to find the best line.
Figure 38 – Track Map Control Box For 2 Cars
20
Ch.6
File Information Window With Two Cars
The second car that was loaded for comparison will now appear in the File Information window. Both the File
Info (Fig 39) and Sensor/Lap (Fig 40) tab will show the information for both cars. For more information about
the File Information window, please see the section above.
Figure 39 – File Info Tab With 2 Cars
Figure 40 – Sensor/Lap Info Tab With 2 Cars
Sensor List Window With Two Cars
The Sensor List window will now list all the sensors available for graphing for both the cars loaded. The sensors
associate with Car 1 will be listed first and the sensors associated with Car 2 are listed second as shown in Figure
41. Just like before you click on the sensor(s) you want to graph and drag and drop them into the graphing
window below.
Figure 41 – Sensor List With 2 Cars
21
Ch.6
Graphing Window With Two Cars
The Graphing window will also change when you have two log files loaded. When you drag and drop the sensors
into the graphing area the Graphing window will look like Figure 42. The sensors are again indicated with
different colors but now you will notice that there will either be a 1 or 2 next to the sensor, this indicates which car
that sensor is associated with. There is now two vertical cursors that indicates the car, one is red the other is blue.
The controls at the top of the Graphing window has also slightly changed. It now allows you to select how you
want to view the data for Car 1 and Car 2, you can see it over the entire race or select a particular lap.
You can zoom in on the sensors data just like you did when you only had one car loaded. Follow the same
directions given in the section above to zoom in on the sensor data being graphed.
Figure 42 – Graphing Window With 2 Cars
22
Ch.7
Help Menu
The RLC Race Analyzer software has a help menu to help you if you do not have this manual handy. To view the
help click ‘Help’ and select ‘Show Help’. Now you can navigate through the different topics to find the answer
you are looking for. There are also hints that will appear in red in the bottom right hand corner of the Race
Analyzer software when your mouse is over different sections of the software. You can also quickly find out
which version of the software you are running by clicking ‘Help’ and selecting ‘About RLC Race Analyzer’.
Always check the website, www.rlcracing.com, for the newest version of the PC software. You can find the
newest version under Downloads at the Technical Support section of the website.
23