1
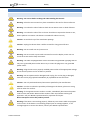
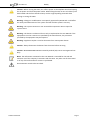
User Guide CEPir Cell Enrichment Process for Isolation of Rare Cells User Manual About this Manual CEPir Manual Number: 100011 Text Revised: March 2012 Note: The information in this document is BioCep Ltd. proprietary. It is provided to customers and authorized representatives of BIOCEP LTD. only. Copyright BioCep Ltd. 2012. This document may not be copied by any means, including electronic, mechanical, photocopying, recording, or otherwise, without the prior written consent of BioCEP Ltd. Unless otherwise indicated, the BioCEP system is for research use only. CONTACT INFORMATION Customer satisfaction is a BIOCEP LTD. priority. To help us in providing you with the best possible product and support, please send us your comments and suggestions. BioCEP Ltd. Rebecca Sieff Medical Center P.O.B. 1008 Safed 13100 Israel Tel: ++972-4-6828828/7 Fax: ++972-4-6923753 Email: [email protected] [email protected] Web: www.biocep.com © 2012 BioCEP Ltd. Page 2 User Manual About this Manual CEPir TABLE OF CONTENTS 1. ABOUT THIS MANUAL......................................................................................................................7 WARNINGS, CAUTIONS AND NOTES .................................................................................................................... 7 2. SAFETY .............................................................................................................................................8 GENERAL SAFETY INSTRUCTIONS ......................................................................................................................... 8 SPECIAL SAFETY INSTRUCTIONS FOR HANDLING POWERFUL MAGNETS .................................................................... 10 3. INTRODUCTION ......................................................................................................................... 11 THE CELL ENRICHMENT PROCESS – CEP ............................................................................................................ 11 THE CEPIR .................................................................................................................................................... 11 IMMUNO-MAGNETIC CELL ISOLATION ................................................................................................................ 11 FLOW-THROUGH, CONTACT-FREE ISOLATION ...................................................................................................... 12 FOUR ISOLATION AREAS AND ELECTROMAGNETIC TECHNOLOGY ............................................................................ 12 STARTING KIT ................................................................................................................................................ 12 4. LABELS AND SYMBOLS .................................................................................................................... 13 LABELS ......................................................................................................................................................... 13 SYSTEM FEATURES ......................................................................................................................................... 14 5. SYSTEM INSTALLATION .................................................................................................................. 15 CONNECTING THE SYSTEM COMPONENTS ........................................................................................................... 15 Finding a suitable location .................................................................................................................... 15 Connecting the power supply ............................................................................................................... 15 6. OVERVIEW OF SYSTEM COMPONENTS ........................................................................................... 16 CEPIR ISOLATION DEVICE ................................................................................................................................ 16 SPECIAL DISPOSABLE ITEMS – BIOCEP DISPOSABLE KITS ..................................................................................... 16 STANDARD CONSUMABLE ITEMS ...................................................................................................................... 17 7. SYSTEM COMPONENTS .................................................................................................................. 18 DETAILED DESCRIPTIONS OF SYSTEM COMPONENTS ............................................................................................. 19 1. Dual Separation Units ....................................................................................................................... 19 2. Sample Disposable Unit (BioCEP Disposable Kit) .............................................................................. 19 3. Buffer Disposable Unit (CEP_KIT) ..................................................................................................... 19 4. Buffer Bottle ..................................................................................................................................... 19 © 2012 BioCEP Ltd. Page 3 User Manual About this Manual CEPir 5. Carousel ............................................................................................................................................ 20 6. Front handle ..................................................................................................................................... 20 7. Display Screen ................................................................................................................................... 20 8. Buffer Pump ...................................................................................................................................... 20 9. Separation Pump .............................................................................................................................. 20 10. Sample Pump .................................................................................................................................. 20 11. Ventilation Opening ....................................................................................................................... 20 12. Sample vessel angle handle ............................................................................................................ 20 13. Separation disposable unit (Mixing Chamber) ............................................................................... 20 14. Rear handle ..................................................................................................................................... 21 15. Reset Switch.................................................................................................................................... 21 16. USB ports ........................................................................................................................................ 21 WORKING UNDER A LABORATORY HOOD ........................................................................................................... 21 8. INSTALLING DISPOSABLE COMPONENTS AND SAMPLE .................................................................... 22 LOCATION OF THE DISPOSABLE COMPONENTS .................................................................................................... 22 INSTALLING THE BIOCEP DISPOSABLE KIT DISPOSABLE COMPONENTS .................................................................... 23 Step 1: Open the BioCEP disposable kit ............................................................................................... 23 Step 2: Prepare the Buffer and collection Area .................................................................................... 23 Step 3: Place the separation disposable unit (see item 13 on page 19): ............................................. 24 Step 3 (Continued): Place the separation disposable unit (see item 13 on page 19) .......................... 25 Step 4: Place the Buffer disposable unit (see item 3 on page 19):....................................................... 26 Step 5: Place the Sample disposable unit (see item 2 on page 19): ..................................................... 27 Step 6: Place the Tubes in the Carousel (see item 5 on page 19) ........................................................ 28 Step 7: Load the Prepared Sample into the Sample Vessel (see item 2 on page 19) ........................... 28 9. PREPARING FOR A CELL SEPARATION .............................................................................................. 29 START THE SOFTWARE AND LOG IN ................................................................................................................... 29 THE CEPIR INITIAL SCREEN .............................................................................................................................. 30 INITIAL SCREEN FOR "NORMAL" PERMISSIONS LEVEL USER .................................................................................... 31 INITIAL SCREEN FOR "ADVANCED" PERMISSIONS LEVEL USER ................................................................................. 32 INITIAL SCREEN FOR "MASTER" PERMISSIONS LEVEL USER ..................................................................................... 33 © 2012 BioCEP Ltd. Page 4 User Manual About this Manual CEPir INITIAL SCREEN FOR "BIOCEP" PERMISSIONS LEVEL USER ..................................................................................... 34 SEPARATION SCENARIOS ................................................................................................................................. 35 CHOOSE AND RUN THE SEPARATION SCENARIO ................................................................................................... 35 CALIBRATION................................................................................................................................................. 36 PUMPS CALIBRATION SCREEN 1 OF 2 – FILL TUBING WITH BUFFER FLUID ................................................................ 37 PUMPS CALIBRATION SCREEN 2 OF 2 – COMPLETE SETUP AND CALIBRATE .............................................................. 38 MAGNETIC SEPARATORS CALIBRATION .............................................................................................................. 39 TOUCH SCREEN CALIBRATION........................................................................................................................... 40 THE ADMINISTRATION SCREEN ......................................................................................................................... 41 THE CEP SCENARIOS MANAGEMENT SCREEN ..................................................................................................... 42 THE FIRMWARE IMAGE MANAGEMENT SCREEN .................................................................................................. 43 BIOCEP SCREEN ............................................................................................................................................ 44 CONFIGURATION SCREEN ................................................................................................................................ 45 10. RUNNING THE CELL SEPARATION SCENARIO.................................................................................. 46 SCENARIO STATUS EXAMPLE 1: BEGINNING OF SCENARIO ..................................................................................... 46 SCENARIO STATUS EXAMPLE 2: PAUSED SCENARIO .............................................................................................. 47 SCENARIO STATUS EXAMPLE 3: A PUMP DOOR IS ACCIDENTALLY OPEN .................................................................. 48 SCENARIO STATUS EXAMPLE 4: PERFORMING SEPARATION ................................................................................... 49 SCENARIO STATUS EXAMPLE 5: DEGAUSSING ..................................................................................................... 50 11. DEVICE SHUTDOWN ..................................................................................................................... 51 12. TROUBLESHOOTING ..................................................................................................................... 52 13. CEPIR MAINTENANCE ................................................................................................................... 54 USER MAINTENANCE ...................................................................................................................................... 54 General Care ......................................................................................................................................... 54 Calibration of the Pumps by the User................................................................................................... 54 Calibration of the Touch Panel by the User .......................................................................................... 55 Fuse Replacement................................................................................................................................. 55 BIOCEP-PROVIDED MAINTENANCE................................................................................................................... 55 Separation Scenarios on the Web ........................................................................................................ 55 Calibration of the Electromagnetic Fields [BioCEP Personnel Only] .................................................... 56 © 2012 BioCEP Ltd. Page 5 User Manual About this Manual CEPir APPENDIX A: SEPARATION SCENARIO GENERATOR ................................................................... 57 HOW ARE SEPARATION SCENARIOS CREATED? .................................................................................................... 57 STARTING THE SEPARATION SCENARIO GENERATOR (SSG) FOR THE FIRST TIME ....................................................... 58 1. Click on Icon ...................................................................................................................................... 58 2. Log in ................................................................................................................................................. 58 3. Enter User and Password .................................................................................................................. 59 4. List of Scenarios ................................................................................................................................ 59 5. Adding Users and Changing Passwords ............................................................................................ 60 IMPORTING SEPARATION SCENARIOS ................................................................................................................. 61 6. Importing a Scenario ......................................................................................................................... 61 EDITING SEPARATION SCENARIOS ..................................................................................................................... 62 OVERVIEW OF THE EDIT SCENARIO SCREEN ......................................................................................................... 63 TERMS USED IN SEPARATION SCENARIOS............................................................................................................ 64 THE FIVE BASIC SEPARATION SCENARIO PROCESSES ............................................................................................. 64 Processes and Related Functions ......................................................................................................... 64 Actions and Parameters........................................................................................................................ 65 EXAMPLE: DETAILED EXPLANATION OF A PROCESS ............................................................................................... 66 HOW TO EDIT THE PROCESSES OF A SEPARATION SCENARIO .................................................................................. 67 Changing the values of parameters in a process function ................................................................... 67 Changing the Timing and Dependencies of a Process Step .................................................................. 68 SAVING A SEPARATION SCENARIO AND USING IT IN A CEPIR CELL SEPARATION ........................................................ 69 Saving the Current Scenario ................................................................................................................. 69 Export the Scenarios to a Flash Drive ................................................................................................... 69 SHUTTING DOWN THE SEPARATION SCENARIO GENERATOR................................................................................... 70 APPENDIX B: SPECIFICATIONS ..................................................................................................... 71 APPENDIX C: WARRANTY ............................................................................................................. 72 © 2012 BioCEP Ltd. Page 6 User Manual About this Manual CEPir 1. ABOUT THIS MANUAL This manual provides the information necessary to operate the CEPir in a safe and efficient manner. Please read and understand this manual before operating the system. If you have any questions, please contact customer support. WARNINGS, CAUTIONS AND NOTES Three types of special messages appear in this User Manual: A warning indicates the possibility of general system failure or hazard to health. A caution indicates a condition that may lead to incorrect or misleading results. A note provides other important information. © 2012 BioCEP Ltd. Page 7 User Manual Safety CEPir 2. SAFETY GENERAL SAFETY INSTR UCTIONS Warning: Do not use before reading and understanding this manual. Warning: Place this user manual in a place accessible to all users for future reference. Warning: To reduce the risks of electric shock do not remove cover or back of device. Warning: To reduce the risks of fire or electric shock do not expose the device to rain, water splashes or moisture. The device is intended for indoor use only. Caution: Do not block any of the ventilation openings. Caution: Unplug this device when it will be unused for a long period of time. Warning: Do not install near any heat source. Warning: Do not scratch or press with excessive force on the display screen. Do not touch the screen with a sharp instrument. Warning: The CEPir is equipped with a three-wire electrical grounded-type plug that fits only into a grounded power outlet. Do not try to insert the plug into a non-grounded power outlet. Warning: Plug the unit into a properly installed power outlet of the appropriate voltage. Ensure that the power cord is not bent or pinched. Warning: Do not operate with a damaged cord or plug. If a cord or plug is damaged, have the cord or plug replaced immediately by a qualified service technician. Caution: Use only with attachments/accessories specified by the manufacturer. Caution: In order to reduce the possibility of damage to the device, place on a strong table or other firm surface. Warning: If the apparatus emits smoke or an odor, immediately disconnect the power cord from the wall outlet. Wait until the smoke or odor stops before touching the apparatus. Call your BioCEP representative for inspection and repair. Never attempt to service this product yourself. Warning: If the CEPir is not working properly, follow any instructions which may appear on the screen. If the device is not working properly but no message appears, or if a message appears to service the device, contact your BioCEP representative. © 2012 BioCEP Ltd. Page 8 User Manual Safety CEPir Caution: Before moving the CEPir, turn off the power via the ON/OFF switch and unplug the AC power cord from the power outlet. When lifting the CEP, be sure to hold it by the back handle and the front handle. Always use the original packing materials when moving or storing the CEPir. Warning: Changes or modifications not expressly approved by BioCEP Ltd. could affect the safety and effectiveness of the system and will void the system's warranty. Warning: The system contains no user-serviceable components. Do not open the system covers. Warning: The device is authorized for use only as explained in this User Manual. If the equipment is used in a manner not specified by the manufacturer, the protection provided by the equipment may be impaired. Warning: Appliance coupler is used as disconnect from mains power device. Caution: Always disconnect the device from the mains before servicing. Caution: INVESTIGATIONAL DEVICE Limited by Federal (US) Law to Investigational Use Only. Note: The information contained in this User Manual is intended for the sole and exclusive use of the company's customers with the CEPir. Any other use of this manual or of any of the information it contains is prohibited. Documentation needs to be consulted. © 2012 BioCEP Ltd. Page 9 User Manual CEPir Safety SPECIAL SAFETY INSTRUCTIONS FOR HANDLING POWERFUL MAGNETS Caution: This special caution label is affixed to the device in order to make users aware of the precautions necessary when using strong electromagnetic fields. The four separation units (see illustration below) contain powerful electromagnets. Observe the following related warnings and cautions when using CEPir. Separation units Warning: Pacemaker Magnets can affect the functioning of pacemakers and implanted heart defibrillators: • • A pacemaker can switch into test mode and cause illness A heart defibrillator may stop working. If you wear these devices, keep a sufficient distance from the magnetic separators. Caution: Magnetic field Magnets produce a far-reaching, strong magnetic field. They can damage electronic devices and other items, including laptops, computer hard drives, credit and ATM cards, data storage media, mechanical watches, hearing aids, and speakers. Warning: Influence on people According to the current level of knowledge, magnetic fields of permanent magnets do not have a measurable positive or negative influence on people. It is unlikely that permanent magnets constitute a health risk, but it cannot be ruled out entirely. For your personal safety, avoid constant contact with the electromagnetic fields near the separation units. © 2012 BioCEP Ltd. Page 10 User Manual Introduction CEPir 3. INTRODUCTION Congratulations on your newly acquired CEPir, the most advanced and flexible immuno-magnetic cell isolation system. THE CELL ENRICHMENT PROCESS – CEP The Cell Enrichment Process is a novel design in immuno-magnetic cell isolation. The CEP’s flow- through design enables quick and efficient separation with outstanding results. The unique contact-free design ensures non damaged cell populations and exemplary separation capabilities. The CEP’s flow-through technology and four electromagnetic fields offer endless separation scenario alternatives and rare cell separation capabilities. Silicone tubing and buffer fluid ensure high viability of target cells suitable for downstream processes. THE CEPIR The CEPir incorporates the patented CEP technology for research and development purposes. The CEPir is a bench top cell separator, which can fit under a hood for sterile isolations. Each isolation requires a CEPir disposable kit. The CEPir can process up to 109 tagged cells and can handle specimen volumes of 0.5-50 mL. The CEPir comes with two preset isolation scenarios, and includes an easy–to-use software system for infinite isolation scenario creation, and a touch screen input mechanism. The CEPir IMMUNO-MAGNETIC CELL ISOLATION The CEPir enables positive isolation of tagged cells or depletion, based on immuno-magnetic cell isolation principles. Prior to utilizing the CEPir, the target cells must be tagged with the relevant reagents and magnetic beads, as is commonly acceptable in this discipline. The CEPir separates cells tagged with any of a number of off-the-shelf reagents and magnetic beads. © 2012 BioCEP Ltd. Page 11 User Manual Introduction CEPir FLOW-THROUGH, CONTACT-FREE ISOLATION The CEP technology utilizes a flow-through, contact-free approach. The flow-through approach allows the gentle passage of the specimen through the isolation areas. The negative fraction flows through the disposable silicon tubing and out of the system, while the tagged cells are held in stasis within a buffer fluid in any of the four isolation areas. The cells do not aggregate on any metallic medium, on the tubing or on each other. This novel design is the key to the high viability of CEP isolated cells. FOUR ISOLATION AREAS AND ELECTROMAGNETIC TECHNOLOGY The CEPir offers four separate isolation areas, through which the cells pass during the isolation process. These numerous isolation areas enable excellent recovery rates with only a single pass and enable rare cell isolation of 1 in 109. The unique electromagnets enable customization of magnetic field strength to suit your isolation needs. STARTING KIT Your CEPir comes with a specialized starting kit, the CEPir Disposable Kit. Isolations with the device require off-the-shelf reagents, beads and buffer. © 2012 BioCEP Ltd. Page 12 User Manual Labels and Symbols CEPir 4. LABELS AND SYMBOLS LABELS Device label – This label is found near the power inlet at the back of the device. Device package label – This label is found on the CEPir device package. Disposable kit label – This label is found on the disposable kit. Disposable kit package label – This label is found on the package of disposable BioCEP kits. © 2012 BioCEP Ltd. Page 13 User Manual Labels and Symbols CEPir SYSTEM FEATURES CEPir has the following system features: Silicone tubing protects cell populations Flow through technology enables high volume separations Four separation areas ensure high yield User-controlled electromagnetic magnetic field strength and flow rates Buffer fluid prevents aridity Depletion and positive separations Touch screen definition for simplicity of use Fits under lab hoods Two preset scenarios Isolation scenario definition and customization option Isolation of up to 1 in 109 tagged cells Isolates 1-50 ml of specimen Support for most bead types and sizes. © 2012 BioCEP Ltd. Page 14 User Manual System Installation CEPir 5. SYSTEM INSTALLATION CONNECTING THE SYSTEM COMPONENTS FINDING A SUITABLE LOCATION In order to place the CEPir in an appropriate location, please note the following: Place the CEPir on a flat, hard and stable surface. Do not position the CEPir on top of other equipment. Install the unit near an AC outlet and where the AC power plug can be easily reached. Place the device in a location with adequate ventilation to prevent internal heat buildup. Do not block the ventilation opening (see item 11 on page 18). In addition, please ensure that the following items are located near the CEPir: A cabinet for CEPir disposable kits storage. A Biohazard waste can. An analytical laboratory scale. Note: Some beads require refrigeration. CONNECTING THE POWER SUPPLY Please perform the following steps: Connect the power cable to the AC input voltage connector. The CEPir has an auto-range power supply for input voltage: 100 – 240 VAC. Connect the power cord to the wall plug, and assure that all cables and connectors are properly connected. Switch the unit on. Power cable and on/off switch (item 17 on page 18). © 2012 BioCEP Ltd. Page 15 User Manual CEPir Overview of System Components 6. OVERVIEW OF SYSTEM COMPONENTS CEPir includes components of three types: Fixed components, which are used and reused for all procedures Disposable components, specifically the CEP Kit, a set of pre-packaged disposables provided by BioCEP Ltd. which is replaced for each separation that is performed. Consumable components, which includes standard off-the-shelf consumable medical supplies such as reagents, vials and physiological buffer. Replacement of all disposable components before each separation procedure prevents cross-sample contamination and eliminates routine cleaning between separations. A brief discussion of these components is given below. CEPIR ISOLATION DEVICE The CEPir Isolation Device is the basic hardware and software used for cell separation. It includes electromagnetic field generators, pumps, fluid reservoirs, computer touch screen, and related software. The CEPir Isolation Device is used for all procedures. It does not require cleaning or maintenance before each procedure. The CEPir Isolation Device is described in detail beginning on page 18. SPECIAL DISPOSABLE ITEMS – BIOCEP DISPOSABLE KITS The BioCEP Disposable Kit is a set of three pre-packaged disposable items used for cell separation: Sample unit Buffer unit Separation unit The BioCEP Disposable Kit is for one-time use only and must not be cleaned or re-used. The Kit is described in detail on page 19. Caution: Always check the expiration date prior to using a BioCEP Disposable Kit. Caution: Do not use if the BioCEP Disposable Kit BioCEP Disposable Kit seal is broken. Caution: The entire BioCEP Disposable Kit BioCEP Disposable Kit must be discarded after each cell separation. It cannot be cleaned or reused. Note: The Buffer solution is not part of the BioCEP Disposable Kit BioCEP Disposable Kit and may be used in more than one procedure. © 2012 BioCEP Ltd. Page 16 User Manual Overview of System Components CEPir STANDARD CONSUMABLE ITEMS These are off-the-shelf disposable items, and are replaced for each separation. Examples of standard disposable items include off the shelf reagents and magnetic beads, a buffer liquid agent, and the vials used for cell collection. Note: The CEPir can utilize any of a number of off the shelf reagents and beads. Be sure to follow incubation and bead-detach protocols for the specific type of reagent in use for best results. The CEPir software allows parameter manipulation which can be adjusted per specifications of the beads in use. Collection vials © 2012 BioCEP Ltd. Buffer Page 17 User Manual CEPir System components 7. SYSTEM COMPONENTS The following diagram lists all of the CEPir components. Bottom view of the Display Screen (Item 7) 17 The fully assembled CEPir Side view, showing the power cord inlet, on/off switch, and fuse housing 1 Dual Separation Units 10 Sample Pump 2* Sample Disposable Unit and tubing 11 Ventilation Opening 3* Buffer Disposable Unit and tubing 4* Buffer Bottle 5 Carousel and vials 6 Front handle 7 Display Screen 12 Sample Vessel handle 13* Mixing Vessel and Separation disposable unit and tubing 14 Rear handle 15 Reset Switch 16 USB ports 17 Fuse assembly 8 Buffer Pump 9 Separation Pump * Disposable component of the BioCEP Disposable Kit © 2012 BioCEP Ltd. Page 18 User Manual CEPir System components DETAILED DESCRIPTIONS OF SYSTEM COMPONENTS Note: Item numbers in blue are references to the diagram on page 18. 1. DUAL SEPARATION UNITS Electromagnets that hold the target cells in stasis. 2. SAMPLE DISPOSABLE UNIT (BIOCEP DISPOSABLE KIT) Vessel to hold the sample cells and the tube that will lead them to the mixing chamber. 3. BUFFER DISPOSABLE UNIT (CEP_KIT) 4. BUFFER BOTTLE Standard consumable that contains the liquid buffer. Buffer bottle © 2012 BioCEP Ltd. Page 19 User Manual System components CEPir 5. CAROUSEL The CEPir comes with two carousels, one for up to four test tubes of 15 ml, and one for up to four test tubes of 50 ml. The Carousel Assembly 6. FRONT HANDLE If it necessary to move the device, it should be gripped firmly by this handle and by the rear handle. 7. DISPLAY SCREEN The display screen is a touch-sensitive device. A user-friendly graphical user interface (GUI) guides the user through the process. The GUI is described on page 29. 8. BUFFER PUMP The Buffer Pump is one of three peristaltic pumps used in the device. It gently draws the buffer solution from the Buffer bottle to the mixing chamber. 9. SEPARATION PUMP Draws from the mixing vessel through the user controlled electromagnetic fields, and four separation areas. 10. SAMPLE PUMP Draws the sample from the sample vessel into the mixing chamber. 11. VENTILATION OPENING Take care not to block this opening. 12. SAMPLE VESSEL ANGLE HANDLE The lower position of this part is to be used in a laminar hood (see next page). 13. SEPARATION DISPOSABLE UNIT (MIXING CHAMBER) This is the mixing vessel where the buffer solution and the sample are mixed in preparation for target cell separation. © 2012 BioCEP Ltd. Page 20 User Manual System components CEPir 14. REAR HANDLE Use this handle and the front handle (see item 6 in the diagram on page 18) to move or carry the device. 15. RESET SWITCH In the event of a device malfunction, you may push Reset to restart the machine. 16. USB PORTS For connecting a keyboard or a disk-on-key. WORKING UNDER A LABORATORY HOOD Working under a hood allows isolations in a sterile environment. Isolations performed under a hood are performed in the same manner as regular isolations. The system includes an adjustable sample handle (see item 12 in the diagram on page 18), which allows easy access to the sample disposable unit, for simple sample loading within the hood. © 2012 BioCEP Ltd. Page 21 User Manual Installing Disposable Components and Sample CEPir 8. INSTALLING DISPOSABLE COMPONENTS AND SAMPLE LOCATION OF THE DISPOSABLE COMPONENTS The following diagram illustrates the CEPir when it is fully prepared for a cell separation procedure. The disposable items are highlighted in the diagram. 2 13 3 4 5 CEPir, highlighting the disposable components 2* Sample Disposable Unit and tubing 5 Vials 3* Buffer Disposable Unit and tubing 13* Mixing Vessel and Separation disposable unit and tubing 4 Buffer bottle * Disposable component of the BioCEP Disposable Kit. Note: The numbers used here refer to the main diagram on page 19. As part of the separation procedure, the BioCEP Disposable Kit must be installed onto the CEPir. The detailed installation steps are given on the following pages. © 2012 BioCEP Ltd. Page 22 User Manual Installing Disposable Components and Sample CEPir INSTALLING THE BIOCEP DISPOSABLE KIT DISPOSABLE COMPONENTS Caution: Before using the Kit, check that its factory seal is intact, and that the expiration date has not been reached. Caution: Always use protective latex gloves when handling items in the Kit. STEP 1: OPEN THE BIOCEP DISPOSABLE KIT STEP 2: PREPARE THE BUFFER AND COLLECTION AREA 3. 1. Open and remove the buffer bottle cap, and replace it with cap from the BioCEP disposable kit. 1. 2. Place the Buffer bottle in the device (see item 4 on page 19). 3. Be sure to open the right plug, as shown in the diagram, in preparation for inserting the tube. © 2012 BioCEP Ltd. 2. Page 23 User Manual Installing Disposable Components and Sample CEPir STEP 3: PLACE THE SEPARATION DISPOSABLE UNIT (SEE ITEM 13 ON PAGE 19): 1. Place the mixing vessel in its place, making sure that it is secured in the omega vessel holder. Ensure that the Orientation Tongue is positioned as shown in the figure. You should hear a “click” when the mixing vessel is in place. 2. Open the Separation Pump door (see item 9 on page 19) (the yellow pump). © 2012 BioCEP Ltd. Page 24 User Manual Installing Disposable Components and Sample CEPir STEP 3 (CONTINUED): PLACE THE SEPARATION DISPOSABLE UNIT (SEE ITEM 13 ON PAGE 19) 3. Place the yellow Pump Key and close the pump door. Ensure that the tubing is in the correct path, and is not pinched when closing the pump door. 4. Before positioning the tubing, place the 90° connector at the hole in the end of the rail. 5. Place the tube through the four separation units. © 2012 BioCEP Ltd. Page 25 User Manual Installing Disposable Components and Sample CEPir STEP 4: PLACE THE BUFFER DISPOSABLE UNIT (SEE ITEM 3 ON PAGE 19): 1. Place the straight connector into the Buffer Cap. 2. Place the blue Pump Key into the Buffer Pump door (see item 8 on page 19) (the blue pump). 3.a. Place the tubing. Ensure that the tubing is in the correct path, and is not pinched when closing the pump door. 3.b. Close the pump door. 4. Depress the blue shutter of the mixing vessel until it is fully down. Connect the 90° blue buffer connector into the opening in the blue shutter. Make sure it is firmly in place. Ensure that the pipe runs through the tube arc that leads to the mixing tank. 3 3b 4. 2. 1. © 2012 BioCEP Ltd. Page 26 User Manual Installing Disposable Components and Sample CEPir STEP 5: PLACE THE SAMPLE DISPOSABLE UNIT (SEE ITEM 2 ON PAGE 19): 1. Place the Sample vessel into its omega vessel holder. 1.a. Ensure that the Orientation Tongue is positioned as shown in the figure. 1.b. You should hear a “click” when the Sample vessel is in place. 2. Open the Sample Pump door (see item 10 on page 19) (Red pump), place the red Pump Key and close the pump door. Ensure that the tubing is in the correct path, and is not pinched when closing the pump door. 3. Depress the red shutter of the mixing vessel until it is fully down. Connect the red sample connector to the opening in the red shutter. Make sure it is firmly in place. 4. Close pump door. Click 3. 4. 1b 2. 1a © 2012 BioCEP Ltd. Page 27 User Manual Installing Disposable Components and Sample CEPir STEP 6: PLACE THE TUBES IN THE CAROUSEL (SEE ITEM 5 ON PAGE 19) Ensure that the end of the yellow connector is placed into the vial: STEP 7: LOAD THE PREPARED SAMPLE INTO THE SAMPLE VESSEL (SEE ITEM 2 ON PAGE 19) Follow your bead manufacturer’s instructions for the sample preparation procedure. In order to load the prepared sample depress the red shutter of the Sample vessel until it is fully down, load the sample in to the vessel through the red hole using a pipette when finish pull up the red shutter. © 2012 BioCEP Ltd. Page 28 User Manual Preparing for a Cell Separation CEPir 9. PREPARING FOR A CELL SEPARATION After the BioCEP Disposable Kit has been installed and the buffer and sample have been loaded, the cell separation process can be initiated. Note – Software Updates: From time to time we will inform you of available software updates. These can be downloaded from the BioCEP website (www.biocep.com ). Installation is per online instructions. START THE SOFTWARE AND LOG IN 1. Turn on the system with the ON/OFF switch. 2. Click on the BioCEP icon. The Logon screen will display: Cell Enrichment Process, v1.41 Enter your username and password. Click on the three dots to display an onscreen keyboard. Note – First time login: If you are logging in for the first time, use username "master" password "master" to login. Please start by loading the XML file that includes users and scenarios created with the BioCEP Scenario Generator software. When done, logoff and login again using the user credentials as defined with the BioCEP Scenario Generator. See Appendix A for instructions. © 2012 BioCEP Ltd. Page 29 User Manual Preparing for a Cell Separation CEPir If you cannot logon, press Help. A support code will be displayed in orange text near the middle of the screen: For assistance, call BioCEP support and provide the support code. THE CEPir INITIAL SCREEN The initial screen that you see is customized to reflect your permission level in the system. The capabilities of each permission level are given below. Permission Level Capabilities Normal Select Scenario to run, Calibrate Pumps/Screen. Advanced "Normal" permissions and also Edit Scenario Master "Advanced" permissions and also Import/Export XML files, Set Scenario Active/Inactive, Update Software, Update Firmware, Export Log file. BioCEP "Master" permissions and also Manual Scenario Run, Calibrate Separators, Set degauss voltage, set pump properties, exit to Windows. Each of these initial screens is discussed in the following pages. © 2012 BioCEP Ltd. Page 30 User Manual CEPir Preparing for a Cell Separation INITIAL SCREEN FOR "NORMAL" PERMISSIONS LEVEL USER 2 1 3 5 6 7 4 8 9 1 User information 6 Run the selected scenario (page 46) 2 Default scenario name for this user. The default scenario is automatically set to the last scenario selected 7 Open Scenario Manual Run screen 3 Description of the selected scenario 9 Calibration Status – OK – Pump is OK Calibrate – You must perform pump calibration (page 36) prior to proceeding with separations 4 System information 5 Select a scenario (page 35) © 2012 BioCEP Ltd. 8 Calibrate pumps and touch screen (page 36) Page 31 User Manual CEPir Preparing for a Cell Separation INITIAL SCREEN FOR "ADVANCED" PERMISSIONS LEVEL USER 2 1 3 4 5 6 7 8 10 9 1 User information 7 Open Scenario Manual Run screen 2 Default scenario name for this user. The default scenario is automatically set to the last scenario selected 8 Calibrate pumps and touch screen (page 36) 3 Description of the selected scenario 10 Calibration Status – OK – Pump is OK Calibrate – You must perform pump calibration (page 36) prior to proceeding with separations 4 System information 5 Select a scenario (page 35) 9 Administration – Edit scenarios (page 42) 6 Run the selected scenario (page 46) © 2012 BioCEP Ltd. Page 32 User Manual CEPir Preparing for a Cell Separation INITIAL SCREEN FOR "MASTER" PERMISSIONS LEVEL USER 2 1 3 5 6 7 4 8 10 9 1 User information 7 Open Scenario Manual Run screen 2 Default scenario name for this user. The default scenario is automatically set to the last scenario selected 8 Calibrate pumps and touch screen (page 36) 3 Description of the selected scenario 4 System information 5 Select a scenario (page 35) 6 Run the selected scenario (page 46) © 2012 BioCEP Ltd. 9 Administration – Edit scenarios, import/export XML files, set scenario active/inactive (page 42); Update firmware (page 43); Export log file (page 41) 10 Calibration Status – OK – Pump is OK Calibrate – You must perform pump calibration (page 36) prior to proceeding with separations Page 33 User Manual CEPir Preparing for a Cell Separation INITIAL SCREEN FOR "BIOCEP" PERMISSIONS LEVEL USER 2 1 3 5 6 7 4 8 9 11 10 1 User information 2 Default scenario name for this user. The default scenario is automatically set to the last scenario selected 3 Description of the selected scenario 4 System information 5 Select a scenario (page 35) 6 Run the selected scenario (page 46) 7 Open Scenario Manual Run screen 9 Administration – Edit scenarios, import/export XML files, set scenario active/inactive (page 42); Update firmware (page 43); Export log file (page 41) 10 Set degauss voltage, set pump properties (page 45) 11 Calibration Status – OK – Pump is OK Calibrate – You must perform pump calibration (page 36) prior to proceeding with separations 8 Calibrate the pumps, touch screen and magnetic separators (page 36) © 2012 BioCEP Ltd. Page 34 User Manual Preparing for a Cell Separation CEPir SEPARATION SCENARIOS A Separation Scenario specifies the detailed steps of buffer and sample pumping speeds and volumes, magnetic field strengths, waiting periods, and other parameters for cell separation. Your CEPir comes with two preinstalled Separation Scenarios: Scenario 11 – Basic isolation scenario Scenario 12 – Basic isolation scenario with intense rinse mode. Scenarios can be edited and created using the PC-based Scenario Protocol Generator, which is described on page 57. Additional scenarios are available for downloading at BioCEP’s website (www.biocep.com). See page 55 for more information on downloading separation scenarios. Two screens in the CEPir touch screen GUI are used in connection with scenarios: CEP Scenarios Management screen (see page 42) o Import/export and edit scenarios o Not available for Normal-level permissions user; limited to Edit capability for Advancedlevel users Select Scenario screen (described below) o Choose a scenario to use when you run the separation process. CHOOSE AND RUN THE SEPARATION SCENARIO Choose the working scenario, by pressing Select from the main screen. The Select Scenario screen will display : Click on the name of a scenario, and press Select. This will return you to the main screen. Then click Run to run the scenario. Click Cancel to return to the main screen without choosing a scenario. © 2012 BioCEP Ltd. Page 35 User Manual Preparing for a Cell Separation CEPir CALIBRATION This screen allows you to calibrate the pumps, magnetic separators, or touch screen. Click on Calibrate Pumps, Calibrate Separators or Calibrate Screen. The appropriate calibration screen will display. Click on Done to return to the main screen. The Pump and Separators information (Rate, Volume, mA, Left mT, Right mT) shows the current values for these parameters. © 2012 BioCEP Ltd. Page 36 User Manual Preparing for a Cell Separation CEPir PUMPS CALIBRATION SCREEN 1 OF 2 – FILL TUBING WITH BUFFER FLUID Use this screen to perform calibration of the buffer, sample and separation pumps. First follow these steps to fill the tubing with buffer solution: 1. Fill the buffer container with Dulbecco's Phosphate Buffered Saline (PBS) solution. 2. Click on Fill for the Buffer pump. This will activate the pump motor. Note that the word Fill on the button now changes to Stop. 3. Click on Stop when the silicon tubing is completely full and no air bubbles are in the tube. This will stop the pump. © 2012 BioCEP Ltd. Page 37 User Manual Preparing for a Cell Separation CEPir PUMPS CALIBRATION SCREEN 2 OF 2 – COMPLETE SETUP AND CALIBRATE Now complete the calibration process, as shown below. Note that the appearance of the Pump Calibration screen has changed: To complete the calibration: 1. 2. 3. 4. 5. 6. Weigh the empty collection vial. Place the collection vial at the end of the tube leading from the Buffer pump. Press Start to start the calibration. When progress bar shows that the process has ended, weigh the collection vial again. Subtract the original empty vial weight (step 1 above) from the vial weight measured in step 4. Enter the result of this calculation into the ml data entry area: Note that clicking on the three dots ••• will open an on-screen keyboard. 7. Press Save Data to save the calibration values. 8. Repeat the instructions on the previous page and this page for the Sample pump and the Separation pump. 9. When all three pumps are calibrated, press Done. Caution: Please be extra careful and as accurate as possible in the pump calibration process. Even a small error in calibration can lead to erroneous separation results. Caution: Re-calibration is required after the CEPir has been switched off . © 2012 BioCEP Ltd. Page 38 User Manual Preparing for a Cell Separation CEPir MAGNETIC SEPARATORS CALIBRATION This screen is used to calibrate the electromagnetic separators. Note: CEPir comes with a pre-calibrated magnetic field. Only BioCEP technicians can recalibrate magnetic field strength, since this procedure requires special measurement tools. © 2012 BioCEP Ltd. Page 39 User Manual Preparing for a Cell Separation CEPir TOUCH SCREEN CALIBRATION The Calibrate Screen button activates the touch screen calibration process: There are three options for touch screen calibration: 4 points, 9 points, and 16 points. Using a higher number of points may result in a more accurate calibration, but will take longer to perform the calibration process. If no button is pressed within four seconds, the system will automatically choose the 9 points calibration option. For all calibration options, follow the on-screen instructions to proceed with the calibration. © 2012 BioCEP Ltd. Page 40 User Manual Preparing for a Cell Separation CEPir THE ADMINISTRATION SCREEN The Administration screen is used to perform system-level functions such as importing or exporting separation scenarios and changing the device setup. CEP Scenarios – Display the Scenarios Management screen, for XML Import/Export (page 42) CEP Hardware – Display the Firmware Image Management screen (page 43) Set Date/Time – Change the time zone, date and time. CEP Upgrade – Place a USB disk on key with the CEPir software update file in the USB connection under the screen, then press this button. Follow the on-screen instructions to update the software. Export Log – Save the system log to an external log file (page 41) Log – View internal messages generated by the CEPir software Done – Return to the main screen © 2012 BioCEP Ltd. Page 41 User Manual Preparing for a Cell Separation CEPir THE CEP SCENARIOS MANAGEMENT SCREEN This screen allow you to import and export scenarios from the system, change which scenarios are available to the user, and edit scenarios. Load XML – Import a scenario file into CEPir Save XML – Export an edited scenario file, for later use in the Separation Scenario Generator program on the PC Edit – Make changes to the selected scenario Toggle Active – Enable/disable Normal and Advanced users from having access to a scenario Log – View internal messages generated by the CEPir software Done – Return to the main screen Note: Only Master and Administrator users can remove scenarios. A scenario must have Active status of No to be eligible for removal. © 2012 BioCEP Ltd. Page 42 User Manual Preparing for a Cell Separation CEPir THE FIRMWARE IMAGE MANAGEMENT SCREEN This screen is used when the device’s firmware must be changed. Add HW Image – Choose a hardware image file, and add it to the list of available images Delete HW Image – Remove the selected hardware image from the list Automatic – If Automatic is displayed here, then the hardware image mode is set to Automatic. This means that CEPir will automatically use the hardware image file with the highest software version number the next time the device is started. Clear Default – Clear the selected file from being the default hardware image. The hardware image mode will be set to Automatic. Set Default – Set the selected hardware image file to the default. The next time the device is started, the selected file will be used. Done – Return to the main screen Log – View internal messages generated by the CEPir software Note: Only Master and Administrator users can delete hardware image. © 2012 BioCEP Ltd. Page 43 User Manual Preparing for a Cell Separation CEPir BIOCEP SCREEN This screen displays when the BioCEP button is pressed on the main screen. Configuration 1 – Set Degauss Voltage, Pump Max speed and Magnet inactivity timeout Configuration 2 – Other BioCEP-related settings Reset Calibration – Reset the Calibration Run Count and set the Status to OK Validate Calibration – Set the Calibration Status to OK Set Regional – Configure the Language. Currently US English only Task Manager – See the running software status Exit (OS) – Exit the CEPir application Serial Control – Used by BioCEP technical support for low level (non-user) control and status Remote Display – Manage the CEPir from a PC. Requires WiFi network access Exit (Sentinel) – Exit in order to change CEPir software version Done – Return to the main screen Log – View internal messages generated by the CEPir software © 2012 BioCEP Ltd. Page 44 User Manual Preparing for a Cell Separation CEPir CONFIGURATION SCREEN This screen appears as follows: Voltage – Set the default degauss (de-magnetize) voltage. Default is 36 V Pump Max Rate – Set the maximum rate for each pump. Default is 20 ml/min Coils time limit – Set the overheating protection time out. If the magnets are left on for a period longer than the configured number of minutes, the running scenario is stopped and the magnets are turned off. This is required to protect the unit from overheating. Save – Save the new values Cancel – Return to previous menu © 2012 BioCEP Ltd. Page 45 User Manual Running the Cell Separation Scenario CEPir 10. RUNNING THE CELL SEPARATION SCENARIO When the Scenario is running (Run from the main screen), CEPir displays a status screen showing the scenario’s activity. The following pages show examples of the status screen. SCENARIO STATUS EXAMPLE 1: BEGINNING OF SCENARIO In this example, buffer fluid is flowing into the mixing vessel. Log – Enter a user comment to the CEPir log file Info – Display an on-screen legend explaining the icons used on the Scenario Run screen Pause – Temporarily pause the scenario operation © 2012 BioCEP Ltd. Page 46 User Manual Running the Cell Separation Scenario CEPir SCENARIO STATUS EXAMPLE 2: PAUSED SCENARIO In this example, the user has pressed the Pause button. The scenario is temporarily stopped, with the option to Resume operation, or to Exit from the scenario. Exit – Cancel execution of the scenario Log – Enter a user comment to the CEPir log file Info – Display an on-screen legend explaining the icons used on the Scenario Run screen Resume – Resume execution of the scenario © 2012 BioCEP Ltd. Page 47 User Manual Running the Cell Separation Scenario CEPir SCENARIO STATUS EXAMPLE 3: A PUMP DOOR IS ACCIDENTALLY OPEN In this example, CEPir is notifying us that a pump door is open. Exit – Cancel execution of the scenario Log – Enter a user comment to the CEPir log file Info – Display an on-screen legend explaining the icons used on the Scenario Run screen Resume – Resume execution of the scenario © 2012 BioCEP Ltd. Page 48 User Manual Running the Cell Separation Scenario CEPir SCENARIO STATUS EXAMPLE 4: PERFORMING SEPARATION In this example, the separator magnetic fields are in operation, and the selected cells are in magnetic stasis. Log – Enter a user comment to the CEPir log file Info – Display an on-screen legend explaining the icons used on the Scenario Run screen Pause – Temporarily pause the scenario operation © 2012 BioCEP Ltd. Page 49 User Manual Calibration CEPir SCENARIO STATUS EXAMPLE 5: DEGAUSSING In this example, the degaussing operation is running . Log – Enter a user comment to the CEPir log file Info – Display an on-screen legend explaining the icons used on the Scenario Run screen Pause – Temporarily pause the scenario operation CALIBRATION © 2012 BioCEP Ltd. Page 50 User Manual CEPir 11. DEVICE SHUTDOWN It is recommended to turn off the device at the end of each day. The system shutdown procedure consists of the following steps: Log off from the system Switch off the device power. Caution: Before switching the device off, make sure all disposable kit parts are removed from the device and that the pump doors are closed. © 2012 BioCEP Ltd. Page 51 User Manual CEPir Troubleshooting 12. TROUBLESHOOTING Condition Probable Cause Unexpected/undocumented error Unit does not switch on Recommended Action Contact BioCEP Ltd. Unit is not plugged into power outlet Check that both ends of the power cable are securely attached Power outlet not working Check that the power outlet is switched on. Check power outlet with another working device. Unit is switched off Check that the power switch is in the "on" position and that the green LED above the screen is on. Screen power plug disconnected Check that the 12 V power cable connected to the screen is securely plugged into its socket. Buffer level too low Add more buffer solution to buffer bottle Tube is pinched Unpinch the tube Pump door is not latched closed Ensure that the pump door is closed properly Scenario contains incorrect pump parameters Review the scenario and change parameters if required Beads not captured by separation magnets Scenario contains incorrect separation unit parameters Review the scenario and change parameters if required Beads not released by separation magnets Scenario contains incorrect separation unit parameters Review the scenario and change parameters if required Unwanted air bubble in tube Buffer level too low Add more buffer solution to buffer bottle Scenario contains incorrect pump parameters Review the scenario and change parameters if required Unit screen is black Liquid not flowing in tubes © 2012 BioCEP Ltd. Page 52 User Manual CEPir Troubleshooting Condition Probable Cause Recommended Action "Run Scenario" does not start the scenario Pump door is open Close pump door Communication problem in unit Check that the communication cable is securely attached to the screen Unit firmware not loaded Check that the firmware version number is displayed in main screen (will display Version HxSy). Select "Program CEP" and make sure the firmware is loaded correctly (will display Version HxSy) Cannot edit scenario parameters User does not have permission to edit scenario Check the user permissions. If required, change user permissions to permit parameter editing Note: When contacting BioCEP for support please provide the device log file (Administrator permissions required) and the scenario XML file used. © 2012 BioCEP Ltd. Page 53 User Manual CEPir Maintenance CEPir 13. CEPir MAINTENANCE Because a new disposable Kit is used for each cell separation, CEPir does not require frequent user maintenance. This section describes the small amount of maintenance that is performed by the user and by BioCEP. Caution: Do not open the device. There are no user serviceable parts inside. Opening the device may void your warranty and service agreements. USER MAINTENANCE GENERAL CARE In case liquid is spilled on one of the CEPir surfaces, simply dry the surface with a plain paper towel and dispose of the towel properly. CALIBRATION OF THE P UMPS BY THE USER Calibration of the pumps consists of testing the pumps for correct volume and speed of pumping. When the device is initially installed by BioCEP personnel, calibrations of the pumps will be performed. If a pump recalibration is required, the device will display Calibrate in the Calibration Status section of the initial CEPir screen (page 31), and a popup message will appear: Pump calibration is performed via the Calibration button of this screen. © 2012 BioCEP Ltd. Page 54 User Manual CEPir Maintenance CEPir CALIBRATION OF THE T OUCH PANEL BY THE USER The touch panel is pre-calibrated. If recalibration is required, use the Calibration option of the main screen of the CEPir touch screen GUI (page 31). FUSE REPLACEMENT In the event of an electrical surge or other problem with the main AC current, it may be necessary to replace the fuse. If you wish to replace the fuse, proceed as follows: 1 2 1. Locate the (1) fuse housing, (2) on/off switch, and (3) power cord inlet on the side of the device. 3 2. Unplug the power cord from both the wall socket and the device itself. 3. Release the fuse cover. The black switch will open from the side of the computer: 4. Pull out the red compartment: 5. Replace both fuses. Note: Always replace both fuses. Always use the same fuse brand and type. The fuse specifications are 3.5 amp and 250 V T (time lag). BIOCEP-PROVIDED MAINTENANCE SEPARATION SCENARIOS ON THE WEB BioCEP publishes additional separation scenarios and software updates on BioCEP's web site (www.biocep.com). Periodically check this site for updates. If available, please follow the instruction provided with the update. As part of your on-going service and support agreement, your BioCEP technician will provide other calibration, software updates and other yearly activities. © 2012 BioCEP Ltd. Page 55 User Manual CEPir Maintenance CEPir CALIBRATION OF THE E LECTROMAGNETIC FIELDS [BIOCEP PERSONNEL ONLY] Calibration of the electromagnetic fields consists of checking for correct field strength at the four separation sites. When the device is initially installed by BioCEP personnel, calibration of the electromagnetic fields will be performed. Should a need arise for further calibration, the calibration will be performed by BioCEP personnel only. P P E © 2012 BioCEP Ltd. Page 56 User Manual CEPir Maintenance CEPir APPENDIX A: SEPARATION SCENARIO GENERATOR During the cell separation process, CEPir performs several operations, including priming the pumps with Buffer, pumping quantities of buffer and sample into the mixing vessel, pumping the resulting mixture past the electromagnetic separation areas, and so forth. The exact sequence and details of these operations are referred to as a Separation Scenario. When you use CEPir, you are presented with a dropdown list of the available Separation Scenarios. From this list you choose one Separation Scenario to perform the cell separation. Note: A Personal Computer or Laptop running Windows (XP/Vista/7) is required to run the Separation Scenario Generator. HOW ARE SEPARATION SCENARIOS CREATED? The Separation Scenario Generator software application is executed on a PC, to create the desired Separation Scenarios. Then the CEPir Administrator imports the Separation Scenarios into CEPir, so that they will be available in the dropdown list. The CEPir Administrator can also manage the list of authorized users. This Appendix describes the operation of the Separation Scenario Generator software. This process is illustrated below. Generate Separation Scenarios Details on page 58 PC 1 One-time operation by Administrator Run Separation Scenario Generator software application Separation Scenarios data file Import Scenarios to CEPir 1 One-time operation by Administrator CEPir Details on page 42 Import Separation Scenarios data file Additional Separation Scenarios available in dropdown list Perform Cell Separation Repeating operation by Users © 2012 BioCEP Ltd. CEPir Details on page 35 Choose and Run Separation Scenario from enhanced dropdown list Page 57 User Manual CEPir Maintenance CEPir X X X X X STARTING THE SEPARAT ION SCENARIO GENERATOR (SSG) FOR THE FIRST TIME 1. CLICK ON ICON On the PC desktop, double click on the Separation Scenario Generator icon: The SSG application will now begin. When SSG is run for the first time, this dialog box displays: This indicates that the initial user/password of master/master has been automatically created. 2. LOG IN The login screen displays, requesting your user and password: © 2012 BioCEP Ltd. Page 58 User Manual CEPir Maintenance CEPir 3. ENTER USER AND PASSWORD Click on User… to enter your initial user and password of master and master: 4. LIST OF SCENARIOS After logging in, you will see the main screen updated with a list of available scenarios. Here is an example of the screen when signed on as user master: User… Switch users master Current user Version 1.65 Software version number New… Create a new scenario Delete… Delete a scenario Export Save scenarios and users in an external file Import Retrieve scenarios and users from a previously exported file Users… View and edit the list of users ID A system-assigned identification for the scenario User Name of the user who created the scenario Scenario Name Name of the scenario Exportable Yes – The scenario will be included in the export file when clicking the Export button No – the scenario will not be included in the export file Description A brief description of the scenario Scenarios A list of currently defined scenarios © 2012 BioCEP Ltd. Page 59 User Manual CEPir Maintenance CEPir 5. ADDING USERS AND CHANGING PASSWORDS Although you can use SSG with the default user of master, we recommend that you define a new user. You may also wish to remove the master user. First click on Users… Then click on Add… Then enter information for the new user: Permission can be one of the following values: Normal Regular user. This user can run scenarios on CEPir but cannot change scenario parameters Advanced Can also change some protocol parameters, such as pumping volume and speed Master Can also modify Separation Scenarios, Users, and User details. Can create new scenarios Admin (reserved for BioCEP use) If expert mode is checked, fewer notification messages will be displayed by the system. We recommend that you check this box only after you are familiar with the system. User Name and Password Selection Since the CEPir device supports the US English keyboard only, use English letters and numbers to define new users and passwords. Switch your keyboard to English and type the user name and password. If your keyboard does not support English, use the on-screen virtual English keyboard to type your user name and password. Please note that when typing the Scenario Name and Scenario Description you can use your local language which will display correctly on the CEPir screen. © 2012 BioCEP Ltd. Page 60 User Manual CEPir Maintenance CEPir IMPORTING SEPARATION SCENARIOS CEPir comes with two predefined Separation Scenarios. If you are signed in as an Advanced or Admin user, you can import these scenarios. Separation Scenario: Basic Isolation Scenario (fill, separation, rinse, collection). Separation Scenario: Basic Isolation Intense Rinse Scenario (fill, separation, rinse, collection). 6. IMPORTING A SCENARIO From the main menu, click on Import: A standard Windows dialog box will display: Choose the desired Separation Scenario, and press Open. A confirmation screen will display, showing summary information about the Separation Scenario: Click OK to continue. © 2012 BioCEP Ltd. Page 61 User Manual CEPir Maintenance CEPir EDITING SEPARATION SCENARIOS From the list of separation scenarios shown on the main screen, double-click to edit or view a scenario. Note: Not all users can edit the separation scenarios. The list of user permissions is on page Error! Bookmark not defined.. Double click on the scenario that you wish to view or edit Details of the scenario will display on the Edit Scenario screen. An overview of this screen is shown on the next page. © 2012 BioCEP Ltd. Page 62 User Manual CEPir Maintenance CEPir OVERVIEW OF THE EDIT SCENARIO SCREEN This diagram shows an overview of the main sections of the Edit Scenario screen. The next page shows more details of the scenario editing procedure. Name and description of the scenario Process shows the process steps defined for the Separation Scenario. This example has five process steps. The buttons on the left (Add, Remove, Up, Down) allow you to add, delete, or reorder the processes. Reset Counters restarts the volume indicator when running the scenario. © 2012 BioCEP Ltd. One or more Kit identification numbers (for future use). The Kit ID identifies which models of the disposable kit are required for this scenario. For the current version of the system, this number may be set to 1 for all scenarios. Click on then enter 1 in the resulting dialog box. Functions shows the detailed actions and parameters for each process. This example shows has four functions. The buttons on the right (Add, Remove, Up, Down, Edit) allow you to add, delete, re-order, or edit the functions. Dependency allows you to specify when to start the function. Done closes this window. Save saves your changes to the scenario. Save As saves your changes under a new scenario name. Page 63 User Manual CEPir CEPir Maintenance TERMS USED IN SEPARATION SCENARIOS A process is a complete stage of the separation, such as rinsing buffer through the system, or separating the target cells. A process is composed of one or more functions. A function is one of the actions of a process, such as pumping fluid from the buffer. A function may have parameters. A parameter is an operational detail of a function, such as the flow rate for a Pump function, or the message to be displayed for a User function. Timing and dependencies determine when a process starts and stops. THE FIVE BASIC SEPARATION SCENARIO PROCESSES A Separation Scenario can consist of any combination of the five basic processes, as shown below. Process Description Priming Set up the collection vial and pump buffer fluid into the buffer and separator tubes. Fill Fill the mixing vessel with buffer fluid. Separation Activate the electromagnets in the separation areas. Pump sample into the mixing vessel, and pump the contents of the mixing vessel past the separation areas. At this point, the desired cells will be in stasis near the separation areas. The undesired cells will exit into a collection vial. Rinsing Pump additional buffer fluid through the separation areas. This will remove any unwanted sample that may have still been in the separation areas. Collecting Demagnetize the separation areas. The target cells will now be released from stasis. Flush the target cells from the system, into a collection vial. PROCESSES AND RELATED FUNCTIONS The following table illustrates the basic processes and related functions. Functions Process CAROUSEL DEMAGNETIZE MAGNET PUMP USER Select a vial Turn off both electromagnets Turn on an electromagnet Choose separator, buffer or sample pump Display a message Priming Fill Separation Rinse Collecting © 2012 BioCEP Ltd. Page 64 User Manual CEPir CEPir Maintenance ACTIONS AND PARAMETERS The following table illustrates each function and its associated parameters. Parameter Function Carousel Select a vial VIAL PUMP RATE VOLUME CAPTION TEXT MAGNET STRENGTH Which vial to use Which pump to activate Flow rate for pump Amount of liquid to pump Title of message Message to be displayed Which magnet to use Strength of magnetic field Vial no. 1, 2 or 3 ––– ––– ––– ––– ––– ––– ––– ––– ––– ––– ––– Pump Select pump ––– Separator, buffer or sample pump 0.5 to 20 ml per minute 0.1 to 50 ml User Display a message ––– ––– ––– ––– ––– ––– ––– ––– text text Magnet Turn on an electromagnet ––– ––– left or right 150 to 850 mT Demagnetize Turn off both electromagnets © 2012 BioCEP Ltd. (no parameters) Page 65 User Manual CEPir Maintenance CEPir EXAMPLE: DETAILED EXPLANATION OF A PROCESS If you click on the fifth process in this example, you will see detailed information on the Collecting process: Here is an explanation of what the Edit Scenario screen is telling us about the four functions in this process. 1. Carousel – Select vial number 2. 2. Demagnetize – Turn off electromagnetic fields at the four separation units. Begin this step only after step 1 above has completed. 3. Pump – Start the buffer pump at a rate of 3 ml/min, until 1 ml has been pumped. Begin this step only after step 2 above has completed. 4. Pump – Start the separator pump at a rate of 3 ml/min, until 5 ml have been pumped. Begin this step after step 3 has pumped 0.5 ml of fluid. © 2012 BioCEP Ltd. Page 66 User Manual CEPir Maintenance CEPir HOW TO EDIT THE PROCESSES OF A SEPARATION SCENARIO CHANGING THE VALUES OF PARAMETERS IN A PROCESS FUNCTION Double click on the function (process step) that you wish to edit (or click once and then press Edit). You will be presented with a dialog box that shows the parameters available in that process step. The parameters and related dialog boxes are shown below. Function Purpose Parameters Carousel Select a vial Which vial: 1, 2, or 3 Separator Turn on a magnet Which magnet: Left or right Strength of magnetic field: 100mT to 900 mT Pump Activate a pump Which pump: Separator, Buffer or Sample Rate of pumping: 0.5 ml to 10 ml per minute Volume to be pumped: 0.1 ml to 40 ml User text Display a message to the user, and wait until he responds on the touch panel Caption: Title of the message Text: Body of the message © 2012 BioCEP Ltd. Dialog Box Page 67 User Manual CEPir CEPir Maintenance CHANGING THE TIMING AND DEPENDENCIES OF A PROCESS STEP The timing and dependency (condition) of a process step refers to exactly when CEPir should begin the step. The default action is to perform each step only when the preceding step has completed. However, more complex scenarios can be created. Some possibilities for dependencies are: Begin step 3 after step 1 and step 2 have completed (default) Begin step 3 after step 2 has pumped 0.5 ml of fluid Begin step 3 after step 1 has completed Begin steps 2 and 3 simultaneously. In order to edit the dependencies of a step, first click once on the step, then click on Dependency: In this example we click on Step 4, Pump, and the dialog box appears that is shown below. The purpose of this dialog box is to set the dependencies of Step 4. In other words, we are now deciding when to begin Step 4. Click here to start Step 4 during the execution of These are Step 3. Since Step 3 is the three Pump, we will also have to previous specify how much fluid steps in this will be pumped by Step 3 process. before we begin Step 4. Note that Step 3 (the immediately previous Click here to start Step 4 at step) is the same time as Step 3. selected. Click here to start Step 4 after the completion of Step 3. This is the default situation. © 2012 BioCEP Ltd. Page 68 User Manual CEPir Maintenance CEPir SAVING A SEPARATION SCENARIO AND USING IT IN A CEPIR CELL SEPARATION When you have completed your editing of a separation scenario, you are ready to save your changes. When all scenarios have been created or edited, you can export them to a flash drive, for use in CEPir. SAVING THE CURRENT SCENARIO Click Save to make permanent the changes that you have made to the scenario. If you wish to copy the changes to a new scenario, click on Save As, and enter the new scenario’s name. When you have made and saved all of your changes, click Done. .. . EXPORT THE SCENARIOS TO A FLASH DRIVE After you have added or updated all scenarios, you can export the scenarios to a flash drive. The can then be imported from the flash drive into the CEPir device, using the touch screen software (see page 42). To export the scenarios, first ensure that they are marked as Exportable in the list of scenarios on the main screen. In order to mark a scenario as exportable, right click on the no icon next to the scenario. The icon will change to yes: Right-mouse click When you have marked all of the desired scenarios as exportable, you are ready to export them to the flash drive. You screen might appear as follows: © 2012 BioCEP Ltd. Page 69 User Manual CEPir Maintenance CEPir In this example, when we click on Export, we will export the following information: List of all users (always included in the exported data) Protocol No 4 Protocol No 5. In order to begin the export, click on Export. A standard Windows dialog box will be displayed: You will typically wish to navigate to a directory in a flash drive, so that you may easily transport the exported data to the CEPir. In this example we are naming the output file my_scenarios.xml. SHUTTING DOWN THE SEPARATION SCENARIO GENERATOR In order to shut down the program, just click on the standard Windows “X” in the upper right-hand corner. © 2012 BioCEP Ltd. Page 70 User Manual CEPir Maintenance CEPir APPENDIX B: SPECIFICATIONS Model: CEP 01-Gen-1 Size (HxWxD in cm): 55x56x39 Weight (Kg, unpacked/packed): 28/40 Power: AC100v-240v 50-60Hz 600W Environmental: RoHS Compliant Operating Temp: 5 – 40oC Operating Humidity: 0-85% Operating Altitude: Maximum of 2000 m Safety: IEC 61010–1: 2001 (2nd Edition) EN 61010–1: 2001 (2nd Edition) UL 61010-1 (Second Edition, July 12, ,2004) CAN/CSA-C22.2 No. 61010-1 (Second Edition) EMI: EN 61326-1:06 FCC CFR 47 Part 15, Sub B ICES-003:04 Interface: USB, TCP/IP, RS-232, WiFi © 2012 BioCEP Ltd. Page 71 User Manual CEPir Maintenance CEPir APPENDIX C: WARRANTY In addition to the below, BioCEP's warranty (the "Warranty") with respect to BioCEP's product (the "Product") is subject to the terms and conditions of sale of this product. BioCEP warrants that the Product will be free from material defects in materials and workmanship encountered during ordinary use of the product as described in this user manual. The Warranty shall not cover Product issues not arising out of defects in materials and workmanship encountered during ordinary use of the Product, including but not limited to Product issues resulting from: failure to follow installation, operating and/or maintenance instructions, or environmental conditions prescribed in this user manual; misuse; abuse; neglect; unauthorized or improperly performed maintenance or repairs; accidents; acts of god; limitations of technology; electrical current fluctuations; modification of or to any part of the Product; use of accessories, spare parts and/or consumables other than those recommended by BioCEP in this user manual; or normal wear and tear. BioCEP does not warrant that the operation of Product or the Product software will be uninterrupted or error free, or that all Product software defects can be corrected. The Warranty does not cover Products which had its serial number defaced, altered or removed, or any consumables or parts identified as sold by third parties. BioCEP makes no warranties, express or implied, written or oral, by operation of law or otherwise, of any products or services furnished under or in connection with the user manual. BioCEP shall be obligated to honor the express warranties set forth in this user manual only upon BioCEP's receipt of full payment for the Product. BioCEP disclaims all implied warranties of merchantability, fitness for particular purpose, and those warranties arising by statute or otherwise in law, or from a course of dealing or usage of trade. Notwithstanding anything to the contrary herein, BioCEP shall not, in any case, (a) be liable for any special, consequential, exemplary, incidental, or indirect damages (including, but not limited to, loss of profits, revenues, data and/or use), even if advised of the possibility thereof; or (b) any claim regarding the Product brought more than eighteen (18) months after the cause of action becomes know to the party bringing the claim. BIOCEP'S LIABILITY, AS SET FORTH HEREINABOVE, SHALL NOT, IN ANY CASE AND FOR ANY REASON WHATSOEVER, EXCEED THE PRODUCT'S PURCHASE PRICE ACTUALLY RECEIVED BY BIOCEP. BioCEP Ltd. Rebecca Sieff Medical Center P.O.B. 1008 Safed 13100 Israel Tel: ++972-4-6828828/7 Fax: ++972-4-6923753 Email: [email protected] [email protected] Web: www.biocep.com © 2012 BioCEP Ltd. Page 72