1
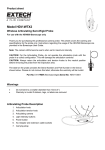
Detachable Monitor
VIDEO BORESCOPE
USER MANUAL
Please read this instruction manual carefully before
using the product
Safety Instructions
Before first use please familiarise yourself with the proper usage of the device. Keep
these operating instructions for future reference. These operating instructions contain
important details for handling the device. Please pass it on along with the unit if it is
handed over to a third party!
Please read the safety instructions most carefully!
These instructions will make it easier for you to handle the device appropriately and
help prevent mishaps and possible damage to the device.
Please note the following safety advice to avoid malfunctions,
damage or physical injury:
● Prevent dirt, dust, grit and liquids in particular getting in to the device. Never
spill liquid of any kind on the video display and the main body of the unit.
● The unit is not shock-resistant. Do not use it as a hammer or drop it.
● Do not immerse the camera and monitor in water. Store it in a dry place. Care to
do store the product safely reduce the risk of electric shock and damage. The image
1
head and the cable are water resistant when the unit is fully assembled, but the
monitor and camera are not.
● Do not use the camera if condensation forms inside the lens. Allow the water to
evaporate before using it again.
Precautions
● The apparatus should not be exposed to dripping or splashing. Keep it clear of
objects filled with liquids, such as vases.
● Turn off the unit if not in use.
● Be sure to dispose of batteries thoughtfully to protect the environment.
● Remove the batteries when cleaning the unit.
● Remove the batteries before storing the unit for extended periods.
● When batteries are low, REPLACE ALL FOUR BATTERIES in the unit with new
ones.
● Use only the size and type of battery specified.
● Be sure to install the battery with the correct polarity as indicated in the battery
compartment.
● Dispose of batteries carefully avoiding exposure to high temperatures which can
cause the batteries to explode.
Do not dispose of batteries in a fire.
Please tape over the terminals to prevent direct contact with
other objects. Some countries have regulations concerning
battery disposal. Please follow all applicable regulations.
2
Table of contents
Page
1. Specifications……………………………………………………….. 4
2. Unpacking your VIDEO BORESCOPE……………………………5
3. Getting started………………………………………………………..7
3.1 Installing batteries…………………………………………………………..…7
3.2 Connecting and disconnecting the lens tube………………………….…7
3.3 Detaching and connecting the detachable LCD monitor…………….…8
3.4 Inserting MicroSD card (supports up to 32GB)…………………………..9
3.5 Installing clip-on tools…………………………………………………....…10
4. Using your VIDEO BORESCOPE………………………………...10
4.1 Basic operation…………………………………………………………….…11
4.2 Menu options……………………………………………………………….…12
4.3 Setting……………………………………………………………………….…13
4.4 Video output……………………………………………………………….….15
4.5 Transferring files to your computer………………………………………15
5. Disposal……………………………………………………………...16
3
1. Specifications
3.5" TFT LCD resolution
320 x 240 Pixels
Lens sensor resolution
640 x 480 Pixels
White balance
Automatic
Exposure to light
Automatic
Video format
NTSC & PAL composite video
Camera illumination
2 white LED lights
Power Consumption
Max 450mA
Ambient/operation temperature
0 to 45
TV Cable length
Approx. 1.5M
Total length of device
111.0 ± 2.0cm
Metal tube length
88.0 ± 2.0cm
Minimum bending radius
4.5cm
Diameter of camera head
10.0mm
Lens coverage
54°
Short distance focus
3 ~ 6 cm
Weight
Approx. 500g
℃
4
2. Unpacking your VIDEO BORESCOPE
5
Before First Use
Remove all packaging materials and check the scope of delivery for completeness
(SEE IN THE PACKAGE) and ensure all the parts indicated are included.
1. 3.5” detachable colour LCD monitor
2. Power ON/OFF button
3. SCROLL UP button
4. RECORD button
5. SCROLL DOWN button
6. MENU button
7. Battery compartment (4 x “AA”, 1.5V)
8. Power indicator
9. Low battery indicator
10. Strap hook
11. Flexible metal tube
12. Lens with LED lighting
13. Micro USB port for micro-mini USB cable (LCD monitor to handle)
14. Mini USB port for mini-standard USB cable (borescope to computer)
15. MicroSD card slot (supports up to 32GB card)
16. Composite video output port (TV-out)
Accessories:
17. Mirror
18. Hook
19. Magnet
20. Composite video cable
21. Standard to mini USB cable (borescope to computer)
6
22. Micro to mini USB cable (LCD monitor to handle)
7
3. Getting started
The product is designed as a remote inspection device. It can be used to look into tight
spots and beam back real-time video to its LCD monitor. Typical applications might
include HVAC, termite and other insect or building inspections, cable routing,
automotive/boat/aircraft inspections etc.
3.1 Installing batteries
1. Open the battery compartment by unscrewing the screw on
the cover.
2. Remove the battery cover and take out the battery holder.
3. Insert 4 new “AA” (1.5V) batteries into the holder. Please
place them according to the correct polarity.
4. Put the holder with batteries back, then install the battery
cover and screw it properly.
☼ When the batteries get flat, the red low battery indicator will come on. Please
change the batteries as per the instructions.
3.2 Connecting and disconnecting the lens tube
How to connect the lens tube
1. Make sure the latch is in the correct position
2. Insert the lens tube gently to avoid damaging
the pins.
3. Screw the connector.
How to disconnect the lens tube
1. Completely loosen the connector, following the
8
remove sign.
2. Unplug the lens tube as shown in the following illustration.
☼ How to connect the optional extension tube
One of the connectors on the extension tube is the same as the one on the body. The
other is the same as the one on the lens tube.
Pair the latch first.
Please refer to the above illustration and 3.2 Connecting and disconnecting the lens
tube connect both ends of the extension tube.
3.3 Detaching and connecting the detachable LCD monitor
Slide the monitor upward to detach it.
Connect the USB cable (micro to mini) between the unit & detached monitor.
9
Take care not to force the USB plug as that can damage the plug & the USB port.
3.4 Inserting MicroSD card (supports up to 32GB)
Before using the camera or video function, a MicroSD card must be inserted into the
card slot.
Note: Card must be inserted with contacts facing upwards
10
3.5 Installing clip-on tools
The VIDEO BORESCOPE is supplied with a hook, mirror and magnet.
ACCESSORIES WARNING:
Do not use excessive force to insert or retrieve probe when using clip-on tools.
No
responsibility will be accepted for tools disconnecting during use and being damaged.
4. Using your VIDEO BORESCOPE
11
Your VIDEO BORESCOPE can be used with the LCD monitor mounted or detached as
shown in the above illustration.
4.1 Basic operation
Power ON/OFF
Press Power ON/OFF button to turn on or off the VIDEO BORESCOPE.
Power indicator will turn green, when powered on.
Camera Illumination
The VIDEO BORESCOPE is equipped with 2 white dimmable LED lights in the lens,
which can be adjusted using the Scroll up or Scroll down button.
Press Scroll up button to increase the brightness
Press Scroll down button to reduce the brightness
Rotating the display
Press Scroll up button for 1.5 seconds to rotate the display by 180˚.
Icons on the display
12
4.2 Menu options
The menu options are accessed by pressing the MENU button.
To move up/down the menu, press the SCROLL UP/DOWN button.
To select a menu item, press the RECORD button.
Press MENU button again to return to the previous menu or exit the menu options.
Select Back option to exit the menu options.
DVR (Digital Video Recorder)
Select DVR mode.
Press the RECORD button to start recording.
icon will flash, when recording.
Press the RECORD button again to stop recording.
Camera
Select Camera mode from menu options.
Press the RECORD button to capture the image.
The picture is automatically saved with a unique file
name.
Play Back
Select Play Back mode from menu options.
The video clip file plays automatically.
Press the RECORD button to pause/play.
13
Press the SCROLL UP/DOWN button to select file.
14
4.3 Setting
15
TV Output
Press the SCROLL UP/DOWN button to highlight NTSC or PAL.
Press the RECORD button to select it.
Press the MENU button to exit.
Note: select the appropriate video standard before connecting to a TV/Display.
Frame Rate
Press the SCROLL UP/DOWN button to highlight a Frame rate.
Press the RECORD button to select it.
Press the MENU button to exit.
Note: 20FPS, 25FPS, 30FPS for Frame Rate options. The higher Frame rate selected,
the bigger file size and the higher quality will be.
Format
Press the SCROLL UP/DOWN button to select Yes. (Select No to cancel)
Press the RECORD button to format.
Press the MENU button to exit.
Note: Please backup all the data on your memory card to computer before
formatting.
Formatting memory card erases all the data on the card.
We suggest formatting the memory card before recording.
Date / Time
Press the SCROLL UP/DOWN button to edit.
Press the RECORD button to select day, month, year, hour, minute and second in
sequence.
Press the MENU button to exit.
16
Language
Press the SCROLL UP/DOWN button to highlight a language.
Press the RECORD button to select it.
Press the MENU button to exit.
4.4 Video output
1. Select proper TV output mode (NTSC or PAL).
2. Connect the VIDEO BORESCOPE and TV by using the Composite video
cable.
3. Switch on the VIDEO BORESCOPE and select video input channel on your TV
Camera picture will then be displayed.
4.5 Transferring files to your computer
1. Connect standard to mini USB cable between mini USB port and your computer
USB port.
2. Switch on the VIDEO BORESCOPE, your computer will detect the memory card as
removable disk drive. Files can be copied or deleted to your computer as required.
17
5. Disposal
Packaging
The packaging can be recycled. Put the packaging materials to appropriate
collection containers only.
Device
After the device has reached the end of its service life, follow the legal
regulations concerning the disposal of electrical devices. Take the device to
your retailer or to an appropriate public collection point, where it will be
recycled
Do not put your used batteries, nickel cadmium, rechargeable, round cell or
starter batteries in with your household rubbish. Take them to an appropriate
disposal/collection site.
18