1
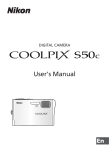
En
COOLPIX CONNECT
User’s Guide
Picture upload services via a public wireless LAN are only available in the U.S.A.
Before you start, read pages 4 to 5 of the User’s Manual.
Disclaimer of Warranties. NIKON’S COOLPIX CONNECT SERVICE IS PROVIDED ON AN
“AS IS” BASIS AND WITHOUT WARRANTIES OF ANY KIND, EITHER EXPRESS OR IMPLIED,
INCLUDING, WITHOUT LIMITATION, ANY WARRANTIES OF MERCHANTABILITY OR FITNESS
FOR A PARTICULAR PURPOSE WHICH ARE EXPRESSLY DISCLAIMED. YOU AND ANY USER
OF NIKON’S COOLPIX CONNECT SERVICE ASSUME ALL RESPONSIBILITY AND RISK IN YOUR
USE OF THE NIKON COOLPIX SERVICE. IN NO EVENT DOES NIKON CORPORATION, NIKON
INC., OR ANY OF ITS RESPECTIVE SUBSIDIARIES, AFFILIATES, DISTRIBUTORS OR DEALERS
(collectively “NIKON”) WARRANT THAT THE NIKON COOLPIX CONNECT SERVICE WILL BE
UNINTERRUPTED, ALWAYS AVAILABLE, ACCURATE, FUNCTIONAL OR ERROR FREE. SOME
STATES DO NOT ALLOW THE DISCLAIMER OF IMPLIED WARRANTIES, SO THE ABOVE
EXCLUSION MAY NOT APPLY TO YOU.
Limitation of Liability. EVEN IF NIKON HAS BEEN ADVISED OF THE POSSIBILITY OF
DAMAGES, NIKON WILL NOT BE LIABLE TO YOU OR ANY USER OF THE NIKON COOLPIX
CONNECT OR ANY THIRD PARTY FOR ANY DAMAGES ARISING FROM USE OF THE NIKON
COOLPIX CONNECT SERVICE, INCLUDING WITHOUT LIMITATION, PUNITIVE, EXEMPLARY,
INCIDENTAL, SPECIAL OR CONSEQUENTIAL DAMAGES; LOSS OF PRIVACY OR SECURITY
DAMAGES; PERSONAL INJURY OR PROPERTY DAMAGES; OR ANY DAMAGES
WHATSOEVER RESULTING FROM INTERRUPTION OR FAILURE OF SERVICE; LOST PROFITS;
LOSS OF BUSINESS; LOSS OF OR FAILURE TO PRESERVE DATA, PICTURES OR IMAGES; LOSS
DUE TO UNAUTHORIZED ACCESS OR DUE TO VIRUSES OR OTHER HARMFUL
COMPONENTS; THE INABILITY TO USE THE NIKON COOLPIX CONNECT SERVICE; OR THE
INTERCEPTION OR LOSS OF ANY DATA, PICTURES, IMAGES OR TRANSMISSION. SOME
STATES DO NOT ALLOW THE EXCLUSION OR LIMITATION OF INCIDENTAL OR
CONSEQUENTIAL DAMAGES, OR OTHER MODIFICATIONS OF OR LIMITATIONS TO CERTAIN
REMEDIES, SO THE ABOVE EXCLUSION OR LIMITATION MAY NOT APPLY TO YOU.
Privacy and Security. PRIVACY CANNOT BE GUARANTEED, AND NIKON IS NOT LIABLE TO
YOU OR ANY OTHER PARTY FOR ANY LACK OF PRIVACY WHILE USING THE NIKON
COOLPIX CONNECT SERVICE. NIKON HAS THE RIGHT, BUT NOT THE OBLIGATION TO
MONITOR, INTERCEPT AND DISCLOSE ANY TRANSMISSIONS OVER OR USING THE NIKON
COOLPIX CONNECT SERVICES. YOU AND ANY USER OF NIKON’S COOLPIX CONNECT
SERVICE ACKNOWLEDGE THAT THIS SERVICE IS NOT INHERENTLY SECURE AND THAT
WIRELESS COMMUNICATIONS CAN BE INTERCEPTED BY EQUIPMENT AND SOFTWARE
DESIGNED FOR THAT PURPOSE.
Thank you for purchasing the Nikon
COOLPIX S50c!
The COOLPIX S50c’s wireless LAN feature allows you to take advantage of Nikon’s
new COOLPIX CONNECT services–Picture Mail and Picture Bank–exciting, user-friendly services that conveniently allow users to upload pictures directly from the camera to
a host server via the Internet.
Picture Mail: Use this service to upload pictures while traveling, or otherwise away from
home or the office, for viewing by your family and friends. E-mail notification of picture
upload can be sent automatically to specified recipients, and uploaded pictures can be
viewed on a computer by accessing the webpage specified in the e-mail notification.
Picture Bank: Use this service to store pictures on the dedicated server. Pictures can
be uploaded to the server to reserve memory card space when taking pictures away
from home.
and upload them via a public wireless LAN...
Pictures are uploaded while traveling!
E-mail notification of picture upload is sent
immediately to your family and friends!
Take pictures...
Access uploaded pictures on the
server from a computer!
This User’s Guide provides step-by-step instructions for using Picture Mail and Picture
Bank, over a public wireless LAN, while away from home or the office.
In addition, another Picture Bank feature, that allows you to upload pictures and
charge the battery all at once simply by connecting the AC adapter to the camera, is
also introduced.
l T-Mobile HotSpot
Use of the COOLPIX CONNECT services over a public wireless LAN connection requires
a T-Mobile HotSpot subscription. You can begin using the T-Mobile HotSpot service
by signing up and creating an account at the URL below:
http://hotspot.t-mobile.com/
After signing up for the T-Mobile HotSpot wireless Internet service, prepare the SSID,
user ID, password, and WEP key. The full user ID, including “@” and the domain
name that follows, must be used.
3
Table of contents
Step 1
Locate public T-Mobile HotSpots
5
Step 2
Choose COOLPIX CONNECT mode
5
Step 3
Configure your alias and e-mail
address
6
Choose Picture Mail or Picture Bank
7
Configure a network profile
7
Choose pictures to upload
9
Specify picture size for Picture Mail
10
Specify a Picture Mail recipient
11
Step 9
Upload pictures
12
Step 10
Register user information with the
server to view uploaded pictures
13
Step 4
Step 5
Step 6
Step 7
Step 8
Use Picture Bank to upload all pictures at once
15
Step 1
Connect the AC adapter to the camera
16
Configure your alias and e-mail address
17
Step 3
Configure a network profile
18
Step 4
Register user information with the server to
view uploaded pictures
19
Step 2
Picture Mail operation
Picture Bank operation
Screen images in monitor may differ from the actual display.
4
Step
1
Locate public T-Mobile HotSpots
Access the URL below to locate public T-Mobile HotSpots where your
camera’s wireless LAN feature can be used.
http://hotspot.t-mobile.com/
Step
2
Choose COOLPIX CONNECT
mode
Before using the camera’s wireless LAN feature, be sure that you have taken at least
one picture with the camera. If pictures have not been recorded, take pictures or insert
a memory card containing pictures into the camera.
2.1
2.2
Turn on the camera.
Apply playback mode.
When the camera is in shooting mode, press i to switch to playback
mode. For more information on playback mode, refer to page 28 of the
User’s Manual.
2.3
Press C.
2.4
User the rotary multi selector to choose M
and press d.
The playback-mode selection menu will be displayed.
5
COOLPIX CONNECT
Entering Text with the Camera
Text for information such as aliases, e-mail addresses, and user ID
and password can be entered using the camera.
• Press d to change the type of character entered in the following order: uppercase letters ➞ lowercase letters ➞ numbers ➞
symbols ➞ uppercase letters, and so on.
• Rotate the rotary multi selector clockwise, or press the rotary
multi selector up, to enter letters (A to Z) in alphabetical order.
Rotate the rotary multi selector counterclockwise, or press the rotary multi selector down, to enter letters in reverse order.
• Press the rotary multi selector right to move the cursor to the right.
Press the rotary multi selector left to move the cursor to the left.
• Press v (l) to preview the letters that have been entered.
• Press m to return to the previous screen.
• Press the shutter-release button to apply selection.
Step
3
3.1
12 26
WEP key
123412341234
Confirm
Back
Delete
Configure your alias and e-mail
address
Select [Input] and press d.
Enter sender info
Enter your alias and
email address
Input
Cancel
3.2
3.3
Enter an alias for yourself (choose an alias,
up to 32 alphanumerical characters, that
identifies you) and press the shutter-release button.
N i kon4
Confirm
Back
Enter your e-mail address (up to 64 alphanumerical characters) and press the shutter-release button.
Cellular telephone e-mail addresses are not supported.
No error message, or indication that an error has
occurred, is sent from the server when delivery errors occur due to incorrect entry of e-mail addresses.
6
6 16
Alias
Delete
10 64
Email
N i k o n4@x x x
Confirm
Back
Delete
Step
4
4.1
Choose Picture Mail or Picture
Bank
Choose [Picture Mail]
or [Picture Bank], and
press d.
Service type
Picture Mail
Picture Bank
I
Searching for SSID
The camera will search for
available SSIDs.
Back
Step
5
5.1
Cancel
Configure a network profile
Choose the SSID and press d.
Select SSID
tmobile
Back
5.2
When the WEP key entry screen is displayed, enter the WEP key provided by TMobile HotSpot and press d.
123412341234
Confirm
Back
7
12 26
WEP key
Delete
The screen for connecting to the access point will
be displayed.
I
Connecting to access point
Cancel
5.3
When the user ID entry screen is displayed,
enter the user ID provided by T-Mobile
HotSpot (including “@” and the domain
name that follows) and press d.
N i kon1
Confirm
Back
5.4
When the password entry screen is displayed, enter the password provided by TMobile HotSpot and press d.
Delete
6 128
Password
N i kon1
Confirm
Back
8
6 128
User name
Delete
Step
6
6.1
Choose pictures to upload
Choose [All images] or [List by date] and
press d.
[All images]: proceed to Step 6.3
[List by date]: proceed to Step 6.2
Picture selection
All images
List by date
Select SSID
6.2
6.3
Select a date.
Press d to select a date in the list by date screen
(y). Press d again to cancel the selection.
Multiple dates can be selected.
Press the shutter-release button to finalize date
selection.
Choose pictures.
List by date
2007/10/10
3
2007/10/09
2
2007/10/08
5
images total [ 5]
Back
ON/OFF Confirm
Select image
Use the rotary multi selector to choose pictures
and press d to choose a desired picture (up to
30). A check mark (y) will be applied to selected pictures. Press d again to cancel the selection.
Confirm
Press v (k) to switch to full-frame playback;
press t (j) to return to thumbnail display.
Press the shutter-release button to finalize picture selection.
5
ON/OFF
When [Picture Bank] is selected in Step 4 on page 7, proceed to Step 9 on page 12.
9
Step
7
Specify picture size for Picture
Mail
When uploading pictures to a dedicated server, picture size can be specified when using Picture Mail.
7.1
Choose a size for uploaded pictures and
press d.
Option
7.2
Description
Photoprint
1,600 × 1,200 pixels
PC size
1,024 × 768 pixels
TV size
640 × 480 pixels
Full size
The same size as the original
Press the shutter-release button.
10
Choose size
Photoprint
PC size
TV size
Full size
Back
Confirm
Step
8
Specify a Picture Mail recipient
Register your family and friends as Picture Mail recipients by entering their e-mail addresses.
8.1
Choose [New] and press d.
Up to 30 recipient e-mail addresses can be added.
Choose address
New
Back
8.2
Enter recipient’s e-mail address (up to 64
alphanumerical characters) and press the
shutter-release button.
Cellular telephone e-mail addresses are not supported.
8.3
8.4
Choose recipients by their e-mail addresses.
Use the rotary multi selector to choose recipient
e-mail addresses and press d to choose the desired recipient e-mail addresses. Press d again to
cancel the selection.
Up to 30 recipient e-mail addresses can be selected.
ON/OFF
Confirm
10 64
Email
N i k o n1@x x x
Confirm
Back
Delete
Choose address
New
[email protected]
[email protected]
[email protected]
[email protected]
Back
ON/OFF Confirm
Press the shutter-release button.
k E-mail Notification
Once picture upload is complete in Step 9, e-mail notification will be sent to the specified recipients. Recipients can view the uploaded pictures on a computer by clicking
on the link provided in the e-mail notification.
l Recipient Aliases
An alias can be registered for each recipient using the camera’s setup menu, or the
COOLPIX CONNECT Utility, to make recipient selection easier. See pages 136 and 139
of the User’s Manual for further information.
11
Step
9
9.1
Upload pictures
Choose [Yes] and press the shutter-release
button.
Send mail
Send pictures?
No
Yes
Confirm
9.2
Picture upload begins.
The screen for connecting to the server will be
displayed.
I
Connecting to server
Cancel
9.3
When upload is complete, the message
shown at right will be displayed.
K
Transfer complete.
Connection
terminated.
12
Step
10
Register user information with the
server to view uploaded pictures
Register user information with the Picture Mail server or Picture Bank server to view
uploaded pictures. Until user registration has been complete, uploaded pictures are
stored in a temporary space on the server and can not be viewed. Once user registration has been complete, private space on the server will be reserved for uploaded pictures, and the pictures can be viewed and downloaded by accessing the server from
a computer.
Register user information with the server
When pictures are uploaded using Picture Mail or Picture Bank, e-mail notification requesting user registration will be sent to the sender e-mail address registered with the
camera. Click the link in the e-mail notification to display the user registration webpage.
Ready the following information before attempting registration.
Key information: Key information is assigned to each
Key information
camera. Select the [Key information] option from the
[Wireless settings] item in the camera’s setup menu and
XXXX
press d to display the key information for your camera. For
more information on the camera’s setup menu, see page
107 of the User’s Manual.
Password: Create a password to access your private space
on the server and be sure that you do not forget it.
10.1
10.2
Open the e-mail notification requesting user registration on a
computer with an Internet connection and click the link provided.
• The user registration webpage will be displayed in your web browser.
Use one of the following compliant web browsers to properly view the
webpage:
- Windows: Internet Explorer 6 or later
- Macintosh: Safari 2 or later
• The sender alias and e-mail address registered with the camera will be
displayed.
Enter the assigned key information and a password to register
your user information.
• User registration is complete once the user information has been sent to
the server.
13
j Notes on User Registration
• After the first picture upload, register user information as soon as possible to protect
pictures, along with other personal information, from unsolicited viewing or theft.
Until user information is registered, pictures are uploaded to temporary space on the
server with no security measures applied.
• Until user information is registered, e-mail notification requesting user registration
will be sent whenever pictures are uploaded. If you do not receive the e-mail notification, sender information registered with the camera may be incorrect. Correct
sender information and upload pictures again.
• Once user information has been registered, information including the sender’s alias
and e-mail address can not be edited from the camera or the Utility. Access the
COOLPIX CONNECT server from a computer to edit user information.
• If you forget the password and reset all wireless settings after you have applied the
password, e-mail notification requesting user registration will be sent to the sender’s
e-mail address the next time pictures are uploaded. Click the link provided in the email notification to access the user registration webpage.
• Before discarding the camera or transferring it to another owner, confirm whether
or not pictures have been uploaded once. If pictures have ever been uploaded, be
sure to register user information with the server, and then reset all wireless settings.
• If this camera was given to you by a previous owner, reset all wireless settings before
using the camera and taking advantage of wireless services.
For more information on user registration, see pages 137, for applying a password,
and 138, for resetting all wireless settings, of the User’s Manual.
k More on User Registration
Refer to the instructions included in the e-mail notification received, as well as those
in the user registration webpage itself, for more information.
l Note on Protecting Personal Information
Once a wireless service has been used, personal information is saved in the camera and
on the COOLPIX CONNECT server. To protect personal information from unsolicited
viewing or theft, apply a password to protect data stored in the camera, and register
user information with the server to protect uploaded data.
14
Use Picture Bank to upload all pictures
at once
Picture Bank offers two options for uploading pictures. Upload selected pictures to the
server (as described on pages 5 to 12), or initiate upload of all pictures when the AC
adapter is connected to the camera.
This section introduces upload of all pictures, initiated with connection of the AC
adapter, via a home wireless LAN. Infrastructure mode, which utilizes an access point,
is required to use a home wireless LAN. For more information on configuring a network profile for home wireless LAN, see page 125 of the User’s Manual.
Upload all pictures!
Battery charge begins
after picture upload!
Take pictures...
Connect the AC
adapter...
This section describes a home wireless LAN for which the only security applied is encryption with a WEP key. Configure home wireless LAN settings at a location that is
physically near the access point.
Home Wireless LAN Settings
• If the access point does not allow connection by any wireless device, or if MAC address filtering is enabled, modify access point settings to allow connection by any
wireless device and configure the camera’s MAC address with the access point. Refer to “Firmware version” on page 123 of the User’s Manual.
• Home wireless LAN configuration can vary from one user to another. If authentication or another type of encryption is enabled, refer to “Configuring Wireless LAN
Settings from the Camera” on page 130 and “Configuring Wireless LAN Settings
from the Utility” on page 139 of the User’s Manual to apply the appropriate settings for the home wireless LAN.
• For more information on home wireless LANs, refer to other commercially available
references on wireless LAN.
15
Step
1
1.1
1.2
Connect the AC adapter to the
camera
Turn the camera off.
Connect the AC adapter to the camera’s multi connector, and
plug the power cable into an outlet.
2
4
3
1
The message, [Starting upload to Picture Bank], will
be displayed.
K
Starting upload to
Picture Bank
Cancel
k Setting the Camera’s Clock
When the camera’s built-in clock has not been set, the message shown above is not
displayed. Refer to page 6 of the Quick Start Guide and set the camera’s clock.
16
Step
2
Configure your alias and e-mail
address
When the sender’s information has been configured with the camera in Step 3 on
page 6 of this guide, the following screens will not be displayed. Proceed to Step 2.3.
2.1
Select [Input] and press d.
Enter sender info
Enter your alias and
email address
Input
Cancel
2.2
Enter your alias (choose an alias, up to 16
alphanumerical characters, that identifies
you) and press the shutter-release button.
For information on entering text, see “Entering
Text with the Camera” on page 6.
2.3
Enter your e-mail address (up to 64 alphanumerical characters) and press the shutter-release button.
Cellular telephone e-mail addresses are not supported.
17
6 16
Alias
N i kon4
Confirm
Back
Email
Delete
10 64
N i k o n4@x x x
Confirm
Back
Delete
Step
3
3.1
Configure a network profile
Choose the desired SSID (wireless LAN network name) and press d.
Select SSID
AP1
AP2
Back
If the WEP key entry screen is displayed, enter the
WEP key and press the shutter-release button.
12 26
WEP key
123412341234
Confirm
Back
The screen for connecting to the access point will
be displayed.
Delete
I
Connecting to access point
Cancel
The screens for connecting to the server, and for uploading pictures to the
server, will be displayed in order. When the upload is complete, the message shown below will be displayed.
I
Connecting to server
I
11MB:Available
Transferring images
to server.
002/030
Cancel
K
Transfer complete.
Connection
terminated.
Cancel
Once upload is complete, the camera turns off, the power-on lamp blinks
orange, and the battery begins charging.
18
Step
4
Register user information with the
server to view uploaded pictures
Register user information with the COOLPIX CONNECT server to view uploaded pictures.
When pictures are uploaded, e-mail notification requesting user registration will be
sent to the sender e-mail address registered with the camera. Refer to Step 10, “Register user information with the server to view uploaded pictures” on page 13 to attempt user registration.
k Deleting Picture Bank Pictures
You can choose to delete only Picture Bank pictures–those pictures that have already
been uploaded to the server–from calendar and list by date playback modes. Refer to
pages 104 and 151 of the User’s Manual for further information.
19
Printed in China
YP6L01(11)
6MA29311-01