1
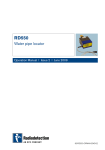
Q ui c k S ta r t
U se r G ui d e
RD547 water leak detector
90/ UG100I NT/01
I SSU E 1 11/2014
Important: This guide provides basic operation instructions and
is intended as a field reference only. It also contains important safety
information and guidelines and should be read in its entirety before
attempting to operate the RD547. Detailed instructions, including
product specification and troubleshooting information are available in
the Operators’ Manual. Radiodetection products, including manuals,
are under continuous development. To ensure you have the most up
to date information, please download the Operators’ Manual from
www.radiodetection.com.
Getting the RD547 ready for use
See the Operators’ Manual for a full description of acoustic
listening devices and RD547 controls, functions and menus.
Insert batteries and attach the headphones and appropriate
measuring device to the RD547.
Insert batteries
Attach headphones
Acoustic device connector
Hydrogen sensor connector
For assembly of accessories see page 12.
RD547 controls
The buttons and dials have a number of functions, depending
upon the current activity.
Dial 1: turn to control
volume, press to capture
a measurement or
hold down to power off
Button 2: press to cancel or go back
Button 1: used to
power on and to
start measurement
Dial 2: turn to navigate
menus and screen
display or press to
select item or setting
2
Main menu
Press Button 1 to power on the RD547 unit and display the
Main menu, which has a number of functions (see the Operators’
Manual for full details).
Turn Dial 2 to navigate to the required function and press to
select it.
There are three Measurement functions on the Main menu:
Display 1 – Main menu
Acoustic Measurements, which has three modes, Smart,
GEO and PWG (see next section)
Trace Gas Detection
Long-term acoustic measurements
The process of setting parameters and capturing measurements
is similar for all three measurement functions.
For this quick start guide we shall look at Acoustic
Measurements and Trace Gas Detection.
Taking Acoustic Measurements
1. Attach the appropriate microphone to the RD547 unit and
power it on (using Button 1).
2. Select Acoustic Measurements from the Main menu.
3. Select Smart mode using the mode selection icon (see
display 2).
4. Hold down the button on the listening device to start
measuring (or hold down Button 1).
5. Release the button on the listening device to capture a
measurement (or release Button 1).
6. Use the information on the display to pinpoint a leak, as
described over.
3
Display 2 – Smart mode Acoustic Measurements
Filter settings
Last six saved
measurements
Current measurement
Mode selection
Headphone volume
Frequency spectrum
Microphone
sensor sensitivity
Mode selection
This icon tells you which mode is selected.
Smart Mode is recommended because it uses
advanced signal processing to indicate whether the
frequency and volume measured is consistent with a leak.
Two other modes are available:
Geo for measuring amplitude only.
PWG for searching for a pipe with an optional pulse
wave generator.
See the Operators’ Manual for information about the RD547
display when these modes are selected.
Current measurement
This element shows the current measurement.
The measurement starts when the button on
the handle is pressed down and finishes
when the button is released. It is
recommended that the button is held down
until any ambient noise which is NOT permanent, such as a dog
barking or a car passing, is eliminated.
The number recorded is the lowest noise level taken (on a scale
of 0 to 99) during this period that is relevant for leak detection.
This information is also shown in bar form to the immediate right
of the number.
The right hand bar represents the smart indicator. In addition to
noise levels, the smart indicator considers the frequency of the noise
measured with an emphasis put on higher frequencies that are
normally present at the site of a leak. The numerical value of this bar,
(70 in the above example), is displayed below it. A high value implies
a high likelihood of a leak at the point of that measurement.
The user is looking for a high noise level and a high “smart” level.
4
Last six saved measurements
This section of the screen shows the six
previous measurements. The most recent
measurement is in position 1 and the
oldest in position 6. Each measurement
consists of four parts:
• A left hand bar showing the noise level.
• A right hand bar showing the “smart” level.
• A numerical value for the noise level shown immediately below
the bars.
• A numerical value for the “smart” measurement shown below that.
Filter settings
For ground measurements the factory setting is 1 to
1000Hz with a high-pass filter of 50Hz and a low-pass
filter of 400Hz.
For fittings it is factory set to a range of 0 to 2000Hz
with a 200Hz high-pass filter and an 800Hz low-pass
filter.
It is possible to set a user-defined frequency spectrum,
as described in the Operators’ Manual. When user
filter settings are defined, all measurements are
cleared to ensure consistency across results.
Microphone settings and frequency spectrum
At the bottom of the display are the settings for the headphones,
frequency spectrum and microphone settings.
The headphone icon on the left shows the current volume setting
for the headphones. Selecting this icon also allows the user to
change the volume level.
The microphone icon on the right shows the current sensitivity
value for the microphone. Selecting this icon allows the user to
change the sensitivity level. This is ideal when set to 50%.
In the center the frequency spectrum is shown in color from
blue for lower frequencies, green and pink for mid frequencies
to yellow for high frequencies. When the width of the frequency
spectrum is changed the colors change correspondingly. For a
spectrum from 1-1000Hz, yellow will indicate higher frequencies
at 1000Hz but for a user defined spectrum of 0-3000Hz yellow
will indicate close to 3000Hz.
The white lines show the current settings for the high-pass and
low-pass filters.
5
WARNING:
Failure to comply with safety warnings can cause serious injury
or death.
You are responsible for determining whether the conditions are suitable
for using this device. Always carry out a risk assessment of the site to be
inspected.
Ensure you follow all applicable laws, regulations, guidelines and policies for
the location, excavation, inspection or fault analysis of a sub-surface utility.
This equipment is NOT approved for use in areas where potentially explosive
(or otherwise hazardous) gases, vapors, liquids or solids may be present.
Do NOT carry out any measurements on components carrying live voltages.
This product does not indicate the depth of sub-surface utilities. Additionally,
it does not detect buried electrical power lines, gas lines or other hazardous
underground objects. If you intend to uncover a sub-surface utility by digging,
you must follow your company, region and country’s codes of practice for
excavation.
It is important to regularly clean and sanitise products which may become
contaminated through contact with foul water or other contaminants
Headphone use: you need to remain alert to traffic and other hazards that
are normally heard outdoors. Always turn the volume down before plugging
headphones into an audio source and use only the minimum level necessary
to take your measurements. Excessive exposure to loud sounds can cause
hearing damage.
Use only the approved headphones which are designed to protect your
hearing when using this device.
CAUTION:
Failure to comply with safety cautions can result in damage to
equipment or property.
This is a precision instrument which could be damaged if left unprotected
during transport or storage. Always use an appropriate case to transport
and store this device.
Do NOT immerse the head of the hydrogen sensor into liquids, sludge or
fine powder.
NOTES
This equipment is designed for use by competent personnel, following
procedures and instructions described in the full user manual. For
comprehensive warning and safety information, refer to the full operators’
manual.
You are responsible for determining whether you consider the measurement
results to be valid and for any conclusions that are reached or any measures
that are taken as a result thereof. Radiodetection can neither guarantee
the validity of any measuring results nor can we accept liability for any such
results. We are on no account able to accept liability for any damage which
may be caused as a consequence of the use of these results. Please see
the Standard Warranty Terms for further information.
Radiodetection (USA) 28 Tower Road, Raymond, Maine 04071, USA
Tel: +1 (207) 655 8525 Toll Free: +1 (877) 247 3797 [email protected]
Radiodetection Ltd. (UK) Western Drive, Bristol BS14 0AF, UK
Tel: +44 (0) 117 976 7776 [email protected]
www.spx.com www.radiodetection.com
© 2014 Radiodetection Ltd. All rights reserved. Radiodetection is a subsidiary of SPX Corporation.
SPX, the green “>” and “X” are trademarks of SPX Corporation, Inc. Radiodetection is a trademark of
Radiodetection Ltd. Due to a policy of continued development, we reserve the right to alter or amend
any published specification without notice. This document may not be copied, reproduced, transmitted,
modified or used, in whole or in part, without the prior written consent of Radiodetection Ltd.
90/UG100INT/01
6
Example use
There are two sources of noise from a leak. The first is the
sound made from the water escaping from the leak site. This
is usually a higher frequency sound and is transmitted along
the pipe and any fittings on it. It is called structure borne
sound. The second noise comes from the escaped water
hitting the surrounding soil. This is transmitted through the
earth above it and emits a lower frequency sound on the
surface. It is called ground borne sound and is usually only
heard close to the leak site. Identifying the leak location is
usually a two stage process. Firstly the leak is localized to a
section of pipe. Secondly, the exact location is pin-pointed.
Localizing the leak using structure borne noise
Identify a fitting (meter, valve or hydrant) near to the
suspected leak. Attach an appropriate microphone fitting,
(extension tip or magnet) to the RD547 and set the filter
settings to fittings. Ensuring the microphone has contact
with the fitting, press the button on the microphone handle
to record. If an external noise source is present, (e.g. car
passing or dog barking), keep the button pressed until
the noise has stopped. Identify a second fitting location
and repeat the process. It may be necessary to take
measurements on several fittings. You can see the results
in the saved measurements graph. The leak will be located
closest to the fitting with the highest measurement.
Pin-pointing the leak using ground borne noise
Having localized the leak to a section of pipe it is possible
to take some measurements at the ground surface to pinpoint the leak. Attach either the ground microphone or the
universal microphone with appropriate tripod to the control
unit. Set the filter settings to ground. Following the direction
of the pipe, take a few measurements. It may be helpful
to mark the ground at the points where you have taken
measurements, so you can return to them later.
You can see the results in the saved measurements graph. As
you get closer to the leak, the noise will get louder and the
frequency will get higher. Be aware that if the measurements
are decreasing, you may be moving away from the leak.
7
Adjusting filter settings
We recommend using the preset filters. However, there may
be times when adjusting the filters to focus on the higher
frequencies normally found at a leak site is helpful. Let’s
assume the peak is about 300 Hz. If we reset the filter to be
between 0 and 300 Hz, we may no longer be able to detect
a leak because we have switched off the higher frequencies.
However, if we reset the filter to be between 320Hz just to
the right of the largest part of the spectrum and 500Hz so the
high frequency sounds are included and move over the area
again:
• Either the numerical value will increase when approaching
the leak and the peak will move towards higher
frequencies,
• OR, if the numerical value is always lower, you were already
directly on top of the leak with the first measurement!
Tracer gas detection
Following local laws and guidelines fill the pipe with a 95/5
forming gas (95% nitrogen, 5% hydrogen). When inspection
pressure has been reached follow the steps below.
1. Attach the hydrogen sensor to the RD547 unit and power it
on (using Button 1).
2. Select Tracer Gas Detection from the Main menu to start the
warm up phase, which may last up to 3 minutes. A progress
bar is displayed on the RD547 display (see display 3). As
this process determines the base levels for measurements,
it should be done outside in the open air or in a place where
you know hydrogen concentration is low.
3. Press Button 1 on the control unit to start measuring. The
record icon alternates between a yellow and white triangle.
Press the button on the sensor to activate the pump. This will
speed up the sample intake.
4. Press Button 1 on the control unit to capture a measurement
on the saved measurements graph. A white cross on the
record icon indicates that measuring has stopped. To restart
measuring press Button 1.
5. Use the information on the display to identify the area with the
higher hydrogen concentration.
6. If necessary, define alarm thresholds or zero calibrate the unit
to assist in identifying hydrogen concentrations.
8
Display 3 – Tracer gas detection
Current measurement and pre-set alarm threshold
Last six saved
measurements
Calibration
and record
Alarm threshold, zero calibration
and acoustic feedback
Current measurement
This element shows the current measurement. The
measurement starts when Button 1 is pressed and finishes
when it is pressed for a second time. The value increases
as you get closer to an area with a higher hydrogen
concentration and decreases as you move away from it.
The number recorded is in a range of 0 to 999 digits, but
the sensor can detect hydrogen concentrations from 10 to
20,000 ppm. The RD547 digital value does not correspond
directly to the ppm value.
The right hand bar represents the
current numerical value and the red
horizontal line to the right of it
represents the preset alarm threshold.
Calibration and record
• During warm-up the center icon
displays a green progress bar while
the sensor self-calibrates. The left-hand icon pulses and
turns green once calibration has finished.
• A dotted line appears, unless zero calibration has been
applied when it displays the absolute value (the digital
display above it shows the relative value). See next section
for more information about zero calibration.
The right-hand icon pulses between a yellow and white
record symbol when measurements are being taken. A white
cross appears when stopped.
9
Last six saved measurements
This section of the screen shows the
six previous measurements. The most
recent measurement is in position 1
and the oldest in position 6. Each
measurement consists of two parts:
• A bar showing the hydrogen
concentration.
• A numerical value for the hydrogen concentration shown
immediately below the bar
Alarm threshold, zero calibration and acoustic
feedback
Acoustic feedback
These two symbols are on/off controls for acoustic feedback.
Use Dial 2 or the touch screen to switch the
headphone tone on or off. This emits a constant
high-pitch tone through the headphones when over an area
of high hydrogen concentration.
Use Dial 2 or the touch screen to switch the tone
on the RD547 unit on or off. This emits a high-pitch
tone from the RD547 unit that increases in frequency the
closer the sensor is to an area of high hydrogen
concentration.
Alarm threshold
Use this control to set the alarm threshold. Use the
touch screen or Dial 2 to navigate to the control
and select it.
Use the touch screen or Dial 2 to set the alarm value and
press Dial 2 to confirm it. The scale is from 0 to 1000 digits.
10
Zero calibration
Use the touch screen or Dial 2 to set zero
calibration. This sets the current measurement value
as the reference value and helps define fluctuating
concentrations at different measurement points more clearly.
The first example shows a measurement of 250 with no
calibration. The second example illustrates how the display
changes when we zero calibrate at 250 in the same location.
The large numerical value is the relative value (000); the value
below it is the absolute value (250).
If we now carry out two further measurements which result in
absolute values of 300 and 100, the display changes to show
relative values of 050 and 000, as follows.
Any measured value below the reference value displays with
a relative value of zero, but the absolute values are always the
actual measured values. Any alarms are triggered on relative
values, not absolute values.
11
Assembly of Accessories
Ground microphone
Extension tips
9V
Test rod
Universal microphone
12
Hydrogen
sensor