1
How to setup and secure Snort, MySQL
and Acid on FreeBSD 4.6 Release
by Keith Tokash
Purpose of document
This document will guide a user through the installation of FreeBSD 4.6 Release, Snort
1.8.6, MySQL, and ACID. It will also guide the user through the process of securing the
machine. The intention is to give users that are new to any of the software the
opportunity to build an enterprise-class system based completely on free, open-source
tools. Following the instructions in this document will get you the following:
•
•
•
•
•
A FreeBSD box running the Windowmaker desktop. I chose Windowmaker
because the intention of this tutorial is to create a dedicated Snort machine. In
other words Gnome and KDE are overkill for what we are doing here (and it
looks nice).
A locked-down machine (C2 in 2002!). I tried to take every precaution without
making the box unusable. If I have missed something, feel free to point it out
(nicely please) with your suggestion on exactly how to fix it.
Snort logging to MySQL and outputting to ACID – **all locally**.
An easy method of updating your software via the ports collection.
The fastest NIDS for your money.
Assumptions
This document assumes the following:
•
•
•
•
The user has at least a little (a few months) experience with a Unix- like operating
system, such as any Linux distribution, Solaris etc. This isn’t necessary but will
make life easier.
The user has the installation ISO image on CD. This is worth the effort as a timesaver, especially if you think you might want more than one FreeBSD box.
This machine will be a dedicated Snort box.
The user has the patience to work through the entire document.
I am not an ultra- mega expert on FreeBSD, Snort, MySQL or Apache, nor do I play one
on TV, so any contributions are welcome. Please send all suggestions or comments to
twigles at yahoo dt com. Please don’t ask me how to bend this tutorial to fit Linux – I
simply don’t know.
File system layout
This machine shouldn’t need a huge hard drive. A 9-gig SCSI would be fine assuming
you delete old alerts. The recommended amount of swap space can be a point of
contention; the old Unix standard was 2 x RAM, but nowadays systems can have
gigabytes of RAM. I have heard many say that over 2GB RAM, swap space should be 1
x RAM. This is how I would lay out a 9-gig hard drive.
/
swap
/usr
/tmp
/var
100m
2000m
2000m
200
rest
It’s important to have at least 1.5 gigs for /usr because we’ll be installing X and patching
the box later, a process that requires source code be installed. The large /var partition is
for mysql, which logs to /var/db/mysql.
Other installation details
•
•
•
•
•
•
•
•
Choose the User + X install, then scroll down a few lines, hit Custom and choose
to install all of the source.
Don’t install inetd, we won’t need it.
Don’t install the Linux compatibility.
Install the ports collection.
Say no to most everything (NFS, FTP etc.). Accept the “Moderate” security.
Configure X; I can’t tell you how to do this because it’s hardware dependent
(know your video card and look up your monitor’s horizontal and vertical sync is
my advice). My experience with xf86cfg so far is that it will tell you that the
setup failed even if it succeeded, so trial and error….
You have the option during the initial installation to choose the packages installed
on your system. I usually do this later in case I mess up the installation and have
to start over.
You probably want to make the default shell /bin/csh rather than /bin/sh for any
users you add. The FreeBSD folks replaced csh with tcsh so you can do
convenient things like hit the up-arrow for previously used commands and hit
[tab] to finish commands or file-names.
On the initial boot
Log in as root. We are going to do several things to the box before installing Snort and
Acid. Since some of it has to do with X, you’ll want to be at the console.
Updating your ports collection
The recommended way to install software in FreeBSD is via the ports collection.
Therefore it’s important to keep your ports up to date. This is easily accomplished by
issuing the following commands:
1. cd /usr/ports/net/cvsupit
2. make
3. make install clean
The make install took me over 15 minutes. Now you’ll get to choose which branch of
ports you want to follow. Since we want to follow the current ports, scroll down a few
choices and choose “.”. You can then tab your way to the Cancel button, hit enter, then
say yes to track the FreeBSD ports collection. Say yes to follow docs, choose a nearby
server, and say no when it asks you if you want to run CVS now. Change directory to
/etc and comment out the line that says “src-all” in the “cvsupfile” file.
4. rehash
5. cvsup - g -L 2 /etc/cvsupfile
The first time you run CVS, it will likely take another 15 minutes, but after that it’s pretty
quick. To update your ports collection daily (very recommended), create the following
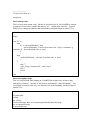
script as /usr/local/etc/cvsup:
#!/bin/sh
# updating ports daily
/usr/local/bin/cvsup - g -L 2 /etc/cvsupfile
Now install it as a cronjob by issuing the “crontab –e” command and putting the
following into the file:
0 13 * * *
/usr/local/etc/cvsup
Note that the default editor is vi, so hit the ‘i’ key to enter insert mode, then just type.
After you type the command in, hit escape, then “ZZ” to exit and save. Make the file
executable with the following command:
•
chmod 755 /us r/local/etc/cvsup
This crontab will run cvsup every day at 1pm (to make it run at 1am, change the 13 to a
1). For more details type “man 5 crontab”.
For more information about the ports collection, goto http://www.freebsd.org/ports/.
X-windows
Don’t start X-windows as root, if you do all the terminals that you pop up will pop up as
root. There’s also the X-server issue, which we’ll also mitigate via ipfw. To start X as a
mere mortal we’ll install wrapper.
1.
2.
3.
4.
5.
6.
7.
8.
cd /usr/ports/x11/wrapper
make
make install clean
cd /usr/ports/x11-wm/windowmaker
make
make install clean
touch /usr/home/[username]/.xinitrc
echo “wmaker” > /usr/home/[username]/.xinitrc
From here you want to change to a normal user to test your X. My non-root user is
twigles, so I do the following:
9. su twigles
10. xinit
If your X configuration is set up correctly, you’ll have a beautiful new Windowmaker
session staring at you. If not, you’ll get something less beautiful, in which case you just
hit [control] + [alt] + [backspace] to kill the X session. Then you can type
“/stand/sysinstall”, go to Configure -> XF86Server and try to configure X again.
Patching BSD
FreeBSD 4.6 RELEASE (and most recent versions of *BSD) have a nasty bug that
absolutely mus t be patched. We can do this while still using the otherwise very secure
and stable RELEASE code by following the advice from the FreeBSD team’s
announcement.
a) Download the relevant patch from the location below, and verify the
detached PGP signature using your PGP utility.
# fetch ftp://ftp.FreeBSD.org/pub/FreeBSD/CERT/patches/SA-02:28/resolv.patch
# fetch ftp://ftp.FreeBSD.org/pub/FreeBSD/CERT/patches/SA-02:28/resolv.patch.asc
b) Execute the following commands as root:
# cd /usr/src
# patch < /path/to/patch
“Resolv.patch” is the patch, the .asc file is the PGP signature of it. After this you will
have to rebuild the whole OS including the kernel, which is a lot easier than it sounds.
Do the following *from the console*:
1.
2.
3.
4.
5.
6.
init 1
cd /usr/src
make buildworld
make buildkernel
make installkernel
make installworld
There are other catches but with this install procedure my experience was this simple.
The official document to read is http://www.freebsd.org/doc/handbook/makeworld.html.
The “make buildworld” should take a couple of hours.
Post-installation cleanup
FreeBSD is secure by default but we can do some work.
•
•
•
•
•
Since this box should have two NICs (one maintanence and one sniffing), add a
line in /etc/rc.conf to bring the second NIC up at boot. Since I have an Intel Pro
card, I added the following:
ifconfig_fxp0="up"
This brings the interface up without an IP address.
Go into /etc/rc.conf and change
sendmail_enable="YES"
to
sendmail_enable="NONE"
We won’t be emailing alerts so Sendmail is unnecessary. If you want to email
anything from this box, leave Sendmail alone or research another MTA.
Also in /etc/inetd, edit the following:
usbd_enable="NO"
inetd_enable="NO"
Unless, of course, you are using a USB device.
Copy /etc/motd to /etc/motd.default and edit /etc/motd to say something nasty
about unauthorized access. Leave two blank lines at the top of the file or they
will be overwritten. I have an example motd at the end of this document.
Go into /etc/ttys and change:
console none
unknown off secure
To:
console none
unknown off insecure
This will make the BSD ask for a password when rebooting into single- user
mode. Note that booting into single-user mode is the primary way to recover your
root password, so if you do this don’t forget root’s password.
Installing the necessary ports
The ports collection is housed by default in /usr/ports. Ports require internet connectivity.
Do the following:
1.
2.
3.
4.
5.
Change directory to /usr/ports/sysutils/idled
make ; make install clean
Change directory to /usr/local/etc
cp idled.cf.template idled.cf
Open idled.cf in your text editor and add “exempt tty ttyv0 all”. This should stop
idled from killing your X session.
6. Examine the idled.cf file and change what you want, it’s pretty self-explanatory.
If necesssary, see “man 5 idled.cf”.
7. After installing idled and making the above change, I received the following
message when I let my SSH session sit there for an hour:
Thu Jul 11 13:57:08
This terminal has been idle 60 minutes. If it remains idle
for 5 more minutes it will be logged out by the system.
1. Change directory to /usr/ports/www/mozilla
2. make ; make install clean
1. Change directory to /usr/ports/ftp/wget
2. make ; make install clean
1. Change directory to /usr/ports/graphics/phplot
2. make WITH_X11=yes
3. When presented with a menu of options to configure into phplot, choose GD 2,
then hit ok.
4. make install clean
1. Change directory to /usr/ports/databases/adodb
2. make ; make install clean
1. Change directory to /usr/ports/net/libnet
2. make ; make install clean
1. Change directory to /usr/ports/security/snort
2. make -DWITH_MYSQL -DWITH_FLEXRESP ; make install
1. Change directory to /usr/ports/security/acid
2. make ; make install clean
•
Type “rehash” so the C shell can find all of the new programs installed.
Editing the necessary files
Several files need to be edited/customized for this to work. I will not go into optimizing
snort.conf here since it is covered in wonderful detail in the Snort User’s Manual.
However I will tell you what to change to log to MySQL and some other tips to make it
work. Also, some other files need to be changed for Apache and Acid to work correctly.
*** Note: If you edit the rules files in Notepad you MUST go into vi and remove the
"^M"s
For Snort
1. Change directory to /usr/local/etc and issue the command “cp snort.conf-sample
snort.conf”.
2. chmod 644 snort.conf
3. Open snort.conf in a text editor and change “var RULE_PATH ./” to “var
RULE_PATH /usr/local/share/snort”.
4. You may need to add the following lines to snort.conf:
• “var HTTP_PORTS 80 443”
• “var ORACLE_PORTS 66 1521 1525 1526 1527 7777”
5. In Section 3 change the following in the database section:
•
"output database: log, mysql, user=snortman password=snortman
dbname=snort host=localhost"
6. cp /usr/local/etc/classification.config-sample /usr/local/etc/classification.config
For Apache
1. Go into /etc/hosts and define your host there. For example, my test system is
named “liza.nag.com”, so my /etc/hosts file looks like this:
• 127.0.0.1
liza.nag.com localhost
2. Go into /usr/local/etc/apache/httpd.conf.
3. Change the following lines:
• DocumentRoot "/usr/local/www/data" to
• DocumentRoot "/usr/local/www/acid"
•
•
<Directory "/usr/local/www/data"> to
<Directory "/usr/local/www/acid">
For ACID
1. chmod 644 /usr/local/www/acid/acid_conf.php
2. Go into /usr/local/www/acid/acid_conf.php
3. Edit the following lines:
• $DBlib_path = "/usr/local/www/data.default/php/adodb";
• $alert_dbname = "snort";
• $alert_password = "snortman”;
• $ChartLib_path = "/usr/local/lib/php/phplot";
• $portscan_file = "/var/log/snort/portscan.log";
Preparing your firewall boot options
In /etc/rc.conf, add the following. We will start with an “OPEN” firewall, then close this
hole after the box works.
#required for ipfw support
firewall_enable="YES"
firewall_script="/etc/rc.firewall"
firewall_type="OPEN"
firewall_quiet="NO" #change to YES once happy with rules
firewall_logging_enable="YES"
#extra firewalling options
log_in_vain="YES"
tcp_drop_synfin="YES"
#change to NO if create webserver accessed from outside
tcp_restrict_rst="YES"
icmp_drop_redirect="YES"
Kernel configuration
The default kernel (“GENERIC”) does not have the firewall built in. We will need to
change this.
•
•
cd /sys/i386/conf
cp GENERIC FW
Add the following lines to FW. By default you should have the ‘vi’ and ‘ee’ text editors.
‘ee’ is a easier if you’ve never used either (It stands for easy editor).
#To enable IPFW with default deny all packets
options IPFIREWALL
options IPFIREWALL_ VERBOSE
options IPFIREWALL_VERBOSE_LIMIT=10
options TCP_DROP_SYNFIN
#drop TCP packets with SYN+FIN
options IPFIREWALL_VERBOSE_LIMIT=100 #limit verbosity
If you have more than one processor, uncomment the lines near the top that read:
#optio ns
SMP
# Symmetric MultiProcessor Kernel
#options
APIC_IO
# Symmetric (APIC) I/O
After adding and subtracting what you want from your kernel, build it with the following
commands. Note that it is easy to mess up kernels so don’t get frustrated if yours doesn’t
compile and run the first time. Just go back and try changing less things.
1. /usr/sbin/config FW
2. cd ../../compile/FW
The next two commands took 3 minutes and 10 minutes respectively on my 350MHz
machine. If you feel confident that your kernel will compile the first time (if you only
add the lines above without commenting anything out then it will), you can string the
next three commands together and go get some tea. It would look like this:
make depend ; make ; make install
3. make depend
4. make
5. make install
For the new kernel to take affect you will have to reboot, but you don’t have to do it yet.
Adding a user for Snort
Snort has the ability to run as a normal user, so if there is ever an exploit and someone
uses Snort to take over your box, they won’t own the entire system. This also means that
your database’s root password isn’t sitting in a clear-text file (snort.conf). To add a user,
type “adduser” and give it the following options:
Please enter a username
Enter username [snort]: snortman
Enter full name [ ]:
Enter shell csh date no sh tcsh [no]: no
Enter home directory (full path) [/home/snortman]:
Uid [1002]:
Enter login class: default [ ]:
Login group snortman [snortman]:
Login group is ``snortman''. Invite snortman into other groups: guest no
[no]:
Enter password [ ]:
Enter password again [ ]:
It’s a good idea to use this user exclusively to run Snort so it doesn’t need a shell.
Setting up MySQL
Run the following commands as root:
• /usr/local/bin/mysql_install_db
• /usr/local/etc/rc.d/mysql-server.sh start
Now that the server is started:
• Do a “netstat –a”. It should show port 3306 listening.
• Do a “ps –aux”. You should see a line that says something like
“/usr/local/libexec/mysqld --basedir=/usr/local --datadir=/var/db/mysql -user=mysql --pid- file=/”
Kill mysqld process – “/usr/local/etc/rc.d/mysql-server.sh stop”
Change directory to /usr/local/share/mysql. Look through the four different .cnf files to
see which one matches your situation best. Personally I used “my- large.cnf” so I did the
following:
•
cp /usr/local/share/mysql/my- large.cnf /etc/my.cnf
We will now restart mysql with the startup script:
•
/usr/local/etc/rc.d/mysql-server.sh start
Now we need to set a password for the root user in mysql. Note that the root user in
mysql is *not* the same root user as the FreeBSD root. You can log into mysql as its
root user even if you are a mere mortal within FreeBSD. So to set up a password for
mysql’s root we issue the following commands:
•
•
•
•
/usr/local/bin/mysql –u root
SET PASSWORD FOR root@localhost=PASSWORD('snortman');
FLUSH PRIVILEGES;
exit
These commands log you into mysql as root, set the password to “snortman”, reset the
privileges so the changes take affect, and quit mysql. Don’t forget the semi- colon at the
end of almost every command in MySQL except quit or exit.
Now type “/usr/local/bin/mysql” and you should get rejected.
Type “/usr/local/bin/mysql -p” and enter the password when prompted.
Setting up MySQL to accept data from Snort
Set up the mysql database for snort with the included scripts:
• As root at the shell type "echo "CREATE DATABASE snort;" |
/usr/local/bin/mysql -u root -p"
• Log into mysql and type "grant INSERT,SELECT on snort.* to
snortman@localhost;"
• SET PASSWORD FOR snortman@localhost=PASSWORD('snortman');
• Quit mysql
• Type “/usr/local/bin/mysql -p < /usr/ports/security/snort/work/snort1.8.6/contrib/create_mysql snort”
• Type “mkdir /var/log/snort”
• Type “chown snortman:snortman /var/log/snort/*”
Log into mysql and verify your snort tables:
L# mysql -p
Welcome to the MySQL monitor. Commands end with ; or \g.
Your MySQL connection id is 8 to server version: 3.23.51
Type 'help;' or '\h' for help. Type '\c' to clear the buffer.
mysql> use snort
Database changed
mysql> show tables;
+------------------+
| Tables_in_snort |
+------------------+
| data
|
| detail
|
| encoding
|
| event
|
| icmphdr
|
| iphdr
|
| opt
|
| reference
|
| reference_system |
| schema
|
| sensor
|
| sig_class
|
| sig_reference |
| signature
|
| tcphdr
|
| udphdr
|
+------------------+
16 rows in set (0.00 sec)
mysql>exit
Snort startup script
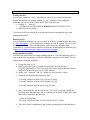
This is a basic snort startup script. Put this in /usr/local/etc/rc.d. For FreeBSD to execute
it upon boot it has to have a name that ends in “.sh”. I called mine “snort.sh”. You will
likely have to change the interface that Snort binds to and don't forget to chmod 755 it.
#!/bin/sh
sleep 3
case "$1" in
start)
if [ -x /usr/local/bin/snort ]; then
/usr/local/bin/snort -c /usr/local/etc/snort.conf –i fxp0 –u snortman –g
snortman -D > /dev/null & && echo -n ' snort'
fi
;;
stop)
/usr/bin/killall snort > /dev/null 2>&1 && echo - n ' snort'
;;
*)
echo ""
echo "Usage: `basename $0` { start | stop }"
echo ""
exit 64
;;
esac
Snort rules update script
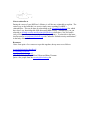
This is a script a found while lurking on a FreeBSD list (alright I stole it from a chap
named Steve Francis). I put this in /usr/local/etc and named it “snort.rules.update”. You
can add this to cron the same way you did with CVS in the beginning, and don't forget to
chmod 755 it.
#!/bin/sh
# Update rules
cd /tmp
rm -rf rules
/usr/local/bin/wget http://www.snort.org/downloads/snortrules.tar.gz
tar -xzf snortrules.tar.gz
# rm snortrules.tar*
mv /tmp/rules/*.rules /usr/local/share/snort
Testing your box
As root type “shutdown -r now”; when the box comes up you can check that Snort,
Apache and MySQL are running with the “ps aux” command. Other diagnostic
commands you can use if the system doesn’t work right away are:
• ifconfig –a
look for
“<UP,BROADCAST,RUNNING,PROMISC,SIMPLEX,MULTICAST>”
• apachectl start (or restart)
The real test will be to catch an alert, which can be done by nmapping the box, then
nmapping the subnet.
Running ACID
After everything is working, you can view alerts in ACID by opening Mozilla and going
to “http://[hostname]/”. If you forgot your hostname you can do a quick “cat /etc/rc.conf”
and you’ll see it there. The rest of the details can be figured out through simple
exploration (it’s a pretty intuitive interface) or from the documentation on the home page
at http://www.andrew.cmu.edu/~rdanyliw/snort/snortacid.html.
Setting up rules for IPFW
Obviously our packet filter isn’t doing anything right now. This was deliberate since we
want to make sure everything works before adding the complexity of a firewall. We can
change this by doing the following:
•
•
•
•
Change directory to /etc
Open rc.firewall in your text editor. Scroll down to the line that says
[Cc][Ll][Ii][Ee][Nn][Tt]. This is the setup for a client, meaning that this ruleset is
designed to protect this box, not the whole network.
Set the “net”, “netmask”, and “ip” variables to your network’s values.
Comment out the following unecessary lines:
${fwcmd} add pass all from ${ip} to ${net}:${mask}
${fwcmd} add pass all from ${net}:${mask} to ${ip}
${fwcmd} add pass tcp from any to ${ip} 25 setup
•
Since I’m running this box in a test lab on a 192.168.10.x network, I added the
following lines right below the line we comment out for email to allow me to SSH
into the box from inside this network:
# Allow incoming SSH
${fwcmd} add pass tcp from 192.168.10.0/24 to ${ip} 22 setup
•
The order of rules is important so don’t permit something after a line that blocks
it.
•
•
•
Open rc.conf in your text editor and change “firewall_type="OPEN"” to
“firewall_type="CLIENT"”
Reboot with “shutdown –r now”
Test the rules by pinging the box and then SSHing to it. The ping should fail and
the SSH should work.
Miscellaneous
Be careful using a Cisco 29xx or 35xx switch to sniff from. Due to the way shared
memory is allocated in those switches, if the sniffing port is highly utilized (>50%) it can
drag performance down from other ports. You also can not sniff more than one VLAN
on those switches or have the sniffer and its target both in port-protected mode.
OpenSSH 2.9 is installed as part of the core distribution but is easily de-coupled, giving
you the ability to update OpenSSH via the ports collection. This has been debated on the
security list, but due to the volatile nature of OpenSSH right now and the fact that 2.9 is
safe (currently), I won’t tackle this right now. Maybe in the FreeBSD 5.0 document….
To-do list
•
•
•
•
•
•
•
Script most of this garbage!!
Secure NTP configuration?
Decouple OpenSSH and track via ports
Chroot Snort
Multiple sensors with 1-2 viewing stations
CPU/memory statistics for monitoring box
Updating procedure via ports
Example motd
This motd looks much better in raw text. Give it a try.
Unauthorized access is prohibited.
,
,
/(
)`
\ \___ / |
/- _ `-/ '
(/\/ \ \ /\
// |` \
OO )/ |
`-^--'`< '
(_.) _ ) /
`.___/` /
`-----' /
<----. __ / __ \
<----|====O)))==) \) /====
<----' `--' `.__,' \
|
|
\
/
______( (_ / \_____
,' ,-----' |
\
`--{__________)
\/
Lists to subscribe to
During the course of your BSD box’s lifetime, it will become vulnerable to exploits. The
easiest way to deal with this is to receive timely news regarding FreeBSD’s
vulnerabilities. This can be done by subscribing to the [email protected] list, which
has a lot of very knowledgeable folks discussing BSD security. Alternatively, you can
subscribe to [email protected], which has a *lot* less traffic
(only official notifications sent out by the development team). To subscribe to the latter,
send an email to [email protected] with “subscribe freebsd-security-notifications”
in the body of the email.
Resources
I drew from quite a few resources to put this together; the top ones are as follows:
www.freebsd.org/doc/handbook/
www.onlamp.com/bsd/
http://docs.freebsd.org/mail/
“FreeBSD Unleashed” by Michael Urban and Brian Tiemann
Quite a few people from the [email protected] list