1
1b - Assign IP addresses to the CR-SEBXs using IP Hunter
When connecting the CR-SEBX to a network without a DHCP or BOOTP server,
or in situations where they will not be used to set the IP addresses, the CRSEBX CD has a device detection and IP setting utility named IP Hunter. This
utility will detect all Cirronet Ethernet devices on the local network, even those
with no IP address. For those units without an IP address, IP Hunter can set the
IP address and then open a browser session with that device to allow for further
configuration. The IP Hunter will display devices that already have IP addresses
and will open browser sessions with those units, but will not change the IP
address already set.
If the PC is not connected to the CR-SEBX or an active network, the Ethernet
adapter will not be active. Depending on the PC, it can take up to 30 seconds
once the PC is connected to an active network or CR-SEBX for the PCs network card to become active. After verifying that the computer’s Ethernet Link
LED is on, open IP Hunter by double-clicking on the file “IPHunter.exe” on the
CR-SEBX CD. Click on the Search button to begin the search for Cirronet
devices; only Cirronet Ethernet devices will be displayed. Ethernet devices from
other manufacturers will not be displayed, even if they have no IP address.
Any Cirronet devices found will be displayed on the screen along with the IP
address (if any), the netmask, the MAC address and the DHCP host name.
Double-clicking on a device with an IP address of 0.0.0.0 will bring up the IP
change dialog box. Enter the desired IP address and the default netmask will
automatically be entered. A new Host Name may be entered if desired;
however, the MAC Address cannot be changed.
Note: IPHunter will allow any IP address to be set. If an IP adress is set that is
not on the same subnet as the PC running IP Hunter, communications with that
CR-SEBX will no longer be possible from that PC.
Click OK and the IP address will be entered in the CR-SEBX and displayed in
the IP Hunter window.
2- Set one CR-SEBX as the Master
When using CR-SEBXs, one unit - and only one - must be set as the “Master”.
All other CR-SEBXs must be set as “Slaves”. When shipped from the factory, all
CR-SEBXs are set as Slaves. In typical installations, the Master CR-SEBX is
the CR-SEBX connected to the central Ethernet network.
HTML Setup (Browser Session)
Double-click on the IP number in IP Hunter or enter the IP Address in your
browser to launch an HTML setup session. A login screen will display. Enter the
default Username, "admin" and default Password, "Cirronet" (case sensitive).
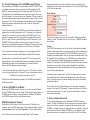
Click on OK and the main browser window will display. The Confiuration
Parameters will appear on the left browser pane with the change/edit fields
displaying in the main browser window (right pane). Click on the Bridge Settings
link in the left browser pane.
Bridge Settings
Click on the drop down arrow to the right of the Mode: field and select either
“Master” or “Slave”. Remember that one - and only one - CR-SEBX may be set
as the Master.
Filtering
The CR-SEBX includes a provision for the filtering of multicast and broadcast
packets. In many networks, there are sufficient multicast and/or broadcast packets to slow the overall performance of the CR-SEBX. Based on the number of
broadcast and multicast packets, they can consume a substantial amount of the
RF bandwidth. By turning filtering on, the CR-SEBX will ignore these packets
and limit transmission to packets with specific device addresses. In some
instances, it is desirable to have the CR-SEBX transmit the multicast and broadcast packets; in such cases, filtering should be disabled. Note that filtering
broadcast packets also filters multicast packets but filtering multicast packets
does not filter broadcast packets.
If requiring a login is desired, select “Yes” from the drop down menu and the
Username/Access-code, Password and (Password) Verify fields will become
active. If requiring a login is not desired, selecting No grays out the fields and
renders them inactive.
Click on Apply then click on Save Settings to store the system configuration
changes in non-volatile FLASH memory. The user may either click on “Reset” to
reboot the processor, click on “Logout” to end the browser session or simply
close the browser window.
3 - Run a communications test.
To run a communications test, connect the Master CR-SEBX to the central
network. The Slave CR-SEBX can be connected to the remote device, network
segment or be left unconnected to any network. With power applied to both
CR-SEBXs - and after the power on reset cycle has been completed - verify that
the Ethernet Link LED on the Master CR-SEBX is on. This indicates a valid
Ethernet connection to the network. Also verify the RF Link LED on the Slave