1
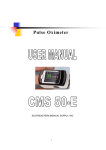
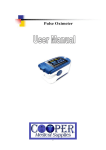
CMS-50E
Pulse Oximeter
CONTEC MEDICAL SYSTEMS CO., LTD
I
This Manual is written and complied in accordance with the council directive MDD 93/42/EEC
for medical devices and corresponding standards. The Manual written is in accordance the
Fingertip Pulse Oximeter. In case of modifications and software upgrades, you will be advised in
due time with a Modification Notice.
The Manual includes the Fingertip Pulse Oximeter’s features and requirements, main structure,
functions, specifications, correct methods for transportation, installation, usage, operation, repair,
maintenance and storage, etc. as well as the safety procedures to protect both the user and
equipment. Refer to the respective chapters for details.
This manual is used for the experienced personnel who is familiar with the measure and the use of
the instrument. This manual is compiled by our company, and the copyright is possessed by our
company.
Instructions to User
Dear Users, thank you very much for purchasing Fingertip Pulse Oximeter. Please read the
following two pages very carefully before using this equipment.
Please read these instructions carefully before using this equipment. These instructions describing
the operating procedures should be followed strictly. Failure to follow these instructions can cause
measuring abnormality, equipment damage and personal injury. The manufacturer is NOT
responsible for the safety, reliability and performance issues and any monitoring abnormality,
personal injury and equipment damage due to user’s negligence of the operation instructions. The
manufacturer’s warranty service does not cover such faults.
This product is medical device, and can be used repeatedly. Its using life is 3 years.
WARNING:
0 For the special patients, there should be a more prudent inspecting in the placing
process. The device can not be clipped on the edema and tender tissue.
0 The light (the infrared is invisible) emitted from the device is harmful to the eyes, so the
user and the maintenance man should not stare at the light.
0 Testee can not use enamel or other makeup.
0 Testee’s fingernail can not be too long.
0 Please refer to the correlative literature about the clinical restrictions and caution.
II
0 This device is not intended for treatment.
Table of Contents
1. SAFETY .............................................................................................................................................1
1.1. INSTRUCTIONS FOR SAFE OPERATIONS ................................................................................... 1
1.2. WARNINGS ............................................................................................................................. 1
1.3. ATTENTIONS ........................................................................................................................... 1
2. OVERVIEW ......................................................................................................................................1
2.1. FEATURES .............................................................................................................................. 2
2.2. ANTICIPATIVE APPLICATION ................................................................................................... 2
2.3. ENVIRONMENT REQUIREMENTS ............................................................................................. 2
3. PRINCIPLE AND CAUTION...........................................................................................................2
3.1. PRINCIPLE OF MEASUREMENT ................................................................................................ 2
3.2. THE ATTENTION OF OPERATION ............................................................................................. 3
3.3. CLINICAL RESTRICTIONS ........................................................................................................ 4
4. TECHNICAL SPECIFICATIONS ...................................................................................................4
5. ACCESSORIES ................................................................................................................................5
6. INSTALLATION ..............................................................................................................................5
6.1. VIEW OF THE FRONT PANEL .................................................................................................... 5
6.2. MOUNTING OF THE LANYARD CORD................................................................................. 5
7. OPERATING GUIDE ......................................................................................................................6
8. CLEANING AND DISINFECTING .................................................................................................9
9. REPAIRING AND MAINTENANCE.............................................................................................10
10. TROUBLESHOOTING.................................................................................................................10
11. KEY OF SYMBOLS.......................................................................................................................11
12. FUNCTION SPECIFICATION ....................................................................................................11
III
1. Safety
1.1 Instructions for safe operations
◇ Check the main unit and all accessories periodically to make sure that there is no visible damage
that may affect patient’s safety and monitoring performance. It is recommended that the device
should be inspected once a week at least. Please stop using the monitor when there is obvious
damage.
◇ Necessary maintenance must be performed by qualified service engineers ONLY. Users are not
permitted to maintain it by themselves.
◇ The oximeter cannot be used together with devices not specified in User’s Manual. Please use
the devices recommend by Manufacturer.
1.2 Warnings
0 Explosive hazard—DO NOT use the oximeter in environment with inflammable gas such as
some ignitable anesthetic agents.
0 DO NOT use the oximeter while the testee is under measurement of MRI and CT.
0 Be cautious of the lanyard cord, please do not break the lanyard cord during usage to avoid
device damage. Please don’t use lanyard cord if allergic to lanyard cord.
0 Please don’t use this product if allergic to rubber cushion.
0 Please dispose the device, accessory and packing (including plastic bag, foam and carton)
according to local law.
1.3 Attentions
Keep the oximeter away from dust, vibration, corrosive substances, explosive materials, high
temperature and moisture.
If the oximeter gets wet, please stop using.
When it is carried from cold environment to warm and humid environment, please not use it
immediately.
DO NOT operate keys on front panel with sharp materials.
High temperature or high pressure steam disinfection of the oximeter is not permitted. Refer to
User’s Manual for instructions of cleaning and disinfection.
Do not have the oximeter immerged in liquid. When it needs cleaning, please wipe its surface
with disinfect solution by soft material. Do not spray any liquid on the device directly.
When cleaning the device with water, the temperature should be less than 60℃.
2. Overview
The pulse oxygen saturation is the percentage of HbO2 in the total Hb in the blood, so-called the O2
concentration in the blood. It is an important bio-parameter for the respiration. For the purpose of
1
measuring the SpO2 more easily and accurately, our company developed the Fingertip Pulse
Oximeter. The device can measure the pulse rate simultaneously.
The Fingertip Pulse Oximeter is tiny, and with low power consumption, convenient to use and carry.
You just need to put the fingertip into the sensor of the device, the SpO2 value will appear on the
screen immediately. In the clinical practice, the tolerance is smaller than ±2% in the range from 70%
to 100%.
2.1. Features
A.
The device can accurately measure SpO2 and pulse rate.
B.
The device will power off automatically if no signal is detected within 5 seconds.
C.
Lithium batteries is required for operating, and the continuous working time is 12 hours.
D.
When Low-Voltage Warning is shown on screen, the device maybe not operate normally.
E.
Light and portable, total weight with batteries is about 50g.
F.
Classification: Class II a, (MDD93/42/EEC
G.
With the function of USB transmission and wireless transmit.
H.
It can store patient’s data and with alarm function.
IX Rule 10)
2.2. Anticipative application
The Fingertip Pulse Oximeter can detect SpO2 and pulse rate through patient’s finger, and indicate
the pulse intensity by the bar-display. This device is applicable for use in home, hospitals (surgery,
anesthesiology department, department of pediatrics, ordinary sickroom), oxygen bar, the
community medical treatment, physical care in sports (you can use the device before or after the
sport, but it is not recommended to use it during the sport) and so on.
This device is not appropriate for the ceaseless monitoring of the patients.
2.3. Environment requirements
Transport and storage
a)Temperature: -20°C~55°C
b)Humidity: ≤95%
c)Pressure: 500hPa~1060hPa
Operating
a)Temperature: 10°C ~40°C
b)Humidity: 35%~75%
c)Pressure: 700hPa~1060hPa
3. Principle and Caution
3.1. Principle of measurement
The measurement of pulse oximeter is that it uses a multi-functional oxyhemoglobinometer to
2
transmit some narrow spectrum light bands through blood samples, and to measure attenuation of
spectrum with different wavelengths according to the characteristic that RHb, O2Hb, Met Hb and
COHb absorb the light of different wavelength, thereby determining O2Hb saturation of different
fractions. O2Hb saturation is called “fractional” O2Hb saturation.
Fractional O2Hb saturation = [O2Hb / (RHb + O2Hb + Met Hb + COHb) x 100
Oppositely, pulse oxygen oximeter measures functional O2Hb saturation:
Functional O2Hb saturation = [O2Hb / (RHb + O2Hb)] x 100
Present SpO2 oximeter transmits light of two wavelengths only, red light (wavelength 660 nm) and
infrared (wavelength 940nm), to differentiate HbO2 from HbR. One side of the sensor contains two
LEDs, and the other side contains a photoelectric detector. SpO2 oximeter measures HbO2 saturation
in the blood by the light plethysmograph when the pulse beats. The result is quite precise when
HbO2 saturation is over 70 % ~ 100%.
Figure1. Operating Principle
3.2. The attention of Operation
A.
The equipment should be fully tested to see if it can be used normally before using.
B.
The finger should be placed properly (see the attached illustration of this manual), or else it
may cause inaccurate measurement.
C.
The SpO2 sensor and photoelectric receiving tube should be arranged in a way with the testee’ s
arteriole in a position in between.
D.
The SpO2 sensor should not be used at a location or limb tied with arterial canal or blood
pressure cuff or receiving intravenous injection.
E.
Make sure the optical path is free from any optical obstacles like rubberized fabric, otherwise it
may result in venous pulsation and inaccurate measure of SpO2.
F.
Excessive ambient light may affect the measuring result. It includes fluorescent lamp, dual ruby
light, infrared heater, direct sunlight and etc.
G.
Strenuous action of the testee or extreme electrosurgical interference may also affect the
accuracy.
H.
Please clean and disinfect the device after operating according to the user manual.
3
3.3. Clinical restrictions
A. As the measure is taken on the basis of arteriole pulse, substantial pulsating blood flow of the
testee is required. For a testee with weak pulse due to shock, low ambient/body temperature,
major bleeding, or use of vascular contracting drug, the SpO2 waveform (PLETH) will decrease.
In this case, the measurement will be more sensitive to interference.
B. For those with a substantial amount of staining dilution drug (such as methylene blue, indigo
green and acid indigo blue), or carbon monoxide hemoglobin (COHb), or methionine (Me+Hb)
or thiosalicylic hemoglobin, and some with icterus problem, the SpO2 determination by this
monitor may be inaccurate.
C. The drugs like dopamine, procaine, prilocaine, lidocaine and butacaine may also be a major
factor blamed for serious error of SpO2 measure.
D. The SpO2 value serves only as a reference value for judgement of anemic anoxia and toxic
anoxia, some patients with serious anemia may also report good SpO2 measurement.
4. Technical specifications
A. Display mode: 65K Color OLED display
SpO2 measuring range:
35%~100%
Pulse rate measuring range: 30bpm~240bpm
Pulse waveform display:
bar graph display
Battery indication:
OLED Signal
B. Power supply requirement:
Lithium battery × 1
Adaptable range: 3.5V~4.2V
C. Operating current: ≤80mA
D. Resolution:
SpO2 : 1%
Pulse Rate : 1bpm
E. Accuracy: SpO2 :70% to 100%±2 digits, below 70% unspecified
Pulse rate:±2 bpm or ±2% (select larger)
F. Measurement at low perfusion:
The values of SpO2 and pulse rate can be displayed properly when pulse saturation is at 0.4%.
Accuracy of SpO2:±4%
Accuracy of Pulse rate:±2bpm or ±2% (select larger)
G. Resistance to surrounding light:
The difference between the value measured in the condition of man-made light and indoor natural
4
light and that of darkroom is less than ±1%.
H. Automatic shutdown function:
The device will power off automatically within 5 seconds when there is no finger in the device.
I. The view direction (four direction) can be changed by pressing the power button when it works.
J. One lithium battery continuous working time is 12 hours.
K. It can store patient’s data for 24 hours.
L. This product has the real-time transmission function, it can upload the measured value to pc with
wire or wireless.
5. Accessories
1. A lanyard cord
2. A User Manual
3. A Charger (used for recharge the lithium battery)
4. An USB cable (used for recharge the battery in the computer and transfer the data to the pc)
5. A CD (drive for USB and software for the pc)
6. Installation
6.1. View of the front panel
Figure2. front view
6.2. Mounting of the lanyard cord
Step1. Put the end of the cord through the hole.
5
Step2. Put another end of the cord through the first one and then tighten it.
7. Operating Guide
7.1 Let the patient’s finger put into the rubber cushions of the clip (make sure the finger is in the
right position), and then clip the finger.
a)
Press the Power Button on the front panel.
b)
Using first finger, middle finger or ring finger when doing test. Low finger temperature, fat
finger, thin finger may cause inaccurate measurement.
c)
Do not shake the finger and keep the patient at ease during the process.
7.2 Get the information directly from screen display.
Put the finger in the oximeter like Figure 3.
Figure 3
Finger Placed
7.3 This product has the function of USB communications.
Firstly setup the USB driver in the computer (See details in CD), store the oximeter users’
software in the computer, open the user’s interface, then connect the oximeter and the computer
with the USB cable to fulfill the communication.
NOTE: This function is only used to data-transfer to the computer, but no downloading.
7.4 When working, the display direction can be changed by pressing the button shortly. There are
four modes of direction.
Press the button long time to enter the following menu interface- Figure 4 ( When the display
direction on the screen is plumb with the finger input direction, you cannot enter the menu
interface, press the button shortly again, let the display direction on screen level with the finger
input direction, continue next step): The user can setup the following parameters in
menu—lightness of backlight, alarm and high-low limit, data transmission( with USB cable),
data store, data upload to computer( with USB cable). See details as following:
6
Figure 4 Menu Interface
1) Backlight Adjust
Press the button shortly, move to item below, select the “Brightness”, press the button
long to adjust the backlight lightness (This product has four mode to adjust the
ligntness)
2) Alarm and adjust the up-low limit
Press the button shortly, move to the item “Alarm”, press the button long to enter the
alarm setting interface as Finger 5:
Figure 5
Alarm setting interface
A. Adjust the up and low limit of alarm
Press the button shortly, move to “Dir”, then press the button long to choose Up or Down value
of the high-low limit of Spo2 and pulse rate.
To raise the Spo2 and pulse rate limit, put the Dir in Up, then press the button to choose the
parameter to be adjusted: SpO2 high limit (SPO2 ALM HI), SpO2 low limit (SPO2 ALM LO),
Pulse rate high limit (PR ALM HI), Pulse rate low limit (PR ALM LO), press the button long
time to adjust the limit to a higher value.
7
To low the Spo2 and pulse rate limit, put the Dir to Down, press the button shortly to choose
the parameter to be adjusted, then press the button long time to low the value.
B. Adjust the alarm state
Press the button shortly to enter the Alarm item, then long press the button to choose alarm on or
off, press “ on” to open and “ off” to close the function.
C. Adjust the pulse rate alarm sound
Press the button shortly, move to “Pulse Sound” item, then long press the button to choose alarm
on or off, press “on” to open and “off” to close the function.
D. Exit the setting
Press the button shortly, move to “ EXIT”, then long press the button to exit the alarm sound and
alarm high and low limit adjust.
3) Wire data transmission adjust
Connect the USB cable with the computer, press the button shortly moving to item “USB”,
long press the button long press the button to choose whether send the data to the display
for synchronous show, if transfer, choose “on”, of end the transfer, choose “off”.
NOTE: Wireless and wire transmission could only use one mode, it is not available to
open the two function at same time.
4) Adjust the data store
This instrument has the 24 hour data store function, it can store the measured pulse rate
and SpO2 value accurately, transfer the data to the computer and show simultaneity.
Operation: press the button shortly and move to the “Record”, then long press the button to
enter the setting for start time of data store, as figure 6. Press the button shortly to move
the underline to the value to be set, then long press the button to start setting. After finish
the setting, move the underline to “Y”, press button long to quit the time setting menu,
records starts. If move the underline to “n”, press button long to quit the time setting menu,
records will not starts, the value stored last time will not be delete .If open the data store
function, the interface shut off after 30 seconds, and “ Recording” show on the screen, then
come black screen, if press the button shortly at this moment, there will show
“ Recording” on the screen, and long press can come to the Figure 5.After 24 hours
recording, “ Memory is full!” will show on the screen, tnen the device will power off
automatically.
NOTE: If open the store function, then the value stored last time will delete
automatically; when the sound and the store function open the same time, after black
screen, the pulse rate sound and the alarm will shut automatically to save power, and
the data transfer can work normally. After black screen, if the finger fall off, the
alarm works continuously, put the finger in again then the alarm stops.
8
Figure 6 Time Setting Menu
Adjust the data upload
Open the software in the computer, press the button shortly and move to the “ Upload”.
Long press the button to choose whether upload the store data in the instrument to the
display, if yes, choose “on”.
NOTE: If choose “on”, then cannot end it artificially, after finishing transfer the data, then
it will come to Exit item, and continue other operations.
7.5 Notes for the battery operation
1) This instrument uses the recharge lithium battery inside, when it is connected to the power
adapter and there is power supply, it will recharge automatically. The battery can be
recharged by the USB cable connecting with the computer, and also with the power adapter
connecting the power supply. The indicator light lights when the battery is in recharged,
and the light shut off when the power is full.
2) The battery can continue work for 12 hours. After the power use up, the instrument will
shut off the power avoiding the permanent damage caused by over-discharge.
3) Recharge the battery after the battery discharge soon. The instrument should be recharged
every six month when it is no regular used. It can extend the battery life following this
guidance.
4) Four modes display for the power as following figure:
Battery
is full
Battery is not full
Power nearly used up.
5) When the battery uses up within 30 minutes after recharged or cannot be recharged, please
change the battery.
, recharge the battery immediately, or the instrument will detect the
6) When it show
power lack and turn off automatically.
8. Cleaning and Disinfecting
Using alcohol to disinfect the device, nature dry or clean it with clean soft cloth.
9
9. Repairing and Maintenance
1. Please recharge the battery when the LCD screen shows
.
2. Please clean the surface of the device before using. Wipe the device with alcohol first, and then let
it dry in air or clean it by dry clean fabric.
3. Please disinfect the device with medical ethanol after use, avoiding the crossinfect when next time
use.
4. The best storage environment of the device is - 20ºC to 55ºC ambient temperature and not higher
than 95% relative humidity.
Please maintain properly for ensuring the device can be used normally.
The device needs to be calibrated once a year (or according to the calibrating program of hospital). It
also can be performed at the state-appointed agent or just contact us for calibration.
High-pressure sterilization cannot be used on the device.
Do not immerse the device in liquid.
It is recommended that the device should not be high pressure sterilization.
Do not put the device in liquid.
Humidity may reduce the using life of the device, or even damage it. It is
recommended that the device should be kept in try environment.
10 .Troubleshooting
Trouble
The SpO2 and Pulse Rate
can not be displayed
normally
The SpO2 and Pulse Rate
display instable
The device can not turn
on
Possible Reason
1. The finger is not properly
positioned.
2. The patient’s SpO2 is too low to be
detected.
1. The finger is not placed inside deep
enough.
2. The finger is shaking or the patient
is moving.
1. The batteries are drained or almost
drained.
2. The device’s malfunction
10
Solution
1. Place the finger properly
and try again.
2. Try again; Go to a hospital
for a diagnosis if you are sure
the device works all right.
1. Place the finger properly
and try again.
2. Let the patient keep calm
1. Recharge battery.
2. Please contact the local
service center.
1. The device will power off
automatically if no signal is detected
within 5 seconds.
The display is off
suddenly
1. Normal.
2. Recharge battery.
2. The batteries are almost drained.
11. Key of Symbols
Symbol
Description
Type BF
Warning – See User Manual
The pulse oxygen saturation(%)
Pulse rate (bpm)
Full-voltage
Low-voltage
SN
Serial number
Shut off the pulse rate indicator sound
Turn on the pulse rate indicator sound
12. Function Specification
显示信息
显示模式
The Pulse Oxygen Saturation(SpO2) 2-digit digital
OLED display
Pulse Rate(bpm)
3-digit digital
OLED display
Pulse Intensity (bar-graph)
bar-graph
OLED display
SpO2 Parameter Specification
Measuring range
35%~100%, (the resolution is 1%).
Accuracy
±2% during 70%~100%.Below 70% unspecified.
Red light (wavelength is 660nm)
Optical Sensor
Infrared (wavelength is 940nm)
Pulse Parameter Specification
11
Measuring range
30bpm~240bpm, (the resolution is 1bpm)
Accuracy
±2bpm or±2% (select larger)
Pulse Intensity
Range
Continuous bar-graph display, the higher display indicate the
stronger pulse.
Battery Requirement
Voltage 3.5-4.2 rechargeable lithium battery × 1
Dimensions and Weight
Dimensions
57(L) × 32(W) × 30(H) mm
Weight
About 50g (with the battery)
12
Contec Medical Systems Co., Ltd
Address: #2-1 Hengshan Road, Qinhuangdao Economic & Technical Development
Zone, Hebei Province, PRC
Tel: +86-335-8015433
Fax: +86-335-8015432
E-mail:[email protected]
Website: http://www.contecmed.com.cn
File No.:CMS2.782.026ESS/0.9
Edition: 0.9
13