1
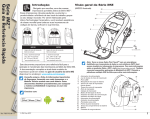
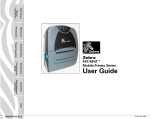
RP4T Printers pg.
35
Manual
Introduction pg. 4
Maintenance pg. 36
P4T Overviewpg. 5
Troubleshooting pg.
38
Printer Preparation
pg. 7
Specifications pg.
43
Radio Regulatory
Information pg. 31
Appendices pg. 46
User Guide
Connecting the
Printer pg. 27
Index pg. 52
© ZIH Corp. 2011
UMAN-P4T-010 Rev.A
P4T/RP4T™
Mobile Printer Series
No Liability for Consequential Damage
Product Improvements
Manual
Introduction pg. 4
RP4T Printers pg.
35
Liability Disclaimer
Copyrights
P4T Overviewpg. 5
Maintenance pg. 36
FCC Compliance Statement
Printer Preparation
pg. 7
Troubleshooting pg.
38
Connecting the
Printer pg. 27
Specifications pg.
43
Radio Regulatory
Information pg. 31
Appendices pg. 46
Canadian Compliance Statement
Agency Approvals and Regulatory Information
Index pg. 52
2
Section Continues
RP4T Printers pg.
35
Manual
Introduction pg. 4
Caution • Warns you of the potential for electrostatic discharge.
Caution • Warns you of a potential electric shock situation.
Maintenance pg. 36
P4T Overviewpg. 5
Caution • Warns you of a situation where excessive heat could cause a burn
Caution • Advises you that failure to take or avoid a specific action could result in physical harm to you.
Caution • Advises you that failure to take or avoid a specific action could result in physical harm to the hardware.
Important • Advises you of information that is essential to complete a task.
Printer Preparation
pg. 7
Troubleshooting pg.
38
Connecting the
Printer pg. 27
Specifications pg.
43
Radio Regulatory
Information pg. 31
Appendices pg. 46
Note • Indicates neutral or positive information that emphasizes or supplements important points of the main text.
Text in this format will jump to the appropriate section in the manual.
Index pg. 52
3
RP4T Printers pg.
35
Manual
Introduction pg. 4
Maintenance pg. 36
P4T Overviewpg. 5
P4T
RP4T
Printer Preparation
pg. 7
Troubleshooting pg.
38
Connecting the
Printer pg. 27
Specifications pg.
43
www.zebra.com/manuals
Appendix “F”
Appendices pg. 46
Radio Regulatory
Information pg. 31
Always refer to the Important Safety Information data sheet
shipped with each printer and the Technical Bulletin shipped
with each battery pack. These documents detail procedures
to ensure maximum reliability and safety while using this
printer.
Index pg. 52
Section Continues
4
RP4T Printers pg.
35
Manual
Introduction pg. 4
Figure 1: P4T/RP4T Illustrated
7
6
P4T Overviewpg. 5
Maintenance pg. 36
4
5
3
Troubleshooting pg.
38
Printer Preparation
pg. 7
2
8
9
1
10
Specifications pg.
43
Connecting the
Printer pg. 27
Figure 1a: P4T/RP4T Bottom View
Appendices pg. 46
Radio Regulatory
Information pg. 31
Index pg. 52
1
2.
3.
4.
5.
6.
7.
8.
9.
10.
11.
12.
13.
14.
15.
16.
17.
Platen Roller
Bar Sensor
Media Support
Printhead
RFID Reader/Encoder (RP4T only)
Ribbon Cartridge Cover
Control Panel
Ribbon Cartridge Cover Latch
Media Cover Latch
Media Support Disks
Label Peeler
Media Cover
External Media Access (optional)
Battery
Battery Charging Receptacle
RS232 Communications Port
USB Port
17
11
16
12
13
15
14
Section Continues
5
RP4T Printers pg.
35
Manual
Introduction pg. 4
Smart Battery
RFID (Radio Frequency Identification)
Maintenance pg. 36
P4T Overviewpg. 5
Use of any battery pack other than the one manufactured by
Zebra specifically for use with P4T Series printers will not
be able to use the diagnostic features of the Zebra Smart
Battery and will not work with the printer.
Printer Preparation
pg. 7
Troubleshooting pg.
38
Connecting the
Printer pg. 27
Specifications pg.
43
Printing Technology
RFID Programming Manual
Direct Thermal
Appendices pg. 46
Radio Regulatory
Information pg. 31
Thermal Transfer
Index pg. 52
6
RP4T Printers pg.
35
Manual
Introduction pg. 4
Caution • Avoid accidental short circuiting of any battery. Allowing battery terminals to contact conductive material will
create a short circuit which could cause burns and other injuries or could start a fire.
Maintenance pg. 36
P4T Overviewpg. 5
Caution • Batteries can explode or catch fire if improperly charged or exposed to high temperatures or fire. Do not disassemble,
crush or expose batteries to water.
Caution • Use of any charger not approved specifically by Zebra for use with its batteries could cause damage to the battery
pack or the printer and will void the warranty.
Read carefully and always observe the safety guidelines for Li-ion batteries provided with each Battery Pack.
Troubleshooting pg.
38
Printer Preparation
pg. 7
Do not place a charger in locations where liquids or metallic objects may be dropped on the charger or, in the case of the
UCLI72-4 Quad Charger, into the charging bays.
Use care in locating any of the approved P4T Series single chargers, the AC Adapter or the UCLI72-4 Quad Charger. Do not
block the ventilating slots on the top and bottom covers. Ensure that the Charger is plugged into a power source which won’t
accidently be turned off if you will be charging batteries overnight.
Connecting the
Printer pg. 27
Specifications pg.
43
Radio Regulatory
Information pg. 31
Appendices pg. 46
Required Regulatory Text for Argentina
Only certified adaptors with the following electrical characteristics shall be used. The use of different adaptors could damage
the device, present hazards to the user and declare the correspondent guaranty void.
LI72: Input ratings: 100-240 VAC 50/60Hz 200mA., Class 2
Output ratings: 8.4 VDC, 800 mA
Index pg. 52
Section Continues
7
RP4T Printers pg.
35
Manual
Introduction pg. 4
Use of chargers not approved by Zebra specifically for use with the P4T Series will void the warranty and could cause damage
to the printer or the battery pack. Zebra is not responsible for any damage to equipment caused by the improper use of
unauthorized equipment.
Maintenance pg. 36
P4T Overviewpg. 5
Troubleshooting pg.
38
Printer Preparation
pg. 7
Description
LI72 single
charger)
AC Adapter/US
Line Cord
AC Adapter/UK
Line Cord
AC Adapter/EU
Line Cord
UCLI72-4 Quad
Charger
Part no
AT17696-xx1
AT18737-xx
AK18913-002
AK18913-006
AK18913-007
AC18177-xx1
Notes.
Must be used with battery
removed from printer
Must be used with battery
installed in printer
Must be used with battery
installed in printer
Must be used with battery
installed in printer
Must be used with battery
removed from printer
Description
15-60V DC
Adapter/Right
Angle
Part no
Notes.
AK18913-003
N/A
1. Full part number is determined by the AC main adapter
appropriate for the region of intended use. Consult your Zebra
sales represenetative or the factory for the appropriate part
number.
The LI72 Charger
Figure 2: LI72 Single Charger
Connecting the
Printer pg. 27
Specifications pg.
43
Radio Regulatory
Information pg. 31
Appendices pg. 46
Yellow
Green
Index pg. 52
LI72 Charger
AT17696-xx
Section Continues
8
Figure 3: Charging the P4T Series Battery with the LI72
RP4T Printers pg.
35
Manual
Introduction pg. 4
Battery Charging
Receptacle
Mains connector will
vary with country of
intended use.
Maintenance pg. 36
P4T Overviewpg. 5
LI72 Battery
Charger
Printer Preparation
pg. 7
Troubleshooting pg.
38
Connecting the
Printer pg. 27
Specifications pg.
43
Radio Regulatory
Information pg. 31
Appendices pg. 46
P4T Series
Battery Pack
Charging Battery Packs with the AT17696-xx LI72 Single Charger
Charger
Function
Steady yellow indicator Standby
Indicator
Charger Status
Index pg. 52
AC power on; no battery being charged
Chargerisapplyingtricklechargecurrent
Slow (1 Hz) flashing
(5% of maximum) to bring a cold battery
Pre-Charge
yellow indicator
temperature up to 0°C before starting a
full charge cycle
Fast (4 Hz) flashing
Rapid
Chargerisapplyingthemaximumcharge
green indicator
Charge
rate to the battery
Slow (1 Hz) flashing
Charger is in trickle charge mode(10% of
Maintain
green indicator
nominal charge value).
The battery may have an internal short,
Fast (4 Hz) flashing
or its charge monitoring circuitry may be
Error
yellow indicator
malfunctioning. Thebatterypackshould
not be used any further.
Steady green indicator Ready
No charge is being applied to the battery
Slow (1 Hz) flashing
Battery temperature is too hot. Charging
alternate yellow and
Wait
will not begin until battery temperature
green indicator
reaches 45°C.
Notes: The battery pack must be removed from the printer when using the AT17696-xx LI72 Single Charger.
Charging will cease three (3) hours after the charger has entered the “Maintain” mode.
Section Continues
9
Figure 4: Charging the P4T Series Battery with the LI72 Single Charger
RP4T Printers pg.
35
Manual
Introduction pg. 4
Mains connector will vary
with country of intended
use.
Battery Charging
Receptacle
Maintenance pg. 36
P4T Overviewpg. 5
LI72 Battery
Charger
Printer Preparation
pg. 7
Troubleshooting pg.
38
Connecting the
Printer pg. 27
Specifications pg.
43
P4T Series Battery
Pack
Charging Battery Packs with the AT18737-xx LI72 Single Charger
LED Status
Charger Status
Green Solid
Fully Charged
Amber Solid
Charging
•
Appendices pg. 46
Radio Regulatory
Information pg. 31
Amber Blinking
•
•
•
Battery Contact Problem
1. Short Circuit of Output Terminals
2. Detection of Short Battery's Circuit
3. No Contact + Terminal
Over Voltage Protection
Over Current Protection
Temperature Waiting Time
Index pg. 52
Operating Temperature
Storage Temperature
Input Voltage
0 to 40o C @ 30-85% Relative Humidity
-30 to 60o C @ 10-90% Relative Humidity
AC100 to 240V 47 to 63Hz
Input Current
Output
0.18A MAX
DC 8.4V 800mA
10
RP4T Printers pg.
35
Manual
Introduction pg. 4
Figure 4A: Charging the P4T Series Battery with the AC Adapter
AC Power Cord
(varies with
location)
Maintenance pg. 36
P4T Overviewpg. 5
P4T Series AC
Adapter
p/n P1026943-1
Printer Preparation
pg. 7
Troubleshooting pg.
38
Connecting the
Printer pg. 27
Specifications pg.
43
Open the
protective cover
for access to
the charger
receptacle
Appendices pg. 46
Radio Regulatory
Information pg. 31
Printer
Status
Off
On
Charging
Status
Off
Off
On
On
Off
On
Printer LCD
Power Button Operation
Off
Normal display operation
Normal display operation, plus
battery icon will cycle through
levelbars. Chargingwillcontinue
as required..
Battery icon will cycle through
level bars. Printer turns off at end
of charge cycle.
Pressing turns printer On
Pressing turns printer Off
Pressingswitchesprintertolimited
operation: only battery charging &
LCD functional
Pressing turns printer On. Printer
will run normally
Index pg. 52
Note: If the battery is out of its safe charging temperature range (either too hot or too cold) the printer will display the following:
“Charging will resume when battery is in the range 0-40 degrees C (32-104 degrees F)” and the battery icon will alternately
flash
and
. Once the battery reaches a safe charging temperature, normal charging will automatically resume.
Section Continues
11
RP4T Printers pg.
35
Manual
Introduction pg. 4
Figure 4B: Charging the P4T Series Battery with the DC Adapter
DC Power Cord
(open wires)
Maintenance pg. 36
P4T Overviewpg. 5
P4T Series DC
Adapter
p/n AT18488-1
Printer Preparation
pg. 7
Troubleshooting pg.
38
Connecting the
Printer pg. 27
Specifications pg.
43
Open the
protective cover
for access to
the charger
receptacle
Appendices pg. 46
Radio Regulatory
Information pg. 31
Printer
Status
Off
On
Charging
Status
Off
Off
On
On
Off
On
Index pg. 52
Printer LCD
Power Button Operation
Off
Normal display operation
Normal display operation, plus
battery icon will cycle through
levelbars. Chargingwillcontinue
as required..
Battery icon will cycle through
level bars. Printer turns off at
end of charge cycle.
Pressing turns printer On
Pressing turns printer Off
Pressingswitchesprintertolimited
operation: only battery charging &
LCD functional
Pressing turns printer On. Printer
will run normally
Note: If the battery is out of its safe charging temperature range (either too hot or too cold) the printer will display the following:
“Charging will resume when battery is in the range 0-40 degrees C (32-104 degrees F)” and the battery icon will alternately
flash
and
. Once the battery reaches a safe charging temperature, normal charging will automatically resume.
Section Continues
12
RP4T Printers pg.
35
Manual
Introduction pg. 4
Figure 4C: Charging the P4T Series Battery with the DC Adapter (Vehicle Cradle)
DC Power Cord
(open wires)
Maintenance pg. 36
P4T Overviewpg. 5
P4T Vehicle Cradle
DC Adapter
p/n AT18488-2
Printer Preparation
pg. 7
Troubleshooting pg.
38
Connecting the
Printer pg. 27
Specifications pg.
43
Access the charger
receptacle located
on the bottom
of the vehicle
cradle as
indicated..
Appendices pg. 46
Radio Regulatory
Information pg. 31
Printer
Status
Off
On
Charging
Status
Off
Off
On
On
Off
On
Index pg. 52
Printer LCD
Power Button Operation
Off
Normal display operation
Normal display operation, plus
battery icon will cycle through
levelbars. Chargingwillcontinue
as required..
Battery icon will cycle through
level bars. Printer turns off at
end of charge cycle.
Pressing turns printer On
Pressing turns printer Off
Pressingswitchesprintertolimited
operation: only battery charging &
LCD functional
Pressing turns printer On. Printer
will run normally
Note: If the battery is out of its safe charging temperature range (either too hot or too cold) the printer will display the following:
“Charging will resume when battery is in the range 0-40 degrees C (32-104 degrees F)” and the battery icon will alternately
flash
and
. Once the battery reaches a safe charging temperature, normal charging will automatically resume.
13
RP4T Printers pg.
35
Manual
Introduction pg. 4
CAUTION: Insure that the adapter and cable you are using for this installation are clearly labeled for use with the vehicle's
voltage. Failure to match the adapter's capacity to the vehicle's voltage could result in improper printer operation, or severe
damage to either the printer and/or the adapter.
P4T Overviewpg. 5
Maintenance pg. 36
Note: It is the installer's responsibility to insure correct wiring and installation.
Note: Zebra is not liable for damage to any equipment caused by improper installation or wiring of the adapter, or
damage resulting from use of the wrong adapter for the intended application.
Printer Preparation
pg. 7
Troubleshooting pg.
38
Connecting the
Printer pg. 27
Specifications pg.
43
Radio Regulatory
Information pg. 31
Appendices pg. 46
Note: Do not lengthen the adapter's power cable or remove the cable's ferrite if equipped. Extending the cable or removing
the ferrite may affect the adapter's reliability and radio frequency interference (RFI). Use care when attaching the adapter's
power cable and power source. The red wire attaches to the positive (+) and the black wire to the negative (-) terminal. If
wired backwards the adapter will be rendered inoperable and will need to be replaced.
General Guidelines
Index pg. 52
Section Continues
14
RP4T Printers pg.
35
Manual
Introduction pg. 4
Figure 5- UCLI72-4 Quad Charger
Battery Status
80% charged
Full charge
Slide Battery Pack
into a Charger bay
Charging Time
2.5 Hrs.
5 Hrs.
Maintenance pg. 36
P4T Overviewpg. 5
Power Supply
Troubleshooting pg.
38
Printer Preparation
pg. 7
Rock Battery
Pack into place
Fast
Fau
lt
Char
ge
Full
Char
Rea
ge
dy
Fast
Fau
lt
Char
ge
Full
Char
Rea
ge
dy
Fast
Fau
lt
Char
ge
Full
Char
Rea
ge
dy
Fast
Specifications pg.
43
Connecting the
Printer pg. 27
Amber
Indicator
Green
Indicator Charger
Bay
Fau
Char
ge
lt
Full
Char
Rea
Pow
ge
dy
er
Power Indicator
Amber
On
Appendices pg. 46
Radio Regulatory
Information pg. 31
Important • A fault condition (flashing amber indicator) is caused by a problem with the battery
pack. The charger may indicate a fault because the battery is too hot or too cold to charge
reliably. Try to charge the battery again when it returns to the room’s ambient temperature.
If the amber indicator starts flashing on the second charging attempt, the battery should
be discarded. Always dispose of batteries in a proper manner. Refer to Appendix E of this
manual.
On
Off
Flashing
Green
Off
Battery Status
Charging
80% charged
Flashing
(O.K. to use)
Completely
On
Charged
Off
Faulty Battery
Notes: For more information regarding the installation and use of the UCLI72-4 Quad Charger refer to the instructions included
with the product.
The UCLI72-4 Quad Charger has a safety feature which stops charging a battery after six hours regardless of its charge state.
Index pg. 52
Section Continues
15
RP4T Printers pg.
35
Manual
Introduction pg. 4
Important • New battery packs are shipped
uncharged. Remove any protective shrinkwrap and labels from a new battery pack
prior to use.
Additional battery packs may be ordered
using Zebra p/n AK18913-001.
Figure 6: Installing the P4T Series Battery Pack
Maintenance pg. 36
P4T Overviewpg. 5
If you are using an LI72 single charger
or the LI72- 4 Quad Charger, you must
charge the battery prior to installing it in
the printer.
Charger port for use
with the P1026943-1
AC Adapter
Troubleshooting pg.
38
Printer Preparation
pg. 7
Charging the Battery
Operator Controls
Connecting the
Printer pg. 27
Specifications pg.
43
Radio Regulatory
Information pg. 31
Appendices pg. 46
Insert this side of the
battery pack into the
bottom of the printer as
shown.
Rock the battery pack
until it clicks into place.
P4T Series
Battery Pack
Index pg. 52
Section Continues
16
RP4T Printers pg.
35
Manual
Introduction pg. 4
Figure 7.1 Opening the Media Cover
Figure 7.2 Loading the Media
Load Media Roll
P4T Overviewpg. 5
Maintenance pg. 36
Note direction media
pulls off the roll.
Pull Media Supports
apart where shown.
Troubleshooting pg.
38
Printer Preparation
pg. 7
Press down on the Media
Cover Latch Lever
Media cover opens
1. Open the Media Cover
2. Loading Media From An Internal Supply
Connecting the
Printer pg. 27
Specifications pg.
43
Radio Regulatory
Information pg. 31
Appendices pg. 46
Index pg. 52
Section Continues
17
Figure 7.3- Loading Media From An External Supply
Manual
Introduction pg. 4
RP4T Printers pg.
35
Media Spacer
Maintenance pg. 36
P4T Overviewpg. 5
Troubleshooting pg.
38
Printer Preparation
pg. 7
Rear Feed Slot
Connecting the
Printer pg. 27
Specifications pg.
43
External Media
Source
3. Loading Media From An External Supply
Appendices pg. 46
Radio Regulatory
Information pg. 31
Index pg. 52
18
Section Continues
RP4T Printers pg.
35
Manual
Introduction pg. 4
Figure 7.4-Close the Media Cover
Pull Media out of the
Printer. Use alignment
marks on the cover to
ensure alignment.
Figure 7.5- Insert Media into Peeler
Peeler Assembly.
Peeler Bar.
4. Press down on Peeler
Assembly where shown
and slide the media until it
emerges .
Maintenance pg. 36
P4T Overviewpg. 5
1. Remove enough
labels from the media
roll to create a 4” [100
mm] leader.
3. Feed the leader over
the peeler bar and into
the printer if you will be
peeling labels as you
print.
2. Align the edge of the
leader with the index marks
on the top cover to ensure it
will pass through the peeler
without wrinkling.
Printer Preparation
pg. 7
Troubleshooting pg.
38
Connecting the
Printer pg. 27
Specifications pg.
43
Radio Regulatory
Information pg. 31
Appendices pg. 46
Close Media
Cover
4. Close the Media Cover:
5. Using the Label Peeler
Optional Step for label stock only
Index pg. 52
Section Continues
19
RP4T Printers pg.
35
Manual
Introduction pg. 4
Media Core Size
Figure 8- Adjusting the Media Core Diameter
Changing The Media Support
Core Diameter Size
Remove Support Disk,
and flip it 180° to change
core size.
Maintenance pg. 36
P4T Overviewpg. 5
Media Support Disk
(shown re-adjusted for
3/4” label media core)
Printer Preparation
pg. 7
Troubleshooting pg.
38
Connecting the
Printer pg. 27
Specifications pg.
43
Radio Regulatory
Information pg. 31
Appendices pg. 46
Media Support Disk
(shown adjusted for 1 3/8”
label media core)
Always ensure that both Support Disks are adjusted for the
same size media core.
Replace the Media Support Disks if they have been adjusted
for different core sizes more than 5 (five) times.
Index pg. 52
Section Continues
20
RP4T Printers pg.
35
Manual
Introduction pg. 4
Figure 9.1-Open the Printer Covers
3. Press the Ribbon
Cartridge Cover latch.
Cover will slide open
Maintenance pg. 36
P4T Overviewpg. 5
1. Press down on the
Media Cover Latch Lever
2. Media cover
opens
Troubleshooting pg.
38
Printer Preparation
pg. 7
2. Load the Ribbon Cartridge.
Figure 9.2-Load the Ribbon Cartridge
3. Locating pins
on the cartridge
must lock into the
printer frame.
If you are using media that requires Thermal Transfer media, perform
this step. If you are using journal stock, or media that uses direct
thermal technology to print labels, omit this step.
1. Open the Printer Covers
2. Drop the cartridge in place
over the printhead as shown.
1. Remove tape and pre-tension
the media to remove wrinkles.
Connecting the
Printer pg. 27
Specifications pg.
43
Radio Regulatory
Information pg. 31
Appendices pg. 46
The Ribbon Cartridges are protected by a security device which
verifies compatiblity with P4T Series printers. Use of third party
cartridges will cause the printer to malfunction, and will void the
factory warranty.
3. Close the Printer Covers
Figure 9.3-Close the Printer Covers
2. Slide the Ribbon Cartridge Cover closed until it
locks in place.
1. Ensure Media is
pulled out of
Printer
Index pg. 52
Always close the Ribbon Cartridge cover before closing the media
cover.
3. Close the
Media Cover
Section Continues
21
RP4T Printers pg.
35
Manual
Introduction pg. 4
Troubleshooting
Maintenance pg. 36
P4T Overviewpg. 5
Indicates a Bluetooth connection is established. This icon is functional only on P4T Series printers with a
Bluetooth wireless option installed.
Indicates that the printer is associated with a wireless Local Area Network (LAN) using an 802.11b/g
compliant radio. This icon is functional only on a P4T Series printer with a WLAN wireless option installed.
A flashing icon indicates that the printer does not detect any label media. This could indicate an out of
media condition, or improperly loaded media.
A flashing icon indicates that the thermal transfer film is depleted.
Troubleshooting pg.
38
Printer Preparation
pg. 7
A flashing icon indicates that data is being transferred to the printer.
Aflashingoutsideelementofthebatteryiconindicateslowchargestatus. Youshouldsuspendanyprinting
operations and recharge or replace the Battery Pack as soon as is convenient.
Cycling charge level elements within the battery icon indicate the P4T Series battery is being charged by
the AC Adapter. Refer to Charger section of this manual.
Connecting the
Printer pg. 27
Specifications pg.
43
Radio Regulatory
Information pg. 31
Appendices pg. 46
Figure 10 -P4T Series Printer Controls & LCD Icons
Scroll Back Button
Press to scroll to the previous
menu choice on the display.
.
Power Button
Press to turn unit on.
Press again to turn unit
off.
Select Button
Press to select a menu choice on
the display.
Scroll Forward Button
Press to scroll to the next
menu choice on the display.
Printer Status
Icons
Refer to the Troubleshooting section for
more information on
the status icons.
Index pg. 52
Feed Button
Display
Indicates status messages and menu
prompts..
Press to advance a
blank label or a predetermined length of
journal media.
If the printer displays:
“Please Recondition the Battery”
and beeps five times, the user
should recondition the battery to
return it to optimal operation.
To recondition the battery, charge
the battery fully overnight and then
use the printer until the printer
shuts down due to a low battery
condition.
Charge the battery again until it
is fully charged. At that point the
battery will be reconditioned. If the
battery is not reconditioned properly the indicated battery charge
level will indicate that there is more
charge remaining in the battery
pack than is actually available. Reconditioning performed as prompted by the printer will ensure accurate capacity indication throughout
the serviceable life of the battery
pack.
Section Continues
22
RP4T Printers pg.
35
Manual
Introduction pg. 4
P4T Overviewpg. 5
Maintenance pg. 36
Extended LCD Functions
Troubleshooting pg.
38
Printer Preparation
pg. 7
Specifications pg.
43
Connecting the
Printer pg. 27
Appendices pg. 46
Radio Regulatory
Information pg. 31
Function
Default setting
Sensor Type
Bar
Baud Rate
19200
Data Bits
8
Parity
N (none)
LCD Contrast
8
No-activity Timeout
120 sec.
Audio Volume
3
Media Type
Journal
LCD Backlight3
Momentary On
Factory Reset (Resets
all to factory set
values)
No
Scroll & Select Options
• Bar
• Gap
• 9600
• 19200
• 32400
• 57600
• 115200
•7
•8
• E (Even)
• N (None)
• O (Odd)
• Increase (15max.)
• Decrease (15 max.)
• Decrease (0 min.)2
• Increase (120 max.)
• 1 – Low
• 2 – Medium
• 3 - High
• Journal
• Label
• Momentary On w/ time delay
• Off
• No
• Yes
NOTES:
1: LCD menu options are under specific application control. Not all options may be available In your printer’s application.
2: A No-activity timeout value of “0” means the printer will remain on until powered off by the operator.
3: LCD Backlight turns on when any key other than FEED is pressed.
Index pg. 52
Section Continues
23
Manual
Introduction pg. 4
RP4T Printers pg.
35
Display Functions Not Controlled from the Keypad
Function
WLAN ID
Default setting
Factory Set Value
Tear-off Position (Top of Form)
00
P4T Overviewpg. 5
Maintenance pg. 36
Network & RF Settings
Printer Preparation
pg. 7
Troubleshooting pg.
38
Connecting the
Printer pg. 27
Specifications pg.
43
Radio Regulatory
Information pg. 31
Appendices pg. 46
Bridge Mode
Off
DTR/VBUS-Power Off
Off
Present-at
000
Bluetooth parameters
802.11g operating parameters
n/a
n/a
Media Type
Journal
Scroll & Select Options
N/A
• Increase (max. = +10)
• Decrease (min. = -120)
• All protocols On
• Protocols On or Off individually
• Off
• On
• On
• Off
• Increase (max.= +120)
• Decrease (min. = 000
DisplayscurrentBluetoothoperatingparameters
Displays current 802.11g WLAN parameters
•Journal
•Label
Index pg. 52
Section Continues
24
Manual
Introduction pg. 4
RP4T Printers pg.
35
Figure 11- Shoulder Strap
Pull Strap here
to shorten
P4T Overviewpg. 5
Maintenance pg. 36
Hold Buckle
Pull Strap here
to lengthen
Printer Preparation
pg. 7
Troubleshooting pg.
38
Connecting the
Printer pg. 27
Specifications pg.
43
Radio Regulatory
Information pg. 31
Appendices pg. 46
Snap into feature on
printer
Index pg. 52
25
Section Continues
Manual
Introduction pg. 4
RP4T Printers pg.
35
Figure 12 -Sample P4T Series Configuration Label
Printing a Configuration Label
Maintenance pg. 36
P4T Overviewpg. 5
Printer Preparation
pg. 7
Troubleshooting pg.
38
Connecting the
Printer pg. 27
Specifications pg.
43
Radio Regulatory
Information pg. 31
Appendices pg. 46
Index pg. 52
26
RP4T Printers pg.
35
Manual
Introduction pg. 4
Maintenance pg. 36
P4T Overviewpg. 5
Caution • The printer should be turned off before connecting or disconnecting any communications cable.
Note • All P4T series printers can communicate by cable; the specific cable used with your printer can vary with the host
terminal.
Figure 13: P4T Series Communication Ports
Troubleshooting pg.
38
Printer Preparation
pg. 7
Battery Charging
Receptacle
USB Port
Connecting the
Printer pg. 27
Specifications pg.
43
Radio Regulatory
Information pg. 31
Appendices pg. 46
Align Locking Plug
features with these
cutouts.
Rotate clockwise
to lock the cable
in place; counterclockwise to unlock the cable.
RS232/USB Port
Serial (RS232C) or USB Port
Index pg. 52
Section Continues
27
RP4T Printers pg.
35
Manual
Introduction pg. 4
USB
Maintenance pg. 36
P4T Overviewpg. 5
Figure 14- Connecting to a Terminal
Figure 15- Connecting to a PC
Printer Preparation
pg. 7
Troubleshooting pg.
38
Connecting the
Printer pg. 27
Specifications pg.
43
Radio Regulatory
Information pg. 31
Appendices pg. 46
Communications Ports
Communications Ports
RS-232C or USB
Communications Cable to
Computer
Terminal
RS232C or USB
Communications Cable
to Terminal
RS232
Connector
USB
Connector
Refer to Appendix A for part numbers.
RS232
Connector
USB
Connector
RS232
Connector
USB
Connector
Index pg. 52
Section Continues
28
Manual
Introduction pg. 4
RP4T Printers pg.
35
www.zebra.com/manuals
P4T Series printer with
Wireless option
P4T Overviewpg. 5
Maintenance pg. 36
Figure 16- Connecting Wirelessly to a Terminal
Printer Preparation
pg. 7
Troubleshooting pg.
38
Connecting the
Printer pg. 27
Specifications pg.
43
Radio Regulatory
Information pg. 31
Appendices pg. 46
Terminal with wireless
communications
capability
Index pg. 52
29
Section Continues
RP4T Printers pg.
35
Manual
Introduction pg. 4
Wireless Communications with Bluetooth®
P4T Overviewpg. 5
Maintenance pg. 36
Refer to Appendix D of this manual for more information on
locating the Product Configuration Code.
Bluetooth Networking Overview
Printer Preparation
pg. 7
Troubleshooting pg.
38
Connecting the
Printer pg. 27
Specifications pg.
43
Radio Regulatory
Information pg. 31
Appendices pg. 46
www.zebra.com/manuals
Wireless Local Area Network Overview
Index pg. 52
RP4T model printers cannot be configured with the 802.11g/
Bluetooth dual radio option.
30
RP4T Printers pg.
35
Manual
Introduction pg. 4
WLAN Module Using 802.11b/g Radio
The following section only applies when the Bluetooth ZBR4 module is installed in a P4T
series printer. This radio configuration has demonstrated compliance to FCC regulations.
P4T series printers with this configuration sold in North America will have the FCC ID:
I28-MD-ZBR4WA and the Industrie Canada ID: 3798B-ZBR4WA for this radio module on a
label on the back of the printer.
Maintenance pg. 36
P4T Overviewpg. 5
Caution • Exposure to Radio Frequency Radiation.
The radiated output power of this internal Bluetooth radio
is far below the FCC radio frequency exposure limits. The
internal Bluetooth radio operates within guidelines found
in radio frequency safety standards and recommendations.
Do not use the printer in an unauthorized manner.
Troubleshooting pg.
38
Printer Preparation
pg. 7
Note • The following section only applies when the ZBR4
Bluetooth Radio is installed in a P4T Series printer. Unless
specified elsewhere in this manual, the antenna used for this
transmitter must not be co-located or must not operate in
conjunction with any other antenna.
European Regulatory Information for the ZBR4 Bluetooth Radio
The following section only applies when the 802.11b/g WLAN module is installed in a P4T
series printer. Other than conditions specified elsewhere in this manual, only one of the
radio options can be installed in the printer at one time and the antenna used for these
transmitters must not be co-located or must not operate in conjunction with any other
antenna.
P4T Series printers for sale in North America will have the 802.11b/g radio FCC ID:
I28-PLAN11BG, and the Industrie Canada ID: 3798B-PLAN11BG printed on a label on the
back of the unit.
Caution • The radiated output power of this internal 802.11b/g
WLAN radio is far below the FCC radio frequency exposure
limits. The internal radio operates within guidelines found
in radio frequency safety standards and recommendations.
Do not use the printer in an unauthorized manner.
European Regulatory Information for this Radio
AT
EE
HU
LU
SK
BE CY
FI FR
IE
IT
MT NL
SI ES
CZ
DE
LV
PL
SE
DK
GR
LT
PT
GB
CH, IS, LI, NO
Connecting the
Printer pg. 27
Specifications pg.
43
Radio Regulatory
Information pg. 31
Appendices pg. 46
Important Notice:
Important Notice:
Index pg. 52
Section Continues
31
Europe – EU Declaration of Conformity
NCC (Taiwan) Compliance Statement
RP4T Printers pg.
35
Manual
Introduction pg. 4
經型式認證合格之低功率射頻電機,非經許可,公司、商號或使用
者均不得擅自變更頻率、加大功率或變更原設計之特性及功能。
低功率射頻電機之使用不得影響飛航安全及干擾合法通信;經發
現有干擾現象時,應立即停用,並改善至無干擾時方得繼續使用。
前項合法通信,指依電信法規定作業之無線電通信。低功率射頻
電機須忍受合法通信或工業、科學及醫療用電波輻射性電機設備
之干擾。
Maintenance pg. 36
P4T Overviewpg. 5
Printer Preparation
pg. 7
Troubleshooting pg.
38
Connecting the
Printer pg. 27
Specifications pg.
43
Radio Regulatory
Information pg. 31
Appendices pg. 46
Index pg. 52
Section Continues
32
Europe – EU Declaration of Conformity
RP4T Printers pg.
35
Manual
Introduction pg. 4
The following section only applies when the CF (Compact Flash) WLAN module and
Bluetooth ZBR4 module are installed in a P4T printer. This co-located radio configuration
has demonstrated compliance to FCC regulations. P4T printers with this configuration
sold in North America will have the FCC ID: I28-ZB4LAN-01 and the Industrie Canada ID:
3798B-ZB4LAN01 for this radio configuration printed on a label on the back of the printer.
Maintenance pg. 36
P4T Overviewpg. 5
Caution • Use of a P4T printer with the co-located ZBR4
Bluetooth radio module and the 802.11b/g WLAN radio
module meets the FCC requirements for radio frequency (RF)
radiation exposure in the standard body worn configuration
with no minimum separation. In this configuration, which
applies whether the belt clip or shoulder strap is used, the
face of the printer from which paper is transported is facing
away from the user’s body. The standard configuration must
always be used when the printer is body worn.
Troubleshooting pg.
38
Printer Preparation
pg. 7
The radiated output power of this radio configuration is far
below the FCC radio frequency exposure limits. Both the
internal Bluetooth and the 802.11b/G radio operate within
guidelines found in radio frequency safety standards and
recommendations. Do not use the printer in an unauthorized
manner.
RP4T printers are not configured with this radio option.
Connecting the
Printer pg. 27
Specifications pg.
43
Radio Regulatory
Information pg. 31
Appendices pg. 46
European Regulatory Information for the Compact Flash 802.11b Radio
and Bluetooth Co-located Radio Modules
AT
EE
HU
LU
SK
BE CY
FI FR
IE
IT
MT NL
SI ES
CZ
DE
LV
PL
SE
DK
GR
LT
PT
GB
CH, IS, LI, NO
Index pg. 52
Section Continues
33
RFID Encoder
RP4T Printers pg.
35
Manual
Introduction pg. 4
Maintenance pg. 36
P4T Overviewpg. 5
RFID option
Printer Preparation
pg. 7
Troubleshooting pg.
38
Connecting the
Printer pg. 27
Specifications pg.
43
Radio Regulatory
Information pg. 31
Appendices pg. 46
No RFID
US
EU
Australia
Taiwan
New Zealand
Brazil
China
Malaysia
Phillipines
India
El Salvador
Isreal
Japan
Korea
Configuration
RFID Encoder
RFID Encoder & 801.11b/G Radio)
RFID Encoder & BT2.0 Radio
PCC
digit “5”
0
U
1
2
6
8
9
A
B
C
D
E
F
G
H
Printer Model
P4T
RP4T
RP4T
RP4T
RP4T
RP4T
RP4T
RP4T
RP4T
RP4T
RP4T
RP4T
RP4T
RP4T
RP4T
FCC ID:
I28RFID-M5ECZ-01
I28RFID-R4LANG-01
I28RFID-M5ZBR4-01
Industrie Canada ID:
3798B-M5ECZ01
3798B-R4LANG01
3798B-M5ZBR401:
Caution • Exposure to Radio Frequency Radiation.
The radiated output power of this RFID encoder is far below
the FCC radio frequency exposure limits. The RFID encoder
operates within guidelines found in radio frequency safety
standards and recommendations. Do not use the printer
in an unauthorized manner.
Index pg. 52
34
RP4T Printers pg.
35
Manual
Introduction pg. 4
T he information in this se c tion is provide d for your
co nve n i e n ce o n l y a n d is su b j e c t to c h a n g e . G o to
h t t p : // w w w. e p c g l o b a l i n c . o r g f o r t h e l a t e s t E P C
information.
Generation 2 Class 1 UHF Passive Tags Supported By The P4T
Alien Squiggle
Avery Dennison
Raflatac Onetenna
Omron Wave
Maintenance pg. 36
P4T Overviewpg. 5
^RS
Troubleshooting pg.
38
Printer Preparation
pg. 7
Connecting the
Printer pg. 27
Specifications pg.
43
Radio Regulatory
Information pg. 31
Appendices pg. 46
^RS
Index pg. 52
Print quality will be reduced when attempting to print over
the transponder portion of an RFID label. It is recommended
that RFID label layouts should not allow printing over the
RFID transponder portion of a label.
35
RP4T Printers pg.
35
Manual
Introduction pg. 4
Maintenance pg. 36
P4T Overviewpg. 5
Caution • Do not print while an LI72 Single Charger is
plugged into the unit. Unreliable battery charging can
result.
Always dispose of used batteries properly. Refer to Appendix E
for more information on proper battery disposal.
Printer Preparation
pg. 7
Troubleshooting pg.
38
Connecting the
Printer pg. 27
Specifications pg.
43
Operator Controls
Caution • Always turn the printer off before cleaning.
To avoid possible personal injury or damage to the printer, never insert any pointed or sharp objects into the printer.
Use care when working near the Tear Bar. The edges are very sharp.
Appendices pg. 46
Radio Regulatory
Information pg. 31
Caution • The printhead can become very hot after prolonged printing. Allow it to cool off before attempting any cleaning
procedures.
Caution • Use only cleaning agents specified in the P4T Series cleaning instructions. Zebra Technologies Corporation will not
be responsible for damage caused by any other cleaning materials used on this printer.
Clean the printer with either the cleaning pen supplied with the printer or a cotton swab saturated with alcohol.
Index pg. 52
Section Continues
36
RP4T Printers pg.
35
Manual
Introduction pg. 4
Caution • To avoid possible personal injury or damage to the printer never insert sharp or pointed objects into the printer
mechanism.
Figure 17.1- P4T Series Cleaning
Tear Edge
Maintenance pg. 36
P4T Overviewpg. 5
Printhead
Elements
Printer Preparation
pg. 7
Troubleshooting pg.
38
Connecting the
Printer pg. 27
Specifications pg.
43
Gap Sensor
Media
Support Disks
Bar
Sensor
Peeler Bar
Platen Surface
Appendices pg. 46
Radio Regulatory
Information pg. 31
Figure 17.2- Cleaning the P4T Series Peeler Assembly
Label Presence
Sensor
Area
Cleaning Method
Interval
Index pg. 52
Use the supplied cleaning pen to clean the print
PrintheadElements elements from end to end (the print elements are
Aftereveryfiverollsofmedia(ormoreoften,
located in the thin gray line on the printhead).
if needed)
Platen Surface
Rotatetheplatenrollerandcleanitthoroughlywiththe
cleaning pen.
Peeler Bar
Clean thoroughly with the cleaning pen.
Tear Edge
Exterior
Wipe with water-dampened cloth
As needed
Interior
Brush/air blow. Ensure the Bar Sensor, Gap Sensor and
LabelPresentSensorwindowsandtheMediaSupport
Disks are free of dust.
37
RP4T Printers pg.
35
Manual
Introduction pg. 4
LCD Control Panel
Icon
Maintenance pg. 36
P4T Overviewpg. 5
Troubleshooting pg.
38
Printer Preparation
pg. 7
Specifications pg.
43
Connecting the
Printer pg. 27
Blank Screen
Appendices pg. 46
Radio Regulatory
Information pg. 31
1. No power:
Status
Indication
Ref. to Troubleshooting
Topic
On
Bluetooth link established
n/a
Off
No Bluetooth link
6,8
On
802.11b/g RF Link established
n/a
Off
No 802.11b/g RF Link
6,8
Number of bars indicates 802.11g signal strength
n/a
Outer icon element flashing
4, 6,
Low Battery
Number of bars indicates battery charge level.
Display will cycle through the battery icons if it is undergoing a charge
from the AC Adapter.
n/a
Flashing
Battery too hot or too cold to charge
2
Flashing
Out of Media
9
Flashing
Ribbon Cartridge depleted
9
Flashing
Data transfer in process
n/a
n/a
Battery voltage too low to turn printer
on or no application loaded
1,14
2. AC Adapter is plugged in and the battery icon is
alternately flashing
and
.
3. Media does not feed:
Index pg. 52
Section Continues
38
RP4T Printers pg.
35
Manual
Introduction pg. 4
4. Poor or faded print or low battery icon (
flashing:
)
Always dispose of used battery packs properly. Refer to
Appendix E for more information.
12. Prints multiple “Void” messages:
13. Communication Error:
Maintenance pg. 36
P4T Overviewpg. 5
5. Partial/missing print:
14. Screen blank
6. No print:
Printer Preparation
pg. 7
Troubleshooting pg.
38
Connecting the
Printer pg. 27
Specifications pg.
43
Radio Regulatory
Information pg. 31
Appendices pg. 46
7. Reduced battery life:
8.
9.
or
icon off:
or
flashing:
10. Skips labels:
Index pg. 52
11. Prints “wrinkle pattern” or partial characters:
Section Continues
39
RP4T Printers pg.
35
Manual
Introduction pg. 4
Printing a Configuration Label
Note • If the FEED key is not pressed within 3 seconds, the
printer will print “DUMP mode not entered” and will resume
normal operation.
Maintenance pg. 36
P4T Overviewpg. 5
Printer Preparation
pg. 7
Troubleshooting pg.
38
Connecting the
Printer pg. 27
Specifications pg.
43
Radio Regulatory
Information pg. 31
Appendices pg. 46
To terminate the Communications Diagnostics Mode:
Performing a Forced Shutdown
Calling Technical Support
Communications Diagnostics
Index pg. 52
To enter Communications Diagnostics Mode:
Section Continues
40
Figure 18.1- P4T Series Configuration Label Sample
RP4T Printers pg.
35
Manual
Introduction pg. 4
Print Head Test
First diagnostic report for all P4T
Series printers
P4T Overviewpg. 5
Maintenance pg. 36
End of First Report
Unit Serial Number
Printer Preparation
pg. 7
Troubleshooting pg.
38
Wireless Communications section for a
P4T Series with an
802.11 radio installed
Installed software and
firmware
Settings for RS232
and USB communications via cable
Specifications pg.
43
Connecting the
Printer pg. 27
Appendices pg. 46
Radio Regulatory
Information pg. 31
Wireless
Communications
section with a
Bluetooth radio
installed.
Units with no
wireless options will
print an empty line
and resume printing.
Index pg. 52
Second diagnostic report for a printer with a
Bluetooth radio
Information on TCP/
IP and LAN addresses and settings.
Information on
any installed
802.11b/g wireless devices.
In this example,
an 802.11b WLAN
card has been
detected.
Second diagnostic report for a printer with an
802.11b/g radio
Section Continues
41
Figure 18.2- P4T Series Configuration Label Sample
RP4T Printers pg.
35
Manual
Introduction pg. 4
Command languges
supported. P4T
Series supports
both CPCL languge
and emulates ZPLII.
Maintenance pg. 36
P4T Overviewpg. 5
Configuration
settings for
ZPL language
emulation
Printer Preparation
pg. 7
Troubleshooting pg.
38
Connecting the
Printer pg. 27
Specifications pg.
43
Radio Regulatory
Information pg. 31
Appendices pg. 46
Flash Memory Size
RAM Size
End of Configuration Report
Maximum label
dimensions and
label sensor
settings
End of second diagnostic report
Resident Fonts
Installed
Files Loaded in
Printer Memory.
Will include file for
LCD prompts (.wml
format)
Index pg. 52
Second diagnostic report continued
Amount of Memory
Available
42
RP4T Printers pg.
35
Manual
Introduction pg. 4
Note.- Printer specifications are subject to change without
notice.
Figure 19- P4T Series Communication Ports
Printing Specifications
Maximum Print Width
1
Maintenance pg. 36
P4T Overviewpg. 5
4.09 in. [103,8 mm]
2.0 in. /sec. [50,8 mm/second ]
Direct Thermal mode
1.5 in/sec. [38,1 mm/second]
Thermal Transfer mode
Print Speed @ 30% density
DistancefromPrintElementtoTear
Edge
Print Head Life
Print Density
5
USB
0.39 in. [9,91 mm] 41 dots
RS232/USB
Combination
Port
1,000,000 inches (25.4 Km) min.
203 dots/inch (8 dots/mm)
Memory/Communications Specifications
Troubleshooting pg.
38
Printer Preparation
pg. 7
Flash Memory
RAM Memory
Standard Communications
Specifications pg.
43
Connecting the
Printer pg. 27
OptionalWirelessCommunications
Real Time Clock (RTC)
Appendices pg. 46
Radio Regulatory
Information pg. 31
8 MB flash (standard)
16 MB RAM)
RS-232C serial port (RJ-45 connector) Configurable
Baud rate (from 9600 to 115.2 Kbps), parity and data
bits. Software (X-ON/X-OFF) or hardware (DTR/STR)
communication handshake protocols.
Two USB 2.0 Full Speed Interface connections:
(1) a “B” type USB connector, and
(2) USB signals are also integrated into the RJ-45
connector.
Refer to the Communications Ports specifications and
Appendix A for information on USB cables.
Bluetooth 2.0 compatible 2.4 GHz SRRF link
Wireless LAN capabilities comply with 802.11b or 802.11g
protocols
Co-located Bluetooth 2.0 + 802.11b/g radios (P4T only)
Time and date under application control. Refer to CPCL
Programming Manual, available at www.zebra.com for
RTC commands.
1
10
Communications Ports
USB
Signal
Pin#
1
2
3
4
5
Name
VBUS
USB USB +
USB_ID
Return
Type
Description
USB Bus Power
bi-directional I/O signals
bi-directional I/O signals
Identifies A/B connector
Ground
RS232/USB
Signal
Pin#
1
2
3
4
5
Index pg. 52
Name
USB DUSB D+
RXD
TXD
DTR
Type
bi-directional
bi-directional
input
output
output
6
7
GND
DSR
input
8
RTS
output
9
10
CTS
VBUS
input
Description
I/O signals
I/O signals
Receive Data
Transmit Data
Data Terminal Ready- set high
when printer is on.
Ground
Data Set Ready- low to high
Request To Send- set high when
printer is ready to accept a
command or data
Clear To Send from host
USB Bus Power
Section Continues
43
P4T Series Media Specifications
RP4T Printers pg.
35
Manual
Introduction pg. 4
Media Width
Max. continuous receipt (w/std. memory)
Inter-label Gap.
Label Thickness
RFID Label Thickness (RP4T only)
P4T Overviewpg. 5
Maintenance pg. 36
Max. Label Roll diameter.
Label Inner Core
Black Mark Dimensions
Media Requirements
P4T Series Font and Bar Code Specifications
Printer Preparation
pg. 7
Troubleshooting pg.
38
2.0 in. to 4.12 in. (50,8 to 104,6 mm)
Continuous, dependent on installed memory
0.08 in. to 0.16 in. (0.12 in. preferred)(2 mm to 4 mm
[3 mm preferred])
0.032 in to 0.007” (0,064 mm to 0,165 mm)
032 in to 0.007” (.064 mm to .165 mm), Thickness
over RFID element- .023 in. [0,58 mm]
2.25 in. (57 mm) O.D.
.75 in. (19 mm) minimum diameter;
1.38 in. (35 mm) RFID Media
Thereflectivemediablackmarksshouldextendpast
the centerline of the roll.
Minimum mark width: 1.0 in. (25,4 mm)
perpendiculartoedgeofmedia,centeredwithinthe
width of the roll.
Mark length: 0.094 in. (2,4 mm) parallel to edge of
media
Linear & 2-D Bar
Codes Available
Use Zebra brand direct or thermal transfer media that is outside wound. Media may be
reflective (black mark) sensing, or transmissive (gap) sensing, die-cut, or continuous. P4T
Series units configured with the External Media option will accept fanfold media used
with an external media supply.
For die-cut labels, use only full auto dies.
Rotation Angles
Connecting the
Printer pg. 27
Specifications pg.
43
Radio Regulatory
Information pg. 31
Appendices pg. 46
Fonts Available
Codabar (NW-7)
UCC/EAN 128
Code 39
Code 93
EAN 8/JAN 8, 2 and 5 digit extensions
EAN 13/JAN 13, 2 and 5 digit extensions
EAN 14/JAN 14, 2 and 5 digit extensions
lnterleaved 2 of 5
MSI/Plessey
FIM/POSTNET
UPC-A, 2 and 5 digit extensions
UPC-E, 2 and 5 digit extensions
QR Code
MaxiCode
PDF 417
Aztec
DataMatrix (using ZPL emulation)
RSS (Reduced Space Symbology®):
RSS-14 Truncated
RSS-14 Stacked
RSS-14 Stacked Omnidirectional
RSS Limited
RSS Expanded
TLC-39/Micro PDF
0°, 90°, 180°, and 270°
StandardFonts:25bit-mappedfonts;1scalable(CGTrimvirate
Bold Condensed*)
Downloadableoptionalbit-mapped&scalablefontsviaLabel
Vista software
International character sets:
Chinese 16 x 16 (trad.), 16 x 16 (simplified), 24 x 24 (simplified);
Japanese 16 x 16, 24 x 24
Korean Myang 16 x 16
Greek
Hebrew/Arabic
*Contains UFST from Agfa Monotype Corporation
*Contains UFST from Agfa Monotype Corporation
Index pg. 52
Section Continues
44
RP4T Printers pg.
35
Manual
Introduction pg. 4
Physical/Environmental/Electrical Specifications
P4T Series
2.9 lbs. (1,32 Kg.)
Weight w/ battery, and TT ribbon
excluding media and radio option
Direct Thermal: -4 °F to 122 °F (-20 °C to 50 °C)
Thermal Transfer: 32 °F to 113 °F (0 °C to 45 °C)
Operating Temperature
P4T Overviewpg. 5
Maintenance pg. 36
Charging Temperature
Storage Temperature
Relative Humidity
Battery
Intrusion Protection (IP) Rating
32 °F to 104 °F (0°C to 40 °C)
-22 °F to 149 °F (-30 °C to 65 °C)
Operating: 10% to 90%
(non-condensing)
Storage: 10% to 90%
(non-condensing)
7.4V Lithium-Ion 4.2 AHr.
14
(54 w/ optional soft case)
Appendices pg. 46
6.53 in.
[165,9 mm]
8.68 in.
[220,5 mm]
Specifications pg.
43
Radio Regulatory
Information pg. 31
#8-32 x .30 DP.
x2
3.38 in.
[85,9 mm]
0.57 in.
[14,5mm]
Troubleshooting pg.
38
Connecting the
Printer pg. 27
2.92 in.
[74,2 mm]
3.16 in.
[80,2 mm]
Printer Preparation
pg. 7
Figure 20-P4T Series Overall Dimensions
External Media
Supply Loading Slot
1.60 in.
[40,6 mm]
Index pg. 52
4.25 in.
[108,0 mm]
3.14 in.
[79,7 mm]
Appendix A
45
RP4T Printers pg.
35
Manual
Introduction pg. 4
USB Cable
RS232 Download Cable
Maintenance pg. 36
P4T Overviewpg. 5
PIN 9
Printer Preparation
pg. 7
Troubleshooting pg.
38
Connecting the
Printer pg. 27
Specifications pg.
43
Radio Regulatory
Information pg. 31
Appendices pg. 46
(TXD) 3
(RXD) 2
(DSR) 6
(GND) 5
(DTR) 4
(CTS) 8
PIN 1 (RTS) 7
SHIELD
10 PIN MOD Plug
(Printer Signals)
3 (RXD)
4 (TXD)
5 (DTR)
6 (GND)
7 (DSR)
8 (RTS)
9 (CTS)
SHIELD
PIN 1
PIN 10
USB Download Cable
4 PIN USB
(Type A Plug)
1 (VBUS)
2 (USB D-)
3 (USB D+)
4 (GND)
Contact the Factory or your Zebra Sales Representative
for more information on interface cables to most major
manufacturer’s data terminals.
You may also visit the Zebra Web site at www.zebra.com
for a listing of interface cables for all series of Zebra mobile
printers
10 PIN MOD Plug
(Printer Signals)
10 (VBUS)
1 (USB D-)
2 (USB D+)
6 (GND)
PIN 1
PIN 10
Index pg. 52
Appendix B & C
46
RP4T Printers pg.
35
Manual
Introduction pg. 4
Maintenance pg. 36
P4T Overviewpg. 5
Printer Preparation
pg. 7
Troubleshooting pg.
38
Connecting the
Printer pg. 27
Specifications pg.
43
Radio Regulatory
Information pg. 31
Appendices pg. 46
Index pg. 52
47
Appendix D
RP4T Printers pg.
35
Manual
Introduction pg. 4
Serial and PCC Number Locations for P4T Series Printers
Maintenance pg. 36
P4T Overviewpg. 5
www.zebra.com
In the Americas, contact
Printer Preparation
pg. 7
Troubleshooting pg.
38
Connecting the
Printer pg. 27
Specifications pg.
43
Regional Headquarters
Zebra Technologies International, LLC
333CorporateWoodsParkwayVernon
Hills, Illinois 60061-3109 U.S.A
T: +1 847 793 2600
Toll-free +1 800 423 0422
F: +1 847 913 8766
Technical Support
T: +1 847 913 2259
F: +1 847 913 2578
Hardware:
[email protected]
Software:
[email protected]
Customer Service Dept
For printers, parts, media,
and ribbon, please call your
distributor, or contact us.
T: +1 877 275 9327
E: [email protected]
P4T Series Product
Configuration Code
(PCC)
P4T Series Serial
Number
In Europe, Africa, the Middle East, and India, contact
Regional Headquarters
ZebraTechnologiesEuropeLimited
Dukes Meadow
Millboard Road
Bourne End
Buckinghamshire SL8 5XF, UK
T: +44 (0)1628 556000
F: +44 (0)1628 556001
Technical Support
T: +44 (0) 1494 768298
F: +44 (0) 1494 768210
Germany:
[email protected]
France: [email protected]
Spain/ Portugal:
Tsspain @zebra.com
All other areas:
[email protected]
Internal Sales Dept.
For printers, parts, media,
and ribbon, please call your
distributor, or contact us
T: +44 (0) 1494 768316
F: +44 (0) 1494 768244
E: [email protected]
In the Asia Pacific region, contact
Appendices pg. 46
Radio Regulatory
Information pg. 31
Regional Headquarters
Zebra Technologies Asia Pacific, LLC
Go to www.zebra.com/contact for
complete contact information
T: +65 6858 0722
F: +65 6885 0838
Technical Support
T: +65 6858 0722
F: +65 6885 0838
E: (China):
[email protected]
All other areas:
[email protected]
Customer Service
For printers, parts, media,
and ribbon, please call your
distributor, or contact us
T: +65 6858 0722
F: +65 6885 0836
E: (China)
[email protected]
All other areas:
[email protected]
Index pg. 52
Appendix E
48
Product Disposal
Manual
Introduction pg. 4
RP4T Printers pg.
35
Battery Disposal
http://www.zebra.com/environment
P4T Overviewpg. 5
Maintenance pg. 36
Insulate depleted bat ter y terminals with tape before
disposal.
Printer Preparation
pg. 7
Troubleshooting pg.
38
Connecting the
Printer pg. 27
Specifications pg.
43
Radio Regulatory
Information pg. 31
Appendices pg. 46
Index pg. 52
49
Appendix F
RP4T Printers pg.
35
Manual
Introduction pg. 4
Using zebra.com
Example 2: Find the Label Vista Download page:
Go to www.zebra.com/software and select “Label Vista”, then click “Submit”.
Example1: Find the Mobile Printer Wireless Configuration Guide.
Go to www.zebra.com/manuals.
Select as a manual type “Networking Manual” then click on “Submit”.
Maintenance pg. 36
P4T Overviewpg. 5
Troubleshooting pg.
38
Printer Preparation
pg. 7
Select manual
type
Click on
“SUBMIT”
Select the
“Label Vista
demo
At the resulting screen, select Wireless Mobile as the networking type. Then select the
desired language. (Best choices are “All” or “English”)
At the resulting window select “Download a free Label Vista demo now “
Connecting the
Printer pg. 27
Specifications pg.
43
Radio Regulatory
Information pg. 31
Appendices pg. 46
Select networking
type (Wireless Mobile
in this example)
Select
language
Click on
“SUBMIT”
At the resulting screen, select “Zebra Mobile Printers - Wireless Configuration Guide” then
click on “Download” to begin the download process.
Index pg. 52
Appendix G
50
RP4T Printers pg.
35
Manual
Introduction pg. 4
Maintenance pg. 36
P4T Overviewpg. 5
This product and/or its use m ay be covered by one or m ore of the
follow ing U S patents and corresponding international patents
w orldw ide
D 275,286
6,261,009
5,113,445
5,399,846
5,726,630
D 347,021
6,261,013
5,140,144
5,408,081
5,768,991
D 389,178
D 430,199
D 433,702
D 549,768
Troubleshooting pg.
38
Printer Preparation
pg. 7
3,964,673
4,019,676
4,044,946
4,360,798
4,369,361
4,387,297
4,460,120
4,496,831
Specifications pg.
43
Connecting the
Printer pg. 27
4,593,186
4,607,156
4,673,805
4,736,095
5,132,709
5,410,139
5,790,162
5,157,687
5,168,148
5,415,482
5,418,812
5,813,343
5,816,718
5,142,550
5,149,950
5,168,149
5,180,904
5,229,591
5,230,088
5,235,167
5,243,655
5,247,162
5,250,791
5,250,792
5,262,627
Appendices pg. 46
Radio Regulatory
Information pg. 31
4,758,717
5,267,800
5,280,163
4,896,026
4,897,532
5,304,786
5,304,788
4,816,660
4,845,350
4,923,281
4,933,538
4,992,717
5,015,833
Index pg. 52
5,017,765
5,021,641
5,029,183
5,047,617
5,103,461
5,280,164
5,280,498
5,321,246
5,335,170
5,364,133
5,367,151
5,372,439
5,373,148
5,378,882
5,396,053
5,396,055
5,410,140
5,412,198
5,420,411
5,436,440
5,444,231
5,449,891
5,449,893
5,468,949
5,479,000
5,479,002
5,479,441
5,486,057
5,503,483
5,504,322
5.519,381
5,528,621
5,532,469
5,543,610
5,545,889
5,552,592
5,570,123
5,578,810
5,589,680
5,612,531
5,642,666
5,657,066
5,680,459
5,791,796
5,806,993
5,820,279
5,848,848
5,860,753
5,872,585
6,267,521
6,270,072 B1
6,285,845 B1
6,292,595
6,296,032
6,364,550
6,379,058 B1
6,409,401 B1
6,411,397 B1
6,428,227 B2
5,874,980
5,909,233
5,976,720
6,480,143
6,530,705
5,995,128
5,997,193
6,540,142
6,607,316
5,978,004
6,004,053
6,010,257
6,020,906
6,034,708
6,036,383
6,057,870
6,068,415
6,068,415
6,095,704
6,109,801
6,123,471
6,147,767
6,540,122
6,609,844
6,655,593
6,784,787
6,874,958
6,899,477
6,908,034
7,126,716
7,137,000
7,172,122
7,190,270
6,151,037
6,201,255 B1
6,231,253 B1
Index
51
RP4T Printers pg.
35
Manual
Introduction pg. 4
, ,
P4T Overviewpg. 5
Maintenance pg. 36
,
, ,
,
Printer Preparation
pg. 7
Troubleshooting pg.
38
,
Specifications pg.
43
Radio Regulatory
Information pg. 31
Appendices pg. 46
,
Connecting the
Printer pg. 27
,
Index pg. 52
52
Zebra Technologies Corporation
475 Half Day Road, Suite 500
Lincolnshire, IL 60069
Phone: +1 847.634.6700
Toll Free: +1 800.423.0442
Fax: +1 847.913.8766
UMAN-P4T-010 Rev. A October 2011