Download Print Settings (CAL 2)
Transcript
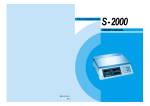
AW/AHW Professional Weighing Scale
User Manual
Sep. 2009
Table of Contents
Specifications ......................................................................................................... 2
Basic specification.......................................................................................... 2
Series specification......................................................................................... 2
Display and keypad ................................................................................................ 3
LCD Display................................................................................................... 3
Keypad............................................................................................................ 4
Using the weighing scale........................................................................................ 6
Counting function........................................................................................... 6
Percentage function ........................................................................................ 6
Operation of M+............................................................................................. 6
Operation of MR ............................................................................................ 6
Alarm function ............................................................................................... 7
Input tare weight by keypad ........................................................................... 7
Settings and Calibration ......................................................................................... 8
General Settings (CAL 1)............................................................................... 8
Print Settings (CAL 2).................................................................................... 9
Calibration Procedure (CAL 3) .....................................................................11
Linearity Calibration Procedure (CAL 4) .................................................... 12
RS232C Connection: DB-09 (Male) ............................................................ 13
Bi-directional RS232C Setting..................................................................... 13
1
Specifications
Basic specification
Digital Display
LCD, height 40 mm x 125 mm
6 digitals
Platter Size (mm)
245 x 355 (W x H)
Dimensions (mm)
387 x 365 x 117(W x L x H)
Net Weight (kg)
3.7kg
Operating Temperature
0 ℃ to +40℃
Relative Humidity
Less than 85%
Power
9V / 500mA, AC adapter;
Built in 6V Rechargeable Battery
Interface
RS-232C
Series specification
Model
AW
Max.
Capacity
1.5kg/3lb
3kg/6lb
7.5kg/15lb
15kg/30lb
30kg/60lb
50kg/100lb
d=
0.1g
0.2g
0.5g
1g
2g
2g
Accuracy
1/15000
1/15000
1/15000
1/15000
1/15000
1/25000
Model
AHW
Max.
Capacity
3kg/6lb
6kg/12lb
15kg/30lb
30kg/60lb
50kg/100lb
d=
0.1g
0.2g
0.5g
1g
1g
Accuracy
1/30000
1/30000
1/30000
1/30000
1/50000
2
Display and keypad
LCD Display
.
Numerical display to display weight, date & time, ID
number
Indicates the weight is stable.
Indicates the weight is at zero.
Hi-Lo
M+
G.W
N.W.
T.W
Hi
Lo
Indicates the accumulation weight in memory.
When ▼ is shown above the G.W. indicator, the Gross
Weight is displayed.
When ▼ is shown above the N.W. indicator, the Net
Weight is displayed.
When ▼ is shown above the T.W. indicator, the Tare
Weight is displayed.
When you are setting the weight upper bound, ▲ is
flashing above the Hi indicator.
When you are setting the weight lower bound, ▲ is
flashing above the Lo indicator.
3
Keypad
Key Icons
Keypad
Descriptions
Off key
Press to switch the scale OFF.
On key
Press to turn the scale ON.
Zero key
Press to absorb trivial weight on the pan
and set the scale to zero.
Press to perform tare operation.
Tare key
~
Numeric and
decimal keys
Press the numeric and decimal keys to
input data such as piece weight, quantity…
etc.
Clear key
Press to clear the input data.
M+ key
Press to accumulate piece counting and
weighing results.
Press to recall total number of
accumulation and total weighing.
Press to set alarm for weight upper bound.
MR key
Hi key
Lo key
Press to set alarm for the weight low
bound.
4
Function key
Print key
Press to toggle among, Hi/Lo, %,
sampling.
Press to set up sample quantity. (Sample
key: multiple sampling methods are
available. See Sampling section.)
Press to set up percentage of the given
sample.
Press to print the weight data.
Unit key
Press to switch between kg and lb.
Date &time key
Press to display the current date and time.
Sampling key
Percentage key
Note: The date and time setting can be changed
in CAL 1 menu.
ID key
Gross/Net/Tare
key
Press to enter the ID mode. Use the
numeric keypad to enter the user’s ID
number.
Press to toggle among Gross Weight, Net
Weight, and Tare Weight on the display.
5
Using the weighing scale
Counting function
1.
Put certain pieces of objects on to the scale pan.
2.
In weighing mode, press the numeric key to set the piece count and press
3.
Now you are ready to perform parts counting for the specific samples. The input data will be
cleared in 4 seconds if
.
is not pressed.
Percentage function
1.
Put certain pieces of objects on to the scale pan.
2.
Press
3.
Place objects of desired piece counts on the weighing pan. The percentage of the objects will
and use the numeric key to enter the percentage of the sample. .
be calculated automatically.
Operation of M+
1.
When there is a load on the weighing pan, press
and after a beep sound, the M+
indicator will light up on the LCD, indicating a data has been recorded.
2.
Clear the load and put another load on the weighing pan. When the scale become stable,
. After a beep sound, the M+ indicator will light up on the LCD, indicating
press
second data has been recorded.
z
z
After each recording, if the load on the weighing pan is not cleared, pressing
will result in the long beep and the scale won’t be able to record the next weighing
result.
The stored memory can memorize up to 180 weighing results.
Operation of MR
1.
In weighing mode, press
to display the accumulated weighing result. The LCD
display will flash the total number of accumulation and the total weight alternatively. For
instance, if you added two weighing results and the total weight add up to 2.0 kg. The
scale will flash ACC.002, and then 2.000kg
6
2.
Press
to exit the MR mode without clearing the data in memory.
Alarm function
1.
Press
key to set the upper bound of the weight. The ▲ is flashing above the Hi
indicator.
2.
Set up the weight upper bound with the numeric keys Press
key again to save your
setting and return to normal weighing mode.
3.
Press
key to set the lower bound of the weight. The ▲ is flashing above the Lo
indicator.
4.
Set up the lower bound with the numeric keys.
5.
Press
key again to save your setting and return to weighing mode.
Note:
z
While the weight exceeds the upper bound of Weight Upper Bound, or lower than the
Weight Lower Bound, or between the lower and upper bound and is not zero, the scale
will beep for warning.
z
You may change the beep settings in CAL 1 menu.
Input tare weight by keypad
1.
In weighing mode, press the numeric keys to input the tare weight. (The unit is in gram.)
2.
Then, press
, and the tare weight has been changed. (The input data will be cleared in 4
seconds if
is not pressed.)
Note: It’s not allowed to set tare weight greater than scale capacity.
7
Settings and Calibration
1. Press and hold any key while turning the scale ON. CAL 1 is shown on the LCD display.
key to toggle among the CAL 1, CAL 2, CAL 3, and CAL 4 menus.
2. Press
3. Select CAL 1, press
to enter General Settings menu.
4. Select CAL 2, press
to enter the Print Settings menu
6. Select CAL 3, press
to enter Calibration procedure.
7. Select CAL 4, press
to enter Linearity Calibration procedure.
Note: To perform CAL 3 and CAL 4 calibration, you must remove the JP3 jumper from the PCB first.
Put the JP3 back after calibration is complete.
General Settings (CAL 1)
In the General Settings menu, press
to toggle among the options, and
1. Aut.oFF– Auto Off Setting
Display Descriptions
A.oFF 0 Disable auto shutdown function.
A.oFF 1 If there is no operation, the scale will shut down in 5 minutes.
A.oFF 2 If there is no operation, the scale will shut down in 10 minutes.
A.oFF 3 If there is no operation, the scale will shut down in 20 minutes.
A.oFF 4 If there is no operation, the scale will shut down in 30 minutes.
2. B. LiGHt - Backlight Setting
Display Descriptions
bL
0 Disable the backlight function.
bL
1 Enable the backlight function.
bL
2 Automatic backlight when there is load on the weighing pan.
3. bbH - Hi Beep Setting
Display Explanation
bbH_ 0 Disable Hi alarm sound.
bbH_ 1 Set Hi alarm sound as continual short beeps.
bbH_ 2 Set Hi alarm sound as continual long beeps.
8
to confirm.
4. bbS - Go Beep Setting
Display Explanation
bbS_ 0 Disable Go alarm sound.
bbS_ 1 Set Go alarm sound as continual short beeps.
bbS_ 2 Set Go alarm sound as continual long beeps.
5. bbL – Lo Beep Setting
Display Explanation
bbL_ 0 Disable Lo alarm sound.
bbL_ 1 Set Lo alarm sound as continual short beeps.
bbL_ 2 Set Lo alarm sound as continual long beeps.
6. dNY-Date Setting (dd/mm/yy)
1. Current date is shown on the display. Press the Date key to select the field for adjustment.
2. The date format is displayed as DD/MM/YY. For example to set the date as April 17, 2009,
press the date key to select the date field.
3. Enter the date with numeric keypad and press date key to go to the next field.
4. When the set up is complete, press tare to save your settings.
7. HNS-Time Setting (hh/mm/ss)
1. Current date is shown on the display. Press the Date key to select the field for adjustment.
2. The date format is displayed as H/M/S. For example to set the date as 16: 50: 23, press the date
key to select the date field.
3. Enter the date with numeric keypad and press date key to go to the next field.
4. When the set up is complete, press tare to save your settings.
Print Settings (CAL 2)
Press
to toggle among the options. Use the numeric keys to input data and press
save your settings.
1. Print Settings
Display
Descriptions
Pr.dEFA
Set the print format to default settings.
Pr.LP50
Set the print format to LP-50 printer.
9
to
2. Printout setting
Display
Descriptions
P. PrESS
Press M+ to print single weighing result. Press C in MR
mode to print accumulated weighing result and total
accumulation.
P. StAb.1
Print weighing result (Net wt, Pc. wt, Pc. count) when the
scale is stable and weight > 0.
* Pressing M+ and MR do not print.
P. StAb.2
Print Net wt when the scale is stable and weight > 0.
* Pressing M+ and MR do not print.
P. ALL.1
Press M+ to print single weighing result. Press C in MR
mode to print accumulated weighing result and total
accumulation.
Print weighing result (Net wt, Pc. wt, Pc. count) when the
scale is stable and weight > 0.
P. ALL.2
Press M+ to print single weighing result. Press C in MR
mode to print accumulated weighing result and total
accumulation.
Print Net wt when the scale is stable and weight > 0.
P.Count
Continuous printing weight data. Usually used for sending
weight data to PC.
P. oFF
Print function disabled.
3. Baud Rate
Display
Descriptions
br2400
Set the baud rate to 2400
Br4800
Set the baud rate to 4800
br9600
Set the baud rate to 9600
4. Parity Setting
Display
Descriptions
PA. 7-E-1
Set the parity to 7-E-1
PA. 7-o-1
Set the parity to 7-o-1
PA. 7-n-2
Set the parity to 7-n-2
PA. 8-n-1
Set the parity to 8-n-1
10
Calibration Procedure (CAL 3)
Please remove the JP3 jumper before you start the calibration process.
In Calibration menu, press
data and press
to toggle among the menu options. Use the numeric keys to input
to confirm.
1. SEL maximum capacity
Display
Descriptions
LoAd
03
Set maximum capacity as 3 kg.
LoAd
06
Set maximum capacity as 6 kg.
LoAd
15
Set maximum capacity as 15 kg.
LoAd
30
Set maximum capacity as 30 kg.
LoAd
50
Set maximum capacity as 50 kg.
Display
Descriptions
A0 off
Zero tracking function is disabled.
A0 on
Zero tracking function is activated.
2. A0
3. Zero Point Calibration
Display
XXXXXX
0
Descriptions
Firstly, it shows AD Value at Zero point. Press
.
Make sure the weighing pan is empty. Wait until the AD value becomes stable, press
proceed.
4. Setup calibration weight
Display
XXXXXX
Descriptions
And put on the calibration weight either by 1/3, 2/3 of the full
capacity or the full load. The corresponding AD value is then
displayed. When AD value become stable, press
. The
displays will shows 1/3, 2/3 of the full capacity in cycle.
11
to
When the displayed number corresponds to the calibration
weight user is using, press
to confirm.
Linearity Calibration Procedure (CAL 4)
Note: This section can only be operated by engineers.
Please have the jumper JP3 switch OFF before you start the calibration process.
In Calibration menu, press
to toggle among the menu options, and
to confirm.
1. Zero Point Calibration
Display
Pnt 0
Descriptions
The AD Value is then displayed.
Make sure the weighing pan is empty. Wait until the AD value becomes stable, press
to
proceed.
2. Calibration by 1/3 of the maximum capacity
Display
Pnt 1
Descriptions
The AD Value of 1/3 of the full load is then displayed.
Put on poise of the 1/3 weight by the maximum capacity. Wait until the AD value becomes stable,
press
to proceed.
3. Calibration by 2/3 of the maximum capacity
Display
Pnt 2
Descriptions
The AD Value of 2/3 of the full load is then displayed.
Put on poise of the 2/3 weight by the maximum capacity. Wait until the AD value becomes stable,
press
to proceed.
4. Calibration by the maximum capacity
Display
Pnt 3
Descriptions
The AD Value of the full load is then displayed.
Put on poise of full capacity of the scale. Wait until the AD value becomes stable, press
linearity calibration is complete.
Note: For 50 kg instrument, 5 section linearity calibrations are required.
12
. The
RS232C Connection: DB-09 (Male)
Pin setup:
2 (TXD)
3 (RXD)
5 (GND)
others (NC)
Bi-directional RS232C Setting
This section is applicable only for models with RS-232C module.
PRINTOUT FORMAT
1. Key press print
Setting
Press M+
Press
Press C in MR mode
Print
ITEM 1 :
Date 02-04-2009 Time
TRANSACTION TOTAL
PrESS
----------------------
07:38:59
----------------------
Date 02-04-2009 Time 07:38:35
ID
ID
Gross Weight: S 10.000 kg
Print
ALL.1
Print
ALL.2
:888888
:888888
Gross Weight: S 10.000 kg
Net Weight : S 10.000 kg
Net Weight : S 10.000 kg
Tare Weight : S
Tare Weight : S
TOTAL NET WEIGHT of 1 ITEM(S) :
10.000 kg
0.000 kg
0.000 kg
Print
StAbLE.1
Print
StAbLE.2
No print out.
No print out.
Print
oFF
13
No print out.
2. Stable auto print
Setting
Print out when the weight is stable.
Print
Date 02-04-2009 Time 07:40:23
StAbLE.1
ID
Print
Gross Weight: S 10.000 kg
ALL.1
Net Weight : S 10.000 kg
:888888
Tare Weight : S
0.000 kg
Print
ALL.2
Net Weight:S 10.000 kg
Print
StAbLE.2
Print
PrESS
No print out.
Print
oFF
STA
SIGN W6
STA
W5
W4
W3
W2
W1
W0
SPACE U1
U0
CR
‘U’ (55h) indicates it’s an unstable weight.
‘S’ (53h) indicates it’s a stable weight.
SIGN
‘-‘(2Dh) means it’s a negative weight.
‘ ‘ (20h) space char indicates it’s a positive or zero weight.
W6…W0
Weight data, decimal point included.
SPACE
20h
U1, U0
‘k’ (6Bh) ‘g’ (67h) indicates that the unit is kilogram.
‘l’ (6CH) ‘b’ (62h) indicates that the unit is lb.
CR
0Dh
LF
0Ah
Command print out
COMMAND
Actions
Response
<ENQ> (05h)
the weight string
(not available when the print format
is set to OFF or PRESS.)
14
LF


