1
PAIRING
LINKS
WIRELESS BASE
POWER
INTERCOM
1 2 3 4 5
PAIR
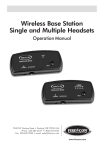
Multiple Headset Base Station
Multiple Headset Base
The multiple headset base station is equipped with 5 yellow LINK LEDS on the front
panel. Each LINK LED represents a headset position with position #1 represented by
the leftmost LED. The pairing priority is given starting with position #1 and ending
with position #5. It is recommended that pairing to new headsets is done
one headset at a time.
1.When the base station is first powered, the green LED labeled POWER on the
bottom left of the front panel will illuminate steadily. Every one of the five LINK
yellow LEDs will either stay unlit, indicating that no headset has been previously
paired to that particular headset slot, or will start flashing rapidly indicating that a
headset has been previously paired to that particular headset slot 5 but is not
currently linked.
NOTE: If any headsets have been previously paired to the base station
and the intent is to keep them paired, then these headsets must remain
turned on and linked in steps 1 through 3 of this procedure. An active
link to a headset is indicated by the respective LINK LED on the front
panel of the base station being steadily illuminated.
2.Press and hold the pairing button in the bottom right corner of the base station
for approximately 5-7 seconds. The respective LINK LEDs for any headset that
is currently linked to the base station will remain steadily illuminated. However,
LINK LEDS for vacant slots and for occupied slots with no actively linked headsets will start flashing slowly to indicate that the base station has been placed in
pairing mode and that these slots have been made available for pairing. The
highest priority slot will be assigned to the headset currently being paired. Once
the base station is placed in pairing mode, the user has approximately 15 seconds
to place the headset in pairing mode.
5