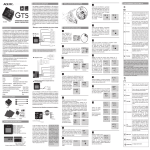
Download Operating Manual FRU-100 0.25 – 2,2 kW
Transcript
Operating Manual FRU-100 Digital Frequency Converter 0.25 – 2,2 kW KALEJA Elektronik GmbH Strübelweg 14, Phone. +49 7172-93711-0 http://www.kaleja.com D-73553 Alfdorf Fax +49 7172-93711-90 e mail: [email protected] This operating manual contains important information on CE marking: - Validity - Project planning, assembly and wiring, commissioning and servicing Copyright KALEJA 2009 All rights reserved. Forw arding as w ell as multiplication of th is documentation, utilization and the disclosure of its contents is prohibited unless specific approval was given. Contraventions will incur compensation payments. The manufacturer reserves the right to correct or alter content and product details as w ell as omissions w ithout prior notice and does not assume liability for damages, injuries or expenses resulting from aforementioned measures. For your retention Table of Contents 1 GENERAL............................................................................................................................1 1.1 RE THIS OPERATING MANUAL..............................................................................................1 1.1.1 Definition of pictographs ...........................................................................................1 1.2 TECHNICAL MODIFICATIONS ...............................................................................................1 2 SAFETY NOTES AND ENVIRONMENTAL PROTECTION................................................. 2 2.1 2.2 2.3 GENERAL SAFETY INSTRUCTIONS ....................................................................................... 2 ENVIRONMENTAL PROTECTION........................................................................................... 2 ADDITIONAL INFORMATION ................................................................................................. 2 3 DESCRIPTION OF DEVICE ................................................................................................ 5 4 TECHNICAL DATA............................................................................................................ 7 4.1.1 General information................................................................................................ 7 4.1.2 Electrical data of power section.............................................................................. 8 4.1.3 Electrical specifications for control section .............................................................. 9 4.1.4 Special requirements for installation as per UL requirements ................................ 10 4.1.5 Type coding............................................................................................................ 10 4.2 ORDER DATA .................................................................................................................. 10 5 DESCRIPTION OF FUNCTION ......................................................................................... 11 6 CONNECTION AND WIRING HINTS ................................................................................ 13 BASIC WIRING DIAGRAM ................................................................................................... 14 6.2 Terminal Description..................................................................................................... 15 6.1 7 INSTALLATION ................................................................................................................. 18 7.1 PRECAUTIONARY MEASURES FOR ASSEMBLING .................................................................. 18 7.2 MECHANICAL INSTALLATION ............................................................................................. 18 7.3 DIMENSIONED DRAWING AND ASSEMBLY DIMENSIONS ......................................................... 19 7.3.1 Frequency converter .............................................................................................. 19 7.4 ELECTRICAL INSTALLATION .............................................................................................. 21 7.4.1 Power supply wiring ............................................................................................... 21 7.4.2 Overload and short circuit protection...................................................................... 22 7.4.3 Earthing.................................................................................................................. 22 7.5 EMC-COMPLIANT INSTALLATION ....................................................................................... 23 7.5.1 Important information about EMC........................................................................... 23 7.5.2 EMC filter for minimising grid-bound faults ............................................................. 23 7.5.3 Admissible line length of motor cable ..................................................................... 24 8 SETTINGS AND COMMISSIONING.................................................................................. 25 8.1 OPERATOR PANEL ........................................................................................................... 25 8.1.1 Introduction ............................................................................................................ 25 8.1.2 Function keys for settings of the drive .................................................................... 26 8.1.3 Function keys during on-site operation (local mode) .............................................. 26 8.1.4 Resetting all parameters to default settings ........................................................... 27 8.1.5 Menu structure ....................................................................................................... 26 8.2 SETTING AND INITIAL START-UP ........................................................................................ 28 8.2.1 Tests to be carried out before initial start-up .......................................................... 28 8.2.2 Drive system safety ................................................................................................ 28 8.2.3 Preparations for switching on drive ........................................................................ 28 8.2.4 Starting the drive .................................................................................................... 29 FRU-100 I 8.3 9 PARAMETER LEVEL..........................................................................................................30 OPERATING AND ERROR MESSAGES .......................................................................... 36 9.1 9.2 9.3 9.4 9.5 10 GENERAL ....................................................................................................................... 36 OPERATION MESSAGES ................................................................................................... 36 SETTING ERROR)............................................................................................................. 36 ERROR MESSAGES .......................................................................................................... 37 FURTHER TROUBLESHOOTING .......................................................................................... 39 SERVICE ........................................................................................................................40 10.1 10.2 10.3 FRU100 REGULAR MAINTENANCE ...............................................................................................40 REPAIR .......................................................................................................................40 RETURNS ....................................................................................................................40 II 1 General 1.1 Re this operating manual This operating manual is intended for users posse ssing the relevant technical knowledge. This operating manual contains a functional description of the FRU-100 frequency converter. No description of the machine or system into which the FRU-100 frequency converter(s) are integrated may be deduced from this operating manual. This operating manual is meant for everyone who is planning to use the FRU-100, that is, everyone who is involved in its assembly, adjustments, commissioning, service or operation. All persons concerned have to read the whole operating manual carefully before starting installation or operation. 1.1.1 Definition of pictographs This symbol indicates danger that may result in personal injury. Attention Caution Caution i This symbol indicates danger that may result in damage to the device or other machine parts. This symbol indicates danger in connecti on with the influence of electrical variables that may result in damage to or impairment of the device or other machine parts. This symbol introduces advice or additional information. Note Symbols may be used in combination! 1.2 Technical Modifications The manufacturer reserves the right to make technical alterations without prior notice. FRU-100 1 2 Safety notes and environmental protection 2.1 General Safety Instructions The w arnings and risks below are listed in or der to allow the user to enjoy maximum benefit and to point out important safety aspects. Attention Caution Replacing a device Installation, commissioning or servicing of these drives must be carried out by expert technicians completely familiar with the workings of this equipment and any related machinery. Non-compliance with this regulation may result in injuries and/ or material damage. All work on the devices must be carried out isolated from the power supply. Connect the drive motor to a suitable protective-conductor terminal. Non-compliance leads to risk of electric shock. All capacitors in the intermediate circuit carry high voltage, even after disconnection. Before opening the device, wait for 3 minutes to allow time for discharge. If the required safety precautions are not followed, FRU-100 frequency converters may consti tute an electrical safety hazard involving danger to life or injury if t he required safety precautions are not followed. Rotating and moving machine parts also pose a danger to life, risk of injury or material damage. These FRU-100 frequency converters have been factory checked before dispatch. Prior to assembly and commissioning, however, please check the devices for possible damages in transit, loose components, packaging material etc. Before carrying out high-voltage resistance tests on the wiring, disconnect the FRU-100 frequency converter from the circuit to be tested. When replacing the FRU-100 frequency converter it is imperative to correctly install all user-defined parameters determining the proper operation of the drive before restarting the device. Disregard of this step may result in danger or risk of injury. Attention Installation This product has an IP20 rating. To ensure safe and reliable operation, please comply with any assembly regulat ions relevant for the respective location. Attention Make sure that - - mechanically faultless fixings according to recommendations are used - - the frequency converter is supplied with sufficient cooling air according to the recommended cooling intervals - - cables and connection technology meet recommendations - - assembly and commissioning is carried out by expert technicians - - specified values are not exceeded FRU-100 2 Implementation The integration of the devices into other facilities or systems lies beyond risk the supplier’s or manufacturer’s scope of responsibility. This includes Attention Servicing, Repairs Attention Risk assessment Attention applicability, effect, operational safety and other facilities or systems. If applicable, the user should consider the relevant aspects of the risk assessment below. Servicing must be carried out by trai ned expert technicians according to manufacturer’s instructions (or sent off to the supplier for servicing). Repairs carried out by the customer, in particular when non-designated spare parts are used for this purpose may result in danger or risk of injury. Repair reports for repairs will only be co mpiled if the defective device is accompanied by a detailed fault description. A drive that is operated under faulty conditions or conditions contrary to the intended use may: - - adopt incorrect speed - - cause high motor overspeed - - cause an incorrect direction of rotation for the motor - The motor may be live (unless suitabl e counter-measures are effective on the system) The user has to designate sufficient mechanical covers and/or has to install monitoring and safety systems according to safety regulations. Intended use Attention EMC Caution VOLTAGE INTERRUPTIONS Speed control of asynchronous squirrel-cage rotors or synchronous motors The device must be used exclusively for the use intended and according to its predefined operational data. Any incorrect use may cause a serious hazard or material damage and will result in loss of warranty. Please comply with the relevant EMC Regulations. The device as such is equipped with an A EMC of class A. The performance of the FRU-100 frequency converter cannot be maintained during a voltage interruption. Attention PROTECTIVE INSULATION All bare, touchable metal parts are protected by basic insulation and earth wires (PROTECTION CLASS I). The user will be responsible for the appropriate connection of the earth wire! Caution 3 FRU-100 2.2 Environmental Protection Attention Note on disposal i Note The packaging provided is flammable and may generate toxic gases if disposed of inappropriately. Inhalation of gases may result in damage to health. Dispose of packaging material in an appropriate way. Worn out devices or parts there of must be disposed of separately as electronic waste. Copper cables and wiring as well as all other recyclable materials must be fed into the material cycle. 2.3 Additional information Support i Please contact your supplier for user support and training. Note FRU-100 4 3 Description of device FRU-100 frequency converter: Modern µP-technology: Programming: Suitable as driving mechanism for asynchronous motors Universal use in general industrial applications as well as fans and pumps Available for voltage range 1AC 230 V for motors up to 2,2kW3AC 220...240 and 3AC 380...480V for motor to 2,2KW Sinusoidal agitation of motor in entire speed setting range Output frequency from 0 to 200 Hz Clock frequency 4...16 kHz adjustable Easy parameterisation and diagnosis providing 3-digit display and 5 function keys enabling on-site control. Extensive integrated protective functions Standard packed items: FRU-200 frequency converter, mains and motor cable included Operating manual including list of parameters The most important components depicted on images 1.1a, 1.1b, 1. 1c and 1.1d, are explained in the table below. DIL-switch: Power Terminals: 3-digit display for indication of parameters or values (See chpt. 8.1 control panel) These 5 control keys are all you need to define all device parameters. (See chpt. 8.1 control panel) To Konifuration of the analog input Connection terminals for the supply and the engine inlet Control Terminals: Terminal blocks for external control signals Display: Operational keys: 5 FRU-100 Valid for: FRU-100-25 No.: 06.10.001 FRU-100-37 No.: 06.10.002 FRU-100-75 No.: 06.10.003 Fig. 1.1a: Important parts of FRU-100 frequency converter (1-phase units) Valid for: FRU-100-153 No.: 06.10.006 FRU-100-223 No.: 06.10.007 Bild 1.1b: Important parts of FRU-100 frequency converter (3-phase units) i Apply M4 cable lugs when connecting the earth wire. Note FRU-100 6 4 Technical Data 4.1.1 General information Control section: Operation via integrated control panel or optionally, via external analogue and digital inputs/outputs : Output frequency 0...200 Boost 0...10 % Fixed specified 3 Stop functions Protections: Surveillances Hz Ramp, DC deceleration, coasting Short circuit phase – phase, or phase - earth, peak current 200% rated current, overload 150% 60s, IGBT- overtemperature, overvoltage, undervoltage Volts per hertz characteristic 6 different adjustable characteristics Overload capacity 150 % IN / 60 s Diagnosis: Inputs/Out puts: Error messages on three-digit LED display Analogue inputs Speed specified value 0...+10 V, 0...20mA or 4...20mA Analogue output Output frequency 0...+10 V (0 V = 0 Hz, 10 V = Max. speed (F06) Digital inputs Potential-free contacts or external DC 24 V Industrial logic circuit for: (12/24 V DC): Power up Reverse Multi-function inputs (inching, fixed specified values, emergency stop, external supervision, reset) Digital output Potential-free relay contact for messages: Turned on Specified value has been reached Fault Voltage: Rated FRU-100 Voltage 15 % rated voltage for normal application Frequency 50...60 Hz Overvoltage category insulation voltage towards PE AC 300 V (For use with TT/TN networks with III earthed neutral point only) 7 ENVIRONMENT A dmissible temperatures Operation -10.. Storage: -25... Transport: 0... +35 +55 +70 °C °C °C short-term Climatic conditions 0...95% relative humidity Safety Other The cooling air used must be as free of dust as possible, non-corrosive and nonflammable. Installation level From 1000m above MSL 1,5% performance reduction per 100m; max. 2000m above MSL. Applied norms EN50178 Protection class I (IEC536) basic insulation and earth wire the user will be responsible for a proper connection of the earth wire (PE). IP protection type IP20 (EN60259) Finger Safety Potential separationSignal and the control circuit is isolated from the mains potential by basic insulation. 4.1.2 Electrical data of power section Voltage supply: Use TT/TN earthed networks Normal applications Special applications require prior Product Denomination: FRU100 -25 FRU-100 -37 FRU-100 -75 FRU-100 -150 FRU-100 -220 0,25 0,37 0,75 1,1 2,2 1,4 1,0 0,53 3,0 16 1,5 >10 2,3 1,0 0,88 5,2 16 1,5 >10 4,2 1,0 1,6 9,4 20 2,5 >10 7,5 1,0 2,9 16,6 20 2,5 >10 10,5 1,5 4,0 23,2 25 4,0 >10 Converter 0,8 132 72 118 120 Converter 0,8 132 72 118 120 Converter 0,8 132 72 118 120 Converter 1,7 143 118 172 120 Converter 1,8 143 118 172 120 120 120 Operation with constant torque Motor performance KW Motor current In Motor cable Connected load Line current Mains fuse Power cable Earth discharge current A mm² KW A A mm² mA L/N AC 230V 50/60Hz Installation, assembly: Cooling system weight Dimension:-Height -Width -Depth Cooling top, bottom Kg mm mm mm mm at 40°C left, right mm FRU-100 0 0 0 8 Voltage supply: Normal applications: only, use with IT networks is prohibited consultation: Use TT/TN earthed networks , Special applications require prior Product Denomination Operation with constant torque 3AC 400 V 50/ 60Hz FRU100153 FRU100220 Motor performance Motor current IN Motor cable kW A mm² 1,5 3,8 1,0 2,2 5,2 1,0 Connected load Line current Mains fuse . Power cable kW A A 2,9 5,0 10 4,0 6,7 10 mm² 1,5 1,5 Earth discharge current mA >10 kg 1,6 143 118 172 120 2 2 Installation, assembly: Cooling system: Converter approx. weight Dimensions: -Height -Width -Depth Cooling distance top, bottom at 40°C: - left, right mm m mm mm 120 >10 Conv 1,6 118 172 120 120 4.1.3 Electrical specifications for control section Reference and auxiliary volt. Analogue inp.-outputs Reference voltage for analoque inputs Auxiliary voltages for digital inputs Range Impedance Max. admissible scanning rate Resolution Digital inputs and outputs Controlterminals 9 Logic-system +10 V ±5 %, 10 mA max +12 V ±15 %, 50 mA max. inputs 0...+10 0…20 4...20 V mA mA 20 kΩ 250 Ω 10 mA 30 ms 10 bit inputs DC 12/24 V Max. load 4,5 mA Impedance scanning rate 3,6 kΩ outputs 0...+10 V 1 mA outputs Potential-free relay contact 250 V AC/1A 30 V DC/1A 30 ms As per EN60204-1 , application of 0,2...0,75 mm² is recommended. FRU-100 4.1.4 Special requirements for installation as per UL requirements Earth wire connectors ♦Symbol (IEC publication 417, symbol 5019) is used to . designate the earth wire connector. Motor overload ♦ External motor overload protection has to be provided. protection: ÜShort circuit: ♦ Fuses must be wired inside the supply. Select these fuses according the Technical Specification, chapter 4. Short circuit ♦ Suitable for use in supply with short circuit current not greater than behaviour of 5000 A rms symmetric. supply: Corner frequency: ♦The maximally adjustable corner frequency is 60 Hz. Operating temp.: ♦ See Technical Specifications, chapter 4, for details on ambient and operating temperature. 4.2 Order data Function Product Denomination/ Item number Frequency conv. FRU-100-25 Art.No.: 06.10.001 0,25 kW, 1AC 220-240 V, 1,4 A For operation at 1AC 230V FRU-100-37 Art.No.: 06.10.002 0,37 kW, 1AC 220-240 V, 2,3 A FRU-100-75 Art.No.: 06.10.003 0,75 kW, 1AC 220-240 V, 4,2 A FRU-100-150 Art.No.: 06.10.004 1,5 kW, 1AC 220-240 V, 7,5 A FRU-100-220 Art.No.: 06.10.005 2,2 kW, 1AC 220-240 V, 10,5 A for 3AC 400V with EMV-filter class A FRU-100-153 Art.No.: 06.10.006 1,5 kW, 3AC 380-480 V, 3,8 A FRU-100-223 Art.No.: 06.10.007 2,2 kW, 3AC 380-480 V, 5,2 A Mounting plate MP-FRU Art.No.: 09.03.001 Adapter for 35mm DIN rail EMV-Filter class B EF-FRU-75 Art.No.: with integrated EMV-filter class A Braking Resistor FRU-100 09.03.010 Technical Data 0,25…0,75 kW 1AC 230 V EF-FRU-220 Art.No.: 09.03.011 1,5...2,2 kW 1AC 230 V EF-FRU-223 Art.No.: 09.03.012 0,75...2,2 kW 3AC 400 V on request on request 10 5 Description of function FRU-100 frequency converters are micro-processor controlled voltage-source converters, suitable for speed control of three-phase AC squirre l cage motors (norm motors). A hierarchical tree menu with control panel based on a 3-digit LED display provides simple selection of function options as well as setting of parameters. The basic functions of the FRU-100 frequency converter are described below: Power rectifier and intermediate circuit: The power supply is rectified by means of a non-controllable diode bridge. The DC link is at the rectifier’s output, consisting of component parts used to limit the charging current and DC link capacitors. The DC link capacitors smooth the DC voltage that is transferred to the converter power circuit. Output converter: The converter transforms the DC voltage from the DC link into a 3phase AC voltage used for motor actuation and consists essentially of a driver circuit and IGBT power transistors. Frequency and amplitude are determined by control inputs and the parameters set at the control panel. Brakes: When acting as a generator (brakes), the motor feeds energy back into the intermediate circuit. This elevat es the voltage in the intermediate circuit. Minor amounts of braking energy can be absorbed by the intermediate circuit. On reaching the conventional voltage limit (approx. 410V and 800V respectively) the FRU-100 frequency converter under overvoltage will switch off in order to protect integrated component parts. Most norm motors operated up to the specified speed can be expected to provide considerable braking capacity due to boosted terminal voltage during the braking action (operation with elevated flow). Parameter: F00 ... F30 Analogue input and output Parameters are values or options previously set at the control panel. Normally these parameters have been specified during installation and commissioning and do not require to be adjusted during operation. Parameter such as Ramp up (F01), determine the travel behaviour of the drive (here boosting acceleration). Parameters such as Stop Mode (P14), determine the position of a software controlled function key. Control panel functions and those of individual parameters are described in chapter 4. The selectable analogue input (0...+10 V, used to set desired values. 0...20 mA or 4...20 mA) is The converter’s output frequency can be reduced at the analogue output (0...+10 V). se terminal 11 FRU-100 Digital inputs and outputs: FRU-100 As a rule, digital inputs are triggered by external contacts. 0V and +12V are available for this purpose. On the other hand it is also possible to switch digital inputs via an external power supply. In this case terminal 10 (OV) acts as reference point. The digital output uses a potential-free relay contact. For detailed information about digital inputs and outputs see pages 2-8 12 6 Connection and wiring hints The images on the next page show a block diagram and a basic circuit. Fig. 2.1 is a basic wiring diagram. Attention Caution i Note 13 The device must be connected by trained technical staff. The power terminals carry high voltages. Physical contact may result in life-threatening shock currents. Do not forget to turn off the power supply before carrying out any work on the frequency converter or motor. Wait until the discharge time of the DC link capacitors has passed (no less than 3 minutes). FRU-100 frequency converters are designed for operation in TT/TN networks with earthed neutral point for power supply. The use in IT networks is prohibited. Ensure that the additional earthing bolt on the device has been connected. Use only cables with standard connection. The basic wiring diagram does not contain comprehensive connection information on EMC and protective earthing (See chapter 7.5 EMCcompliant installation). FRU-100 6.1 Basic wiring diagram FRU-100-25 / -37 / -75 FRU-100-150 / -220 FRU-100-153 / -223 Picture 2.1: Basic wiring diagram FRU-100 FRU-100 14 6.2 Terminal Description Attention Caution The power terminals carry high voltages. Physical contact may result in life-threatening shock currents. Do not forget to turn off the power supply before carrying out any work on the frequency converter or motor. Wait until the discharge time of the DC link capacitors has passed ( no less than 3 minutes. FRU-100 frequency converters are designed for operation in TT/TN networks with earthed neutral point for power supply. The use in IT networks is prohibited. 6.2.1 Power terminals Tittle Function Explanation Connection for protective earthing . . . All safety and EMC instructions in chapter 3. L1 L2 L3 Connection for power 1AC 200...240 V +10/-15 % 3AC 200...240 V +10/-15 % 3AC 380...480 V +10/-15 % T1 T2 T3 Motor connection phase AC AC 0...supply P R i Connections for external braking Auser:FRU-100-25 / FRU-100-37 resistor Further exülanation of the connections to the power terminals see Basic wiring diagram, Image 2.1 (Page 14). Note 15 FRU-100 6.2 Control Terminals Con tact Designa tion Signal, function Explication 1 (A) TRIP Digital output (multi-function output): 2 (B) RELAY Message turned on; message specified value reached; fault -potential-free relay contact 3 (C) FW Digital input “boost“, for starting and shutdown (configurable) of drive +12 V (+24 V ) = Boost / forward 0V = Stop Stop -Shutdown set the same as stop mode (F14) (See pages 4-13) 4 (D) RE Configurable digital input, preferably for “reverse“ direction of rotation: +12 V (+24 V) = forward / reverse OV = forward / stop - FW/RE configurable via operating mode (F03) 5 (E) +12V 12 V voltage for control inputs - 50 mA max. load 6 (F) SP Multi-function inputs: 7 (G) RS Inching, fixed specified value 1; emergency shutdown; external supervision; - configurable via multi-function inputs (F19/F20) reset; fixed specified value 2 +12 V (+24 V) = e. g. inching speed 0V = Standard Operation 8 (H) +10V Internal +10 V reference for analogue inputs - 10 mA max. load 9 (I) Vin Analogue input for speed specified value: +10 V = max. speed (F06) 0 V = min. speed (F07) - Mass for all analogue signals, reference potential for external supervision voltage - Do not use for any other purposes 10 (K) 0V Enabling of analogue inputs via specified value selection (F11) Warning: See page 12 11 (L) FM+ i Analogue output within range 0...+10 V according to output frequency of the following scaling: +10 V = max. speed (P2) 0 V = 0 Hz - 10 mA max. load For information on wire cross-section see chpt. xxx Electrical Specifications of Control Section on page xx. Note 16 FRU-100 6.2.3 Configurable analog input Before opening the doore the DIP switches on the FRU-100 only voltage-free switch schalten. Only in the voltages outdoor state the DIL-switch switch. Caution The analog input (Clamp 9) can be used a voltage input (0...+10 V) or current input (4...20 mA or 0...20 mA) frequency standard used. The selection is made on parameters (F11) and the DIL-switch SW1. SW1 Signal Parameters 0...20 mA 4…20 mA (F11 = 001) (F11 = 002) 0...10 V 17 (F11 = 001) FRU-100 7 Installation 7.1 Precautionary measures for assembling When assembling the FRU-100 frequency converter, please take the following precautionary measures: Attention Caution i Assembly and commissioning of this FRU-100 frequency converters must be carried out by technical staff in compliance with the relevant safety regulations. Use reliable fixings by following the recommendations below. Cooling and ventilation correspond to the recommendations made on the dimensioned drawings and assembly dimensions hereinafter. Cable and power terminals must be firmly connected according to recommendations. For details on minimum distance, fixing and ambient conditions please see chpt. 3.1 Technical Specifications and the drawings below. Note 7.2 Mechanical installation Assemble FRU-100 frequency converters horizontally on a level vertical plane. For dimension of the FRU-100 frequency converter and the position of anchorage points please see fig. 3.1. The following assembly options are provided: Assembly on mounting panel using two M4 screws . Mounting on 35mm DIN rail Under normal operating conditions the FRU-100 frequency converter will generate heat. Assembly should therefore allow for unhampered vertical airflow along the converter. In addition, the mounting panel should be cool and any transmission of heat radiating from adjacent equipment should not be transmitted to the FRU-100 frequency converter. To ensure correct ventilation fo r the FRU-100, arrange for the cooling distance set out in the information on pages 8 and 9. The assembly next to one another of several FRU-100 frequency converters or other devices belonging to the power electronics with simultaneous consideration of the cooling di stance is feasible, provided t he maximum ambient temperature is not exceeded. FRU-100 18 7.3 Dimensioned drawing and assembly dimensions 7.3.1 Frequency converter Mounting: 35 mm Mounting rail DIN-rail adapter 3 Screws FRU-100 Height FRU-100-25 to FRU-100-37 132 mm 72 mm . 118 mm 116 mm . FRU-100-150 143 mm 172 mm FRU-100-220 Width 118 mm Depth Hole distance A Hole distance C 127,5 mm 61 mm 108 mm FRU-100-153 FRU-100-223 Picture 3.1: Dimensions and sizes 19 FRU-100 7.3.2 EMC-filter (Limit B) Picture 3.2: Dimensions and mounting für for option EF-FRU-75 Picture 3.3:Dimensions and mounting for option EF-FRU-220 EF-FRU-223 7.3.3 Braking Resistor FRU-100 20 7.4 Electrical installation Wiring requirements for the use of FRU-100 frequency converter for speed alteration will be discussed below. The great variety of specific applications rules out a depiction of all possible wiring diagrams. 7.4.1 Power supply wiring Please follow safety regulations when working on electrical systems. The power terminals carry high voltages. Physical contact may result in lifethreatening shock currents. Comply with all national norms and local safety regulations issued by the local Attention power station. Do not forget to turn off the power supply before carrying out any work on the frequency converter or motor. Wait until the discharge time of the DC link capacitors has passed (no less than 3 minutes). Caution Prior to carrying out high voltage insulation measurements on the wiring, disconnect the FRU-100 frequency converter from the circuit to be tested. Furthermore pay attention to the following: Power cables must be designed for at least 1.1 x rated current. Lay power cables (in particular 3-phase motor cables) isolated from the desired and actual value cables and from the wiring of other electronic assembly groups. What is required is a power supply within the tolerances set out in chpt. 3.1.2 Electrical Specifications Power Circuit, page 8. The specified cable cross-sections are as set out in “Electrical Equipment of Machinery“ EN 60204-1, for PVC-insulated copper cables for permanent operation up to 40 °C ambient temperature. Allowing for the specified types of layout according to the following differentiation: B1 Protective tube or cable duct with three live single-conductor wires B2 Protective tube or cable duct with three live wires in one cable C Wall mounting of cable with three live wires E Mounting on cable rack 21 FRU-100 7.4.2 Overload and short circuit protection Carry out and protect supply according to regulations, e. g. see table below: FRU-100 Power cable 1) Type Mains fuse / Power switch2) Cable cross-sec. Wiring type . Cable cross Wiring type section FRU-100-25 16 A 1,5 mm2 B1,B2,C, E 1,0 mm2 B1,B2,C,E FRU-100-37 16 A 2 1,5 mm B1,B2,C, E 2 1,0 mm B1,B2,C,E FRU-100-75 20 A 2,5 mm2 B1,B2,C,E 1,0 mm2 B1,B2,C,E 20 A 2 B1,B2,C,E 2 B1,B2,C,E 2 FRU-100-150 1) Motor cable 2,5 mm 2 1,0 mm FRU-100-220 25 A 4 mm B1,B2,C,E 1,5 mm B1,B2,C,E FRU-100-153 10 A 1,5 mm2 B1,B2,C,E 1,0 mm2 B1,B2,C,E FRU-100-223 10 A 1,5 mm2 B1,B2,C,E 1,0 mm2 B1,B2,C,E Use standard time-lag fuses 2) Use power switch with delayed overload behaviour (such as protective motor switch) Different ambient temperatures or customer, national or EMC regulations may require the use of other cable cross-sections. The choice of cable cross-section is the responsibility of the electrician. i For intallations according to UL and other requirements please follow the regulations for intallation as per UL. Note 7.4.3 Earthing Attention The motor has to be connect to a correctly and permanently installed earth wire. Non-compliance with this direction may result in life-threatening electric shock. Establish a sufficiently proportioned earth wire connection at the earth terminal by following the relevant regulations. FRU-100 22 7.5 EMC-compliant installation The standard version of the FRU-100 series includes an EMC filter of class A. It is also designed for use in the industrial and plant sector . If a higher class is r equired there is always the option of equipping the device with a filter of class B. i For further information on the subject matter of EMC please do not hesitate to contact KALEJA Elektronik GmbH. (See chpt. 10 Service) Note 7.5.1 Important information about EMC The integrated EMC filters inside the FRU-100 frequency converters have been designed for the use in earthed networks. In some installations, however, unearthed networks are to be found. The use of unearthed networks is prohibited. Further information is available on request. Attention The filters have integrated capacitors between the phases and the phases towards earth as well as discharge resistors. After disconnecting from the mains, please wait for at least 3 minutes before removing the protective covers or touching terminal clamps. Non-compliance may result in life-threatening injuries due to electric Caution shock. Regulations for safe earthing take priority over EMC earthing at all times. The earth wire connection between the power supply and the FRU-100 frequency converter has to be executed in the form of a fixed installation. For this purpose plan the connection of a sec ond earth wire, parallel to the first, connected to separate earth connections on the FRU-100 frequency converter. Each earth wire has to be designed separately according to the rules. Clock frequency and cable length to the motor have a considerable effect on the losses of the EMC filter. The use of earth current monitoring systems in combination with FRU-100 frequency converters or similar is not suitable for personal protection . Personal protection will have to be provided in a different way, see EN50178/VDE0160. Please seek information about the relevant directions and possible threshold value changes. 7.5.2 EMC filter for minimising grid-bound faults In order to reduce grid-bound faults, the standard equipment of each FRU-100 frequency converter includes an integrated EMC filter of class A. To reach threshold value B, it is possible to install an additional EMC filter. The cable connection between the FRU-100 frequency converter and the motor must be installed far from other cables or lines, preferably using a shielded execution. 23 FRU-100 The FRU-100 frequency converter has to be connected firmly and permanently to the e arth wire, so as to prevent the hazard of electric shock in case of a failure (e.g. phase failure). This is achieved by connecting a second earth wire, c onnected parallel to the first. Each earth wire has to be designed separately according to the rules. i Note Anodised or yellow dichromated surfaces such as cable or norm profile rails, screws etc. possess great HD impedance that acts negatively on EMC. To ensure protection against corrosion, apply grease to anchoring points and threads. Alternatively, you can apply conducting varnish to any empty surfaces on the mounting panel. For frequency converter fed drives, cable -bound failures increase proportionately to the length of the motor cable. 7.5.3 Admissible line length of motor cable Shielded / armoured cables possess a significant capacity between the conductor and the shield. This capacity increases linearly with the cable length.Typical values are 200pF per metre, however, these values depend on the type of cable and the nominal current value. Long cable lengths may exhibit the following undesired characteristics: - During charging and discharging the cable capacities may, contingent on the switching frequency, tend to faulty shutdowns with “overcurrent”. - These line-related failures increase with increasing cable lengths, driving the EMC filter to saturation and thereby diminishing the filter effe ct. To comply with threshold value B (with external EMC filters), cables of a length up to 5m are admissible. - Triggering earth current control equipment (suc h as FI circuit break ers) due to increased high-frequency earth currents - Increased thermal losses in EMC filter The use of motor throttles at the output of the FRU- 100 frequency converter may remedy the problem. When operating several motors via a single FRU-100 frequency converter, minimise the shielded cable as much as possible. For this purpose, it is best to plan a central allocation point with one cable leading to the FRU- 100 frequency converter. For breaks in the shield (such as intermediate terminals, contactors or similar) arrange for a preferably HF-compatible connection for the broken shield. To achieve an EMC compliant installation without thermal overload of the EMC filter with longer cables than intended you can also use suitable output filters (motor filters). Such motor filters ensure high life expectancy for motors by limiting dU/dt and overvoltage on the motor winding. Install such motor filt ers as closely as possible to the FRU-100 frequency converter. Ask your supplier for help with selection. FRU-100 24 8 Settings and commissioning 8.1 Operator panel All settings for the frequency converter are made at the control panel. This function is described below. Users who are already familiar with the control panel can continue with chapter “Settings and initial start-up (page 8.2). 8.1.1 Introduction FRU-100 frequency converters use a control panel comprising a 3-digit LED display and 5 function keys, see fig. 4.1. This allows simple diagnosis and configuration. Operator panel Display and menu Fig. 4.1: Operator panel 25 FRU-100 8.1.2 Function keys for settings of the drive The 5 function keys enable free movement among the tree menu and the settings for the respective parameters. The individual function of these keys is as follows: DSP/FUN The menu key allows you to switch bet ween the operating mode display and the diagnosis / parameter level. The display shows the specified value in standby mode; output frequency is displayed whilst the motor is rotating. After selecting the parameter level, the most recently se lected parameter will appear on the display (F00...F30). DATA/ENT This key is used to access individual values from the parameter level. To return to parameter level, simply press this key again. Any changes you made will be adopted and confirmed beforehand by the message “End“. HIGHER This key enables you to advance within the selected menu level. If an adjustable parameter is selected, its value will increase as this function key is pressed. LOWER/RESET This key enables you to return within the selected menu level. If an adjustable parameter is selected, its va lue will decrease as this function key is pressed. If an error message appears it can be reset by pressing this key. RUN/STOP This key is used to start or stop the frequency converter in local mode. 8.1.3 Function keys during on-site operation (local mode) In local mode, it is possible to control the device on-site and to send start and stop commands via the control panel. 1) To change local mode, set parameter F10 to 000. 2) Pressing the RUN/STOP key initiates the command boost or stop. In the process, you can select between local specified value and remote specified value by using parameter F11. 3) The DSP/FUN key is used to switch between parameter level and diagnosis level. The diagnosis level indicates the specified value during standby mode. Output frequency will be shown after the start command was given. 8.1.4 Resetting all parameters to default settings This function is used to reset all setting parameters of the FRU-100 frequency converter to factory default settings. Caution All previously set values will be lost. Prior to a restart be mindful of any safety notes on commissioning. 1) To reset parameters to default settings, invoke parameter F25. 2) For a 50 Hz system this parameter has to be set to 010. For a 60 Hz system this parameter has to be set to 020. Any other settings will have no effect. This function is also used to change the corner frequency from 50Hz to 60Hz or vice versa. 3) The parameter F25 will aut omatically be reset to 000 after invocation. The default settings will remain until the change of individual parameters. FRU-100 26 8.1.5 Menu structure List of parameters FRU-100 Parame ter F00 F01 F02 F03 F04 F05 F06 F07 F08 F09 F10 F11 F12 F13 F14 F15 F16 F17 F18 F19 F20 F21 F22 F23 F24 F25 F26 F27 F28 F29 F30 27 Significance Default Factory adjustment Ramp up Ramp down Operating mode Direction of rotation Volts per Hertz characteristic Max. speed Min. speed Fixed target value 1 Inching-nominal value Enable local/remote . Specified value selection local/remote . Clock frequency Voltage elevation/boost Stop mode Braking time Start frequency braking Braking voltage Motor rated current Multi-function input 1 Multi-function input 2 Multi-function output Change of direction Automatic restart Number of restarting attempts Default setting Fixed speed 2 Fixed speed 3 Auto-Start CPU program version Error messages setting 000 05.0 05.0 000 000 001/004 50.0/60.0 00.0 10.0 06.0 000 001 001 000 005 00.0 000 00.5 01.5 08.0 100 002 005 003 000 001 000 20.0 30.0 001 (Space available for you to enter your settings) Customer Page setting 29 29 29 29 29 29 29 29 30 30 30 30 30 31 31 31 31 31 31 32 32 32 32 32 33 33 33 33 33 34 34 FRU-100 8.2 Setting and initial start-up Commissioning must be carried out by competent staff. Ensure that no person or object is present within the danger zone. Attention Work on the drive system or merely opening the housing is only permitted under the following conditions: Complete disconnection from mains and control-generated power supply Awaiting end of discharge time for intermediate circuit (at least 3 min) Verification that all terminals are isolated from supply Caution Non-compliance may result in life-threatening bodily harm! Prior to checking whether the motor or the wiring is isolated and prior to checking cable joints, it is absolutely necessary to disconnect the FRU-100 frequency converter from the part to be checked. 8.2.1 Tests to be carried out before initial start-up Please check the following befor e proceeding with turning on the power supply for the first time: 1) Power supply is available as required. 2) The motor nominal voltage matches the power supply and the motor is correctly wired and connected in star or star delta. 3) The external wiring such as power terminals, motor terminals and above all the safety earthing have been expertly executed. 4) There is no visible damage to the FRU-100 frequency converter or the wiring. 6) Motor shaft and, as far as available, separate ventilators can be rotated by hand without difficulty. 8.2.2 Drive system safety Check the whole drive system for safety. In particular ensure that 1) - machine rotation, regardless in which direction, does not cause damage; 2) - no one is working on the machine or drive who may be endangered by switching on the power supply or by movements of the drive; 4) - no damage is caused to other facilities or parts by switching on the power supply or movements of the drive. 8.2.3 Preparations for switching on drive . - . Attention Prepare switching on of drive as follows: 1) Release FRU-100 frequency converter by removing the input safeguard or opening the circuit breaker. 2) If possible, uncouple motor shaft from its load. 3) Check whether the power switch or selector switch is set to OFF. 4) After 1) ... 3) have been carried out carefully; establish power supply to FRU-100 frequency converter. FRU-100 28 5) Ensure that important parameters such as POTs are set to minimum end stop (left end stop) and that ramp times are set according to default values (See pages 4-6). These values are suitable for most applications. Application-specific modification may be necessary. 6) Afterwards switch off the FRU-100 frequency converter. 8.2.4 Starting the drive After all these preparatory steps have been carried out carefully and all safety regulations taken into consideration you can then start up the drive as follows: 1) Reconnect the power supply. The 3-digit LED display will show a value based on the specified value on the POT. 2) If need be, carry out any required additional changes to the parameters at this point (See paragraph “Parameter level“). The mode of action for the function keys is described in chapter.8.1.2 "Function keys for settings of the drive". 3) External Contact on FW (Ramp) terminal 3 close to terminal 9 small speed set point pretend the motor starting to rotate slowly. 4) If the motor rotates in the wrong direction, 2 of the 3 phases may be mixed up. If this is the case, check wiring as described in chpt. 5 C onnection and Wiring Information. There is also a chance that the setting for parameter F04 is wrong and has to be changed. 5) For applications with a high breakaway torque you can increase the voltage in the lower characteristic curve. To achieve this, increase the value of the related parameter Boost Voltage Elevation (F13), page 31. If the set boost is too high, the frequency converter may report a fault sending error message Overload (oL). You can reset this message by pressing Reset. To avoid this error, either scale back the boost slightly or reduce the starting torque. In an extreme case it will becom e necessary to fit a converter that provides a higher capacity. 6) When several motors are supplied by one frequency converter in parallel configuration each individual motor should be protected against thermal overload by a protective motor switch. Caution 29 The drive may start overheating during low speed if its ventilation becomes insufficient. In this case, it will be necessary to use a separate ventilator. This usually happens with minor excitation frequencies of <15Hz. FRU-100 8.3 Parameter level Para meter F00 Function [default setting] Factory adjustment Settings Grey values are feasible on request! Do not change this value under any circumstances! Ramp up These are used to set the time that is required by the motor to reach the maximum speed specified in parameter F07. Ramps F01 [5.0] Setting range available from [0.1]s to [999]s. Changes may also be made during operation. F02 Ramp down [5.0] This is where you set the time required by the motor from the point of shutdown to a total stop. Setting range available from [0.1]s to [999]s. Changes may also be made during operation. Operating mode F03 contact 3 contact 4 Operating mode [000] Forward/Stop; Back/Stop [000] [001] Boost/Stop: Forward/Back (See also chpt. 5.3.2 control terminals) Direction of rotation F04 Direction of rotation [000] [000] [001] Backward Forward Volts per Hertz characteristic F05 Volts per Hertz characteristic This is where you set the start-up behaviour. At 50Hz network: [001] Linear [002] Heavy starting [003] Pump/Ventilator At 60Hz network: [004] Linear [005] Heavy starting [006] Pump/Ventilator For ventilators and pumps with a great breakaway torque or moment of inertia “Linear” setting may be of an advantage. Parameter F25 (default value for frequency) is not automatically changed at the Note same time. You must set the corner frequency separately. Maximum and minimum speed i F06 max. rpm: [50.0] F07 Minimum speed [00.0] FRU-100 Maximum value for excitation frequency Excitation frequency is proportional to speed.=> Specification of maximum speed. Setting range available from [1.0]Hz to [200]Hz Minimum value for excitation frequency Excitation frequency is proportional to speed. => Specification of minimum speed. Setting range available from [1.0]Hz to [200]Hz 30 Para Function meter [default setting] Fixed speed Fixed target value 1 F08 [10.0] Settings [setting range] This is where you can set a fixed value for excitation frequency. => Static torque Setting range available from [0.0]Hz to [200]Hz. Inching frequency F09 Inching-nominal value Fixed value for inching mode [6.0] Setting range available from [0.0]Hz to [200]Hz. Enable local/remote mode F10 Enable Change between remote operation and manual operation. [000] [000] Local mode via RUN/STOP key [001] Remote mode via terminal 3 FW (boost) Specified value selection local/remote F11 Specified value selection [000] Default for specified value of excitation frequency [000] Local specified value (manual selection via control panel) [001] Remote setpoint via analog input term.9, SW1-3 0-10V [002] Remote setpoint via analog input term.9, SW1-1 0-20mA Clock frequency F12 i Note 31 Clock frequency Parameter Frequency Parameter Frequency value value 4kHz 10kHz [005] 5kHz 12kHz [001] [006] 6kHz 14.4kHz [002] [007] 7.2kHz 15kHz [003] [008] 8kHz 16kHz [004] [009] [005] [010] Clock frequencies from 12 kHz only support operation with small load. A high clock frequency reduces motor noise but causes higher losses in the frequency converter and bad rotational behaviour at a low output frequency. FRU-100 Para Function Settings meter [default setting] [setting range] Voltage elevation (Boost) at low frequency A boost facilitates the setting of sensible magnetization for the Boost F13 motor at low speed in order to ac hieve a higher starting torque [0.0] for drives with high breakaway torque. The voltage in the lower speed range will be purposefully in creased in relation to the desired volts per Hertz characteristic. U: Output voltage fB: Corner frequency B : Boost This is adjustable within a range of maximum output voltage. i Note [0.0] % to [10.0] % of the The parameter Boost should only be increased to the point required to reach the necessary starting torque. Setting too high a value may cause a fault in the frequency converter due to overcurrent, or boost may fail or motor may succumb to thermal overload. Stop mode F14 Stop mode [000] [000] Ramp: [001] Coasting: Controlled deceleration on ramp according to set value for parameter F02) Deceleration without brake effect Direct current braking F15 Braking time [0.5] Brake time indicates how long it takes before the motor is braked by means of direct current after the deceleration of the ramp Setting range available from [0.0]s to [25.5]s. F16 F17 Starting frequency [1.5] Frequency at which direct current braking starts during deceleration Braking voltage Variable of braking voltage for direct current braking pulse [8.0] Setting range available from [0.0]% to [20.0]%. Setting range available from [1.0]Hz to [10.0]Hz. Motor rated current F18 i Note Motor current Setting range available from [0.0]% to [200]%. [100] To protect the motor against overload, it is possible to set the motor current in relation to the output current of the FRU- 100. The FRU-100 switches off after 1 minute at settings below 100% and when reaching 150% of the motor current set. Error message OL1 – Motor Overload appears. Settings of more than 100% will result in a switch-off of the FRU-100 after reaching an overload of 150%, generating error message OL2 – Frequency Converter Overload. FRU-100 32 Para Function meter [default setting] Multi-function inputs F19 Settings [setting range] Multi-function input1 (terminal6) These inputs are ready for operation using the following settings: [002] Parameter [001] [002]* [003] [004] [005] [006]* Meaning Inching mode with inching frequency from F09 Fixed specified value1 with frequency from F08 Multi-function input2 F20 Emergency shutdown (stop mode F14 is (terminal7) ignored) External supervision [005] Reset – faults are reset. Fixed specified value2 with frequency from F26 *Enable command (terminal 3) must be issu ed for operation w ith fixed specified values. In addition follow the engineering logic shown below: Multi-function Input1 Multi-function Input2 Output frequency Fixed target value 1 OFF Value from F08 ON Fixed target value 2 OFF ON Value from F26 Fixed target value 3 ON Value from F27 ON Fixed target value 4 A fourth specified value can be set via analogue input terminal9 or a local specified value. This is applied if none of the multifunction inputs is turned on. Emergency shut-dow n: The frequency converter shuts down the drive according to the set ramp. External supervision: It is possible to connect a PCT thermistor analysing unit Note (make contact element) Reset: Resetting an error message via a multi-function input Multi-function output Multi-function output [001] Message Operation F21 [002] Message Specified Value has been reached [003] [003] Error Notice: Relay contact max 250VAC/1A or 30VDC/1A Change of direction Change of direction [000] Change of direction possible F22 [001] Change of direction blocked [000] Notice: Forward is the only possi ble direction of rotation. F04 cannot be set to [001]. i Automatic restart F23 Automatic ON [001] [000] [001] enabled disabled This must not be changed as otherwise restart protection after faults would no longer be guaranteed. Attentio n i Note 33 In case of a power failure of less than 2s, you can select this function in order to decide whether the frequency converter is supposed to restart or to move into error mode. Error message LUC is issued during setting [001] and short-term power failures. FRU-100 Para Function Settings meter [default setting] [setting range] Number of restarting attempts Selecting an output When the frequency converter moves into error mode due to a F24 pending error message, this parameter can be used to [0] determine how many restart attempts should be made. If the fault happens on both sides, the converter will restart. Adjustment range available from [0] to [5]. If F24= 0, the frequency converter will not try to restart during a pending error message. If the converter currently works by applying direct current braking or tries to shut Note down but an error occurs, restarting will not be possible. Default setting i F25 Default setting Corner frequency is fixed and preset [010] Default setting 50Hz [020] Default setting 60Hz Notice: Parameter F25 will be automatically reset to 000 after a RESET to default settings has taken place. After all changes the parameter F23 will be set to [000], i. e. restart protection after error is no longer ensured! Attention Change parameter F23 to [001]! Fixed speeds 2 and 3 F26 Fixed speed 2 [20.0] F27 Fixed speed 3 [30.0] This is where you can set a fixed value for excitation frequency. => Static torque Setting range available from [0.0]Hz to [200]Hz. This is where you can set a fixed value for excitation frequency. => Static torque Setting range available from [0.0]Hz to [200]Hz. Automatic start after connecting mains voltage F28 Auto-Start Auto-Start function after connecting mains voltage: [001] [000] Auto-Start with enabling terminal 3 after connection of mains voltage possible (program version 2.2 or later) [001] Auto-Start with enabling terminal 3 after application of mains voltage not possible After a power failure of more than 2s this function can used to select whether the frequency converter with pending release at terminal 3 should restart directly. . Attention If changed, a direct start after applying the mains voltage will not be possible! FRU-100 34 Param Function eter [default setting] Display parameter Settings [setting range] . F29 CPU program version F30 Error messages i This parameter is used to display and reset the last three error messages. The order of error messages is indicated by a full stop. x.xx Last error message xx.x One but last error message xxx. First error message To display the last three error messages, press the arrow UP key. To reset error messages, press the arrow DOWN/RESET key. Note 35 FRU-100 9 Operating and error messages 9.1 General FRU-100 frequency converter offer many warning and error evaluation functions. This considerably reduces the danger of damage to frequency converter, motor and related equipment under faulty conditions . The diagnosis information on the control panel’s display unit often facilitates quick error location. If you detect a fault in the FRU-100 frequency converter, return the frequency converter to the supplier; we strongly advice against repairs onsite. 9.2 Operation messages message Significance SPO SP1 Cause Zero speed Specified value frequency is smaller than 1Hz, at min. speed F07 =000 Auto-Start impossible Release/boost command at terminal 3 is enabled when mains voltage is applied but the auto-start function disabled. Check setting of parameter F28. SP2 Local mode Emergency stop Frequency converter is working in remote specified value mode and RUN/STOP key is pressed on frequency converter. You will have to reset Release/Boost, before you can restart. E.S. One of the multi-function inputs F19/F20 has been configured to Remote specified value Emergency Stop function and this message is pending (operating mode: local mode and remote specified value) Emergency stop B.B. External supervision One of the multi-function inputs F19/F20 has been configured to External Supervision function and this message is pending (operating mode: local mode and remote specified value) 9.3 Setting error) message Significance Cause - Set F22 to 000 Change of direction of rotation blocked 1. ER1 Error 1 Frequency converter is working - The arrow keys are used in local mode only to increase or in operating mode remote specified decrease the output frequency value (F11=001) and the arrow keys UP or DOWN/RESET were - CPU program version is nonpressed alterable 2. An attempt was made to change - Merely parameters F01, F02, F04 CPU program version F29 and F13 can be changed during operation 3. Parameter should be changed during operation ER2 Error 2 4. LOC FRU-100 2. F22 =001 and via input REV (terminal 4), to reverse and to change direction of rotation Remedy - Set F04 to 000 F22 and F04 are simultaneously set to 001 1. Parameter error F06, F07 - F06 > F07 36 9.4 Error messages Error messages that cannot be reset Message Significance Cause Remedy CPF Program error External electromagnetic effect - Connect in parallel RC absorption circuit with interfering magnetic contact EPR EEPROM error EEPROM defect - Check and replace memory module, as required OU Excess voltage 1. Supply voltage too high 2. Measuring arrangement In standby defective mode LU Undervoltage in standby mode 1. OH Overload in standby mode 1. Supply voltage too low 2. Measuring defective arrangement Ambient temperature too high 2. Insufficient cooling 3. Measuring defective arrangement - Check network voltage - Contact supplier - Check network voltage - Contact supplier - Improve cooling - Contact supplier Error messages that can be reset manually message Significance Cause Measuring arrangement defective - Contact supplier OC Overcurrent in standby mode OL1 Motor overload 1. 2. OL2 37 Frequency converter overload Remedy To much strain - Use larger motor Incorrect V/F characteristic - Select different V/F characteristic 3. Current limit F18 set incorrectly - Check current limit F18 1. To much strain - Use larger frequency converter 2. Incorrect V/F characteristic - Select different V/F characteristic FRU-100 Error messages that can be reset manually and via auto-reset Message Significance OCS OCA OCC OCD OCB OUC LUC OHC FRU-100 Cause 1 2 3 Remedy Motor short at housing Motor cable short at earth Power transistor defective Short-term start-up peak current Boost ramp set too short Overcurrent on 1 2 Incorrect V/F characteristic boosting 3 Motor performance too high overload Overcurrent in 1 Short-term 2 Short-term power cut continuous operation Coasting ramp too short Overcurrent during coasting Overcurrent on Direct current braking 1 Braking time too long F15 braking 2 Starting frequency too high F16 3 Braking voltage too high F17 1 Coasting ramp too short Overvoltage 2 Moment of inertia too large during 3 Excessive supply operating or fluctuations coasting Mains voltage too low Mains voltage 1 2 Excessive supply insufficient fluctuations 1 To much strain Heat sink Ambient temperature too overtemperatur 2 high e 3 Insufficient ventilation - Check motor - Check motor cable - Contact supplier - Set boost ramp longer Select different V/F characteristic Use larger frequency converter Check load conditions Apply power choke - Set coasting ramp longer - Check parameter settings F15, F16, F17 - Set coasting ramp longer - Use larger frequency converter - Apply power choke - Check the power voltage - Set boost ramp longer - Use larger frequency converter - Apply power choke - Check strain - Use larger frequency converter - Check ventilation 38 9.5 Further troubleshooting Problem Possible cause Remedy - Check mains voltage - Connect and then disconnect mains voltage Connect and then disconnect mains Is voltage applied to terminals T1, T2 and voltage T3? - Check wiring Check whether incorrect parameter settings - Where necessary, reset to default setting were selected? - Turn off device and check mechanics Motor jammed? - Check wiring of terminal 9 MVI Is remote specified value applied to analogue input? Have terminals T1, T2, T3 been mixed up? - Check wiring - Check wiring Are inputs FW and RE wired correctly? Motor does not Is mains voltage applied, is green LED lit up? rotate Motor rotating in wrong direction Is the wiring of analogue input terminal 9 Motor is rotating at fixed correct? speed Was the right operating mode selected? Is the load too large? Are the motor parameters (number of pins, Motor speed voltage) correct? too high or low Was the right gear transmission selected? Was the correct maximum speed selected? Voltage dip at motor during maximum speed? Reduce strong Is the load too large? speed Fluctuations Are the load fluctuations too great? Is the mains voltage constant? 39 - Check wiring - Check parameter setting - Check parameter setting - Reduce load - Check motor dimensioning - Take gear transmission into account - Reduce maximum speed - Load fluctuations - Increase motor and frequency converter capacity - Install power choke up-stream of frequency converter FRU-100 10 Service 10.1 Regular maintenance FRU-100 frequency converters are to a great extent maintenance-free. Despite this, the following tests should be carried out at regular intervals: 1.) Ventilation: Is the ventilator noise audible? (0.37kW and 0.75kW only) Is the cooling air able to circulate unhampered around the device? 2.) Fixings, connections: Are the mounting fittings of the FRU-100 firmly tightened? Are all connections properly clamped? 10.2 Repair Users will not be able to repair the FRU-100 frequency converter themselves. In case of an error, we recommend to return the defective device for repairs. Disconnect the FRU-100 frequency converter co mpletely from the power supply before starting with disassembling. Take discharge time of intermediate circuit capacitors (approx. 3 min) into Attentio account. Non-compliance may result in fatal electric shock if device is touched. n 10.3 Returns If an error requires the return of a FRU-100 frequency converter, we recommend following the procedure below: Contact your supplier and have the following information ready for your phone call: - Type of FRU-100 frequency converter - Series no. Your supplier will be happy to explain the a rrangements with respect to an exchange and the necessary formalities involved. Return your device in environm entally friendly, reusable packaging suited for this kind of transport. Do not forget to enclose a c oherent error description with your device. This reduces repair times and lowers repairs costs. FRU-100 40


