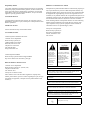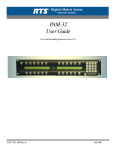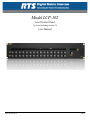
1
Model LCP-102
Level Control Panel
Up to and including version 1.0
User Manual
9350-7623-000 Rev E
5/2010
Proprietary Notice
SHIPPING TO THE MANUFACTURER
The product information and design disclosed herein were originated by
and are the property of Bosch Security Systems, Inc. Bosch reserves all
patent, proprietary design, manufacturing, reproduction, use and sales
rights thereto, and to any article disclosed therein, except to the extent
rights are expressly granted to others.
All shipments of product should be made via UPS Ground, prepaid (you
may request from Factory Service a different shipment method). Any
shipment upgrades will be paid by the customer. The equipment should
be shipped in the original packing carton. If the original carton is not
available, use any suitable container that is rigid and of adequate size. If
a substitute container is used, the equipment should be wrapped in paper
and surrounded with at least four (4) inches of excelsior or similar
shock-absorbing material. All shipments must be sent to the following
address and must include the Proof of Purchase for warranty repair.
Upon completion of any repair the equipment will be returned via
United Parcel Service or specified shipper, collect.
COPYRIGHT NOTICE
Copyright 2010 by Bosch Security Systems, Inc. All rights reserved.
Reproduction, in whole or in part, without prior written permission from
Bosch is prohibited.
WARRANTY NOTICE
See the enclosed warranty card for further details.
CUSTOMER SUPPORT
Technical questions should be directed to:
Factory Service Department
Bosch Security Systems, Inc.
8601 East Cornhusker Hwy.
Lincoln, NE 68507 U.S.A.
Attn: Service
Customer Service Department
Bosch Security Systems, Inc.
12000 Portland Avenue South
Burnsville, MN 55337 USA
Telephone: 877-863-4169
Fax: 800-323-0498
[email protected]
Technical Questions EMEA
Bosch Security Systems Technical Support EMEA
http://www.rtsintercoms.com/contact_main.php
RETURN SHIPPING INSTRUCTIONS
Customer Service Department
Bosch Security Systems, Inc. (Lincoln, NE)
Telephone: 402-467-5321
Fax: 402-467-3279
Factory Service: 800-553-5992
Please include a note in the box which supplies the company name,
address, phone number, a person to contact regarding the repair, the type
and quantity of equipment, a description of the problem and the serial
number(s).
THE LIGHTNING
FLASH AND
ARROWHEAD
WITHIN THE
TRIANGLE IS A
WARNING SIGN
ALERTING YOU
OF
“DANGEROUS
VOLTAGE”
INSIDE THE
PRODUCT.
CAUTION: TO REDUCE
THE RISK OF ELECTRIC
SHOCK, DO NOT
REMOVE COVER. NO
USER-SERVICABLE
PARTS INSIDE. REFER
SERVICING TO
QUALIFIED SERVICE
PERSONNEL.
THE
EXCLAMATION
POINT WITHIN
THE TRIANGLE
IS A WARNING
SIGN
ALERTING YOU
OF IMPORTANT
INSTRUCTIONS
ACCOMPANYIN
G THE
PRODUCT
SEE MARKING ON BOTTOM/BACK OF PRODUCT
WARNING: APPARATUS SHALL NOT BE EXPOSED TO DRIPPING
OR SPLASHING AND NO OBJECTS FILLED WITH LIQUIDS, SUCH
AS VASES, SHALL BE PLACED ON THE APPARATUS.
WARNING: THE MAIN POWER PLUG MUST REMAIN READILY
OPERABLE
CAUTION: TO REDUCE THE RISK OF ELECTRIC SHOCK, GROUNDING OF THE CENTER PIN OF THIS PLUG MUST BE MAINTAINED.
WARNING: TO REDUCE THE RISK OF FIRE OR ELECTRIC SHOCK,
DO NOT EXPOSE THIS APPRATUS TO RAIN OR MOISTURE.
WARNING: TO PREVENT INJURY, THIS APPARATUS MUST BE
SECURELY ATTACHED TO THE FLOOR/WALL/RACK IN ACCORDANCE WITH THE INSTALLATION INSTRUCTIONS.
This product is AC only.
Important Safety Instructions
1. Read these instructions.
2. Keep these instructions.
3. Heed all warnings.
4. Follow all instructions.
5. Do not use this apparatus near water.
6. Clean only with dry cloth.
7. Do not block any ventilation openings. Install in accordance with the
manufacturer’s instructions.
8. Do not install near any heat sources such as radiators, heat registers, stoves, or
other apparatus (including amplifiers) that produce heat.
9. Do not defeat the safety purpose of the polarized or grounding-type plug. A
polarized plug has two blades with one wider than the other. A grounding type
plug has two blades and a third grounding prong. The wide blade or the third
prong are provided for your safety. If the provided plug does not fit into your
outlet, consult an electrician for replacement of the obsolete outlet.
10.Protect the power cord from being walked on or pinched particularly at plugs,
convenience receptacles, and the point where they exit from the apparatus.
11.Only use attachments/accessories specified by the manufacturer.
12.Use only with the cart, stand, tripod, bracket, or table specified by the
manufacturer, or sold with the apparatus. When a cart is used, use caution when
moving the cart/apparatus combination to avoid injury from tip-over.
13.Unplug this apparatus during lightning storms or when unused for long periods
of time.
14.Refer all servicing to qualified service personnel. Servicing is required when the
apparatus has been damaged in any way, such as power-supply cord or plug is
damaged, liquid has been spilled or objects have fallen into the apparatus, the
apparatus has been exposed to rain or moisture, does not operate normally, or
has been dropped.
Table
of
Contents
LCP-102 Description ................................................................................................................................................3
Specifications .............................................................................................................................................................4
Location and Mounting .............................................................................................................................................5
Connections ...............................................................................................................................................................5
Power Up and Initial Settings ...................................................................................................................................8
APPLYING POWER .....................................................................................................................................................................8
PROGRAMMING MENUS ............................................................................................................................................................8
SETTING THE PANEL ADDRESS ..................................................................................................................................................8
ADJUSTING THE DIMMER ..........................................................................................................................................................9
Panel Mode Selection ..............................................................................................................................................11
Page Select ..............................................................................................................................................................11
TRIMS Mode Assignments and Operation ..............................................................................................................12
TRIMS MODE ASSIGNMENT ....................................................................................................................................................12
PAP Mode Assignments and Operation ..................................................................................................................12
PAP MODE ASSIGNMENT ........................................................................................................................................................12
PAP MODE OPERATION .........................................................................................................................................................13
CDP Mode Assignments and Operation ..................................................................................................................13
CDP MODE ASSIGNMENTS .....................................................................................................................................................13
CDP MODE OPERATION .........................................................................................................................................................13
Saving Configuration Changes ...............................................................................................................................14
Notes ........................................................................................................................................................................15
List
of
Figures
FIGURE 1.
FIGURE 2.
FIGURE 3.
FIGURE 4.
FIGURE 5.
FIGURE 6.
FIGURE 7.
FIGURE 8.
FIGURE 9.
LCP-102 Reference View ......................................................................................................................4
Connection example for a single LCP-102 or multiple LCP-102s .......................................................6
Connection example of an LCP-102 connecting to a UIO-256/GPIO-16 ............................................6
Interconnect cable from a Zeus, Cronus or ADAM intercom system to the LCP-102 .........................7
Interconnect cable from an ADAM CS intercom system to the LCP-102 .............................................7
Y cable for connection of an LCP-102 and a UIO-256/GPIO-16 to a Zeus, Cronus,
or ADAM intercom system.
7
Cable to interconnect two LCP-102s (All intercom systems) ...............................................................7
Y cable for connection of an LCP-102 and a UIO-256/GPIO-16 to
an ADAM CS intercom system. .............................................................................................................7
Cable to connect UIO-256/GPIO-16 to the LCP-102 (All intercom systems) .....................................7
CHAPTER 1
Introduction
NOTE:
The LCP-102 is not compatible with the CS9000 Series intercom systems.
For information on how to complete the configuration of some features, see the AZedit user manual.
LCP-102 Description
The LCP-102 combines the features of an analog trim panel, a CDP (Camera Delegate) panel, and a PAP (Program Assign
Panel) in a single frame (2 rack units). You can easily switch between three (3) panel modes and make rapid configuration
changes using the menu selector on the front panel. In each mode, you can make up to 64 assignments and then adjust the
assignment levels. For example,
•
•
•
In Trims mode, you can assign and adjust the analog input and output trims for up to 64 intercom ports.
In PAP mode, you can select the program input source and set its level for each of 64 IFBs.
In CDP mode, you can assign up to 64 intercom ports to any combination of party lines and then adjust the listen
level for each participant on that party line.
The LCP-102 connects to the auxiliary data port of any ADAM, ADAM CS, Cronus or Zeus intercom system. Also, it has a
loop connector for connection to an auxiliary device, such as another LCP-102, or a UIO-256/GPIO-16 frame. Since a single
LCP-102 provides trim adjustments for 64 ports, only one (1) unit is required to completely configure an ADAM CS or Zeus
system. For larger ADAM intercom systems, up to 15 additional LCP-102 frames can be connected via the loop connectors.
3
Specifications
FIGURE 1.
LCP-102 Reference View
Data Connector – DB-9 Male
Pin 1 ...........................................................................Common
Pin 2 ............................................................................... Data –
Dimensions:................................................ 2 RU, 19” W, 7” L
Pin 3 ...................................................................................N/A
Pin 4 ...................................................................................N/A
Weight: ........................................................................ 8.20 lbs
Pin 5 ...................................................................................N/A
Pin 6 ...................................................................................N/A
Power Consumption ................................................... 13 Watts
Pin 7 ...............................................................................Data +
Pin 8 ...................................................................................N/A
Pin 9 ...................................................................................N/A
Specifications
Loop Connector – DB-9 Female
Pin 1 ...........................................................................Common
Pin 2 ............................................................................... Data –
Pin 3 ...................................................................................N/A
Pin 4 ...................................................................................N/A
Pin 5 ...................................................................................N/A
Pin 6 ...................................................................................N/A
Pin 7 ...............................................................................Data +
Pin 8 ...................................................................................N/A
Pin 9 ...................................................................................N/A
4
CHAPTER 1
Installation
Location and Mounting
The LCP-102 occupies two (2) rack spaces in a standard 19-inch equipment rack or bay, and is 7.25 inches (184.2mm) deep
behind the front panel (including the rear panel connectors). There are no special ventilation requirements. The LCP-102
should be mounted at or near operator eye-level when standing or sitting to permit easy access to the front panel controls and
displays.
Connections
System connections are summarized in Figure 2. Cable diagrams are shown in Figure 4 to Figure 9.
When connecting a UIO-256/GPIO-16 frame along with the LCP-102, you have a choice of two (2) methods:
•
•
Using LOOP connector of the LCP-102
Using a Y cable
If you have several LCP-102’s connected in a chain, you can connect the UIO-256/GPIO-16 to the LOOP connector of the last
LCP-102 in the chain, or you can insert it anywhere in the chain with a Y cable. Whichever configuration you use, you can
also connect three (3) additional UIO-256/GPIO-16 frames to the first UIO-256/GPIO-16 in a ring configuration as illustrated
in the UIO-256/GPIO-16 User Manual.
3
Connections
FIGURE 2.
Connection example for a single LCP-102 or multiple LCP-102s
FIGURE 3.
Connection example of an LCP-102 connecting to a UIO-256/GPIO-16
Two (2) methods for connecting a UIO-256/GPIO-16 with the LCP-102, up to three (3) mor UIO-256/GPIO-16 frames may be
connected to the first UIO-256/GPIO-16 in a ring configuration as described in the UIO-256 and GPIO-16 User Manuals.
4
Connections
Interconnect cable from a Zeus, Cronus or
ADAM intercom system to the LCP-102
FIGURE 4.
Cable to interconnect two LCP-102s (All
intercom systems)
FIGURE 7.
Interconnect cable from an ADAM CS
intercom system to the LCP-102
FIGURE 5.
Y cable for connection of an LCP-102 and a
UIO-256/GPIO-16 to an ADAM CS intercom system.
FIGURE 8.
Y cable for connection of an LCP-102 and a
UIO-256/GPIO-16 to a Zeus, Cronus, or ADAM
intercom system.
FIGURE 6.
Cable to connect UIO-256/GPIO-16 to the
LCP-102 (All intercom systems)
FIGURE 9.
5
Power Up and Initial Settings
Power Up and Initial Settings
Applying Power
During a normal power up the alphanumeric displays first show asterisks (****). After a few moments, some assignments
may appear in the displays above selected keys (depending upon whether or not anything was previously assigned using the
intercom system configuration software). If there are currently no assignments, the displays show dashes. If the LCP-102
connected to the intercom system cannot establish communication with the intercom system, all LCP-102 displays continue to
show asterisks. In this case, check the cable from the first LCP-102 to the intercom system and verify the intercom system is
operational.
NOTE:
If more than one (1) LCP-102 is used, set the addresses using the programming menus, as described in
“Programming Menus.
Programming Menus
The LCP-102 Programming Menus are accessed using the ADDRESS KEY. The menus are summarized in Table 1.
TABLE 1. The
LCP-102 Programming Menus
PAGE SEL Menu Items
SERVICE Menu Items
Page 1
DIMMER
Page 2
SET ADDR
Page 3
SET MODE
Page 4
VER
Setting the Panel Address
Before programming any assignments, each LCP-102 should be set to a unique panel address as follows:
NOTE: Each programming step should be performed within approximately 10 seconds. Otherwise, the LCP-102
automatically cancels the procedure.
To set the address for the LCP-102, do the following:
1.
Turn the ADDRESS KEY encoder until SERVICE displays.
2.
Tap the ADDRESS KEY encoder once.
DIMMER appears in the menu display.
3.
Turn the ADDRESS KEY encoder until SET ADDR displays.
4.
Tap the ADDRESS KEY encoder once.
ADDR 1 appears in the menu display.
5.
Tap the ADDRESS KEY encoder to select ADDR 1 for the first LCP-102.
This stores the setting, and all displays show asterisks for a few moments. Then, all displays show dashes.
6.
Double-tap the ADDRESS KEY encoder to exit programming mode when finished. Otherwise, the LCP-102
automatically exits after 10 seconds.
NOTE: The address setting is retained in the LCP-102 memory when power is removed.
7.
6
Repeat step 1 through step 6 to set addresses on additional LCP-102s, select ADDR 2, ADDR 3 for the third for the
second LCP-102 and so on.
Power Up and Initial Settings
Adjusting the Dimmer
To adjust the dimmer, do the following:
1.
Turn the ADDRESS KEY encoder until SERVICE displays.
2.
Tap the ADDRESS KEY encoder once.
DIMMER appears in the display window.
3.
Tap the ADDRESS KEY encoder again.
One (1) or more right-pointing arrowheads appear.
4.
Turn the ADDRESS KEY encoder to increase or decrease the brightness of the arrowheads.
5.
Tap the ADDRESS KEY encoder to save changes.
All displays flash asterisks at the new brightness level and then returns to normal operation.
7
Power Up and Initial Settings
8
CHAPTER 1
Operation
Panel Mode Selection
The LCP-102 has three (3) panel modes:
•
•
•
TRIMS
PAP
CDP
To select the LCP-102 panel mode, do the following:
1.
Turn the ADDRESS KEY encoder until SERVICE appears.
2.
Tap the ADDRESS KEY encoder.
3.
Turn the ADDRESS KEY encoder until SET MODE appears.
4.
Tap the ADDRESS KEY encoder.
5.
Turn the ADDRESS KEY encoder to until the desired mode (Trims, PAP, or CDP) appears.
6.
Tap the ADDRESS KEY encoder to select the panel mode desired.
Page Select
Within each panel mode, there are four (4) setup pages of assignments available. Each page lets you setup 16 assignments. You
can then switch between pages to view settings or make changes.
To select pages, do the following:
1.
Turn the ADDRESS KEY encoder until PAGE SEL appears.
2.
Tap the ADDRESS KEY encoder.
3.
Turn the ADDRESS KEY encoder until PAGE 1 appears.
4.
Tap the ADDRESS KEY encoder.
Any assignments already configured for the page appear in the display window. Otherwise, the display show dashes.
You are now ready to setup assignments on the newly selected page. Refer to the following paragraphs that apply to the
currently selected panel mode.
3
TRIMS Mode Assignments and Operation
TRIMS Mode Assignments and Operation
In TRIMS mode, you assign individual ports of the intercom system to display and then adjust the input and output trims. This
is the same as adjusting the analog input/output gains in AZedit.
TRIMS Mode Assignment
To configure TRIMS mode assignments, do the following:
1.
Place the LCP-102 in TRIMS mode, as described in “Panel Mode Selection” on page 3.
2.
Select one (1) of the four (4) setup pages, as described in “Page Select” on page 3.
3.
Tap the specific key encoders to select one (1) of the 16 assignable displays currently not being used.
4.
Turn the encoder to scroll through the list of intercom ports.
5.
Tap the encoder to select the intercom port.
The selected intercom port is now assigned to the display.
6.
Repeat step 1 through step 5, as needed.
To cancel or clear an assignment, do the following:
1.
Tap either assignment encoder knob.
The display goes blank.
2.
Tap the encoder knob once again.
The display returns to showing dashes, indicating no assignments.
TRIMS Mode Operation
For each assigned display, turn the upper encoder under the display to change the input level. Turn the lower encoder to
change the output level. Turning an encoder one (1) notch in either direction displays the current level. Further rotation
changes the level.
PAP Mode Assignments and Operation
In PAP mode, you set up IFBs and then adjust the level from the defined program input to the defined IFB output.
PAP Mode Assignment
To assign PAPs to the LCP-102, do the following:
1.
Run AZedit and define the output port for each IFB you want to set up, then send changes to the intercom system.
NOTE: For each IFB, you can define or change the input port either from the intercom system configuration
software or from the LCP-102, but you must always define the output port first using the intercom system.
2.
Place the LCP-102 in PAP mode, as described in “Panel Mode Selection” on page 3.
3.
Select one (1) of the four (4) setup pages, as described in “Page Select” on page 3.
4.
Tap the encoder knob under one of the currently unused assignable displays to enter IFB assign mode.
5.
Turn the encoder knob to scroll through the list of IFBs.
6.
Tap the encoder knob once to assign the IFB to the display assignment.
NOTE: If you already assigned the input port for the IFB using the intercom system configuration software, you can
skip step 5 and 6.
7.
4
With the display showing the name of the IFB, tap the encoder knob.
The LCP-102 enters input port assignment mode. The scroll list of intercom ports appear in the display.
CDP Mode Assignments and Operation
8.
Turn the upper encoder knob to select the intercom port where the program source for the IFB is connected.
9.
Tap the encoder to assign the selected port.
The display shows the IFB name, and the IFB is completely set up.
10.
Repeat step 5 and step 6 to make further assignments.
To cancel or clear an assignment, do the following:
1.
Tap either assignment encoder knob.
The display goes blank.
2.
Tap the encoder knob once again.
The display returns to showing dashes, indicating no assignments.
PAP Mode Operation
To change the program level, do the following:
>
Turn either encoder knob.
Turning the encoder knob on notch in either direction displays the current level. Further rotation changes the level.
CDP Mode Assignments and Operation
In CDP mode, you use each display and its encoders to assign one (1) intercom port to any party line. Then, during operation,
you can adjust the level at which that port hears the party line audio.
CDP Mode Assignments
To assign CDPs to the LCP-102, do the following:
1.
Place the LCP-102 in PAP mode, as described in “Panel Mode Selection” on page 3.
2.
Select one (1) of the four (4) setup pages, as described in “Page Select” on page 3.
3.
Tap the encoder knob under one of the currently unused assignable displays.
4.
Double-tap either encoder knob to access a scroll list of intercom ports.
5.
Turn the encoder knob to locate the intercom port you want to assign to a party line.
6.
Tap the encoder knob to select the intercom port.
7.
Tap the encoder knob again to access the scroll list of party lines.
8.
Turn the encoder knob to locate the party line you want to assign the intercom port to.
9.
Tap the encoder knob.
This assigns the port to the party line as a talker/listener, and the name of the port reappears in the display window.
10.
Repeat step 1 through step 9.
To cancel or clear an assignment, do the following:
1.
Tap either assignment encoder knob.
The display goes blank.
2.
Tap the encoder knob once again.
The display returns to showing dashes, indicating no assignments.
5
Saving Configuration Changes
CDP Mode Operation
To change the listen level for a port, do the following:
>
Turn either encoder knob one (1) notch in either direction to display the current level.
Further rotation changes the level.
To display the party line the port is assigned, do the following:
>
Tap either encoder knob once.
The party line displays for about four (4) seconds, and then the port name reappears.
Saving Configuration Changes
The settings for address, current panel mode and current setup pages are saved in LCP-102 and are kept if the power turns off.
All display assignments and level settings are uploaded to the intercom system and become part of the online configuration.
This configuration is retained if there is a loss of power to the intercom system. However, if you wish to have a backup copy of
your settings, save the settings to disk using your intercom system configuration software.
6
Notes
Notes
7