1
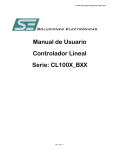
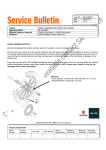
HK52 Digital Video Camera User Manual General Product Features Supports AVI video format. Supports 30 fps at 720*480 Supports USB1.1 and USB2.0. Supports 16GB microSD card class 4 or higher.(maximum) Build-in lithium ion battery which can operate camera for more than 75 minutes Operation Guide 1. Battery Charge The battery is a lithium ion rechargeable battery, so please charge before first use. The methods for charging as following: 1.) Connect to computer with USB cable, or; 2.) Connect to suitable charger with USB cable, then plug into electrical outlet. Note: It may take about three full charges for the battery to achieve its maximum efficiency . When battery power is insufficient, the HK52 camera will enter into power off mode and the LED indicators will go out. 2. Voice Activated Video Recording Insert a microSD (transflash) memory card of rating 4 or higher into the slot on the camera. Slide “ON/OFF” button to “ON”, and press “M” once to start up the video camera. At this time both the indicator LEDs will be constantly red, indicating it has entered voice-activated standby mode. If the external sounds are greater than 60 dB, the camera will automatically enter into video recording mode and proceed to record video, one of the LEDs will slowly flash blue; If the external sound drops to less than 65 dB continuously for 2 minutes, the camera will automatically return to standby mode; Under standby state, if the external sound reaches 60 dB again, it will re-enter into video recording mode and proceed to record video. 3. Manual Video Shooting Slide “ON/OFF” button to “ON”, and press “M” once to start up the video camera. Now press “M” once again to switch to manual video mode. Now press “Record/stop” button to start taking a movie. The right indicator LED will continuously flash blue. To stop taking the movie press the “Record/stop” button again and wait for the camera to go to standby and save the file. To take another movie, press ‘Record/Stop’ button again. The resolution for the video file is 720 * 480, and the frame rate is 30fps. 4. Taking Photographs Slide “ON/OFF” button to “ON”, and press “M” once to start up the video camera. Now press “M” twice again to switch to photograph mode. Now press “Record/stop” button to take a photo. The right indicator LED will flash blue once, each time the “Record/stop” button is pressed. The Photo resolution is 1280*1240. 5. Separate sound recording Slide “ON/OFF” button to “ON”, and press “M” once to start up the video camera. Now press “M” three times again to switch to sound record mode. Now press “Record/stop” button to make a recording. The right red indicator LED will flash blue continuously. To stop recording sound press the “Record/stop” button again and wait for the camera to go to standby and save the sound file. To make another sound recording, press ‘Record/Stop’ button again. 6. Power Off In the standby mode slide “ON/OFF” button to “OFF”. 7.Setting CameraTime 1. Build a text called TAG.TXT under root directory of card using ‘Notepad’. 2. Open TAG.TXT, and write as following: [date] 2013/10/29 12:00:00 3. Place a back-up copy in the ‘100media’ directory (where the video files go) so that it can be copied to the root directory if/when the system deletes it. When the camera is turned on, the system will check and analyse TAG.TXT, then set system time according to file time. After that the text will be updated by system automatically, until the camera is switched off. 8. Auto-power off function The camera will save the file and turn off automatically as following: a. When you shoot video without enough remaining battery power. b. When there is insufficient memory left. c. Under standby mode, without any camera operation in 45 seconds. 9.Connecting to a computer Connect to a computer with camera power off. Both red LED indicators on the camera will turn on and the camera will be recognized as a removable drive. Access to files is then possible. Note: It is better copy the video file into the computer’s harddrive to play, in order to prevent possible jerky/unsmooth playback due to speed limitations on the microSD memory card. 10.Reset If the camera fails to work correctly it may need to be reset. 1. Push “ON/OFF” to “OFF” 2. Remove lithium ion battery for a few seconds then replace back in camera.