1
WS 6710 Instruction manual
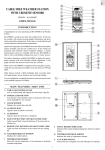
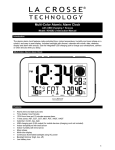
Main Unit Appearance
Part A- LCD
A1: Moon Phase
A3: Weather Forecast
A4: Time Display
A5: Second,Week,Alarm mode Icon display
A6: Indoor Temperature.
A7: Outdoor Temperature
Part B- Buttons
B1: “AL ON/OFF” button
B2: “CHANNEL” button
B3: “MAX/MIN “ button
B4: ”SNOOZE/LIGHT” button
B5: “MODE”,”SETTING” button
B6: “+(12/24)” , “WEARTHER”button.
B7: “- (°C/°F)” button
B8: “RESET” button
Part C- Structure
C1: Wall Mount Hole
C3: Stand
C2: Battery Compartment
Thermo Sensor Unit Appearance.
D1: Transmission Indication LED
D2: Outdoor Temperature
D3: Wall Mount Hole
D4: °C/°F” button
D5: “TX” button
D6: Battery Compartment
D7: Stand
Set Up:
y
Insert batteries.
y
Use a pin to press the RESET (B8) button
Weather Forecast Function:
z
After Batteries inserted, or holding “WEATHER” button (B6) for 3 seconds, weather icon Flash (A3).
Enter the current weather pressing “- “ (B7) buttons. Press “ + “ (B6) button to confirm the setting.
The weather forecast may not be accurate if the current weather entered is not correct.
z
The current weather status should be entered again if the altitude of the Main Unit is changed.
( Barometric pressure is lower at higher altitude location. Therefore, altitude change will affect the
weather forecast). The weather station will start the first forecast at 6 hours later after the current
weather status is entered.
z
Totally 5 different weather status symbols in the weather forecast. They are forecasting the weather
in future.
” means Sunny .
“
“
” means Slightly Cloudy.
“
” means Cloudy.
“
” means Rainy
“
” means heavy rain.
z
If there is any inconsistency of weather forecast between Local Weather Station and this unit, the
Local Weather Station's forecast should prevail. We will not held responsible for any trouble that
may come up due to wrong forecasting from this unit.
z
The trend pointer displayed on the LCD (A3) indicates the trend of the Barometric pressure.
“
“
“
” indicates the barometric pressure trend is increasing.
” indicates the barometric pressure trend is steady.
” indicates the barometric pressure trend is decreasing.
Outdoor Thermo Sensor Unit Registration Procedure:
z
The main unit automatically starts receiving transmission from Outdoor Thermo Sensor for outdoor
temperature after batteries are inserted.
z
The thermo sensor will automatically transmit temperature to the main unit after batteries inserted.
Batteries compartment (D6) of thermo sensor is locating behind the back cover, unscrews to open.
z
Press “ TX “ button (D5) on the thermo sensor unit to transmit temperature to the main unit
manually. The main unit gives a “beep” sound if it received the temperature.
Display outdoor temperature :
z
Hold “ CHANNEL” button (B2) for 3 seconds to cancel unused channel manually. It will
automatically register a new channel again if a new channel is received.
If there is no temperature displayed in existing channel ( “ - - . –“ is displayed on the LCD ), hold
“CHANNEL” button (B2) for 3 seconds to cancel that channel and will receive the channel again
(“Beep” sound can be heard.). Then, press “ TX “ button (D5) on the thermo sensor unit to transmit
signal to the main unit manually
z
The trend pointer displayed on the LCD indicates the trend of the outdoor temperature.
“
” indicates the outdoor temperature is increasing.
” indicates the outdoor temperature is steady.
“
“
z
” indicates the outdoor temperature is decreasing.
Press “ °C /°F” button (D4), on the Thermo Sensor unit, to select Thermo Sensor displayed in
Celsius mode or Fahrenheit mode.
Maximum/Minimum In/Outdoor Temperature and indoor humidity Recording Function:
z
z
Press “MAX/MIN” button (B3) to show the maximum or minimum Temperature/humidity reading.
“
” is shown on the LCD if maximum record is shown.
“
” is shown on the LCD if minimum record is shown.
Hold “MAX/MIN” button (B3) for 3 seconds to clear the recorded maximum and minimum reading.
Time Setting:
z
When the LCD display Time mode, hold “MODE” button (B5) for 3 seconds to enter Clock/Calendar
setting Mode .
z
Press “+” (B6) or “-” (B7) buttons to adjust the setting and press “MODE” button (B5) to confirm
each setting.
z
The setting sequence is shown as follow: Hour, Minutes, Second, Year, Month/Day sequence,
Month, Day, Time Zone, Day-of-week (language).
z
8 languages can be selected in Day-of-week, they are: German, English, Russian, Denmark, Dutch,
Italian Spanish and French. The languages and their selected abbreviations for each day of the
week are shown in the following table.
Language
Sunday
Monday
Tuesday
Wednesday
Thursday
Friday
Saturday
German, GE
SO
MO
DI
MI
DO
FR
SA
English, EN
SU
MO
TU
WE
TH
FR
SA
Russian, RU
BC
NH
BT
CP
HT
NT
CY
Denmark, DA
SO
MA
TI
ON
TO
FR
LO
Dutch, NE
ZO
MA
DI
WO
DO
VR
ZA
Italian, IT
DO
LU
MA
ME
GI
VE
SA
Spanish, ES
DO
LU
MA
MI
JU
VI
SA
French, FR
DI
LU
MA
ME
JE
VE
SA
12/24 Hour Display mode:
y
Press “+(12/24)” button (B6) to select 12 or 24 hours mode.
Snooze Alarm Clock Function:
z
Press “MODE” button (B5) to select to view :
Time
z
Weekday
Alarm Time (“ALM “ Shown on theCD)
When viewing the Alarm Time, hold “MODE” button (B5) for 3 seconds to enter Alarm Time setting.
Press “ +” (B6) or “-” (B7) buttons to adjust the alarm time.
z
Press “ALARM on/off” button (B1) to switch alarm on or off. If it is on, “
z
When Alarming, press “SNOOZE / LIGHT” button (B4) to activate the snooze alarm. The alarm will
” shown on the LCD.
snooze for 5 minutes, then it alarms again. This snooze function can be enabled for maximum 7
times.
z
Press any button to stop the snooze alarm.
Moon Phase Display
The Moon Phase (A1) of each day is shown on the LCD.
A: New Moon
B: Waxing Crescent
C: First Quarter
D: Waxing Gibbous
E: Full Moon
F: Waning Gibbous
G: Last Quarter
H: Waning Crescent
Low batteries indicator:
y
Low battery icon “
“appear at outdoor temperature row in particular channel indicating the
external transmitter of the channel in low battery status. The batteries should be replaced.
Note:
z
Use a pin to press the reset button (B8) if the Unit does not work properly.
z
Avoid placing the clock near interference sources/metal frames such as computer or TV sets.
z
The clock loses its time information when the battery is removed.
z
All Setting Mode will automatically exit in 15 seconds without any adjustment.