1
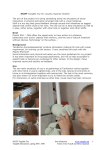
WEB PLATFORM FOR VISUAL STIMULATION User's Manual Authors: Yolanda Matas Martín Félix Hernández del Olmo – Carlos Manuel Santos Plaza Elena Gaudioso Vázquez – David Prada Esteban CONTENTS 1. Introduction .....................................................................................4 1.1. The application........................................................................ 4 1.2. Fast boot-up ...........................................................................4 1.2.1. Accessing the website .........................................................4 1.2.2 Registering ............................................................................6 1.2.3. Recovering user data ..........................................................7 1.2.4. Editing personal data ...........................................................8 1.2.5. Closing a session ................................................................9 1.2.6. Accessing the game list. Content .............................................9 1.2.7. Accessing the pupil list. Starting a session with a pupil..... 10 2. Game use ................................................................................................13 2.1. Obtaining information on each game .................................... 13 2.2. Configuring games .....................................................................15 2.3. Running games ..................................................................... 17 2.3.1. Game board .......................................................................18 2.3.2. Dropdown menu ................................................................18 2.3.3. Changing screens ..............................................................19 2.3.4. Obtaining help ...................................................................19 2.3.5. Reinforcement ...................................................................19 2.3.6. Exiting games ….................................................................20 2.4. Results in real time ............................................................... 20 2.5. General assessment ............................................................. 21 3. Pupil management ............................................................................24 3.1. Working with non-assigned pupils ......................................... 24 3.2. Adding a pupil ....................................................................... 25 2 3.3. Editing pupils’ data ............................................................... 27 3.4. Removing pupils ................................................................... 28 3.5. Assigning pupils to a different teacher ..................................29 3.6. Re-admitting a former pupil .................................................. 30 3.7. Individual pupil assessment ................................................. 31 3.8. Pupil statistics …...............................................................….33 3 Chapter 1. Introduction 1.1. The application The EVIN (Spanish acronym for internet visual stimulation) visual stimulation platform features the following functionalities. It provides users with a set of games or exercises to stimulate visual development in people whose ability to receive or process the visual stimuli in their surrounds is compromised. The variables for the games or visual exercises can be configured for adaptation to each specific need (size, complexity, display time, number of stimuli...). When a pupil plays a game, the scores are displayed in real time. This provides professionals with feedback on pupils’ progress in a given exercise. The results can be entered in a database, to: ◦ monitor a pupil’s individual progress with different game variables ◦ monitor the general performance of groups of pupils with the statistical information provided to assess the effectiveness of a given game in helping users to surmount their visual difficulties. The rest of this manual explains the platform’s modus operandi. This symbol signals important information. This symbol signals a warning. 1.2. Fast boot-up 1.2.1. Accessing the website The EVIN platform, which can be accessed at http://evint.org/, has been developed for and tested with the following navigators: Internet Explorer, Firefox, Safari and Chrome. The interface displayed when the application is accessed is shown below: 4 The top navigation menu contains six main sections: Home briefly describes project content and objective s. The Site map shows the platform layout. Games is for playing the site games and securing a general assessment of pupils’ scores. Only registered users may access this section. Pupils enables professionals to monitor their assigned pupils’ progress. They may also work with pupils not assigned to them if they know their user names. This is intended for parents, for instance, or professionals who are not a given pupil’s usual teacher. Only registered users may access this section. The FAQs section aims to solve the most frequently asked questions about program use. Contacts is the section for submitting suggestions, opinions and queries. Lastly, the Accessibility link at the bottom of the page opens a page on these features. Clicking Games or Pupils opens the following log-in window: 5 When the user name and password are keyed into the respective boxes and ENTER is clicked, the following information appears at the top of the page: user name and surname date link to My account to update personal data Exit option to close the session. 1.2.2 Registering New users may register from the log-in window: Clicking the Register? link displays the following form, where users can enter their personal data: 6 The password is assigned automatically and sent to the e-mail address provided. The Category field has three options. Teachers are teachers, coaches... Specialists include professionals such as rehabilitation instructors, opticians, psychologists, pedagogues and psycho-pedagogues. Pupils’ family may be parents, siblings or others. When the form is completed and the Create button clicked, an e-mail containing the user data and some general information on how to use the application is received instantly at the address provided. Registered users may change their passwords or any other item. See section 1.2.4 Editing personal data. 1.2.3. Recovering user data Users who have forgotten their user name or password or both can retrieve this information from the log-in window. 7 Clicking “Forgot your user name or password?” displays the following screen. The e-mail address to be typed into the box is the one submitted when originally registering. When Request user data is clicked, the user instantly receives a mail with his/her user name and new password. 1.2.4. Editing personal data Once a session is started, a text link to My account appears on every page. 8 Clicking this link displays the personal data form. The data may be changed as desired. When all the fields are filled in correctly and Save is clicked, a confirmation message is received on the Pupils page, which opens automatically. For security reasons, users who change their e-mail address are assigned a new password, which is sent to the new address. 1.2.5. Closing a session To exit a session click the Exit link at the top of the page, positioned to the right of the date (see screenshot above). 1.2.6. Accessing the game list. Content Once the session is started, the list of games is displayed by clicking the Games button on 9 the top navigation menu or at the bottom of the page. The elements included on the list for each game are as follows, from left to right. The game picture is a link to a detailed game description. The name is a text link to the same information as above. The game description is given underneath the name. The three links in the last column, from top down, are as follows. ◦ Play displays the form for configuring game variables. ◦ General assessment displays the form for selecting the group of pupils whose scores are to be used to assess game effectiveness. ◦ Help displays a help screen for the game. 1.2.7. Accessing the pupil list. Starting a session with a pupil With the session running, click the Pupils button on the top navigation menu or at the bottom of the page to access the following screen. 10 Each pupil is associated with three links which, from left to right, are as follows. The pupil’s name displays his/her information (such as clinical data or games used previously). Play displays the list of games. Edit is used to update the pupil’s information. Starting a session with a pupil The purpose of the “start session with pupil” option is to enter the pupil’s game or exercise scores in the database. This can be done in a number of ways: by clicking any of the links associated with the pupil on the Pupils page by using the Select pupil link near the top of the variables page for any of the games, which opens the existing list of pupils from the Games page, by clicking Play for any game, which also displays the page 11 with the existing list of pupils. Game demos can be accessed by clicking the Play without pupils link positioned after the list of pupils. When a pupil is selected, the session information is displayed underneath the teacher’s name, as shown in the following screenshot. The information displayed is as follows: • the user icon followed by the word Pupil • a link consisting of the pupil’s user name, from which his/her data and scores on previous games can be accessed • a close session icon followed by the phrase Close session, both of which close the session with the present pupil and open the page with the full list of Pupils. 12 Chapter 2. Game use 2.1. Obtaining information on games Clicking a picture or name on the list of games page displays a screen with a detailed game description, as in the example below. In the screenshot, the pointer is positioned below the View variables link, which takes the user to the page that describes game variables. The name of each item on the list is a link that opens a page containing more specific 13 information. When the link enabled on the above screenshot is clicked, the following page is displayed. In addition, help for each game can be accessed in any of three ways. clicking the Help link on the list of games 14 clicking the Help link on the variables form for each game typing “ctrl + ‘A’” or using the dropdown menu when any of the games is running. In addition, the teacher’s guide (link above the list of games) contains suggestions for use as well as information on game objectives and procedures. 2.2. Configuring games Game variables are configured from the form designed for that purpose, accessed by clicking the Play link for the game in question. 15 If the session was opened with no pupil, the user may select one here. The page displayed is reproduced below. The items on the variables forms, from top to bottom, are described below. A series of dropdown lists or check boxes show the possible settings for each variable: useful information on each variable can be obtained by running the pointer across the item in question. The checkbox alongside the words Audio reinforcement is used to enable/disable game sound effects. The checkbox alongside the words Visual reinforcement is used to enable/disable 16 visual reinforcement. The checkbox alongside the words Save results is used to enable (default option) or disable automatic score entry in the database. After the preceding items are configured and the Play button is clicked, one of two things may happen. ◦ If a pupil session is running, the game screen is displayed. ◦ Otherwise, a small window opens with information on the number of demos available. Demo mode scores are not entered in the database. Running a game without recording the scores in the database may be useful, for instance, when the user wants to test game operation, with or without a pupil. The games require JavaScript. If that application is not enabled, EVIN informs the user accordingly, as shown in the screen below. Additional information may be obtained as described in item 2.1 Obtaining information on games and the application’s FAQs. 2.3. Running games 2.3.1. Game board The full screen option must be enabled to visualise the game board correctly. Otherwise, some of the elements may not be viewed properly. Users are advised to read the Help section, 1. Boot-up and requirements. Examples of application game boards are shown below. 17 2.3.2. Dropdown menu All games have a transparent dropdown menu that can be visualised without obstructing the view of the game board. This menu features the options shown on the screenshot below. • For a description of the Back/Next function, see item 2.3.3 Changing screens. • Full screen displays the games in full screen mode. This option is not enabled in EVIN when the navigator used lacks the respective function. • The Hide menu option is used to conceal the dropdown menu. • Help displays assistance for the game. See item 2.3.4 Obtaining help. 18 • The characteristics of the Exit game function are described in item 2.3.6. The table below list the ways to access this menu. Show Hide By pressing F10 By pressing F10 By pressing the mouse wheel and turning it backward By pressing the mouse wheel and turning it forward Touch screens: by touching the screen Touch screens: by touching the screen lightly with a vertical downward motion lightly with a vertical upward motion By selecting the Hide menu option on the dropdown menu ------ 2.3.3. Changing screens When a game is over, a new screen is automatically displayed. Teachers who find this screen unsuitable can change to another with the keys “Ctrl + '→'” (and “Ctrl + '←'” in some games) or with the dropdown menu. More specific information is available in the Help function for each game. 2.3.4. Obtaining help Help for a given game can be obtained by typing “Ctrl + ‘A’” or by selecting Help on the dropdown menu. 2.3.5. Reinforcement When a screen exercise is completed, the pupil receives positive or negative reinforcement, depending on the score and the game. More specific information is available in the Help function for each game. Examples of reinforcement are shown below. 19 2.3.6. Exiting games Games are exited by typing “Ctrl + ‘X’” or selecting Exit on the dropdown menu. The Help function contains more specific information on how to exit games if errors occur. 2.4. Results in real time When the user exits a game, his/her scores are shown as in the screenshot below. 20 Note that the user receives information on whether the scores were entered in the database, the number of right and wrong choices, the percentage of the former and the game duration (time needed). 2.5. General assessment Clicking General assessment for any game on the list displays a page for selecting the group of pupils whose scores are to be assessed. 21 At this time, three types of queries are supported: all pupils pupils with exercises within a given range of dates pupils by clinical data (birth date, diagnosis, distance visual acuity and visual field). After the group of pupils is selected and the View button is clicked, the results requested are displayed on a new screen, as shown below. From left to right, the information given in the results table for each game configuration used is as follows: 22 total number of sessions total number of pupils who used the configuration (disregarding repetitions) variable settings for the game mean number of correct choices mean number of incorrect choices mean number of attempts (attempts = correct + incorrect choices) mean time needed to complete the game mean percentage of correct choices. Analysis of the results is based only on the variables most relevant to the performance of the associated visual task. Dividing the settings into relevant and irrelevant aims to facilitate assessment of pupils’ progress. Each game configuration can be set to a different level. Before a pupil can be assessed at a given level, he/she must have completed a reasonable number of sessions at that level. Logically, the larger the number of levels, the less each pupil will be able to practise at each, to the detriment of progress monitoring. 23 Chapter 3. Pupil management 3.1. Working with unassigned pupils Pupils may train with two or more adults (parents and a support teacher, for instance). In such cases, for reasons of coordination, the pupil is assigned to only one of them. The others may also work with the pupil, but they will not be able to modify his/her personal data or assign him/her to another teacher. Working with an unassigned pupil is very straightforward: all that need be known is the pupil’s user name. The option is found at the bottom of the main Pupils page, as shown below. When the pupil’s user name is entered in the box and the Request support button is clicked, the pupil appears on the list of non-assigned pupils, where the only option is Play. 24 Note that the page now contains an Non-assigned pupils list, with the pupil requested. Sessions with non-assigned pupils are begun in the same way as with assigned pupils. 3.2. Adding a pupil To add a pupil, simply click the Add new pupil link, positioned underneath the assigned pupils list. That displays the new pupil form reproduced in the screenshot below. 25 After filling in the form, click Create. If any of the fields contains an error, a box appears at the top of the screen listing the incorrect fields and the problem detected. An example is shown below. When the form is completed correctly and Create is clicked, the pupil is added and the Pupils page is displayed, showing the name of the new pupil and a message confirming 26 that the operation was successfully completed. Pupils’ names and surnames are not stored in the database. Particular care has been taken to ensure the confidentiality and anonymity of all the data. The rationale is that most pupils are minors whose data are subject to protective legislation in Spain as well as in other countries where EVIN may be used. 3.3. Editing pupils’ data A pupil’s data can be modified by clicking the Edit link next to the pupil’s name on the list. The form displayed is shown below. After editing the data as desired, the user clicks Save. Fields with errors are handled as described in the preceding section. After the data are edited, the Pupils page is displayed, along with a message confirming the success of the operation. 27 3.4. Removing pupils from the list Teachers cannot erase pupils’ data from the database. They can remove pupils from their assigned list, however. This is done by clicking the Edit option for the pupil in question. The screen displayed is shown below. 28 Clicking the Remove link positioned just over the pointer in the illustration above displays the Pupils page, along with a message confirming the success of the operation and the list without the pupil in question. Teachers may re-admit pupils at a later date if they wish. See item 3.6 Re-admitting former pupils. 3.5. Assigning pupils to a different teacher Only the system administrator can re-assign pupils. Requests can be submitted from the Contacts page. 29 3.6. Re-admitting former pupils Re-admissions are handled from the main Pupils screen, clicking the Re-admitting former pupils link, as shown below. The list of former (previously removed) pupils is displayed. See item 3.4 Removing pupils. When Re-admit is clicked alongside the name of the pupil to be taken back, the screen displays the Pupils page, where his/her user name re-appears on the list of assigned pupils. 30 3.7. Individual pupil assessment The steps to be followed to monitor a pupil’s progress are set out below. The screen displayed when the pupil's user name is clicked from the Pupils page is as follows. The information furnished includes the name of the teacher to whom the pupil is assigned, the pupil’s data and the games used in training. Clicking the link to any of the games displays a screen such as reproduced below. 31 It includes a table with a View scores link for each game configuration used by the pupil. Clicking the link opens a window with the pupil's scores for that configuration. Two tables are displayed in the aforementioned window. The first gives the session details: ◦ session number ◦ session date ◦ number of correct choices ◦ number of incorrect choices ◦ number of attempts (correct + incorrect choices) 32 ◦ time needed ◦ percentage of correct choices (correct choices/(correct + incorrect choices)x100) The second contains the mean scores for all the preceding sessions: ◦ total number of sessions ◦ mean number of correct choices ◦ mean number of incorrect choices ◦ mean number of attempts (correct + incorrect choices) ◦ mean time needed ◦ mean percentage of correct choices. 3.8. Pupil statistics The link labelled Pupil statistics is found on the lower left of the Pupils page. When the link is clicked, the following page is displayed. 33 This section is designed to enable the user to ascertain the number of pupils in the database, grouped by total number, age, pathology... At this writing, five search criteria are supported: all pupils and pupils by clinical data (age, diagnosis, distance visual acuity and visual field). 34