1
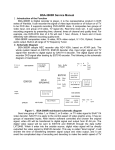
EXAMPLE OF MULTIPLE ALARM WIRING / ISOLATION UNIT WIRING
Note: For interconnection of smoke alarms to Fire Panel or Auxiliary devices, use only LIFESAVER
Isolation Relay Model RK10A.
6.1:8
6.1:9
This Smoke Alarm can be interconnectable only with other SMOTEC or LIFESAVER models of
Smoke Alarms; whether it be of Ionisation or Photoelectric design. Interconnection with other brands
may cause damage or result in a shock or fire risk.
When interconnected all Smoke Alarms will sound upon activation. However, only the originating
Smoke Alarm will have a latched Red LED, which will diminish automatically within 5 minutes.
6.2
Mounting Instructions:
Note:
Rechargeable battery is built into this Smoke Alarm.
NO USER REPLACEABLE PARTS INSIDE.
6.2:1
Separate Smoke Alarm from mounting base by sliding cover (in direction of arrow) with one hand on
the back of the mounting base and one hand sliding Smoke Alarm.
Unhinge Smoke Alarm from mounting base by removing hinge from under retaining flap of mounting
base. (See Fig.2)
Connect supply cable (through pre-cut aperture in ceiling) to terminal block and fix terminal shroud
(supplied). (See Fig.1)
Ensuring pre-cut aperture is large enough to accommodate terminal shroud, fix the mounting base to
the ceiling, utilizing the fixing screws (supplied).
Re-hinge Smoke Alarm onto mounting base ensuring hinge is held securely under retaining flap of
mounting base. (Fig.2).
Align and slide smoke alarm up onto mounting base (Fig 2 & 3) then slide in the reverse direction of
arrow to ensure proper connection.
Switch on power and check the green light on alarm cover. It should be lit when mains power is
switched on indicating that the smoke alarm is properly connected to the mounting base.
Secure Tamper Locking Screw (supplied) to smoke alarm.
Test alarm by pressing Test button.
6.2:2
6.2:3
6.2:4
6.2:5
6.2:6
6.2:7
6.2:8
6.2:9
Figure 1:
1.1 Base plate and terminal cover installation.
1.2 A & B are fixing holes.
Figure 2:
2.1 Slide metal clip (A) to corner of
base plate tongue (B).
2.2 Slide metal clip fully, as shown
in figure.
4