1
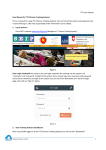
Sample Banking Management System for iSBS SBMS 2.0 Installation & User Manual Version 2.1 MicroDigital Co., Ltd. #A-101, Korea Bio Park B/D, 694-1, SamPyung-Dong, BunDang-Gu, SungNam-Si, GyungGi-Do, 463-400, Korea Tel : +82-31-628-2200 / Fax : +82-31-628-2222 [email protected] / www.MD-Best.com SBMS 2.0 User Manual 2 All Rights Reserved www.MD-Best.com SBMS 2.0 User Manual Table of Contents Chapters 1. Hardware Preparation & IP Address / Gateway Setup Sections Pages 1) Hardware Package 4 2) IP Address and Gateway Setup 5 for Windows XP 3) IP Address and Gateway Setup 7 for Windows 7 2. SBMS Software: Installation & ODBC Setup 3. SBMS Software Setting & Run 1) Installation 9 2) ODBC Setup for Windows XP 12 3) ODBC Setup for Windows 7 15 1) Run Program 18 2) Login 18 3) Master Window (Main Menu) 19 4) Registration 21 5) Search 24 6) Pulling 25 7) Export to Excel 27 8) Configuration 28 4. Note 30 Attention! Contents of SBMS can be modified without prior notification for performance upgrades. All Rights Reserved 3 www.MD-Best.com SBMS 2.0 User Manual 1. Hardware Preparation and IP Address / Gateway Setup 1) Hardware Package 1.1 iSBS Package iSBS (MD-Si2) Label System VacTube & VacTube Box Scanner 1.2 Hardware Setup iSBS (MD-Si2) CAUTION Computer Label Printer 4 All Rights Reserved The computer and the label printer Must be connected with Cross LAN Cable, which is included in iSBS Package. Scanner A. Connect Barcode Printer to your computer via LAN cable (Cross Cable) B. Connect Barcode Scanner to Computer via USB port C. Power On Barcode Printer D. Power On Computer E. Set IP Address and Gateway Attention! Computer is not included in the package. www.MD-Best.com SBMS 2.0 User Manual 2) IP Address and Gateway Setup for Windows XP ① Right click on “My Network Places” from your desktop ② Click “Properties” to open the “Network Connections” window ③ Right click “Local Area Connection” ④ Click “Properties” to open the “Local Area Connection Properties” window 5 All Rights Reserved www.MD-Best.com SBMS 2.0 User Manual ⑤ Click “Internet Protocol (TCP/IP)” ⑥ Click “Properties” to open “Internet Protocol (TCP/IP) Properties” Window ⑦ Click and select “Use the following IP address:” ⑧ Set “IP address:” to 192.168.0.115 ⑨ “Subnet mask” values will be automatically appear (Do NOT change!) v ⑩ Set “Default gateway” to 192.168.0.113 and click “OK” to save and close Attention! The IP address MUST NOT be same as the IP address set in the Label Printer; however Default gateway MUST be same as the Default gateway in the Label Printer. 6 All Rights Reserved www.MD-Best.com SBMS 2.0 User Manual 3) IP Address and Gateway Setup for Windows 7 ① Right click on “Network” from your desktop ② Click “Properties” to open up the “Network” window ③ Click “Local Area Connection” on the right side of “Unknown network” to open Local Area Connection Status window (Caution: Make sure the label printer is connected to the computer via LAN Cable) Attention! If “Unidentified network” cannot be found, please check the hardware connection between the Label Printer and Computer. All Rights Reserved 7 www.MD-Best.com SBMS 2.0 User Manual ④ Click “Properties” in the Local Area Connection Status window ⑤ Click and uncheck “Internet Protocol Version 6 (TCP/IPv6)” on the list and make sure “Internet Protocol Version 4 (TCP/IPv4)” is checked ⑥ Select “Internet Protocol Version 4 (TCP/IPv4)” ⑦ Click “Properties” to open “Internet Protocol Version 4 (TCP/IPv4) Properties” window 8 All Rights Reserved www.MD-Best.com SBMS 2.0 User Manual ⑧ Select “Use the following IP Address :” and set “IP Address” to “192.168.0.115” “Subnet Mask” values will automatically appear (Do NOT touch) ⑨ Set “Default Gateway” to “192.168.0.113” ⑩ Click “OK” and save and close 2. SBMS Software: Installation & ODBC Setup 1) Installation For Windows XP ① Double click on “SBMS (ver2.0)” icon in SBMS CD to start the installation of SBMS Software ① Right click on “SBMS (ver2.0)” in the CD For Windows 7 ② Click on “Run as administrator” 9 All Rights Reserved www.MD-Best.com SBMS 2.0 User Manual ③ Click “Next” to proceed Attention! It is recommended to exit all other programs before the installation. ④ Set directories for “Install folder” ⑤ Click “Install” to proceed the installation Attention! Default Install folder is “C:\SBMS2.0” 10 All Rights Reserved www.MD-Best.com SBMS 2.0 User Manual ④ Click “Ok” to close the window Installation complete! Attention! For Windows 7 and VISTA users, Please continue to additional steps below Attention! Default Shortcut Location on Start Menu: Start Program SBMS2.0 Attention! : Additional steps for Windows 7 and VISTA ⑤ Locate LPr.zip file in the provided CD ⑥ Extract the LPr.zip file to “SBMS2.0” folder unzip CAUTION! Make sure the files compressed in LPr.zip file have transferred directly to “SBMS2.0” folder, NOT to any subdirectories in “SBMS2.0” folder. All Rights Reserved 11 www.MD-Best.com SBMS 2.0 User Manual 2) ODBC Setup for Windows XP Attention! ODBC needs to be set before execute the program. ① Click “Start Control Management Tools ODBC” to open “ODBC Data Source Administrator” window 12 All Rights Reserved ② Click “System DSN” tab to open ③ Click “Add” to open “Create New Data Source” window ④ Select “Microsoft Access Driver (*.mdb)” and click “Finish” to open “ODBC Microsoft Access Setup” window www.MD-Best.com SBMS 2.0 User Manual ⑤ Type “SBMS” in “Data Source Name:” ⑥ Click “Select…” to open “Select Database” window ⑦ Select “DB_SBMS.mdb” file in “DATABASE” folder in “SBMS2.0” folder ⑧ Click “OK” to return to “ODBC Microsoft Access Setup” window Attention! Default Location for SBMS2.0: C:/SBMS2.0/DATABASE ⑨ Confirm that DB_SBMS.mdb file is selected, and click “Ok” to return to “ODBC Date Source Administrator” window 13 All Rights Reserved www.MD-Best.com SBMS 2.0 User Manual ⑩ Confirm “SBMS” on the list and click “Ok” to complete the ODBC setup 14 All Rights Reserved www.MD-Best.com SBMS 2.0 User Manual 3) ODBC Setup for Windows 7 For Windows 7: 32bit ① Click “Start” button ② Type “ODBC” in search, and press “Enter” to open “ODBC Data Source Administrator” window For Windows 7: 64bit ① Open a “Windows Explorer” ② Go to “SysWOW64” folder in “Windows” folder ③ Double click “odbcad32” application to open “ODBC Data Source Administrator” window CAUTION! For ODBC setup in Windows: 64bit, users may open “ODBC Data Source Administrator” by following the steps for Windows 7: 32bit above, but you CANNOT add proper contents; therefore make sure to follow proper protocol. 15 All Rights Reserved www.MD-Best.com SBMS 2.0 User Manual Attention! After the “ODBC Data Source Administrator” window is open, please follow steps below: ① Click “Add” button to open “Create New Data Source” window ② Select “Microsoft Access Driver (*.mdb)” from the list ③ Click “Finish” to proceed to “ODBC Microsoft Access Setup” window ④ Type “SBMS2.0” for Data Source Name ⑤ Click “Select” to open “Select Database” Windows 16 All Rights Reserved www.MD-Best.com SBMS 2.0 User Manual ⑥ Select “DB_SBMS.mdb” file in “DATABASE” Folder in “SBMS2.0” Folder (Default Location : C:/SBMS2.0/DATABASE) ⑦ Close all the windows by clicking “OK” 17 All Rights Reserved www.MD-Best.com SBMS 2.0 User Manual 3. SBMS Software Setting & Run 1) Run Program ① Double clicking “SBMS2.0” icon will run the SBMS software. Attention! For Windows 7 or VISTA users, I. II. III. IV. Right click on “SBMS2.0” icon. Click “Properties” to open “Properties” window for SBMS 2.0 application. Click “Compatibility” to go to “Compatibility” tab Click and check “Run this program as an administrator” under “Privilege Level” Section. 2) Login First time “Login” requires “User ID” and “Product No.” If you do not have them, contact the distributor or manufacturer. Password is NOT required for the first time. You will set the User ID and Password in the “Config” of SBMS program. 18 All Rights Reserved www.MD-Best.com SBMS 2.0 User Manual 3) Master Window (Main Frame) Main Menu Sample Databases Archive • Registration is to register Sample Databases to the Archive. • Search is to find Sample Databases based on user’s search condition. • Pulling is to update the record of the samples when users pull the samples. • Export is to export the list of Sample Databases in the Archive to Microsoft Excel. • Config is to administrate the Archive. • Only 100 most recently registered Sample Databases are shown in the Archive. • Users may select multiple number of Sample Databases by pressing “Ctrl” and select the Databases in the Archive. 19 All Rights Reserved www.MD-Best.com SBMS 2.0 User Manual ① Show Whole Samples / Show Selected Samples • Users can organize the list in the Archive by showing only selected Sample Databases in the Archive by selecting the Sample Databases, right-clicking on the selected Sample Databases, and clicking on “Show Selected Samples” • To return to the whole list of the Sample Databases in the Archive, right-click on the Archive and select “Show Whole Samples” ② Amendment of Sample Databases • Users can modify or correct the information in Sample Databases by right-clicking the Sample Database in the Archive and click “Amendment of Sample Info.” • After the amendment, click “Save” to save the current information in the Database, and click “Print Barcode” to print the barcode for the modified sample information. • Users may cancel the modification by clicking “Cancel” before save. CAUTION! Users CANNOT print out the barcode without executing save first. 20 All Rights Reserved www.MD-Best.com SBMS 2.0 User Manual ③ Deletion of Sample Databases • Users can delete Sample Databases by right-clicking the Database in the Archive and click “Delete Sample Info.” to open a warning window. Click “Yes” to delete the Sample Databases permanently. CAUTION! When the sample databases are deleted, users CANNOT restore the databases. 4) Registration ① Fill in each categories with information of the sample • Users can register Sample Databases by clicking on “Registration” from Main Menu to open “Prescription Registration” window • Users can put information of the sample in “Prescription Registration” window. • Categories with “*” is required to fill in. • Users can also search Sample Databases by scanning the barcode from the sample to fill barcode values in “Barcode Input” and clicking on search. 21 All Rights Reserved www.MD-Best.com SBMS 2.0 User Manual • Users can fill in “Sample Type” manually, however users can also assign Sample Types in Config to select them by scrolling down. • Users can also assign Diagnosis Names in Config to select them by scrolling down. • When users click on any boxes for “Location”, values will automatically appear, which are the values from the last registration, therefore users can follow the last Sample Database registration. • If users have selected assigned sample type in “Sample Type” category, values from the 1st box in “Location” will be automatically set according to the assigned Sample Type number. Attention! Preregistration (assigning) of Sample Types in Config is recommended. It is much simpler to manage the “Location” values from the vast amount of Sample Databases in this way. • Click “Help” to read the description for each box for “Location”. • Values from 1st box defines the type of samples. • Values from 2nd box defines the type of deep-freezer. (Deep-freezer ID) • Values from 3rd box defines the location of VacTube Box inside the deep-freezer. • Values from 4th box defines VacTube Box ID. • Values from 5th box defines the location of the sample inside the VacTube Box. 22 All Rights Reserved www.MD-Best.com SBMS 2.0 User Manual • If the user sets “Location” values identical to other sample which has already been registered, an error occurs. • In this case, click “OK” to continue the registration process. Attention! Errors occur, if users do not fill in mandatory categories with “*” Please, make sure to fill in mandatory categories with “*” before save. Mandatory categories are “Patient ID”, “Sample Type”, “Location”, “Total No.of(segments)”, and “Total sample volume” • For “Adi. Info. #”, users can add their own categories by registering categories in Config. ② Click “Save” to save current information ③ Click “Print Barcode” to print 2D barcode from Label Printer ④ Attach the printed label to ⑤ Confirm the registered sample database displayed on the uppermost row in the Archive 23 All Rights Reserved www.MD-Best.com SBMS 2.0 User Manual 5) Search ① Click “Search” from Main Menu to open “Prescription Search In Detail” window ② Fill in the categories which will be the condition to search ③ Click “Search” to find matched sample databases based on the categories that are filled in ④ Confirm the matched sample databases In order to return to whole list of samples… ⑤ Click “Search” from Main Menu to open “Prescription Search In Detail” window ⑥ Empty all the categories blank ⑦ Click “Find all” to return to the whole list in the Archive • In order to search Sample Databases in a certain date, only first blank next to “Date” needs to be filled with the specific date. • In order to search Sample Databases in a certain age, only first blank next to “Age” needs to be filled with the specific age. • For all the categories except “Age”, “Sex”, and “Remote”, search system allows users to find any Sample Databases containing the word(s) that the users filled in, within the category. For example, if the user typed “This is” in “Adi. info. 1” category, the user will find any Sample Databases such as Databases containing “This is Sample”, and “This is a test” in their “Adi. info. 1”, if there are such Sample Databases. 24 All Rights Reserved www.MD-Best.com SBMS 2.0 User Manual 6) Pulling Information of the sample ① Click “Pulling” from Main Menu to open “Pulling Record” window ② Scan the 2-D barcode attached on the VacTube ③ Click “Search” to bring out the information of the sample • In case the user is not able to scan the barcode on the VacTube, user can either manually type in the location code written on the barcode label and click “Search”, or select the Database among Sample Databases in the Archive, then right-click, and select “Pulling” to open “Pulling Record” manually. 25 All Rights Reserved www.MD-Best.com SBMS 2.0 User Manual ④ Fill in the categories under “Pulling Record” ⑤ Click “Save” ⑥ Confirm the pulling information Records of pulling • Temporary Records of Pulling is available until the user closes the window. • An error occurs, if there are not enough segments to pull. • Users can always check the pulling records of samples in “Pulling Record” window. • In order to amend or delete pulling records in “Pulling Record” window, right-click on the records at the bottom, and select “Delete Sample Info.” or “Amendment of Sample Info.” • When the user select “Delete Sample Info.”, a confirmation window will be shown. • Click “Export to Excel” to export the Temporary Records Of Pulling to Microsoft Excel Spreadsheet. • Select “Yes” to delete the selected pulling records permanently. 26 All Rights Reserved www.MD-Best.com SBMS 2.0 User Manual • Clicking “Export to Excel” will automatically be saved as “Pulling Record + Pulling Date.xls” in SBMS2.0/EXCEL folder. • When segment pulling is executed, “Pulling Record” values in Sample Databases change from “N” to “Y” 7) Export to Excel ① Click “Export” from Main Menu to transfer the databases in the Archive to Microsoft Excel Spreadsheet ② Confirm the data transferred to the Spreadsheet • In the “Pulling Record” window, clicking “Export to Excel” will open the Microsoft Excel with the pulling records. In addition, there is also a function to export corresponding databases to Excel Spreadsheet in Main Frame. • Clicking “Export” will also automatically be saved as “Sample Information + Current Date/Time.xls” in SBMS2.0/EXCEL folder. 27 All Rights Reserved www.MD-Best.com SBMS 2.0 User Manual 8) Configuration ① Click “Config” from Main Menu to open “Configuration” window Assigning Sample Types ① Fill in “Sample Type” category with a title for the sample type ② Put a number to represent the sample type in “Shorten Number” category ③ Click “Add” to assign a sample type Assigning Diagnosis Names ① Fill in “Diagnosis Name” category with a title for the diagnosis ② Click “Add” to assign a diagnosis name 28 All Rights Reserved www.MD-Best.com SBMS 2.0 User Manual Setup Additional Information ① Fill in any “Adi. info. #” under “Adi. Information” with a title for the additional information ② Click “Save” to assign an additional category Create or change current ID and Password ① Type current ID in “Current ID” and current Password in “Current P/W” under “Account Management” ② Fill in “New ID” and “New P/W” ③ Click “Activate!” • If there is no current ID or P/W, leave “Current ID” or “Current P/W” category blank. • New ID and Password will be effective on next login. • For setting no ID or Password, leave “New ID” or “New P/W” category blank. All Rights Reserved 29 www.MD-Best.com SBMS 2.0 User Manual 30 All Rights Reserved www.MD-Best.com SBMS 2.0 User Manual 31 All Rights Reserved www.MD-Best.com MicroDigital Co., Ltd. #A-101, Korea Bio Park B/D, 694-1, SamPyung-Dong, BunDang-Gu, SungNam-Si, GyungGi-Do, 463-400, Korea Tel : +82-31-628-2200 / Fax : +82-31-628-2222 [email protected] / www.MD-Best.com