1
Back To Tutorial Main
User Manual For Registered Funeral Director (Cremation)
Step 1:
Step 2:
Step 3:
Step 4:
Step 5:
Step 6:
Step 7:
Step 8:
Step 9:
Step 10:
Homepage (Main)
Information About Cremation
Online Registration For Cremation
Cremation Booking Schedule
Deceased Details
Confirmation Page
Confirm Transaction Page
Payment Page
Acknowledgement Of Payment
Printing Of Acknowledgement Of Payment
Step 1
Homepage
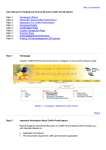
Choose "Cremation" (As shown in Diagram 1) if you wish to make a cremation
booking.
Diagram 1. Homepage for Registered Funeral Director
[ Top ]
Step 2
Important Information About Cremation
Read through the ‘Important Information on Cremation’ page which provides you with
important details on:
·
·
·
the documents required for cremation application process,
the coffin size,
the collection of cremated remains and
·
rules and regulations
Diagram 2. Important information for Cremation session applications.
·
Click ‘I Agree’ if you agree with the conditions.
[ Top ]
Step 3
Online Registraton For Cremation
Fill in the details in the application page as shown in Diagram 3. Fields marked with
asterisk (*) are mandatory.
Diagram 3. Online registration for Cremation session
·
Enter Death Certificate No. and Cremation Permit No.
·
If the death certificate is not issued in Singapore, enter the Cremation Permit No.
issued in Singapore by Port Health Office.
·
If it is issued in Singapore, click on the check box provided. The Death Certificate
No. will automatically be reflected as the Cremation Permit No.
·
Select the religion of the deceased.
·
Click on the ‘Next’ button to continue.
[ Top ]
Step 4
Cremation Booking Schedule
You are now required to select a cremation session. (Refer to Diagram 4).
Diagram 4. List of available Cremation sessions
·
The Crematoria for which bookings can be done are listed as shown in the
diagram.
·
Available Cremation Sessions for the next 7 days from application date, including
application date will be listed. To select a date, click on the Cremation Date dropdown list.
·
Click on the “Cremation Fee” link to view the Cremation Fee details.
·
Click on the “Refresh” link to get the current status on the available sessions for the
selected cemetery.
·
Click on the “Previous” button to go back to Application page.
·
Click on the “Next” button to continue.
[ Top ]
Step 5
Deceased Details
Fill in the deceased details as shown in Diagram 5. Fields marked with asterisk (*) are
mandatory.
Diagram 5. Deceased Details page.
·
Only valid Singapore NRIC numbers should be entered in the NRIC No. field. The
NRIC number should be in S9999999X format.
·
The Birth Date and Death Date should be entered in DD/MM/YYYY format.
Alternatively, click on the calendar icon next to the field to open the calendar and
select a date.
·
The description field for cause of death is a required entry. Please enter
description as shown in the Death Certificate.
·
Click on the “Next” button to continue.
·
Choose “Not Applicable” for the Infectious Death field, if the deceased died of
causes other than HIV and SARS.
·
Note: Payment information is based on the deceased Birth and Death date, and it
should be entered correctly for the accurate calculation of payment.
[ Top ]
Step 6
Confirmation Page
A confirmation page will display. Verify all the details and click “Confirm” to proceed.
For amendments, please click “Previous” to amend.
Diagram 6. Confirmation page.
·
Verify the Payment details, Cremation session, deceased details on the page. If
the fee and GST amount are not correct, then check the deceased age (Date of
Death, Date of Birth) entered on the earlier pages.
[ Top ]
Step 7
Confirm Transaction Page
Once application has been confirmed, you will have to now select the payment mode.
(Refer to Diagram 7).
Diagram 7. Confirm Transaction Items page.
·
Presently, eNets(Credit Card, Debit Card and Internet Banking) is the mode of
payment available, and it is selected by default.
·
In this page, to continue to pay for the application, make sure the check box is
checked “on”, and then click on the “Compute Payment” button. At least one
payment should be checked “on” to make payment.
·
To make another booking or register coffin permit applications before payment,
click on the “New Booking” function to bring you back to the Home page. The
current application will be saved for later payment.
·
After verifying all details and are ready to make payment, click on the “Compute
Payment” button.
[ Top ]
Step 8
Payment Page
Verify the payment mode.
Diagram 8. Confirm Payment page.
·
Click on the “Pay Now” button to make payment. This will bring you to the payment
gateway where the payment is made using the bank interface. The payment is
made for the total amount shown. Partial payment or different modes of payments
are not allowed.
·
To make payment for only a selected applications registered, Click on the
“Previous” button to go to the “Confirm Transaction Items” page again.
[ Top ]
Step 9
Acknowledgement Of Payment
Once payment has been successfully made, the “Acknowledgement of Payment” page
will be displayed. Refer to Diagram 9
Diagram 9. Acknowledgement of payment page
·
When you see this page, it means that the payment and booking/application has
been successful.
·
The receipt number is shown on this page together with the rest of the important
application details.
·
Quote the “Registration No” shown on the first line to refer to the
booking/application when you approach the counter at the booking office.
·
Click on the “Print Acknowledgement of Payment” button to open a printable
version of the acknowledgement of payment. Print the page for future reference.
·
To start a new booking/application, click on the “New Transaction” button.
[ Top ]
Step 10
Printing Of Acknowledgement Of Payment
Diagram 10. Acknowledgement of payment.
·
Click on the “Print” button to print the Acknowledgement of Payment.
·
Click “Close” button to close the pop-out browser window.
[ Top ]
Back To Tutorial Main