1
2. Getting Started
2.1.Connections
2.1.1.Signal Connections
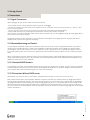
When setting up your processor, make connections as follows:
- Do not power the unit until the input and output connector are plugged.
- Connect the output(s) from the sound source (mixer) to the Ch. 1 XLR input connector (mono) or both, Ch. 1 and Ch. 2 XLR
input connectors (stereo).
- Connect the output XLR connector(s) to the input connector(s) of the selected power amplifier(s).
- Always make sure that your power amps are the last item turned on and the first turned off.
Once all of the connections have been made, and the device is powered up, you can navigate through the entire signal path of
your processor from the front panel.
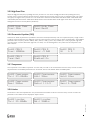
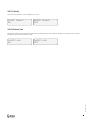
The display provides you with a clear and concise overview of each aspect of the signal path from the input (left side of
display) to the output section (right side of display).
2.1.2.Remote Monitoring and Control
For the quickest and easiest results we recommend to install and use the PC or MAC configuration software. It provides a
complete and comprehensive tool to make your loudspeaker configuration settings, and to manage your presets.
When
connecting the unit via USB, make sure to connect it directly to your computer or to use a USB hub that supports USB 1.0.
If you have problems with the USB connection, please refer to the Installation Guide for details on how to install the proper
driver.
When connecting the unit via an Ethernet network, you have several options. The PC/MAC application has an auto-discovery
tool that will automatically connect to any unit found on the network.
Please refer to the Software Manual available on our
website for details on the control software.
2.1.2.1.Standard DHCP Network
For the easiest connection, use a standard Ethernet Router, plug in the unit and your computer, and the connection should be
made automatically. Standard routers have a DHCP server built in and enabled. A DHCP server assigns a network address to
your computer and to the TEOd8, allowing them to connect automatically.
2.1.2.2.Connection Without DHCP server
Alternatively, you can use a direct (cross) cable or a simple Ethernet Switch to connect the unit to your PC or
UM_TEOd8_v1_DEF
MAC. Please note that in this case, especially Windows computers may take up to several minutes to assign themselves a
network address (indicated by the text: “This connection has limited or no connectivity”). The computer and the TEOd8 both
will assign themselves a network address in the ZeroConfig range (169.254.0.0 - 169.254.255.255), and the TEOd8 will be
discovered automatically by the PC/MAC application. To facilitate connections without DHCP router, it may be convenient to
set your computer to a fixed IP address. If you do this, please choose any address in the ZeroConfig range, and set the subnet
mask to 255.255.0.0.
8