1
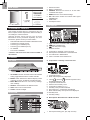
To activate the outdoor temperature and humidity
auto-scan function:
1. Press SELECT to navigate to the Temperature or
Humidity Area.
will show next to the Area.
2. Press and hold MODE to activate auto-scan. The
temperature and humidity display will scroll from
indoor to ch1 through to ch3.
3. Press any key to stop the auto-scan.
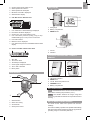
To view humidity (Humidity, Dew point) readings:
1. Press SELECT to navigate to the Humidity Area.
will show next to the Area.
2. Press UP / DOWN to select the channel.
3. Press MODE repeatedly to toggle between the
humidity / dewpoint displays.
4. Press MAX / MIN to toggle between current / MAX /
MIN displays.
NOTE Channel 1 is used for the outdoor temperature
and humidity sensor. Additional temperature and humidity
sensors can use other channels.
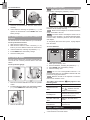
WEATHER FORECAST
This product forecasts the next 12 to 24 hours of weather
forecast within a 30-50 km (19-31 mile) radius.
The timestamp is displayed accordingly in the Clock
Area.
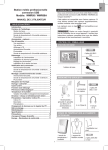
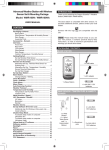
Weather Forecast Area
ICON
DESCRIPTION
To clear the memories and timestamp for the
temperature, humidity and dew point readings:
Sunny
In the Temperature or Humidity Area, press and hold MAX
/ MIN to clear the readings.
Partly cloudy
NOTE The dew point advises at what temperature
condensation will form.
Cloudy
TEMPERATURE AND HUMIDITY TREND
Rainy
The trend lines are shown next to the temperature and
humidity readings. The trend is shown as follows:
RISING
STEADY
FALLING
Snowy
WIND CHILL / DIRECTION / SPEED
TEMPERATURE AND HUMIDITY
The weather station displays indoor and outdoor
readings for:
1. Temperature / relative humidity (current / maximum
/ minimum)
2. Trend line
3. Wind chill (current / minimum) and dew point level
(current / maximum / minimum)
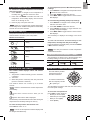
The base station provides
wind speed and wind
direction information.
To read the wind direction
find the compass point the
is pointing to.
The weather station can connect up to 3 remote
sensors.
The timestamp records the date and time when storing
the wind speed readings.
NOTE Channel 1 is dedicated for outdoor temperature
and humidity.
To select the wind speed unit:
shows which remote sensor ’s data you are
viewing.
Press UNIT to switch between:
• Metres per second (m/s)
• Kilometers per hour (kph)
• Miles per hour (mph)
• Knots (knots)
appears when indoor data is displayed.
The timestamp records the date and time when storing the
temperature and humidity readings in memory.
To select the temperature measurement unit:
Press UNIT to select °C / °F.
NOTE The unit of all temperature related displays will
be changed simultaneously.
7
EN
To view temperature (Current / Max / Min temperature)
readings:
1. Press SELECT to navigate to the Temperature Area.
will show next to the Area.
2. Press UP / DOWN to select the channel.
3. Press MAX / MIN to toggle between current / MAX /
MIN displays.
AUTO SCANNING FUNCTION