1
SIGN UP
Via the G-Connect website
1
Go to www.gconnect.co.za.
2
On the Home Page click on the Sign Up button.
SIGN UP
3
Complete the info requested in the Sign Up form.
4
Select Next.
5
Complete/Select the notifications you wish to receive.
6
Agree to the T&C’s.
7
Select Submit.
Easy as Pie! You now have your very own G-Connect account!
SIGN UP
Via the Connection Manager
1
Open the Connection Manager applet.
2
Click on the Sign Up button.
3
Complete the info requested in the Sign Up form.
SIGN UP
4
Select Next.
5
Complete/Select the notifications you wish to receive.
6
Agree to the T&C’s.
7
Select Submit.
See! We told you the Connection Manager does the thinking for you!
You now have your very own G-Connect account!
TOP-UP
Via the G-Connect website
1
Go to www.gconnect.co.za
2
Login to your account by entering your username and password.
3
Select the Top-Up function from the menu bar.
4
Complete the Top-Up details form.
5
Select Submit
6
Confirmation of your account Top-Up along with your current
account balance will be displayed.
7
Close the dialog box and go surfing!
TOP-UP
Via the Connection Manager
1
Open the Connection Manager applet.
2
Click on the Top-Up button.
3
Select the payment method of your choice and click on Next.
4
Enter your payment details and select Next.
TOP-UP
5
Agree to the T&C’s.
6
Select Submit.
TOP-UP
8
You will be asked to confirm your Top-Up amount.
Select Yes.
9
Confirmation of your account Top-Up along with your
current account balance will be displayed.
10
Select Finish and go surfing!
Router Settings
ADSL
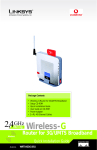
This is the basic 1-2-3 for setting up your ADSL
router. The setup of your specific router might
differ slightly and therefore we would suggest
that you keep the router’s user manual handy.
Ready. Steady. Let’s go!
Let’s start with the Telephone Cable: Connect one
end of the telephone cable to the DSL port on the
router and the other end of the cable into the wall
socket.
We need power! Connect your power adapter to the
power input on the back of the router and then plug
the other end of power adapter into the power socket.
Switch on your router and computer.
The Ethernet Cable goes where? Connect one end
of the Ethernet cable to one of the 4 LAN ports on
the back of the router and attach the other end to an
Ethernet port on your computer.
Access your router: You will need to now consult
your router user manual to find the router’s default IP
address. Open your web browser (IE, Firefox, etc.)
and enter the IP address in the address bar, say a
little prayer and press Enter. You will now be asked
for a username and password. This should also be
available in the router’s user manual.
ADSL
Router settings: As we recommend that you make
use of our Connection Manager, the preferable router
protocol setting is Bridge mode. Ensure that the ATM
PVC settings in your WAN interface are as follow:
Protocol
VLAN
VPI/VCI
Encapsulation
QoS Class
PCR/SCR/MBS
Bridging
Default
8/35
LLC
UBR
4000/4000/10
Should you opt not to make use of the Connection Manager
you will need to set up your router in Router Mode. Ensure that
the ATM PVC settings in your WAN interface are as follow:
ADSL
Protocol
VPI/VCI
Encapsulation
QoS Class
PCR/SCR/MBS
Username
Password
PPPoE
8/35
LLC
UBR
4000/4000/10
[email protected]
GConnect
SIM Activation & Provisioning Process
3G
You can provision your current contract SIM
onto our APN and use the awesome 3G
service. You will still be able to use your SIM
for voice calls. This service is only available to
Vodacom SIM cards, excluding Nashua Mobile,
Autopage Cellular, MTN, Virgin Mobile and Cell
C SIM cards.
3G
1
Go to www.gconnect.co.za
2
Login to your account by entering
your username and password.
3
Select the SIM Provisioning function
from the menu bar.
4
Enter the requested details.
5
Agree to the T&C’s
6
Submit your request.
7
Our call centre will contact you to
confirm and verify your details.
By making use of our Connection Manager, your
set up of your 3G modem is as easy as:
3G
Connect the 3G dongle to your laptop; the drivers
will automatically load and viola!
However, should you prefer not to make use of
the Connection Manager you will have to manually
configure your APN settings.
1
Open your APN wizard
Ensure that the APN and Authentication settings are
as follow:
APN Name:
Username:
Password:
2
www.tsamma.com
GConnect
GConnect
Also make sure that your PAP and CHAP settings
are enabled under your advanced setup options.
Connecting with Wi-Fi at a Hotspot
Wi-Fi
You can connect to the Internet at a Hotspot through one of
two methods:
Connect wirelessly by using the Wi-Fi radio in your device
(laptop/PDA/cellphone) to connect to the Internet via an
access point (AP) and router provided at the Hotspot (in most
cases the AP/router is not visible).
Connect via an Ethernet cable. The Ethernet cable is often
provided in hotel rooms and you canuse it to connect your
laptop to a Wi-Fi access point and router.
Getting Connected using Windows XP
Wi-Fi
Enable your Wi-Fi network option on your laptop
Click on the Start button and select Settings, now select the
Control Panel.
Once the Control Panel has opened select Network
Connections.
Locate your Wireless Network, right click on it and select
Enable.
Your Wireless Network should now be enabled and a Wi-Fi
icon will be displayed in the system tray.
Right click on the Wi-Fi icon and select View Available Wireless
Networks.
Select the WirelessG network and click the Connect button.
You should now be connected to the WirelessG Hotspot.
Open your Internet Browser as if you’re connecting to the
Internet.
A Hotspot venue landing page will appear where you can login
via your G-Connect account.
Getting Connected using Windows Vista
Wi-Fi
Enable your Wi-Fi network option on your laptop
Click on the Start button and select the Control Panel.
Once the Control Panel has opened select ‘View Network
Status and Tasks under the Network and Internet option.
Once the Network and Sharing Center screen is displayed,
select the Manage Network Connections option under Tasks
on the left.
Locate your Wireless Network, right click on it and select
Enable.
Your Wireless Network should now be enabled and a Wi-Fi
icon will be displayed in the system tray.
Click on the Start button and select Connect to.
Click on the Show Dropdown and select the Wireless option.
Select WirelessG and then Connect.
If you receive an alert that states you are accessing an
unsecured network, select the Connect Anyway option.
You should now be connected to the WirelessG Hotspot.
Open your Internet Browser as if you’re connecting to the
Internet.
A Hotspot venue landing page will appear where you can login
via your G-Connect account.
Login on Landing Page
Enter your G-Connect Username and Password.
Once the sign up/verification process has been completed
successfully, a
Session Information screen will pop up that provides information
on the status of your session.
Note: Do not close the session window as this is needed to
log you out. If you close the window before logging out, it’s
likely that your Internet
connection will remain active, resulting in unnecessary
bandwidth/Wi-Fi usage (which will deplete your Wi-Fi account
balance/run up usage on your Wi-Fi account).
You are now free to surf the Internet as you please!
Wi-Fi
Once you have hit the landing page on your web browser you
will need to make use of Option 2 – Logon Using A Service
Provider. Select G-Connect which will be listed as one of your
Local service providers.