1
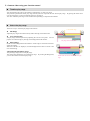
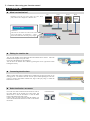
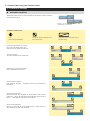
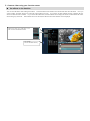
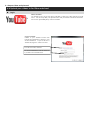
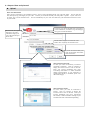
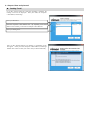
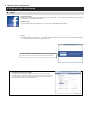
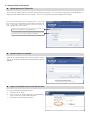
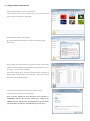
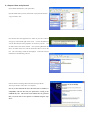
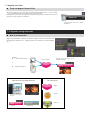
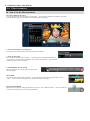
LoiLoScope EX/AX/FX User Manual This manual is for LoiLoScope EX, LoiLoScope AX, and LoiLoScope FX. Please confirm the application you are using. You can also view the user manual for LoiLoScope EX/AX/FX and the camera user manual from within the software. You can view the manual by clicking on the icon at the bottom right of the screen. *You must have an internet connection. The LoiLoScope EX/AX/FX User Manual will be displayed. The PICSIO manual will be displayed for LoiLoScope EX users. The JVC Manual download page will be displayed for LoiLoScope AX users. This button will not be displayed for LoiLoScope FX users. LoiLoScope EX/AX/FX User Manual Table of Contents Things you can do in LoiLoScope EX/AX/FX 1. Start LoiLoScope EX/AX /FX 7 8 1-1 How to run LoiLoScope EX 1-2 How to close 1-3 Open a project 1-4 How to install LoiLoScope AX/FX 1-5 Install Follow the on-screen instructions to install. How to start LoiLoScope AX/FX 2. Learn the basics! 2-1 Tutorial 2-3 Mouse Functions 2-4 How to operate with touch. Minimum system requirements All of the operations can be done with touch Operation is faster and easier with multi-touch 3. Search for video, picture, and music files! 12 13 14 Media browser What is the media browser? Tabs and buttons Back-up Select the back-up folder Selecting multiple files How to select multiple files Deselect Read files 4. Select your favorite scene! 4-1 11 Click Zoom 2-2 3-2 10 Basic operations for LoiLoScope EX/AX/FX 3-1 9 Playing and trimming Play a video 16 17 Button functions Trimming videos and music Rotating pictures Copy thumbnails 4-2 Play on a big screen Play on full screen 4-3 Line up thumbnails Select multiple thumbnails Throw thumbnails 5. Create a video using your favorite scenes! 5-1 5-2 5-3 18 19 20 Timeline What is a timeline? Names of each part Button functions Play range on the timeline Selecting a play range on the timeline Video size Timeline Bar What is a timeline bar? Editing the timeline bar Connecting timeline bars Redo timeline bar movement Copy the timeline bar Splitting the bar with the scissor tool Multiple selection (hold) Multiple selection: right click line (touch) Multiple selection: right click line (surround) Quick image editing Transition settings Automatic transition Manual transition 23 25 5-4 Adjust volume 26 5-5 Video layout 27 5-6 Moving and transforming videos Animate the video position and shape 28 Set the animation in the timeline Functions of each part Animation map and Key Frame Group Key frame Set effects on the timeline 6. Output videos and pictures 6-1 6-2 6-3 Select an output format Various output formats Output range Change the output size and bit rate How to output file Output from the media browser Output from thumbnail Output from the magnet Output to file Output to WMV Output high quality MP4 videos with Smart Rendering Output audio file 6-4 Output file to DVD 6-5 6-7 6-8 6-9 32 33 35 Output file for DVD Export 6-6 31 36 Output videos for iPod, iPhone Upload your videos to YouTube and share! Log In Upload Share your videos by E-mail with Vimeo Log In Upload Send E-mail Upload videos to Facebook Log In Upload pictures to Facebook Upload videos to Facebook Log in with a different Facebook account Burn pictures from your camera to CD/DVD 37 39 42 44 Using Windows7, Vista Using Windows XP 7. Organize your files! 7-1 48 Collect and organize your thumbnails What is a magnet? Functions of each part Collect files with the Collector Magnet Manual slideshow Automatic slideshow Trash can magnet: Remove files 7-2 Organize using the shortcuts How to use shortcuts 51 8. Enter text! 8-1 How to enter text Type of text Enter text Compile text and videos in the timeline 8-2 Change the settings for your text Text setting tray Background settings Text settings Shadow settings 9. Create fun videos with effects! 9-1 How to use the Deco-Pen Use slow mode to write Deco-Pen tools Deco-Stamp How to use the Deco-Stamp Deco-Stamp tools 9-3 52 53 Deco-Pen 9-2 50 Effect pen How to use the Effect pen Effect pen tools (Effect Tray) 55 56 9-4 9-5 Effect animation How to use the Effect animations Effect list 10. Option Settings GPU DVD Picture Out Background Advance Setting Save Location License Language 11. Learn the names of each part 11-1 11-2 List of Home menu icons LoiLoScope AX (for Windows) System requirements LoiLoScope FX (for Windows) System requirements 14. LoiLo User support 14-1 65 LoiLoScope EX (for Windows) Recommended system requirements for editing 64 Keyboard shortcuts 13-3 63 List of keyboard shortcuts System requirements for editing 62 Home Menu functions 13-2 60 Functions of each part 13. System requirement for LoiLoScope EX/AX/FX 13-1 58 Names of the objects on the desktop 12. Master the keyboard shortcuts! 12-1 57 User support window 67 Things you can do with LoiLoScope EX/AX/FX Things you can do with LoiLoScope EX/AX/FX Page Camera Display full screen 18 Slideshow 49 Select and watch the scenes you want 17 Connect videos and watch 20 You can save files from the media browser to your PC. 15 Share pictures and videos on Facebook 42 Easily upload Videos to YouTube ~ Connectivity with Facebook/Twitter 37 Share videos by e-mail (Vimeo) 39 Create files for DVD ~Connectivity with Windows DVD Maker 35 Send videos to iTunes 34 Various tools and effects 53 Add text and music 51 High quality videos with Smart Rendering 33 Edit by touch 13 View pictures and videos Back up to your PC Share videos with friends Easy Editing Windows 7 multi touch 1. Start LoiLoScope EX/AX/FX Start LoiLoScope EX (LoiLoScope AX/FX users should refer to section 1-4 and beyond.) 1-1 How to run LoiLoScope EX Select LoiLoScope EX from the Auto-run menu after you connect the PICSIO to your PC. If LoiLoScope EX is not displayed in the auto-run menu, click "Open folder to view files" and double click on the LoiLoScope EX icon to run. If the auto-run window is not displayed From the "Start menu", click on "Computer" and open the windows explorer. Double click the "PICSIO_APP Removable disk" and then double click on the "LoiLoScopeEX.exe" to run LoiLoScope EX. 1-2 How to close When LoiLoScope EX is in full screen mode, click the “X” on the top-right corner to close the program. In modes other than full screen mode, click on the “X” to close the window. From Left: Minimize / Restore Down / Close 1-3 Open a project To open previously saved projects/desktops, click the desired project/desktop in the home menu. 1. Start LoiLoScope EX/AX/FX 1-4 How to install LoiLoScope AX/FX Install Insert the LoiLoScope AX/FX installation CD in to your PC. Double click on the LoiLoScopeAX/FX.msi installed within the CD. Follow the on-screen instructions to install Once the welcome screen for the displayed, click "Next". LoiLoScope AX/FX setup wizard has been Check the folder the software will be installed to, then click "Next". Click "Next" at the installation confirmation screen. 1. Start LoiLoScope EX/AX/FX If the User Account Control screen appears, click "Yes" (for Windows 7). Please wait while the installation finishes. When the confirmation screen is displayed after the installation has finished, click "Next" to finish the installation. 1-5 How to start LoiLoScope AX/FX Start the software by double-clicking on the LoiLoScope AX/FX shortcut on your desktop. The operation methods for LoiLoScope AX/FX are the same as LoiLoScope EX. Please use this as a standard manual from section 1-2 (How to close) forward. 2. Learn the Basics! 2. Learn the Basics! 2-1 Basic Operations for LoiLoScope EX/AX/FX Click Zoom Click and hold the desktop and move By dragging the background, you can move the desktop as you please. You can also zoom in and zoom out by scrolling up/down with your mouse wheel. Zoom In or Out with a Click Just click an object you want to zoom in on. By clicking on an object it will zoom in for prioritized viewing and begin to play. Click on a thumbnail you wish to edit Click on the background for mid-zoom When zooming on a timeline or thumbnail, by clicking on the background or the zoom out button on the upper right portion of the object, it will zoom out to “mid-zoom”. If the desktop is already set at full desktop view, click on a certain area in the background for a closer “mid-zoom” around the selected area. Click the zoom out button for "mid-zoom". Click the background after you have finished editing. Click the background for a full desktop view When in “mid-zoom” view, you can click on the background again in order to go into full desktop mode which will enable you to view all thumbnails, timelines, and magnets on the desktop. Zoom In Mid-Zoom 2. Learn the Basics! 2-2 Tutorial Please begin with the tutorial. By gaining first-hand experience with the functions and features of LoiLoScope EX/AX/FX, it will make things much easier to learn. From the Home menu at the top of the screen, click on desktop, and then tutorial. The tutorial will not only explain, but guide you through the general works of the enhanced video editing software. Tutorial button 2-3 Mouse Functions Play videos and music with mouse over Thumbnails of videos, pictures, and music files will be displayed on the desktop. When the mouse cursor is simply placed over the thumbnail, it will begin playing the file. One-click will allow editing of the thumbnail. Files can be edited and even deleted within the desktop, but will not affect the original file. However, if the original file is moved around in windows or is deleted, it will no longer work in the LoiLoScope EX/AX/FX desktop unless a proper workaround has been conducted. Mouse over Play a thumbnail Click Edit thumbnail Select magnet Edit timeline Mid-Zoom Full desktop view Drag Scroll the desktop Scroll the timeline window Right-Click Multiple selection of thumbnails Multiple selection of magnets Multiple selection of timeline bars Shortcut Mouse-Wheel Zoom In/Out of screen Scroll the media browser Fast-Forward/Rewind video preview of media browser Zoom In/Out for timeline bar in timeline window Change thickness of effect pen 2. Learn the Basics! 2-4 How to operate with touch System requirements To edit using touch in LoiLoScope EX/AX/FX, you will need Windows 7 Home Premium or above, and a monitor that supports multi-touch. All the functions can be done by touch You can enjoy video editing by touching the screen. By touching the screen directly, you can add drawings and hand written messages directly on to the video, and arrange the screen by moving the videos without using the mouse. Touch the screen to edit videos, music, and pictures with your friends and family to create memorable projects together. Operation is faster and easier with multi-touch 1. Zoom using 2 fingers You can zoom in and out of the screen by pinching the desktop with 2 fingers. 2. Rotate, Expand, and minimize videos on the timeline You can zoon, rotate, and move videos and pictures on the timeline by operating the screen with 2 fingers. 3. Touch to screen to draw By touching the screen, you can easily add hand written messages and drawings to your videos. You can operate the software by touch, the same way you would use the mouse. 3. Search for video, music, and picture files 3. Search for video, music, and picture files 3-1 Media browser What is the media browser The media browser displays the videos, music, and pictures files you can edit in LoiLoScope EX/AX/FX. Select the JVCCAM or PICSIO, back-up, music, pictures, encode to, tab to display the files in each folder. Mouse over a thumbnail to preview the file. The JVCCAM and PICSIO tab contains videos and pictures that you have taken with your camera, and can be directly added and edited in LoiLoScope EX/AX/FX. Click or drag the file you want to edit. The media browser contains useful tools to manage your files. You can back up the file on to your PC from the camera, output to a different file format, upload it to the web, and manage files you previously edited or saved in LoiLoScope EX/AX/FX. You can display the media browser at any time by clicking the icon on the bottom right. By clicking the folder of the shooting day, you can display the files on the right. You can view a preview by placing your mouse over the thumbnail. During the preview, you can fast forward/rewind with the mouse wheel. Click to read file Click on the file to read. 3. Search for video, music, and picture files Tabs and buttons *The JVCCAM tab will be displayed as "PICSIO" in LoiLoScope EX. Displays the video, picture, and audio files organized by date. Displays the contents of the back-up folder Displays music from the My Music folder, and pictures from the My Pictures folder Back-up Save the data from your camera on to your PC By using the media browser, you can save the data from your camera to your PC. Select the files you want to save (click the check boxes on the bottom-left corner, or use multiple select), and then click the back-up button. Check the file size, and then click "Yes" to save the files to a designated folder on your PC. The files that you have backed up on your PC will be displayed in the Back-up tab. If you click the back-up button without selecting anything in the media browser, all the files that have not been backed up from your camera will be saved on to your PC. *A warning message will be displayed if there is insufficient space available to back up files on the drive. Please check the available space on your hard drive. Selecting the back-up folder You can select which folder you want to back up your camera data to. Click on Options inside the Home menu at the top of the screen, and select "Save Location" from the menu on the left. In order from the left: back-up, close, and zoom out button File Delete button A "Delete file" button will be displayed on all tabs excluding the JVCCAM tab. This button will permanently delete the selected file from your PC. This action cannot be done, so please do so at your own discretion Folder bar By clicking the folder bar, you can select all the thumbnails that are within the folder. You can read all of the files by dragging and dropping it on the desktop Displays files created in LoiLoScope EX/AX/FX Click on the grey button on the left of the directory to select a folder. 3. Search for video, music, and picture files 3-2 Selecting multiple files How to select multiple files You can select multiple files in the following ways: While holding down the right mouse button, drag the red line over or around the files you wish to select Click the check box on the bottom left of the file Click the folder bar to select all the files within that folder Hold the shift key, and click on the folder bar and select multiple folders You can select multiple files by dragging the red line after selecting the multiple selection button at the bottom left of the screen. Deselect You can deselect files in the following ways: Click the check box on the bottom left of the file to deselect the selected file Right click the file while holding the Ctrl key While holding down the Ctrl key, hold the right mouse button and deselect multiple files by dragging the red line over or around the files you wish to deselect Read Files You can read the files from the media browser by dragging and dropping the file on to the desktop. You can read all the files from a folder by dragging and dropping the folder bar. Dragging and dropping the folder bar will attach the files to a magnet. Quickly move files to the magnet or timeline with the shortcut You can quickly send files from the media browser or desktop to the desired magnet or timeline using the shortcut. To use the shortcut, right click the file, or click the shortcut button on the bottom left of the screen. *See 7-2 for more information about how to use the shortcut 4. Select your favorite scene! 4. Select your favorite scene! 4-1 Play and trimming Play a video To play a thumbnail, place your mouse cursor over the thumbnail (mouse over). The video should start playing. Click the video and the video will zoom to an optimal size and display the editing tools. Button functions Border color is the same as the magnet サムネイル再生ウインドウ Delete thumbnail Display original file Zoom out Tray switch Play/Pause In point Out point Play Volume In point button Fast forward Rewind File name Out point button Play speed Copy button Cut out a picture 4. Select your favorite scene! Trimming videos and music Editing thumbnails is simple. Move the "in" and "out" points to select your favorite scene. If you would like to select multiple scenes from the same file, click the thumbnail copy button, and adjust the "in" and "out" points again. Rotating pictures When viewing picture files, you can rotate the picture 90, 180, and 270 degrees from the setting tray if the picture is rotated incorrectly. Select the amount of rotation from the rotate pull down menu displayed in the setting tray to the left of the thumbnail to rotate your picture. Copy thumbnails Once you have selected your scene with the "in" and "out" points, click the thumbnail copy button to copy the thumbnail. In the copied thumbnail, the "in" and "out" points will be saved. Copy button 4-2 Play on a big screen Play on full screen Double click the play screen of the thumbnails to view the video in full screen. You can edit the video while in full screen by bringing the mouse cursor to the bottom of the screen to display the editing tools. You can disable full screen by double clicking again. 4. Select your favorite scene! 4-3 Line up thumbnails Select multiple thumbnails You can select multiple thumbnails displayed on the screen. You can do this by clicking the multiple selection button at the bottom left of the screen or right clicking the mouse to display a red line. Use the red line to draw over or surround the thumbnails you wish to select. You can use this to send multiple files to a timeline or magnet. You can select multiple thumbnails by clicking the multiple selection button or right clicking the mouse to display a red line to draw over or surround the thumbnails you wish to select. The selected thumbnails will be translucent. Throw thumbnails Throw thumbnails on the screen to organize your desktop like organizing documents on a table. Drag and release the thumbnail, and the thumbnail will glide over the screen. You can use this to separate your video files from your picture files. 5. Create a video using your favorite scenes! 5. Create a video using your favorite scenes! 5-1 Timeline What is a timeline? Create a base for your project by connecting videos, pictures, and music You can create a timeline by clicking on the timeline icon in the Home menu. The timeline is a "workbench" for to you to connect or compile thumbnails. If you drag and drop a thumbnail in to the timeline window, it will be displayed as a timeline bar. The length of the bar is determined by the length of the video. The bars at the top of the timeline window will be displayed in the front of the play window. Names of each part Full screen play, close, Zoom out Play window Tray switch Click to show/hide the effects setting tray Tool bar Controls the thumbnail Timeline window The "workbench" to connect and compile timeline bars Button functions Return to previous timeline bar Tray switch Volume Rewind Fast-forward Copy button Play speed Play/Pause Change color/title In point Next timeline bar Output size Cut out picture button Play position You can zoom in/out of the Timeline window with the mouse wheel. Out point <Yellow Range> User selected play range <Pink Range> Play range 5. Create a video using your favorite scenes! Timeline play range You can adjust the play range in the timeline by adjusting the "in" and "out" points. The pink bar represents the current play range, and the yellow bar represents the user selected play range. over the in/out point, you can see what time point it is currently at. The video within the pink range will be rendered when uploading or output from the timeline. Select the play range There are 3 ways to select the play range in the timeline By placing the mouse cursor User selected range File Range Adjust the play range to the timeline bar by double clicking on the timeline bar. User selected range The play range selected by the user by adjusting the "in" and "out" points. You can play the user selected range by clicking on the background of the timeline. Play range of all timeline Bars Entire Range Double click the background of the timeline to set the range to include all of the files within the timeline. When all of the files are displayed, click the background once more to return to the user selected range. About the Pink and Yellow ranges The pink range displays the current play range. The yellow range displays the user selected play range. you can return to the user selected play range. By clicking the background, Double click the bar to focus in on the play range. 5. Create a video using your favorite scenes! Video size From the pull down menu in the timeline toolbar, you can change the resolution of your video. The available sizes are different for LoiLoScope EX/AX/FX. LoiLoScope EX 960x540 NTSC QHD size Video format for Japan and the US 960x540 PAL QHD size Video format for Europe 1280x720 NTSC HD quality(720p)Video format for Japan and US 1280x720 PAL HD quality(720p) Video format for Europe 1920x1080 NTSC HD quality(1080p)Video format for Japan and US 1920x1080 PAL HD quality(1080p)Video format for Europe Freely set the size Custom LoiLoScope AX 720x480(4:3) NTSC SD quality Video format for US and Japan. Non-Square Pixel 4:3 720x480(16:9) NTSC SD quality Video format for US and Japan. Non-Square Pixel 16:9 720x576(4:3) PAL SD quality Video format for Europe. Non-Square Pixel 4:3 720x576 PAL SD quality Video format for Europe. Non-Square Pixel 16:9 640x480(4:3) NTSC SD quality Video format for US and Japan. 640x360(16:9) NTSC SD quality Video format for US and Japan. Square pixel 16:9 640x480(4:3) PAL SD quality Video format for Europe. Square pixel 4:3 640x360(16:9) PAL SD quality Video format for Europe. Square pixel 16:9 Square pixel 4:3 Freely set the size Custom Please refer to the table below. LoiLoScope FX 960x540 NTSC QHD size Video format for Japan and the US 960x540 PAL QHD size Video format for Europe 1280x720 NTSC HD quality(720p)Video format for Japan and US 1280x720 PAL HD quality(720p) Video format for Europe 1920x1080 30p NTSC HD quality (1080p) Video format for US and Japan 1920x1080 60p NTSC A smoother HD quality (1080p). 1920x1080 25p PAL HD quality (1080p) Video format for Europe 1920x1080 50p PAL A smoother HD quality (1080p) Video format for Europe. Custom Freely set the size Video format for US and Japan 5. Create a video using your favorite scenes! 5-2 Timeline bar What is a timeline bar? Text Video Picture Music Depending on the file type (video: yellow, text: green, music: pink), each file will be displayed in a different color. text movie02.mp4 video.mp4 picture.jpg Timeline bar The border of the timeline bar will have the same color as the magnet it was connected to. A white border means that it does not belong to any magnet. movie02.mp4 The selected timeline bar will be displayed in blue Editing the timeline bar The "in"/"out" handles will be displayed when the timeline bar is clicked. Move the handled left and right to trim your video. Freely move the timeline bar by dragging it. You can move the timeline bar 1 frame by pressing the left or right arrows while holding the Ctrl key. Connecting timeline bars When you drag and connect a timeline bar to another bar, the bar will notify you by turning yellow. The timeline bar will also turn yellow when adjusting the "in"/"out" points to connect with another timeline bar, edge of the play range, or when the timeline bar is at 0:0:0. Redo timeline bar movement Press Ctrl+Z to undo a timeline bar movement or click on the Undo button at the bottom left of the screen, and Shift+Ctrl+Z to redo the movement or click the Redo button at the bottom left of the screen. Caution: Once you remove the bar from the timeline, you cannot use the undo/redo function to undo or redo the bar movement. Undo/Redo Button music.mp3 5. Create a video using your favorite scenes! Copy the timeline bar Click on the copy button after you have selected the timeline bar you want to copy. The copied bar will appear behind the original. Splitting the bar with the scissor tool Pause the video with the timeline bar selected to display the Scissor tool. split the bar by clicking on the scissor tool. You can Multiple selection (hold) When you want to select the remaining bars, select the timeline bar on the very left of the selection and hold the left mouse button to select all of the bars to the right. While holding the mouse button, drag the bars within the timeline window to move the bars to the left or right. Multiple selection: right click line (touch) While pressing the right mouse button, select multiple bars with the red line by drawing over them. You can also do this by clicking the multiple selection button at the bottom left of the screen. Multiple selection: right click line (surround) While pressing the right mouse button, draw around the files you want to select with the red line. You can also do this by clicking the multiple selection button at the bottom left of the screen. Multiple Selection button Multiple Selection button Quick image editing Once you select multiple timeline bars, a green handle will appear around the selected timeline bars. By dragging the handle to the left or right, you can extend or contract multiple timeline bars. 5. Create a video using your favorite scenes 5-3 Transition settings Automatic transitions When timeline bars touch or overlap each other in the timeline window, a transition will automatically be set. Portions of the bar that overlap will automatically set a transition. Automatic transition rules Cut in (Screen changes immediately) Fade In/Out (slowly interchange) for 20 frames on both ends. Lined up on the timeline (no overlap) The screen will change with a cut in. Fade in/out for 20 frames on both ends. No parts connected All videos will fade in/out on both ends. End of the bar is at the same position. Fade out 20 frames for all videos. Short bar within a long bar. Fade in/out for 20 frames. No difference if the top and bottom bar interchange. Partial overlap Example 1 The transition will vary depending on the placement of the top and bottom bar. The top bar will fade in for the duration of the overlap of the bar. The bottom bar will fade out for 20 frames. Partial overlap Example 2 The top bar will fade out for the duration of the overlap of the bar. The bottom bar will fade in for 20 frames. Fade In/Out (slowly interchange) only the parts that overlap. 5. Create a video using your favorite scenes Manual transition You can manually adjust the automatic transition. Select the timeline bar and click the "Open Transparency/Transition Control Button" displayed on the bottom right (or top right) of the timeline bar. Click the fade editing button to display the controller. Return to Auto-Transition Mode Set the transparency of the fade in start point, fade out end point, transparency of the video, fade out start point, and the transparency of the fade out end point. When you finish with the settings, click the transition button again, or click on the background to close the controller. Click the "Return to Auto-Transition Mode" to cancel the manual transition settings. Fade in end point Move the slider back and forth to set Opacity 100% Fade in start point transparency Move the slider up and down to set Opacity 0%~100% Move the slider up and down to set Return to Auto-Transition Mode Fade out start point Move the slider back and forth to set Fade out end point transparency Move the slider up and down to set Return to auto-transition 5-4 Adjust volume You can adjust the volume of your video manually. Select the timeline bar and click the "Open fade and volume control panel" button displayed on the bottom right (or top right) of the timeline bar to display the controller. You can adjust the volume settings for the fade in start point volume, fade in end point, volume during play, fade out start point, and the fade out end point. Once you are done with the settings, click the background or the volume adjustment button to close the controller. Fade in end point Move the slider back and forth to set Fade out start Point Move the slider back and forth to set Volume 100% Fade In Start Point Move the slider up and down to set Volume 0%~100% Move the slider up and down to set Fade out end point Move the slider up and down to set 5. Create a video using your favorite scenes 5-5 Video layout Move and transform your video You can transform and move videos, pictures in the play window or by clicking on the timeline bar. Move object Move handle Expand/Contract handle Rotate handle The color of the border will be the same color of the magnet that the timeline bar is from. Change the size and rotate the video. To reset the video, double click on the border, or the reset button. Reset Return the object to its original position Rotate 90 degrees clock/counter-clock wise Rotate 90 degrees to the left or right Fit Adjust the video to fit in the play window 5. Create a video using your favorite scenes 5-6 Animate the video shape and position Set the animation in the timeline You can set the animation to move videos, pictures, and text, and the strength of the effect in the timeline. each object on the timeline. If you turn the animation button off, the recorded animations will be disabled temporarily. You can set the animation for Functions of each part While recoding an animation, the play window will be minimized. place objects outside of the margins. You can Freely move objects Click the tray switch to open the effect tray. Select the timeline bar you would like to animate. starting point for the timeline bar. In the play window, select a Click the source tab located on the left. Turn on the animation layer button in the effect tray. An animation map for "Scale", "Shift", and "Rotate" will appear in the timeline window. Scale Shift Rotate Scale Shift Rotate Move the object in the play window while the video is playing to record a key frame group (blue line) under "Shift". 5. Create a video using your favorite scenes Animation map and key frame groups By moving the object within the play window, you can record a key frame group within the map. < Play Window > Rotate Scale Shift Depending on the adjustments, you can record key frames for each group. < Animation Map > Selected timeline bar Video/Picture/Music Scale Shift Move back and forth Rotate Length of video Delete line Drag and drop the line in to the margin to delete Key Frame You can create smooth animations by using the key frame instead of moving the object by freehand. Select the start and end point of the object, and the animation will be created automatically. Create smooth animations from the start point to the end point < Start Point > Pause the video and select the necessary key frames. You can create animations for scale, move, and rotate separately. Move the key frame back and forth or drag it into the margin to delete the key frame. <Start Point> Pause the video, and click the key frame button. Scale Shift Rotate < End Point > Pause the video and select a point in the play window you would like the object to end the animation. You can select the end point from the key frame first. <End Point> key frame start point Scale Shift Rotate key frame end point 5. Create a video using your favorite scenes Set effects in the timeline You can also add effects while editing the timeline. Select the timeline bar and then select the desired effect from the menu. Once you select an effect, the effect setting tray on the left of the timeline will open. If you select an effect without selecting a timeline bar, the effect will affect the entire timeline. If you set the effect afterwards, click the timeline bar to display the effects for that timeline bar in the effect setting tray on the left. If the timeline bar is not selected, the effects for the whole timeline will be displayed. Choose the effect you would like to set. The “X” button will delete the effect. Tray Switch You can show/hide the tray. 6. Output videos and pictures! 6. Output videos and pictures 6-1 Select an output format Output in various formats After you have finished editing your files, you can output your files and save them. Select the icon depending on how you will use the file. ・ For viewing videos on PC - MP4, WMV output ・ For viewing videos on iPod, DVD or other devices - Export, DVD output ・ To show the world your video or to store your videos – YouTube ・ Share private videos through e-mail - Vimeo ・ Share pictures and videos on Facebook - Facebook Output range When outputting video from a thumbnail or timeline, the video between the "in" and "out" points will be output. Please make sure you have the correct range selected for output. Changing output size and bit rate Change the video size from the pull down menu. also directly enter the size. You can Change the frame rate of the output video. Select the video play speed between 10% - 2000% from the pull down menu. You can also directly enter the speed. 6. Output videos and pictures! 6-2 How to output file Output from the media browser Select the file you would like to output from the media browser. Click the file format you would like to output your video to, and your selected video files will be thrown in to a magnet on the desktop. Adjust the settings for your output format, and click "Ok" to begin output. Output from thumbnail While the thumbnail on the desktop is selected, choose a format you would like to output your video to from the Share menu. Output from a magnet While the magnet on the desktop is selected, choose a format you would like to output your videos to from the share menu. All your music, video, and picture files attached to the magnet will be output to the selected file format. You can also use this to batch encode multiple videos to a single format. 6. Output videos and pictures! 6-3 Output to file Output to WMV WMV files are high quality despite their file size. WMV files are the standard video file for Windows. Adjust the settings in the dialog window and output. To designate an output folder, please refer to the section on option settings in the Home menu. Select output format You can adjust the settings for the output file Select picture quality: Move the slider to adjust the video quality. You can choose the quality of the video between the range of 0 - 100. The larger the number, the bigger the file size, but higher quality. Fix file size: Fix the file size of the output video. Fix bit rate: Fix the bit rate of the output video. Change settings Resize: Change the size of the output video. Change frame rate: Change the frame rate of the video. Change speed mode: Change the play speed of the output video. Reset to default setting By clicking this button, all the setting will return to their default settings. (Default setting: Select picture quality: Quality 90) Output high quality MP4 videos with Smart Rendering Using Smart Rendering, you can quickly output high quality MP4 videos. Smart Rendering does not render your full video, but only the portion of video that overlap each other, and only renders the frames of the video that has changed from the original. By only rendering the necessary frames, the unaltered portions will be output in its original state for quick, high quality output. Adjust the resolution, and either NTSC or PAL format in the dialog. Detailed information about the file you will output will be displayed in the Output information box. To designate an output folder, please refer to the section on option settings in the Home menu. Click here to view information about resolution and file formats. Output file information will be displayed here. 6. Output videos and pictures! Output audio file This will output an audio file. You can use this to output audio from a video, or change the format of an audio file. Choose the file type, and audio bit rate in the dialog window, and click "OK" to output. To choose an output file, please refer to the section on option settings in the Home menu. File format WAV Uncompressed audio file format. AAC This file format is generally used for portable audio players. The higher the bit rate, the bigger the file size, but your audio quality will increase. (Some portable audio players may not support this file format.) WMA File format playable in Windows Media Player. The higher the bit rate, the bigger the file size, but your audio quality will increase. 6. Output videos and pictures! 6-4 DVD Output Output a file to create a DVD When you output to DVD in LoiLoScope EX/AX/FX, it creates a WMV file. Once the file output has finished, Windows DVD Maker* will automatically run. *Only users of Windows 7 and Vista Home Premium can use Windows DVD Maker. 1. Select a file to output Select a video, and then click on "Output to Device" from the Share menu. Once the dialog window is displayed, select "DVD" to display the file destination window. Select the destination you would like to save your file to begin output. 2. Automatically file read in Windows DVD Maker Users who are using Windows 7 or Vista Home Premium, Windows DVD Maker will automatically start up once the file output is complete. The output file will automatically be read in to Windows DVD Maker. 3. Automatically open output folder Windows XP and Vista Home Basic users can use their own DVD writing software to create DVD-Video disks. 6. Output videos and pictures! 6-5 Export Output videos for iPod and iPhone Output file Export can be used to create video formats for your portable media player or mobile phone. Select the resolution, and then click "OK". To designate an output folder, please refer to the section on option settings in the Home menu. You can select the resolution for the output file. The output folder will be displayed at the bottom. You cannot select the 960x540 resolution in LoiLoScope EX/AX Output file Once the file has been output, iTunes will automatically run. Please use iTunes to transfer files to your iPod or iPhone. iTunes will automatically recognize the output file *For information about iPod, iPhone, iTunes, please contact the manufacturer. *iPod, iPhone, iTunes are the registered trademarks of Apple Inc. 6. Output videos and pictures! 6-6 Upload your videos to YouTube and share! Log In What is YouTube? Use YouTube to save your private videos on the Web, or share your videos with the rest of the world. You can easily share your uploaded videos with your friends on Facebook and Twitter. You can even upload HD quality videos for YouTube. Log In to YouTube Connect to your YouTube account from LoiLoScope EX/AX/FX by entering in your account information. If you do not have a YouTube ID, register to create an account. To create an account, click here. It is not recommended to click this check box if you share a PC with other users. 6. Output videos and pictures! Upload Enter video information Once you have connected to your YouTube account, a screen to enter information about your video will appear. You can enter the title, description, tag, and category for your video. Select if you would like to make your video public or private. If your video is set to private, only you can watch the video. You can automatically set your video to be shared on your Facebook News Feed or Tweet on your Twitter. Enter the title, description, and tag for your video. Choose the category for your video from the pull down menu. If you log in to an account that does not belong to you on a shared PC, click here to log out and log in using your account information. Private video: Only you can watch the video. Public video: Anybody can watch the video. If you do not want to share your video on Facebook and Twitter, click "disconnect". Share the link on Facebook To share your video on Facebook, you must be connected to Facebook. Click on "Connect" to display the account screen as seen on the left. Enter your account information and verify LoiLoScope EX/AX/FX to enable automatic sharing with Facebook. If you would like to upload videos directly to Facebook, please view the Facebook page. Share the link on Twitter To tweet videos, you must be connected to Twitter. Click on "Connect" to display the account screen as seen on the left. Enter your account information and verify LoiLoScope EX/AX/FX, to enable automatic tweeting of your YouTube video after it has finished uploading. 6. Output videos and pictures! 6-7 Share videos by e-mail with Vimeo Log In What is Vimeo? Vimeo is a video sharing service where you can upload high quality videos, protect them with a password, and share them with only the people you want to share it with. The link of the uploaded video will be included and sent with your message. *This service is only available in English. Vimeo may change the content of their service without notice. Log in to Vimeo Please log in to Vimeo. Click the "Log In" button even if you do not have a Vimeo account. You can create one in the next screen. If you have a Vimeo account, enter your account information. If you do not have a Vimeo account, click the "Join Vimeo" link at the Log In screen to create an account. Vimeo Registration You can choose from two different account types that Vimeo offers. The Basic account is a free account with a 500 MB upload limit per week. The Plus account requires a subscriber fee, but allows you to upload up to 5GB per week. After you have chosen your account type, enter in your name, e-mail address, and account password. Please read the Terms and Agreements of Vimeo before your click the check box. 6. Output videos and pictures! Upload Verify LoiLoScope EX/AX/FX Once you have logged in to Vimeo, an be displayed. On this screen you EX/AX/FX and Vimeo to be linked. the bottom left of the screen to EX/AX/FX. authorization screen will will allow LoiLoScope Click the blue button at authorize LoiLoScope Click this blue button to authorize LoiLoScope EX/AX/FX to upload videos to Vimeo. Enter video information First, enter the title of your video. If you would like to protect your video with a password, click on the check box next to "Apply Password", and enter a password. If you would like to send your video link to your friends and family after it has uploaded, click on the check box next to "Send an e-mail after uploading is finished". Select a video quality, and click "Next". If you want to place a password on your video, click the check box and enter the password. If you would like to send an e-mail to your friends and family after the video has uploaded, click the check box. Select the video quality. Please make sure you have enough upload space when selecting a video quality. If "Waiting in line" is displayed after you upload your video Even after your video has been uploaded to Vimeo, the "Waiting in line" message means that your video is still being processed on the Vimeo website. You can watch the video after the website has finished processing your video. You can see how much you can upload this week, here 6. Output videos and pictures! Sending E-mail If you have selected "Send an e-mail after uploading is finished", the message screen will be displayed. Enter your name, the recipients’ e-mail address, and message. Enter your name here. Enter the recipients' e-mail address here. By separating each e-mail address with a comma, you can enter in multiple e-mail addresses. Enter your message here. Once you have finished entering your message, a confirmation screen will appear. Check your name, recipients' e-mail address, and message and then click "Send" to share your videos with your friends and family. 6. Output videos and pictures! 6-8 Upload videos to Facebook Log In What is Facebook? Facebook is a simple SNS to share information with your friends. You can directly upload pictures and videos to Facebook from LoiLoScope EX/AX/FX. What is a SNS? A Social Networking Service (SNS) is a service to create communities on the internet. Log In Click the Facebook icon and log in. If you have a Facebook account, enter in your account information and log in. If you do not have an account, please create one. If you already have a Facebook account, click here. If you would like to create an account, please click "To become a member, click here". Information about privacy settings The default privacy setting for Facebook is set so anyone can view your profile. To change this, go to "Account", "Privacy Settings", and then "Customize settings". If you would like to share your profile with your friends only, click "Friends only". This will affect every part of your Facebook profile. 6. Output videos and pictures! Upload pictures to Facebook! You can directly upload pictures to Facebook from LoiLoScope EX/AX/FX. You can upload a single picture from the desktop or multiple pictures from the media browser or magnet. You can even upload video and pictures together from a magnet. Once you have finished logging in, you can upload pictures. If you would like to add pictures to an existing album, select the album from the pull down menu. If you would to create a new album for your pictures, enter in the name of the album, place, and description. Select an existing album to add your pictures to. You can create a new album to upload your pictures to. Upload videos to Facebook Enter the title and description of your video and upload. Videos that go over Facebook’s upload limit will automatically be split and uploaded. Log In to Facebook with a different account To log in to Facebook with a different account: 1. 2. 3. Click the “Log out” button Click the "Log In" button and from the "Authorization" screen, click on "Log in with a different account" Enter in the account information and log in 6. Output videos and pictures! 6-9 Burn pictures from your camera to a CD/DVD For Windows7, Vista Connect your camera to your PC and run LoiLoScope EX/AX/FX. From the camera tab, select the pictures you want to burn to CD/DVD. Drag and drop the selected pictures to the desktop. magnet like the picture on the right. They will be attached a Click the "Collection" button circled in red in the picture on the right, to gather all the pictures in to a single folder. 6. Output videos and pictures! Insert a blank CD/DVD in to your PC's optical drive. Open the folder where you have collected all of your pictures and click "Burn" in the tool bar at the top of the folder. From the burning options, select "Master" By selecting "Master" the data can be viewed on any operating system. Click "Next". Once your files have been prepared to be written to your disc, a disk writing window will open and display the files that have been prepared to be written to your disc. You can delete or add files. Once you have all the files to be written, click "Burn to disc" from the top and the "Disk writing wizard" will be displayed. Follow the onscreen instructions to finish burning your disc. Caution: Please avoid doing other tasks while writing to the disc. You can give the disc a title, but it is not required. Even if you have followed the above directions, due to bad discs or compatibility with the disc and your optical drive, writing to the CD/DVD may fail. This section in the manual does not guarantee that you will be able to burn pictures to CD/DVD using the steps above. 6. Output videos and pictures! For Windows XP Connect your camera to your PC and run LoiLoScope EX/AX/FX. From the camera tab, select the pictures you want to burn to CD/DVD. Drag and drop the selected pictures to the desktop. attached a magnet like the picture on the right. They will be Click the "Collection" button circled in red in the picture on the right, to gather all the pictures in to a single folder. 6. Output videos and pictures! Insert a blank CD/DVD in to your optical drive. Open the folder where you have collected all of your pictures and click "Copy all items to CD". Once the files have been prepared to be written to your disc, a balloon will pop up at the bottom right of the screen. Click on the balloon to view the files that have been prepared to be written to your disc. can add or remove files to this window. You Once you have gathered all the files to be written to the disc, click the "Write these files to CD" on the left. The "CD writing" wizard will be displayed. Follow the onscreen instructions to finish burning your disc. Caution: Please avoid doing other tasks while writing to the disc. You can give the disc a title, but it is not required. Even if you have followed the above directions, due to bad discs or compatibility with the disc and your optical drive, writing to the CD/DVD may fail. This section in the manual does not guarantee that you will be able to burn pictures to CD/DVD using the steps above. 7. Organize your files! 7. Organize your files! 7-1 Collect and organize your thumbnails! What is a magnet? A magnet is an organizational tool to gather and group your thumbnails. You can throw your thumbnails to the magnet to separate your files, and change the order of your thumbnails and select your favorite scenes. If you drag the magnet close to a thumbnail, the thumbnail will stick to the magnet and you can keep your desktop clean and organized. You can adjust the color, name, and the length of the magnet. If you shorten the magnet to the minimum length, the magnet will hide the thumbnails. Double click or drag the star icon to restore the size of the magnet. Functions of each part Slideshow This will play the videos attached to the magnet in full screen Delete Delete the magnet Collector Magnet You can gather the thumbnails attached to the magnet to a folder Zoom out Zoom out and deselect the magnet by clicking this button while the magnet is selected Copy Copy the magnet and thumbnails Minimized: A star will be displayed and will hide the thumbnails Change the length dragging the arrow mark Magnet Color Changer Click and change the color using the color circle Change the Name Double click the text to change the name of the magnet by 7. Organize your files! Collect files with the Collector Magnet Collect files If you click the folder icon on the top right of the magnet, you can gather all of the files attached to the magnet to a single folder. Select "Copy" (the original file will not be altered) or "Move" (The original file will be deleted and moved) and designate a folder to save to. Delete File "Permanently delete file" will delete the data off of your PC. This action cannot be undone. Copy the thumbnails on the magnet to a designated folder. Manual slideshow Press the left and right arrow keys to move to the next/previous thumbnail while playing thumbnails attached to the magnet. You can jump through thumbnails attached to the same magnet like a playlist. You can easily create a playlist by re-arranging the thumbnails. You can use the left and right arrow keys to move to the next/previous thumbnail in full screen mode. Use the arrow keys to move to the next/previous thumbnail Automatic slideshow This will play you playlist in full screen. Double click the magnet or click the slideshow icon above the magnet to play and edit the thumbnails in full screen. Click on the auto-play button to play all of the thumbnails collected to the magnet. Auto-Play ON The slideshow will start with the thumbnail at the top left. You can freely change the order of the thumbnails. OFF The videos on the magnet will be played on repeat 7. Organize your files! Trash can Magnet: Remove Files The Trash can magnet can be used to gather unwanted thumbnails and delete them. Click on the trash can icon to delete Thumbnails from the LoiLoScope EX/AX/FX desktop. Deleting files from the Trash can magnet does not delete the original file, but only deletes the file from the project, and the original file is unaffected. Click the Trash can icon to delete Thumbnails 7-2 Organize using shortcuts How to use shortcuts Right click a thumbnail or timeline bar and the magnets, trash can, and timeline will be displayed as shortcut icons. Drag the mouse over to where you want to send the file. <Method> Click the Shortcut button Drag to shortcut Quickly move the object to the selected destination or Right click the object Objects that can be moved with the Shortcut List of shortcut icon Magnet Files from the media browser Timeline Thumbnails Trash can Magnets Timeline bar 8. Enter text! 8. Enter text! 8-1 How to enter text Type of text In the Art menu, there are options for adding text only; "Text", and text with a background; "Text Frame". By clicking on the "Text" or "Text Frame" button, a text thumbnail will be created on the desktop. Text Text Frame Enter text To enter text, click on the "enter text here" and enter your text. Compile videos and text in the timeline Add text While editing on the timeline, click on the text in the Art menu to create a 10 second text timeline bar at the current position of the seek bar. Place the text bar at the top of the timeline, to display it in front of your video. You can also place your text thumbnail from the desktop to your timeline to get the same effect. Change the position of your text By clicking the text timeline bar or the text within the timeline window, you can display the scale, rotate, and move controllers. Use these controllers to position your text anywhere you like. Combine text frames and videos on the timeline to create fun videos. 8. Enter text! 8-2 Change the settings for your text Text setting tray Select the category you would like to set from the background/text/shadow tabs on the left of the setting tray. You can set the text size, text color, shadow position, shadow color, and background (only for text frame). Background Settings Select a background Set the background design and transparency of the text frame. You can select a design for your text frame from the "Message", "List", "Cool", and "Image" categories. Mouse over the image in the Setting tray to view a preview in the play window and then click to apply your desired design. Flip the Background Image You can flip the background image by clicking on the image you want to flip. Text settings You can set the font, size, thickness, position, and color of your text. Pick the color for your text using the multi-colored bar. Use the color picker on the left to choose the shade, and the bar on the right to choose transparency. Shadow settings You can set the shadow of your text with the On/Off button. If you turn the shadow "On" you can set the color, blue, direction, and length of the shadow. 9. Create fun videos with effects! 9. Create fun videos with effects! 9-1 Deco-Pen How to use the Deco-Pen Deco-Pen Using the Deco-Pen, you can add hand written messages and illustrations to your videos and pictures. Select a thumbnail or timeline bar and click Deco-Pen from the effect menu. Select the pen tool from the setting tray. Click the play window and start recording. When the video begins to play, freely write or draw on the video. Use the Pen Tool to draw illustrations and messages on your video. Draw while the video is playing, and the lines you drew will be displayed the way you drew it. Draw while the video is paused for the lines to show up immediately. When the video has finished playing, it will be paused. If you would like to keep drawing, click on the screen to continue. Other tools you can use with the Deco-Pen are the animation eraser, which makes the image you drew disappear. You can also easily set the object you drew to move about on the screen. For more information, please see the section on Deco-Pen tools. Use slow mode to write You can make it easier to write by slowing down the play speed of the video. Click on slow (x0.5) or super slow (x0.2) to slow down the play speed of the video. You can also adjust the play speed from the Play Speed pull down menu. Change the play speed You can adjust the play speed of the video. Click the x1 in the editing tools to display the pull down menu. The normal play speed of the video is x1. You can choose from x0.1 to x8 to edit your videos. 9. Create fun videos with effects! Deco-Pen tools Pen This tool allows you to draw freely on your video. By drawing the line while the video is playing, it will show up at the exact place and timing that you drew it. If you draw while the video is paused, the lines will show up starting with the next frame. Pen Tip Style and Size You can change the pen size with the size slider or with the mouse wheel. You can choose the pen tip style from a circle, square, and with borders. By changing the color, the border color is automatically changed. Select color Use the color picker to select a color. Click the multi-colored bar to select a color. You can also select the hue and transparency. Animation Eraser Images drawn with the Deco-Pen will be displayed on the screen even if the scene changes. Use the eraser to erase the image at your desired timing. You can erase separate lines while playing or you can pause and erase multiple lines. Eraser Completely erase part of an image drawn with the pen. Erase All (Trash can tool) Erase all of images on the screen. You can use this if you want to start over. Selector You can use this to move and image that you have previously drawn. Use the selector to surround the images you want to select. The selected image will change color. Drag the image to your desired position. Animation You can animate the lines you have drawn using the Deco-Pen. From the 4 types of pull down menus, choose your desired animation. By default, "none" is selected. You can select when you want to begin animating your lines. For information about the Animation Button, please see the section on Effect Animations. Wriggle Move Color Blink The lines will get thicker and the borders change color The lines will move up, down, left, and right The color of the lines will change The transparency of the lines will change 9. Create fun videos with effects! 9-2 Deco-Stamp How to use the Deco-Stamp You can use the Deco-Stamp like pressing a stamp to create lively videos. Select a thumbnail or timeline bar and select Deco-Stamp from the effect menu. Use the Animation Pen tool to place stamps on your video Click the screen to begin recording. Click "Slow" or "Super slow" to draw on the screen while playing your video. If you would like to draw on the screen at normal speed, select "Normal". If you would like to change the speed while playing the video, select a speed from the "Play Speed" pull down menu. The play speed you select will affect the video your output. Click or drag the mouse over the screen to apply the stamp. Once the video finishes playing, it will be paused. If you would like to add more Deco-Stamps click play to continue. Deco-Stamp Tools Stamp Tray There are 4 different types of stamps: Stamp, Spray, Roller, and Anime. Select the stamp you would like to use and mouse over the screen to see a translucent preview of the stamp. Click or drag the mouse to apply the stamp. You can adjust the size using the mouse wheel. Spray This is a Deco-Stamp with movement. Drag the stamp around the screen to "spray" the objects on the screen. By changing the size of the stamp, you can create lively videos with the same stamp. Roller Drag the stamp on the screen freely. The object will follow the path you drew with your mouse, appear, and disappear. The objects will stay on the screen as long as you have the mouse button held down. You can leave the mouse button clicked, fill up the screen, and let go of the mouse button. The objects will disappear, beginning from the starting point. Stamp Apply the stamp by clicking or dragging it across the screen. The object will be displayed as long as you have the mouse button held down, and disappear a few seconds after you have let go. Anime This stamp is animated like a flip-comic. The object will be displayed as long as you have the mouse button held down, and disappear a few seconds after you have let go. *The eraser and erase all tools can be used in the same fashion as the Deco-Pen. Please see the Deco-Pen section for more details. 9. Create fun videos with effects! 9-3 Effect Pen How to use the Effect Pen Effect Pen You can apply effects to specific places. By using the effect pen to apply effects, you can apply effects to specific places. You can also reverse the effect so that the places you drew with the pen do not have the effect. Tray Switch Click to show/hide the effect tray Effect Pen Tools (Effect Setting Tray) Transparency Animation Record Button By turning the round button on, you can record the changes in your effects as animations. If you turn the button off, you can disable the animation temporarily. This will adjust the transparency of the effect (only for clipping) Effect Pen Click the check box to enable the effect pen. See below for information about the tools. Animation Pen You can select the style of the animation pen The stamp will apply the effect like a stamp, each time you click the mouse. The brush will apply the effect over the area you draw your mouse, in the shape of the pen. Anime will add movement (rotate, expand, and contract) the stamp. Brush Size Adjust the brush size for the effect. Animation Pen This is the brush that applies the effect to your videos. Select the style of your brush from stamp/brush/anime. Erase All (Trash can tool) Erase all effects. Animation Eraser Set the timing of when the effect is to be erased after you have used the Effect Pen. Selector Select or move the effect. Eraser Permanently erase part of the applied effect from the video. Reverse Reverse the range to apply the effect 9. Create fun videos with effects! 9-4 Effect animation How to use the Effect animation Recording Animation Movement You can record the amount of the effect as an animation. You can set the animation recording for each effect. Turn the animation button off to disable the recorded animation temporarily. 1. Turn on the animation recording button The change in the amount of effect will be recorded as an animation. 2. Move the effect slider Move the slider while the video is playing. The change will be recorded as an animation. *If you have 2 or more items to animation, click to select the animation. The animation with the blue border will be animated. 3. Animation Key Frame Group When an animation is recorded, a key frame group (blue line) will appear. Move/Delete You can move the position of the key frame. If you drag the key frame outside of the border, it will be erased. To erase all key frame groups, click the trash can button on the right. Key Frame Animation While the video is paused, change the parameter or click the + icon to add a key frame. end points of the key frame to create a smooth animation. Choose the start and 9. Create fun videos with effects! 9-5 Effect List Brightness You can adjust the contract and the brightness. If you video is too dark or too bright, adjust the brightness first before your adjust the contract. If you use the effect pen, you can apply the effect to specific places. Color Change You can adjust the saturation and hue. Select the color with hue, and adjust with saturation. If the saturation is set to 0, the video will become monochrome. If you use the effect pen, you can apply the effect to specific places. Clipping You can use the effect pen to clip certain parts of the image. Select the transparency and size, and then select the pen style from stamp, brush, and anime. Click or drag the mouse over the screen to apply. You can also reverse the place you want to clip. Use the clipping effect on the timeline with other videos to use this effect effectively. Edge This effect will emphasize the edges and cut out the rest. You can adjust the amount of the effect applied and the thickness of the outline. If you use the effect pen, you can apply the effect to specific places. Threshold This effect will emphasize the selected colors and black out the rest. the amount of the effect and the amount of threshold. If you use the effect Pen, you can apply the effect to specific places. Blur The screen will be blurred. If you use the effect Pen, you can apply the effect to specific places. You can adjust 9. Create fun videos with effects! Glow This effect will add flare to your video give your video a soft feel. You can adjust the amount of brightness and blur. If you use the effect pen, you can apply the effect to specific places. Mosaic: This will apply a mosaic to your video. You can adjust the fineness of the mosaic. If you use the effect pen, you can apply the effect to specific places. Negative/Positive Reverse the negative and positive colors in the video. If you use the effect pen, you can apply the effect to specific places. Monochrome This effect will change a video with color to monochrome. You can adjust the amount of effect applied. You can also make the video sepia. If you use the Effect Pen, you can apply the effect to specific places. DECO-Pen You can free hand draw illustration on your video. Select the thickness, style and color, and draw directly on the screen. After you have finished drawing, apply an animation to make your lines wiggle or blink. DECO-Stamp You can add objects to your video like pressing a stamp. stamps, you can choose from spray, roller, and anime. Along with normal 10. Option Settings 10. Option Settings GPU By enabling GPU video playback, users who have a graphics card that support h.264 video playback, can further enjoy LoiLoScope EX/AX/FX smoothly. *GPU video playback is only supported in Windows Vista and Windows 7. Please use the most recent graphics drivers. Windows XP does not support video playback. Graphics Cards that support GPU video playback Intel G45 or better NVIDIA® GeForce 8000 series or later (Excluding 8800GTX,8300) ATI RadeonHD2000series or later (Excluding 2900) DVD Writing Set the DVD writing software to Windows DVD Maker. automatically run and add the created video to the list. For more information, please refer to 6-4 DVD Output. This will enable windows DVD Maker to Picture Out Set the save folder for pictures cut out from thumbnails or timelines. Background You can set the background image for LoiLoScope EX/AX/FX to Galaxy, Dark, Bright, Grey or Blue. 10. Option Settings Advance Setting Set whether to drop the quality of H.264 videos during preview to decrease the load of the CPU. Remove the check mark if you wish to view the videos in high quality. Save Location Designate the folders to save files created using the back-up , file output, DVD, and Export function. License Display LoiLoScope EX/AX/FX license information. You can enter the serial number or license file you received when you purchased the software to authorize. Language You can select the display language of LoiLoScope EX/AX/FX from 17 languages. (English, Brazilian Portuguese, Canadian French, Dutch, Finnish, French, German, Italian, Japanese, Korean, Polish, Portuguese, Russian, Traditional Chinese, Simplified Chinese, Spanish, Swedish) You must restart the software for the language change to take place. When restarting the software, save your Desktop to maintain your current project. 11. Learn the names of each part! 11. Learn the names of each part! 11-1 Names of the objects on the desktop Function of each part 1 Menu The Home, Share, Effect, and Art button at the top of the screen contain the functions for each section. 2 Media Browser The media browser displays all the files you can edit in LoiLoScope EX/AX/FX. Select the video/music/picture tab to display the files, click on the check boxes to directly output or upload from the media browser, or move the files to the desktop by either clicking or drag and drop the file to the desktop. 3 Magnet The magnet can help you organize the scattered files on the desktop. You can change the color, length, and the title of the magnet, and also change the order of the thumbnails that are stuck to the magnet. You can line up videos and pictures and play them as a slideshow or you can bulk upload and output the file. 4 Thumbnail You can preview the video, music, and/or picture file by placing your mouse over the thumbnail. Click to set the start and finish points, and use only the portions you want. 5 Timeline Gather and compile your favorite scenes to create a project. 6 Trash can A magnet to gather and erase unwanted video/picture/music thumbnails from the desktop. 11. Learn the names of each part! 11-2 List of Home menu icons Home Menu functions Save desktop or create a new project Click here to save your current LoiLoScope EX/AX/FX project or create a new project. Saving the desktop By saving the desktop, you can save the current state of your desktop thumbnails and timeline. The saved file is called a project. Depending on the contents of your project, it may be convenient to split up your project and save them separately. If you delete a video or photo file from Windows, the file will not be available in your project. Moving the desktop files If you move the original video, music, or picture file that is being used in your saved project, the project file will recognize the file has moved only if the file is placed within the same folder group as the project file. If placed elsewhere, your project file will not be able to recognize where the file has moved to. If the project file cannot recognize the location of the file, a dialog box will be displayed, and will allow you to reset the paths of each file that could not be found. Magnet This button will create a magnet. The magnet will help you collect and organize the thumbnails on your desktop. thumbnails collected on the magnet into a single folder. You can also gather the Timeline This button will create a timeline. In the timeline, you can arrange your videos, pictures, and music to create a single video. You can also rotate, move, and change the size of the files to arrange the scene. You can create as many timelines as desired. Options This button will allow you to change the detailed settings for each function. You can change the settings for the GPU decoder, DVD writing software, background image, and the output folder. 12. Master the keyboard shortcuts! 12. Master the keyboard shortcuts! 12-1 List of keyboard shortcuts Keyboard shortcuts Here you will find a list of keyboard shortcuts you can use in LoiLoScope EX/AX/FX. Thumbnail Play/Pause Full screen Play/Pause Timeline Play/Pause Thumbnail Return frame Full screen Timeline Thumbnail on a magnet Return frame Return frame Next thumbnail Thumbnail Full screen Next frame Next frame Timeline Thumbnail on a magnet Next Frame Previous thumbnail Thumbnail Send to trash Full screen Timeline bar Send to trash Send to trash Magnet selected Delete magnet Thumbnail Deselect Full screen Exit full screen Timeline bar Deselect Magnet Deselect Timeline bar Move play position 1 frame Control +Z key Timeline bar Undo Shift +Control +Z key Timeline bar Redo Space bar Arrow key (Left) Arrow key(right) Delete key ESC key Control + arrow key (left/right) or 13. LoiLoScope EX/AX/FX System requirements 13. System requirements 13-1 LoiLoScope EX (for Windows®) System Requirements for Editing OS Windows® XP Home Edition/Professional (Pre-Installed Version, SP3) Windows Vista® Home Basic/Home Premium (32bit/64bit,Pre-Installed Version, SP2) Windows® 7 Home Premium (32bit/64bit, Pre-Installed Version) CPU Intel® Core™ 2 Duo 2GHz or better Memory 2GB or more GPU Intel® 945 or later NVIDIA® GeForce 6000 Series or later ATI Radeon9600 or later Others Microsoft .Net Framework 3.5sp1 must be installed on your PC. Compatible with videos cards that have H.264 video decoding. (Excluding Windows® XP) To use multi-touch operation, you must have Windows® 7 and a multi-touch compatible screen. Recommended System Requirements for editing OS Windows® XP Home Edition/Professional (Pre-Installed Version, SP3) Windows Vista® Home Basic/Home Premium (32bit/64bit, Pre-Installed Version, SP2) Windows® 7 Home Premium(32 bit/64bit, Pre-Installed Version) CPU Intel® Core™ 2 Duo 2GHz or better Memory 2GB or more GPU Graphics cards with H.264 video decoding Intel® G45 or better NVIDIA® GeForce 8000 series or better (Excluding 8800GTX,8300) ATI RadeonHD2000 series or better (Excluding 2900) *Not compatible with NVIDIA® CUDA/ATI® Stream hardware encoders. or OS Windows® XP Home Edition/Professional(Pre-Installed Version, SP3) Windows Vista® Home Basic/Home Premium(32bit/64bit, Pre-Installed Version, SP2) Windows® 7 Home Premium(32bit/64bit, Pre-Installed Version) CPU Intel® Core™ 2 Duo 3GHz or better or Intel® Core™ 2 Quad 2Ghzor better Memory 2GB or more GPU Intel® 945 or better NVIDIA® GeForce 6000 or better ATI Radeon9600 or better *Not compatible with NVIDIA® CUDA/ATI® Stream hardware encoders. 13. LoiLoScope EX/AX/FX System requirements 13-2 LoiLoScope AX (for Windows®) System requirements OS Windows® XP Home Edition/Professional (Pre-Installed Version, SP3) Windows Vista® Home Basic/Home Premium (32bit/64bit, Pre-Installed Version, SP2) Windows® 7 Home Premium (32bit/64bit, Pre-Installed Version) CPU Intel® Core™ 2 Duo 1.6GHz or better (Intel® Core™ 2 Duo 2GHz or above recommended) Memory 2GB or more GPU Intel® 945 or later NVIDIA® GeForce 6000 Series or later ATI Radeon9600 or later *Not compatible with NVIDIA® CUDA/ATI® Stream hardware encoders. Others 13-3 Microsoft .Net Framework 3.5sp1 must be installed on your PC. Compatible with videos cards that have H.264 video decoding. (Excluding Windows® XP) To use multi-touch operation, you must have Windows® 7 and a multi-touch compatible screen. LoiLoScope FX (for Windows®) System requirements OS Windows® XP Home Edition/Professional (Pre-Installed Version, SP3) Windows Vista® Home Basic/Home Premium (32bit/64bit, Pre-Installed Version, SP2) Windows® 7 Home Premium (32bit/64bit, Pre-Installed Version) CPU Intel® Core™ 2 Duo 2GHz or better (Intel® Core 2 Duo 3GHz or above or Intel Core 2 Quad 2Ghz or above is recommended. Required for 1080/60p playback and editing) Memory 2GB or more GPU Intel® G45 or better NVIDIA® GeForce 8000 series or better (Excluding 8800GTX, 8300) ATI Radeon HD2000 series or better (Excluding 2900) *Not compatible with NVIDIA® CUDA/ATI® Stream hardware encoders. Others Microsoft .Net Framework 3.5sp1 must be installed on your PC. Compatible with videos cards that have H.264 video decoding. (Excluding Windows® XP) To use multi-touch operation, you must have Windows® 7 and a multi-touch compatible screen. 14. LoiLo User Support 14. LoiLo User Support 14-1 User Support Window We accept inquiries by telephone and e-mail. For detailed information about support, go to the website listed below. http://loilo.tv/product/15