1
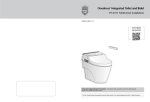
TM
Onedrous Integrated Toilet and Bidet
TH-0111 User Manual
User manual covers the installation of the bidet toilet seat in box labeled 2 of 2, and the toilet in box labeled 1 of 2.
[ ]
To view installation
video scan QR code
with mobile device
“Important safeguards/general cautions”- information that can protect user from safety hazards.
Please read carefully for proper usage.
- This user manual contains the products warranty. Please submit to our warranty department within 15 days of purchase.
Product Features
Front Wash
Auto flush
For her front wash
Automatically flushes toilet
Back Wash
Sleep mode
For his and her back wash
Minimize electricity consumption when
not in use
Turbo wash
Protection from low temperature burn
Oscillating water stream
Protect user from low temperature burn
Protection from electrical short
Warm air dryer
If short in electrical, special breaker cuts the
power
Oscillating
Product features
2
Important safeguards
4
Cautions Before Installation
4
General Caution
6
Product components
10
Antibacterial resin
Setting up and using the auto flush
12
Adjustable nozzle moves back and
forth to wash
Antibacterial resin for nozzle, seat, and
seat cover
Setting up and using the remote control
14
Initial operation
15
Continuous
Manual Control
Checklist before use
16
Adjustable water temperature - 4 levels
Manual control on main unit in lieu of
remote control
Seat temperature control
Self-Diagnosis
How to use (Summary)
17
Operation (Basic)
18
Operation (Detail)
22
Separation of the unit from toilet bowl
26
Draining water from tank
27
Maintenance for winter season
27
Trouble shooting
28
Specifications
29
Deodorizer
Information to the user
30
To remove odor from toilet bowl
Warranty
30
Dryer temperature control
Soft opening and closing
Adjustable air dryer temperature - 5 levels
Seat cover and seat opens and closes slowly
Automatic Self-Cleansing Stainless Nozzle
Nozzle contains a stainless cap to prevent
debris. Nozzle is automatically washed before
and after each use.
Water filters
Improves hygiene by filtering out
contaminates from tap water
Other
Installation Manual and Operating Instructions
Other
Automatically runs diagnostic
Operation
Operation
Adjustable seat temperature - 4 levels
Installation
Installation
Dry
Preparation
Preparation
2
Contents
3
1
IMPORTANT SAFEGUARDS
READ ALL INSTRUCTIONS BEFORE INSTALLATION AND USE
2
Cautions Before Installation
WIRING REQUIREMENT
THIS PRODUCT MUST BE PLUGGED into a 120V grounded GFCI outlet. (North America 120V ac, 60Hz).
The rated power consumption is 1400W.
In locations where only a standard two prong outlet is available, it is the responsibility of the user to install a grounded
The following terms are used in this manual to indicate hazards.
three-prong outlet. Using high voltage is dangerous and may result in a fire, other accident, or damage to the unit.
Manufacturer is not responsible for damage resulting from high voltage, or operating without proper grounding.
Indicates an immediately hazardous situation
Caution
Indicates potentially hazardous situation and, if not avoided, may result in minor or
moderate injury or damage to the unit.
Prohibited Emphasis on what not to do
Preparation
Danger
This product should be on its own circuit. Sharing a circuit could cause the
branch circuit fuse to blow or the circuit breaker to trip. Continuous usage
under these conditions may result in fire or damage to the unit.
CAUTION
Instructions How to operate and install unit
This appliance has to be grounded.
GROUND INSTRUCTIONS
1⃞ This unit must be grounded. In the event of an electrical short circuit, grounding reduces the risk of electric shock.
This unit is equipped with a cord having a grounding wire with a grounding plug. The plug must be plugged into
an outlet that is properly grounded.
DANGER - To reduce the risk of electrocution:
1. Do not place or store product where it can fall or be pulled into a tub or sink.
2. Do not place in or drop into water or other liquid.
3. If unit falls into water, unplug unit and remove from water.
CAUTION - To reduce the risk of burns, electrocution, fire, or injury to persons.
2⃞ This unit is for use with a 120V circuit, and has a grounding plug (see sketch A in Figure 1). If a properly grounded
outlet is not available, a temporary adapter, (see sketch B and C) may be used to connect plug to a 2 - pole
receptacle. The temporary adapter should be plugged into a properly grounded outlet (sketch A) and should be
installed by a licensed electrician. The green colored rigid ear and lug, extending from the adapter must be connected
to a permanent ground.
1. Close supervision is necessary when this unit is used by children, elderly, or disabled.
2. Use this product only for its intended use as described in this manual.
Preferred Connection
Temporary Connection
Do not use attachments not recommended by the manufacturer.
3. Never operate this product if it has a damaged cord or plug or if it is not working properly,
GROUNDED
OUTLET
ADAPTER
ADAPTER
if it has been dropped or damaged, or dropped into water. Return the product to a service center for
examination and repair.
4. Keep the cord away from heated surfaces.
GROUNDING PIN
5. Never block the air openings of the product or place it on a soft surface, such as a bed or couch,
METAL SCREW
GROUNDED
OUTLET BOX
TAB for
Grounding Screw
- Figure 1-
where the air openings may be blocked. Keep the air openings free of lint, hair, and the like.
6. Do not use the unit if you are sleeping or tired to the point of being drowsy.
7. Never drop or insert any object into any opening or hose.
8. Do not use outdoors or operate where aerosol (spray) or oxidated products are being used.
9. Unplug this product before filling. Fill (reservoir) with water. Do not overfill (or specify filling instructions)
SAVE THESE INSTRUCTIONS
4
DANGER
Improper grounding can result in electric shock. Electric wiring has to be done
in accordance with all local codes, or in the absence of local codes,
with National Electrical Codes.
The use of an extension cord is not recommended or advised. If it is necessary to use an extension cord, use only a three-prong
extension cord (one to one), and a three slot built-in GFCI receptacle that will accept the plug for this product. The marked rating of the
extension cord should be equal to or greater than the electrical rating of the unit (10amp). Consult a licensed electrician if you are not
sure whether it is properly grounded.
Installation Manual and Operating Instructions
5
3
General Cautions
The following terms are used in this manual to indicate hazards.
Safety Warning
Danger
Indicates an immediately hazardous situation
Caution
Indicates potentially hazardous situation and, if not avoided, may result in minor or
moderate injury or damage to the unit.
Do not splash water on the main unit or
power cord, and do not utilize it in areas of
high levels of humidity
Instructions How to operate and install unit
Preparation
Prohibited Emphasis on what not to do
Do not separate, disassemble, or repair the unit,
or allow foreign substances inside the unit.
Safety Warning
- Only qualified service personnel should repair
this product.
Do not plug in the power cord before
connecting the water supply hose
Do not plug in the power cord before connecting
the water supply hose
- May result in fire or damage to the unit.
- This product is only for 120V
This product must be grounded before usage
and plugged into an AC120V/60Hz power
outlet. Please ground to prevent from electric
shock.
Do not plug or unplug the power cord with
wet hands
This unit requires a dedicated outlet
Children, elderly, patients and those who
are physically limited should use the low
temperature setting for the seat, water, and
dryer.
When cleaning the product, do not use detergent
(oxidized products, sink products, toilet cleaning products, and
any type of stain remover) on the external surface of the
electronic toilet seat. Also do not spray air fresheners onto
seat as the unit has a deodorizer.
After using the unit at high temperatures, the temperature should
be readjusted to “Low” for the elderly, children, and those with
sensitive skin.
oxidized
oxidized
oxidized
products
products
products
sink
sink
sink
sink
products
products
products
toilet
cleaning
toiletcleaning
cleaning
toilet
toilet
cleaning
products
products
products
products
- May cause an electric shock or damage to the unit
if not properly grounded
Unplug the power cord when cleaning the
product. Turn off power to outlet prior to
installing unit.
- It can cause electric shock or bodily injury
Keep the cord away from flammable
substances.
- Using cleaning detergents or air fresheners can change the color of the external
Surface and can also cause problems with function of the seat.
Connect the product to cold water supply.
The product must be connected to a 120V power source.
Do not connect power cord if the cord is damaged or broken.
Do not plug the unit into a loose electrical outlet.
- May cause failure or electric shock
- May cause fire or electric shock
Sitting on seat or using dryer for a long time may cause low temperature burns.
Those who cannot adjust the temperature or those who have sensitive skin should take special precautions.
6
Installation Manual and Operating Instructions
7
3
General Cautions
General caution
Do not stand on seat or seat cover.
Do not sit on closed seat cover.
General caution
Do not use a broken product.
When cleaning power cord, please
clean with dry cloth
Never put the product in water
Preparation
- Do not stand on top of the seat cover,
seat or main body unit.
- This can damage or break the unit.
- May cause electric shock or damage the product
Do not slam or close the seat cover forcefully,
may cause damage to the soft closing feature.
Prevent children from putting foreign substances or
inserting their hand into the dryer outlet or onto the
nozzle
A guardian should be present when
the seat is in use by a child.
Do not push the control button,
if not using the product.
dryer outlet
- Can damage the product
Do not pull the connecting hose forcefully
or bend it.
- Water may leak or not be supplied.
- Can cause burns
- Can cause product failure
Constant direct sunlight may cause
discoloration of unit
- May cause discoloration
When the following people sit down on the seat, a guardian should pay extra attention so that they will not fall when sitting
on the toilet seat or standing up from it. - Children, elderly, or those who cannot independently sit or stand on the seat.
8
Simple
control
- May cause injury
Do not let urine contact the dryer outlet
or nozzle area.
- May cause failure
- If nozzle is clogged, please clean
with a soft brush.
When cleaning or not using the product over
a long period of time, be sure to unplug the
unit. (Refer to page 27)
- May cause electric shock
Sitting on seat or using dryer for a long time may cause low temperature burns.
Those who cannot adjust the temperature or those who have sensitive skin should take special precautions.
Installation Manual and Operating Instructions
9
4
Product Components
Back wash
Main unit
Remote control
Turbo wash
>> Remote control
Lid
Preparation
Front wash
Caution label
>> Remote control
front
Remote control receiver
Main function
Power plug
Main unit
Manual Flush
Nozzle
(refer above)
Simple Control
Skin sensor embedded
in seat
Water supply hose
Heated Seat
Stop all operation
Turbo wash
Back wash
Dry washed area
Front wash
Flush the toilet
(for bidet)
Toilet bowl
Water supply hose
(for toilet flush
water tank)
Extra function
When selected during wash function, it starts massage wash.
(To stop function push the button one more time.)
Washes nozzle for 20 seconds
When selected during wash function nozzle oscillates automatically for
a wider wash. To stop oscillating function, push the button again.
With automatic energy function, the seat temperature will stay at 89.6℉. If no one is using bidet, it returns to sleep mode.
The automatic sleep mode can be adjusted by pressing energy safe button. (On/Off)
Product components
For plumbing
For product fixation
For remote control
Installation instructions
After user stands up from seat, it works approximately one more minute and then automatically turns off. When the dryer function is
selected, deodorization stops. After dryer function stops, deodorization starts again. (normal operational conditions) Deodorizer starts again
when user sits on the seat.
The water pressure and dryer temperature
can be adjusted 5 levels
T valve
Water supply hose
(for toilet flush water tank)
10
The water temperature can be adjusted
4 levels (off, low, middle, high) and can be
checked by LED light
Front packing and bolt (2pcs)
Side packing and bolt (2pcs)
Remote control
Holder
1.5v AAA type
Battery (2pcs)
User manual
The nozzle position can be adjusted 5 levels.
The seat temperature can be adjusted 4 levels
(off, low, middle, high) and can be checked by LED light
Quick Guide
Installation Manual and Operating Instructions
11
5
Setting up bidet onto toilet and using the auto flush
※ Bidet and contents can be found in box labeled 2 of 2.
Install base plate
Fixed hinge install
- Please make sure to tighten bolts and nuts.
Connecting water flush ball chain
Installing front mounting bolts
1) Plug in power and unit will beep.
2) Press “Front wash” button on slim key (side button / seat unoccupied) for
about 3 seconds, the ball chain will begin turning.
3) Insert ball chain to the ball chain connector as photo below
※ Make sure that the ball chain is inserted properly and
place the bidet on the toilet bowl.
※ After checking ball chain, place the bidet on the toilet bowl.
4) After installing from mounting bolts (#5) and rear mounting bolts (#6)
press “Front wash” button on slim key for about 3 seconds to initialize.
Mounting bolt
Bolt case
Base plate
Toilet mounting holes
Mounting packing
Mounting Nut
Rubber cap
Mounting bolts
ball chain
connector
Installation
Front wash
button
ball
chain
Connect the flexible tube
Manual water flush lever
- Connect the flexible tube with T-valve and
turn water supply valve to allow water to flow.
Installing rear mounting bolts
•Please turn mounting bolts gently with hand.
(Do not use power tools or driver)
Rubber cap
water inlet hose
(for bidet)
급수 호스
water
inlet hose
(변기용)
(for
toilet bowl)
Mounting bolts
T Valve
Adjust the length of ball chain by examining the
functioning state of plug.
water supply valve
※ Make sure there is no water leakage. Do not use power tools or screw driver.
Connect
the ball chain to
toilet lever and
siphon cover.
12
Installation Manual and Operating Instructions
13
6
7
Setting up and using the remote control
Setting up remote control
Initial operation
Before installing the product, please turn on the water for 3 minutes to flush the hose
Remote control holder should be installed in an area that will not be exposed to water
Turn to the left to open the inlet valve and check to make sure there are no leaks in the
hose connection.
- Make sure that the selected spot will not be exposed to water and
the area where you intend to affix the holder is clean and dry.
- Place remote control holder in convenient spot near the toilet bowl.
- Place 2 AAA type batteries into remote control
Back side of
double sided tape
Skin sensor
Installation
water supply hose
(for bidet)
water supply hose
(for toilet flush water tank)
(+, - Please consider the right polarity)
water supply valve
Initial setting for RF transmission remote control
❶ Without sitting on the unit, push and hold the (top) and (front wash) button for 5 seconds on the
OFF
State
ON Flashing
State State
simple control until the seat LED turns on.
Connect power plug to 120V outlet.
FLUSH
OCCUPIED
ENERGY SAVER
- If LED light is not working after plugging in outlet, push the (back wash) or (front wash) button on the simple control.
(Remember this control pad is located on the side of the bidet top.)
- It will make "beep" sound if water begins to flow into the unit
POWER
Push back wash
❷ Push the (stop) button and (seat) button at the same time on the remote control for 10 seconds.
or front wash
then water will begin to flow into unit.
FLUSH
OCCUPIED
ENERGY SAVER
➞
POWER
While sitting on the unit, please check each function by following user manual.
- This product only works when user sits on the seat.
- Please be aware that your skin must be in contact with the skin sensor to initiate functions.
❸ When the seat LED turns off, RF type remote control and main unit are synchronized.
14
Installation Manual and Operating Instructions
15
8
9
Checklist before use
Only use a grounded 120V/60Hz outlet for this unit
How to use (Summary)
Sit on the seat
- If user’s skin is not in direct contact with the skin sensor
- If baby seat is installed on the product
- To operate properly, this product needs to be plugged in.
skin sensor
- Please have full contact with the skin sensor when sitting on the seat
- If the skin sensor cannot detect the skin, back wash, front wash, turbo wash, and/or
dryer function may not work.
Checklist after installation
Open the water valve and determine if
there are any leaks
- To operate properly, water has to be supplied.
If skin sensor is not working, the control button
may not work.
water supply valve
Please sit on center of seat.
Push front wash, back wash, or
turbo wash button.
- Can use front wash, back wash, or turbo wash functions
- Each function operates for approximately 2 minutes and stops
automatically
- Push the button again for continued use.
- If baby seat is installed on seat, the product will not operate properly.
(Skin sensor will not detect baby seat.)
- Before use of this product, please remove the skin sensor sticker.
Push the dryer button.
Operation
- Dryer function operates while the LED light (water pressure/dry temperature) on
remote control is on
- The dryer function works approximately 3 minutes and stops automatically
- Push the dryer button again for more drying
If water pressure is weak.
- During flushing, water pressure may be slightly diminished.
- You may experience delayed/nominal nozzle function if water pressure is low.
Push the auto flush button.
- Change auto flush to manual flush by holding button for 3 seconds
Cleaning the body unit
Beware not to use any bathroom cleaning detergents such as benzene acid chemical detergent on the seat exterior.
- Using any type of chemical products or rough scrubbers on the electronic toilet seat surface,
which is made out of plastic material can either damage or change its color.
Do not spray water directly or use a shower hose on the main body unit.
- Can cause fire or damage to the unit.
When cleaning, the power cord must be unplugged from the power outlet, and make sure water does not contact the cord and/or outlet.
Push the stop button.
After cleaning, use a soft cloth to dry the unit.
- All functions will immediately stop: Back wash, turbo wash, front wash, or
Do not use any cleaning products such as Oxy Clean.
16
dryer function will stop.
Installation Manual and Operating Instructions
17
10
Operation (Basic)
Sit on the seat
- Please make sure that your skin is in direct contact with the skin sensor
when sitting on the seat to fully activate.
Reference
- Do not press the control buttons (remote control/single controls) harder than needed.
- This can cause damage. Please be aware to pull down your clothes amply and do not cover the seat with any clothing items,
as it can prevent the seat from activating.
Push Front wash, Back wash, or Turbo wash button
- Each function runs for approximately 2 minutes.
Push the Stop button.
- Back wash, turbo wash, front wash or dryer function will stop
Automatic self-cleaning nozzle
- Before and after any wash function, the nozzle will automatically clean itself. It is normal to see water spraying
How to clean the nozzle
- Without sitting on the seat - Push the
[Back wash button] for 3 seconds
on simple control (side controls on seat).
The nozzle will come out and stop.
Reference
- Front wash, Back wash, or Turbo wash stops automatically after 2 minutes.
- For additional use, press function again.
- Front wash and Back wash button are located on the front of the remote control.
- Brush the nozzle with a soft bristled brush.
- After cleaning, press the
[Stop button] and the nozzle will perform its
self-cleaning function
Operation
Even if the stop button is not pushed, nozzle cleaning function runs approximately for 2 minutes and
will automatically stop.
Push the dry button
- The dryer function operates for approximately 3 minutes.
- When the dryer button is pushed, the auto flush function works automatically.
Nozzle Change
Nozzle Seperation
Nozzle Combination
Reference
- When dryer function is selected, deodorization stops
After dryer function stops, deodorization starts again. (Normal operational conditions)
Push the auto flush button.
- Push the auto flush button on remote control to operate
auto flush function.
- By pushing the button for 3 seconds, the auto flush function will
change to manual flush.
18
Installation Manual and Operating Instructions
19
10
Operation (Basic)
Manual Control
Seat temperature control
※ Manual controls can be used if there is a power outage or remote control is damaged or lost
Front wash
button
Stop
button
- Manual controls include manual flush, front wash,
back wash, and stop button.
- If seat temperature button is selected, LED display will show selected temperature.
seat temperature
Low - High
Manual flush
button
Back wash
button
- Manual flush button(
power outages.
Low - High
Low - High
Room temperature / off
93.2℉
Low - High
98.6℉
Low - High
104℉
) can be used during
Reference
- Water pressure and nozzle position of front and back wash can be adjusted by 5 levels.
- Remote control cannot be used if front wash, back wash, oscillate, or massage function are being operated manually.
- Please close the seat cover when the product is not used.
It will keep seat warm and save electricity.
- To use oscillate or massage function after using simple control, please push the same button on the remote control
one more time and push the oscillate or massage button
Low temperature safe mode
- After 15 minutes sitting on the seat, maximum seat temperature will be reduced gradually in
5 minute increments for 30 minutes.
- Without sitting on the seat, water flows automatically.
- Nozzle moves for about 20 seconds to wash entire nozzle and then automatically retracts.
Operation
Automatic self-cleaning nozzle function
Nozzle position control
- To set the nozzle position, please push the nozzle position button
(back or front) while using front wash, back wash, or turbo wash.
- Nozzle position which was previously set is saved.
※ Nozzle position can be adjusted by 5 levels.
Air Dryer temperature control
- Push water pressure/dryer temperature (+High or - Low) to set air dryer temperature.
- Dryer temperature which was previously set is saved.
(Push water (+) high or (-) low button to set dry temperature.)
※ Air Dryer temperature can be adjusted by 5 levels.
20
Installation Manual and Operating Instructions
21
11
Operation (Detail)
Water pressure control
Massage
- Push water pressure/dry temperature (+ High or - Low) to set
water pressure from 1 to 5 levels.
- Water pressure which was previously set is saved.
(Push (+) High or (-) Low button to set water pressure)
- During the Front wash, Back wash, or Turbo wash function, push the Turbo wash/Massage button to start the
Massage function.
(When massage function is working, push the turbo/massage button to stop the function.)
Auto massage function: The massage function is automatically activated when using each wash function.
(Front, Back, or Turbo wash)
(NOTE) If the water pressure is weak.
How to set auto massage function
- After using each wash function (Front, Back, or Turbo wash) push stop button and then push massage button. Hold for 3 seconds to
set massage level. Unit will beep when set.
- Push the button again for 3 seconds to cancel massage setting. Unit will beep twice when cancelled.
- After auto massage function is set for each wash function (Front wash, Back wash, or Turbo wash), massage function will be operated
automatically during each function even If user did not put the massage button.
- Check if the water pressure is set to “low”
Hold for 3 seconds to set
massage level.
Unit will “Beep” when set.
- When selected “Beep”,
when canceled “Beep beep”
Operation
Water temperature control
Hold for 3 seconds to cancel massage
setting. Unit will “Beep” twice when
deactivated.
Oscillating
- Press the water temperature button, and LED display will change, so you can select your
desired water temperature. You can set the water temperature while using water.
Auto oscillation function: Even if user does not push oscillation button when user uses each wash function,
(Front wash, Back wash, or Turbo wash) oscillation is set to operate automatically.
How to set or cancel the automatic oscillation function.
- After using each wash function (Front wash, Back wash, or Turbo wash), push stop button and then push oscillate button for 3 seconds,
then auto oscillate function will be set up with “beep” sound. Push the button one more time for 3 seconds, and it will cancel the oscillation
function. Unit will beep twice when cancelled.
- After auto oscillation function is set for each wash function (Front wash, Back wash, or Turbo wash), oscillation function will operate
automatically during each function even if user did not push the oscillation button.
water temperature
Low - High
22
Low - High
Low - High
Room temperature / off
93.2℉
Low - High
98.6℉
Low - High
104℉
Hold for 3 seconds to set
auto oscillation level and
unit will “Beep” when set.
Hold for 3 seconds to cancel
oscillation setting.
“Beep beep” will sound.
- When selected “Beep”,
when canceled “Beep beep”
- Even if the power is out or reboot it,
auto move function setting will remain
Installation Manual and Operating Instructions
23
11
Operation (Detail)
Energy saver
Battery Replacement
OFF
State
Saver On/ Off
- When pressing (
) the energy saver LED on the main unit will turn on
ON Flashing
State State
FlUSH
- Energy saver mode automatically maintains water and seat temperature of 89.6℉(32℃)
OCCUPIED
-
If LED light on main unit does not go on when pressing button on the remote control - change battery.
LED light turns on with initial push of desired button, press again to activate function.
After 10 minutes, unit goes into energy saver mode.
You will need to reset functions after changing batteries.
ENERGY SAVER
POWER
In energy saver mode, the seat heating temperature could appear to be lower than
the actual temperature setting.
1⃞
2⃞
1⃞
Other energy saver tips
( Be careful +, - ,polarity)
In order to save energy, please abide by the following instructions:
1⃞ Please insert batteries into remote
2⃞ Closed battery cover
- Keep seat cover closed when not in use to prevent heat from being lost.
- Keep temperature set to low.
- Please unplug the power cord if you do not plan to use the unit for a long period of time.
Replace batteries
Change batteries when LED is flashing.
Deodorizer ON/Off (initial setting is Off)
- Please press button for (
Operation
Deodorizer
1:1 real size
1.5V Alkaline AAA battery
) 3 seconds (press button again for 3 seconds, the function is cancelled.)
- After setting deodorizer function, it is automatically activated when sensing person.
“Deodorizer” button
Press 3 seconds
Single chime
“Deodorizer” button
Press 3 seconds
Double chime
- Select: Single Chime
- Cancel: Double Chime
- Deodorizer function automatically stops after approximately 1 minute
Reference
- Deodorizer function stops while dryer is selected. After dryer function completes, deodorizer automatically activates.
24
Installation Manual and Operating Instructions
25
12
Draining water from tank
Loosen the nut on the hose that is connected to the unit,
and then separate the electronic toilet seat from the
toilet in the following order as illustrated.
Disconnect the power plug
Shut the valve by turning it to the right
water supply valve
Press and hold the drain button located on the side of the body unit.
Do not turn the seat upside-down. This can cause damage to the unit as well as fire hazard.
※ Raise main unit of bidet after separated Fix Cap (arrow indicated) & fixed bolt
Disconnect the T-valve from the water supply. (Refer to page 13)
Drain button
Separate bidet after disconnecting bidet and toilet hose
Connect the water hose to the toilet which was disassembled while installing the electronic
toilet seat, and turn the water valve to the left to open it. See if there is any leaking from
the water hose connection.
14
Separation of unit from the toilet bowl
Operation
13
Maintenance for winter season
※ Please follow the instructions below when moving or separating the unit from the toilet for cleaning purposes
Disconnect the power plug
Check if the power cord is plugged in securely.
FlUSH
- power is connected, led is lighten
OCCUPIED
ENERGY SAVER
POWER
Shut the water supply valve
water supply valve
Adjust the (
from freezing.
) button to “low” to prevent water
If the product is not used for a long period of time, please
disconnect the power cord and drain the water from the
internal unit.
Push and hold the drain button in the center of the bidet top
to completely drain the water from the internal unit.
Drain button
26
Installation Manual and Operating Instructions
27
15
16
Trouble shooting
Specifications
※ Please be sure to check the following aspects before asking for help.
Trouble shooting
Specification
Factors to check
Power rating
The water does not spray
The unit is not operating
Water is leaking
- Check if the water tank is filled.
- See if the water valve is open
- Check if the water filter (strainer) is clogged.
- Check if the power cord is connected.
- See if the power is turned off from the main unit.
- Make sure that the Skin sensor on the seat touches your skin when
you sit on the seat.
- Ensure plumbing is properly connected. If water is leaking from the main unit
disconnect and contact service personnel.
Water
inlet type
Direct inlet Flow Type, Low Tank
Water inlet pressure
1.0 ~7.0 kgf/cm²(14.2psi ~ 99.6 psi)
Back
Max. 700cc ± 150cc / min
Front
Max. 700cc ± 150cc / min
Water pressure adjustments
1 ~ 5 levels
Warm water temperature
control
Room Temp. ~ 93.2℉, 98.6 ℉, 104 ℉
Heater
1340W
Safety device
Bi-metal, Thermal fuse, Flow sensorHeated
Heated
Temperature control
Room Temp. ~ 93.2℉, 98.6 ℉, 104 ℉
Heater
55W
- Check if the water pressure is set to “low”
Safety device
Thermal fuse, temperature sensor in seat, Prevent low-temp burning
Warm air control
Room temp ~ 113 ℉ , 5 levels
Warm Air
Dryer Device
Seat, water and
dryer is not warm
When the nozzle doesn’t
come out
When water is cold or warm
- See if seat temperature is set to “low”.
- See if the water temperature is set to “low”.
- See if the dryer temperature is set to “low”.
- Make sure skin is touching Skin sensor
120V / 60Hz / 1400W
Type
Wash device
Seat
Water pressure is weak
TH-0111
Heater
250W
Safety device
Thermal fuse
Turbo wash function
○
ELB
×
Economy mode
○
Deodorizer
○
Inlet water temperature
41℉~ 93.2℉ (recommended 54℉~ 93.2℉)
Ambient temperature
41℉~ 104℉ (recommended 54℉~ 93.2℉)
Dimensions
W: 415mm(16.34inch) L: 695mm(27.36inch) H: 145mm (5.71inch)
Weight
43.74kg (96.43 lbs) ( China bowl:38kg(83.78lbs) Bidet:5.74kg(12.66lbs)
- Adjust the temperature
* Recommended water pressure is 1.0 ~7.0 kgf/cm²
Dryer does not work
28
Other
Body unit shakes
- Tighten the bolts (do not over-tighten)
- Make sure skin is in contact with skin sensor
Installation Manual and Operating Instructions
29
17
Information to the user
This Warranty does not cover the following
This equipment has been tested and found to comply with the limits for a Class B digital device, pursuant to part
15 of the FCC Rules. These limits are designed to provide reasonable protection against harmful interference in a
residential installation. This equipment generates, uses and can radiate radio frequency energy and, if not
installed and used in accordance with the instructions, may cause harmful interference to radio communications.
However, there is no guarantee that interference will not occur in a particular installation. If this equipment
does cause harmful interference to radio or television reception, which can be determined by turning the
equipment off and on, the user is encouraged to try to correct the interference by one more of the following
measures:
- Reorient or relocate the receiving antenna.
- Increase the distance between the equipment and receiver.
- Connect the equipment into an outlet on a circuit different from that to which the receiver is connected.
- Consult the dealer or an experienced radio/TV technician for help.
WARNING
Any changes or modifications not expressly approved by the manufacturer could void the
user’s authority to operate the equipment and limited warranty.
18
Warranty
To ensure your warranty protections you must complete and return this card
with a copy of your receipt to Royal Line, within 15 days after date of
purchase to validate your warranty.
ONE YEAR WARRANTY
Attn: Warranty Dept.
Royal Line LLC
VALID ONLY WITH ORIGINAL PURCHASE RECEIPT
Warranty: Royal Line LLC warrants this product against defects in any parts or workmanship for a period of 1 year from
PO BOX 1313 Seaford, NY 11783
the original purchase date. This product is for residential use only. It is not intended to be used in commercial or industrial
settings. This product warranty covers only the original consumer purchaser of the product.
operation, shipping damage, abuse , misuse, unauthorized repairs, made or attempted, alterations, improper
Other
Warranty Coverage: This warranty is void if the product has been damaged by accident, neglect, improper handling or
Zip code
assembly/installation or maintenance, commercial use or other causes no arising out of defect in materials or
workmanship. This warranty does not extend to any units which have been altered or modified or to damage to product
or parts there of which have had the serial numbers removed, altered, defaced, or rendered illegible.
Implied Warranties: Any implied warranties which the purchaser may have are limited in duration to 1 year from the date
of purchase. This limited warranty is in lieu of all other warranties expressed or implied, including warranties or
merchantability and fitness for a particular purpose and excludes all liability for incidental or consequential damages for
Service Department
any cause whatsoever.
Inquiries and support
Warranty Performance: During the above 1 year warranty period, a product with a defect will be replaced when the
Email: [email protected]
product is returned to an authorized dealer. The replacement part will be in warranty for the balance of the 1 year period
Phone: 800-516-7450
and an additional one-month period. No charge will be made for such replacement.
30
Installation Manual and Operating Instructions
31