1
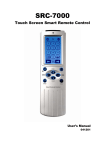
SRC-7000
RemoteComm
Software User’s Manual
050225
Preface
About this manual
This manual is designed to make using the SRC-7000 RemoteComm
program as easy as possible. Information in this document has been
carefully checked for accuracy; however, no guarantee is given to the
correctness of the contents. The information in this document is subject
to change without notice.
Copyright
© Copyright 2005
This document contains proprietary information protected by copyright.
All rights are reserved. No part of this manual may be reproduced by
any mechanical, electronic or other means, in any form, without the
prior written permission of Sunwave Technology Corporation.
Trademarks
All trademarks and registered trademarks are the property of their
respective owners.
SUNWAVE Customer Service & Support Info
E-Mail: [email protected]
URL: www.sun-wave.com
Table of Contents
CHAPTER 1 OVERVIEW ..........................................................................................1
INTRODUCING THE SRC-7000.................................................................................1
SYSTEM REQUIREMENTS.............................................................................................1
ABOUT THE REMOTECOMM SOFTWARE ....................................................................2
CHAPTER 2 INSTALLATION....................................................................................3
SLC-2080 CABLE....................................................................................................3
SRC-7000 REMOTECOMM INSTALLATION...............................................................6
CHAPTER 3 GETTING STARTED .............................................................................7
STARTING THE SOFTWARE..........................................................................................7
THE INTERFACE .........................................................................................................7
THE SRC-7000 VMCF FILE...................................................................................10
CONNECTING THE SRC-7000 TO A PC ................................................................10
CHAPTER 4 USING THE SOFTWARE INTERFACE ..............................................11
USING A PRE-PROGRAMMED CODE .......................................................................12
ADDING A DEVICE KEY FROM A PRE-PROGRAMMED CODE....................................15
ADDING A SOFT KEY ..............................................................................................19
LEARNING AND SHOOTING CODE ..........................................................................21
CREATING A DEVICE KEY .......................................................................................24
CREATING A MACRO KEY ......................................................................................26
CREATING A TIMER MACRO ...................................................................................31
CREATING A CYCLE KEY.........................................................................................33
CREATING A LABEL ................................................................................................37
EDITING THE REMOTE CONTROL CONFIGURATION ...................................................39
CUSTOMIZING YOUR WELCOME PAGE ...................................................................41
CHAPTER 5 PORTABLE MODEL FILES.................................................................43
IMPORTING A MODEL FILE ......................................................................................43
EXPORTING A MODEL FILE ......................................................................................44
CHAPTER 6 COMMUNICATIONS.......................................................................45
DOWNLOADING FROM THE REMOTE CONTROL ......................................................45
i
UPLOADING TO THE REMOTE CONTROL ..................................................................46
CHAPTER 7 ICON EDITOR SOFTWARE ..............................................................47
LIBRARY FILES .........................................................................................................47
CREATING AN ICON ..............................................................................................49
CHANGING AN ICON ............................................................................................51
IMPORTING A LIBRARY ............................................................................................53
APPENDIX...............................................................................................................56
TROUBLESHOOTING................................................................................................56
ii
Introducing the SRC-7000
Chapter 1 Overview
This chapter provides an overview of the SRC-7000
RemoteComm software, its features and functions.
Introducing the SRC-7000
Congratulations on your purchase of the SRC-7000 touch
screen remote control. The SRC-7000 remote control is a digital
programmable universal remote control that can control
multiple devices in your home and interface with your
computer.
This manual specifically covers RemoteComm, the SRC-7000
remote control software. The RemoteComm software provides
an interface for configuring and customizing the SRC-7000. You
can also use the RemoteComm software to create macros and
timers, similar to the function used in SRC-7000 Remote Control.
This manual should be used in conjunction with the SRC-7000 user
manual and the user manuals for the devices it is to control.
System requirements
This software is used for a PC with CD-ROM drive, USB port, and
30MB of free hard-disk space.
Supported operating systems:
Windows 98 and 98SE
Windows ME
Windows 2000 Professional
Windows XP Home Edition and Professional
Microsoft® and Windows are either registered trademarks or
trademarks of Microsoft Corporation in the United States and/or
other countries.
1
SRC-7000 RemoteComm User’s Manual
About the RemoteComm software
RemoteComm software is designed to make configuring and
customizing of the SRC-7000 easy and convenient. When the
software is installed, you can connect your SRC-7000 to your
computer to upload or download configuration data.
When the RemoteComm and Icon Editor software is installed,
you can easily:
2
•
Create macros and timer macros
•
Back up your configuration to a PC
•
Customize the LCD layout using the unique
RemoteComm software
•
Create your own icon library of using Icon Editor software,
and use it on the SRC-7000
•
Upload or download your own database of using your PC
SLC-2080 cable
Chapter 2 Installation
Read this chapter to learn how to install the software and drivers
required for the SRC-7000. Read this section carefully and install
all the components in the correct order, exactly as it describes in
the instructions.
SLC-2080 cable
The SLC-2080 cable is the interface cable that connects the SRC7000 to your computer. The cable comes in two pieces. Both
pieces are required to connect the SRC-7000 to a computer. The
smaller cable, with the round, 3.5 mm plugs can be used to
connect two remote controls together to share data.
Note: You must first install the SLC-2080 USB driver for the SLC-2080 cable
to work.
To install the SLC-2080 cable:
1. Plug the SLC-2080 cable into the USB port on your PC.
The operating system should detect the new USB device
automatically and display the following screen.
3
SRC-7000 RemoteComm User’s Manual
2. Click
to display the following screen.
Search for a
suitable driver
for my device
3. Check the Search for a suitable driver for my device radio
.
button and click
Specify a
location
4. Insert the RemoteComm CD-ROM in the CD-ROM drive.
5. Check the Specify a location option and click
Browse to the location
of the driver on the
supplied CD-ROM
6. Browse to the location of the driver on the supplied
.
CD-ROM and click
4
.
SLC-2080 cable
The flowing screen is displayed.
7. Click
to display the following screen.
8. Click
to complete the installation.
Note:
You may need to restart your machine for the new installation to
become active.
5
SRC-7000 RemoteComm User’s Manual
SRC-7000 RemoteComm installation
Insert the CD-ROM into your CD-ROM drive. Setup should begin
automatically. After installing the SLC-2080 USB cable driver, click
SRC-7000. The SRC-7000 RemoteComm software will install
automatically.
If setup does not begin automatically, running the RemoteComm
7000*_*.exe file in the CD root folder, or the AutoRun.exe file, to
begin Setup. Follow the on-screen instructions.
6
Starting the software
Chapter 3 Getting started
Read this chapter after you have installed the RemoteComm
software to learn how to operate the interface and use the basic
functions.
Starting the software
Double click the icon on the desktop to start the RemoteComm
software. You can also click the Start button and then start the
software from the Sunwave folder in the Start menu.
The interface
A welcome screen appears when the RemoteComm software is
started.
When the software is fully loaded, you must confirm the remote
control model you are using.
7
SRC-7000 RemoteComm User’s Manual
1. Highlight SRC-7000 and click OK.
2. Select the item you want, and click the
button.
• New default VMCF file
If you are configuring your SRC-7000 for the first time, you will
probably want to modify the new default VMCF file by
selecting this item.
• Open an existing VMCF file
If you have a saved version of the active VMCF file on your
hard disk, you can modify that and then upload it to the
remote control.
8
The interface
• Download from remote control
If you are already using your SRC-7000 and need to modify
the VMCF file in the remote control, connect the SRC-7000 to
the PC. See “Connecting the SRC-7000 to a PC” on page 10.
button, a status bar indicates the
When you click the
download progress. See Chapter 6 Communications on
page 45 for more information about connecting and
downloading from the remote control.
The following screen appears.
When you see this screen, you are ready to start using the
RemoteComm software to program your SRC-7000 remote
control.
9
SRC-7000 RemoteComm User’s Manual
The SRC-7000 VMCF file
A VMCF file contains the configuration for your remote control.
It can be created and modified of using RemoteComm
software. It can also be stored on your computer hard disk.
You can download the VMCF file from the SRC-7000 to your PC
and modify it, or store it on your hard disk as a backup profiles.
You can also transfer a VMCF file directly from one SRC-7000
remote control to another.
A VMCF file contains all the configuration data for the SRC-7000
including soft keys, macros, timers etc.
When you have backed up your VMCF file to your PC, you can
choose the "Open an existing VMCF file" option to modify it.
Connecting the SRC-7000 to a PC
Some functions within the software require you to connect the
SRC-7000 to a PC. For example, you will need to connect the
SRC-7000 to your PC when you upload or download
configurations. Connect your PC and SRC-7000 with the provided
as shown in the diagram below.
10
Connecting the SRC-7000 to a PC
Chapter 4 Using the software interface
Read this chapter and learn how to use the RemoteComm
software to configure your SRC-7000 remote control.
Main tool bar icons
To create a new VMCF file.
To open an existing VMCF file stored on your hard disk
To save the current VMCF file
To edit the home LCD soft page
To import a model file to a selected device
To export a model file from a selected device
To edit a macro device
To download a VMCF file from the remote control
To upload the current VMCF device to the remote
control
11
SRC-7000 RemoteComm User’s Manual
Using a pre-programmed code
The easiest way to program your SRC-7000 for a new device is to
use a pre-programmed code. The RemoteComm software is
equipped with a large database of pre-programmed codes.
To use a pre-programmed code:
1. Start the RemoteComm software as described in the
section of “Starting the software” on page 7.
2. Select a VMCF file to modify. See page 7 for details of
“how to select a VMCF file”.
When the VMCF file is loaded, the window below is
displayed:
You can modify any of the devices listed in the left hand
panel. As an example, let's assume that you want to
load a preprogrammed code to control your new TV:
3. Right click the TV icon in the left hand panel.
A drop down menu appears as follows:
4. Select “Load pre-program code to device” item from the
drop down menu.
12
Using a pre-programmed code
A warning box appears of asking you to confirm that the
original setting may be deleted.
to confirm that you wish to overwrite the
5. Click
existing configuration for the chosen device.
The pre-programmed code is entry window appears.
Enter device type
Enter the
brand name
6. Select the device type and the brand name in the first
two fields.
7. If you know the pre-programmed code number, select it
from the list in the third field by clicking on it with the
.
mouse, and then press
8. If you don't know the pre-programmed code number,
you must perform an Auto Test instead.
13
SRC-7000 RemoteComm User’s Manual
Perform an Auto Test to confirm which pre-programmed code you
need to control your device.
To perform an Auto Test
1.
Turn on the device you are trying to control with the
SRC-7000 (in this case a TV).
2.
Connect the remote control to the computer with the
SLC-2080 USB cable. See Connecting the SRC-7000 to a
PC on page 10.
3.
Follow steps 1-6 above.
4.
Point the SRC-7000 at the device you are trying to
control.
5.
Click
in the fourth field.
Signals are transmitted to the TV from the SRC-7000
sequentially.
6.
When the device is turned off, then you can now make
a note of the current pre-programmed code number.
This is the code you require.
Note: When the device is turnned off, click
stop the Auto Test.
immediately to
Pre-programmed
code list
Current pre-programmed
code is displayed here
7.
14
Select the code you require from the pre-programmed
code list and click
.
Adding a device key from a pre-programmed code
Note:
•
After the configuration, you need to download the new
VMCF file to the SRC-7000 to make it active. See
Chapter 6 Communications on page 45 for more
information.
•
You should also save a copy on your hard disk as a
backup. To save the current VMCF file, click the save
and name it so that you can find it again.
button
Adding a device key from a pre-programmed code
You may find that the devices listed in the left hand panel of the
RemoteComm interface window do not suit your needs exactly.
You can delete items from this list and add new ones of your own.
You can also add new devices within existing devices. The
easiest way to add a new device is to pick one from the list of
pre-programmed devices.
To add a new device:
1. Start the RemoteComm software as described in
Starting the software on page 7.
2. Select a VMCF file to modify.
When the VMCF file is loaded, the window below is
displayed:
You can delete
any of the devices
in the left hand
panel, or add a
new device of your
own.
or the Home icon in the left
3. Click on the home button
hand panel to return the Home LCD soft window.
15
SRC-7000 RemoteComm User’s Manual
Note: You can also click any of the existing devices in the list if you
want to add a device key within that device.
4. Press the
or
button to go to the page where
you want the device key to appear.
Page1
Page2
5. Move the cursor to the white
background and right click to display a
drop down menu.
6. Select Add device from pre-program
code.
The pre-programmed code entry
window will appear. Let's assume that
you are adding a new TV device.
Enter device type
Enter the
brand name
16
Adding a device key from a pre-programmed code
7. Select the device type and the brand name in the first
two fields.
8. If you know the pre-programmed code number, select it
from the list in the third field by clicking on it with the
. If you don't know the premouse, and then press
programmed code number, you will need to perform an
Auto Test. See the previous section for details of how to
perform an Auto Test.
Pre-programmed
code list
Current preprogrammed code is
displayed here
9. Select the code you require from the pre-programmed
code list and click
.
After you have inputted the pre-programmed codes, a
new key will appear in the top left corner of the LCD soft
window. You can drag the new key to a new position on
the screen with the mouse.
10. Double click on the new key to popup the key properties
window.
17
SRC-7000 RemoteComm User’s Manual
11. Give the new key a name of using the keyboard or onscreen keyboard.
12. Click inside the Edit Label field and use either the
keyboard or the on-screen keyboard to enter a key
name.
Note:
● To add a carriage return (new line) in your
key name, use the enter key on the onscreen keyboard.
● You can select the icons by click the “Icons”
tap on the text table.
● You can also click the “Load Icon Library”
button to load your own icons. See “Chapter
7 Icon Editor” for more information.
13. Press
.
Your new device key will appear in the LCD
soft window with the new name. When you download the
configuration to your remote control, it will have the
characteristics of the pre-programmed device you selected.
Your new device will also appear in the device list in the left
panel of the interface and it can be modified or deleted just like
the other devices in the list.
18
Adding a soft key
Note:
•
You will need to download the new configuration to the remote
control to make it active. See Chapter 6 Communications on
page 45 for more information.
•
You should also save a copy on your hard disk as a backup. To
and name it
save the current VMCF file, click the save button
so that you can find it again.
•
You can delete a device from the menu tree by right clicking
on it and selecting Delete device from the drop down menu.
Adding a soft key
You can add or delete a key to any of the devices defined,
including those that you have defined yourself.
To add a new soft key:
1. Start the RemoteComm software as described in
”Starting the software” on page 7.
When the correct VMCF file is loaded, the window below
will be displayed:
Select a
device to
add a new
soft key
2. Click on the device that you want to add a key to in the
left hand panel.
3. When the LCD soft window appears, click the next
and previous
buttons to browse the page on which
you want to add a new key.
19
SRC-7000 RemoteComm User’s Manual
4. Right click on the white background and select Add
button from the drop down
menu.
A new key will appear in the top left corner of the LCD
soft window. You can drag the new key to a new position
on the screen with the mouse.
5. Double click on the new key to popup the key properties
window.
6. Give the key a name as described on page 18.
7. Click
8. Click
to return to the previous screen.
to save your new key.
Note:
• You can change the location of the button to another page by
right clicking on the soft key and selecting "Move to" to select a
new page.
• You can resize any of the soft keys by dragging the corner of the
key with the mouse. You can also reposition any of the soft keys
20
Learning and shooting code
by clicking and dragging them to a new position.
• You can move the new key to a new page by right clicking on it
and choosing move to from the drop down menu.
• To learn how to apply a function to your new key, see the next
section, Learning and shooting code.
• You will need to download the new configuration to the SRC7000 to make it active. See Chapter 6 Communications on page
45 for more information.
• To save the current VMCF file, click the save button
it so that you can find it again.
and name
Learning and shooting code
Use the learning and shooting code functions to copy a new key
from the original remote. You can add a function either to a soft
key that you have added yourself and a key within an existing
device, or a device key.
To apply the function to a key:
1. Start the RemoteComm software as described in
Starting the software on page 7.
2. Click the device icon from the left hand panel and select
the key for your new function. This can be any one of the
keys on the Home LCD soft window, or any key on the
LCD soft windows for existing devices.
3. Double click the key in the LCD soft window to display its
properties.
Double click the
button to display its
properties
4. Click the Code tab to display the key's code properties.
21
SRC-7000 RemoteComm User’s Manual
Code tab
When the code properties window is displayed, you are
ready to apply a function to the key. You will also need
the original remote control that came with the device.
Learn IR
code mode
button
5. Connect the SRC-7000 to the PC as described in
Connecting the SRC-7000 to a PC on page 10.
22
Learning and shooting code
6. Click the Learn IR code mode button.
7. Point the original remote control at the bottom of the
SRC-7000. Press and hold the key you want to teach.
Press and hold
the key on the
original
remote
control that
you want the
SRC-7000 to
learn
The SRC-7000 beeps when it has learnt the new key. A
graphical wave from of the IR signal appears in the IR
Code View box.
IR code view
8. To test the new function, click the Stop Learning mode
button, to end the learning process.
23
SRC-7000 RemoteComm User’s Manual
9. Point the SRC-7000 at the device. Click the Shoot IR code
button.
If the learning process has worked, the new code should
be sent by the SRC-7000 and the device should react
accordingly. If the new key does not work, repeat steps 710 to re-teach the code.
10. Press
to return to the LCD soft window view.
11. Press
on the device window to save the new key
function.
Note:
You will need to download the new configuration to the SRC-7000 to
make it active. See Chapter 6 Communications on page 45 for
more information.
You should also save a copy on your hard disk as a backup.
Creating a device key
You can add a new device from a pre-programmed set of
codes, as described in Adding a device key from a preprogrammed code on page 15. However, you may want to add
a new device key of your own design. You will probably only
want to add new device keys to the Home LCD soft windows, but
you can add a device key to any pages of existing devices.
To add a device key:
1. Start the RemoteComm software as described in
”Starting the software” on page 7.
2. Click the Home icon in the left hand
panel to add a new device key to the
Home LCD soft window. You can also
click on any of the existing devices if
you want to add a child device to one
of them.
The Home LCD soft window or the LCD
soft window for the device you have
24
Creating a device key
chosen will appear.
3. Right click on the white background where you want the
new device key to appear.
4. Select Add button from the drop
down menu.
5. Drag the new key to where you
want it to appear on the LCD soft
window.
6. Double click the key to display the
key properties box.
7. Click the Attribute tab to display
the key attributes.
Attribute
tab
Device radio
button
8. Click the radio button to define the new key as a device
key.
9. Click
to return to the LCD soft window, and click
to save the new configuration.
Note:
• You can add a label to your key in the same way as you would
for a soft key, see on page 19.
• You can also add a function to the new device key, see Learning
and shooting code on page 21.
• Note: You will need to download the new configuration to the
remote control to make it active.
See Chapter 6
Communications on page 45 for more information.
25
SRC-7000 RemoteComm User’s Manual
• You should also save a copy on your hard disk as a backup. To
and name it
save the current VMCF file, click the save button
so that you can find it again.
Creating a macro key
You can create a macro key either on an LCD soft window for an
existing device, or on the Home LCD soft window. A macro is a
series of commands one after the other. You could for instance
write a macro to turn on a VCR then switch it to a particular
channel, and begin recording. All could be simplified just with the
press of a single key.
To create a macro:
1. Start the RemoteComm software as described in
Starting the software on page 7.
2. Click on a device or the Home icon in the
left hand panel where you would like your
new Macro key to appear.
The Home LCD soft window or the LCD
soft window for the device you have
chosen appears.
3. Right click on the white background
where you want the macro key to appear.
Right click here to
place a macro
button on the page
26
Creating a macro key
Select Add button from the drop down
menu.
4. Drag the new key to where you
want it to appear on the LCD soft
window.
5. Double click the key to display the
key properties box.
6. Click the Attribute tab to display
the key attributes.
Attributes tab
Macro radio button
7. Click the Macro radio button to define the new key as a
macro key.
A new Macro tab appears.
27
SRC-7000 RemoteComm User’s Manual
8. Select the Macro tab panel.
9. Click
to begin creating a new macro.
A new window opens.
Delay
Device view
Key view
LCD soft
window
10. Select the first step for your macro. Each step can be any
key that has been programmed into your SRC-7000.
Note:
• You can not delete or edit the highlight step before the these
steps of your macro were already saved.
• You can store up to 60 commands in one macro.
• Each step of your macro can be any one of the keys you have
programmed into your SRC-7000.
• Use the Device View to select the location of the key you require.
• Select the key either by clicking the key in the LCD soft window,
or the icon in the Key View.
11. Set the delay after the step
using the delay field.
28
Creating a macro key
Note:
You can set the delay between commands using the delay field.
Once you set the delay, the same delay will be inserted between
commands until you change it.
12. Continue adding steps with delays until your macro is
completed.
Note:
• You can keep track of which step you are currently setting shown
on the top left corner of the screen and you can use the Up and
Down buttons to go back and make changes.
• If you try to add a new macro key to a macro, the step will be
ignored when the macro is run.
13. When your macro is complete, press
key properties page.
to return to the
Your macro is displayed
in list form.
You can highlight any
step in the macro and
use the arrow keys to
move the position up or
down.
14. Press
macro.
to save your
29
SRC-7000 RemoteComm User’s Manual
Macro step buttons
View macro step
New macro step.
Insert macro step.
Edit a macro step.
Delete a macro step.
Save macro key.
Move a macro step up or down.
Note:
• When your macro has been saved you then can use the
,
buttons to edit the highlighted step, or delete the
or
highlighted step.
• You will need to download the new configuration to the SRC-7000
to make it active. See Chapter 6 Communications on page 45
for more information.
• You should also save a copy on your hard disk as a backup. To
and name it
save the current VMCF file, click the save button
so that you can find it again.
30
Creating a timer macro
Creating a timer macro
Up to 32 timer macros can be defined. Timer macro keys are the
same as ordinary macro keys, but a timer function must be set so
that the macro runs at a predetermined time.
To create a timer macro:
1. Start the RemoteComm software as described in
”Starting the software” on page 7.
2. Click on the timer macro in the left
hand.
The Home LCD soft window for timer
macro keys appears.
3. Double click the macro timer key to which you wish to
apply for the timer.
The button properties window appears.
31
SRC-7000 RemoteComm User’s Manual
4. Add a label to the key of using the on-screen keyboard.
5. Click the Timer tab.
6. Use the radio buttons and the drop down menus to set a
weekday for the macro to run, or a specific time and
date, or disable the timer function if it is not required.
7. Click the Macro tab.
8. Define a macro as described in Creating a macro key on
page 26.
9. Click
to return to the LCD soft window, and click
to save the new configuration.
32
Creating a cycle key
Creating a cycle key
You can create a cycle key for your SRC-7000. A cycle key can
combine a number of different keys in one. Each time the key is
pressed, the next key is executed. You could program a cycle
key with your favorite channels. If your favorite channels are 25,
07, and 67, you could program a cycle key so that it switched the
TV to channel 25 the first time you pressed it, 07 the second time
you pressed it, and 67 the third time.
To create a cycle key:
1. Start the RemoteComm software as described in
Starting the software on page 7.
2. Click on a device or the Home icon in the
left hand panel where you would like
your new cycle key to appear.
The Home LCD soft window or the LCD
soft window for the device you have
chosen appears.
3. Right click on the white background where you want the
cycle key to appear.
”Right click here to
place a cycle key
on the page
33
SRC-7000 RemoteComm User’s Manual
4.
SELECT ADD BUTTON FROM THE DROP DOWN
MENU.
5.
DRAG THE NEW KEY TO WHERE YOU WANT IT
TO APPEAR ON THE LCD SOFT WINDOW.
6. Double click the key to display the
key properties box.
7. Click the Attribute tab to display the key attributes.
Attributes tab
8. Click the Cycle radio button to define the new key as a
cycle key.
Press “Start learning
mode” button
34
Creating a cycle key
9. Select the Cycle tab.
10. Connect the SRC-7000 to the PC as described in
Connecting the SRC-7000 to a PC on page 10.
11. Click the “Start Learning mode” button.
12. Point the original remote control at the bottom of the
SRC-7000. Press and hold the key you want to teach.
The SRC-7000 beeps when it has learnt the new key. A
graphical representation of the IR signal appears in the IR
Code View box.
Exit learning
IR code
mode
IR code view
13. Repeat step 14 for the next key in the sequence and so
on until all the sequence is learnt.
14. Press the Exit learning IR code mode button.
35
SRC-7000 RemoteComm User’s Manual
15. Test your cycle code by selecting the code from the left
hand panel, pointing the SRC-7000 at the device and
clicking the Shoot IR code test button.
16. Click
to return to the LCD soft window page.
17. Click
in the device window to save the new
configuration
Note:
• You need to download the new configuration to the remote
control to make it active. See Chapter 6 Communications on
page 45 for more information.
• You should also save a copy on your hard disk as a backup. To
and name it
save the current VMCF file, click the save button
so that you can find it again.
36
Creating a label
Creating a label
You may want to create a label for one or more of your LCD soft
windows. A label is like a page title to remind you what the page
contains.
To create a label:
1. Start the RemoteComm software as described in
Starting the software on page 7.
2. Click on the device that requires a label in the left hand
panel.
3. When the LCD soft window
appears for that device, click
the next
and previous
buttons to display the
page on which you want to
add a new label.
Note:
You can also add a label to the Home LCD soft window (SRC-7000
main screen).
4. Right click on the white background and select Add
button from the drop down menu.
37
SRC-7000 RemoteComm User’s Manual
A new key will appear in the top left corner of the LCD
soft window. You can drag the new key to a new position
on the screen with the mouse.
5. Double click on the new key to display the key properties
window.
6. Give the key a name using the keyboard, or select the
text or icons from the on-screen keyboard.
7. Click on the Attributes tab to display attributes for the new
key.
38
Editing the remote control configuration
8. Click the Label radio button to define the new key as a
label.
9. Click
10. Click
to return to the previous screen.
to save your new key.
Note:
• You need to download the new configuration to the remote
control to make it active. See Chapter 6 Communications on
page 45 for more information.
• You should also save a copy on your hard disk as a backup. To
and name it
save the current VMCF file, click the save button
so that you can find it again.
Editing the remote control configuration
You can edit remote control configuration using the Edit
Configuration function.
To edit the remote control configuration:
1. Start the RemoteComm software as described in
Starting the software on page 7.
2. From the edit menu, select Edit Remote Setting.
Edit Menu
39
SRC-7000 RemoteComm User’s Manual
The Remote Setting window appears.
3. Use the sliders and drop down boxes to configure the
remote control characteristics. You can also turn off the
welcome screen here by un-checking the Welcome
page box.
4. Press
to complete your changes and return to the
main screen.
Note:
• You need to download the new configuration to the remote
control to make it active. See Chapter 6 Communications on
page 45 for more information.
• You should also save a copy on your hard disk as a backup. To
save the current VMCF file, click the save button
and name it
so that you can find it again.
40
Customizing your welcome page
Customizing your welcome page
You can add your own welcome page that displays when the
SRC-7000 powers up.
Note: Only low resolution 104 x 160 black and white images may be
used for the welcome page.
To load your own welcome page:
1. Start the RemoteComm software as described in
Starting the software on page 7.
2. From the edit menu, select Edit Remote Setting.
Edit Menu
The Remote Setting window appears.
41
SRC-7000 RemoteComm User’s Manual
3. Click on the Welcome Page tab to display the welcome
page settings.
Load picture
button
Save picture for
system button
4. Click the Load picture button and browse to the location
of the new picture.
Note:
Only low resolution (104x160) black and white pictures can be used.
5. Click the Save picture for system button to save the new
picture.
6. Click
.
Note:
• You need to download the new configuration to the remote
control to make it active. See Chapter 6 Communications on
page 45 for more information.
• You should save a copy on your hard disk as a backup. To save
and name it so
the current VMCF file, click the save button
that you can find it again.
42
Importing a model file
Chapter 5 Portable model files
A portable model file is a file that contains all the configuration
data for a particular device. Portable model files all have the
extension .vmod. You can use RemoteComm software to import
and export portable model files.
Importing a model file
You can configure the SRC-7000 for a particular device simply by
importing the portable model file for that device if you have it.
To import a model file:
1. Start the RemoteComm software as described in
”Starting the software” on page 7.
2. Right click on the device you want to import to in the left
hand panel and select Import model file to device from
the drop down menu.
3. Select a file to import.
43
SRC-7000 RemoteComm User’s Manual
4. Click Open to import the file.
Note:
• After you configure the VMOD file in RemoteComm you will need
to download the file to remote control to make it active. See
Chapter 6 Communications on page 45 for more information.
• You can save a copy on your PC as a backup by clicking the
save button and naming it so that you can find it again.
Exporting a model file
You may want to export a model file as a backup profiles, or to
give to someone else.
To export a model file:
1. Start the RemoteComm software as
described in
Starting the software on page 7.
2. Right click on the device you want
to export to in the left hand panel
and select Export device to model
file from the drop down menu.
The Save As box appears.
3. Give the model file a name and click
file.
44
, to save the
Downloading from the remote control
Chapter 6 Communications
The communications menu enables you to upload configurations
to the SRC-7000 that you have made or modified. You can also
download the SRC-7000 active configuration to your PC.
Downloading from the remote control
To download a configuration from the SRC-7000:
1. Connect the SRC-7000 to the PC. See SRC-7000
RemoteComm installation on page 6.
2. Start the RemoteComm software as described in
Starting the software on page 7.
3. Click Communications and select Download from Remote
from the drop down menu or click the
the transmission.
icon to start
A status bar shows the progress of the download.
The software prompts you to save the current configuration.
4. Click
to complete the process.
45
SRC-7000 RemoteComm User’s Manual
Uploading to the remote control
To upload a configuration to the SRC-7000:
1. Connect the SRC-7000 to the PC. See SRC-7000
RemoteComm installation on page 6.
2. Start the RemoteComm software as described in
Starting the software on page 7.
3. Click Communications and select Upload to Remote from
the drop down menu or click
transmission.
icon to start the
A status bar shows the progress of the upload.
4. Click
46
to complete the process.
Library files
Chapter 7 Icon Editor Software
You can create your own icons for keys using the Icon Editor
software provided with the SRC-7000. This chapter explains how
to use the icon editing software to create icons, and how to
import them into RemoteComm software.
Library files
Use the Icon Editor to create a library of icons. When you have
created a library of icons, you can import it using RemoteComm
software.
To open an icon library:
1. Open the Icon Editor software of using the icon in the
desktop or the Start menu.
Note: You can also open the Icon Editor from the RemoteComm
tool bar by clicking "Tools" for quick editing.
2. Either open an existing icon library or create a new one.
Note: You can make multiple icon libraries and save them with
different file names, but you will probably only need to make one
library of all your icons.
47
SRC-7000 RemoteComm User’s Manual
3. Click
to open a new icon library, or click
existing library.
to open an
If you open a new library, the following box appears and
you must enter a name for the library.
Enter a name
for your new
library
If you open an existing library, the following box appears
and you must choose an existing library to open.
Open an
existing
library from
the list
48
Creating an Icon
Creating an Icon
Before creating an icon, you must first open a library file. See
Library files on last section.
To create a new icon:
1. Click
to begin creating a
new icon.
2. Choose the size of the icon
to create.
Note: Some large icons will not fit on
the smaller buttons, so make sure
you create an icon of the
appropriate size.
3. Click
.
The following screen is displayed.
Icon preview
Tools pallet
49
SRC-7000 RemoteComm User’s Manual
4. Use the tools in the tools pallet to create your icon.
Selection tool - Use to select an area
Pencil tool - Use to draw freehand
Line tool - Use to draw straight lines
Text tool - Use to add text and new paragraphs
and to edit and add emphasis to all language
fonts uploaded to Icon Editor
Flood fill tool - Use to fill an enclosed area
Eraser tool - Use to erase
Rectangle tool - Use to draw rectangles
Rounded rectangle tool - Use to draw rectangles
with rounded corners
Ellipse tool - Use to draw ellipses
Filled rectangle tool - Use to draw filled rectangles
Filled rounded rectangle tool - Use to draw filled
rounded rectangles
Filled ellipse tool - Use to draw filled ellipses
Vertical flip tool - Use to flip a selection vertically
Horizontal flip tool - Use to flip a selection
horizontally
Invert tool - Use to invert the colors in a selection.
50
5. Click
to save the finished icon to the library.
6. Click
to save the library file.
Changing an icon
Changing an icon
You can edit any of the icons saved in your icon libraries. Before
editing an icon, you must first open an existing library file. See
Library files on page 47.
To edit an icon in an existing icon library:
1. Click
to open an existing icon library.
2. Open an existing library from the list.
Open an
existing
library from
the list
The following conformation message appears.
3. Click
4. Click
.
to open the icon library browser.
Right click an
icon to edit it.
51
SRC-7000 RemoteComm User’s Manual
5. Right click on an icon in the library and
select Edit Icon to edit it. You can also
select Remove Icon to delete the icon
from the library.
Note: The library browser is divided into 5 pages of icons of different
sizes.
to close the library browser window and
6. Click
begin editing the icon.
52
7. Click
to save the finished icon to the library.
8. Click
to save the library file.
Importing a library
Importing a library
To use the new icons you have created with the SRC-7000, you
must import the icon library using the RemoteComm software.
To import an icon library:
1. Start the RemoteComm software as described in Starting
the software on page 7.
2. Select the device from the panel on the
left of the interface where, the button
with the icon is displayed.
Note:
You can import your new edited icons and use them on any keys. If
the icon size is larger than the size of the button, the icon can't be
shown properly. Adjust the size of the button to accommodate the
icon. You may need to use square buttons especially to display
some of the larger icons.
Double click the button in the LCD soft window on which you want a
new icon to appear.
Double click a
button to see its
properties
53
SRC-7000 RemoteComm User’s Manual
The button properties window appears.
Load Icons
Library
3. Click the Load Icons library.
Select a library
file from the list
4. Select a library file from the list and click
.
5. Click
when the
confirmation message appears.
The new icons will appear in the user defined icons pages
under the label tab in the properties window.
54
Importing a library
User defined
icon libraries
User defined
icons
6. The user-defined icons can be added in the same way as
text or pre-defined icons.
7. Click
8. Click
to return to the previous screen.
to save your new key.
Note:
• You need to download the new configuration to the remote
control to make it active. See Chapter 6 Communications on
page 45 for more information.
• You should also save a copy on your hard disk as a backup. To
save the current VMCF file, click the save button
and name it
so that you can find it again.
55
SRC-7000 RemoteComm User’s Manual
Appendix
Troubleshooting
Problem
Possible solution
Touch screen does not
display anything when
touched.
*Check the batteries are installed correctly.
*The batteries may be discharged. Replace
the batteries.
The SRC-7000 cannot
operate a device after
learning a function.
*Check the SRC-7000 has learned the function
correctly. Delete the code and teach the SRC7000 again.
*Check you used the correct remote to teach
the SRC-7000.
*The SRC-7000 cannot learn all codes. You
may not be able to program the SRC-7000 for
some devices or functions.
Cannot transmit between
two SRC-7000s (using the
optional SLC-2080 cable).
*Check the batteries in both remotes.
*Make sure the cable is connected properly.
Learning does not work.
*The batteries may be discharged. Replace
the batteries.
*Check the remote is correctly aimed at the
SRC-7000’s learning eye.
*Check the remote’s IR transmitter is 5 ~ 10 cm
from the SRC-7000’s learning eye while
learning.
*Check you are holding the remote’s button
until the function is learned.
*Do not teach the SRC-7000 near
incandescent lights.
*Check the SRC-7000 has learned the function
correctly.
*The SRC-7000 cannot learn all codes. You
may not be able to program the SRC-7000 for
some devices or functions.
56
Troubleshooting
Problem
Possible solution
Macro does not work.
*Check you are using the SRC-7000 within the
effective transmission distance (8 ~ 10 m)
The batteries may be discharged. Replace the
batteries.
*Check that the macro is programmed
correctly. Re-program the macro.
*Make sure the SRC-7000’s IR port points at all
the devices you want to control.
*Re-arrange order of macro commands.
A button on your existing
remote performs two or
more functions.
*Some remotes issue multiple codes when a
single button is pressed. Teach separate
buttons on the SRC-7000 for these different
codes
The touch screen turns off.
*The SRC-7000 has a power-saving feature and
switches off automatically after 90 seconds of
inactivity. To switch it back on again, move the
SRC-7000.
Can’t transmit
configuration between PC
and SRC-7000.
*Make sure the SRC-7000 shows main menu
LCD before the transmission.
*Turn on the SRC-7000 before transmission.
*Make sure you have properly installed the
SLC-2080 USB cable driver.
*Check all connections.
*Ensure the SRC-7000 batteries are charged.
Icons don't display
properly.
*Change the button shape and size as
required.
57