1
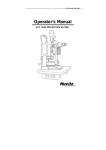
USER’S MANUAL SILT LAMP
SL 880
Notification
Dear Users,
Thank you for your purchase of SL 880 Slit Lamp. Please take time to read our
user’s manual carefully before use.
This guarantees you to make full use of this unit and prolongs the operation life of
this unit.
Precautions
If you have detected abnormal heat, smoke, noise or smell, immediately stop using
the product.
In the event of an abnormality, turn off the power and disconnect the power plug from
the power socket. Continuing to use the product may result in electric shock or fire.
Observe the instructions given below regarding the power cable:
•
•
•
•
•
•
Be sure to use the supplied or specified power cable.
Do not modify, forcibly bend, kink or pull the power cable.
When disconnecting the power cable from the AC outlet, be sure to hold the cable
by the plug.
Pulling the cable may cause wire breakage or shot circuit, resulting in fire or electric
shock.
Do not connect or disconnect the plug of the power cable to/from the AC outlet
using wet hands.
Doing so may result in electric shock.
Do not touch the product with wet hands while the power cable is connected
to the AC outlet.
Doing so may result in electric shock.
If the product will not be used for a long period, disconnect the power cable
from the power source. Leaving the cable connected to the power socket for
a prolonged period will consume electricity and may result in heating.
Content
1.
Name of Parts............................................................................................... 4
2.
Assembly....................................................................................................... 7
3.
Operation.................................................................................................... 16
4.
Maintenance............................................................................................... 22
5.
Common Trouble Shooting......................................................................... 28
6.
Responsibility.............................................................................................. 29
7.
Transportation............................................................................................. 29
8.
Optional Accessories.................................................................................. 29
9.
Specifications.............................................................................................. 31
1. Name of Parts
18
19
17
20
16
21
15
22
14
23
13
12
24
25
11
26
10
27
1
2
4
3
9
5
6
8
7
Fig. 1
4
1. Joystick
Incline joystick to move the instrument slightly on the horizontal surface and
rotate it to adjust the elevation of the microscope.
2. Base Locking Screw
The base will be locked when fastening this screw.
3. Rail Cover
Protect the rail surface
4. Base
Support the microscope and the illumination arms with the joystick controlling
its movement.
5. Work Table
6. Accessory Drawer
Store the focusing test rod and other accessories.
7. Brightness Control Switch
Two levels are available – H ( HIGH ), N ( NOR - MAL). Avoid working
continuously at high setting, as the service life of the bulb will be shortened.
8. Main PowerSwitch
9. Pilot Lamp
10. Location Roller
When it is in the middle, it stands for included angle of 0 between the
microscope arm and the illumination arm. And the right or left side the
included angle of 10.
11. Centering Knob
Loosening the knob allows the illumination light to be moved from the center
of the vision filed for indirect retro-illumination. Fastening the knob brings
the illumination light back to the center.
12. Slit Width Control Knob
The slit width is continuously adjustable within the range from 0 to 9mm.
13. Magnification Changer Lever
Push the lever of either side to select the desired magnification of the
microscope.
5
14. DiopterAdjustment ring
Adjust the eyepieces diopter to obtain a clear image before using the
instrument.
15. Aperture and Slit Height Control Knob
Rotate this knob to adjust the spot and the slit height. Swing the knob
horizontally to revolve the slit.
16. FilterSelection Lever
There are four filters for selections
17. Slit height and aperture display window
18. Lamp cap
19. Reflecting Mirror
The long mirror is provided. The observation pathway may be interfe red if
the included angle between the microscpe arm and the illumination arm
is only 3º - 10º.
20. Forehead Belt
21. Fixation target
An illuminated fixed spot for patient to look at.
22. Horizontal Mark
When the horizontal center of the patient’s eye is in line with the mark, the
elevation of the microscope controlled by joystick is also in its center position.
23. Chin-rest
24. Chin-rest elevation adjustment knob
Rotate the knob to adjust the elevation of the Chinrest.
25. Protection cap
Please cover the main shaft hole with the protection to prevent dusts and
physiological salt solution from dropping into the main shaft pole of the
illumination arm during the operation. Take off the cap when assemble the
focusing test rod.
26. Mocroscope and illumination arm couple bolt
Fasten this bolt and illumination arm and the mircroscope arm could be move
in couple state to rotate together. Loosen it and the illumination arm then
6
can rotate separalely.
27. Microscope arm locking knob
Lock the rotational movement of the microscopearm.
2. Assembly
2.1
Components
A
B
C
D
E
F
G
7
H
I
J
K
L
M
N
O
P
R
Q
S
8
A
B
C
D
E
F
G
H
I
J
K
L
M
N
O
P
Q
R
S
Name
Quantity
Illumination Part
Base Part (with microscope)
Head rest part
Breath shield
Work table with Power Box
Rail cover
Input Power cable
Chin-rest paper
Spare main illumination Bulb
Protection cap
Spare fuse
Spare long Reflecting Mirror
Brush
Dust Cover
Focusing Test Road
Cross Screw Driver with Wood handle
Watch screw Driver (small)
Watch screw Driver (big)
Spaner
1
1
1
1
1
2
1
1
1
1
2
1
1
1
1*
1
1
1
1
(*Optionally available in some region)
2.2
Assembly Procedure
Necessary tools are as follows:
Cross Screw Driver With Wood Handle (P)
Watch screwdriver (R)
Spanner (S)
1. Selecting voltage and fuse
Fuse holder
Voltage
selector
9
Selector voltage and fuse
•
Check the setting on the voltage selector located on the bottom of the power
box. If it doesn’t match with the input voltage, slide it to the proper position
with screwdriver (R).
•
Open the fuse holder with screw driver (P) and take out the fuse, check and
ensure that its rated value iscorresponding to the mains voltage:
110 Volt.....................1A
220 Volt..................... 0.5 A
It has been set to the 220 v 0,5 A before leaving our factory.
Important Matters
Set the input voltage and frequency of the instrument according to that of the mains.
2. Assembling the worktable ( E )
To attach the worktable on the motorizedinstrument table, please screw off
four M8x20mm bolts with spring washers with the spanner (S).
Lift the worktable to aim its screw hole at the assembly hole of the instrument
table.
•
Put down the worktable, with the power panel facing the user, refasten the
bolt securely with the spanner.
10
3. Assembling the Head-rest Part ( C )
Head rest
fixation
plate
Chin-rest
connection
board
•
Remove the four screws attached to the chin-rest connection board with
the screw driver ( P ).
Screw
Head-rest
fixation plate
Chin-rest
connection
board
•
Put two cables in the gap between the headrest fixation plate and the chinrest connection board ( Fig 5.)
•
While ensuring they are not clamped, retighten the previously removed screws.
11
4. Assembling the base part ( B ) and the rail cover ( F )
Wheel
Rail
G
•
Place the wheels of both sides of the base ( B ) on the rails on the worktable
•
Check whether the wheels can be rolled steadily on the rails.
•
Remove four screws attached to the rail with the screw driver ( P ).
•
Place the rail cover ( F ) to the rail, retighten the previously removed screws.
5. Assembling Illumination part (A)
•
Loosen the illumination arm couple bolt (13).
Mark
26
Screw
12
•
Rotate the brass shaft sleeve to make the angle of the red mark and the
illumination arm between 30º - 90º
•
Loosen the screw in the illumination arm with the screwdriver (R). Aim the
assembly hole of the illumination arm at the brass shaft sleeve then put it
down with care, let the shaft keeping close to the bottom surface well and
the two red marks stretch in one line simultaneously.
•
After the two red marks accurately aligned re-tighten the screw.
6. Assembling the breath shield ( E )
Fixation screw
Microscope
arm
Breath shield
•
Remove the breath shield fixation screw from the microscope arm.
•
Pass the removed screw trough the hole of the breath shield then re-screw
it into the arm.
7. Connecting Plug
•
Peel of the sticky tape attached to the cap, which ensures that the cap is
tightened to the lamp base during transportation.
13
Sticky tape
•
Insert the plug on the top of the head-rest part (C) into the socket of the lamp
cap (18) on the illumination part (A).
•
Connect the two plugs below the head-rest part with the corresponding
output socket of the power box.
•
Insert the plug of the input power cable (G) into the input socket of the power
box.
•
Remove the cable clips from the bottom of the worktable with screwdriver
(P) and wrap the output and input cables respectively, then re-attach them
to the bottom of the worktable.
Cable clip
14
8. Assembling the breath shield ( E )
•
Pull out the two fixing pins from the chin-rest.
•
Get rid of the paper package and let the pins go through its holes.
•
Insert the fixing pins into the hole again.
Pin
H
2.3
Checking procedure after assembling.
1. Power plug
•
This instrument supplies a 3-wire cable. Please select a proper power socket
as matched.
•
Ensured that the instrument is grounded well.
Important Matters
Please use the special cable supplied with this instrument.
2. The power box and the illumination part
•
When the main power switch (8) of the power box is placed at “I” it turns
on, and “O” for turn off. The main power switch should be set at the “O”
position before connecting the input cable with the power socket.
15
•
Turn on the main power switch, and the pilot lamp (9) will be lighted. Open
the slit width control knob (12) to examine the illumination.
•
Press the brightness control switch (7) respectively at two positions and
the brightness should be changed according.
•
Check the fixation target device to confirm it is lighting.
•
Check it all the movable parts such as aperture and slit height control knob
(15), filter selection lever (16), and magnification changer lever (13) etc. could
be operated freely.
•
After examining, turn off the main power ad cover the instrument with the
dust cover (N).
3. Operation
3.1
Diopter compensation and pupil distance adjustment.
1. Use of the focusing text rod (M) The rod is supplied as one of standard
accesories for confirming the microscopes is adjusted correctly.
Insert it into the main shaft hole with the flat surface.
Focusing test rod
Shaft holder
Important Matters
After adjusting, remember to take out the rod and insert the protection cap.
16
2. Brightness adjustment
Switch on the main power switch and set the brighttness control switch (7)
at “N” position. Turn the slit width control knob (12) to make the slit width
to be 2-3mm.
3. Diopter compensation
The focus of the microscope is calibrated according to the emmetropia.
If the user is an ametropia, he or she should adjust the eyepiece diopter.
Suggest adjusting the diopter as following procedures.
•
First, rotate the diopter adjustment ring (19) counter clockwise down to end.
•
Second, rotate the ring clockwise untila sharp slit image appears on the
focusing text rod.
•
Adjust another eyepieces as the same procedure.
•
Racord the diopter value on each eyepiece for future reference.
4. Pupil distance adjustment
Separate the prism box of the microscope with both hands to adjust the
P.D. until both eyes could see the same image on the focusing test rod
through the eyespieces, and at the same time a stereo vision will be obtained.
Diopter scale
Ring
Prism box
At the same
hight
Important Matters
While adjusting the p.d., ensure that both eyepieces are at the same height.
17
3.2
Patient position and fixation target.
1. Positining the patient´s head
Have the patient place his chin on the chin-rest (23) and the forehead against
the forehead belt (20). Adjust the chin-rest elevation adjustment knob (24)
below the chin-rest until the patient´s canthus aligns with the horizontal
mark (22).
20
22
23
24
2. Use of the fixation target
For fixing the patient´s eyesight, just make him look at the fixation target (21)
with the eye not to be examined. To change fixing position, move the lamp
bar, as well as move the curved lever around the headrest.
Curver lever
Fixation target bar
18
3.3
Base operation
1. Horizontal rough adjustment
Keep the joystick (1) erect and move the base (4) to make the microscope
move on the horizontal surface to aim at the object roughly.
2. Vertical adjustment
Rotate the joystick to adjust the microscope´s height until it aligns with the
target. Turn the joystick clockwise to raise the microscope and counter
clockwise to lower it.
3. Horizontal fine adjustmen
Tilt the joystick to make the microscope move slightly on the horizontal surface.
White watching through the eyepieces, tilt the joystick to aim accurately at
the object for a sharp image.
4. Locking the base
When finishing the adjustment, fasten the base locking screw (2) to lock the
base (4) and prevent it from sliding.
1
2
4
19
3.4
Illumination parts operation
1. Changing the slit width
Turn the slit width control knob (12) and the slit width will be changed from
0mm to 9mm. The slit becomes a circle all the 9mm size.
12
2. Changing the aperture and slit height
Turn the aperture and slit height control knob (15) and 6 different circular
bearns of light are available at full aperture: 9, 8, 5, 3, 1, 0.2 diameter
respectively. With a slit image, the slit height can be changed continuously
from 1 to 9mm, which is indicated through the display window (17).
17
15
20
3. Rotating the slit image
Swing the aperture and slit height controlknob (15) horizontally to revolve
the slit image at any angle from vertical to horizontal. The rotation angle scale
indicates the angle of image rotation with small division for 5º and big division
for 10º.
Scale
15
4. Deflecting the illumination light
Loosen the centering knob (11) and swing the slit widht control knob (12)
by the arrow, so the light spot moves away from the center of the microscope
vision field. It is mainly used to examine the eye by indirect retro-illumination.
Fasten the centering knob and the slit light will return to the center of the
microscope vision field.
11
21
5. Filter selection
Turn the filter selection lever (16) in the horizontal surface to add four different
kinds of filtersrespectively into the illumination pathway.
Usually the heat absorption filter is used so that the patient may feel more
comfortable in long period or examination.
1.
2.
3.
4.
5.
No filter
Heat absorption filter
ND filter
Red-free filter
Blue filter
16
1
2
3
4
5
4. Maintenance
Important Matters
The replace waste materials should be tr eated as industrial rubbish.
4.1
Replacing the illumination bulb
•
Turn the main power switch (8) off.
•
Pull out the plug connected to the lamp house, rotate the lamp cap (18)
counter clockwise and pull it out from the illumination part (A).
22
Plug
18
•
Take out the old bulb and replace it with a new one. The groove in the bulb
fixation disc should be almed at the flange of the lamp base, otherwise the
illumination may be uneven.
Important Matters
The bulb is hot
•
Place the lamp cap in the original position and rotate it clockwise and insert
the connecting plugs.
•
Turn on the main power switch and check whether the new bulb works or not.
Bulb
Fixation disc
Flange
23
4.2
4.3
•
Place the lamp cap in the original position and rotate it clockwise and insert
the connecting plugs.
•
Turn on the main power switch and check whether the new bulb works or not.
Replacing the reflecting mirror
•
Set the angle between the microscope and the illumination arm to exceed 30º
•
Remove the long mirror by holding the extended surface.
•
Insert new long reflecting mirror.
Replacing the fuse
•
Turn off the main power switch (8) and pull out the input cable from the power
socket.
•
Screw off the fuse holder cover with the screw driver (P).
•
Replace it with a new fuse, then fasten the cover.
•
The fuse specifications are as follows
110V
220V
1A, 250V
0,5A, 250V
24
Important Matters
Please select the fuse of the same type, specification and rate value.
4.4
Adjusting the tightness of the slit width knob.
It the slit width control knob is too loose, the slit width may be out of control.
Loosen the screw on the right knob with the screw driver (O), then hold the left
knob firmly with one hand, white the other hand rotate the right knob clockwise
to adjust its tightness. When it is appropiate, fasten the screw of the right knob
firmly again.
Screw
Left knob
Right knob
25
4.5
Replacing the chin-rest paper
When the paper is exhausted, pull upwards two fixing pins of the chin-rest and
place a new package of paper, then fix the fixing pins again.
Pin
4.6
Cleaning
1. Cleaning the lenses and mirrors
If any dust stick on the lenses or reflecting mirrors, brush them with the brush
(M) supplied in the standard accesories. In case any dust still remains, wipe
it off with soft cotton dipped with absolute alcohol.
Important Matters
Never scratch with fingers or any other hard materials.
2. Cleaning the slide plate, rail and shaft are dirty
The vertical and horizontal movement will be unsteady. Wipe them with clean
soft cloth.
3. Cleaning and sterilizing the plastic parts
Clean the palstic parts such as chin-rest bracket, forehead belt with soft cloth,
dipped with soluble detergent or water, sterilize with medicinal alcohol.
26
Shaft
Rail
Slide plate
Important Matters
Don’t wipe with any corrosive detergent lest that the surface should be damaged.
4.7
Consumables
Please specify names and quantities when ordering following consulmables.
Part name
Outlook
Illumination Bulb
SL 880
Slit Lamp
Long Reflecting Mirror
Chin – rest paper
Fuse 1 A (110 V)
0,5 A (220V)
27
5. Common Trouble Shooting
In case there is any trouble, please check according to the following table for reference.
If it still cannot work, please contact the Repair Department or an authorized distributor.
Trouble
Possible Cause
Remedy
No illumination
The cable isn’t connected
correctly with the power
socket.
Connect the power cable
correctly.
The main power switch is
on the “O” position.
Place the switch on “I”
position.
The plug on the power box
is loose.
Insert the plug firmly.
The plug in the lamp cap is
loose.
Insert the plug firmly.
The bulb has burnt out.
Change the bulb.
The fuse has blown.
Change the fuse.
The bulb is not assembled
properly.
Assemble the bulb properly.
The filter lever is in the
middle position or in the
position of gray filter.
Set the filter lever to the
correct.
Voltage selector is wrongly
set.
Set the voltage selector
correctly.
The coat of the reflecting
mirror is oxidized.
Change the reflecting
mirror.
Too much dust on the
reflecting surface.
Clean the surface with the
brush.
Voltage selector is wrongly
set.
Set the voltage selector
correctly.
Slit is too dark
Fuse has blown
28
Trouble
Possible Cause
Remedy
The fuse doesn’t comply
with the specification.
Replace it with a suitable
fuse.
Slit closes
automatically
The slit width control knob
is too loose.
Adjust the tightness of
the control.
Fixation target
is off
The output plug is loose.
Insert the output plug
firmly.
6. Responsability
We will supply the circuit diagram of the instrument, electric component list, drawing
annotation and calibration details according to the customer´s need for repair.
If there is any need for enquiry of relative information and relative service or some
questions, please contact with us directly.
7. Transportation
During the transportation, be careful to protect it from wetness, upside down and violent
vibration. The relative humidlty should be 10% to 90%, and enviroment temperature
-25ºC to 40ºC. This instrument should be stored in a well ventilated room without
corrosive gas where the relative humidlty should be 10% to 80% and enviroment
temperature -10ºC to 40 ºC.
If the assembled instrument should be moved or tranported in short distance; please
lock all the moveble parts. Move this instrument carefully with hands pushing or carrying
its table. If for long distance transportation, please repack it with original package.
8. Optional Accessories
(purchase in addition)
8.1
10% measuring eyepieces
Replace the common eyepieces withthis one to measure the length and angle.
29
Scale specification
Length scale
16mm
(0.5mm minimum graduations)
Angle scale
360º
(5º minimum graduations)
Measuring parameters
8.2
Length scale
To be used at 10x only
Diopter compensation
-5D to +3D
Angle scale
No limit
Applanation tonometer
This LSL 880 slit lamp could be equipped with Haag-Streit AG Model R-900
or model T-900 applanation tonometer for measuring the intraocular pressure.
30
9. Specifications
Microscope
Type
cross angle stereovision
Model of magnifying
change the objective for 2 grades magnification
Eyepiece
10X
Total magnification rate
objective x eyepiece = magnification rate/vision field.
1X
10X
10X
18mm
1.6X
10X
16X
14,5mm
Range of PD adjustment
10x eyepiece
55mm to 82 mm
Diopter adjustment
10x eyepiece
+- 6D
Illumination
Slit projection magnification
2/3X
Slit width
continuous from 0mm to 9 mm.
(at 9 mm, slit becomes a circle)
Slit height
continuous from 1 to 8 mm
Aperture diameter
9mm, 8mm, 5mm, 3mm, 2mm, 1mm, 0,2mm
Slit angle
0º to 180º with horizontal scanning capability
Slit inclination
5º,10º,15º,20º four steps
Filter piece
Heat absorption, 13%ND, red-free, and blue
Illumination bulb
12V30W halogen bulb
31
Movement base
Fore and back movement
90mm
Left and right movement
100mm
Fine movement
15mm
Vertical movement
30mm
Chin – rest parts
Vertical movement
80mm
Fixation target
Red Led
Powersource
Input voltage
100/220V + 10%
Input frequency
50/60 Hz
Input power
58 VA
Output voltage
Illumination bulb 9,8V, 11,6V
Fixation target
7,2V
Electreic safe standard
Conform to Standard IEC601- 1, Class I Type B
Dimension and Weight
Packing box
670mm x 570 mm x 510mm
Total weight
23 Kg
Net weight
20 Kg
32
LUXVISION is not responsible or liable for indirect, special or consequential damages arising out of or in
connection with the use or performance of the product or damages with respect to any economic loss,
loss of property, loss of revenues or profits, loss of enjoyment or use, costs of removal or installation or
other consequential damages of whatsoever nature. Some states do not allow the exclusion or limitation
of incidental or consequential damages. Accordingly, the above limitation may not apply to you.
Every effort has been made to ensure the accuracy of this manual. However, LUXVISION, makes no
warranties with respect to the documentation and disclaims any implied warranties of merchantability
and fitness for a particular purpose. LUXVISION, Inc. shall not be liable for any errors or for incidental or
consequential damages in connection with the furnishing, performance, or use of this manual or the examples
herein. The information in this document is subject to change without notice.
33