Download BT-4650
Transcript
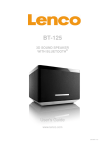
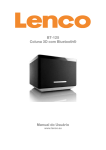
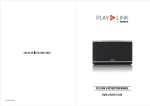
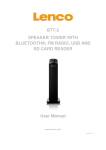
BT-4650
3D SOUND SPEAKER
®
WITH BLUETOOTH
User's Guide
www.lenco.com
201307 v1.0
Important safety instructions
When used in the directed manner, this unit has been designed and manufactured to ensure
your personal safety. However, improper use can result in potential electrical shock or fire
hazards. Please read all safety and operating instructions carefully before installation and use,
and keep these instructions handy for future reference. Take special note of all warnings listed in
these instructions and on the unit.
1. Water and Moisture
The unit should not be used near water. For example: near a bathtub, washbowl, kitchen sink,
laundry tub, swimming pool or in a set basement.
2. Ventilation
The unit should be situated so that its location or position does not interfere with its proper
ventilation. For example, it should not be situated on a bed, sofa, rug or similar surface that
may block the ventilation openings. The ventilation should not be impeded by covering the
ventilation openings with items, such as newspapers, table-cloths, curtains, etc. Also, it
should not be placed in a built-in installation, such as a bookcase or cabinet, which may
impede the flow of air through the ventilation openings; minimum distances 30 cm around the
apparatus for sufficient ventilations.
3. Heat & Flame
The unit should be situated away from heat sources such as radiators, heat registers, stoves
or other appliances (including amplifiers) that produce heat.
No naked flame sources, such as lighted candles, should be placed on the apparatus.
4. Power Source
The unit should be connected to a power supply only of the type described in the operating
instructions or as marked on the appliance. Where the direct plug-in adaptor is used as the
disconnect device, the disconnect device shall remain readily operable.
5. Cleaning
The unit should be cleaned only as recommended. See the section "Care and Maintenance"
of this manual for cleaning instructions.
6. Object and Liquid Entry
Care should be taken so that objects do not fall and liquids are not spilled into any openings
or vents located on the unit. It shall not be exposed to dripping or splashing and that no
objects filled with liquids, such as vases, shall be placed on the apparatus.
7. Attachments
Do not use attachments no recommended by the product manufacturer.
8. Lightning and Power Surge Protection
Unplug the unit from the wall outlet and disconnect the periods of time. This will prevent
damage to the product due to lightning and power-line surges.
9. Overloading
Do not overload wall outlets, extension cords, or integral convenience receptacles as this can
result in a risk of fire of electric shock.
10. Damage Requiring Service
This unit should be serviced by qualified service personnel when:
A. Objects have fallen into or liquid has been spilled into the enclosure.
B. The unit has been exposed to rain.
C. The unit has been dropped or the enclosure damaged.
D. The unit exhibits a marked change in performance or does not operate normally.
11. Servicing
2
The user should not attempt to service the unit beyond those methods described in the user's
operating instructions. Service methods not covered in the operating instructions should be
referred to qualified service personnel.
Care and maintenance
•
•
•
•
•
Do not subject the unit to excessive force, shock, dust or extreme temperature.
Do not tamper the internal components of the unit.
Clean your unit with a damp (never wet) cloth. Solvent or detergent should never be used.
Avoid leaving your unit in direct sunlight or in hot, humid or dusty places.
Keep your unit away from heating appliances and sources of electrical noise such as
fluorescent lamps or motors.
Resetting the unit
If the unit experiences a power surge or electric shock, it is possible that the internal microcontroller may lock up and the unit will not respond to any commands from the panel controls.
1. In this event, unplug and then reconnect the AC-DC power adaptor into the wall outlet.
2. Use a straightened paper clip, toothpick or similar objects to press the RESET button located
at the rear of the main unit (see the below figure). The reset operation clears the system
memory and all of your previous settings will be erased.
Caution: Do not use a sharp, pointed object to press the reset button. It may damage the
reset switch inside the unit.
Features
Thank you for purchasing the BT-4650 - 3D sound speaker with Bluetooth®.
This model incorporates following features:
-
Playback mobile device, like Apple devices, smart phones or tablet music through Bluetooth®
technology
Audio line-in (AUX) for connecting other digital audio player
Built-in 4 High Fidelity Speakers and incorporated wave field synthesis (WFS) technology to
produce 3D sound effect
Built-in subwoofer for heavy bass effect
iPhone, iPod, iPod mini, iPod nano, iPod touch, iPod classic and iPod shuffle are trademarks of
Apple Inc., registered in the U.S. and other countries.
Apple devices like iPad/iPhone/iPod, smart phones and/or tablet are not included.
3
Description of parts
Front View
1. POWER button
2.
3.
4.
5.
6.
7.
8.
9.
Rear View
Press to turn on the unit.
At “on” status: Press to select Bluetooth or AUX-In mode.
Press and hold to turn off the unit.
Status LED indicator
VOLUME + / - button
Adjust volume level up or down.
4 Main Speakers
Subwoofer
Stand
DC-in jack
For the connection of external DC power supply.
AUX-IN jack
Auxiliary audio signal input.
RESET button
For resetting the unit
Installation
AC-DC Power Adaptor Connection
The unit can be powered by an external AC-DC Adaptor, required the output DC15V 2400mA
(included).
(1) Connect the adaptor’s DC output plug to the DC-in jack of the unit.
(2) Firmly and securely plug the adaptor’s AC main plug into AC main outlet.
Bluetooth® operation
The unit plays from mobile devices (like, iPad/iPhone/iPod Touch ,Smart phone and tablet) music
through Bluetooth® operation.
Note: The unit is designed mainly for Bluetooth® pairing with Apple device, (like iPad, iPhone and
iPod Touch) and other brand of smart phone / mobile device which have latest Bluetooth
function®. Although some of the earlier mobile phone models which have Bluetooth® function, it
may not be compatible with this system.
4
Before you will use the Bluetooth® pairing / connection, the following information will help:
®
(1)
Whilst the unit is searching for a Bluetooth device (e.g. iPhone), the status LED
indicator will fast blink in blue light.
®
(2)
Whilst the unit paired/connected with a Bluetooth device (e.g. iPhone), the status LED
indicator will slowly blink in blue light.
(3)
The Bluetooth® device name of this model: Lenco
The PIN is: 0000
Bluetooth® pairing/connection
1. Press the POWER button to turn on the unit.
2. Press the POWER button to select Bluetooth® mode. The status LED indicator will blink fast
®
in blue light whilst the unit is searching nearby Bluetooth device.
3. From the mobile device, turn on its Bluetooth® function and it will also search for the nearby
Bluetooth® device as well.
4. From the Bluetooth® device list of your mobile device, tap on Bluetooth® device name
“Lenco” of this model for the connection. Enter the “0000” if it prompts for the PIN.
5. Once the mobile device is paired/connected with the unit, the status LED indicator will blink
slowly in blue light.
®
Playback Bluetooth music
1. Playback your iPad/iPhone/iPod Touch or smart phone music.
2. You may adjust both the volume control of your mobile device and the volume control of this
unit to find the most desirable volume setting.
3. From your mobile device, you may press:
(a) the
/
button to Play / Pause Bluetooth music.
(b) the
/
button to skip tracks forward / backward.
Operation hints
(A) Auto-pairing/connection :
With your mobile device is paired and connected;
(1)
(2)
(3)
in the case of (i) pressing the POWER button a round trip back to the Bluetooth mode or
(ii) turn the unit off and on (at Bluetooth® mode) again;
In the first 10 seconds after the unit entered the Bluetooth® mode, it will search the last
connected mobile device and will auto-pair/connect with it.
button from the mobile device to resume music playback.
Tap the
Note: Although the main unit disconnected the Bluetooth® connection, the mobile device still
takes time to complete the disconnection process. The mobile device screen still shows the
“connected” Bluetooth® symbol and at this moment it will not respond to the re-connection
request from the main unit. Once the mobile device finished the disconnection process, its
screen will show “disconnected” status and will start to respond main unit’s re-connection
request. Figure A illustrates example of some major mobile devices’ Bluetooth® symbols in
different status.
5
Figure A :
Different mobile devices takes different operation time, in case at the time the Bluetooth® symbol
changed to “disconnected” status but the 1st 10 seconds were over, try steps (A)-(1) to (3) above
for the auto-connection or try manual connection from your mobile device.
(B) Manual pairing/connection:
In the case you would like to pair/connect other mobile device;
(1)
(2)
(3)
®
Switch off the Bluetooth function of the currently paired/connected mobile device.
Main unit enters the Bluetooth® mode, after the 1st 10 seconds, the unit will search for the
®
nearby Bluetooth device and the Blue status LED indicator will blink fast.
Turn on the Bluetooth function of the desired mobile device and pair/connect with
the main unit.
(C) Out of range situation:
(1) Whilst Bluetooth® music playback, the mobile device is moved to other place which is out
of the Bluetooth® communication range, the communication link disconnected then
moves back the mobile device within range.
(2) The main unit Bluetooth® mode Blue LED indicator will blink which also searches for the
nearby Bluetooth® device.
®
(3) In this case, you can reestablish the Bluetooth communication link by implementing
approach (A) or (B) above.
Energy Saving Note
In Bluetooth® mode, if the Bluetooth® communication link disconnected for around 60 minutes,
the unit will go into standby mode automatically.
Listening to an external audio source
1. Connect an audio cable with 3.5mm stereo plug from an auxiliary audio device to the AUX IN
jack of the unit.
2. Press the POWER button to turn on the unit.
6
3. To select auxiliary audio input, press the POWER button until the status LED indicator lights
green steadily.
4. Turn on the external auxiliary audio device.
5. The volume can now be controlled through the unit.
Operate all other functions on the external device as usual.
Notes: (a) Press and hold the POWER button to turn off the unit when you finish listening.
Don't forget to switch off the power of the external audio device as well.
(b) If there is without any music (signal) presented at the AUX-IN input jack for around 10
minutes, the unit will turn into standby mode automatically.
3D Sound effect
This model integrated sonic emotion 3D sound technology which uses (WFS) wave field
synthesis to create the illusion of sounds all around. Any input even stereo can be used including
the iPhone/iPad/iPod Touch/Smart phone Bluetooth® streaming music or Aux-in music being in
stereo; by using WFS from sonic emotion, the 3D sound effect can create a virtual sound field
where you can enjoy the finest audio no matter where you are in the room from a single device.
Sonic emotion and Sonic Emotion 3D sound are registered trademarks of sonic emotion ag.
Technical data
Power AdaptorInput:
Output:
AC 100 - 240V ~ 50/60Hz
DC 15V 2400mA
Power Supply for the unit
DC 15V 2400mA
Speaker Output
Total 35W (Max.)
Operating temperature
and Humidity
0 ~ +35 degree C
70%
Service and support
For information: www.lenco.com
For support: http://lencosupport.zendesk.com
Lenco helpdesk:
Germany
0900-1520530
The Netherlands 0900-23553626
Belgium
02-6200115
(Local charges)
(Local charges + 1ct p/min)
(Local charges)
The helpdesk is accessible from Monday till Friday from 9 AM till 6 PM.
When contacting Lenco, you will always be asked for the model and serial number of your
product. The serial number can be found on the back of the device. Please write down the serial
number below:
7
Model: BT-4650
Serial number:_________________________________
Lenco offers service and warranty in accordance to European law, which means that in case of
repairs (both during and after the warranty period) you should contact your local dealer.
Important note: It is not possible to send products that need repairs to Lenco directly.
Important note:
If this unit is opened or accessed by a non-official service center in any way, the warranty
expires.
This device is not suitable for professional use. In case of professional use, all warranty
obligations of the manufacturer will be voided.
8
Notice, statements and information
Lenco is not liable for printing errors in the manual.
The specifications and external appearance of the set are subject to change without prior notice.
Declaration of Conformity
This symbol indicates that the relevant electrical product or battery should
not be disposed of as general household waste in Europe. To ensure the
correct waste treatment of the product and battery, please dispose them in
accordance to any applicable local laws of requirement for disposal of
electrical equipment or batteries. In so doing, you will help to conserve
natural resources and improve standards of environmental protection in
treatment and disposal of electrical waste (Waste Electrical and Electronic
Equipment Directive).
Products with the CE marking comply with the EMC Directive (2004/108/EC)
and the Low Voltage Directive (2006/95/EC) issued by the Commission of the
European Community.
Hereby, STL Group BV, Ankerkade 20 NL 5928 PL Venlo, declares that this product is in
compliance with the essential requirements and other relevant provisions of Directive 1999/5/EC.
The declaration of conformity may be consulted at
https://lencosupport.zendesk.com/forums/22413161-CE-Documents
This product operates at 2400 - 2483.5 MHz and is designated only to be used inside a normal
household environment. This product is suited for this purpose within all EU counties.
1797
®All rights reserved
For information and support: www.lenco.com
9


