1
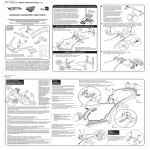
L0540 Newborn Baby Toddler Older Baby WARNING IMPORTANT! KEEP INSTRUCTIONS FOR FUTURE REFERENCE. www.fisher-price.com/uk Consumer Information Parts IMPORTANT! Please remove all parts from the package and identify them before assembly. WARNING To prevent serious injury or death: • Fall Hazard - It is dangerous to use this product on an elevated surface, since child’s movement may cause the product to slide or tip over. Use only on a floor. • Suffocation Hazard - Never use on a soft surface (bed, sofa, cushion) since the product can tip over and cause suffocation in soft surfaces. • Never leave child unattended. • Never use as a carrier or lift while child is seated. Never use the toy bar as a handle. • Use the upright position only when child has developed enough upper body control to sit without leaning forward. • Always use the restraint system until child is able to climb in and out of the product unassisted. • Reclined position not recommended for children who cannot sit up by themselves (6 months approximately, until 9 Kg/20 lbs). Toy (Toy may be different) Pad with Seat Back Tube Hint: Please refer to the care section to remove the seat back tube for cleaning. Toy Bar Front Bar 2 Side Rails Crossbar CAUTION Note: Tighten or loosen the screws with a Phillips screwdriver. Do not over-tighten the screws. This package contains small parts in its unassembled state. Adult assembly is required. #4 x 20 mm Screws – 6 Shown Actual Size • Please read these instructions before assembly and use of this product. • Adult assembly is required.Tool needed for assembly: Phillips screwdriver (not included). • Requires one “D” (LR20) alkaline battery (not included) for soother operation.Toy includes one non-replaceable button cell battery. • Product features and decorations may vary from photographs. 2 Assembly IMPORTANT! Before assembly and each use, inspect this product for damaged hardware, loose joints, missing parts or sharp edges. DO NOT use if any parts are missing or broken. Contact Mattel for replacement parts and instructions if needed. Never substitute parts. Crossbar 3 • Insert and "snap" the back rails into the sockets in the side rails. Pull up on the back rails to be sure they are secure. Side Rails 1 Side Rails • Place the side rails on a flat surface. • Fit the crossbar tabs into the small rectangular opening in each side rail. Push the crossbar down completely. • Insert two #4 x 20 mm screws into the crossbar and tighten. PUSH PUSH Front Bar 4 LIFT Hint: You may want to install batteries into the soother before assembling the front bar to the front rails. • Position the front bar so that the soother is upright. Fit it to grooved area on the inside of the front rails. • Insert four #4 x 20 mm screws into the front rails and tighten. Hint: You may need the help of another adult to hold the front bar in place while you insert and fasten the screws. LIFT 2 • First lift the front rails and then push out the back rails. 3 Assembly Pad Clips Seat Back Tube Socket Socket 7 • Fit the clips on the front edge of the pad to the bottom edge of the front bar. 5 • Insert the ends of the seat back tube (inside the pad) into the sockets in the front rail. Push down on the seat back tube until you hear a “click” on each side. • Pull up on the seat back tube to be sure it is secure. Buckle Pad Flap Pocket 8 6 • Wrap a pad flap around a front rail and fasten the buckle. Make sure you hear a “click”. • Repeat this procedure to fasten the other pad flap. Hardboard • Locate the pocket in the bottom of the pad. • Fit the hardboard (attached to the front bar) into the pocket in the pad. 4 Assembly Toy Bar Toy Clamp Slot 10 9 • Fit the toy into the slot in the top of the front rail. • Fit the toy bar clamp to the top of the front rail. Push the toy bar clamp down to “snap” it into place. Hint: To remove the toy bar, lift the edge of the clamp and pull to remove. 5 Battery Installation Hint: We recommend using an alkaline battery for longer battery life. + "D" (LR20) 1,5V x 1 - Battery Safety Information In exceptional circumstances, batteries may leak fluids that can cause a chemical burn injury or ruin your product.To avoid battery leakage: • Do not mix old and new batteries or batteries of different types: alkaline, standard (carbon-zinc) or rechargeable (nickel-cadmium). • Insert batteries as indicated inside the battery compartment. • Remove batteries during long periods of non-use. Always remove exhausted batteries from the product. Dispose of batteries safely. Do not dispose of this product in a fire.The batteries inside may explode or leak. • Never short-circuit the battery terminals. • Use only batteries of the same or equivalent type, as recommended. • Do not charge non-rechargeable batteries. • Remove rechargeable batteries from the product before charging. • If removable, rechargeable batteries are used, they are only to be charged under adult supervision. • Turn the product face down. • Loosen the screw in the battery compartment door and remove the battery compartment door. • Insert one “D” (LR20) alkaline battery into the battery compartment. • Replace the battery compartment door and tighten the screw. IMPORTANT! If vibrations become faint, or if there are no vibrations, remove the “D” (LR20) battery from the soothing unit and dispose of it properly. Replace the battery with a new “D” (LR20) alkaline battery. • Protect the environment by not disposing of this product with household waste (2002/96/EC). Check your local authority for recycling advice and facilities (Europe only). 6 Newborn-to-Toddler Portable Rocker Newborn Baby Toddler Older Baby 7 Setup WARNING WARNING To prevent serious injury or death: • Use the upright position only when child has developed enough upper body control to sit without leaning forward. • Reclined position not recommended for children who cannot sit up by themselves (6 months approximately, until 9 Kg/20 lbs). To prevent serious injury or death: • Fall Hazard - It is dangerous to use this product on an elevated surface, since child’s movement may cause the product to slide or tip over. Use only on a floor. • Suffocation Hazard - Never use on a soft surface (bed, sofa, cushion) since the product can tip over and cause suffocation in soft surfaces. Kickstand UPRIGHT SEAT Upright Fasten the straps on the back of the seat. Make sure you hear a “click”. Seat Rotate the kickstands out to convert to a seat. RECLINE Kickstand Recline Unfasten the straps on the back of the seat. Rocker Rotate the kickstands in to convert to a rocker. 8 ROCKER Setup WARNING LIFT To prevent serious injury or death: Never use the toy bar as a handle. PRESS PRESS Toy Bar EXTEND FRAME Clamp Extend Frame While pressing the buttons on the back of the frame, lift the seat back to extend the frame for toddler use. PUSH Toy Bar • Fit the toy bar clamp to the top of the front rail. Push the toy bar clamp down to “snap” it into place. Hint: To remove the toy bar, lift the edge of the clamp and pull to remove. PRESS PRESS SHORTEN FRAME Shorten Frame While pressing the buttons on the back of the frame, push the seat back to shorten the frame for newborn or older baby use. 9 Secure Your Child Anchored End Anchored End WARNING To prevent serious injury or death: • Never leave child unattended. • Never use as a carrier or lift while child is seated. • Always use the restraint system until child is able to climb in and out of the product unassisted. Free End Free End 2 TIGHTEN LOOSEN To tighten: • Feed the anchored end of the waist strap up through the buckle to form a loop . Pull the free end of the waist strap . To loosen: • Feed the free end of the waist strap up through the buckle to form a loop . Enlarge the loop by pulling on the end of the loop toward the buckle. Pull the anchored end of the waist strap to shorten the free end of the waist strap . Waist Strap Waist Strap Restraint Pad 1 • Turn the toy bar out of the way or remove it altogether. • Place your child in the seat. Position the restraint pad between your child’s legs. • Fasten the waist belts to each side of the restraint pad. Make sure you hear a “click” on both sides. • Check to be sure the restraint system is securely attached by pulling it away from your child.The restraint system should remain attached. 10 Soothing Vibrations and Fun Music Fold for Portability and Storage PRESS 1 • Make sure your child is properly secured in the seat. • Slide the power switch on the soothing unit to for vibrations and O to turn vibrations off. Note: If vibrations from the soothing unit become faint, or if there are no vibrations, remove the battery from the soothing unit and dispose of it properly. Replace the battery with a new “D” (LR20) alkaline battery. • Pull the ring on the toy for a delightful tune! • Press both frame release buttons. LIFT 2 • Lift the back rails from the side rails. 11 Care Fold for Portability and Storage • The pad is machine washable. Wash it separately in cold water on the gentle cycle. Do not use bleach.Tumble dry separately on low heat and remove promptly.The frame, toy bar and toys may be wiped clean using a mild cleaning solution and a damp cloth. Do not use bleach. Do not use harsh or abrasive cleaners. Rinse clean with water to remove residue. Do not immerse the frame or the toys. To remove the pad: • Unfasten the pad flaps. • Remove the pad clips from the front bar. • Remove the hardboard from the pocket in the pad. PUSH 3 • Push the back rails toward the front rails. PRESS PRESS LOWER • Press the seat back tube release buttons on each side of the front rails. Pull to remove the seat back tube. Remove the seat back tube from the sleeve in the pad. To replace the pad, first insert the seat back tube into the sleeve in the top of the pad.Then, follow the assembly instructions. 4 • Lower the seat back. Questions? www.service.mattel.com/uk 01628 500303 Great Britain: Mattel UK Ltd, Vanwall Business Park, Maidenhead SL6 4UB. Australia: Mattel Australia Pty. Ltd., 658 Church Street, Locked Bag #870, Richmond, Victoria 3121 Australia. Consumer Advisory Service 1300 135 312. New Zealand: 16-18 William Pickering Drive, Albany 1331, Auckland. Asia: Mattel East Asia Ltd, Room 1106, South Tower, World Finance Centre, Harbour City, Tsimshatsui, HK, China. Malaysia: Diimport & Diedarkan Oleh: Mattel SEA Ptd Ltd. (993532-P) Lot 13.5, 13th Floor, Menara Lien Hoe, Persiaran Tropicana Golf Country Resort, 47410 PJ. Tel: 03-78803817, Fax: 03-78803867. ©2006 Mattel, Inc. All Rights Reserved. ® and ™ designate U.S. trademarks of Mattel, Inc. Fisher-Price, Inc., a subsidiary of Mattel, Inc., East Aurora, New York 14052, U.S.A. PRINTED IN CHINA/IMPRIMÉ EN CHINE L0540pr-0726