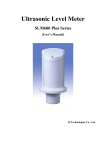
Download FLOMOTION FM1000C Ultrasonic Level Meter USER`S MANUAL
Transcript
FLOMOTION FM1000C
Ultrasonic Level Meter
USER’S MANUAL
MARCH 2011
2
Flomotion Systems Inc. 800.909.3569
FlomotionSystems.com
FLOMOTION FM1000C Operating & Maintenance Manual
FLOMOTION FM1000C
Ultrasonic Open Channel Flowmeter
USER’S MANUAL
MARCH 2011
3
Flomotion Systems Inc. 800.909.3569
FlomotionSystems.com
FLOMOTION FM1000C Operating & Maintenance Manual
Table of Contents
Chapter 1. Introduction ...........................................................................................................................................................................5
About the FLOMOTION FM1000C.....................................................................................................................................................5
Product Specification .............................................................................................................................................................................6
Chapter 2. Installation .............................................................................................................................................................................7
Power Supply Requirements ...............................................................................................................................................................7
Dimensions ..............................................................................................................................................................................................8
Outdoor and Open Vessel Installation ...............................................................................................................................................9
Closed Vessel Installation.....................................................................................................................................................................9
Stand Pipe Installations.......................................................................................................................................................................10
Cable Entry ............................................................................................................................................................................................11
Terminal Connection Details ..............................................................................................................................................................11
Preparation for Operation ...................................................................................................................................................................12
Maintenance ..........................................................................................................................................................................................12
Chapter 3. How To Use FM1000C Series ........................................................................................................................................13
Display.....................................................................................................................................................................................................13
Measuring Mode...................................................................................................................................................................................13
Program Mode ......................................................................................................................................................................................14
How to use the buttons........................................................................................................................................................................14
Examples................................................................................................................................................................................................15
LED Functions.......................................................................................................................................................................................16
What to Do First ....................................................................................................................................................................................16
Chapter 4. Program...............................................................................................................................................................................17
Application Menu ..................................................................................................................................................................................17
Current Output Menu...........................................................................................................................................................................19
Compensation Menu............................................................................................................................................................................20
Outputs Simulation Menu ...................................................................................................................................................................23
Password Menu ....................................................................................................................................................................................23
Chapter 5. Troubleshooting .................................................................................................................................................................24
Menu Option Record Sheet................................................................................................................................................................25
FM1000C Series Application Menu..................................................................................................................................................25
4
Flomotion Systems Inc. 800.909.3569
FlomotionSystems.com
FLOMOTION FM1000C Operating & Maintenance Manual
Chapter 1. Introduction
About the FLOMOTION FM1000C
The FLOMOTION FM1000C Series operates on the principle of timing the echo received from a measured pulse
of sound transmitted in air and utilizes “state of the art” echo extraction technology.
Easy calibration and maintenance free performance mean that you can install the FM1000C Series rapidly and
with confidence.
The FM1000C Series can show level, space, distance, on the display. The switched outputs can be programmed
to give an ‘ON’ and ‘OFF’ point for external control. There is a 4-20 mA output that can be connected to a remote
chart recorder or PLC, to monitor level, space or distance, dependant on the measurement mode selected, and
provides a ‘fault condition’ alarm of either 3.8mA or 21mA.
The FM1000C Series has an IP67 lid covering an integral LCD display and 5 buttons used for programming
purposes, together with 4 LED’s which provide status information whilst in RUN and PROGRAM Mode.
5
Flomotion Systems Inc. 800.909.3569
FlomotionSystems.com
FLOMOTION FM1000C Operating & Maintenance Manual
Product Specification
Physical
Dimensions
Weight
Case material/description
Overall: 4.61 D x 8.22 in. H ( 117 D x 208.8 H mm)
Transducer: 2.2 D x 4.72 in H (56 D x 120 H mm)
Mounting: 2” NPT
Nominal: 3.3 lb (1.5 kg)
Polypropylene
Environmental
IP Rating (electronics housing)
Max. & Min. temperature (electronics)
Pressure
Nema 6 (IP67)
-4°F to 185°F (-20°C to +85°C)
up to 29 psi (2 Bar)
Performance
Accuracy
Resolution
Max. Range
Beam Angle
Damping Rate
Temperature Compensation
Outputs
Analogue output
0.20% of the measured range or .39in (10mm) whichever is greater
0.03% of full scale or 1mm (whichever is greater)
Liquids 19.6 ft (6m) or 32.8 ft (10m)
8° at -3dB
Adjustable from 0.1m/min to 10m/min
Fully compensated via integral temperature sensor over entire
operational span
Display
4-20mA into max 750 Ω (user adjustable) Fault condition Alarm
3.8mA or 21mA user selectable.
5 Digit LCD Display
Programming
On-board programming
via 5 tactile push button keys
Supply
Power supply
Current Consumption
DC 20 - 30V
Less than 0.021A
Certificate
CE approval
EMC approval to BS EN 61326-1:2006 (Class A),.
6
Flomotion Systems Inc. 800.909.3569
FlomotionSystems.com
FLOMOTION FM1000C Operating & Maintenance Manual
Chapter 2. Installation
The FLOMOTION FM1000C is composed of one controller unit and one sensor
Power Supply Requirements
The FM1000C operates from a DC supply of 20–30V and will typically draw less than 0.08A.
All electronic products are susceptible to electrostatic shock, so follow proper grounding procedures during
installation.
The compact one-piece construction of the FM1000C can be mounted easily using the integral nose thread
(2”NPT).
When choosing a location to mount the FM1000C, bear in mind the following:
• For easy access to the LCD display and programming buttons mount it where it is easily accessible.
• The ultrasonic signal path should be free of falling material and obstructions such as pipes, beams etc.
• The FM1000C should be mounted at least 1.15ft (30cm) above the maximum level of the material and
be perpendicular to the surface.
• The mounting surface should be vibration-free.
• The ambient temperature is between -4° to 185°F (-20° to 85°C)
• There should be no high voltage cables or electrical inverters close by.
• Do not use any metal substances when installing (Please use the PVC nut & flange supplied as option)
7
Flomotion Systems Inc. 800.909.3569
FlomotionSystems.com
FLOMOTION FM1000C Operating & Maintenance Manual
Dimensions
8
Flomotion Systems Inc. 800.909.3569
FlomotionSystems.com
FLOMOTION FM1000C Operating & Maintenance Manual
Outdoor and Open Vessel Installation
The FM1000C can be simply mounted on a bracket, suitable for the application and secured using the thread
located at the top of the transducer (2” NPT).
Care should be taken to ensure that the FM1000C is not installed in direct sunlight, in order to avoid errors in the
measurement of ambient temperature.
Attention should also be taken, when mounting the unit, to ensure that strong windy conditions are avoided,
wherever possible, to prevent abnormal operation.
Minimum 0.98 ft (30cm) Closed Vessel Installation
The FM1000C can be simply screwed into a flange and secured using the thread located at the top of the
transducer (2”NPT).
Where possible use a flange made of a synthetic material such as PVC, to avoid vibration.
Place a rubber gasket between the flange of the FM1000C and the connection to the vessel to avoid vibration.
9
Flomotion Systems Inc. 800.909.3569
FlomotionSystems.com
FLOMOTION FM1000C Operating & Maintenance Manual
Stand Pipe Installations
When mounting the FM1000C to a standpipe care should be taken to ensure that the standpipe is of sufficient
space with reference to its length, see the table below for details:
D
Length
3.15 in. (80mm)
9.22 in. (234mm)
3.94 in. (100mm)
11.42 in. (290mm)
5.91 in. (150mm)
16.93 in. (430mm)
7.87 in. (200mm)
22.44 in. (570mm)
When using a standpipe, fixed to the top of a vessel, ensure that the open end of the standpipe is clear of any
obstructions such as weld seams, gaskets etc. in order to avoid unwanted signal returns.
If using standpipes, which extend into the vessel, beyond the blanking distance, but not as far as the empty level,
then the open end of the standpipe should be cut to an angle of 45°.
The maximum level
(100% of Span) is inside
the Blanking Distance
Pipe should be free of
obstructions such as weld seams
Incorrect Standpipe size
10
Flomotion Systems Inc. 800.909.3569
FlomotionSystems.com
FLOMOTION FM1000C Operating & Maintenance Manual
Cable Entry
Even though the FM1000C has a high NEMA rating, it can’t be protect against moisture which comes in
continuously for a long time. The FM1000C Series has a single PG13.5 cable entry, fitted with a suitable seal, to
ensure moisture protection is maintained. After connecting the cable, route the cable down from the controller.
Terminal Connection Details
The FM1000C Series terminal connections are detailed below. Wiring details are also given on the terminals
under the access cover.
• V+ : Direct current(DC) input terminal (max.30V DC)
• Io : Current Output terminal (4-20mA)
Important Information
If the equipment is installed or used in a manner not specified in this manual, then the protection
provided by the equipment may be impaired.
11
Flomotion Systems Inc. 800.909.3569
FlomotionSystems.com
FLOMOTION FM1000C Operating & Maintenance Manual
Preparation for Operation
Before switching on, check the following:
•
•
The FM1000C is mounted correctly.
The power supply is correctly installed.
Maintenance
There are no user serviceable parts inside FM1000C, if you experience any problems with the unit, then please
contact your local distributor for advice.
To clean the equipment, wipe with a damp cloth. Do not use any solvents on the enclosure.
12
Flomotion Systems Inc. 800.909.3569
FlomotionSystems.com
FLOMOTION FM1000C Operating & Maintenance Manual
Chapter 3. How To Use FM1000C Series
Display
While in the Run Mode, the 3-digit LCD display will show the current level reading in centimeters, it will also
display a flashing “0” when a fault condition (Loss Of Echo) is detected. When in the Program Mode the display
is used to read information on the Menu Options and the values entered.
There are two operating modes for your FM1000C, Run Mode and Program Mode.
Measuring Mode
This mode is used once the FM1000C has been set up in program mode. It is also the default mode that the unit
reverts to when it resumes operation after a power failure.
When the FM1000C is switched on for the first time, it will display, in centimeters, the distance from the
transducer face to the target.
After programming is complete, any switched outputs that are set will operate when the level reaches the
relevant setpoints. While in Run Mode the Detect and Distance LED’s provide information on the status of the
signal.
13
Flomotion Systems Inc. 800.909.3569
FlomotionSystems.com
FLOMOTION FM1000C Operating & Maintenance Manual
Program Mode
This mode is used to set up the FM1000C or change information
already set, this is achieved by using the 5 pushbuttons located
either side of the display.
Entering a value for each of the menu options that are relevant to
your application provides all the programming information.
The menu number is displayed with alphabet “P”. Up and Down Key
makes move to another menu.
How to use the buttons
To access the Program Mode simply press the “Mode” button. Confirmation that you have entered the Program
Mode will be given by the Detect and Mode (Level, Distance or Space) LED’s being extinguished, and the
Software Version will also appear in the display. Each subsequent press of the Mode button will advance you
through the options, 01 to 05. To access other group options, you have to press the Mode and Up/Down buttons.
• Access the Program Mode:
MENU
• Move to other group option:
↑
• Move inside of each group option:
• Change option value:
• Return to Measuring Mode:
• Return to Program Mode:
↑
↓
MENU
↓
RUN
ESC
14
Flomotion Systems Inc. 800.909.3569
FlomotionSystems.com
FLOMOTION FM1000C Operating & Maintenance Manual
Examples
[Example] Changing the bottom distance value from 10 meters to 9 meters,
Press “MENU” button for 1 second in measuring mode.
2. Software version displays for 2 second.
3. After showing the S/W version, the menu number displays.
4. Use “UP” and “DOWN” button go to P04.
5. Press “menu” button, the first digit flickers. With “UP” and “DOWN”
button, the number is changed.
6. After first digit setting, press “MENU “button to move the second digit.
7. After all setting, press “RUN” to save the value. it returns to
measuring mode.
8. If press “ESC” button instead of “RUN” button, it returns to the menu
which you selected right before. The setting value isn’t saved.
15
Flomotion Systems Inc. 800.909.3569
FlomotionSystems.com
FLOMOTION FM1000C Operating & Maintenance Manual
LED Functions
There are 4 LED’s, located above the display their functions are as follows:
LED
Condition
Function
Detect &
Level
Flashing together
Indicates Normal Operation
Mode selected = Level
Detect &
Distance
Flashing together
Indicates Normal Operation
Mode selected = Distance
Detect &
Space
Flashing together
Indicates Normal Operation
Mode selected = Space
Detect
Flashing alone
Indicates that FM1000C is detecting an echo but
checking if the value is correct.
None
All Of Display indicates
flashing “E*”
Indicates that FM1000C has gone into Fail
condition.
E0 means there is no reflected echo received.
E1 means transducer and electronic part is
disconnected
What to Do First
When you first power the FM1000C on, it will be reading the distance from the face of the transducer to the
surface in meters or feet, as shown on the display.
TIP
In some applications it is simplest to empty the vessel, take a reading from the FM1000C for distance and then
setup the empty level to this figure.
Once you are satisfied with the installation, and the FM1000C is reading what you would expect in terms of
distance from the face of the transducer to the material level, then you can set up the options as detailed in
Chapter 4 Program.
16
Flomotion Systems Inc. 800.909.3569
FlomotionSystems.com
FLOMOTION FM1000C Operating & Maintenance Manual
Chapter 4. Program
This chapter describes all of the menu options in the FM1000C, in numerical order. Press the menu button to
change a menu option. Select from menu 1 to menu 18 by moving up or down with the arrow keys. The grey
marked cell below is the factory set value.
Application Menu
[P01] Operating Mode
This option sets the mode of operation when in measuring mode, and can be set to one of the following:
Option
Description
1 = Level
Display shows how full the vessel is with respect to the Empty (0 % of Span)
2 = Distance
Display shows the distance from the transducer face to the surface.
3 = Space
Display shows how an empty vessel is with respect to Full (100 % of Span)
i.e. how much space is available in the vessel.
[P02] Measuring Unit
This option is to choose the measuring unit between meter and feet.
Option
Description
1
Meter
2
FT
[P03] Display
This option sets the display unit of LCD display among 1. inch (cm), 2. mA, or 3. %
Option
Description
1
Distance by selected measuring unit
2
mA (Current value)
3
% (Percentage)
17
Flomotion Systems Inc. 800.909.3569
FlomotionSystems.com
FLOMOTION FM1000C Operating & Maintenance Manual
[P04] Empty Level
This option is to set the maximum distance from the face of the transducer to the bottom distance, in inches (cm).
The tank has to be empty. User can set factory set value with up and down keys. The maximum set value is 600
for ULM-10C-X06, 1000 for ULM-10C-X10.
Model
Empty Level (meter)
ULM-10C-X06
6.00
ULM-10C-X10
10.000
[P05] Blanking Distance
This option is the distance from the face of the transducer that is not capable of being measured, and is pre-set
to 12 inches (30cm). It should not be set to less than this figure, but can be increased if required.
18
Flomotion Systems Inc. 800.909.3569
FlomotionSystems.com
FLOMOTION FM1000C Operating & Maintenance Manual
Current Output Menu
[P06] 4 mA Setpoint
The range of current is from 4mA to 20mA. This option sets the distance (or level or space, depending on the
selected Operating Mode (Option 01) at which the 4mA output will occur. By default 4mA will represent Empty
(0% of Span)
[P07] 20 mA Setpoint
The range of current is from 4mA to 20mA. This option sets the distance (or level or space), depending on the
selected Operating Mode (Option 01) at which the 20mA output will occur. By default 20mA will represent Full
(100% of Span). If you set the lowest point as 20mA, 4mA should be set for highest point.
Important Information
The Span is the maximum working distance from Empty (0%) to Full (100%), and is automatically
calculated as Empty Level (Option 04) minus Blanking Distance (Option 05). Except for when Operating
Mode (Option 01) = Distance in this case the Span is the same as the Empty Level (Option 04)
[P08] mA Fail-safe Value
If the FM1000C Series fails to receive a valid echo return from the target, then the mA output can be used to
indicate a fault condition (Loss of Echo). This option determines the mA output value which will indicates such a
condition.
Option
Description
1 = 3.8mA
Fault condition (LOE) indicated by 3.8mA
2 = Hold
The previous measured value outputs
3 = 22mA
Fault condition (LOE) indicated by 22mA
[P09] mA Fail-safe Time
In the event of a fail-safe condition occurring (LOE - Loss of Echo) the fail safe timer determines the time before
the mA output indicates a fault condition (LOE). If a fault condition is present for the duration of the fail-safe time,
it regards it as an error. The time range is between 20 and 900 seconds. The pre-set is 300 seconds.
19
Flomotion Systems Inc. 800.909.3569
FlomotionSystems.com
FLOMOTION FM1000C Operating & Maintenance Manual
Compensation Menu
[P10] Damping Rate
The measured value is not displayed in real time. The value is generated by averaging over a certain time period.
This can be more effective for accurate value. But when the level is changing dramatically, it can cause some
inaccuracy. For more accurate level, choose the suitable damping rate in accordance with the velocity of level.
The pre-set is “1.”
Option
Description
0.01
Step: 0.01
100.0
0.01m/min
Responds to changes to a max. 0.01m/min (Slow)
Minimum: 0.01 - Maximum: 100.0
Responds to changes to a max. 100m/min (Fast)
100m/min
[P11] Detection Threshold Voltage
This option determines detectable size of the return echo. This is useful when the first return echo is needed in a
condition where small objects create various kinds of return echoes. In that case set the value higher, so the
signal is stronger than the noise, but less likely to detect small echoes. The 8 is equal to 0.8V. The pre-set is “3.”
No.
Voltage
3
4
←Low
High→
5
6
7
8
9
10
11
12
13
14
15
[P12] Output Power
This option is used to set the power output from the transducer to suit varying applications. By reducing the
power emitted the beam angle will be effectively reduced and can be applied as detailed below:
Option
Description
1 = Low Power
For use on short range applications
2 = Normal Power
For use in normal conditions
3 = High Power
For use in outdoor applications, long range measurement
4 = Maximum Power
For use in difficult applications where conditions are dusty,
steamy or turbulent.
20
Flomotion Systems Inc. 800.909.3569
FlomotionSystems.com
FLOMOTION FM1000C Operating & Maintenance Manual
[P13] Sound Velocity
This option allows for the velocity of sound to be changed according to the atmosphere the transducer is
operating in. By default the velocity is set for sound traveling in air at a temperature of 32°F (0°C).
The table below gives details of the velocity of sound in various gaseous atmospheres. In all cases the velocity
indicated is that in a 100% gaseous atmosphere at 32°F (0°C). In atmospheres less than 100% it may be
necessary to check the level indicated at near empty and near full and compare with the actual level, several
times, then adjust the Sound Velocity accordingly to obtain an accurately displayed reading.
Gas
Sound Velocity
Chlorine
206 m/sec
Carbon Dioxide.
259 m/sec
Argon
308 m/sec
Oxygen
316 m/sec
Air
331.5 m/sec
Ammonia
415 m/sec
Methane
430 m/sec
Helium
435 m/sec
Neon
965 m/sec
[P14] Vapor Temperature Compensation
The sound velocity in air increases or decreases at a uniform rate of 60cm/°C, however in atmospheres other
than air it will change at a different rate.
This option allows the rate of change in cm/°C to be set according to the present atmosphere and temperature.
The level indicated, should be compared with the actual level, several times, then Vapor Temperature
Compensation adjusted accordingly, to obtain an accurately displayed reading. The pre-set is 60cm/°C.
21
Flomotion Systems Inc. 800.909.3569
FlomotionSystems.com
FLOMOTION FM1000C Operating & Maintenance Manual
[P15] Detection Algorithm
This option determines the detection algorithm. The returned signal can be strong or weak according to field
conditions. This option chooses what signal is effective.
Option
Description
1
Automatic
2
Effective only for the First signal
[P16] Detection Target
The signals reflectance is subject to change by the measuring target.
Option
Description
1
Liquid
2
Bubble Liquid
3
Solid
4
Powder
.
22
Flomotion Systems Inc. 800.909.3569
FlomotionSystems.com
FLOMOTION FM1000C Operating & Maintenance Manual
Outputs Simulation Menu
When the FM1000C is operated with other instruments in a current loop, this menu can be used to simulate the
output current from the FM1000C for testing purposes.
[P17] Simulation
Enter the range desired. FM1000C sends out the output current for the range. For example, if you put 7 meters
(0.700), the output current is sent out in response to 7 meters. If the range value is over than the lowest level or
highest level, the error signal is sent out.
Password Menu
[P18] Password
This option prevents malicious and unskilled user from changing option values. Once this option is set, the
password is required whenever entering into program mode. The initial password is “0”
1. If the password is not “0”, the “pass” shows on the display.
2. After 1 second, it moves to setting mode automatically. The first
digit flickers. Use “UP” and “DOWN” button to set the password.
Use “MENU” button to move the digit position.
3. After setting password, press “RUN” button, the password is
saved and return to the program mode.
4. When the password is incorrect, the error message shows on the
display. After 1 second it returns to setting password mode.
** When you forget the password, please ask the manufacturer.
23
Flomotion Systems Inc. 800.909.3569
FlomotionSystems.com
FLOMOTION FM1000C Operating & Maintenance Manual
Chapter 5. Troubleshooting
This section describes some problem symptoms, with suggestions as to what to do.
Symptom
Cause
What to Do
The level changes
heavily periodically
Motor or mixer is
installed.
1. Set the velocity lower than current setting
value.
OR
2. The level should be moved to another
position where it is not affected by the
machinery.
The level changes
irregularly
Barrier within the
ultrasonic range.
1. Set the velocity lower than current setting
value.
OR
2. Set the Detection Threshold Voltage lower
than current voltage.
OR
3. Check the sensor bottom surface to see if
there is any foreign debris.
The level shows
only within blanking
distance
Error caused by the
protrusions in the nozzle
of the reservoir.
1. Check the nozzle inside surface.
OR
2. Check the nozzle diameter which is
recommended in the manual.
OR
3. Increase the blanking distance not over the
highest level point.
The level is
incorrect in the
sealed space.
The pressure is
increased by gas
generation.
1. Set the sound velocity according to the
medium.
OR
2. Install ventilation.
24
Flomotion Systems Inc. 800.909.3569
FlomotionSystems.com
FLOMOTION FM1000C Operating & Maintenance Manual
Menu Option Record Sheet
FM1000C Series Application Menu
Menu List
Values Note
Menu
Description
Factory Set
P01
Operating Mode
1 = Level
P02
System Unit
1 = cm
P03
Display
1 = cm(inch)
P04
Empty Level
Empty Dist.
P05
Blanking Distance
30cm
Current Output Menu
P06
4mA Setpoint
0
P07
20mA Setpoint
600 / 1000
P08
mA Fail Safe Value
3 = 22mA
P09
Fail Safe Time
300 sec
Compensation Menu
P10
Damping Rate
1
2
3
4
5
1m/min
P11
Detection
Threshold 7 = 0.7V
P12
Output Power
2
P13
Sound Velocity
332
P14
Vapor Temp. Comp.
60
P15
Detection Algorithm
1
P16
Detection Target
1
Outputs Simulation Menu
P17
Outputs Simulation
-
Password Menu
P18
Password
0
25
Flomotion Systems Inc. 800.909.3569
FlomotionSystems.com
FLOMOTION FM1000C Operating & Maintenance Manual


