1
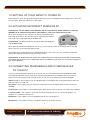
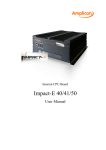
Impact-C computer user manual
Part No: 85080318 issue A2
Amplicon.co.uk
IT and Instrumentation for industry
Sales: +44 (0) 1273 570 220 Website: www.amplicon.com Email: [email protected]
Thank you for purchasing an Impact-C tower PC system.
This manual will help you get started using your Impact-C and provide you with information in the
unlikely event that you experience any hardware difficulties.
Using this manual
Every care has been taken to ensure your Impact-C has been built to the highest quality standards
using fully tested components. However, like all electrical goods, an extremely small percentage
can develop faults. This manual has been designed as an easy to follow quick start and trouble
shooting guide.
The sections have been clearly laid out, but if you find a hardware problem that is not covered or
solved by this manual, you may call the Amplicon technical support line, Monday to Friday between
8.30am and 5pm on 0844 324 0617. Calls are charged at 5p / minute.
Contents
1.0 SETTING UP YOUR IMPACT-C TOWER PC
2.0 ACTIVATING MICROSOFT WINDOWS XP
3.0 CONNECTING PERIPHERALS AND OTHER DEVICES TO YOUR PC
4.0 USING THE CD/RW
5.0 TROUBLESHOOTING
5.1 General problems
5.2 CD drive problems
5.3 Speakers & headsets
5.4 E-mail, modem, and Internet problems
5.5 Error messages
5.6 Keyboard problems
5.7 Mouse problems
5.8 Lockups and software problems
5.9 Memory problems
5.10 Video and monitor problems
1
Amplicon.co.uk
IT and Instrumentation for industry
Sales: +44 (0) 1273 570 220 Website: www.amplicon.com Email: [email protected]
PAGE
2
2
2
3
3
3
3
4
5
6
7
7
8
10
10
1.0 SETTING UP YOUR IMPACT-C TOWER PC
Please follow the quick start guide for details of how to connect your desktop personal computer (PC). Once this
has been done, follow the instructions in this guide.
2.0 ACTIVATING MICROSOFT WINDOWS XP
PLEASE NOTE - DO NOT INSERT YOUR WINDOWS CD INTO THE CD DRIVE WHEN STARTING UP YOUR PC.
WINDOWS XP IS ALREADY INSTALLED ON YOUR IMPACT-C. THE CD IS A BACK-UP COPY ONLY.
When you first switch on your Impact-C you will be prompted for some
information about the PC and yourself. This is required by Microsoft to
ensure you have a legitimate copy of Windows XP.
PLEASE NOTE - you may need access to a phone when activating your
copy of Windows XP.
When asked for the Microsoft Windows Licence key, you will find this written as a 25 digit code on the side
panel of your PC on the label that looks like this:
Your product key must be typed into the appropriate field on screen. Once you have finished the activation
process the following sections will help you set up your PC.
PLEASE NOTE - A limited 30 day trial of anti-virus software has been installed on your PC. We recommend that
you upgrade this to a full licence or install other anti-virus software on your PC as soon as you have registered
your copy of Windows.
3.0 CONNECTING PERIPHERALS AND OTHER DEVICES
TO YOUR PC
If you are connecting peripherals such as printers to your PC, you should consult the handbook provided.
The following information will be useful when choosing a peripheral that is compatible with your Impact-C.
Please ensure your peripheral can connect to your PC with one of the following connection standards:
USB 2.0/1.1/1.0 - Your Impact-C has six USB ports that are compatible with any peripheral device that uses
USB 1.0. USB 1.1 or USB 2.0.
Serial Port - Your Impact-C has one serial port. Older devices such as flatbed scanners may require this
standard.
Parallel Port - Your Impact-C has one parallel port. Older devices such as printers may require this standard.
6 channel audio - Your Impact-C comes with 6 channel audio sound. You can use stereo speakers, 2.1
speakers or 5.1 speakers with your PC.
Headphone - Your Impact-C has one headphone port on the front of your PC.
Microphone - Your Impact-C has one microphone socket on the front of your PC.
2
Amplicon.co.uk
IT and Instrumentation for industry
Sales: +44 (0) 1273 570 220 Website: www.amplicon.com Email: [email protected]
4.0 USING THE CD/RW
This Impact-C PC comes with a CD rewriter drive and Nero software.
The CD/RW drive is located on the front, at the top of your PC.
When inserting a CD press the eject button (marked with
label side up, in the centre of the tray.
on the front of the CD drive) and place your CD,
Based on the CD type you have inserted, Windows will automatically give you the options available for playing,
reading or writing to the CD. From this point, follow the on-screen instructions.
.
5.0 TROUBLESHOOTING
If you are experiencing any problems with your computer, the following tips will help you solve the problem.
5.1 General problems
If you added or removed a part or device before the problem started, review the installation procedures and
ensure that the part or device is correctly installed.
If a peripheral device does not work, ensure that the device is properly connected.
If an error message appears on the screen, write down the exact message. This message may help technical
support personnel diagnose and fix the problem(s).
If an error message occurs in a program, see the program's documentation.
If the problem is related to one of the following, please follow the steps indicated before calling our
support helpline on 0844 324 0617.
5.2 CD drive problems
DRIVE IS NOT RECOGNISED OR DOES NOT READ DISKS
STEP 1 - ENSURE THAT MICROSOFT WINDOWS RECOGNISES THE DRIVE
Click the ‘Start’ button and click ‘My Computer’. If the floppy, CD, or DVD drive, is not listed, perform a full scan
with your antivirus software to check for and remove viruses. Viruses can sometimes prevent Windows from
recognising the drive(s).
STEP 2 - TEST THE DRIVE
Insert another floppy, CD, or DVD to eliminate the possibility that the original one is defective.
STEP 3 - RUN THE HARDWARE TROUBLESHOOTER
Click the ‘Start’ button and click ‘Help and Support’.
Type ‘hardware troubleshooter’ in the Search field and click the arrow to start the search.
Click ‘Hardware Troubleshooter’ in the Search results list.
In the Hardware Troubleshooter list, click ‘I need to resolve a hardware conflict on my computer’, and click
‘Next’.
Follow the on-screen instructions.
3
Amplicon.co.uk
IT and Instrumentation for industry
Sales: +44 (0) 1273 570 220 Website: www.amplicon.com Email: [email protected]
STEP 4 - CALL TECHNICAL SUPPORT
If none of the previous steps have resolved your problem, please call the Amplicon technical support line on
0844 324 0617.
PLEASE NOTE: High-speed CD drive vibration is normal and may cause noise, which does not indicate a defect
in the drive or the CD or DVD.
NO MUSIC PLAYS WHEN A CD IS INSERTED
STEP 1 - ADJUST THE WINDOWS VOLUME CONTROL
Click the speaker icon in the lower-right corner of your screen.
Ensure that the volume is turned up by clicking the slidebar and dragging it up.
Ensure that the sound is not muted by clicking any boxes that are checked.
STEP 2 - CHECK THE SPEAKERS OR HEADSET CONNECTIONS
If you can't hear sound through your speakers please see the following section on checking speakers.
If you can't hear sound through your headphones, please see the following section on checking your headset.
5.3 Speakers & headsets
CAN NOT HEAR ANY SOUND THROUGH SPEAKERS OR HEADSET
PLEASE NOTE: The volume control in some MP3 players overrides the Windows volume setting. If you have
been listening to MP3 songs, ensure that you did not turn the player volume down or off.
CAN NOT HEAR ANY SOUND THROUGH SPEAKERS
STEP 1 - CHECK THE SPEAKER CABLE CONNECTIONS
Ensure that the speakers are connected as shown on the setup diagram supplied with the speakers. If you
purchased a sound card, ensure that the speakers are connected to the card.
STEP 2 - ENSURE THAT THE SUBWOOFER AND THE SPEAKERS ARE TURNED ON
See the setup diagram supplied with the speakers. If your speakers have volume controls, adjust the volume,
bass, or treble to eliminate distortion.
STEP 3 - ADJUST THE WINDOWS VOLUME CONTROL
Click or double-click the speaker icon in the lower-right corner of your screen. Ensure that the volume is turned
up and that the sound is not muted.
STEP 4 - DISCONNECT HEADPHONES FROM THE HEADPHONE CONNECTOR
Sound from the speakers is automatically disabled when headphones are connected to the computer's frontpanel headphone connector.
STEP 5 - TEST THE ELECTRICAL OUTLET
Ensure that the electrical outlet is working by testing it with another device, such as a lamp.
STEP 6 - ELIMINATE POSSIBLE INTERFERENCE
Turn off nearby fans, fluorescent lights, or halogen lamps to check for interference.
4
Amplicon.co.uk
IT and Instrumentation for industry
Sales: +44 (0) 1273 570 220 Website: www.amplicon.com Email: [email protected]
STEP 7 - CONTACT TECHNICAL SUPPORT
If none of the previous steps have resolved your problem, please call the Amplicon technical support line on
0844 324 0617.
CAN NOT HEAR ANY SOUND THROUGH HEADSET
STEP 1 - CHECK THE HEADPHONE CABLE CONNECTION
Ensure that the headphone cable is securely inserted into the headphone connector.
STEP 2 - ADJUST THE WINDOWS VOLUME CONTROL
Click or double-click the speaker icon in the lower-right corner of your screen. Ensure that the volume is turned
up and that the sound is not muted.
STEP 3 - CONTACT TECHNICAL SUPPORT
If none of the previous steps have resolved your problem, please call the Amplicon technical support line on
0844 324 0617.
5.4 E-mail, modem, and Internet problems
PLEASE NOTE - If you have a dial up modem, connect the modem to an analogue telephone jack only. The
modem does not operate while it is connected to a digital telephone network.
If you are having problems connecting to the Internet or receiving e-mails, please check the following.
STEP 1 - CHECK THE TELEPHONE LINE CONNECTION
Is there a dial tone when you pick up the phone?
STEP 2 - ENSURE THAT YOU ARE CONNECTED TO THE INTERNET
Ensure that you have subscribed to an Internet provider. With your Internet browser or Microsoft Outlook open,
click ‘File’. If ‘Work Offline’ has a checkmark next to it, click the checkmark to remove it and connect to the
Internet. For help, contact your Internet service provider.
STEP 3 - CHECK THE TELEPHONE JACK
Ensure everything is securely in place and connected to the correct sockets as described in your modem or
router hardware manual.
Ensure that you hear a click when you insert the telephone line connector into the modem.
STEP 4 - CONNECT THE MODEM DIRECTLY TO THE TELEPHONE WALL JACK
If you have other telephone devices sharing the line, such as an answering machine, fax machine, surge
protector, or line splitter, then bypass them and use the telephone to connect the modem directly to the
telephone wall jack. If you are using a line that is 3m or more in length, try a shorter one.
STEP 5 - RUN THE MODEM HELPER DIAGNOSTICS
Click the ‘Start’ button, point to ‘All Programs’, and then click ‘Modem Helper’. Follow the instructions on the
screen to identify and resolve modem problems. (Modem Helper is not available on all computers.)
5
Amplicon.co.uk
IT and Instrumentation for industry
Sales: +44 (0) 1273 570 220 Website: www.amplicon.com Email: [email protected]
STEP 6 - VERIFY THAT THE MODEM IS COMMUNICATING WITH WINDOWS
Click the ‘Start’ button and click ‘Control Panel’.
Click ‘Printers and Other Hardware’.
Click ‘Phone and Modem Options’.
Click the ‘Modems’ tab.
Click the COM port for your modem.
Click ‘Properties’, click the ‘Diagnostics’ tab, and then click ‘Query Modem’ to verify that the modem is
communicating with Windows.
If all commands receive responses, the modem is operating properly.
STEP 7 - CONTACT YOUR ISP
Please call your Internet Service Provider (ISP) who will run a diagnostic on your line and service.
STEP 8 - CONTACT TECHNICAL SUPPORT
If none of the previous steps have resolved your problem, please call the Amplicon technical support line on
0844 324 0617.
5.5 Error messages
If the message is not listed, see the documentation for the operating system or the program that was running when
the message appeared.
A FILENAME CAN NOT CONTAIN ANY OF THE FOLLOWING CHARACTERS: \ / : * ? " < > |
Do not use these characters in filenames.
A REQUIRED .DLL FILE WAS NOT FOUND
The program that you are trying to open is missing an essential file. To remove and then reinstall the
program:
Click the ‘Start’ button, click ‘Control Panel’, and then click Add or Remove Programs.
Select the program you want to remove.
Click the Change or Remove Program icon.
See the program documentation for installation instructions.
Drive letter :\ IS NOT ACCESSIBLE. THE DEVICE IS NOT READY
The drive can not read the disk. Insert a disk into the drive and try again.
NON-SYSTEM DISK ERROR
Remove the floppy from the drive and restart your computer.
NOT ENOUGH MEMORY OR RESOURCES. CLOSE SOME PROGRAMS AND TRY AGAIN
Close all windows and open the program that you want to use. In some cases, you might have to restart your
computer to restore computer resources. If so, run the program that you want to use first.
For all other error messages not covered by your software help, contact Amplicon technical support on 0844 324
0617.
6
Amplicon.co.uk
IT and Instrumentation for industry
Sales: +44 (0) 1273 570 220 Website: www.amplicon.com Email: [email protected]
5.6 Keyboard problems
STEP 1 - CHECK THE KEYBOARD CABLE
Ensure that the keyboard cable is firmly connected to the computer.
Shut down the PC, reconnect the keyboard cable as shown on the setup diagram for your computer, and then
restart the computer.
Check the cable connector for bent or broken pins and for damaged or frayed cables.
Straighten bent pins.
Remove keyboard extension cables and connect the keyboard directly to the computer.
STEP 2 - TEST THE KEYBOARD
Connect a properly working keyboard to the computer, and try using the keyboard.
STEP 3 - RUN THE HARDWARE TROUBLESHOOTER
Click the ‘Start’ button and click ‘Help and Support’.
Type ‘hardware troubleshooter’ in the Search field and click the arrow to start the search.
Click ‘Hardware Troubleshooter’ in the Search Results list.
In the Hardware Troubleshooter list, click ‘I need to resolve a hardware conflict on my computer’, and click
‘Next’.
Follow the on-screen instructions
STEP 4 - CONTACT TECHNICAL SUPPORT
If none of the previous steps have resolved your problem, please call the Amplicon technical support line on
0844 324 0617.
5.7 Mouse problems
STEP 1 - CLEAN THE MOUSE
If your screen cursor skips or moves abnormally, clean the mouse. To clean a non-optical mouse:
Turn the retainer ring on the underside of your mouse anti-clockwise, and then remove the ball.
Wipe the ball with a clean, lint-free cloth.
Blow carefully into the ball cage to dislodge dust and lint.
If the rollers inside the ball cage are dirty, clean the rollers with a cotton swab moistened lightly with isopropyl
alcohol.
Re-centre the rollers in their channels if they are misaligned. Ensure that fluff from the swab is not left on the
rollers.
Replace the ball and retainer ring, and turn the retainer ring clockwise until it clicks into place.
STEP 2 - CHECK THE MOUSE CABLE
Remove mouse extension cables, if used, and connect the mouse directly to the computer.
Reconnect the mouse cable as shown on the setup diagram for your computer.
STEP 3 - RESTART THE COMPUTER
Simultaneously press <Ctrl><Esc> to display the Start menu.
Type ‘u’, press the keyboard arrow keys to highlight ‘Shut down’ or ‘Turn Off’, and then press <Enter>.
After the computer turns off, reconnect the mouse cable as shown on the on the setup diagram for your
computer.
Start the computer.
7
Amplicon.co.uk
IT and Instrumentation for industry
Sales: +44 (0) 1273 570 220 Website: www.amplicon.com Email: [email protected]
STEP 4 - TEST THE MOUSE
If available, connect a properly working mouse to the computer, and try using the mouse.
STEP 5 - CHECK THE MOUSE SETTINGS
Click the ‘Start’ button, click ‘Control Panel’, and then click ‘Printers and Other Hardware’.
Click ‘Mouse’.
Try adjusting the settings.
STEP 6 - RUN THE HARDWARE TROUBLESHOOTER
Click the ‘Start’ button and click ‘Help and Support’.
Type ‘hardware troubleshooter’ in the Search field and click the arrow to start the search.
Click ‘Hardware Troubleshooter’ in the Search Results list.
In the Hardware Troubleshooter list, click ‘I need to resolve a hardware conflict on my computer’, and click
‘Next’.
Follow the on-screen instructions
STEP 7 - CONTACT TECHNICAL SUPPORT
If none of the previous steps have resolved your problem, please call the Amplicon technical support line on
0844 324 0617.
5.8 Lockups and software problems
THE COMPUTER DOES NOT START UP
STEP 1 - ENSURE THE POWER CABLE IS FIRMLY CONNECTED TO THE PC AND TO THE
ELECTRICAL OUTLET
STEP 2 - ENSURE THE MONITOR POWER CABLE IS FIRMLY CONNECTED TO THE MONITOR AND
THE ELECTRICAL OUTLET
STEP 3 - CHECK THE ELECTRICAL OUTLET
Use another appliance such as a lamp or fan to check that your electrical outlet is working.
A PROGRAM STOPS RESPONDING
STEP 1 - END THE PROGRAM
Press <Ctrl><Shift><Esc> simultaneously.
Click ‘Applications’.
Click ‘the program that is no longer responding’.
Click ‘End Task’.
THE COMPUTER STOPS RESPONDING
STEP 1 - TURN THE COMPUTER OFF
If you are unable to get a response by pressing a key on your keyboard or moving your mouse, press and hold
the power button for at least 8 to 10 seconds until the computer turns off. Then restart your computer.
8
Amplicon.co.uk
IT and Instrumentation for industry
Sales: +44 (0) 1273 570 220 Website: www.amplicon.com Email: [email protected]
A PROGRAM IS DESIGNED FOR AN EARLIER WINDOWS OPERATING
SYSTEM
STEP 1 - RUN THE PROGRAM COMPATIBILITY WIZARD
The Program Compatibility Wizard configures a program so it runs in an environment similar to non-Windows
XP operating system environments.
Click the ‘Start’ button, point to ‘All Programs’ > ‘Accessories’, and then click ‘Program Compatibility Wizard’.
In the welcome screen, click ‘Next’.
Follow the instructions on the screen.
A SOLID BLUE SCREEN APPEARS
STEP 1 - TURN THE COMPUTER OFF
If you are unable to get a response by pressing a key on your keyboard or moving your mouse, press and hold
the power button for at least 8 to 10 seconds until the computer turns off. Then restart your computer.
OTHER SOFTWARE FAILURE OR PROBLEMS
STEP 1 - CHECK THE SOFTWARE DOCUMENTATION OR CONTACT THE SOFTWARE
MANUFACTURER FOR TROUBLESHOOTING INFORMATION
Ensure that the program is compatible with the operating system installed on your computer.
Ensure that your PC meets the minimum hardware requirements needed to run the software. See the
software documentation for information.
Ensure that the program is installed and configured properly.
Verify that the device drivers do not conflict with the program.
If necessary, uninstall and then reinstall the program.
STEP 2 - BACK UP YOUR FILES IMMEDIATELY
STEP 3 - USE A VIRUS-SCANNING PROGRAM TO CHECK THE HARD DRIVE, FLOPPY DISKS, OR
CDS
STEP 4 - SAVE AND CLOSE ANY OPEN FILES OR PROGRAMS AND SHUT DOWN YOUR
COMPUTER THROUGH THE START MENU
If none of the previous steps have resolved your problem, please call the Amplicon technical support line on
0844 324 0617.
9
Amplicon.co.uk
IT and Instrumentation for industry
Sales: +44 (0) 1273 570 220 Website: www.amplicon.com Email: [email protected]
5.9 Memory problems
If you receive an insufficient memory message:
STEP 1 - SAVE AND CLOSE
Save and close any open files and exit any open programs you are not using to see if that resolves the problem.
STEP 2 - REFER TO SOFTWARE MANUFACTURER HANDBOOK
See the software documentation for minimum memory requirements. You may not be able to run that program
on this PC.
STEP 3 - CONTACT TECHNICAL SUPPORT
If none of the previous steps have resolved your problem, please call the Amplicon technical support line on
0844 324 0617.
5.10 Video and Monitor Problems
PLEASE NOTE: See the monitor documentation for additional troubleshooting procedures before calling
Amplicon technical support.
THE SCREEN IS BLANK
STEP 1 - CHECK THE MONITOR CABLE CONNECTION
Ensure that the graphics cable is connected as shown on the setup diagram for your computer.
If you are using a graphics extension cable and removing the cable solves the problem, the cable is
defective.
Swap the computer and monitor power cables to determine if the power cable is defective.
Check the connector for bent or broken pins.
(It is common for monitor cable connectors to have missing pins.)
STEP 2 - CHECK THE MONITOR POWER LIGHT
If the power light is off, firmly press the button to ensure that the monitor is turned on. If the power light is lit or
blinking, the monitor has power. If the power light is blinking, press a key on the keyboard or move the mouse.
STEP 3 - TEST THE ELECTRICAL OUTLET
Ensure that the electrical outlet is working by testing it with another device, such as a lamp.
STEP 4 - CONTACT TECHNICAL SUPPORT
If none of the previous steps have resolved your problem, please call the Amplicon technical support line on
0844 324 0617.
THE SCREEN IS DIFFICULT TO READ
STEP 1 - CHECK THE MONITOR SETTINGS
See the monitor documentation for instructions on adjusting the contrast and brightness, demagnetising
(degaussing) the monitor, and running the monitor self-test.
STEP 2 - MOVE THE SUBWOOFER AWAY FROM THE MONITOR
If your speaker system includes a subwoofer, ensure that the subwoofer is at least 60cm away from the monitor.
10
Amplicon.co.uk
IT and Instrumentation for industry
Sales: +44 (0) 1273 570 220 Website: www.amplicon.com Email: [email protected]
STEP 3 - MOVE THE MONITOR AWAY FROM EXTERNAL POWER SOURCES
Fans, fluorescent lights, halogen lamps, and other electrical devices can cause the screen image to appear
"shakey." Turn off nearby devices to check for interference.
STEP 4 - ROTATE THE MONITOR TO ELIMINATE SUNLIGHT GLARE AND POSSIBLE
INTERFERENCE
STEP 5 - ADJUST THE WINDOWS DISPLAY SETTINGS
Click the ‘Start’ button, click ‘Control Panel’, and then click ‘Appearance and Themes’.
Click ‘Display’ and click the ‘Settings’ tab.
Try different settings for Screen resolution and Colour quality.
STEP 6 - CONTACT TECHNICAL SUPPORT
If none of the previous steps have resolved your problem, please call the Amplicon technical support line on
0844 324 0617.
The information is believed to be accurate. However Amplicon Liveline Limited accepts no responsibility for any problems caused by errors
and omissions. Specifications are subject to change without notice.
11
Amplicon.co.uk
IT and Instrumentation for industry
Sales: +44 (0) 1273 570 220 Website: www.amplicon.com Email: [email protected]