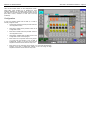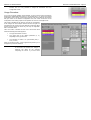
1
MENTOR 12 USER’S MANUAL
MENTOR 12 USER’S MANUAL
VERSION 1 – NOVEMBER 2006 – COPYRIGHT EUROSMC, S.A.
ALL RIGHTS RESERVED.
DISCLAIMER
The information contained in this document is intended only to describe the
product MENTOR 12 and its operation. This document has no contractual
contents and implies no warranty about the product’s specifications.
EuroSMC, S.A. claims the right to change the characteristics of the product and
the contents of this document with no previous announcement.
The user of the product is the only responsible of any consequences from the use
of the product for the purposes described or not in this document.
EuroSMC, S.A. explicitly exonerate themselves from the responsibility of any
errors accidentally made in this document.
Copying, reproducing or in any other way publishing this document in whole or in
part is prohibited without written authorization from EuroSMC, S.A.
The only official version of this document is the version written in Spanish
language
SECTION 1: PRODUCT INTRODUCTION – Page 2
INDEX
Safety considerations.................................................................................... 7
Package’s contents ....................................................................................... 8
Handling the Mentor 12................................................................................. 9
Transport case.......................................................................................... 9
Working position ..................................................................................... 10
Product description ..................................................................................... 10
Start-up process.......................................................................................... 11
Start-up process.......................................................................................... 12
Initial check ................................................................................................. 14
Quick Start .................................................................................................. 16
Power output control and regulation....................................................... 16
Monitoring the binary input ..................................................................... 17
Binary output control............................................................................... 17
Battery simulator setup and control ........................................................ 18
Measuring external quantities................................................................. 19
SECTION 2: BASIC CONTROL
20
Introduction ................................................................................................. 20
Description of source controls..................................................................... 22
Selection of an output value........................................................................ 23
MENTOR 12 USER’S MANUAL
SECTION 1: PRODUCT INTRODUCTION – Page 3
MENTOR 12 USER’S MANUAL
SECTION 1: PRODUCT INTRODUCTION – Page 4
Selection of one single source (INDEPENDENT mode) ........................ 24
Simultaneous selection in several sources (SELECTED mode) ............ 24
Selection when there are more than 3 available sources. ZOOM key. .. 25
Application and Use of the function and help keys ..................................... 25
“Select all” key ........................................................................................ 26
“Reset Values” key ................................................................................. 26
“Rotate” key ............................................................................................ 26
“Save” and “Rest.” keys.......................................................................... 27
“Config. Status 2” and “Status 2” keys ........................................................ 29
Measurement Window ................................................................................ 31
Configure times ........................................................................................... 32
TIMER START conditions ...................................................................... 33
TIMER STOP conditions ........................................................................ 34
TIMER Activation.................................................................................... 35
TIME DELAY .......................................................................................... 36
Configure measurements............................................................................ 37
System alarms ............................................................................................ 40
Battery Simulator......................................................................................... 42
Logger ......................................................................................................... 43
SECTION 3: ADVANCED CONTROL
44
Introduction ................................................................................................. 44
FAULT Function .......................................................................................... 48
Configuration .......................................................................................... 52
Execution................................................................................................ 53
RAMP Function ........................................................................................... 56
Configuration .......................................................................................... 57
Execution................................................................................................ 62
PULSE RAMP function ............................................................................... 64
Configuration .......................................................................................... 66
Execution................................................................................................ 70
BINARY SEARCH Function ........................................................................ 72
Configuration .......................................................................................... 74
Execution................................................................................................ 78
STATE SEQUENCER function ................................................................... 80
Configuration .......................................................................................... 81
Execution................................................................................................ 83
SECTION 4: CONFIGURATION
86
Introduction ................................................................................................. 86
Common Configuration Operations............................................................. 87
Analog Outputs ........................................................................................... 88
Power Outputs. Definitions. .................................................................... 89
Usage Procedure.................................................................................... 90
Power Output Configuration ................................................................... 91
Configuration of the Low Level Outputs ................................................. 91
MENTOR 12 USER’S MANUAL
SECTION 1: PRODUCT INTRODUCTION – Page 5
MENTOR 12 USER’S MANUAL
Binary Outputs ............................................................................................ 94
Definitions............................................................................................... 94
Usage Procedure.................................................................................... 95
Binary Inputs ............................................................................................... 96
Definitions............................................................................................... 96
Usage Procedure.................................................................................... 97
Miscellaneous ............................................................................................. 99
Definitions and Use .............................................................................. 100
Maintenance.............................................................................................. 103
Definitions and Use .............................................................................. 103
SECTION 1: PRODUCT INTRODUCTION – Page 6
Safety considerations
Do not operate this product before carefully reading and understanding this manual, especially the safety
warnings and recommendations. The use of this equipment is reserved to trained personnel only.
DANGER: Never try to use a Mentor 12 that looks damaged, dirty or incomplete. Connecting the unit to a power supply with any
or all of its case’s faces removed is extremely dangerous.
DANGER: Harmful voltage can build up at the unit’s output connectors. Keep this in mind when handling the test leads and other
devices connected to them. Never introduce a non-isolated conductive tool or instrument into the unit’s connectors while the unit is
powered on or connected to the power supply.
CAUTION: Turn the unit ON before cabling anything to the connection’s board. Most input and output connectors in this board are
dynamic and feature self-protecting mechanisms that work only in if the Mentor 12 is powered on. Internal damage may result from
connecting the unit to wrong points when it is powered OFF.
CAUTION: Ensure that your power supply’s characteristics match the product’s supply requirements (voltage 100-260 Vac and
frequency 45-65 Hz) before connection. Use only the supplied power cord to an AC outlet that includes a good EARTH connection.
CAUTION: The equipment should only be serviced after adequate anti-static measures and procedures have been carried out.
WARNING: Keep the ventilation holes clear from any obstruction to avoid over-heating.
WARNING: Use only your finger or a soft pointer to operate the touch panel. Avoid excessive pressures on the touch panel. A
subtle touch should immediately activate the desired action. Do not use abrasive or alcohol-based substances to clean the touch
panel. Use only a soft, lint-free tissue or a special cleaning product for touch panels.
MENTOR 12 USER’S MANUAL
SECTION 1: PRODUCT INTRODUCTION – Page 7
MENTOR 12 USER’S MANUAL
SECTION 1: PRODUCT INTRODUCTION – Page 8
Package’s contents
Quantity
Description
1
Mentor 12 unit, with variable power output channel configuration
1
Power Cord
1
Set of test leads in a nylon bag
1
Twisted-pair ETHERNET LAN cable
1
External mouse / keyboard PS/2 cord
1
User’s documentation
1
Certificate of calibration
1
Transportation hard case with wheels
NOTE:
Contents may differ from the product’s standard packaging when
ordered with custom-specific options. If this is the case, refer to the
packing list included in the product’s shipping documentation.
Handling the Mentor 12
The Mentor 12 has been designed with ergonomics in mind to provide a safe,
convenient and reliable operation.
Transport case
Use always the supplied transport case for long displacements. This will save you
useless efforts and will avoid accidental damages to the unit. The transport case
features wheels and an extensible handle for your convenience.
Rest the case flat on the ground before opening it.
CAUTION: Do not grab the unit by the touch panel. Slide one hand into the slot underneath the touch panel and grab the back of
the unit with the other hand to lift the unit off the case onto the working surface. Another slot can be found behind the touch panel.
The test leads are packaged in a nylon bag inside the transport case. Re-package them
always when you finish working.
Stick FRAGILE labels on the transport case for long distance shipment.
Avoid strong impact and vibration to the unit even when kept in
the transport case.
Use always the transport case and include all the accessories
when sending the unit for servicing or calibration.
MENTOR 12 USER’S MANUAL
SECTION 1: PRODUCT INTRODUCTION – Page 9
MENTOR 12 USER’S MANUAL
Working position
The Mentor 12 can stand up in two positions to better adapt to your work environment.
Both ways take up very little from your working surface. The standard position is
designed for a tabletop. Normally, you will not need to make any adjustment in the
touch panel orientation when using this position. Ventilation to the unit and access to
the connections are optimal in this position.
If you prefer to lay the Mentor 12 on the floor, stand it over the back side, where the
ventilation holes are found. Ensure that the surface is flat, hard and clean. Do not
operate the unit on soft carpets, cushioned or similar types of surface that can block the
normal ventilation air flow. Sand or excessive dust can get into the unit and cause
serious ventilation problems in the long term. You will need to adjust the touch panel’s
orientation when using the Mentor 12 in this position.
Product description
The Mentor 12 has been designed to make relay testing as easy, safe and efficient as
possible. The built-in computer eliminates the need of buying, carrying, connecting and
maintaining an external PC. This approach provides also stronger security against
operation mistakes and viruses. Yet, the Mentor 12 takes advantage of the best things
that are now common in the personal computing world: Plug & Play, graphical interface,
USB compatibility and access to the Internet, to say a few.
SECTION 1: PRODUCT INTRODUCTION – Page 10
Main ON/OFF switch
Touch Screen TFT
panel (swivel)
Main FUSE
Power STATUS LED
Adjustment knob
GROUND connector
BATTERY simulator
Power VOLTAGE outputs
Handle
Power CURRENT outputs
COMMUNICATIONS set
Analogue MEASUREMENT
BINARY INPUT
BINARY OUTPUT
MENTOR 12 USER’S MANUAL
ETHERNET RJ-45 plug
GPS antenna plug
SECTION 1: PRODUCT INTRODUCTION – Page 11
MENTOR 12 USER’S MANUAL
SECTION 1: PRODUCT INTRODUCTION – Page 12
Start-up process
CAUTION: Ensure that your power supply’s characteristics match the product’s supply requirements (voltage 100-260 Vac and
frequency 45-65 Hz) before connection. Use only the supplied power cord to an AC outlet that includes a good EARTH connection.
Before connecting any other device to the connections panel, plug the Mentor 12 into a
suitable AC supply using the supplied AC cord and switch the unit ON. Various start-up
screenshots will be displayed, with the TFT panel going occasionally black for a short
while: this is normal. The start up process takes less than 2 minutes and includes:
•
General hardware check
•
Embedded PC start up test & initialization
•
Specific hardware check
•
Mentor Application start up
Upon completion of the start up process, the Basic Control screen will give you a
general glance of the standard Mentor 12’s characteristics:
Output source selection area
Output source level display
Output source phase angle
Output source level range & frequency bus
Output source ON/OFF
Battery Simulator ON/OFF
Battery Simulator DC setting
Battery Simulator setup area
Measurements window
Binary Input Monitoring
MENTOR 12 USER’S MANUAL
Binary Output ON/OFF buttons
SECTION 1: PRODUCT INTRODUCTION – Page 13
MENTOR 12 USER’S MANUAL
SECTION 1: PRODUCT INTRODUCTION – Page 14
You can now proceed to set up the control and power requirements for your test, and to
carry out the appropriate connections to the tested object (relay, IED, transducer, etc.).
You will find detailed directions how to configure the Mentor 12’s power and control
logic in the Configuration section in this manual.
DANGER: Harmful voltage can build up at the unit’s output connectors. Keep this in mind when handling the test leads and other
devices connected to them. Never introduce a non-isolated conductive tool or instrument into the unit’s connectors while the unit is
powered on or connected to the power supply.
When you finish your work, proceed to disconnect the test leads from the Mentor 12
first, then from the test objects. In this way you will prevent any voltage from
accidentally touching the surrounding objects or yourself.
You can then turn the unit off directly. No software shutdown procedure is required.
Initial check
We recommend you to carry out a general check on your particular unit, in order to
confirm that it has been configured properly according to your specifications. This will
take you less than 5 minutes:
NOTE:
•
The procedures below assume that the Mentor 12 is in its initial
power-on state, i.e., no changes have been made to the default
factory settings.
OUTPUT AMPLIFIERS CONFIGURATION: The initial factory-defined layout
shows three voltage sources at the upper half and three current sources at
the lower half of the Basic Control screen. Their default presets are: 63.5 V
for the voltage sources, 1 A for the current sources and 0º-240º-120º for the
angles.
Power sources are represented by colored (red, yellow, blue) rectangles
labelled Vs# for voltage and Cs# for current.
However, this basic layout does not represent the maximum output
capabilities of your Mentor 12. By means of the Configuration menu, you can
add the following to the standard power layout:
a) any combination of up to SIX current-mode or voltage-mode LOW
LEVEL SOURCES, regardless to the number of power channels that
you have ordered, or
b) any combination of up to SIX sources taken from the standard lowlevel outputs and from any number of additional voltage or current
AMPLIFIERS that you may have purchased with you Mentor 12.
Please refer to the Configuration section in this manual to find out how to
locate, set up and include all your available output resources into the effective
power layout of your particular unit.
•
FREQUENCY: Each power source is attached to any of two frequency buses,
Freq1 being the default assignment. Actual frequency bus #1 and #2 settings
are displayed and adjusted at a small window next to the sources section,
underneath the phasorial power system representation. Be sure that the
frequency bus(es) you are using match the electrical characteristics of the
system that you are testing.
Any change made to a frequency bus is automatically taken by all the sources
attached to it.
•
ALARMS: The ALARMS indicator should be always dim (grey) after poweron. Otherwise, touch the indicator to bring the alarm details up and refer to
the corresponding section in this manual for information on alarm
interpretation, possible causes and solutions.
•
BATTERY SIMULATOR: The pre-adjusted DC voltage is shown in the
corresponding rectangle on the lower right. Touch and hold on the Battery
Simulator label to select a different voltage level if required.
MENTOR 12 USER’S MANUAL
SECTION 1: PRODUCT INTRODUCTION – Page 15
MENTOR 12 USER’S MANUAL
Quick Start
You can quickly become familiar with your Mentor 12 by conducting a simple routine
through some basic manual operation functions:
•
TFT panel operation
•
Power output and regulation
•
Binary input and output ports
•
Battery simulator
•
Analogue external measurement
To accomplish this, you will need at least the following materials:
•
Multimeter
•
One pair of test leads
Power output control and regulation
Choose one of the available current channels and try the following:
1.
Adjust all the current channels to zero and be sure that the output is OFF.
2.
Set up your meter and connect its current measurement input to the output
connector of a current channel.
3.
Select the channel in the touch screen and turn the regulation knob gently
clockwise while you observe the meter’s display. Compare this display with
the regulated value of that channel in the Mentor 12.
4.
At a certain point, check the output control by touching the channel’s OFF
button in the Mentor 12 and then back ON. While you do this, check that the
SECTION 1: PRODUCT INTRODUCTION – Page 16
meter’s output goes
correspondingly.
5.
to
zero
and
back
to
the
adjusted
quantity
Turn the channel’s output OFF by touching its OFF button in the touch panel.
Now, set up your meter for voltage measurement and repeat the above procedure for
the voltage channels.
Monitoring the binary input
The Mentor 12 is permanently monitoring the presence / absence of contact or voltage
signal at its binary inputs. You can experience this easily:
1.
Take one test lead and connect one end to the black connector between the
“1a” and “1b” yellow connectors in the Binary Inputs pad of the connections
board.
2.
Connect the free end of the test lead to “1a”. The corresponding indicator
labelled “1a in” in the lower section of the Basic Control screen should lit in
yellow.
3.
Move the same end of the test lead to “1b”. The “1b in” indicator should lit in
yellow now.
Binary output control
Set up your meter for continuity testing, so it will beep when you short its test leads.
Now, perform the following steps:
1.
Connect the meter’s leads between the black and blue connectors of binary
output 1 in the Binary Outputs pad of the connections board.
MENTOR 12 USER’S MANUAL
SECTION 1: PRODUCT INTRODUCTION – Page 17
MENTOR 12 USER’S MANUAL
2.
Touch the Out 1 button of the Binary Output pad in the lower right corner of
the touch panel. The meter should beep until you touch the button again to
deactivate the output.
IMPORTANT:
Instead of using the meter, you may want to connect the binary
output to a binary input as described in the previous procedure. In
this case, you will get a visual feedback in the touch panel rather
than a sound signal from the meter.
Battery simulator setup and control
The procedure here is similar to checking the voltage power outputs described at the
beginning of this chapter. However, rather than regulation, you can select the battery
simulator’s DC output voltage from a set of predefined values in the range of 0-250 Vdc.
Set up your meter for DC measurement, connect its leads to the Battery Simulator pad
in the connections board, and do the following:
1.
Touch the ON button in the Battery Simulator pad at the bottom right corner of
the touch panel and check that the voltage displayed there is now being
measured by the meter.
2.
Switch to a different DC value by touching the Battery Simulator pad (not the
ON/OFF button) for a few seconds and selecting from the emerging window.
When you do this, the battery simulator’s output is automatically stopped, so
you should see zero in your meter’s display now.
3.
Repeat steps 1 and 2 if you want to check other available DC output values in
the battery simulator.
SECTION 1: PRODUCT INTRODUCTION – Page 18
Measuring external quantities
Unless you also have an external source of electrical quantities, you can use the lowlevel signal generation and regulation resources in your Mentor 12 to accomplish this
practice:
1.
Ensure that all the power sources (voltage and current) are set to zero level
and the output control is switched OFF.
2.
Plug one of the supplied multi-lead adapters into one of the connectors
labelled LL Outs 1-3 or 1-6 at the lower left section of the connections board.
3.
Choose one red / black pair of bananas at the free end of the adapter and
plug them into the red / black connectors at the Analog DC Inputs pad.
4.
Set the measurements window in the Basic Control screen to External
Measurement mode by touching the measurement readings as many times
as necessary.
5.
Configure the connected low level output as a source using the Configuration
menus.
6.
Select the added low level source in the Basic Control screen and turn the
adjustment knob while you watch the readings changing at the Measurements
window. Values at this window and at the source’s pad should match if you
have set a 1:1 ratio for the low-level source configuration.
MENTOR 12 USER’S MANUAL
SECTION 1: PRODUCT INTRODUCTION – Page 19
SECTION 2: BASIC CONTROL
Introduction
The section called Basic Control refers to the control of the
equipment in an entirely manual mode. It has different
controls for total control over all its functions. It is also the
default home screen for Mentor 12, once the system has
been booted. This section includes a detailed explanation of
the operating mode of the different Mentor 12 controls, which
is common for all its screens. This operating mode will not
be described in the sections corresponding to these
functions, as it will be taken for granted that the procedure is
already known, so it is very important to carefully read this
section.
As shown in the picture, in the upper left-hand section of the screen, we can find the
controls of all the outlet sources configured (see Configuration section), the frequency
control, the chronometer or timer, several quick access command keys and the vectorial
view of the magnitudes selected.
•
Different selection tabs are located on the top of the screen, providing access
exclusively to the selection and configuration of different functions that are
directly related to the Basic Control.
•
The status of all the Mentor 12 inputs and outputs, both digital and analogical,
is shown on the bottom of the screen. There are also two arrows on the
bottom of the screen, which, combined with the rotary knob, enable the
desired output values to be selected, with the selected resolution. There is
also a button called “alarms” which lights up in RED whenever an operation
alarm occurs in any of the equipment outputs. A screen appears, when you
press this button, which describes the type of alarm that has occurred and the
module it corresponds to.
•
The line of buttons on the right of the screen provides direct access to the
different Control Modes of Mentor 12. Apart from the access to these
modules, the Battery Simulator control can also be accessed, in order to
either select the output value or activate or deactivate the output. These
buttons and functions are always available for use from any control screen of
the equipment.
MENTOR 12 USER’S MANUAL
SECTION 2: BASIC CONTROL – Page 21
MENTOR 12 USER’S MANUAL
SECTION 2: BASIC CONTROL – Page 22
Description of source controls
The controls of a power output source are described below.
The figure shows what the control of a power output source looks like, before it has
been manipulated in any way, which is, in default conditions (see Configuration). We
can see the following controls and tags:
•
Cs1: This indicates the type of Cs (Current Source) source and its number
(1). There can be up to 6 current sources, depending on the equipment
configuration (Cs1 … Cs6).
When pressed, the background color changes to BLACK meaning that the
source has been SELECTED.
The following tags can be found, indicating the different types and numbers of
sources available, which are, apart from the current sources described:
•
Vs…n: This indicates that it is a Voltage Source. There can be up to 6 at the
same time depending on the configuration.
•
Ll…n: This indicates that the output source used is a Low Level Output.
There can be up to 6 outputs at the same time, depending on the
configuration of the power sources (See Configuration Section for greater
detail). They tally with the output of the Connectors marked LL OUT from 1 –
3 and from 4 – 6.
•
Lv xxx.xxx A: The Lv tag indicates that the value selection made in the
associated setting window is for SIGNAL LEVEL. The next tag (in this case A
for amperes) indicates the unit of the level selected. This can be A (amperes),
or V (Voltage) and this corresponds with the type of output source. The level
is selected with the resolution and number of available digits indicated
therein.
•
Ph xxx.xxx º: The Ph tag indicates that the value selection made in the
associated setting window is for PHASE ANGLE in degrees, which
corresponds to the level value selected previously, that is, to the source. The
Source with
output
ACTIVATED
and SELECTED
Source in Frequency BUS
selection mode
Default source with
deactivated,
independent output
(NOT SELECTED)
angle is selected with the resolution and number of available digits indicated
in the relative window. The value selection and direction of rotation are
determined by the selections made in CONFIGURATION.
•
ON/OFF: This is used to ACTIVATE or DEACTIVATE the source output.
The INACTIVE status (Output disconnected) corresponds with the GREEN
color and the ON legend on the key. This legend indicates the action that
the key will carry out when pressed, NOT ITS STATUS, which is
indicated by its color.
The ACTIVE status (Output connected) corresponds with the RED COLOR
and the OFF legend on the key
•
25 A/ Freq 1: This button is both indicator and selector.
As indicator, the top line (in this case 25 A) indicates the maximum permitted
level selection (25) with its relative unit (A). The bottom line (in this case Freq.
1) indicates which of the two frequency buses (Freq 1 or Freq 2) it is assigned
to, or if it is assigned as a direct output, in which case DC appears.
As selector, it permits selecting the frequency bus or direct mode. To do so,
it suffices to press the button and a menu drops down with the three
possibilities. After the desired one has been pressed, the menu closes and it
is selected.
Selection of an output value
A description is given below of the action to be taken to obtain a certain output value
from one or several Mentor sources at the same time. This description is given step by
step, and it can be applied at any time to any value selection on any control screen as
the process is common to all the equipment control programming:
MENTOR 12 USER’S MANUAL
SECTION 2: BASIC CONTROL – Page 23
MENTOR 12 USER’S MANUAL
SECTION 2: BASIC CONTROL – Page 24
Selection of one single source (INDEPENDENT mode)
To select any value, be it level or phase angle, it suffices to press on the setting window
you wish to vary. A red-colored cursor will appear under some of the digits of this
window. If the cursor appears on the weight digit that you wish to adjust (e.g. The digit
that adjusts the angle by 10 degree intervals, as in the figure), you must only increase
with the endless rotary knob until the desired value is reached. In the case of the figure,
it will vary every 10 degrees.
If you wish to change its adjustment resolution, it suffices to press the arrow buttons
situated on the bottom of the screen, directly above the rotary knob. If you press the
right-hand arrow, the red-colored cursor will move to the right, increasing the resolution
by one decade. If you press the left-hand arrow, the red-colored cursor will move to the
left, decreasing the resolution by one decade.
In our example in the figure, if we press the right-hand key, our resolution increases to
achieve degree be degree adjustment. If we press the left-hand key, our resolution
decreases to achieve adjustment in 100 degree intervals.
Simultaneous selection in several sources (SELECTED
mode)
Mention has been made above of the SELECTED mode and how to activate it in each
source. This mode is used to make adjustments, changes in frequency reference and
actions on the output status all at the same time, thus permitting three-phase
adjustments or even of more sources, just by applying the single rotary knob, or any
ON/OFF output control button. However, there are logically some limitations to carry
out this practical function, depending on the parameters or actions that the change
affects. These are described below:
•
When LEVEL or phase ANGLE values are adjusted, any change made in a
source on SELECTED mode, occurs in the same way in ALL the sources
OF THE SAME TYPE (V or I) that are in that mode. That is, a change in
level or angle in a Voltage source will only affect the voltage sources and
not the current ones. The changes that are sent to the sources are
INCREASES, both in phase angle and in level, so these increases sent will
Sources C1, C2, C3 and Llc6 in SELECTED mode, Sources Llc4 and Llc5 in
INDEPENDENT mode
be added or subtracted, depending on the direction of the adjustment, to or
from the values established at the start of the process.
•
When you apply any ON/OFF key of a source in SELECTED mode, this
change will take effect in ALL the sources of this mode, regardless of the
output source type.
•
When you apply any key that permits changing the frequency reference
(BUS) of a source in SELECTED mode, this change will take effect on ALL
the sources in this mode, regardless of the type of output source.
Selection when there are more than 3 available sources.
ZOOM key.
As you can see on the previous screen, when there are more than 3 sources of one
type selected (see Configuration section), 3 of them appear in reduced form under a
key marked ZOOM. The sources that appear under this key ONLY PRESENT
INFORMATION about levels, phase angles and output status. None of the parameters
mentioned can be changed. However, the mode can be selected as INDEPENDENT
or SELECTED, by pressing them.
To be able to make changes in these sources you must go from reduced mode to
expanded mode. This is done by pressing the ZOOM key. This action expands the
sources under it and reduces the ones that were expanded, as you can see from the
picture below.
Selected expanded sources Llc4, Llc5 and Llc6 with the ZOOM key
Application and Use of the function and help keys
Under the individual controls for each source, there is a row with different keys, whose
aim is to help carry out normal functions in the protections test, both quickly and easily,
so just by clicking once you can access the desired changes. The different keys are
described individually below:
MENTOR 12 USER’S MANUAL
SECTION 2: BASIC CONTROL – Page 25
MENTOR 12 USER’S MANUAL
“Select all” key
This is used to directly and simultaneously place the sources in SELECTED mode. It is
a function sequential selection key, that is, each pulse corresponds to a function. When
it reaches the last one it goes back to the first, and so on and so forth. Every time it is
pressed, the situation described by the tag is generated and this changes to indicate the
action that will occur when pressed again. It has the following possibilities:
•
Select all: This is the default configuration. When you press the key ALL the
existing sources are placed in SELECTED mode.
•
Select voltage: When you press this key, the selection of the current sources
is deactivated, and only the voltage sources remain in SELECTED mode.
•
Select current: When you press this key, the selection of the voltage modes
is deactivated, and only the current sources remain in SELECTED mode.
•
Deselect all: When you press this key the SELECTED mode is deactivated
in all the sources that might be in this mode.
“Reset Values” key
This is used to return to the default values established in the Configuration (see
Configuration section) in all the sources in SELECTED mode. It is important to point out
here that this key will have NO effect on sources that are in INDEPENDENT mode.
“Rotate” key
This key is designed to help the operator. It is quite normal during relay testing in threephase mode or phase to phase mode for it to be necessary to “rotate” the whole system
in terms of phase angles, in order to simplify calculations with phase angles or even
avoid connection changes to the relay itself. By doing this, the reference phase
SECTION 2: BASIC CONTROL – Page 26
connected to the relay will always have an angle of zero degrees, while maintaining the
appropriate phase rotation.
For example, if we assume a phase rotation ABC and a positive direction of rotation of
the angles selected on the screen in clockwise direction (see Configuration section), the
selected angles corresponding to each phase are:
•
Phase A (0º) which corresponds to output source Cs1, Phase B (120º) which
corresponds to output source Cs2 and Phase C (240º) which corresponds to
output source Cs3, in our example.
If the “Rotate” key is pressed, the situation would change to the following:
•
Phase C (240º) which corresponds to output source Cs1, Phase A (0º) which
corresponds to output source Cs2 and Phase B (120º) which corresponds to
output source Cs2, in our example.
If the “Rotate” key is pressed again, the situation would then change to:
•
Phase B (120º) which corresponds to output source Cs1, Phase C (240º)
which corresponds to output source Cs2 and Phase A (0º) which corresponds
to output source Cs2, in our example.
If you press the “Rotate” key once again the situation returns to the original one. In
short, with this key we manage to change our reference phase, as the relay being
tested sees it, without physically having to change the output source that corresponds to
it or the connection to the relay.
“Save” and “Rest.” keys
These keys are designed to help the operator. They are described together as they
complement each other. During relay testing in manual mode, it is quite normal to have
to repeatedly return to identical adjustment situations each time. This key combination
exists to prevent having to adjust them in each case, making it possible, on the one
hand, to save up to five adjustment situations or “panels”, and on the other hand,
MENTOR 12 USER’S MANUAL
SECTION 2: BASIC CONTROL – Page 27
MENTOR 12 USER’S MANUAL
permitting quick and easy recovery and application of saved panels. They are used as
follows:
•
Save key: When you press this key a drop-down menu appears with 5
buttons marked as “Save 1….5”. If you press on the one where you wish to
save the panel, this is saved in the selected position. Tags with “+” sign
indicate that the position is empty. Those marked with the other tag indicate
that they contain data. In the picture below, tags 1, 2 and 3 contain data and
positions 4 and 5 are empty.
•
Rest. Key: When you press this key a drop-down menu appears with 5
buttons marked as “Restore 1….5”.- Each number corresponds to the panel
saved with the “Save” key. When you press on the one you wish to make
active at that time, the panel is reproduced in the settings of the active panel.
Tags with “-“ sign indicate that the position is empty. Those marked with the
other tag indicate that they contain data. In the picture, tags 1, 2 and 3
contain data and positions 4 and 5 are empty.
IMPORTANT:
All the panels saved during a work session are maintained until the
equipment is disconnected. When the system is booted again, none
of the work panels remains.
SECTION 2: BASIC CONTROL – Page 28
“Config. Status 2” and “Status 2” keys
During relay testing, be it manual or not, the possibility of
carrying out dynamic changes in both the analogical and
logic values of the different outputs selected is of great help
(and is sometimes essential), in order to assess the
response of the relay being tested to this change, either by
trip time measurement or by the subsequent study of the
performance of the outputs of this relay, using the “Logger”
function.
For this function to be practical it is necessary to be able to
configure this status, even while the conditions of the
“normal” or “1” status are activated. This is what the Config.
Status 2 key is used for. Once the operator has edited the
desired parameters on this screen, the condition of 2nd
value is activated with the Status 2 key.
MENTOR 12 USER’S MANUAL
SECTION 2: BASIC CONTROL – Page 29
MENTOR 12 USER’S MANUAL
The operation sequence is as follows:
7.
Press Config. Status 2 once. The background
color of the key changes to blue. A screen
appears where you can configure the power
outputs and the logic outputs that you wish to skip.
8.
Press Config. Status 2 again to return to the
normal control screen. The background color of
the keys changes back to grey.
9.
Press the Status 2 key for the outputs to
instantaneously change to status 2 selected
previously; the timer starts (if configured to do so)
and they remain like that until stopped. To return
to Normal status, you must press “Status 2” key
again. In this case the screen only shows the
configured values. They cannot be varied. If you
wish to vary the values of “Status 2”, you must
repeat the process described.
SECTION 2: BASIC CONTROL – Page 30
Measurement Window
There is a section on the Basic Control panel that contains a window, which shows the
values measured of different magnitudes in real time. The following magnitudes are
available:
•
Trip time in seconds (timer function): This measures the time elapsed
between two events and presents the measurement on the window. Their
selection and configuration (start and stop) are described further on in this
manual. The units may be “seconds” or “cycles” (See configuration section).
•
Duration of the output in seconds (time delay function). It maintains both
the power outputs and the digital outputs during the time indicated on the
window. The selection of the time value and the selection of the simultaneous
actions with the end of count are described further on in this manual. The
units may be “seconds” or cycles” (See configuration section).
•
Value of the magnitude measured through the analogue measurement
input (configurable units)
•
Value of the number of pulses or frequency measured through the logic
inputs that can work as counters, (configurable units)
As you can see in the figure, the measurement window is divided into two sections:
•
The upper section where the name of the measurement function selected and
a green or red colored indicator appear. The function is not active when the
indicator is green and active when the indicator is red. If you press the
indicator the status of the measuring device changes in cycles.
•
The bottom section where the measurement appears. The measurement unit
used also appears after the digits. If you press the measurement window, the
parameter, to be measured in cycles, changes, out of those mentioned
above. The Reset button only appears with the time and pulse counter
MENTOR 12 USER’S MANUAL
SECTION 2: BASIC CONTROL – Page 31
MENTOR 12 USER’S MANUAL
parameters. If you press this button the window resets to zero and is ready for
a new measurement cycle.
Configure times
This tab marked as “Timing Settings” is situated at the top of the Basic Control screen. If
you press it you access a screen that enables you to configure the start and stop
conditions of the Timer, on the one hand, and on the other, the conditions and
times when it works as an Output Time Delay.
The following controls are available for the Start and Stop conditions in Timer
mode:
SECTION 2: BASIC CONTROL – Page 32
TIMER START conditions
•
If you wish to start the timer by the action of the
Power Outputs, press the relative button and it will
be activated, its indicator lighting up in red. The
button on the right indicates the type of operation
of the selected outputs, ON or OFF, that is, the
timer will start when the outputs are connected
or by changing from Status 1 to Status 2, in the
case of ON indication, or the timer will start when
the outputs are disconnected or by changing
from Status 2 to Status 1 in the case of OFF
indication. To select either one just press the
button mentioned and select either of the two
situations on the menu that immediately appears.
MENTOR 12 USER’S MANUAL
SECTION 2: BASIC CONTROL – Page 33
MENTOR 12 USER’S MANUAL
•
If you wish to start the timer by the action of a Binary Input combination, press
the relative button to activate it and the indicator will light up in red. With the
button situated on the right you will access a menu which permits selecting
these inputs, simply by pressing the terminals of the input you wish to use.
Each one of the inputs has a cyclic operation button associated with it, which
selects its active mode between UP (input activation) DOWN (input
deactivation) or CHG (Change in input status). It can also be selected if the
action logic between the inputs is OR (the timer start will be activated when
ANY of the inputs selected changes to the logic status selected) or AND (the
timer start will be activated when ALL the inputs selected change to the logic
status selected)
•
If you wish to start the chronometer by the action of a Binary Output,
press the relative button to activate it and its indicator will light up in red.
With the button situated on the right you will access a menu which
permits selecting these outputs, simply by pressing the terminals of the
output you wish to use. In this case neither status nor logic can be
configured. The selected outputs always act as OR and activate the start
when the status is CHANGED.
TIMER STOP conditions
The timer can only be stopped by the action of the Binary Inputs. If you press the
relative button it will be activated and the indicator will light up in red. With the button
SECTION 2: BASIC CONTROL – Page 34
situated on the right you will access a menu which permits selecting these inputs,
simply by pressing the terminals of the input you wish to use. Each one of the inputs
has a cyclic operation button associated with it, which selects its active mode between
UP (input activation) DOWN (input deactivation) or CHG (Change in input status). It can
also be selected if the action logic between the inputs is OR (the timer stop will be
activated when ANY of the inputs selected changes to the logic status selected) or AND
(the timer stop will be activated when ALL the inputs selected change to the logic status
selected)
TIMER Activation
•
If you wish the timer to RESET and to start automatically
each time the start conditions selected occur, use the button
marked “Autoreset”. If you press the relative button it will be
activated and its indicator will light up in red. If you press it
again, it will be deactivated, and its indicator will change to
grey. If the “Autoreset” is deactivated the timer will start and
stop in agreement with the selected conditions and the time
unit will remain until the “Reset” button is pressed. If “Reset”
is not pressed and a new operation is carried out, the timer
will not start.
•
Below the previous button there is a section called “when the
timer stops…” which permits selecting the desired action on
the outputs when the timer stops. “All outputs OFF” can be selected which
changes all the selected outputs, be they Voltage or Current, to OFF status,
or “Current outputs” which only changes the current outputs selected to OFF
status, leaving the voltage outputs active.
•
The “Delay” button is on the right of these buttons. It is activated and
deactivated in cycles. When activated, a window is displayed to enter data
using the rotary knob, in this case in milliseconds, which defines the time that
elapses between the moment the timer stops (trip signal of the relay being
tested) and the effective disappearance of the voltages and/or currents in the
MENTOR 12 USER’S MANUAL
SECTION 2: BASIC CONTROL – Page 35
MENTOR 12 USER’S MANUAL
output (switch opening). In short, it enables us to simulate the so-called
“switch time”. When this button is deactivated or activated with time selection
“0” ms the selected outputs are immediately deactivated when the timer
stops.
TIME DELAY
In the section marked TIME DELAY there is a table that contains the
controls to select the waiting time, see the function start condition
and establish the actions when the time interval ends:
•
The Time Delay START conditions are established with
the same controls as the ones with which the timer start
condition is established, as explained above. In any case,
the screen informs of the selected condition, following the
“start condition” tag.
•
In the time setting window, the desired time is entered in milliseconds, using
the rotary knob. It is marked as “Time Delay: Initial value of the count”.
•
There are two possible actions when the count down ends. One is to remove
nd
all selected outputs and the other, assuming that we are in 2 value status, is
to return to status 1 (initial)
•
The Time Delay can be activated at the same time as the Timer in all the
tests. If the timer count ends before the event selected to stop the timer
occurs, this will not stop.
SECTION 2: BASIC CONTROL – Page 36
Configure measurements
This tab, marked as “Measurement configuration” is situated
on the top of the Basic Control screen. When pressed, you
access a screen where you will be able to configure the units
that the values measures will be read in, through the
analogical input on the one hand, and through the binary
inputs, on the other hand. This function, specifically
designed for tests on measurement transducers with
analogical output in VDC or mA DC or on Counters with
analogical or digital output by pulses, makes the conversion
from the magnitude measured by the relative equipment
input (V, mA, Pulses) to the units that are assumed to be the
nominal ones of the element to be tested (V, A, KVA, Kw,
Kvar, Kw, time…. etc) entering the ratio between both.
Proceed as follows:
•
There are two buttons in the section
corresponding to “Measurement of analogical
inputs”. These are marked “Voltage” and
“Current” respectively, and are used to select the
type of output of the converter being tested. When
one of them is selected, the equipment terminal
connection diagram indicates the correct
connection of the converter to same.
•
There is also another button marked “Convert”.
When this button is pressed, the measurement
conversion window appears and the button then indicates the status that will
exist when pressed again, namely “Do not convert”.
•
Press on the space marked “Convert units to:” and the keyboard will appear
on the screen. Write the name of the units you wish to convert to (e.g. KVA).
MENTOR 12 USER’S MANUAL
SECTION 2: BASIC CONTROL – Page 37
MENTOR 12 USER’S MANUAL
•
Enter the ratio values between these units and the
real output of the converter. One value for zero is
entered and another for the scale end. This is
because there are converters which, to avoid
errors in zero, are converted to a definite value (for
examples outputs from 4 to 20 mA). In this case,
we enter the value of 4 mA in the first window and
its correspondence in the next, which would be the
value 0 KVA. In the next group of windows we
would enter the scale end, in the first window 20
mA and in the next its correspondence, for
example, 2000 KVA. The values are entered with
the numerical keyboard that appears on screen
when the relative window is pressed.
•
Once the values and the units have been entered,
the reading of the value measured on the
measurement window of the Basic Control screen
(Analogue Input) is presented in converted units. If
you press the “Do not convert” button, the units
and ratios entry windows disappear from the
screen and the values shown by the measurement
window on the Basic Control screen are the direct
values in V DC or mA DC, depending on what has
been selected.
SECTION 2: BASIC CONTROL – Page 38
There are two buttons in the section corresponding to
“Measurement of binary input”. These are marked
“Pulses” and “Frequency” respectively, and are used to
select the type of output of the converter/ energy measuring
device being tested. The number of the Digital Input selected
for the measurement is indicated on these buttons.
•
To make this selection, press the button marked
“Select” which takes you to a menu where you can
select the input you wish to use just by pressing
the relative terminal as seen from the following
screen.
•
For the unit conversion process, proceed in the
same way as for the analogical inputs, described
above.
MENTOR 12 USER’S MANUAL
SECTION 2: BASIC CONTROL – Page 39
MENTOR 12 USER’S MANUAL
System alarms
The Mentor has different alarms that warn the operator when
different systems are not working correctly as soon as they
are activated. They are mainly applied to the equipment
power outputs and are always visible on any of the screens
and/or applications except in the Configuration ones.
When any kind of alarm occurs in an output source, its level
indication window lights up in RED, also deactivating the
On/Off output control.
Furthermore, the button marked as “Alarms” situated on the
bottom of the screen, also lights up in RED.
When we press this button a screen appears that indicates
the type of alarm that has occurred and the module where it
has occurred. For this purpose, all the output sources are
divided into one section that corresponds to its Power
Supply Source and another section that corresponds to its
Amplifier.
The following types of alarms can be indicated by the
system:
•
OVL.- This means overload of the source affected.
This alarm indicates that the source is being
overloaded, with respect to its maximum power
capacity. In the case of current sources this
generally indicates that their output is open or that the load connected is
excessive for the power and the values selected. In voltage sources it
indicates that the load is excessive for their power or that there is a shortcircuit. The appearance of this type of alarm implies an instantaneous
disconnection of the sources affected by it.
•
THERM.- This means that the source affected has surpassed the admissible
thermal limits for correct operation. When this alarm appears it implies the
SECTION 2: BASIC CONTROL – Page 40
immediate disconnection of the source affected and the deactivation of the
relative On/Off key. After a cooling time (this may be several minutes), when
the temperature returns to safe values, this alarm resets on its own, enabling
the source to operate again.
•
Vout.- This means that the source is not giving the values that it should give
in its outputs. It may appear in the Source or in the Amplifier. The appearance
of this alarm implies an immediate disconnection of the source affected. This
alarm generally indicates a FAULT in the source affected, so it does not reset
on its own. When this type of alarm occurs, it is advisable to reset the
equipment, by switching it off and then on again. If the alarm appears again
after switching it back on, this definitely indicates that the source is out of
service due to a fault.
•
FUSE.- The appearance of this alarm indicates that one or several fuses that a
source contains as final protection has or have blown and must be replaced
to be able to continue using it. When this occurs the module affected must be
taken out, following the instructions given in the Basic Maintenance section of
this manual, and the fuse affected replaced.
MENTOR 12 USER’S MANUAL
SECTION 2: BASIC CONTROL – Page 41
MENTOR 12 USER’S MANUAL
Battery Simulator
The Mentor 12 has a built-in battery simulator. It is designed to produce three different
fixed voltage values in direct current, which must be used to supply the relays being
tested and which require an auxiliary power supply. The values that can be selected are
48 V, 125 V and 250 V. 60 W power exists in each one of these ranges, with continuous
working cycle.
The physical output is situated on the top of the Side Terminal panel, where there are
two terminals, a red Terminal that corresponds to the positive pole and a black Terminal
that corresponds to the negative output pole. It also has an optic indicator that lights up
when the output is activated, indicating the presence of more than 42 V and the relative
precaution when handling this output.
The Simulator control is located on the bottom right of the screen and is visible not only
in the Basic Control section but on all the accessible function screens. It has two main
functions:
•
ON/OFF OUTPUT CONTROL: By briefly pressing the button indicated the
status alternates between ON and OFF. When the button is on green, this
indicates that the output is OFF and when it is on red, this indicates that it is
ON. There is a legend on the right of the button that indicates the value of the
output range selected, which will be the value injected into the load when the
output is activated.
•
OUTPUT VALUE SELECTION: By pressing the button for LONGER a pop-up
window appears below the ON/OFF button, with 3 buttons that indicate 48 V,
125 V and 250 V respectively. The one that is active at that time appears in
blue. To select another value just press the relative button. The window will
close and the new output value selected will appear on the value indication of
the battery simulator control.
IMPORTANT:
The output of the Battery Simulator, unlike the other power outputs,
is always ACTIVE, even in function changes (Basic C, Advanced C,
Configuration, etc.) until it is manually deactivated or the equipment
is switched off.
SECTION 2: BASIC CONTROL – Page 42
Logger
There is a screen in the Mentor where all events that occur to the unit are logged such
as when the sources are switched on, there is a change in status of the binary outputs
or a change in status of the binary inputs.
All these events are automatically recorded and can be viewed on the “Logger” screen.
•
The ACTIVATE button must be pressed for the
recording function to capture the events that occur
between the start and stop of the chronometer.
This button will change to a light blue color while it
is activated. To see the list of captured events,
press the Events List button.
•
The logger does not show the latest event
recorded when you open it. If you want to see the
latest event, you need to hit the List of Events
button.
•
You may want to clear up the logger’s screen
before you update it with the latest event. To do
so, hit the Clear List of Events button first.
MENTOR 12 USER’S MANUAL
SECTION 2: BASIC CONTROL – Page 43
SECTION 3: ADVANCED CONTROL
Introduction
If you press the button marked “Advanced Control” on the
right-hand column of the main screen you access a set of
advanced test functions that enable the user to quickly and
simply carry out a series of tests types that are very typical
for protection relays. These tests permit determining the
state of the relay and obtaining readings and results of
different relay parameters under different test conditions that
can be configured entirely by the user.
There are two screens in all the functions that comprise the
Advanced Control. One of them, which appears when you
select the Function is called “Graphic” or test configuration,
where the graphic appears that explains what the function
will do as well as the controls necessary to configure it
correctly. The other screen is the “Execution” screen, which,
when selected, shows a graphic of what the equipment is
doing. This screen moves in real time enabling the operator
to see how the test he has configured is carried out. One or
several vertical yellow-colored lines appear on the graphic of
the execution screen, when this ends, indicating the time
when the TRIP condition selected occurred. Depending on
where these TRIPs occur, (expected or not expected) the
function will stop or not, but in any case all the TRIPS will be
shown, be they valid or not to stop the test.
How to select values, times, etc. will not be described in this
chapter, as this has been described in depth in section 1
(Basic Control). One of the great advantages of the Mentor 12 is precisely this. The use
of all the controls is shared by all the functions so they are extremely easy to use, once
you know the setting and control process.
Not only the levels and angles of the analog power outputs
can be configured in all the Advanced Control Functions, but
also the state of the different digital binary outputs. The latter
can be configured by pressing the rectangle that contains
the 8 digital outputs and that indicates their state (red they
are active and white deactivated). A window appears when
this rectangle is pressed displaying the binary outputs as
they appear on the equipment terminal panel. If you press
the blue terminal of each one of them, you select the relative
output as active, as shown in the picture below. Bear in mind
that the state of the output (active or deactivated) depends
on how the output is configured in CONFIGURATION (NO or
NC)
The TRIP signal that stops the execution of the function can
also be configured in any of them, by combining the twelve
available binary inputs in OR or AND logic. This condition
can be selected by pressing the white-colored button marked
“TRIP” on the configuration screen.
MENTOR 12 USER’S MANUAL
SECTION 3: ADVANCED CONTROL – Page 45
MENTOR 12 USER’S MANUAL
Another of the characteristics that all the advanced functions
share is the existence of the “Logger”, which, when activated,
shows all the events that occur in the digital inputs
throughout the execution of the function, associated with their
time tag, name of the digital input and event occurred. It is
thus possible to carry out an in-depth study of the
performance of the relay tested throughout the function. This
is very important for analysing its results.
SECTION 3: ADVANCED CONTROL – Page 46
Each one of the available options is described below, listing,
in the first place, its possible application and then the use of
the available controls, which are accessed from the buttons
situated on the left of the Advanced Control screen. It is
important to highlight that the different test options always
start up with the last configuration.
MENTOR 12 USER’S MANUAL
SECTION 3: ADVANCED CONTROL – Page 47
MENTOR 12 USER’S MANUAL
FAULT Function
The FAULT function permits the user to configure a complete simple fault and execute
it, that is, the states called:
SECTION 3: ADVANCED CONTROL – Page 48
PRE-FAULT in terms of its electrical parameters (values and
angles) and in the state of the binary outputs (to simulate the
state of any device outside the relay such as the high
voltage switch). Furthermore, the duration of this state can
also be configured in the relative box indicated on the
function graphic. After the preset time has elapsed all the
outputs will change to the next state. This Pre-fault state
usually defines the load conditions of a line in its normal
service state, before a fault occurs. The load parameters
before the fault are often essential to assess the
performance of the protection tested, above all that its
duration is sufficient to “load” the protection tested. A
minimum default value of 1 second is suggested.
You can access the screen to configure these values by
pressing the GREEN colored button, marked “Pre-fault”. A
screen appears where you must enter the desired levels and
angles for the power outputs (See Output Value Selection in
Section 1 Basic Control) and also the logic states for the
digital outputs.
MENTOR 12 USER’S MANUAL
SECTION 3: ADVANCED CONTROL – Page 49
MENTOR 12 USER’S MANUAL
FAULT in terms of its electrical parameters (values and
angles) and in the state of the binary outputs (to simulate the
state of any device outside the relay, such as the high
voltage switch). The maximum duration of this state can also
be configured. Unlike the pre-fault state, where the only
conditioning factor to change to the next state (Fault) is for
the time established for this condition to elapse, in this case
the change to the next state generally occurs due to the
binary input condition defined on the TRIP button being
satisfied, and if this does not occur, because the maximum
time defined for the state has elapsed. If the expected trip
occurs, the function returns the time that it took for the trip to
take place from the moment when the Fault state began,
presenting this as a test result.
You can access the screen to configure these values by
pressing the RED colored button, marked “fault”. A screen
appears where you must enter the desired levels and angles
for the power outputs (See Output Value Selection in Section
1 Basic Control) and also the logic states for the digital
outputs.
SECTION 3: ADVANCED CONTROL – Page 50
POST-FAULT, in terms of its electrical parameters (values
and angles) and in the state of the binary outputs (to
simulate the state of any device outside the relay such as
the high voltage switch). Furthermore, the maximum duration
of this state can also be configured in the relative box
indicated on the function graphic. After the preset time
elapses all the outputs disconnect and change to
deactivated state.
The Post-fault state starts when the switch time, if any, ends,
when the trip occurs in the Fault state, or when the time
defined for the Fault state has elapsed, without any trip.
The Post-Fault state is important during the test, as it
enables us to simulate the real position of the protection and
define its performance depending on whether it is situated in
BARS (BUS) where the healthy voltages are maintained, or
on the LINE side, where these voltages disappear when the
switch is applied.
You can access the screen to configure these values by
pressing the BLUE colored button, marked “POST-fault”. A
screen appears where you must enter the desired levels and
angles for the power outputs (See Output Value Selection in
Section 1 Basic Control) and also the logic states for the
digital outputs.
MENTOR 12 USER’S MANUAL
SECTION 3: ADVANCED CONTROL – Page 51
MENTOR 12 USER’S MANUAL
There is also another button on the configuration screen,
called TRIP, which enables you to establish the TRIP
condition depending on the digital inputs chosen for this.
This is done in the same way as explained in Basic Control
(See Basic Control, selection of timer start and stop
conditions).
Configuration
In short, the following fields must be filled in, in order to
correctly configure a fault:
•
Green button marked Pre-Fault provides access to
its configuration screen.
•
Red button marked Fault provides access to its
configuration screen.
•
Blue button marked Post-Fault provides access to
its configuration screen.
•
White button marked TRIP provides access to the
configuration screen of the trip signal.
•
Blue window on the pre-fault area of the graphic:
you must enter the duration of the pre-fault in
milliseconds, clicking on this and using the digit
adjustment selection arrows and the rotary knob.
•
Blue window on the Fault area of the graphic: you must enter the maximum
duration of the fault in milliseconds, clicking on this and using the digit
adjustment selection arrows and the rotary knob.
SECTION 3: ADVANCED CONTROL – Page 52
•
Blue window on the post-fault area of the graphic: you must enter the duration
of the post-fault in milliseconds, clicking on this and using the digit adjustment
selection arrows and the rotary knob.
•
Blue window in the area of the graphic marked
Trip: you must enter the switch time to be
simulated in milliseconds. That is, it defines the
time lag between the trip signal of the relay
tested and the effective disappearance of the
voltages and/or currents in the output (Switch
opening).
Execution
After correctly configuring the fault as described above,
the system is ready to execute it. Proceed as follows:
•
Press the key marked “Execute” on the upper
right-hand corner of the configuration screen.
The window will change to the execution screen and the
test will be carried out. It may take a few seconds for the
test to start, due to the process time.
Fault Execution: there have been no trips
MENTOR 12 USER’S MANUAL
SECTION 3: ADVANCED CONTROL – Page 53
MENTOR 12 USER’S MANUAL
The execution display will show the three states of the test by means of horizontal bars
in different colors (blue for pre-fault, red for fault and white for post-fault) presenting all
the events where the selected trip condition has been satisfied by means of yellowcolored vertical lines.
Fault Execution. The trip has occurred during the Fault state
SECTION 3: ADVANCED CONTROL – Page 54
However, only the first valid trip that occurs, which is the first
after initiating the Fault state, will stop the test and change
(after the switch time, if any) to the post-fault state.
Two times appear on the actual graphic. One is the time that
has elapsed from the start of the function until the valid trip
and the other is the time that has elapsed from the start of
the Fault state to the valid trip indicated of the relay being
tested. This latter time is considered as the final result of the
function.
The test results are shown on the window situated under the
graphic. Here the times of ALL the trips that have occurred
are indicated, measured from the start of the relative state
where it occurred, as well as the total execution time of the
function indicated by the “END” tag. That is, if there is a trip in
pre-fault, the time indicated on the screen will be from the
moment when it began with the pre-fault, if there is a trip in
the fault, from the moment the fault state began and, if there
is a trip in the post-fault, from the moment when the post-fault
state started.
Furthermore, to record and identify the test results better, a
key appears in the lower left-hand corner which says
“Logger”. If you press this key, you can see absolutely all the
digital events that have occurred during the function
execution, with their relative identification and time tag. (See
LOGGER).
MENTOR 12 USER’S MANUAL
SECTION 3: ADVANCED CONTROL – Page 55
MENTOR 12 USER’S MANUAL
RAMP Function
The Ramp function, which is selected when you press the relative button, marked
“Ramp” located on the functions selection column, on the left of the advanced control
screen, permits carrying out upward or downward ramps of any output parameter
available on the Mentor.
SECTION 3: ADVANCED CONTROL – Page 56
The ramps are generally used to systematically determine the trip level of a protection
relay with respect to the parameter that is varied.
This is really the equivalent to moving the value of the parameter by mechanical means,
such as turning a variac, which is a normal task in classical relay testing.
One of the real advantages of being able to carry out a programmed ramp, is that both
the increases in value and the duration of the injection are always exactly the same, so
the test is always performed in exactly the same conditions, obtaining equal conditions
in each test in order to test the repetitive measurement capacity of the relay.
The ramps are not normally used with the Current parameter, especially if they are very
fine (very small increases) as these are long-lasting and continuously apply the current
to the relay, so it is relatively easy to overload it or even destroy its input unit. To vary
this parameter it is better to use the Pulse Ramp, described below.
However, the linear ramp is the best way of handling parameters such as the Phase
Angle, Voltage and Frequency, especially the latter, as the real performance of these
parameters can be reproduced with great precision.
2 simultaneous ramps can be configured using different parameters, each one applied
to different types of output sources, for example, one ramp moving the Voltage and the
other moving the Current (Impedance ramp).
Simultaneous ramps, even of different parameters applied to the same selected output
source, for example one ramp moving the voltage and the other moving the frequency
at the same time on the same output source, in this case voltage ( V/Hz variation ramp).
Configuration
All the ramp parameters can be configured on the configuration screen. As we have
already mentioned, two simultaneous ramps can be configured but below we will
indicate how just one is configured. Whenever one single ramp is required, it must be
configured as Signal 1. The ramp corresponding to Signal 2 can only be configured as a
second ramp. Proceed as indicated below for this:
MENTOR 12 USER’S MANUAL
SECTION 3: ADVANCED CONTROL – Page 57
MENTOR 12 USER’S MANUAL
•
Press on the button situated in the upper left-hand
corner, marked “Signal1”
•
A window will appear; press on the name of the
parameter you wish to use for the ramp. This may
be AMPLITUDE, which means that the ramp will be
applied to the signal level that will be selected in
the following step; PHASE, which means that the
ramp will be applied to the phase angle of the
signal that will be selected in the next step or
FREQUENCY, which means that the ramp will be
applied to ALL the sources whose frequency
reference is Frequency Bus 1 (Freq. 1)
•
If you select AMPLITUDE, two buttons appear
below it, marked “Voltage” and “Current”,
respectively. If you press on the one you wish to
use, the available output sources, corresponding to
the selected magnitude, appear in the bottom
window.
SECTION 3: ADVANCED CONTROL – Page 58
•
If you select PHASE the Frequency 1 sources
eligible for the angle ramp appear below. The
sources chosen will carry out the same angle
variation with identical start and end points.
•
Press on the indicators of each output source you
wish to use. For example, if you wish to use a
single-phase ramp, press on any one of them, but
not on the others. If you want a phase-to-phase
ramp (two-phase) press on two of the available
sources, if it is three-phase, on three of them,…
etc.
MENTOR 12 USER’S MANUAL
SECTION 3: ADVANCED CONTROL – Page 59
MENTOR 12 USER’S MANUAL
•
If you have selected FREQUENCY, a tag will
appear which indicates that “the ramp will be
applied to all the channels in Freq. 1” and the
indicators of all the sources that are in Frequency
1. These icons are only indicators and you cannot
select them as they are already selected.
•
When you have made your selection, press OK to
confirm and return to the configuration screen, or
CANCEL to return to the configuration screen
without making any selection.
•
On the configuration screen, following the “Signal
1” key there must be a tag that indicates the
parameter (Amplitude or Phase), the type of signal
selected (Voltage or Current) and the output
sources that the ramp will carry out (C1, C2, etc).
•
If you have selected FREQUENCY, the tag
indicates Frequency and that it is applied to all the
sources in FREQ. 1
•
Enter the desired values to execute the ramp on
the data input windows of the graphic. You must
enter values for the magnitude (white-colored
window and in the relative unit) and values for the
durations
(blue-colored
window
and
in
milliseconds).
•
Enter this value using the rotary knob in the window that defines the initial
value of the magnitude (on the green line). The ramp will begin to apply the
increases on this value.
•
Enter the desired time value in milliseconds in the window that defines the
duration of the initial state (below the green line). It is recommended to select
SECTION 3: ADVANCED CONTROL – Page 60
a minimum value of 1 second (1000 ms) to permit
the correct polarisation of the relay.
•
Enter the desired time value in milliseconds in the
window that defines the duration of each increase.
This time must at least be that expected for the
tripping of the relay element being tested.
•
Enter this value in the window that defines the final
value of the magnitude. If this is greater than the
initial value, the ramp will be ascending (positive
increases) and if it is less, the ramp will be
descending (negative increases).
•
Enter the desired value in the window that defines
the value of each increase. Bear in mind that the
sign of the increases depends on the type of ramp
(ascending or descending)
•
The Ramp function, like all the advanced control
functions, has the possibility of entering a delay in
the deactivation of the power outputs in
connection with the detection of the defined trip
event, in order to simulate the switch time, for
example. To define this time, enter the desired
value in milliseconds in the relative window.
•
To select the Initial State of the output sources
and binary outputs press the green button marked Initial State. The power
and binary output states and values selection screen will appear. You will see
that you may select any value for any magnitude that is NOT selected to carry
out the Ramp. The magnitudes selected for the Ramp appear in grey and with
the value selected as Initial Value on the previous configuration screen, which
cannot be modified.
MENTOR 12 USER’S MANUAL
SECTION 3: ADVANCED CONTROL – Page 61
MENTOR 12 USER’S MANUAL
•
To select the binary output state during the actual execution of the Ramp
(once the time marked for Initial State has elapsed) press the red button
marked “Fault State”. You will see that you may not select anything on the
power outputs, which are deactivated for selection and that you can only vary
the state of the binary outputs.
•
To select the trip signal that will stop the ramp,
press the white button marked “trip” and select the
binary inputs you wish to use.
The Ramp will thus be configured and ready to be executed
immediately. Observe that the information about the number
of steps (increases) and the total duration of the function (in
milliseconds) appears in the lower right-hand corner of the
window. These data are automatically calculated from the
initial, end, increase and step duration values.
Execution
The execution of the configured ramp starts when you press
the key marked “Execute” on the configuration screen,
skipping to the execution screen. Here a window is displayed
where you can see how the ramp is executed. The scale of
the elected magnitude is presented on the y-axis and the
time scale on the x-axis. Both scales and their divisions are
automatically calculated and cannot be edited by the user.
When the selected trip condition occurs, the test stops, the
power outputs disconnect after the selected switch time and
a yellow-colored vertical line appears on the execution
screen, indicating the moment when the trip occurred.
Furthermore, on the bottom of the screen of the results
window, the following test results appear:
SECTION 3: ADVANCED CONTROL – Page 62
•
TRIP TIME, which shows the time that has elapsed in seconds between the
moment when the increase occurs where the trip
has occurred and the moment when this trip
occurs, which is, in effect, the relay trip time at that
specific value.
•
The TRIP VALUE (level), which shows the value in
its relative unit that causes the relay to trip.
•
The total DURATION of the test (END), which
shows the total time used by the function to carry it
out.
There are two buttons in the upper right-hand corner of the
screen marked “Configure” and “Execute” respectively. They
work as follows:
•
The “CONFIGURE” button returns to the
configuration screen of the function. It does not
work during the test execution
•
The “EXECUTE” button starts the test. Once the
test has started, the tag changes to “ABORT”. If
this button is pressed during the test, the test will
immediately stop, and the button will change to
“EXECUTE” again, to start it again if desired.
Furthermore, and to have a better record and identification of
the test results, a key called “Logger” appears in the bottom
left-hand corner. By pressing this key, it is possible to see absolutely all the digital
events that have occurred during the execution of the function, with their relative
identification and time tag. (See LOGGER)
MENTOR 12 USER’S MANUAL
SECTION 3: ADVANCED CONTROL – Page 63
MENTOR 12 USER’S MANUAL
PULSE RAMP function
The Pulse Ramp function, which is selected when you press the relative button, marked
“Pulse Ramp” on the functions selection column, on the left of the advanced control
screen, permits carrying out upward or downward pulse ramps of any output parameter
available on the Mentor.
SECTION 3: ADVANCED CONTROL – Page 64
The basic difference with respect to the Ramp function described above is that instead
of continuously increasing the magnitude, a preset condition state occurs between each
increase (normally an equivalent state to a Pre-Fault) so this function permits “quitting”
the fault conditions and “entering” them with each increase.
As it is possible in this function to define ALL the magnitudes that are not selected to be
varied during the ramp, what we really have here is a way of
carrying out a FAULT ramp, each state with its pre-fault and
its fault.
This function is preferably used when instantaneous or
defined time values are sought in Overcurrent elements, as it
enables us to inject a high current value during a specified
time and return to low current conditions or even non-existing
current conditions between each programmed increase, thus
eliminating the possibility of damaging the relay tested.
It is also very useful when you wish to verify trip setting
values in Protection Areas (typical application to test area
limits in remote relays), as we can enter the area for a
defined time and exit it without causing trips of the other
slower areas with each increase.
The selectivity that is achieved with this function when
selecting the trip elements, makes it very interesting to use
when testing trip outputs of relays that have different
protection functions assigned to them at the same time, thus
avoiding the need to change the configuration of the relay
being tested.
Only pulse ramps can be carried out simultaneously, unlike
the linear ramp described in the previous section.
MENTOR 12 USER’S MANUAL
SECTION 3: ADVANCED CONTROL – Page 65
MENTOR 12 USER’S MANUAL
Configuration
The Configuration screen permits configuring all the pulse
ramp parameters Proceed as indicated below for this:
•
Press on the button situated in the upper lefthand corner, marked “Signa1”
•
A window will appear; press on the name of the
parameter you wish to use for the ramp. This
may be AMPLITUDE, which means that the
ramp will be applied to the signal level that will
be selected in the following step; PHASE, which
means that the ramp will be applied to the phase
angle of the signal that will be selected in the
next step or FREQUENCY, which means that
the ramp will be applied to ALL the sources
whose frequency reference is Frequency Bus 1
(Freq. 1).
•
If you select AMPLITUDE, two buttons appear
below it, marked “Voltage” and “Current”,
respectively. If you press on the one you wish to
use, the available output sources, corresponding
to the magnitude selected, appear in the bottom
window.
•
If you select PHASE the Frequency 1 sources
eligible for the angle ramp appear below. The
sources chosen will carry out the same angle
variation with identical start and end points.
•
Press on the indicators of each output source you wish to use. For example, if
you wish to use a single-phase ramp, press on one any of them, but not on
SECTION 3: ADVANCED CONTROL – Page 66
the others. If you want a phase-to-phase ramp (two-phase) press on two of
the available sources, if it is three-phase, on three of them, etc.
•
If you have selected FREQUENCY, a tag will appear which indicates that “the
ramp will be applied to all the channels in Freq. 1” and the indicators of all the
sources that are in Frequency 1. These icons are only indicators and you
cannot select them as they are already selected.
•
When you have made your selection, press OK to confirm and return to the
configuration screen, or CANCEL to return to the configuration screen without
making any selection.
•
On the configuration screen, following the “Signal 1” key there must be a tag
that indicates the parameter (Amplitude or Phase), the type of signal selected
(Voltage or Current) and the output sources that the ramp will carry out (c1,
c2, etc).
•
If you have selected FREQUENCY, the tag indicates Frequency and that it is
applied to all the sources in FREQ. 1
•
Enter the desired values to execute the pulse ramp on the data input windows
of the graphic. You must enter values for the magnitude (white-colored
window and in the relative unit) and values for the durations (blue-colored
window and in milliseconds).
•
Enter this value using the rotary knob in the window that defines the initial
value of the magnitude (on the green line). Bear in mind that this value of the
magnitude will be the same as the value between intervals, too, that is, the
value corresponding to the pre-fault state.
•
Enter the desired time value in milliseconds in the window that defines the
duration of the initial state (below the green line). It is recommended to select
a minimum value of 1 second (1000 ms) to permit the correct polarisation of
the relay. This duration is only applied to the state prior to the start of the
MENTOR 12 USER’S MANUAL
SECTION 3: ADVANCED CONTROL – Page 67
MENTOR 12 USER’S MANUAL
pulse ramp, not to the intervals between increases that are selected
independently.
•
Enter the first pulse of the ramp in the window that defines the value of the
magnitude. This is the initial value of the ramp.
•
Enter the desired time value in milliseconds in the window that defines the
duration of each increase. This time must at least be that expected for the
tripping of the relay element being tested.
•
Enter the desired time value in milliseconds in the
window that defines the duration of each initial
state (pre-fault, between increases). This time
must at least be that necessary to return the relay
to its standby state. This is especially important
when they are remote relays that need a minimum
pre-fault time with healthy voltages to be properly
polarised and to calculate the faults correctly.
•
Enter this value in the window that defines the
value of the magnitude for the end of the pulse
ramp. If this is greater than the initial value, the
pulse ramp will be ascending (positive increases)
and if it is less, the pulse ramp will be descending
(negative increases).
•
Enter the desired value in the window that defines
the value of each increase. Bear in mind that the
sign of the increases depends on the type of ramp
(ascending or descending).
•
The Pulse Ramp function, like all the advanced
control functions, has the possibility of entering a
delay in the deactivation of the power outputs in
connection with the detection of the defined trip
event, in order to simulate the switch time, for
SECTION 3: ADVANCED CONTROL – Page 68
example. To define this time, enter the desired value in milliseconds in the
relative window.
•
To select the Initial State of the output sources and binary outputs press the
green button marked Initial State. The power and binary output states and
values selection screen will appear. You will see that you may select any
value for any magnitude that is NOT selected to carry out the Ramp.
Furthermore, the state you select for the binary outputs on this screen will be
the state that the function adopts for all the states between increases. The
magnitudes selected for the Ramp appear in grey and with the value selected
as Initial Value on the previous configuration screen, which cannot be
modified.
•
To select the Fault state of the binary outputs and output sources, press the
red button marked “Fault State”. The screen will appear to select values and
both power and binary outputs states. You will see that you may select any
magnitude that is NOT selected to carry out the Ramp. Furthermore the state
you select for the binary outputs on this screen will be the state that the
function adopts for all the fault states. The magnitudes selected for the Ramp
appear in grey and with the value selected as value of the first pulse on the
previous configuration screen, which cannot be modified.
•
To select the trip signal that will stop the ramp, press the white button marked
“trip” and select the binary inputs you wish to use. It is important to highlight
that a trip will only be considered as valid to stop the function when this
occurs within a fault state. If it occurs outside the fault state (in the state
between faults), this will be displayed on the results screen, but it will not stop
the execution of the function.
The Pulse Ramp will thus be configured and ready to be executed immediately.
Observe that the information about the number of steps (increases) and the total
duration of the function (in milliseconds) appears in the lower right-hand corner of the
window. These data are automatically calculated from the initial, end, increase and step
duration values.
MENTOR 12 USER’S MANUAL
SECTION 3: ADVANCED CONTROL – Page 69
MENTOR 12 USER’S MANUAL
Execution
The execution of the configured Pulse Ramp starts immediately
when you press the key marked “Execute” on the configuration
screen, skipping to the execution screen. Here a window is
displayed where you can see how the ramp is executed. The
scale of the elected magnitude is presented on the y-axis and
the time scale on the x-axis. Both scales and their divisions are
automatically calculated and cannot be edited by the user.
When the selected trip condition occurs, the test stops, the
power outputs disconnect after the selected switch time and a
yellow-colored vertical line appears on the execution screen,
indicating the moment when the trip occurred. If other trip
signals have occurred during the test execution but they have
not been considered valid because they have occurred outside
the fault state, they will also appear on the graphic, exactly
where they took place.
Furthermore, on the bottom of the screen on the results
window, the following test results appear:
•
The TRIP TIME, which shows the time that has
elapsed in seconds between the moment when the
increase occurs where the trip has occurred and the
moment when this trip occurs, which is, in effect, the
relay trip time at that specific value.
•
The TRIP VALUE (level), which shows the value in
its relative unit that causes the relay to trip.
•
The total DURATION of the test (END), which shows the total time used by
the function to carry it out.
SECTION 3: ADVANCED CONTROL – Page 70
There are two buttons in the upper right-hand corner of the
screen marked “Configure” and “Execute” respectively. They
work as follows:
•
The “CONFIGURE” button returns to the
configuration screen of the function. It does not
work during the test execution
•
The “EXECUTE” button starts the test. Once the
test has started, the tag changes to “ABORT”. If
this button is pressed during the test, the test will
immediately stop, and the button will change to
“EXECUTE” again, to start it again if desired.
Furthermore, and to have a better record and identification of
the test results, a key called “Logger” appears in the bottom
left-hand corner. By pressing this key, it is possible to see
absolutely all the digital events that have occurred during the
execution of the function, with their relative identification and
time tag. (See LOGGER).
MENTOR 12 USER’S MANUAL
SECTION 3: ADVANCED CONTROL – Page 71
MENTOR 12 USER’S MANUAL
BINARY SEARCH Function
The Binary Search function, which you can select by
pressing the relative button marked “Binary Search” on the
function selection column, on the left of the advanced control
screen, enables you to carry out upward and downward
pulse ramps of any output parameter available on the
Mentor. However, unlike the two test functions described
above, it does not use a fixed increase value, as it adapts to
different values to make an effective search.
In the Binary Search, a preset condition state occurs
between each increase (normally an equivalent state to a
Pre-Fault) so this function permits “quitting” the fault
conditions and “entering” them with each increase.
As it is possible in this function to define ALL the magnitudes
that are not selected to be varied during the ramp, what we
really have here is a way of carrying out a search using
FAULTS, each state with its pre-fault and its fault.
In both functions described above (Ramp and Pulse Ramp)
an initial value and an end value are assumed for the ramp,
as well as a fixed increase value for each step. These two
functions are excellent to verify the accuracy of a trip value
within some known margins. That is, for example, if we know
the assumed trip value of a relay, we would start the ramp at
80% of this value and we would set 110% of the value as the
end value, to cover a small margin of error. But if we do not
know the trip point, not even its order of magnitude, to find this, we would have to start
the ramp at a minimum value and end it at a very high value. If you require a certain
amount of accuracy in this search, the fixed increase selected should be very small,
which would make the test very long, and not very practical, for this same reason.
SECTION 3: ADVANCED CONTROL – Page 72
The Binary Search function is designed to cover this circumstance, that is, when you do
not know the trip value or even, when you wish to verify a known trip value carrying out
the test in a different way.
An initial search point is defined in this function as well as an end point that may be
separated from the initial one as much as we want (for example, between 0.01 and 25
A) as well as a maximum function Precision or Resolution.
After defining these limits, the function will give a first pulse at half the value of the
range defined by the initial and end values (21 + 10.10 = 31.1 which / 2 = 15.55, in our
example). If it detects a trip it drops to half the difference between the last applied value
and previous value (if this is the first point the previous value would be the starting
level). If it does not detect a trip it increases to half the difference that it dropped
previously (If it is the first pulse then this would be the upper limit)….and so on and so
forth, until the value of the increase to be reduced is the same or less than the value
entered in the resolution box. This is a very quick and accurate way of searching for trip
values.
The most significant difference, however, between a Binary Search and the previous
Ramps is that only one trip is detected in the Ramps (going up or down until this occurs)
whereas in the Binary Search multiple trips occur for the relay tested.
This is not a trivial difference, as the majority of the relays block the output relay in their
active mode if a trip occurs and do not reset again until they detect that the switch is
unquestionably open.
This behaviour obviously represents a problem when the test comprises multiple trips.
The state of the switch is analysed either by confirming that the current measured is null
or very close to zero (typically < 100 mA) or detecting that the input corresponding to
52A is open. The 52A is the auxiliary contact of the switch that indicates its position,
which would correspond with a binary output in the Mentor if the power switch is being
simulated. Some relays even need to confirm both circumstances before resetting the
trip contact.
This must be taken into account when configuring the Binary Search, which, regarding
all other aspects, is very similar to the Pulse Ramp, as described below:
MENTOR 12 USER’S MANUAL
SECTION 3: ADVANCED CONTROL – Page 73
MENTOR 12 USER’S MANUAL
Configuration:
The Configuration screen permits configuring all the Binary
Search parameters. Proceed as indicated below for this:
•
Press on the button situated in the upper left-hand
corner, marked “Signa11”
•
A window will appear; press on the name of the
parameter you wish to use for the ramp. This may
be AMPLITUDE, which means that the ramp will be
applied to the signal level that will be selected in
the following step; PHASE, which means that the
ramp will be applied to the phase angle of the
signal that will be selected in the next step or
FREQUENCY, which means that the ramp will be
applied to ALL the sources whose frequency
reference is Frequency Bus 1 (Freq. 1)
•
If you select AMPLITUDE, two buttons appear
below it, marked “Voltage” and “Current”,
respectively. If you press on the one you wish to
use, the available output sources, corresponding to
the magnitude selected, appear in the bottom
window.
•
If you select PHASE the Frequency 1 sources
eligible for the angle pulse ramp appear below. The
sources chosen will carry out the same angle
variation with identical start and end points.
•
Press on the indicators of each output source you wish to use. For example,
if you wish to use a single-phase ramp, press on one any of them, but not on
the others. If you want a phase-to-phase ramp (two-phase) press on two of
the available sources, if it is three-phase, on three of them,… etc.
SECTION 3: ADVANCED CONTROL – Page 74
•
If you have selected FREQUENCY, a tag will appear which indicates that “the
ramp will be applied to all the channels in Freq. 1” and the indicators of all the
sources that are in Frequency 1. These icons are only indicators and you
cannot select them as they are already selected.
•
When you have made your selection, press
OK to confirm and return to the configuration
screen, or CANCEL to return to the
configuration screen without making any
selection.
•
On the configuration screen, following the
“Signal1” key there must be a tag that
indicates the parameter (Amplitude or
Phase), the type of signal selected (Voltage
or Current) and the output sources that the
ramp will carry out (c1, c2, etc).
•
If you have selected FREQUENCY, the tag
indicates Frequency and that it is applied to
all the sources in FREQ. 1
•
Enter the desired values to execute the pulse
ramp on the data input windows of the
graphic. You must enter values for the
magnitude (white-colored window and in the
relative unit) and values for the durations
(blue-colored window and in milliseconds).
•
Enter this value using the rotary knob in the
window that defines the initial value of the
magnitude (on the green line). Bear in mind
that this value of the magnitude will NOT be
the same as the value that exists between
increases, that is, the value corresponding to
MENTOR 12 USER’S MANUAL
SECTION 3: ADVANCED CONTROL – Page 75
MENTOR 12 USER’S MANUAL
the pre-fault state, which is entered in its relative window. It may be greater or
less than the value entered in the initial value window.
•
Enter the desired time value in milliseconds in the window that defines the
duration of the initial state (below the green line). It is recommended to select
a minimum value of 1 second (1000 ms) to permit the correct polarisation of
the relay. This duration is only applied to the state prior to the start of the
Binary Search, not to the intervals between increases that are selected
independently.
•
Enter the desired value in the window that defines the end of the Binary
Search. If no trip is detected, the Binary Search will stop at this value.
•
Enter the desired time value in milliseconds in the window that defines the
duration of each increase. This time must at least be that expected for the
tripping of the relay element being tested.
•
Enter the desired time value in milliseconds in the window that defines the
duration of each pre-fault between increases. This time must at least be that
necessary to return the relay to its standby state. This is especially important
when they are remote relays that need a minimum pre-fault time with normal
voltages to be properly polarised and to calculate the faults correctly.
•
Enter the desired value in the window that defines the Precision or
Resolution.
•
With the Binary Search function, like all the advanced control functions, it is
possible to enter a delay in the deactivation of the power outputs in
connection with the detection of the defined trip event, in order to simulate the
switch time, for example. To define this time, enter the desired value in
milliseconds in the relative window.
SECTION 3: ADVANCED CONTROL – Page 76
•
To select the Initial State of the output sources and
binary outputs press the green button marked Initial
State. The power and binary output states and
values selection screen will appear. You will see that
you may select any value for any magnitude that is
NOT selected to carry out the Ramp. Furthermore,
the state you select for the binary outputs on this
screen will be the state that the function adopts for all
the states between increases. The magnitudes
selected for the Ramp appear in grey and with the
value selected as Initial Value on the previous
configuration screen, which cannot be modified.
•
To select the Fault State of the binary outputs and
output sources, press the red button marked “Fault
State”. The screen will appear to select values and
both power and binary outputs states. You will see
that you may select any magnitude that is NOT
selected to carry out the Ramp. Furthermore the
state you select for the binary outputs on this screen
will be the state that the function adopts for all the
fault states. The magnitudes selected for the Ramp
appear in grey and with the value selected as value
of the first pulse on the previous configuration
screen, which cannot be modified.
•
To select the trip signal that will stop the ramp, press
the white button marked “trip” and select the binary inputs you wish to use. It
is important to highlight that a trip will only be considered as valid to calculate
the function steps when this occurs within a Fault state. If it occurs outside (in
the state between faults), this will be displayed on the results screen, but it
will not count in the internal calculation of the function execution.
MENTOR 12 USER’S MANUAL
SECTION 3: ADVANCED CONTROL – Page 77
MENTOR 12 USER’S MANUAL
The Binary Search will thus be configured and ready to be executed immediately.
Observe that the information about the number of steps (increases) and the total
duration of the function (in milliseconds) appears in the lower right-hand corner of the
window. These data are automatically calculated from the initial, end, increase and step
duration values.
Execution
The execution of the configured Binary Search starts
immediately when you press the key marked “Execute” on the
configuration screen, skipping to the execution screen. Here
a window is displayed where you can see how the function is
executed. The scale of the elected magnitude is presented on
the y-axis and the time scale on the x-axis. Both scales and
their divisions are automatically calculated and cannot be
edited by the user.
When the trip condition occurs, the binary search recalculates
and the next pulse occurs. When the magnitude of the
increase corresponding to the pulse is less or equal to the
Resolution entered in the configuration and a trip is achieved,
the test stops, the power outputs disconnect after the
selected switch time and some yellow vertical lines appear on
the execution screen, which indicate the moment when the
trips took place. If other trip signals have occurred during the
test execution but they have not been considered valid
because they have occurred outside the fault state, they will
also appear on the graphic, exactly where they took place.
Furthermore, on the bottom of the screen on the results
window, the following test results appear:
•
The TRIP TIME, which shows the time that has
elapsed in seconds between the moment when the
SECTION 3: ADVANCED CONTROL – Page 78
last increase (the binary search always ends with a trip) occurs and the
moment when this trip occurs, which is, in effect, the relay trip time at that
specific value.
•
The TRIP VALUE (level found), which shows the value in its relative unit that
causes the relay to trip.
•
The total DURATION of the test (END), which
shows the total time used by the function to carry it
out.
There are two buttons in the upper right-hand corner of the
screen marked “Configure” and “Execute” respectively. They
work as follows:
•
The “CONFIGURE” button returns to the function
configuration screen. It does not work during the
test execution.
•
The “EXECUTE” button starts the test execution.
Once the test has started, the tag changes to
“ABORT”. If this button is pressed during the test,
the test will immediately stop, and the button will
change to “EXECUTE” again, to start it again if
desired.
Furthermore, and to have a better record and identification of
the test results, a key called “Logger” appears in the bottom
left-hand corner. By pressing this key, it is possible to see
absolutely all the digital events that have occurred during the
execution of the function, with their relative identification and
time tag. (See LOGGER)
MENTOR 12 USER’S MANUAL
SECTION 3: ADVANCED CONTROL – Page 79
MENTOR 12 USER’S MANUAL
STATE SEQUENCER function
The State Sequencer function that is selected by pressing
the relative button marked “State Sequencer” on the
functions selection column, on the left of the advanced
control screen, permits configuring all the outputs available
on the Mentor, be they analogical or Binary, as you desire.
The change from one state to another can be configured
either by elapsed time, by any combination of the binary
inputs, by both things or by manual initiation (operator input).
The State Sequencer is used to test protection functions that
are closely connected to times and actions dependent on
each other, such as reclosing cycles, protection schema with
segregated or selective trips, sending orders and signals to
other protections, communication schema, etc…
To use this function it is essential to study the data contained
in the Logger in detail as well as their correlation with the
changes in state.
This function is very easy to use and configure, but its
configuration and its results must be carefully studied to
obtain a coherent report, which depends basically on what
the protection or schema tested are expected to do under
the injected conditions.
SECTION 3: ADVANCED CONTROL – Page 80
Configuration
With the configuration screen it is possible to configure all the parameters of the states
corresponding to the sequence you wish to configure. A summary of the conditions of
each state is presented on this screen, to help identify them and understand them
quickly. As you can see on the screen all the selected values of the power outputs (V
and C) are present as well as their output state (red ON, green OFF), the frequency
value in each one of the two buses, and on the bottom line, the programmed state for
the binary outputs (Red active, Grey Not active).
The condition for skipping to the next selected state (TRIP condition) can be seen on
the lower part of each state. There are three possible ones:
•
TIME which, if activated, is indicated in green, followed by the selected time in
milliseconds. It may be active at the same time as the Binary Inputs.
•
KEY which, if activated, is indicated in red. This selection is incompatible with
any other.
•
BINARY INPUT, which, if activated, is indicated in green. The combination of
binary inputs that activate it does not appear, however. To see this, it must be
edited, as we will see below. It may be active at the same time as the TIME
condition.
It is important to point out that when TIME and BINARY INPUTS are activated, they
work in OR logic, that is, whatever happens first (input activation, or for the time
established to pass) will be what produces the passage to the next state.
In the case of KEY, it will only change to the next state when the operator presses the
relative key.
There are a series of keys on the bottom of the window where the different states
appear (up to three states are visible at the same time).
MENTOR 12 USER’S MANUAL
SECTION 3: ADVANCED CONTROL – Page 81
MENTOR 12 USER’S MANUAL
A key marked “Erase” appears in the centre. This key is used to erase or delete the
state situated immediately above it.
Two identical sets of keys (containing arrows) appear on the right and left of this key.
The keys closest to the aforementioned (Erase) key that contain an arrow pointing
upward, are used to INSERT a new state exactly where it indicates. These are the
buttons highlighted in red in the following picture.
The next keys, with a horizontal arrow, the one on the right pointing to the right and the
one on the left pointing to the left, are used to move the visible states on the window in
one direction or another and, at the same time, select the state to be edited, by placing
the EDIT button on each state. Buttons highlighted in red
The other two keys, furthest away from the centre, with vertical arrows, the one on the
left pointing down and the one on the right pointing up, are used to go to the start or end
of the state sequence, respectively,.
If you wish to edit the information of a specific state, use the arrows mentioned to place
the button marked EDIT on this state. This button will appear in the upper right-hand
corner of the summary window of the state to be edited.
Press the EDIT button and the standard configuration screen will appear, which will
enable you to change values of all the parameters, state of the power outputs and
states of the binary outputs. Once you have made the changes, press OK to return to
the state window where you should see the summary of the configuration made.
On the same state summary window, if you press on the bottom window where the
summary of the state change conditions appears, the configuration window will appear
where you can determine and parameterise them. Proceed as follows:
•
Press the button marked TIME. This will activate the state change for this
parameter. The indicator associated with the button will change to red.
•
Select the desired time value on the adjacent window using the rotary knob
and the left and right arrows on the same screen.
SECTION 3: ADVANCED CONTROL – Page 82
•
If you press the button marked KEY you will
activate the manual state change to be carried out
by the operator. The indicator associated with the
button will change to red. If the time change has
previously been activated, this will be deactivated.
•
If you press the button marked BINARY INPUTS
the state change for this parameter is activated.
The indicator associated with the button will
change to red. If you press the associated button,
the binary input selection window will open where
you will be able to select the desired inputs, their
state and their activation logic. The state change
for this parameter is compatible with TIME and not
compatible with KEY.
•
As the TIME and Binary conditions can be
selected at the same time, when one of them is
selected, if you press the other, both are then
selected and if you press the other one again for a
second time, the first is deselected, and only the
second one will be selected.
Execution
The execution of the configured State Sequence starts
immediately when you press the key marked “Execute” on the configuration screen,
skipping to the execution screen. Here a window is displayed where you can see how
the Sequence is executed. The time scale is presented on the x-axis. Each state that
appears on the execution screen is marked with the relative order number.
MENTOR 12 USER’S MANUAL
SECTION 3: ADVANCED CONTROL – Page 83
MENTOR 12 USER’S MANUAL
Furthermore, the following test results appear on the bottom
of the screen of the results window:
•
The TRIP TIME, which shows the time that has
elapsed in seconds between the moment when
the state changes where the trip has occurred and
the moment when this trip occurs, which is, in
effect, the relay trip time under the specific
conditions in this state. There can obviously be
multiple trips.
SECTION 3: ADVANCED CONTROL – Page 84
The total DURATION of the test (end), which shows the total
time used by the function to carry it out.
There are two buttons in the upper right-hand corner of the
screen marked “Configure” and “Execute” respectively. They
work as follows:
•
The “CONFIGURE” button returns to the
configuration screen of the function. It does not
work during the test execution.
•
The “EXECUTE” button starts the test. Once the
test has started, the tag changes to “ABORT”. If
this button is pressed during the test, the test will
immediately stop, and the button will change to
“EXECUTE” again, to start it again if desired.
Furthermore, and to have a better record and identification of
the test results, a key called “Logger” appears in the bottom
left-hand corner. By pressing this key, it is possible to see
absolutely all the digital events that have occurred during the
execution of the function, with their relative identification and
time tag. (See LOGGER). In this function, the Log must be
studied to determine if the test result has been satisfactory
or not.
MENTOR 12 USER’S MANUAL
SECTION 3: ADVANCED CONTROL – Page 85
SECTION 4: CONFIGURATION
Introduction
You can access this software module at any time just by pressing the key marked
“Configuration” on the main menu situated on the right of any screen.
The Mentor 12 is an extraordinarily complete system insofar as the functions it can carry
out are concerned, as it uses different hardware configurations and operating modes.
That is why it requires a program section with which users can determine how they are
going to use it depending on their application.
In some cases, the configuration is associated with settings with respect to their working
method (angle selection limits, their direction of rotation, frequency assumed, etc...).
In other cases, they depend on the device being tested (type of binary inputs or
outputs).
It can also depend on the type of test that is going to be conducted or on the settings of
the relay being tested, determining the number of channels and the associations
between them so that greater signal levels, greater power, etc. are obtained.
The screens that the section is subdivided into are clear enough for the user not to have
any doubts about choosing the one he has to access in each case. Progression through
them is very intuitive so the actual control guides the user to achieve the desired
configuration.
In the Configuration section the user can select and configure his whole MENTOR 12
test equipment to work in different ways, through the following sub-sections:
•
ANALOG OUTPUTS that include power outputs (amplifiers) and low level
outputs LLO,
•
BINARY OUTPUTS.
•
BINARY INPUTS.
•
MISCELLANEOUS where the general and default conditions are established
for different general work parameters.
•
MAINTENANCE that enables the user to access different basic maintenance
tools as well as remote upgrading (over the Internet) of the equipment
software and firmware.
Common Configuration Operations
A series of operations and actions that affect the whole section generally are described
below. The aim of this is not to repeat instructions and/or remarks throughout the
chapter.
When you access Configuration ALL the equipment outputs that might be activated are
immediately deactivated except for the output that corresponds to the Battery Simulator
that maintains its state (ON or OFF) at all times. If you wish to change this state, you
can do this from any Configuration screen.
MENTOR 12 USER’S MANUAL
SECTION 4: CONFIGURATION – Page 87
MENTOR 12 USER’S MANUAL
We have to enter both values and text into the Configuration screen, as we pass
through them, precisely to adapt the equipment configuration to our needs. There are
two methods that are generally used to do this. We can use the keypad to select or type
them in or use the rotary knob to select them. Both systems are explained below:
•
Selection by keypad: Every time you need to enter something using the
keypad, when you touch the relative window the keypad appears on the
screen. Depending on what you wish to enter, a different keypad appears. If it
is a numerical value only a numerical keypad appears, and if what you wish to
enter may be alphanumerical, in that case a complete QWERTY type keypad
appears on the screen.
•
Selection by rotary knob: Some parameters are entered using the rotary
knob situated on the front. See Section 2 (Basic Control) for a complete
description on how it works.
The configuration selected remains in use from the moment it is selected. When the
equipment is turned off or reset, the configuration is automatically saved (without any
intervention by the operator), so when the equipment is rebooted, it starts with the last
configuration selected.
The Mentor 12 is a PLUG & PLAY system. This means that when one or more
amplifiers are inserted, whatever the type, the equipment immediately recognises their
existence and gets ready to use them. It is important to point out here that, once the
new hardware has been inserted, the equipment will start up with the previously
existing configuration, so if you wish to change it to see the new amplifiers you will
have to go to the Analog Output option.
Analog Outputs
We can find two types of Analog Outputs:
•
Power outputs: These are the Power Amplifier outputs that the equipment
has. They can be Voltage or Current. These outputs are combined in different
SECTION 4 CONFIGURATION – Page 88
ways to construct sources of one type or another, associated with the output
terminals on the terminal panel.
•
Low Level Outputs: These are accessed through the connector situated on
the terminal panel. There can be up to low level outputs. The number of
available low level outputs depends on the power output configuration that is
being used.
Consequently, the objective of the configuration screen for the
analog outputs, which permits configuring both low level
outputs and power outputs, consists in offering the user a
high degree of flexibility and adaptation of the available
outputs to the application or use desired at any time.
Power Outputs. Definitions.
It is important to perfectly understand and distinguish between
what is called CHANNEL, SOURCE and SOURCE
CONTROL through this Manual. They are defined as follows:
•
CHANNEL: From hereon this word will be used to
define an equipment Output Amplifier, be it Voltage
or Current type.
•
SOURCE: A Source can be comprised of a
combination of one or more channels. They are
called Cs1… Cs6, in the case of Current Sources or
Vs1 … Vs6 in the case of Voltage Sources.
•
SOURCE CONTROL: This is a window that permits
controlling all the necessary parameters of a
Source. Namely, Level, Phase Angle and
Frequency Reference. A SOURCE CONTROL is
associated with a certain Source on all the program
MENTOR 12 USER’S MANUAL
SECTION 4: CONFIGURATION – Page 89
MENTOR 12 USER’S MANUAL
screens, and it is only possible to change the association from this
configuration screen.
Usage Procedure
If you press on the tab marked “Analog Outputs” on the top of the screen accessed by
pressing the CONFIGURATION option on the General Menu, you access the general
configuration control screen of the Analog Outputs. Apart from presenting the controls
that give access to the different configuration tools, this screen shows the current
configuration of the analog outputs so the operator can see it on one single screen.
This screen is divided into two sections. The left one corresponds
to the Voltage Low Level Outputs and Sources and the right one
corresponds to the Current Low Level Outputs and Sources. Both
sections work in exactly the same way, and only the magnitude
that is controlled varies.
There is a button / indicator for each one of the sources used
where the following information appears:
•
The type and number of source.
•
The upper limit of the relative parameter (V, A)
depending on the type of source.
•
The reference at which it is synchronised (Freq. 1,
Freq. 2 or DC)
When you press this button, a menu appears that permits you to
change the synchronism reference.
WARNING:
Bear in mind that if the source is comprised
of more than one channel, the change in
reference will affect all the channels
comprising the source. If you then make
SECTION 4 CONFIGURATION – Page 90
those channels independent, remember that they will maintain the
reference that you gave them when combined.
The Low Level Output buttons / indicators are located on the bottom of this window.
They work in the same way as the power outputs do.
If you want to make changes to the current configuration, use one of the appropriate
“CHANGE” buttons, which gives access to the controls that enable you to make these
changes, as described below.
When you press the “CHANGE” button corresponding to Current type outputs a similar
screen to the one below appears (depending on the number of channels installed):
Power Output Configuration
•
Press on the button that indicates the number of sources you want to use.
•
The different possible configurations appear on the right with the available
channels. Press on the one you wish to use.
•
Press the button marked “connection schematic”. A window appears
indicating the connections both to the charge and between the different
equipment outputs, if applicable.
WARNING:
Strictly follow the connection instructions. The terminals that appear
without connections on the diagram must be left free. The terminals
that appear connected to others must be connected as indicated. If
you do not do it like this, you will not obtain the correct results.
Configuration of the Low Level Outputs
If you wish to use the Low Level Outputs, you must select the ones you wish to use and
configure them in turn.
MENTOR 12 USER’S MANUAL
SECTION 4: CONFIGURATION – Page 91
MENTOR 12 USER’S MANUAL
Bear in mind that the number of Low Level Outputs available depends on the
configuration of the Power Outputs.
In each case, the program will only show you the Low Level Outputs available. If you
wish to use more than the ones that appear (maximum 3), you must modify the power
output configuration so less Sources are used.
Proceed as follows:
•
Press on the button that indicates the low level output you wish to use. This
will stay marked.
•
If you also wish to configure the presentation mode (end of scale and units)
that this output should be the equivalent to, press the button marked “…” of
each one and proceed as follows.
•
Select the unit in which you want to see your output, pressing “Volts” or
“Amps”.
•
Enter the ratio you wish to use for the parameter on the relative window. Bear
in mind that the end of scale of the Low Level Output is 7.07 V RMS. If you
select a ratio of 1000: 1 on the relative CONTROL display you would see
7070.000 V or A, according to the selected unit, when it is at maximum
regulation. This value is indicated below the ratio entry window.
•
Enter the correction value of the phase angle you wish to assign to the Low
Level Output on the relative window (necessary to simulate the error of a
converter or of a possible external amplifier).
•
Press OK to exit and confirm the changes or CANCEL to exit without
modifying anything.
Exactly the same process described is followed to configure the Low Level Outputs and
Sources in the Voltage section.
Once you have made the desired changes, press the button marked “DONE” if you wish
to preserve them or “CANCEL” if you wish to exit without executing the changes.
SECTION 4 CONFIGURATION – Page 92
You will return to the General Screen where the new current configuration will be
displayed, if appropriate.
MENTOR 12 USER’S MANUAL
SECTION 4: CONFIGURATION – Page 93
MENTOR 12 USER’S MANUAL
Binary Outputs
There are 8 Binary (Logic) Outputs in the MENTOR 12, in
order to be able to program their behaviour so the action of
devices outside the protection schematic that is being tested
can be simulated. To cover the different situations that it
might be necessary to simulate, the Binary Outputs can be
configured in different ways.
Definitions
Each Binary Output can be configured as:
•
Relay: The logic output (0 to 1) is carried out
physically by the contact of an electromechanical
relay. This permits a high switching power (up to 8
A). Its disadvantage is that the closing operation
does not last for the same time as the opening
operation, it being much shorter. It has the
advantage of not depending in any case on the
polarity or type of signal applied to it.
•
Open collector: The logic output (0 or 1) is
carried out physically by a transistor to Open
Collector, which acts as a switch with polarity.
Although it does not permit power in the switching
(max. 30 mA), this is sufficient to attack any opt
coupled type input of the kind that any modern
protection relay has. It has the advantage of operating very quickly (0.1 m2)
and its operation time is the same in both operations (closing and opening),
too.
SECTION 4 CONFIGURATION – Page 94
•
Normally Open (NO): It assigns state 0 (deactivated) to it when the output
keeps its contact open. State 1 (activated) corresponds to closed contact.
•
Normally Closed (NC): It assigns state 0 (deactivated) to it when the output
keeps its contact closed. State 1 (activated) corresponds to the open contact.
Usage Procedure
When you press on the tab marked “Binary Outputs” on the top of the screen that you
access when you press the CONFIGURATION option on the General Menu, you access
the configuration control screen of the Binary Outputs. This screen shows the current
configuration of the binary outputs and permits changing them.
As you can see in the figure, each binary output corresponds to a section that contains:
•
The order number of each input from OUT1 to OUT8.
•
A text window that, by means of the keypad (which appears on screen when
you touch this window), enables you to enter a specific name to identify each
output. This may be alphanumerical and may contain 5 characters at the
most.
•
Two cyclic operation buttons that permit selecting the binary output mode,
according to the above definitions.
All the outputs are independent and can be configured in any way without limitations.
When you finish configuring the outputs you do not need to confirm anything. The
outputs are configured as shown on the screen just by exiting it.
MENTOR 12 USER’S MANUAL
SECTION 4: CONFIGURATION – Page 95
MENTOR 12 USER’S MANUAL
Binary Inputs
The MENTOR 12 has 12 (Logic) Binary Inputs grouped
together in 6 galvanically isolated pairs, in order to be able to
detect the behaviour of the logic outputs of the relay or
protection schematic that is being tested. Therefore, and to
cover the different situations that might need to be detected,
the Binary Inputs can be configured to detect both Dry
Contact operation signals, that is without voltage, or the socalled Wet Contracts, that is, a signal with voltage applied to
them.
Definitions
Each Binary Input can be configured as:
•
Dry Contact: This detects if the potential-free
contact, applied to the binary input, is open or
closed. It works as a continuity detector.
•
Low Voltage (1.5 V): This detects if voltage of
more than 1.5 V is applied or not to the binary
input. That is, it only detects if the signal applied
exceeds 1.5 V. It detects voltage signals in Direct
Current and in Alternating Current, alike.
•
High Voltage (15 V): It detects if voltage of more
than 15 V is applied or not to the binary input. That
is, it only detects if the signal applied exceeds 15
V. It detects voltage signals in Direct Current and in Alternating Current, alike
(only in you wish to detect if they appear). This configuration is usually used
when working with high value voltage signals and in areas where there is very
SECTION 4 CONFIGURATION – Page 96
strong electromagnetic noise, such as high voltage substations, to avoid
undesired detections.
•
High Active: It assigns state 0 (deactivated) to the binary input when it
detects Open Contact or Voltage Absence. It goes to state 1 (activated) when
it detects Closed Contact or Voltage Presence.
•
Low Active: It assigns state 0 (deactivated) to the binary input when it
detects Closed Contact or Voltage Presence. It goes to state 1 (activated)
when it detects Open Contact or Voltage Absence.
WARNING:
If a voltage is applied to an input configured as DRY CONTACT,
during normal equipment operation, it will automatically change its
configuration to LOW VOLTAGE (1.5 V) without any other
consequence and without any warning. This protects the equipment
and a result is obtained for the test that is being performed.
However, to configure it again as DRY CONTACT, this must be
done by returning to the configuration screen.
Usage Procedure
If you press on the tab marked “Binary Inputs” on the top of the screen that you access
by pressing the CONFIGURATION option on the General Menu, you will access the
Binary Input configuration control screen. This screen shows the current Binary Input
configuration and permits changing them.
As you can see in the figure, each binary input corresponds to a section that contains
•
The order number of each input from In1a to In6a and In1b to In6b.
•
A text window (which appears on screen when this window is touched) where,
using the keypad, you can enter a specific name to identify each input. This
can be alphanumerical and may contain 5 characters at the most.
MENTOR 12 USER’S MANUAL
SECTION 4: CONFIGURATION – Page 97
MENTOR 12 USER’S MANUAL
•
Two cyclic operation buttons that permit selecting the binary input mode,
according to the previous definitions.
All the inputs are independent and can be configured in any way without limitations.
When you finish configuring the inputs you do not need to confirm anything. The inputs
are configured as shown on the screen just by exiting it.
SECTION 4 CONFIGURATION – Page 98
Miscellaneous
In this section of the Configuration Software you can carry
out different general configurations of the Mentor 12, which
affect different factors that make the operation more efficient.
These aspects are:
•
Referring to the way of viewing and/or
handling different magnitudes: It is possible to
work in primary values (V and A) or secondary
values (V and A), entering the ratio of the voltage
transformers and current transformers, by way of
their primary and secondary values. It is also
possible to configure both the way the phase
angles are read (scale from 0 to 360º or scale from
+ 180º to - 180º), and define the direction of
rotation of our regulation (positive degrees in
clockwise direction or in anti-clockwise direction).
Finally, it is also possible to define if the times and
durations are going to be viewed and defined in
seconds or in number of cycles at the selected
reference frequency.
•
Referring to default values in normal
magnitudes: Default values for the Voltage and
Current can be entered. These will generally
define the pre-fault or healthy values of these
magnitudes.
Whenever you use the “Reset Values” key in Basic Control or start the
equipment from off, these values will exist in the respective source controls.
MENTOR 12 USER’S MANUAL
SECTION 4: CONFIGURATION – Page 99
MENTOR 12 USER’S MANUAL
•
Referring to basic work parameters: These are parameters that rarely
change for the operation. We can set the value of the Basic Frequency at
which the equipment works (normally 50 or 60 Hz, but it can be any other
value) and the Debounce and Glitch values, which are filters applied to the
binary inputs, to avoid undesired or untimely actions.
•
Referring to the language the application works in: The work language
can be selected, with all the advantages this implies.
Definitions and Use
The operator can find all the necessary controls on this screen, grouped into different
sections:
•
Value reference: The control of the Voltage and Current magnitude values
can be selected in primary or secondary values. To select one mode or
another, press on the one you wish to use.
•
Ratios: In this section you can assign the transformation ratios of the voltage
transformers and of the current transformers in the event that you wish to
control in primary values.
As you can see on the screen, it is possible to enter data to define ratios that
affect groups with three sources (three-phase system), as it is assumed that
the protection transformers are identical for each phase, at one same
measurement point.
IMPORTANT:
You must enter the data corresponding to voltage in the following
way:
In the window corresponding to “Primary Rated Voltage” you must
enter the rated value of the transformer primary in Phase Volts to
Neutral (e.g.: 127020 V) and in the window corresponding to
“Secondary Rated Voltage” you must enter the rated value of the
transformer secondary in Phase Voltages to Neutral (e.g.: 63.510
V).
SECTION 4 CONFIGURATION – Page 100
Note:
The voltage transformers are usually defined by their primary and
secondary voltages between phases, not from Phase to Neutral.
The values entered in the previous example correspond to a
transformer that you will normally find defined as “220 KV/110 V”.
You must divide both the primary and secondary values by the
square root of 3, to find the values of Phase Voltage to Neutral.
You can enter different values for the sources (Vs) from 1 to 3 and for sources
(Vs) from 1 to 6.
IMPORTANT:
You must enter the data corresponding to Current in the following
way:
In the window corresponding to “Primary Rated Intensity” you must
enter the rated value of the transformer primary in Amps (e.g. 2000
A) and in the window corresponding to “Secondary Rated Intensity”
you must enter the rated value of the transformer secondary in
Amps (e.g.: 5 A).
You can enter different values for the sources (Cs) from 1 to 3 and for
sources (Cs) from 1 to 6. Sources 7 to 9 and 10 to 12 refer to the voltage
channels in current mode.
•
Default values: Enter the voltage value in volts that you want to have as
default value in the window marked “Voltage”, by pressing on it.
•
In the window marked “current” the current value in amps that you wish to
have as default value by pressing on it.
•
Degree scale: This refers to the way the phase angle of each source is
viewed and selected. Depending on the operator’s preferences you can select
between a scale of 0 to 360º and a scale from +180º to -180º. To do this,
press on the desired option.
•
Direction of rotation: This refers to the agreement adopted to define which
is the direction of rotation of positive angles, as shown on the displays of the
MENTOR 12 USER’S MANUAL
SECTION 4: CONFIGURATION – Page 101
MENTOR 12 USER’S MANUAL
source control This can be selected as clockwise (to the right), or anticlockwise (to the left). Press on the desired option to select.
•
Time measurement: You can choose for the time treatment, referring both to
its measurement and to the duration, to be directly in time units “seconds” or
in cycle numbers at the reference frequency, “Cycles”. Press on the desired
option to select.
•
Debounce: The time parameter called “Debounce” refers to the behaviour
when detecting changes of state of the Binary Inputs, and it is defined as the
time, after a change of state of a binary input, during which the
detection of new changes is inhibited. The desired value is entered into
the respective window in milliseconds.
•
Glitch: The time parameter called “Glitch” refers to the behaviour when
detecting changes of state of the Binary Inputs, and it is defined as the time
that a level must remain for it to be considered a change. The desired
value is entered into the respective window in milliseconds.
•
Reference frequency: This is the default frequency used for both buses. The
desired value is entered into the respective window in Hertz.
•
Language selection: This is used to select the equipment work language.
When you press the button, a drop-down appears with the available language
options. Press on the one you wish to use.
SECTION 4 CONFIGURATION – Page 102
Maintenance
This section of the Configuration Software enables you to
make basic screen settings to view it correctly. It also gives
access to the maintenance functions and certain advanced
functions of the equipment, protected by means of user
codes.
Definitions and Use
•
TFT brightness: This adjusts the luminosity of the
TFT display so that it adapts perfectly to the
lighting conditions. Press “UP” to increase the
brightness and “DOWN” to reduce it. Each time
you press it you increase or decrease the
brightness one portion. Do not adjust by keeping
the button pressed.
If you press the “SAVE” button the configuration
you have got at that time will be saved and this will
be the default configuration that equipment starts
up with.
•
Cursor on screen: The Mouse cursor is present
on screen by default, however at times it may
interfere with operation when the touch panel is
used. If users wish, they can click on this option to
make the cursor disappear. This is not a
permanent configuration and when the equipment is started up again, the
mouse appears again.
•
Screen calibration: This refers to the keystroke accuracy on the screen. It is
very important for this to be very accurate as otherwise, screen operation
becomes tedious and slow. Due to different circumstances such as small
MENTOR 12 USER’S MANUAL
SECTION 4: CONFIGURATION – Page 103
MENTOR 12 USER’S MANUAL
movements of the touch panel with respect to the screen or very large
changes in the room temperature from one working place to another, it may
be necessary to readjust the touch panel. This operation is quick and simple
and is done by pressing the “Calibrate” button, which takes you to some
windows that show you the steps you have to carry out. Follow the
instructions given in each step and you will calibrate your touch panel
correctly.
It is advisable to use a fine plastic stylus to increase the accuracy.
You can repeat the process as often as necessary until the touch panel is
calibrated to your liking. The calibration you carry out will be the default
configuration when the equipment starts up again.
•
Advanced options: This is the access window to different maintenance,
software upgrading and operation options. You must enter a User Name and
a Password, by pressing on the respective windows, using the keypad. Press
“ENTER” to access these options, which are explained in detail in the “Basic
Maintenance” section of this Manual.
SECTION 4 CONFIGURATION – Page 104