1
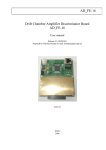
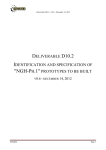
MEC PA08082 User Manual M4 Sciences Embedded micro-Controller MEC-PA08082 User Manual (Version 02.21.14) M4 Sciences 1201 Cumberland Avenue, Suite A West Lafayette, IN 47906 USA P: +1 765.479.6215 F: +1 765.807.3066 e-mail: [email protected] Page 1 of 45 website: www.M4Sciences.com MEC-PA08082 M4 Sciences Embedded Controller for Driving TriboMAM® Standard, TriboMAM®-mini, and TriboMAM®-micro drilling systems: Together the MEC controller and TriboMAM drilling system make up the TriboMAM drilling system. Thank you for purchasing a MEC-PA08082 Controller. The TriboMAM drilling system uses Modulation-Assisted Machining (MAM®) to enable the improvement of drill speeds and feed rates for high-aspect ratio centerline drilling in CNC lathes. This manual provides information regarding safety precautions, installation procedures and operating protocols in the use of the MEC-PA08082 Controller. This product is covered by United States and foreign patents, issued and pending. Information in this publication supersedes that in all previously published material. Specifications are subject to change without notice. © Copyright 2014 all rights reserved. Printed in the U.S.A. MEC-PA08082 User Manual (Version 02.21.14) M4 Sciences 1201 Cumberland Avenue, Suite A West Lafayette, IN 47906 USA P: +1 765.479.6215 F: +1 765.807.3066 e-mail: [email protected] Page 2 of 45 website: www.M4Sciences.com TABLE OF CONTENTS 1 2 3 4 5 6 7 8 Safety .......................................................................................................................... 4 1.1 Safety Precautions .............................................................................................. 4 1.2 Product Protection Precautions .......................................................................... 5 1.3 Safety Terms and Symbols .................................................................................. 5 Introduction ................................................................................................................ 7 2.1 Receiving Inspection ........................................................................................... 7 2.2 Installation .......................................................................................................... 7 2.3 TriboMAM Connection procedure ...................................................................... 9 Operation .................................................................................................................. 13 3.1 Programming Instructions ................................................................................ 14 3.1.1 Startup .......................................................................................................... 14 3.1.2 Program Menu .............................................................................................. 15 3.1.3 Remote Menu ............................................................................................... 16 3.1.4 System Menu ................................................................................................ 18 3.1.5 Indicator Lights and Errors ............................................................................ 19 3.1.6 Emergency Stop ............................................................................................ 21 Specifications ............................................................................................................ 22 4.1 Output ............................................................................................................... 22 4.2 Features ............................................................................................................ 22 4.3 Performance ..................................................................................................... 23 4.4 General Specifications ...................................................................................... 23 Accessories ................................................................................................................ 24 Certification............................................................................................................... 24 Maintenance ............................................................................................................. 24 7.1 Safety ................................................................................................................ 24 7.2 Maintenance Assistance ................................................................................... 25 7.3 Servicing the Fuses ............................................................................................ 25 Communications Protocol ........................................................................................ 27 8.1 DB25 Port Pin Layout ........................................................................................ 28 8.2 DB25 Port Pin Configuration ............................................................................. 44 MEC-PA08082 User Manual (Version 02.21.14) M4 Sciences 1201 Cumberland Avenue, Suite A West Lafayette, IN 47906 USA P: +1 765.479.6215 F: +1 765.807.3066 e-mail: [email protected] Page 3 of 45 website: www.M4Sciences.com 1 Safety Review the following precautions to maintain safety and prevent damage to the instrument or equipment connected to it. The safety features of this instrument may be ineffective if the equipment is not operated in the manner stated in this manual. Refer all maintenance procedures to qualified personnel. 1.1 Safety Precautions Use the Proper Power Cord. To avoid fire hazard, use only the power cord provided with this instrument. Avoid Electric Overload. To avoid electric shock or fire hazard, do not apply a voltage to a terminal that is outside the range specified for that terminal. Avoid Electric Shock. To avoid electric shock, do not touch the metal surfaces of the HV connector while the instrument is on. Ground the Product. This product is grounded through the ground conductor of the power cord. To avoid electric shock, the ground conductor must be connected to earth ground. Before making connections to the input and output terminals of the product, ensure that the product is properly grounded. Do Not Operate Without Covers. To avoid electric shock or fire hazard, do not operate this instrument with the covers removed. Use Proper Fuses. To avoid fire hazard, use only the fuse type and rating specified for this instrument. Indoor Use Only. This instrument is intended for indoor use only. Do Not Operate in Wet or Damp Conditions. To avoid electric shock, do not operate this instrument in wet or damp conditions. Do Not Operate in an Explosive Environment. To avoid injury or fire hazard, do not operate this instrument in an explosive environment. MEC-PA08082 User Manual (Version 02.21.14) M4 Sciences 1201 Cumberland Avenue, Suite A West Lafayette, IN 47906 USA P: +1 765.479.6215 F: +1 765.807.3066 e-mail: [email protected] Page 4 of 45 website: www.M4Sciences.com 1.2 Product Protection Precautions Use the Proper Power Source. Do not operate this instrument with a power source that is different from the voltage specified on the serial number tag. Provide Proper Ventilation. To prevent the instrument from overheating, do not block air-cooling fins in back of unit. Do Not Operate with Suspected Failures. If you suspect there is damage to this instrument, contact M4 Sciences. 1.3 Safety Terms and Symbols These terms may appear in this manual: Warning: Warning statements identify conditions or practices that could result in injury or loss of life. Caution: Caution statements identify conditions or practices that could result in damage to this product or other equipments. These symbols may appear on the instrument: Warning, risk of electric shock Caution, refer to Operator’s Manual CAT I Installation category I (overvoltage category): Classification for the operation of a unit using voltage systems or circuits with required standardized limits for transient voltages. Category I pertains to voltages supplied at the peripheral level, with smaller tolerances for transient voltages as specified by the Low-Voltage Safety standard (EN 61010-1). MEC-PA08082 User Manual (Version 02.21.14) M4 Sciences 1201 Cumberland Avenue, Suite A West Lafayette, IN 47906 USA P: +1 765.479.6215 F: +1 765.807.3066 e-mail: [email protected] Page 5 of 45 website: www.M4Sciences.com CAT II Installation category II (overvoltage category): Classification for the operation of a unit using voltage systems or circuits with required standardized limits for transient voltages. Category II pertains to using voltage supplied on the local level (example: local wall outlets) with smaller tolerances for transient voltages as specified by the Low-Voltage Safety standard (EN 61010-1). Danger: High-voltage generating equipment, including this amplifier and related supplies are not designed, rated, or qualified to be operated in an environment or atmosphere which contains combustible or explosive materials or gases which may be ignited by electrical discharges. MEC-PA08082 User Manual (Version 02.21.14) M4 Sciences 1201 Cumberland Avenue, Suite A West Lafayette, IN 47906 USA P: +1 765.479.6215 F: +1 765.807.3066 e-mail: [email protected] Page 6 of 45 website: www.M4Sciences.com 2 Introduction The M4 Sciences MEC-PA08082 is used to drive TriboMAM and TriboMAM-mini type piezo-based drilling system. The unit utilizes computer control interfaces for input, monitoring and control functions. The graphical front panel display with a keypad is used for local input and control. 2.1 Receiving Inspection Visually inspect the instrument for physical damage such as dents, nicks, scratches, broken fittings, etc. External damage may indicate more serious damage has occurred within the instrument. In the event of damage, notify M4 Sciences and request instructions. Do not attempt to use a damaged instrument. 2.2 Installation The MEC-PA08082 is designed for operation on a bench top. The MEC-PA08082 is aircooled. Allow a minimum of 50 mm (2 in) of free space around the heat exchange fins on the rear panel. Refer to Figures on pages 10 and 11 for descriptions of front and rear panel features. Caution: Do not operate the instrument with the covers removed. The covers must be installed completely to ensure proper cooling. Power Connection The MEC-PA08082 is designed for power sources of 100 to 240 V AC, at 48 to 63 Hz. Caution: The MEC-PA08082 may be damaged if operated at an incorrect voltage. Check the voltage to ensure that configuration matches the line voltage in your area. Warning: Make no attempt to bypass the ground prong in the power cord. This is a protective ground and any attempt to negate it could result in an electrical shock. 1. Verify that power source has ground to the power cord. MEC-PA08082 User Manual (Version 02.21.14) M4 Sciences 1201 Cumberland Avenue, Suite A West Lafayette, IN 47906 USA P: +1 765.479.6215 F: +1 765.807.3066 e-mail: [email protected] Page 7 of 45 website: www.M4Sciences.com Caution: If the power source is not grounded, then ground the MEC-PA08082 using the rear panel threaded ground stud connection. Threaded ground stud connection MEC-PA08082 REAR PANEL Ground connection example Note: This ground connection is only required if the power source is not grounded. Threaded ground stud connection MEC-PA08082 REAR PANEL Grounding Wire MEC-PA08082 User Manual (Version 02.21.14) M4 Sciences 1201 Cumberland Avenue, Suite A West Lafayette, IN 47906 USA P: +1 765.479.6215 F: +1 765.807.3066 e-mail: [email protected] Page 8 of 45 website: www.M4Sciences.com Warning: Make no attempt to operate the MEC-PA08082 without ground connection. A ground connection is required for proper operation. 2. Ensure that the power switch is off before connecting the power source. 3. Plug the power cord into the power connector on the rear panel. 4. Plug the free end of the power cord into the power source. 2.3 TriboMAM Connection procedure 1. Connect the high-voltage cable to the SMB output jack (labeled HV OUT) on the MEC-PA08082 as shown below. The high-voltage cable assembly for TriboMAM to MEC-PA08082 connection is of the SMB type. Only cables supplied by M4 Sciences may be used for connecting the TriboMAM system to the MEC-PA08082 Controller. MEC-PA08082 User Manual (Version 02.21.14) M4 Sciences 1201 Cumberland Avenue, Suite A West Lafayette, IN 47906 USA P: +1 765.479.6215 F: +1 765.807.3066 e-mail: [email protected] Page 9 of 45 website: www.M4Sciences.com SMB COAXIAL PLUG (For MEC-PA08082 coaxial jack) SMB-RIGHT ANGLE MEC-PA08082 User Manual (Version 02.21.14) M4 Sciences 1201 Cumberland Avenue, Suite A West Lafayette, IN 47906 USA P: +1 765.479.6215 F: +1 765.807.3066 e-mail: [email protected] Page 10 of 45 website: www.M4Sciences.com 2. Connect the high-voltage cable to the SSMB (or SSMC) jack located on the TriboMAM drilling system. Route the high-voltage cable as directly as possible to the TriboMAM drilling system and away from grounded surfaces. This minimizes the effects of stray capacitance on the performance of the MEC-PA08082. It is desirable to keep the high-voltage output cable un-bundled from other cabling and away from grounded structures. These measures will minimize capacitive loading of the amplifier and reduce extraneous coupling to other devices. Connect SSMC-type cable Connect SSMB-type cable SSMC-type (left) and SSMB-type (middle) connectors on TriboMAM-mini drilling system Power cable attached to front panel of MEC-PA08082 Controller The high-voltage cable assembly for TriboMAM connection may be configured with one of two types of coaxial cable connectors. These are SSMB and SSMC type plugs. The SSMC plug connector can be readily identified as it uses a threaded connection to the SSMC jack. The SSMB connector is a small version of the standard SubMiniature Version B or SMB connector. The SSMB connector is a 'snap-on' coupling for ease connection. The SSMB cable assembly connection may be configured with one of two types. These are SSMB-STRAIGHT and SSMB-RIGHT ANGLE as shown on the next pictures. MEC-PA08082 User Manual (Version 02.21.14) M4 Sciences 1201 Cumberland Avenue, Suite A West Lafayette, IN 47906 USA P: +1 765.479.6215 F: +1 765.807.3066 e-mail: [email protected] Page 11 of 45 website: www.M4Sciences.com TriboMAM power cable connector configurations SSMB-STRAIGHT Warning: SSMB-RIGHT ANGLE The high voltage output connector carries high voltage. DO NOT touch the high voltage output connector or the load circuit while the MECPA08082 is operating. An electrical shock could result. Always turn off the MEC-PA08082 before making changes to the load connections. The maximum voltage at the high voltage output connector is +150 V. MEC-PA08082 User Manual (Version 02.21.14) M4 Sciences 1201 Cumberland Avenue, Suite A West Lafayette, IN 47906 USA P: +1 765.479.6215 F: +1 765.807.3066 e-mail: [email protected] Page 12 of 45 website: www.M4Sciences.com 3 Operation The following pictures show the location of various controls, displays, indicator lights and components on the Front and Rear Panels of the MEC-PA08082 Controller. Front panel 4 Channel Front Panel (optional) Rear panel RS-232 serial port and USB port are for M4Sciences Engineering use only MEC-PA08082 User Manual (Version 02.21.14) M4 Sciences 1201 Cumberland Avenue, Suite A West Lafayette, IN 47906 USA P: +1 765.479.6215 F: +1 765.807.3066 e-mail: [email protected] Page 13 of 45 website: www.M4Sciences.com RS-232 9 pin female interface port with a 300-19.2 k baud rate (minimum) (115.2 k desired) with flow control hardware. This port is not currently used. Please contact M4 Sciences for additional information. USB 2.0 full speed compliant with a maximum transfer data rate of 12 Mbits/second. The USB port is used only for transfer of new software to the MEC-PA08082 by M4 Sciences personnel. 3.1 Programming Instructions 3.1.1 Startup Power up the MEC-PA08082 by pushing the power switch to the ON position. A welcome screen will appear. The controller software version is indicated on the screen (v X.XX in the image below). Press any key to enter the Main Menu. There are three options: 1. Program Setting – edit and run drilling programs, up to 5 programs can be stored 2. Remote Control – run program through I/O communications 3. System Setting – change English/SI units, display contrast/brightness, etc. Press UP or DOWN button to change the highlighted line. Press SELECT button to enter the highlighted submenu. Press the HOME button to return to the Main Menu. MEC-PA08082 User Manual (Version 02.21.14) M4 Sciences 1201 Cumberland Avenue, Suite A West Lafayette, IN 47906 USA P: +1 765.479.6215 F: +1 765.807.3066 e-mail: [email protected] Page 14 of 45 website: www.M4Sciences.com 3.1.2 Program Menu When Program Setting is selected, the screen below will appear on the LCD display. The first line shows the current program number (1 to 5 available) and program status. The following status are possible: READY – program is ready for run; press START button to run the program RUN – program is running; high voltage output is on EDIT – program parameters can be edited; program cannot be run in this status ERROR – indicate the input value is not allowed when editing the program RESET – system is shut down unexpectedly; need to press RESET button to restore Drilling program 3.1.2.1 Run/Stop Program In the READY mode, press UP or DOWN button to change the current program. In the READY mode, press START button to run the program (high voltage output on). In the RUN mode, press STOP button to stop the program (high voltage output off). 3.1.2.2 Edit Program In the READY mode, press SELECT button to enter the EDIT mode for modifying the current program (The first line of the program will be highlighted). Press UP or DOWN button to choose the variable to be modified (The corresponding line will be highlighted). After highlighting the right variable, press SELECT button to start modifying the value of the variable; press UP or DOWN button to modify the value of the variable; press LEFT or RIGHT button to change the digit to be modified (for diameter and feed); press SELECT button to finish and save the value. MEC-PA08082 User Manual (Version 02.21.14) M4 Sciences 1201 Cumberland Avenue, Suite A West Lafayette, IN 47906 USA P: +1 765.479.6215 F: +1 765.807.3066 e-mail: [email protected] Page 15 of 45 website: www.M4Sciences.com Select “Exit edit mode” to return back to the READY mode. During editing the program, if ERROR status shows up on the top line, it indicates the combination of the input values are out of the processing envelope of the TriboMAM; an error message indicating “Invalid Diameter, Reduce Feed or Reduce RPM” will be shown at the bottom of the screen. Adjust the corresponding variables until the error is cleared. The error has to be cleared before returning back to the READY mode. Program edit mode Error in program edit Note: Maximum values for spindle rotation RPM and drill feed depend on the other drilling parameters. The maximum values specified in the TriboMAM drilling system user manual are absolute maximums for the TriboMAM system. Actual drilling application limits are process dependent. Note: The actual CNC program conditions must be set to the same conditions in the MEC controller in order to ensure proper operation of the TriboMAM. Note: The maximum RPM and maximum feed cannot be reached at the same time, they depend on each other and also on other variables (flutes and diameter). 3.1.3 Remote Menu After selecting the Remote Control from the main menu, the following screen appears. For remote operation, the Remote Menu must be active on the controller (displayed on the screen). If Exit Remote Mode is selected, then remote operation is disabled and the MEC must be controlled manually. If the controller is powered off at the Remote Menu, it will automatically go back to the Remote Menu the next time it is powered on (skip the welcome screen). MEC-PA08082 User Manual (Version 02.21.14) M4 Sciences 1201 Cumberland Avenue, Suite A West Lafayette, IN 47906 USA P: +1 765.479.6215 F: +1 765.807.3066 e-mail: [email protected] Page 16 of 45 website: www.M4Sciences.com The Remote Menu lists the functions (some are optional) that can be controlled using the I/O communications. These functions can be turned on and off. The bottom line indicates the status of the remotely controlled program. The first two letters indicates the model of the TriboMAM used (SD – Standard, MN – Mini, MC – Micro). The number after “PG” is the program number. The number after “CH” is the output channel number. Program status as described in section 3.1.2 appears at the end. TriboMAM Program model number Output channel Program status Note: The standard MEC Controller is configured for the Start option to be enabled on the remote menu. All other functions require optional software [SOFTMEC] from M4 Sciences. 3.1.3.1 Remote Menu Standard MEC Configuration The Start option is used to enable/disable remote triggering of the high voltage output (HV Out) to the TriboMAM. This is used to turn the TriboMAM tool on and off. 3.1.3.2 Remote Menu Optional MEC Configuration: SOFTMEC The Program option is used to enable/disable remote selection of a specific program (1-5) from the controller memory. The Channel option is used to enable/disable remote selection of output channels (1-4). If the Channel is disabled (off), then the channel in the program will be active. MEC-PA08082 User Manual (Version 02.21.14) M4 Sciences 1201 Cumberland Avenue, Suite A West Lafayette, IN 47906 USA P: +1 765.479.6215 F: +1 765.807.3066 e-mail: [email protected] Page 17 of 45 website: www.M4Sciences.com The E-Stop option is used to enable/disable remote input of the emergency stop from an external CNC control or output of a fault at the MEC controller. The Reset option is used to enable/disable remote input of the reset. Please note that while the Start option is standard for every controller, the Output channel, Program, E-Stop, Reset options are expandable options and require the special SOFTMEC upgrade from M4 Sciences. Standard feature: Start ON - Runs a program that is selected manually. For example, if program 2 needs to be operated remotely Program menu Select program 2 Return to remote Menu. The status bar should show “PG2”, indicating Program 2 has been selected. Optional features: Channel ON Program ON E – Stop ON Reset ON CAUTION If the MEC is placed in the "Remote Menu" then inputs from an external device (such as relay inputs from a CNC machine control) will override manually selected output channels or program numbers Refer Communications Protocol Section 8 for more information. To exit the Remote Menu, select Exit Remote Mode. (HOME button does not work here!) 3.1.4 System Menu After selecting the System Setting from the Main Menu, the following screen appears. Press UP or DOWN button to change the highlighted lines. Press the SELECT button to modify the highlighted parameters or start the highlighted function. MEC-PA08082 User Manual (Version 02.21.14) M4 Sciences 1201 Cumberland Avenue, Suite A West Lafayette, IN 47906 USA P: +1 765.479.6215 F: +1 765.807.3066 e-mail: [email protected] Page 18 of 45 website: www.M4Sciences.com System Menu The Unit option can be set to SI (denoted as mm for “millimeter”) or English units (denoted as In for “inches”). If mm is selected, drill diameter and feed per revolution will be in millimeters. If In is selected, drill diameter and feed per revolution will be in inches. Contrast and Backlight are controlling the LCD display. Function Test – HV output at preset low frequency and full amplitude for checking the displacement of connected TriboMAM. Audible Check – HV output at audible frequency to check the connected TriboMAM. 3.1.5 Indicator Lights and Errors Several indicator lights are provided on the controller. These are denoted on the front panel of the controller as Power On (Green), Power Limit (Yellow), Overcurrent Trip (Red), HV Out (Red) and Emergency Stop (Red). MEC-PA08082 User Manual (Version 02.21.14) M4 Sciences 1201 Cumberland Avenue, Suite A West Lafayette, IN 47906 USA P: +1 765.479.6215 F: +1 765.807.3066 e-mail: [email protected] Page 19 of 45 website: www.M4Sciences.com The Power On indicator light indicates whether the device is on or off. The Power Limit indicator light indicates if the MEC-PA08082 is near its power limit. The MEC-PA08082 will run and power the TriboMAM with this indicator light on. The Overcurrent Trip indicator light illuminates when the current capability of the MECPA08082 is exceeded or if output shorting occurs. The MEC-PA08082 will not run when this indicator light is on. The HV Out indicator light indicates when the controller is running / sending a highvoltage signal to the HV Out port on the front panel. The Emergency Stop indicator light is illuminated when the Emergency Stop button is depressed. “Reset” appears on the status bar of LCD display when a) current limit exceeded on HV out, or b) e-stop engaged, or c) heat sink temperature limit exceeded or d) temperature limit exceeded inside housing of MEC controller, or e) the Emergency Stop button is depressed, or f) short circuit. RESET Example on the status bar. Program Menu screen example MEC-PA08082 User Manual (Version 02.21.14) M4 Sciences 1201 Cumberland Avenue, Suite A West Lafayette, IN 47906 USA P: +1 765.479.6215 F: +1 765.807.3066 e-mail: [email protected] Remote Menu screen example Page 20 of 45 website: www.M4Sciences.com 3.1.6 Emergency Stop In case of an emergency, the high voltage output and the TriboMAM drilling system can be turned off by depressing the Emergency Stop button on the front panel of the controller. The Emergency Stop indicator light is on until the button is returned to its initial state. To return back to normal operation, pull the Emergency Stop switch out and press the Reset key before pressing the Start key again. Warning: The Emergency Stop does NOT disable the main power to the MEC-PA08082 controller. It disables the power to the HV Out connector on the front panel. MEC-PA08082 User Manual (Version 02.21.14) M4 Sciences 1201 Cumberland Avenue, Suite A West Lafayette, IN 47906 USA P: +1 765.479.6215 F: +1 765.807.3066 e-mail: [email protected] Page 21 of 45 website: www.M4Sciences.com 4 Specifications 4.1 Output The standard configuration of the MEC-PA08082 has one output channel. Additional output channels are optional. No more than one output channel can be active at a time. Output Voltage Range Output Current Range -50 V to +150 V DC or peak AC. 0 to 1 A peak [0.707 A rms] 4.2 Features RS-232 Interface, USB Port and Programming Capability, USB 2.0 full speed compliant with a maximum transfer data rate of 12 Mbits/second, a RS-232 Interface with a 30019.2 k baud rate (minimum) (115.2 k desired) with flow control hardware. Internal programming capabilities allow control and monitoring of features, which include: Frequency Control 0.01 Hz to 1000 Hz. Offset Voltage -50 V to +150 V Amplitude Voltage -50 V to +150 V Output Channel Control One channel (optional 4 channels) Keypad An eight-button keypad is provided for user programming of unit operation parameters. Waveform Generation 14 bit, 0.01 Hz to 1.0 kHz resolution (minimum) 16 K to 64 K samples per cycle, with offset capability and control range of -50 V to +150 V HV output MEC-PA08082 User Manual (Version 02.21.14) M4 Sciences 1201 Cumberland Avenue, Suite A West Lafayette, IN 47906 USA P: +1 765.479.6215 F: +1 765.807.3066 e-mail: [email protected] Page 22 of 45 website: www.M4Sciences.com LCD Interface 128 x 64 dot graphic LCD display with back-light and light intensity adjustments. Displays output information. Over Current Trip The high voltage will turn off and the error will be indicated on the display screen when current capability of the amplifier is exceeded or output shorting occurs. Maximum current capability is 1 Amp. Trip Reset After a Trip event occurs and the high voltage is turned off, depressing a series of keys on the keypad will turn off the Over Current Trip indicator and allow the high voltage to be turned back on, once the fault has been removed. Limit Indicator The display indicates when the MEC-PA08082 does not provide the required high-voltage. This can occur when the load exceeds the amplifier capacity. High-Voltage Front panel display indicates when the high-voltage is on. Power On Front panel display becomes active when the power is on. 4.3 Performance DC Voltage Gain 20 V/V DC Voltage Gain Accuracy (input to output) Better than 2%. Offset Voltage Less than ±1 V 4.4 General Specifications Dimensions 19" rack mountable, 4” (2U high), 14" depth Weight 6 kg (13 lb) High-Voltage Output Connector SMB coaxial bulkhead jack MEC-PA08082 User Manual (Version 02.21.14) M4 Sciences 1201 Cumberland Avenue, Suite A West Lafayette, IN 47906 USA P: +1 765.479.6215 F: +1 765.807.3066 e-mail: [email protected] Page 23 of 45 website: www.M4Sciences.com High-Voltage Output Impedance 0.1 ohms I/O Connectors Two (2) 25-pin D type connector RS-232 Serial Port Connector USB Port 2.0 Power Requirements (Line Supply) 100 to 240 V AC at 48 to 63 Hz Power Entry Module A standard three-prong AC line connector with an integral fuse holder and an ON/OFF power switch Operating Conditions Temperature Relative Humidity 0 °C to 35 °C To 85%, noncondensing 5 Accessories Line Cord (for 90 to 127 V AC operation) Fuses, 5 mm x 20 mm, 1 A 6 Certification M4 Sciences certifies that each Model MEC-PA08082 is tested and calibrated to specifications using measurement equipment traceable to the National Institute of Standards and Technology or traceable to consensus standards. 7 Maintenance 7.1 Safety Observe the following safety precautions when performing maintenance procedures on the Model MEC-PA08082: 1. Do not open the panels to the MEC-PA08082. Warranty will be void if the panels are opened. MEC-PA08082 User Manual (Version 02.21.14) M4 Sciences 1201 Cumberland Avenue, Suite A West Lafayette, IN 47906 USA P: +1 765.479.6215 F: +1 765.807.3066 e-mail: [email protected] Page 24 of 45 website: www.M4Sciences.com 2. Always turn off the Model MEC-PA08082 and disconnect it from its power source before cleaning or inspecting it. Failure to observe this precaution could result in personnel injury or equipment damage. 3. Refer all maintenance procedures to qualified personnel. 7.2 Maintenance Assistance Preventative Maintenance/Cleaning the Instrument Preventative maintenance consists of inspecting and cleaning the instrument. Preventative maintenance performed on a regular basis may prevent instrument failure and improve reliability. Inspection: Visually inspect the instrument for loose or damaged controls and connectors or other undesirable conditions. Cleaning: Disconnect the unit from all external connections prior to cleaning. Clean the Model MEC-PA08082 as operating conditions require. Clean the exterior of the instrument with a soft cloth dampened with water. Use only water to dampen the cloth. The use of solvents may damage the finish or plastic components. A small brush is effective in removing dirt from the front and rear panel controls and connectors. 7.3 Servicing the Fuses Refer servicing the fuses to qualified personnel. Always unplug the power cord from the power source before attempting to change the fuses. Always replace the fuses with fuses of the same rating. Warning: Never attempt to service the fuses when the instrument is plugged into the power source. An electrical shock could result. The line fuses are contained in a fuse holder, which is an integral part of the power connector. These are the only user serviceable fuses. 1. On the rear panel of the controller, use a small flat head screwdriver to access the fuse door as shown below. MEC-PA08082 User Manual (Version 02.21.14) M4 Sciences 1201 Cumberland Avenue, Suite A West Lafayette, IN 47906 USA P: +1 765.479.6215 F: +1 765.807.3066 e-mail: [email protected] Page 25 of 45 website: www.M4Sciences.com 2. Use the screwdriver to guide existing fuse from controller. 3. Replace any blown fuses with same type and rating. If the instrument has repetitive fuse failure, a more serious problem might exist within the instrument. Please contact M4 Sciences in this situation. MEC-PA08082 User Manual (Version 02.21.14) M4 Sciences 1201 Cumberland Avenue, Suite A West Lafayette, IN 47906 USA P: +1 765.479.6215 F: +1 765.807.3066 e-mail: [email protected] Page 26 of 45 website: www.M4Sciences.com 8 Communications Protocol Please refer to the Programming Instructions section earlier in this manual for a description of the Remote Menu functions. The communications protocols described in this section correspond directly to these Remote Menu functions. The MEC-PA08082 can be interfaced directly to the CNC machine tool for limited basic relay logic interaction. The standard MEC-PA08082 is configured for on or off type control of the HV output signal to the TriboMAM-drilling system. Additional relay driven I/O features are available, including the ability to select individual programs stored within the MECPA08082 memory. These I/O features currently do not enable direct transfer of numerical data such as G-code information between the MEC-PA08082 and the CNC controller of a particular machine tool. NOTE: Some communication features require optional software SOFTMEC The MEC-PA08082 includes the following interface ports for relay control: Two (2) DB 25 parallel female connectors for programmable machine tool interface. These ports are used for active relay control with the CNC machine tool. Note: A standard installation does not require interaction with the USB, RS232 or I/O A and I/O B ports. For further information please contact M4 Sciences. MEC-PA08082 User Manual (Version 02.21.14) M4 Sciences 1201 Cumberland Avenue, Suite A West Lafayette, IN 47906 USA P: +1 765.479.6215 F: +1 765.807.3066 e-mail: [email protected] Page 27 of 45 website: www.M4Sciences.com 8.1 DB25 Port Pin Layout The interface ports are shown in the following image of the MEC-PA08082 Rear Panel. There are 2 DB 25 pin port connectors on the back panel of the MEC-PA08082 (I/O A and I/O B). These connectors may be linked to the CNC machine tool with the appropriate cables to allow operational interfacing to the controller directly from external relays (+12V to +24V DC). The following tables provide a description of each pin of the I/O A and I/O B ports. For details regarding the communication protocol of each pin, consult the DB25 Pin Configuration immediately following this section. MEC-PA08082 User Manual (Version 02.21.14) M4 Sciences 1201 Cumberland Avenue, Suite A West Lafayette, IN 47906 USA P: +1 765.479.6215 F: +1 765.807.3066 e-mail: [email protected] Page 28 of 45 website: www.M4Sciences.com I/O Port A Pin# Name Input/ Output Pin Description 1 IN1a Input Input 1a – used for program selection 2 3 IN2a IN3a Input Input Input 2a – used for program selection Input 3a – used for program selection 4 5 IN4a IN5a Input Input Input 4a – used for output channel selection Input 5a – used for output channel selection 6 7 IN6a +12 V Input Output Input 6a – start/stop operation command +12V Current limited DC supply (100-200 mA, polyswitch or equiv.) 8 9 +12 V K3no Output Relay +12V Current limited DC supply (100-200 mA, polyswitch or equiv.) Relay K3 normally open contact, ISOLATED (Main Power) 10 11 K3co K4no Relay Relay Relay K3 common contact, ISOLATED Relay K4 normally open contact, ISOLATED (Run/Stop) 12 13 K4nc Iout Relay Output Relay K4 normally closed contact, ISOLATED (Run/Stop) Current monitoring output (1V/100mA) 14 15 IN1b IN2b Input Input Input 1b – reference for IN1a, connected to 0V reference Input 2b – reference for IN2a, connected to 0V reference 16 17 IN3b IN4b Input Input Input 3b – reference for IN3a, connected to 0V reference Input 4b – reference for IN4a, connected to 0V reference 18 19 IN5b IN6b Input Input Input 5b – reference for IN5a, connected to 0V reference Input 6b – reference for IN6a, connected to 0V reference 20 21 GND GND - Internal 0V reference for pin #7, 8 Internal 0V reference for pin #7, 8 22 23 K3nc K4co Relay Relay Relay K3 normally closed contact, ISOLATED (Main Power) Relay K4 common contact, ISOLATED 24 GND Unit ground 25 Eout Output Voltage monitoring output (1V/20V) I/O Port A includes 2 single pole double throw relays (K3 and K4) on the back panel DB25 female connector. The relay logic is as follows (0=relay off, 1= relay on) Relay K3 – MEC Main power toggle switch on front panel: 0=off and 1=on Relay K4 – MEC program running (started): 0= stopped, 1= run 3 terminals of each relay are accessible on the DB25 pin-outs according to table above K3no/nc/co = pin 9/pin 22/pin 10 and K4no/nc/co = pin 11/pin 12/pin 23 no = normally open, nc = normally closed, co = common These relays can be wired with several configurations, depending on the desired type of input to the external machine. As shown in the table above pin 7 and pin 8 provide a local +12V source if needed. **The K3 and K4 relays are completely isolated from the MEC controller. An external DC power source (e.g., an external +12V source) may be used to energize the relays. I/O Port B MEC-PA08082 User Manual (Version 02.21.14) M4 Sciences 1201 Cumberland Avenue, Suite A West Lafayette, IN 47906 USA P: +1 765.479.6215 F: +1 765.807.3066 e-mail: [email protected] Page 29 of 45 website: www.M4Sciences.com Pin# Name Input/Output Pin Description 1 IN7a Input Input 7a – emergency stop 2 3 IN8a IN9a Input - Input 8a – unit reset Reserved 4 5 IN10a IN11a - Reserved Reserved 6 7 IN12a +12 V Output Reserved +12V Current limited DC supply (100-200 mA, polyswitch or equiv.) 8 9 +12 V K1no Output Relay +12V Current limited DC supply (100-200 mA, polyswitch or equiv.) Relay K1 normally open contact, ISOLATED (Reset monitor) 10 11 K1co K2no Relay Relay Relay K1 common contact, ISOLATED Relay K2 normally open contact, ISOLATED (software error status) 12 13 K2nc Iout Relay Output Relay K2 normally closed contact, ISOLATED (software error status) Current monitoring output (1V/100mA) 14 15 IN7b IN8b Input Input Input 7b – reference for IN7a, connected to 0V reference Input 8b – reference for IN8a, connected to 0V reference 16 17 IN9b IN10b Input Input Input 9b – reference for IN9a, connected to 0V reference Input 10b – reference for IN10a, connected to 0V reference 18 19 IN11b IN12b Input Input Input 11b – reference for IN11a, connected to 0V reference Input 12b – reference for IN12a, connected to 0V reference 20 21 GND GND - Internal 0V reference for pin #7, 8 Internal 0V reference for pin #7, 8 22 23 K1nc K2co Relay Relay Relay K1 normally closed contact, ISOLATED (Reset monitor) Relay K2 common contact, ISOLATED 24 GND Unit ground 25 Eout Output Voltage monitoring output (1V/20V) I/O Port B includes 2 single pole double throw relays (K1 and K2) on the back panel DB25 female connector. The relay logic is as follows (0=relay off, 1= relay on) Relay K1 – reset monitor: 0=system ok, 1=reset required (system needs reset button pressed on the front panel) Relay K2 – software error: 0=no errors ok, 1=software error (reset button needs pressed on the front panel) *K1 relay controller reset can be due to the following: a) current limit exceeded , b) e-stop engaged, c) heat sink temperature limit exceeded or d) temperature limit exceeded inside housing of MEC controller, d) short circuit. 3 terminals of each relay accessible on the DB25 pin-outs according to the table above K1no/nc/co = pin 9/pin 22/pin 10 and K2no/nc/co = pin 11/pin 12/pin 23 no = normally open, nc = normally closed, co = common These relays can be wired with several configurations, depending on the desired type of input to the external machine. As shown in the table above pin 7 and pin 8 provide a local +12V source if needed. **The K1 and K2 relays are completely isolated from the MEC controller. An external DC power source (e.g., an external +12V source) may be used to energize the relays. MEC-PA08082 User Manual (Version 02.21.14) M4 Sciences 1201 Cumberland Avenue, Suite A West Lafayette, IN 47906 USA P: +1 765.479.6215 F: +1 765.807.3066 e-mail: [email protected] Page 30 of 45 website: www.M4Sciences.com 8.1.1 Input Control of the MEC functions The MEC can be controlled remotely using external low voltage relays (+12 to +24V) Note: Input control of the MEC is only possible when the remote menu is selected and displayed at the LCD. The input control is available with limited functionality in a standard MEC and additional capability with an optional configuration. Standard Configuration: Start High Voltage (HV): ON option is available in the remote menu. In I/O Port A, pin 6 is connected to +12 to +24V input and pin 19 is connected to the 0V reference for the DC input. The Start engages the high voltage output to the TriboMAM drilling system. Refer to diagram “PORT A: PROGRAM SELECTION”. This function is the same as pressing Start/Stop key on front panel. This is selectable If “Strat” is turned on, the MEC HV output can be controlled from an external voltage input Optional Configuration: SOFTMEC Note: The MEC is available with additional output channels and software features. This option is referred to as SOFTMEC. The SOFTMEC option enables functional control at the high voltage output, program selection, E-Stop, and Reset: These relay driven I/O features that can be accessed by directly linking the external I/O DB25 ports at the back of the MEC to the appropriate external relays at the machine tool. MEC-PA08082 User Manual (Version 02.21.14) M4 Sciences 1201 Cumberland Avenue, Suite A West Lafayette, IN 47906 USA P: +1 765.479.6215 F: +1 765.807.3066 e-mail: [email protected] Page 31 of 45 website: www.M4Sciences.com Program. Scroll up or down by pressing the Up or Down directional/selection keys and select Program. Press the Select key to choose the desired option (On or Off). If Program “On” is enabled, then the MEC program selection (program 1, 2, 3, 4 and 5) can be controlled from an external DC signal. Refer to table on diagram “PORT A: PROGRAM SELECTION”. This is selectable Output Channel. Scroll up or down by pressing the Up or Down directional/selection keys and select Channel. Press the Select key to choose the desired option (On or Off). If Channel “On” is enabled, then the MEC output (channel 1, 2, 3 or 4) can be controlled from an external DC signal. Refer to table on diagram “PORT A: CHANNEL SELECTION”. This is selectable MEC-PA08082 User Manual (Version 02.21.14) M4 Sciences 1201 Cumberland Avenue, Suite A West Lafayette, IN 47906 USA P: +1 765.479.6215 F: +1 765.807.3066 e-mail: [email protected] Page 32 of 45 website: www.M4Sciences.com E-Stop. Scroll up or down by pressing the Up or Down directional/selection keys and select E-Stop. Press the Select key to choose the desired option (On or Off). If E-Stop “On” is enabled, the MEC can be stopped remotely from an external DC signal. Refer to diagram “PORT B E-STOP EMERGENCY STOP”. This is selectable Note: If E-Stop ON, then “Reset” appears on the status bar of LCD display. The red LED on front panel does not illuminate if a remote E-Stop is present. Warning: The Emergency Stop does NOT disable the main power to the MECPA08082 controller. It disables the power to the HV Out connector on the front panel. Reset. Scroll up or down by pressing the Up or Down directional/selection keys and select Reset. Press the Select key to choose the desired option (On or Off). If Reset “On” is enabled, then the MEC can be reset from an external DC signal. Refer to diagram PORT B RESET ON. This function is the same as pressing the reset key located on the front panel. This is selectable MEC-PA08082 User Manual (Version 02.21.14) M4 Sciences 1201 Cumberland Avenue, Suite A West Lafayette, IN 47906 USA P: +1 765.479.6215 F: +1 765.807.3066 e-mail: [email protected] Page 33 of 45 website: www.M4Sciences.com 4 Channel Front Panel (optional) The following picture show the front panel of the optional MEC-PA08082 Controller. Note: The four channel output configuration is available as an upgrade [SOFTMEC] to the standard controller. The four channel output does not operate simultaneously, and only one output channel can be active at any given time. The output channels 1-4 can be selected in any order but never simultaneously. Please contact M4Sciences regarding optional software [SOFTMEC]. MEC-PA08082 User Manual (Version 02.21.14) M4 Sciences 1201 Cumberland Avenue, Suite A West Lafayette, IN 47906 USA P: +1 765.479.6215 F: +1 765.807.3066 e-mail: [email protected] Page 34 of 45 website: www.M4Sciences.com MEC-PA08082 User Manual (Version 02.21.14) M4 Sciences 1201 Cumberland Avenue, Suite A West Lafayette, IN 47906 USA P: +1 765.479.6215 F: +1 765.807.3066 e-mail: [email protected] Page 35 of 45 website: www.M4Sciences.com MEC-PA08082 User Manual (Version 02.21.14) M4 Sciences 1201 Cumberland Avenue, Suite A West Lafayette, IN 47906 USA P: +1 765.479.6215 F: +1 765.807.3066 e-mail: [email protected] Page 36 of 45 website: www.M4Sciences.com MEC-PA08082 User Manual (Version 02.21.14) M4 Sciences 1201 Cumberland Avenue, Suite A West Lafayette, IN 47906 USA P: +1 765.479.6215 F: +1 765.807.3066 e-mail: [email protected] Page 37 of 45 website: www.M4Sciences.com MEC-PA08082 User Manual (Version 02.21.14) M4 Sciences 1201 Cumberland Avenue, Suite A West Lafayette, IN 47906 USA P: +1 765.479.6215 F: +1 765.807.3066 e-mail: [email protected] Page 38 of 45 website: www.M4Sciences.com MEC-PA08082 User Manual (Version 02.21.14) M4 Sciences 1201 Cumberland Avenue, Suite A West Lafayette, IN 47906 USA P: +1 765.479.6215 F: +1 765.807.3066 e-mail: [email protected] Page 39 of 45 website: www.M4Sciences.com 8.1.2 MEC Relay Logic Control I/O Functions Two DB25 pin serial port connectors (Port A and Port B) are located on the back panel of the MEC controller. These connectors allow Input/Output (I/O) interfacing from an external control such as a CNC controller or other interface. Each of the I/O Port A and Port B interface to 2 single pole double throw relays located internally on the MEC controller printed circuit board. **These four internal relays are completely isolated from the MEC controller. An external DC power source (e.g., an external +12V - +24V source) may be used to energize the relays. A +12V source is available on the I/O Port DB 25 connector at pin 7 and pin 8 if needed. These relays can be wired with several configurations, depending on the desired type of input to the external machine. The following pages outline typical configurations for the I/O port wiring typical of a machine installation and interface to a CNC controller with spare relays and M-codes already available on the CNC machine tool. These relays are summarized as follows: I/O Port A Interface to 2 single pole double throw relays (K3 and K4) on the back panel DB25 female connector. The relay logic is as follows (0=relay off, 1= relay on) Relay K3 – MEC Main power toggle switch on front panel: 0=off and 1=on Relay K4 – MEC program running (started): 0= stopped, 1= run 3 terminals of each relay are accessible on the DB25 pin-outs K3no/nc/co = pin 9/pin 22/pin 10 and K4no/nc/co = pin 11/pin 12/pin 23 no = normally open, nc = normally closed, co = common MEC-PA08082 User Manual (Version 02.21.14) M4 Sciences 1201 Cumberland Avenue, Suite A West Lafayette, IN 47906 USA P: +1 765.479.6215 F: +1 765.807.3066 e-mail: [email protected] Page 40 of 45 website: www.M4Sciences.com I/O Port B Interface to 2 single pole double throw relays (K1 and K2) on the back panel DB25 female connector. The relay logic is as follows (0=relay off, 1= relay on) Relay K1 – reset monitor: 0=system ok, 1=reset required (system needs reset button pressed on the front panel) A reset condition can occur when a) current limit exceeded, b) e-stop engaged, c) heat sink temperature limit exceeded, d) temperature limit exceeded inside housing of MEC controller, or d) short circuit. Relay K2 – software error: 0=no errors ok, 1=software error (reset button needs pressed on the front panel) 3 terminals of each relay accessible on the DB25 pin-outs K1no/nc/co = pin 9/pin 22/pin 10 and K2no/nc/co = pin 11/pin 12/pin 23 no = normally open, nc = normally closed, co = common Relay Circuit The following figure shows a basic representation of one of the internal relays on MECPA08082. MEC-PA08082 User Manual (Version 02.21.14) M4 Sciences 1201 Cumberland Avenue, Suite A West Lafayette, IN 47906 USA P: +1 765.479.6215 F: +1 765.807.3066 e-mail: [email protected] Page 41 of 45 website: www.M4Sciences.com MEC-PA08082 User Manual (Version 02.21.14) M4 Sciences 1201 Cumberland Avenue, Suite A West Lafayette, IN 47906 USA P: +1 765.479.6215 F: +1 765.807.3066 e-mail: [email protected] Page 42 of 45 website: www.M4Sciences.com MEC-PA08082 User Manual (Version 02.21.14) M4 Sciences 1201 Cumberland Avenue, Suite A West Lafayette, IN 47906 USA P: +1 765.479.6215 F: +1 765.807.3066 e-mail: [email protected] Page 43 of 45 website: www.M4Sciences.com 8.2 DB25 Port Pin Configuration Voltage signals for input pins IN1a – IN8a IN1b – IN8b are connected to 0 V reference for input voltage IN1a – IN8a IN1a – IN8a input voltage Vin specification Recommend setting: ON: |Vin| between 12V to 24V OFF: Vin 0V Program Selection - IN1a through IN3a select the program when in remote mode IN1a OFF IN2a OFF IN3a Program Selected OFF Program 1 ON OFF OFF Program 2 OFF ON OFF Program 3 ON ON OFF Program 4 OFF OFF ON Program 5 ON OFF ON *Optional Program 6 OFF ON ON *Optional Program 7 ON ON ON *Optional Program 8 *Custom option. Contact M4 Sciences if needed. MEC-PA08082 User Manual (Version 02.21.14) M4 Sciences 1201 Cumberland Avenue, Suite A West Lafayette, IN 47906 USA P: +1 765.479.6215 F: +1 765.807.3066 e-mail: [email protected] Page 44 of 45 website: www.M4Sciences.com Channel Selection - IN4a and IN5a select the HV output channel in remote mode IN4a OFF IN5a OFF Output Channel ON OFF *Optional Output 2 OFF ON *Optional Output 3 ON ON *Optional Output 4 Output 1 *Custom option. Contact M4 Sciences if needed. Operation Control - IN6a controls the HV output on/off when in remote mode IN6a Operation on/off ON Start OFF Stop Emergency Stop - IN7a monitors the emergency stop when in remote mode IN7a Emergency Stop ON e-stop on OFF e-stop off Reset - IN8 monitors the reset when in remote mode IN8a Reset on/off ON Reset on OFF Reset off MEC-PA08082 User Manual (Version 02.21.14) M4 Sciences 1201 Cumberland Avenue, Suite A West Lafayette, IN 47906 USA P: +1 765.479.6215 F: +1 765.807.3066 e-mail: [email protected] Page 45 of 45 website: www.M4Sciences.com