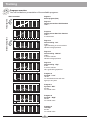
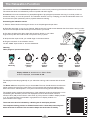
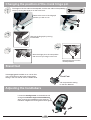
1
8080 TRS3
User Manual
Table of contents
Please Note
Setting Up
Dashboard
Dashboard windows
Using the Menu and Language Selection
Choosing the User
Stand by mode
System Settings
User's data
Device data
Monitoring the Heart Rate
Training
Programs
Programs overview
How to create your own personal programs
Training data
Fitness mark
Conconi Test
Description
Test programs
Test protocols
Description
Coaching
What is Coaching?
Entering Personal Data
Training with the Coaching program
Taking the capacity test
Display the training plan / training unit
Running the training unit
Training process
Downgrading
Loading scheme of the Coaching program
Team Award
The Relaxation function
Transport and storage
Accessories (sold separately)
Specifications
Glossary
What to do, if...?
Warranty conditions
Menu Diagram
Sample Diagrams, supplement to the Individual Program
Assembling
Maintenance
1
2
2
3
4
4
5
5
6
7
8
9
13
14
14
15
16
17
18
20
20
21
22
23
24
26
28
30
31
32
32
33
35
36
38
39
41
42
49
8080 TRS3
This ergometer is specially designed for health and endurance training.
High quality manufacturing, a user friendly dashboard, ease of use and maintenance all
contribute to make this appliance an ideal training device for sport and fitness purposes.
Also note that the complete equipment and the wide performance range should appeal to
sport or fitness conscious persons of every age group.
Please note
Read this user manual thoroughly before using the device.
Please follow the recommendations about your health.
You should undergo a general medical examination before you start a training program.
You should interrupt immediately the training session if you fill uncomfortable, dizzy or in any way ill during a training
session. Always start a training with a low load and then increase the load gradually. At the end of the training
reduce the load. After the training you should execute a few stretching and gymnastics exercises to relax your
muscles.
Recommendations about the training location
Install your training device on a level ground. The device may damage wooden floors. We therefore recommend the
installation of a protective underlay on wooden floors. We also recommend not to in-stall the device on white or lightcoloured carpets or mats because they could be stained by the black colour of the device's feet. We recommend
that the training location be properly aerated to provide enough fresh air, but nevertheless avoid draught.
You can use this device in a temperature range from +10°C to +35°C.
Safety notes
Children should only use this device under supervision and they must be provided with a proper explanation of its
operating principles. This device is not a toy. Please make sure the device is in working order. You should never
train on a defective device. The device may only be used by one person at a time. You should wear appropriate
clothing and shoes while training. The device may only be used if all the parts are firmly attached and no part is
loose. You may only execute the repair operations described in this user manual. Other repair and service
operations may only be carried out by qualified specialists. Do not press the buttons with the fingernails, always use
the fingertips to avoid scratching the buttons. Avoid wetting the dashboard. If during a training session your
dashboard is wetted by sweat you should wipe it with a soft cloth after training. The device surface should not come
into contact with corrosive or strong chemicals.
The maximum allowable user weight is 120kg.
Daum electronic gmbh provides a 24 months warranty for the device for private use, and a three (3) months
warranty for commercial use. The warranty is voided in the case of improper utilisation.
1
Setting Up
When the device is switched On,
the LCD screen displays a big “d”
and the system plays a start-up tune.
On / Off
The On/Off switch is located
on the rear of the device.
watt
After this the system displays
the program last used. The manual
program is displayed on the first start-up.
The Dashboard
1.
2.
3.
4.
5.
6.
7.
8.
9.
10.
11.
12.
13.
14.
15.
16.
17.
18.
19.
20.
menu
10.
Heart rate display
Dissipated energy and time display
RPM display
Speed and distance display
Load in watt display
Graphic screen
Control button
Heart rate sensor connector
Relax sensor connector
Menu key
Info key
Fitness key
Function key
Reset key (recessed)
PC connector
User display
Memory card reader/writer
Sliding switch: 1. card reader operation
2. ErgoWin u. dashboard update operation
3. Card reader update operation
Connector dashboard cable
Dashboard battery
info
11.
17.
5.
2.
16.
4.
3.
9.
8.
7.
18.
15.
fitness
12.
1.
6.
14.
20.
13.
19.
2
Dashboard Displays
The graphic screen displays the programs. The load (in watt) is shown on the
scale on the left side of the screen. The training time is shown on the lower axis.
In heart rate controlled programs the system displays 100 beats per minute at
the 200 watt position.
In height profile programs the time axis shows the distance covered, while the
watt axis shows the height profile.
Note: the illustrations may be changed without notice!
watt
250
The watt window shows the load in watt. The displayed watt value will blink to
indicate reaching either the watt load limit of the device or the watt load limit of
the user. It also shows the relax value with relaxation exercises.
13:08
3
You can individually set up which data you whish to view: clock, training time,
speed, distance or dissipated energy (in kJoule). You can switch back and forth
with a second display by pressing the control button. See page 5.
The user window specifies the user number (1 to 4 or guest 0).
The heart rate displays the heart rate. When only the upward pointing arrow is
displayed in the middle, then this means that the heart rate is too low to ensure
an effective training. Inversely, when only the downward pointing arrow is
displayed then the heart rate is too high. If the arrow starts blinking then the
load is too high and the user should moderate the training.
OK
Speed and distance window: this window shows the actual speed or the
corresponding distance covered. Pressing the control button switches back and
forth between these two values. See also page 5.
The RPM display indicates the velocity in revolutions per minute.
(+ = pedal faster, - = pedal slower).
3
+
128
0.0
0
Using the Menu and Language Selection
Use the Menu key to call and leave the menu.
Use the function key to move back one step in
the menu. Press the info key to display
information about the use of the menu.
menu
info
fitness
If you press the info key during a training (workout) session the system will display actual training and program data.
Turn the control button to move up or down in the menu.
Press the control button to open the selected option, e.g. language selection:
Menu
Settings
Menu
Training
Training data
Settings
Information
User
Training
Training data
Settings
Information
User
Back
User data
Device data
Back
watt
Back
watt
watt
1. Press the menu key
2. Turn the control button to select “Settings”
3. Press the control button
4. Turn and press the control button to select “Device Data”.
Language
Device data
Deutsch
English
Français
Italiano
Portuguese
Date
Time
Contrast
Language
RPM-Adaptation
Back
Back
watt
watt
7. Press the Menu key
to return to
your training program,
Press the function key
to return to “Device Data”.
6. Turn and press the control button
to select required language.
Note: 2 languages are available for each software version.
5. Turn and press the control
button to select “Language”.
User display window
Menu
Menu
Training
Training data
Settings
Information
User
Training
Training data
Settings
Information
User
Back
Back
watt
User selection
Guest
User 1
User 2
User 3
User 4
Guest
User 1
User 2
User 3
User 4
Back
Back
watt
1. Press the menu key
2. Turn the control button to select “User”
3. Press the control button
User selection
watt
watt
4. Turn and press the control button to select a user from 1 to 4 or Guest.
5. The selected user is then indicated in display window 16.
6. Press the menu key to return to the start.
The device will store the training data of
four users. It is therefore important that
each user selects his own “number” when
training. Guest data are not stored.
16.
User display window
The following is an example of a possible user's number attribution scheme in a family:
Mum
Person 1
Dad
Person 2
Daughter
Person 3
4
Son
Person 4
System Settings
User's data
menu
menu
Press the
menu key
Turn to
select
“Settings”
Press
control
button
Turn to
select
“User's data”
Press
control
button
If you want to change the user's data you should always note
the presently selected user. This information will always be shown
in the user window (16). (See Choosing the User p. 4)
16.
User display window
User data
Physical data
Limit values
Coaching
Delete
Miscellaneous
Back
Turn and press the control button to enter and store your physical data
Birth date
Enter your birth date
Gender
Choose M (male) or F (female) to enter your gender.
Height
Enter you height in cm.
Weight
Enter your weight in kg.
Fat content (%)
Enter your body fat content (if known).
watt
User data
Physical data
Limit values
Coaching
Delete
Miscellaneous
Back
watt
User data
Physical data
Limit values
Coaching
Delete
Miscellaneous
Back
watt
User data
Physical data
Limit values
Coaching
Delete
Miscellaneous
Back
You can also enter your own limit values.
You would then be informed if one of these values is exceeded.
You can select here the maximal load (between 25 and 400 watts).
Watt
If you choose e.g. 180W the load will not exceed this value,
and the watt display will blink.
When the actual heart rate exceeds the entered limit value
Heart rate
the system reduces automatically the applied load, and
an audible alarm sounds. “OFF” means no heart rate limit active,
“Auto” means heart rate corresponding to the age of the user applied.
A signal melody plays when the time limit is exceeded.
Training time
A signal melody plays when the distance limit is exceeded.
Distance
A signal melody plays dissipated kJoule values reaches the entered value.
Phys. kJoule
You can also enter and save the Coaching data by turning and pressing the control button
Enter your actual performance capacity.
Evaluation
Enter the number of times you want to train per week.
Frequency
Choose your target.
Training type
The minimum heart rate achieved during the last Coaching performance test.
Min. heart rate
The maximum heart rate achieved during the last Coaching performance test.
Max. heart rate
The performance achieved during the last Coaching performance test.
Max. Performance
The delete function will reset all the data of the selected user to the initial state.
watt
User data
Physical data
Limit values
Coaching
Delete
Miscellaneous
Back
watt
Start point
Cool down
Start-up
Window 2
Window 4
Watt increase
Watt decrease
Heart rate adapting
Choose start point “ON” if you want to start the program at the point of your choice.
Choose a program to run at the end of a training session (see page 12)
Choose the program that you wish to run after switching the device on.
Choose the data to display in Window 2.
Choose the data to display in Window 4.
Set the watt increase rate (in seconds) for heart rate controlled programs.
Set the watt decrease rate (in seconds) for heart rate controlled programs.
Adapt the fixed heart rate programs to your own heart rate range
5
System Settings
Device data
menu
menu
Press
key
Device data
Date
Time
Contrast
Language
Adjusting the RPM
Back
Turn to
select
“Settings”
Press
control
button
Turn to
select
“Device data”
Press
control
button
Date entry
1. Turn and press the control button to set the day.
2. Turn and press the control button to set the month.
3. Turn and press the control button to set the year.
(DD/MM/YYYY).
watt
Device data
Date
Time
Contrast
Language
Adjusting the RPM
Back
watt
Device data
Date
Time
Contrast
Language
Adjusting the RPM
Back
watt
Device data
Date
Time
Contrast
Language
Adjusting the RPM
Back
watt
Device data
Date
Time
Contrast
Language
Adjusting the RPM
Back
watt
RPM Adjusting
100.0 %
Back
Setting the time
1. Turn and press the control button to set the hour.
2. Turn and press the control button to set the minute.
3. Turn and press the control button to set the seconds.
(HH:MM:SS).
Contrast
You can choose a value for the contrast for the graphic screen from 10 to 25.
The optimal value lies normally around 16.
Language
Choose the appropriate language:
German, English, French, Italian, Portuguese, Finnish, Danish, Dutch.
Note: Only 2 languages are available for any software edition.
Adjusting the RPM (for the high performance sport domain)
Material wear and deviations of mechanical settings may result in a
discrepancy between the displayed RPM value and real pedalling speed
achieved. We have therefore provided the software with a “RPM adjusting”
function, which you can use to check the displayed RPM values and adjust it
if needed.
Pedal at constant speed (e.g. 60 RPM) for 1 minute
(the clock in window No. 2 will show time progress)
and count the pedal revolutions (measured value).
The following formula gives the setting value:
Measured value x 100%
Displayed value (Window No. 3)
watt
“Set value”
(turn)
= Setting value (%)
6
Press
control
button
Monitoring the Heart Rate
Heart beats
Please take serious care to watch your heart rate while training and not to exceed the limits!
200
190
180
170
160
150
140
130
120
110
100
90
80
Health
Hazard!
Beep Signal
Ala
rm
z
one
Dan
ger
Example
for a person 50 years old
or heart rate limit of 170
100%
Alarm Zone
Heart rate above 170
zone
85%
Danger Zone
Heart rate 145 to 169
Aero
OK
bic zo
ne
75%
Heart rate 128 to 144
60%
Aerobic Zone
Heart rate 102 to 127
Display set
to heart rate
Heart rate 40 to 101
70
20 25 30
35 40
45 50 55
60 65 70 Age
Whenever the actual heart rate exceeds that of the alarm zone and the heart rate limit for age / limit heart
rate is set to active (see page 5) the system will give a beep signal and the load will be automatically reduced.
Training in the aerobic heart rate zone
The “ ” indicates training below
the aerobic heart rate zone.
“OK” indicates that you the
user is training within the
aerobic heart rate zone.
The “ ” indicates training above
the aerobic heart rate zone. A blinking
display indicates reaching the alarm zone.
Training in the aerobic zone will always be healthy and safe. This zone is
located at 60% to 75% of the maximum heart rate or of the heart rate limit.
You will always achieve your training target optimally if you train in the appropriate
zone, whether your target is the improvement of your fitness level, the reduction
of your body fat content or the development of muscular mass.
For beginner: the widely accepted recommendation is to
train at 55% to 65% of the maximum heart rate. This zone
is very well suited for weight loss or for returning users after
an extended interruption due to illness.
A very high
heart rate can
be very dangerous!
Heart rate measure using the ear clip
Plug the connector on the right side of the dashboard,
attach the clip on the other end of the cable to your ear.
Display window 1 will then display your heart rate after
a short delay.
Heart rate measure using the chest band (optional accessory)
Apply some water on the inner side of the band to the left and right side of the serration and then fasten it to your
chest firmly to prevent it from sliding off and insuring the electrodes are in direct contact with the skin.
If you have in the room many devices that may interfere with the signals of a wireless heart rate measuring device,
then these devices must be located at a distance of at least 1.5m from the heart rate measuring device. If more than
one wireless heart rate measuring systems are used in the same room then only one of these systems may be
located close to the training device.
Warning! If you have a heart pacemaker you should consult your physician to find out if you can safely
use the chest band transmitter!
7
Training
Note: Training with the ergo_memo-card1 is described in the user manual on the companion CD.
Select a starting point
When the starting point setting is set to “ON” (see also p. 5) you can
choose the point at which the training will start with the built-in programs.
Programs
Please
choose
start point
menu
menu
watt
display sample
Press
key
Programs
Watt
Heart rate
Height profile
Special
Personal Prog
Back
Select
“Training”
(turn button)
Press
control
button
Select
“programs”
(turn button)
Press
control
button
press
control button
Choose
“Starting point”
(turn)
watt
display sample
press
control button
Watt controlled programs: the applied load in independent of the speed.
Heart rate controlled programs:
when the heart rate exceeds the set value the load is decreased and vice versa.
Height profiles: not available for this model.
Special programs: strength and RPM programs.
Personal programs: you can create your own programs.
watt
Watt
Standard
Cooldown
Performance test
Manual
Standard programs: you can choose from 28 programs already stored in the machine.
Cool-down: short programs for cool down after the actual training.
Capacity test: use it to test how long you can go under an increasing load.
Manual: you can here increase or decrease the load by turning the control button.
Back
watt
Heart rate
Built-in programs
Manual
Back
watt
Programs
Watt
Heart rate
Height profile
Special
Personal Prog
Back
Zurück
Built-in programs: with the built-in programs the heart rate is directly controlled. The set heart rate
varies in the course of the program and thus the corresponding load. If the heart rate increases
above the set value the load drops automatically; if the heart rate drops below the set value the load
increases.
Manual heart rate program: you decide at what heart rate in pulses per minute you want to train,
and the device will adjust the load so that this value is maintained.
Height profile programs: Not available for this model.
watt
Special
Strength programs
RPM
Back
Strength programs: these programs are based on 15 braking levels (1 to 15), and the effort there
is a function of the pedalling speed. The load in watt corresponding to the braking level and speed is
displayed in window No. 5. The load in watt corresponding to the braking level is determined from
the actual speed multiplied by a factor specific to the program and rounded to 5 watt units.
Constant RPM programs: this program was specially developed for joggers, as they want to run at
their own personal jog frequency (speed).
watt
Personal prog.
Watt
Heart rate
Speed
Back
Watt: you can create your own program for a load independent of the speed.
Heart rate programs: you can here develop your own program that will individually control your heart
rate during the course of the program.
Speed: create a program controlled by the running speed. When your speed drops below the set value,
the load will decrease, when your speed exceeds the set value the load will increase.
watt
8
Training
Programs overview
You will find below a presentation of the available programs:
Test programs
Watt controlled
Program 0
manual program (Watt)
1
WATT
Program 1
Capacity test 25 Watt / WHO-Standard
32 Min.
0
10
20
30
40
2
Standard programs
WATT
0
10
20
30
40
10
20
30
40
0
10
20
30
40
10
20
30
40
10
20
30
40
10
20
30
40
10
20
30
40
0
10
20
30
40
Program 4
Interval training “Medium”
35 Min.
for women and men
with little training experience
Program 5
Interval training “High”
38 Min.
for women and men
with a good training experience
Program 6
Pyramid “Low”
19 Min.
for untrained women and men
age up to 35 years
Program 7
Pyramid “Mid”
43 Min.
for trained users
Program 8
Pyramid “High”
45 Min.
for trained users
50 min
9
WATT
Program 3
Interval training “Low”
33 Min.
Light load training for women and men
with little training experience
50 min
8
WATT
0
50 min
7
WATT
0
50 min
6
WATT
0
50 min
5
WATT
0
50 min
4
WATT
Program 2
Capacity test 50 Watt / BAL-Standard
24 Min.
for trained users
50 min
3
WATT
0
50 min
Program 9
The Alps
23 Min.
for trained users
50 min
9
Training
10
WATT
0
10
20
30
40
10
20
30
40
10
20
30
40
10
20
30
40
10
20
30
40
10
20
30
40
10
20
30
40
0
50 min
17
WATT
10
20
30
40
50 min
18
0
10
20
30
40
Program 11
Mount Everest
40 Min.
for trained users
Program 12
Active Profi Lady
25 Min.
for untrained women
up to 40 years of age
Program 13
Active Sport Lady
22 Min.
for untrained women
up to 60 years of age
Program 14
Beginners Training 1
18 Min.
For young users up to 14 years of age
Program 15
Beginners Training 2
23 Min.
for untrained men up to 70 years of age
50 min
16
WATT
0
50 min
15
WATT
0
50 min
14
WATT
0
50 min
13
WATT
0
50 min
12
WATT
0
50 min
11
WATT
0
Program 10
Matterhorn
30 Min.
for trained users
50 min
Program 16
Body Watching 1
34 Min.
for trained women up to 30 years of age
Program 17
Body Watching 2
53 Min.
for trained women up to 50 years of age
The duration of this training of almost one hour
requires strong will and will make you sweat!
Program 18
Short 1
20 Min.
suitable for squeezing a training
session between two appointments
10
Training
19
Speed training
0
10
20
30
50 min
40
20
WATT
0
20
40
60
80
100
120
21
WATT
0
20
40
60
80
100
120
20
40
60
80
100
120
20
40
60
80
100
120
20
40
60
80
100
120
Endurance programs
20
40
60
80
100
120
20
40
60
80
100
120
20
40
60
80
100
120
140 min
140 min
Program 24
Medium speed training
134 Min.
Program 25
Heavy speed training
134 Min.
20
40
60
80
100
120
Program 26
Endurance load test
“Performance sport”
80 Min.
Program 27
Endurance load test
“High performance sport”
80 Min.
140 min
28
WATT
0
140 min
27
WATT
0
140 min
Program 23
Easy speed training
134 Min.
26
WATT
0
Program 22
Heavy excursion, 100 min
Very demanding training for professional sport
This program has extreme loading conditions! Please do not
develop any exaggerated ambitions and do not overwork!
25
WATT
0
Program 21
Medium excursion, 84 min
Very demanding training for high performance sport
This program with high loads with continually varying loading.
The loading conditions correspond to what is encountered in
competitions.
24
WATT
0
140 min
Program 20
Easy excursion, 70 min
Demanding training for performance sport activity
This program is suited to improve your endurance, to train for
strength and endurance strength and to improve your tolerance
to lactic acid.
23
WATT
0
140 min
22
WATT
0
140 min
Program 19
Short 2rainieren
30 Min.
for trained users, who want
to check out their performance
Program 28
Endurance load test
“Professional sport”
80 Min.
140 min
11
Training
29
PULS
Program 29
preventive, easy short program
20 Min. / max. 130 pulses / min.
light load training for women and men
with little training experience
200
150
Heart rate programs
100
50
0
10
20
30
40
50
60
70 min
30
PULS
Program 30
Average Optimal Program
30 Min. / max. 130 pulses / min.
light loading training for women and men
with little training experience
200
150
100
50
0
10
20
30
40
50
60
70 min
31
PULS
Program 31
long basic endurance program
60 Min. / max. 140 pulses / min.
Endurance training for women and men with training experience
200
150
100
50
0
10
20
30
40
50
60
70 min
Program 32
Basic endurance program with peak loads
50 Min. / max. 160 pulses / min.
Demanding endurance training for women and men with training
experience
32
PULS
200
150
100
50
0
10
20
30
40
50
60
70 min
33
PULS
Program 33
Interval program basic endurance
35 Min. / max. 140 pulses / min.
Endurance training for women and men with little training experience
200
150
100
50
0
10
20
30
40
50
60
70 min
Program 34
Interval program
(average load level)
60 Min. / max. 160 Pulses / min.
Interval training in the basic zone for women and men with training
experience
Program 35
Interval program
(average load level)
70 Min. / max. 170 Pulses / min.
very demanding interval training in the higher heart pulse rate zone
34
PULS
200
150
100
50
0
10
20
30
40
50
60
70 min
35
PULS
200
150
100
50
0
10
20
30
40
50
60
70 min
36
PULS
Program 36
Step test with 10 min load duration
60 Min. / max. 150 Pulses / min.
Load test for the leisure and sport zone
200
150
100
50
0
10
20
30
40
50
60
70 min
Program 37
Senior I, low heart pulse rate
25 Min. / max. 120 Pulses / min.
This program is suited for pulse rate characteristics of senior users
37
PULS
200
150
100
50
0
10
20
30
40
50
60
70 min
Program 38
Senior II, low heart rate
40 Min. / max. 130 Pulses / min.
Demanding endurance training in the lower heart rate zone for active
senior users
38
PULS
200
150
100
50
0
10
20
30
40
50
60
70 min
Cool-Down Programs are the perfect way to end a training.
Program 42
WATT
42
Easy cool-down
10 Min.
For women and men with little training experience
and following a very light training load
0
20
10
5
25 min
15
43
WATT
0
5
10
15
20
44
WATT
0
25 min
5
10
15
20
25 min
Program 43
Medium cool-down
15 Min.
For women and men with training experience a
nd following an medium to heavy training load
Program 45 Conconi 1
Program 46 Conconi 2
Program 47 Cardio program
Program 48 RPM program
Program 50 strength program
Program 77
personal watt controlled program
Program 78
personal heart rate controlled program
Program 79
personal speed controlled program
Program 44
Heavy cool-down
20 Min.
For athletes with high performance training. The program
allows an accelerated regeneration after the most heavy training loads.
12
Training
How to create your own personal programs
Personal prog.
Every user can create one program of each of the following: watt, heart rate and speed controlled
pro-gram. Users number 1 to 3 can create programs with a duration of up to 60 minutes, user
number 4 can create programs with a duration of up to 240 minutes. Start by choosing the type
of program you want to create. Make copies of the blank diagrams provided at the end of this
user manual (page 42) and use them to design your programs.
Watt
Heart rate
Speed
Back
watt
Here is, for instance, the procedure to create a watt controlled program:
Watt
Select Watt.
Select Modify and start “drawing”.
Training
Modify
Turn the control button to the left/right to increase/decrease the height of the bar on the display
until you set the bar to the proper height.
Back
watt
Every drawn bar corresponds to a training duration
of one minute. Display window No. 2 will show the minute at which you are now
located.
1 min.
watt
When you set up this step
(bar) to the required watt
value press the control button. Repeat the same procedure with the following bars.
…
watt
Repeat this procedure until
you finish creating your program.
Display example
for entry step 1
watt
When your program is finished press the function key and answer the question:
“Erase the bars starting here?” Answer “Yes” or “No” (meaning: program ends either after the last value/bar
entered or, if pre-sent, after the last existing value/bar) and select Training.
The same procedure applies also for the modification of an existing personal program.
A program designed on the blank diagram to
look like the illustration to the left will appear
on the screen as illustrated to the right.
WATT
400
300
200
100
0
10
20
30
40
50 min
watt
For heart rate controlled programs you design a heart rate curve instead of a watt curve.
If the heart rate measured during the actual training is below the curve the load will be raised and vice versa.
For speed controlled programs you design a speed curve. When the actual speed during the training is below the curve
the load is reduced and vice versa.
13
Training
Training data
Training data
Actual
Total
Weight
Fat content
Coaching
Back
watt
Display example for
actual training data
You review the training data of the selected user:
- Actual: the training values of the last training
- Total: the values of all the training units together
- Weight: the distribution over a period of 60 days and of 1 year
- Fat content: the distribution over a period of 60 days and of 1 year
- Coaching: the values of the last capacity test and the actual coaching stand
Actual
Ø-kmh
Max-kmh
Time
Distance
23.0
31.0
56.4
18.0
Back
watt
Note: if you don't run a program to its end you should press the menu key
before switching the device off in order to save the training data.
Other
Training
Data
(turn)
(see also the menu diagram pages 39/40)
Fitness mark
The device can carry out an evaluation your fitness.
The measurement principle is based on the fact that the pulse rate falls faster within the first minute following a
load period for healthy, well-trained users than for healthy, less trained users.
If the user presses the Fitness key during a training session, the present training will be interrupted and the load
will be lowered to 25 watts within a few seconds. The graphical screen will display the message “Fitness mark
determination”. The drop in pulse rate within 60sec will be measured (see window no. 2) and the mark computed
according to the following scheme and displayed:
The fitness mark F1 is awarded for a pulse rate drop of more than 25.0% within 60 sec
The fitness mark F2 is awarded for a pulse rate drop of 20.0% to 24.9% within 60 sec
The fitness mark F3 is awarded for a pulse rate drop of 16.0% to 19.9% within 60 sec
The fitness mark F4 is awarded for a pulse rate drop of 12.0% to 15.9% within 60 sec
The fitness mark F5 is awarded for a pulse rate drop of 8.0% to 11.9% within 60 sec
The fitness mark F6 is awarded when the pulse rate drop is less than 8% within 60 sec
The mark of “F 0” is awarded if no usable result can be measured. After the evaluation process the training
program resumes at the same position at which the fitness test was started. The load in Watt is raised within a few
seconds to its value just before the evaluation and the training can be continued.
A fitness evaluation is not possible after the training session is finished.
Graphic window
Fitness evaluation process
A pulse measuring device (pulse sensor ear clip or the cardio sensor chest belt)
must be connected and functional during the whole fitness evaluation process.
The measuring process takes one minute and its progress is displayed.
1. Train at least 15 minutes in the OK-area.
2.
3.
fitness
Abbrechen
Press the fitness key.
Window No. 2 displays an “F”, and a timer from 1 to
60 seconds during the measurement process.
4. Continue pedalling “loosely” at the load of
25 Watt during the measurement process.
5.
After one minute window no 2 displays the F mark
and the system plays a short melody.
Example for
fitness mark 2
14
Conconi-Test
Description
The Conconi Test / E
The Conconi test was originally developed for running to control the training intensity and to determine the
performance ability. This test uses the fact that the heart pulse rate increases linearly with the load. This is true
only up to a certain pulse rate and load. The pulse rate curve deviates from the linear if the load is further increased
above this point (see fig. 3 page 18). This deviation point indicates the so-called anaerobic threshold according to
researches by Conconi (for the Conconi test also known as the Conconi threshold).
The anaerobic threshold is the point where the organism produces more lactic acid than it can eliminate. This
means that, from this point, lactic acid starts to accumulate in the body and eventually leads to a load
collapse. The threshold is used to determine the training domains and to evaluate the performance ability
(you will find some practical hints about determining the training domains below).
The main advantage of the Conconi test, as compared to e. g. the lactate performance test, is the small-ness
of the necessary financial, technical and personal investment. At this point we should also mention that the
Conconi test is controversial among many training professionals. It is widely used in Italy and Switzerland.
Others have a critical approach toward the Conconi test for the following reasons:
A maximum loading is necessary when undergoing the test. For this reason it is recommended to pass a
medical examination before taking the test. The Conconi test should only be taken by healthy individuals.
About 20% of all the tests do not show a deviation point. Sometimes the pulse rate increases linearly up to
more than 190 pulses per minute.
Nevertheless, the Conconi test permits an easy and accurate control of the training for many athletes, and an
evaluation of their performance ability.
Taking the Conconi test with the ergo_lyps:
The Conconi test should in principle starts with an easy start-up program. One of the easier and shorter
warm-up programs should be used here. The pulse rate should not exceed 130 pulses per minute during
warm-up. Since the performance ability of users is widely spread, two special programs are provided for
taking the Conconi test.
Program 45 begins with a load of 60 watts and is intended for users with lesser training experience, while
program 46 is intended for the more capable users. The load is increased by 20 watts every program step for
both programs.
You will find a test protocol on page 17. Write down the pulse rate values achieved and the corresponding
load levels (in watt). You can then fill in the values for protocol 1 for the Conconi test (program 45, from 60 to
400 watts) in the upper part of the protocol.
For the higher Conconi test corresponding to protocol 2 (program 46) fill in the heart rate values for load
values of 120 to 700 watts maximum.
The test should be terminated whenever the user feels he reached his maximum load capacity. An overload
should absolutely be avoided!
15
Conconi-Test
Test programs
menu
menu
Press
key
Press
Control
button
Select
“Training”
(turn)
Press
Control
button
Press
Control
button
Select
“Programs”
(turn)
Press
Control
button
Select
“Performance test”
(turn)
Select
“Watt”
(turn)
Press
Control
button
Select
45 or 46
(turn)
Conconi-Test program 45
Watt
12,28 12,58
11,63
10,92
11,97
400
300
11,28
10,08
10,52
9,12
9,62
7,97
200
8,57
100
3,50
2,0
6,55
5,70
4,70
7,30
0
0
3
2
1
5
4
6
9
8
7
10
11
13 min
12
Conconi-Test program 46
Watt
11,13
400
11,57
10,17
10,67
9,10
300
9,65
7,88
8,52
200
2,72
1,47
100
5,68
4,80
3,82
7,22
6,48
0
0
1
2
3
4
5
6
7
8
16
9
10
11
12
13
14
15
16 min
Conconi-Test
Test protocols
ergo_lyps 8080 TRS 3
TEST PROTOCOL / Conconi Test
Name............................................. Date..........................
Time...................
Heart pulse rate
in beats / min
PROTOCOL 1 / Program E 45
PROTOCOL 2 / Program E 46 (from 120 to 400 Watt)
Power in Watt
Heart rate at rest .......................
Notes about the test
60
80
100
120
140
160
180
200
220
240
260
280
300
320
340
360
380
400
Program E 45 ( 60 - 400 Watt )
120
140
160
180
200
220
240
260
280
300
320
340
360
380
400
Program E 46 ( 120 - 400 Watt )
Heart pulse rates
after 1 minute
after 2 minute
after 3 minute
Conconi test program 45 (blank diagram)
Heart rate in beats/min
Heart rate
200
Maximum loading is necessary when running the
Conconi test. Therefore we recommend
undergoing a medical examination before taking
the test. Only healthy individuals may take the
Conconi test! There is no valid correspondence
between the Conconi threshold and the lactate
threshold.
150
100
50
0
0
100
200
400
300
17
Watt
Conconi-Test
Description
Evaluating the Conconi test
After the achieved heart rates have been properly recorded in the protocol, you can proceed with the
graphical evaluation of the Conconi Test. Therefore construct a co-ordinate system as shown in figure 1
below. The horizontal axis (X axis) represents the performance in watt, starting with the lowest test value.
For the Conconi test program 45 this value is, for instance, 60 watts. The vertical axis (Y axis) represents
the heart pulse rate for every test step. In the example below the heart rate for the first test step (60 watts)
is around 105 beats per minute, for the second step (80 watts) it is 120 beats per minute, etc.
After all the heart pulse rate points have been represented in the co-ordinate system, proceed with joining
the individual points to form the line representing the linear increasing portion of the curve. In the figure this
is the straight line with the steep slope.
The higher points (higher load steps) will generally lie underneath this line. These points can also be joined
by a straight line as shown in the figure (this is the second line with the lesser slope).
The intersection of these two lines is shown in fig
1 by an arrow.
Heart pulse rate in beats / min
200
This intersection point is called the deflection
point and corresponds to the anaerobic Conconi
thresh-old. In fig. 1 this threshold is at 181 beats
per minute. This heart rate is determined by
drawing a straight line parallel to the lower axis
(X axis) starting at the deflection point toward left.
The point where this line intersects with the
vertical Y axis (heart rate) is the point we want to
determine (in our example 181 beats/min.).
180
160
140
120
100
80
60
100
140
180
260
220
300
340
380
Power in Watt
Fig. 1: Graphical evaluation of the Conconi Test
Heart rate in %
Conconi threshold = 100 %
The individual training domains can be determined
using the heart rate at the deflection point (in our
example 181 beats/min.) as shown in figure 2. The
heart rate at the deflection point is assigned a value
of 100%.
100
WSA
90
GA 2
80
GA 1
80%
70
Compensation
60
100
140
180
220
260
300
Performance in watt
Fig. 2: Determining the training domains
18
Conconi-Test
Compensation training
The compensation domain lies underneath 70 percent. In our example this represents the region below 127 beats per
minute. Training in this domain is for active recovery.
GA 1 - Training
The GA 1 domain lies between 70 and 80 percent. In our example this corresponds to 127 to 145 beats per minute.
Training in this domain sets the foundation of the performance abilities. The most part of the training should occur in this
domain (for endurance sports).
GA 1 Training is the central element of biking in the preparation phase.
Function
Development of basic endurance as foundation for all the more intense training units.
Training method
The actual training follows the continuous training method with constant load and a pedalling speed of 80 to 110 RPM,
duration of 2 to more than 5 hours.
GA 2 - Training
GA 2 - Training, more intensive biking, is used for achieving a higher loading for experienced athletes with a
good basic endurance ability.
Training method
Warm-up and biking for 10 to 30 minutes,
since GA 2 Training puts high loading on the musculature and circulation system.
High heart rate limit of 80 to a maximum of 90 percent (in our example 145 to 163 beats/min )
The actual training follows the interval method (e. g. 8 x 4 min with 2 min. at no load)
or alternatively the continuous method.
CSE (competition specific endurance) Training
Most intensive form of training for top athletics shortly before and during competition phase.
The heart rate increases up to 100 % of the Conconi threshold (in our case 181 beats per minute).
CSE training is run in the interval methods (e. g. 8 times 1 minute with 3 minutes at no load).
Function
Achieving maximum fitness. Getting used to very high lactic acid concentration in the musculature.
Improved elimination of lactic acid.
Training method
Warm-up and biking for 10 to 30 minutes,
since CSE Training puts high loading on the musculature and cardiovascular system.
High heart rate limit up to 100% of the Conconi threshold.
The actual training follows the interval method (e. g. 8 times 1 minute with 3 min. at no load).
19
Coaching
Cardiovascular training
What is Coaching?
Fitness training
Muscle build-up
Weight / fat reduction
The “Coaching” concept introduces an intelligent training program offering the user four different training objectives
(see illustration above) to choose from. The ergo_bike will compute and monitor an optimal training plan based on the
performance evaluation, available time, and an individual performance test. This training plan will be continually
updated and adjusted through regular and automatic control of the training results to ensure an optimal training course
and success.
Warning!
1. The Coaching program was developed for users in good health condition. Therefore we urgently
recommend that users undergo a thorough medical examination to determine their physical ability for sport
activities before starting a training with the Coaching program. Should a user feel ill during a coaching
training, he or she should seek medical advice about physical activities and continuing the training.
2. The user is required to enter the amount of time he or she can or want to train (the number of training units per
week), and to evaluate his or her own fitness level. The user should not overestimate his capacity regarding the
number of training units and their difficulty grade. In sport activity overworking does not help, while a thoughtful and
controlled training plan leads generally faster and more efficiently to its objective.
The same applies also to the self evaluation of the user physical performance capacities before the start of a Coaching
plan. A user who evaluates his capacities at a lower level will achieve his training objectives safely and without
overworking, even though in a longer period of time.
3. The user must take a capacity test at the start of the Coaching plan, and then once every 4 weeks. The computer
uses this test to determine the load prescriptions (e.g. the maximum load in watt and the maximum heart rate during
the training). This test is a full load test, and the user should only take it to the point where he can go without
overworking or overloading himself.
4. When used properly, the coaching program will not turn users into high performance athletes. The goal of this
program is to preserve your health and to increase your performance capacities, and to make you globally “fit”.
Entering Personal Data
The following basic prerequisites must be satisfied, and the important settings must be done on the dashboard
before the coaching program can be started:
1. A user should train with the coaching program only with the pulse sensor always on (ear clip or even better with
the cardio sensor chest belt) (see page 7).
2. The program must be assigned to a specific user identification number 1 to 4 (see page 4).
3. Since the program depends on many personal exact data, all the required data and alarm values must be
entered before starting the program (see page 5) for the first time. Take into consideration that, as a special
case for the Coaching program, the data about the training duration (time), the distance (km), and the kJoule
burned need not be entered. These values are computed by the Coaching program. Any data entered for the
alarm values for the training duration, the distance, and the kJoule burned will be ignored by the Coaching program
or set to their default value (in this case 0).
20
Coaching
4. Personal performance evaluation
The users must evaluate their personal performance capacities before starting a training with the Coaching
program. The following section should help the users evaluate their own performance capacities:
0=
Beginner:
The user does not have any training experience or practices physical activity only occasionally and very irreg
ularly. This applies also for users who are returning from a long training interruption (e.g. because of a wound
or an illness).
1=
Average:
You do sport regularly. But you are mainly oriented toward recreational sport activities, less toward endurance
sport. The training frequency is about 1 to 2 hours per week.
2=
Advanced:
You do regularly endurance sport (e.g. jogging, biking, etc.).
The training frequency is about 2 to 4 hours per week.
3=
Very well trained:
You have an extensive training experience in endurance sport. Your physical performance and load capacity is
above average. The training frequency is at least 3 hours per week, preferably in endurance sport.
5. Setting the training type
menu
menu
Press
key
Select
“Settings”
(turn)
Press
Control
Button
Select
“Personal data”
(turn)
Press
Control
button
Press
Control
button
Select
“Coaching”
(turn)
With this setting the user sets his personal training target.
Select
“Training type”
(turn)
Once set, this setting can be changed only after confirming the safety message “Delete all
data?”. If this message is confirmed by turning the control button to select “Yes” and pressing
the control button, then all the programmed Coaching settings and stored training data for the
actual training plan will be permanently erased! After this step, a new Coaching training can
be started with the setting of another training objective. If you don't wish to erase the available
data, and thus continue training with the actual training target, then you should select “No” by
turning the control button and press it to confirm.
Training type
Cardiovascular
Weight/fat
Fitness
Muscular
development
Back
Training type
WARNING:
Delete
all data?
No
Back
No
or
yes
turn
press
You can now begin training with the Coaching program.
The Coaching program starts by determining the performance capacity of the user by mean of a capacity test.
21
Coaching
Training with the Coaching program
1. Taking the capacity test (program 1)
menu
menu
press
menu
key
press
control
button
select
“Training”
(turn)
Select
“Coaching”
(turn)
(the load increases by 25 watt every 2 minutes)
1
WATT
After starting the ergometer
the graphic screen displays
the diagram of the capacity test.
400
300
200
100
0
10
20
30
40
50 min
WHO Standard Capacity Test 25 watt
(32 Min. / max 400 Watt)
watt
menu
Do not exceed your personal load limit!
Interrupt the training immediately if the
load or effort becomes too heavy!
press the “Menu” key
to interrupt the test
You should avoid extreme efforts on the day before the test and
on the day of the test. Sleep sufficiently before the test. You should
postpone the test if you feel ill (e.g. cold with fever). If you are un-sure,
consult a physician. Please keep a pedalling speed of 40 to 60 RPM during the test.
In order to take the capacity test you must have the physical capacity to run the test program at
least up to 75 watts, in other words you must complete the first 4 minutes. Otherwise the test evaluation
will read “not run” and any further training with the Coaching program will not be allowed! If this is the
case, please retake the test and run it at least up to 75 watt. This load value is far below the capacity of
the average user and according to medical research within the reach of every healthy adult user. If you
have trouble reaching this load value then you should not continue with your Coaching training! In this
case please consult a physician and take a thorough medical check, and talk with your doctor before you
continue training with the ergometer. The “Coaching training” has been designed for use exclusively by
healthy users!
The evaluation test is complete at the latest when the user reaches the load of 400 watts after 32 minutes. Though,
it is more realistic to expect that a user will not have the capacity to run the test to 400 watts (normal case!!) and
will interrupt the test by pressing the “Menu” key because he lacks the strength or to avoid an overload. If you feel
tired or exhausted (avoid overloading) please simply stop pedalling and confirm the end of the test by pressing the
Menu-key! The Coaching program will automatically terminate the capacity test when you reach the higher heart
rate limit corresponding to your age, gender, capacity, etc!
Attention, the test will possibly be terminated too early if the higher heart rate limit setting value is too low.
After the evaluation test is taken the system will display “OK” as a confirmation of the completed evaluation test.
The program will take the actual capacity values into account to determine the personal training plan, and compares them with the test results of the successive capacity tests that must be taken at 4 weeks interval
22
Coaching
Attention, a completed and accepted capacity test counts as the training activity
for one calendar week. Thus the actual coaching program can only be continued on
Monday of the following week. Obviously, each user is free to train with other
programs during this waiting period, if his fitness condition allows it.
Back
2. Display the training plan / training unit
Running the training unit
menu
menu
Press
key
Training plan
Week 37100%
Week 3833%
Press
Control
button
Press
Control
button
Press
Control
button
Select
“Training”
(turn)
Back
Training
Unit 1 100%
Unit 2 --%
Unit 3 --%
Select
“Coaching”
(turn)
The evaluation test was run in the first training week (week 37),
and that week is then completed to 100%. The weekly training
for the actual week 38 has been completed to 33%. The system
displays dashes “---” instead of the numbers for the calendar
weeks that did not start yet. When the user confirms the selected
training week the system displays the next screen “training”
(training units).
The screen shows that the first training unit (unit 1) has been
completed to 100%. Since no training activity has yet been
completed for the second training unit the system displays
dashes “--” instead of numbers. The program is ready to run this
training unit.
Back
When the user confirms the selected training unit, the system displays the message
“Coaching Pr. xx/xx min, put on the heart rate sensor and start training”
Press
Control
button
When you start the training the system displays the
diagram of the first program selected by the computer
for the “training unit”
e.g.
watt
The not completed training units (<100%) will be resumed at the minute at
which the training were interrupted. The training unit not completed to 100%
will always be concurrently selected. The display will show to the side the
percentage of completion of the respective unit (e.g. 80%). The training can
only proceed with the following unit (also selected) after the incomplete unit
has been completed to 100%. The selection (highlight) of the incomplete unit
is then removed.
23
e.g.
Training
Unit 1 100%
Unit 2 80%
Unit 3 --%
Back
Coaching
3. Training process
The Coaching program can only help the user achieve his intended goal from training if the prescribed training
units are run consciously. This should be the normal situation!
In the case that a user must deviate from the training plan prescribed by the Coaching program because of
illness, vacation or others reasons, the Coaching program offers possibilities to adjust the training.
A training unit (TU) is not completely run:
The system displays the message shown to the right the next time the
Coaching function is called and before the display of the training units selectio
n. It is confirmed by pressing the control button. The number of the incomplet
e units will be displayed after the word “unit” instead of the “x”. This message will
not appear after this unit is completed.
Deviation from
training plan
.
Continue
incompletely
run unit x
press
The user runs too few TUs during the calendar week
The message to the right will be displayed at the start of the following week,
after the training type is selected and before the training plan. It is confirmed
by pressing the control button. This message will not be displayed as soon as
.
the missing training unit(s) is (are) completed.
Deviation from
training plan
Catch-up on
the missing units
of last week!
press
Catching up incomplete training units
In the case of training interruption, you have the possibility to downgrade the training plan using the control button. It is
then possible to select a previous week (backward scrolling). Before the start of every training session, the computer runs
a review of the training status and displays the results on the graphic display, with information about any eventual
deviation from the training plan. This could be, for instance, missing training units from the previous week, which the
computer determines immediately at the beginning of the training session in the following week, and signals with the
message “Deviation from training plan” ---- “Catch up on the missing units of the past week!” (see illustration
below). The missing units (in the example below week 39) of the previous week must be completed to 100% before the
.
training of the actual week 40 can start.
Deviation from
training plan
Training plan
Week 39 75%
Week 40 --%
Training plan
Week 39 75%
Week 40 --%
Catch-up on
the missing units
of last week!
press
(Confirm)
Back
Turn to select
week 39
Back
In the situation described here, the previous week (e.g. week 39) will remain selected (highlighted) until the missing
25% training units are completed and week 39 is complete to 100%. Only then you will be allowed to start the training
of the actual week 40. The highlighting (selection) of week 39 will be removed when the value reaches 100%.
If the training is interrupted for a longer period (1 to X weeks) because of illness or vacations, it be-comes then
impossible to catch up with the missing training units in a short period. For this situation, the Coaching program offers
the possibility to downgrade a variable number of weeks. In the example below, the training was interrupted for 2
weeks (week 40 and 41), and 67% of the last training week, which is only completed to 33%. In this situation the
program recommends downgrading to week 39. Then week 39 will also have to be completed to 100% before the
training can resume with the actual week 42.
24
Coaching
Downgrading the Coaching Program by 2 weeks
Window no. 6
Deviation from
training plan
-- weeks are
missing
Training plan
not complete!
press
(confirm)
Deviation from
training plan
Downgrade your
training plan
at least to week 39!
press
(confirm)
This message is displayed automatically
Turn back to
week No. X
Week x e.g.
Week 39
Training plan
Week 39 75%
Week 40 --%
Week 41 --%
Week 42 --%
Back
Confirm downgrading
Downgrading sequence
press
(confirm)
The lower target week of the downgrade can be set by mean of the control
button. When a downgrade is confirmed, all the weeks downgraded, which
were already completed, and all their training units will be reset to “0%”.
Only the completed units of the week to which the downgrade is done
(e.g. 75%) will be preserved. Also, now the actual date (e.g. week 42) will
be used for the downgraded week. The illustration to the right (above) shows
the display after a downgrade of 2 weeks to week 39. Both the downgraded
week 39 and the actual week 42 are highlighted (selected). The selection
of the downgraded week will be removed when it is completed 100%. Only
then the training can resume with the actual week (e.g. week 42).
The missing training units (25%)
are completed later.
Training plan
Week 39 100%
Week 40 - - %
Week 41 - - %
Week 42 - - %
Back
25
Coaching
4. Downgrading
Downgrading the Coaching program further than the minimum recommendation
(downgrading further than prescribed)
Deviation from
training plan
-- weeks are
missing
Training plan
not complete!
press
(confirm)
Deviation from
training plan
Downgrade your
training plan
at least to week 39!
press
(confirm)
Training plan
Week 39 75%
Week 40 --%
Week 41 --%
Week 42 --%
Back
Turn back to
week No. X
e.g. week 38
This message is displayed automatically
Downgrading sequence
If, following an interruption, a downgrade is done to a week with partially completed training
units (for instance only 25%), then the user will have to first complete the missing training
units to 100%. This represents a non-negligible extra load for the user, particularly if
weakened by an illness. Because the missing training units (e.g. 75%) must be completed in
addition to the normal 100% training units of the actual week (week 42) during the actual
training week (e.g. 42) (this would total to 175%).
Therefore, we recommend giving up the last completed training units (e.g. the 25%), and to
downgrade the training one more week (e.g. to week 38 / illustration to the right).
Consequently, the training profile will be extended by 3 weeks.
The illustration to the right shows that the training can resume with the actual week (42),
without completing the training of week no. 39 that is interrupted at 25% when the training
plan is downgraded by an extra week to week no. 38, which is completed to 100%.
Training plan
Week 38 100%
Week 40 - - %
Week 41 - - %
Week 42 - - %
Back
Training plan
Week 38 100%
Week 40 - - %
Week 41 - - %
Week 42 100%
Back
Start the training unit (e.g. week 42)
When the actual week (e.g. week 42) is completed to 100% the reference to the downgrade
is removed (e.g. to week 38) and the system displays a normal training plan (see illustration
to the right below).
Training plan
Week 42 100%
Week 43 --%
From now on, the training will proceed normally, i.e. as soon as week 42 is completed to
100%, the training plan proceeds with week 43.
Back
The user is on vacation and does not train for one or more complete weeks:
The next time the coaching function is called the message shown here
will be displayed after the training type is selected and before the training
plan. The “x” in the message text will be replaced in the actual message
by the number of the last calendar week whose completed part is > 0 %.
You will find more recommendations about personal and individual downgrading on pages 27 and 28 in the case of illness, prolonged absence,
many missed training sessions, etc.
Deviation from
training plan
Deviation from
training plan
-- weeks are
missing.
Training plan
not complete!
Downgrade your
training plan
XX
at least to week
....
press
(confirm)
26
press
(confirm)
Coaching
Notes about downgrading in the case of training interruption:
We advise beginners or the lesser active sportspersons, in the case they need to downgrade following a
prolonged training interruption, to downgrade farther behind than the program suggests. The lost training is
nevertheless very small and will be rapidly recovered.
A well-trained user can close the interruption by doing a shorter downgrade and compensate the training. The
training structure of the coaching is well thought and has a very cautious approach particularly towards health
risks.
It is very often the case that a very high training frequency is selected at the start of a Coaching plan, which
cannot be held in real life. If you get the message “Deviation from training plan” many times, do not hesitate to
reduce the training frequency. An essential aspect of the training on an ergometer is that it be done with a
positive state of mind. In any case, you should avoid stress during the training!
1. Training interruption because of vacation and without sport activities during that period:
1a)
1 Week training interruption:
Please continue with the last training week not completely done.
1b)
2 Weeks training interruption:
Please downgrade by at least 3 weeks in the training plan.
1c)
3 and more weeks training interruption:
Please downgrade by at least 4 weeks.
1d)
In the case of a training interruption of more than 6 weeks:
we advise the user, particularly beginners, to restart the Coaching plan from the beginning.
2. Training interruption because of illness.
You should seek the advice of your physician before resuming the training. Many illnesses (e.g. infection with
fever) will make you lose more physical capacity and endurance than a normal training interruption. Given the
high number of possible illnesses we can only provide a very general overview.
2a)
1 week training interruption because of a common, light infection:
Downgrade by about 3 to 4 weeks. We recommend consulting your physician before resuming the training.
2b)
2 weeks training interruption because of flu infection with fever:
Downgrade to at least 4 weeks. We recommend consulting your physician before resuming the training.
2c)
We urgently recommend you consult your physician about resuming the training in the case of any
serious illness (e.g. viral flu, orthopaedic problems, wounds).
27
Coaching
Loading scheme of the Coaching program?
Trainings type = cardiovascular training: (sample with 3 training units per week)
This type of training applies carefully its loading and leads to a healthy increase of the capacity of your
cardiovascular system. The training units set by the Coaching program can be different from the samples cases
presented here (e.g. depending on the personal performance evaluation, etc...).
1st Unit: 20 min with low heart pulse rate for cardio training.
2nd Unit: adjusted watt controlled built-in program no. 6 for 19 minutes.
3rd Unit: pulse controlled built-in program with individual pulse rate prescriptions.
After about 24 weeks of training:
1st Unit: 45 min with low heart pulse rate for cardio training.
2nd Unit: pulse controlled built-in program with individual pulse rate prescriptions.
3rd Unit: adjusted watt controlled built-in program no. 4 for 35 minutes.
Training type = weight reduction: (sample training with 4 training units per week)
This training type applies a cautious loading at low heart rates. The training units have an extended training
duration (up to 70 minutes). These units require endurance and motivation from you, but they help you achieve
a stable weight reduction. Naturally, under the condition that you keep your daily calorie intake constant. Using
this program, you can achieve a weight reduction of about 1.5 to 2 kg in the first 4 weeks, and then about 200
to 500 gr. per week in the following weeks.
1st unit: 30 min training with low heart pulse rate to burn fat.
2nd unit: adjusted watt controlled built-in program no. 12 for 25 minute.
3rd unit: heart rate controlled built-in program with individual heart rate prescriptions.
4th unit: heart rate controlled built-in program with individual heart rate prescriptions.
After about 21 weeks of training
1st unit: 50 min training with low heart pulse rate to burn fat.
2nd unit: heart rate controlled built-in program with individual heart rate prescriptions.
3rd unit: adjusted watt controlled built-in program no. 17 for 53 minutes.
4th unit: heart rate controlled built-in program with individual heart rate prescriptions.
Fitness training: (sample training with 5 training units per week)
This training type helps you achieve endurance and fitness. It focuses on low intensity, somehow longer training
units.
1st unit: adjusted watt controlled built-in program no. 3 for 33 minutes.
2nd unit: 30 min heart rate controlled built-in program with individual heart rate prescriptions.
3rd unit: adjusted watt controlled built-in program no. 12 for 25 minutes.
4th unit: 35 min training at the individual endurance heart rate.
5th Test for re-evaluation and determination of your personal heart rate at training.
(This test will be carried out every 4 weeks, as was already mentioned.)
After about 18 weeks of training:
1st unit: 50 min training at the individual endurance heart rate.
2nd unit: heart rate controlled built-in program with individual heart rate prescriptions.
3rd unit: adjusted watt controlled built-in program no. 4 for 35 minute.
4th unit: heart rate controlled built-in program with individual heart rate prescriptions.
5th unit: adjusted watt controlled built-in program no. 17 for 53 minute.
28
Coaching
Muscle build-up (sample training for 6 training units per week)
This training type leads to improving fitness and endurance. In addition to endurance training units, you will be
required in this program to run training units with low pedalling speed (60 RPM). This will reliably increase your
strength and endurance power, and support muscle build-up in a proportional way.
1st unit: adjusted watt controlled built-in program no. 3 for 33 minutes.
2nd unit: Strength program for 20 min for muscle build up.
3rd unit: 20 min heart rate controlled built-in program with individual heart rate prescriptions.
4th unit: Strength program for 25 min for muscle build up.
5th unit: adjusted watt controlled built-in program no. 7 for 43 minutes.
6th Test for re-evaluation and determination of your personal heart rate at training.
After about 11 weeks of training:
1st unit: adjusted watt controlled built-in program no. 5 for 38 minutes.
2nd unit: Strength program for 40 min for muscle build up.
3rd unit: 35 min heart rate controlled built-in program with individual heart rate prescriptions.
4th unit: Strength program for 35 min for muscle build up
5th unit: heart rate controlled built-in program with individual heart rate prescriptions.
6th unit: adjusted watt controlled built-in program no. 8 for 45 minutes.
You should keep a pedalling speed of 40 to 60 RPM with the strength program, which corresponds to
the requirements of the coaching program.
You can train with the Coaching program for a maximum of 80 weeks. If you want to further use the
Coaching program you would have to delete all the data.
End of
Coaching!
Delete
all data?
No
Back
watt
If the date is not correctly set (e.g. after battery replacement or in the case of a weak battery)
the system displays the following message:
Attention
Date OK?
Delete
all data?
No
Back
watt
Set the correct date.
29
Team Award
Your perseverance will be rewarded
Teamaward
Take part in the
Congratulation
for completing
20,0000km!
120123456120
Back
Team Award
lyps
Team Award awarding levels
2,000 km
400 km
4,000 km
8,000 km
menu
menu
Press
key
Select
“Information”
(turn)
Press
Control
button
Press
Control
button
Select
“Team Award”
(turn)
Graphic screen
If you send us the code number displayed in window no. 6, together
with your name, your address, your email address, the serial
number of your device (on the name plate), and the serial number of
your dashboard (see “Menu”, “Information”, “Version Data”,
“Serial Number”); we will send you an award for your performance.
Give us a chance to surprise you!
And you will be admitted in the “Hall of Fame”.
Teamaward
Congratulation
for completing
20,0000km!
120123456120
Back
You can enter the required information directly to our web page
at www.daum-electronic.de, under the heading “Team Award”
(the simplest possibility),
or send us an email to “[email protected]”,
or send us a fax to ++49 / (0) 911 753714,
or write to us to
daum electronic GmbH,
Team Award department
Flugplatzstr. 100,
D-90768 Fürth
30
Confirmation code for the
Team Award
The Relaxation Function
The relaxation function is a Biofeedback process that is carried out by measuring the electrical resistance of the skin.
The measured values are indicated by means of optical and audio signals.
Biofeedback is thus the translation into perceptible signals of physiological processes occurring in our body, which our
senses can barely, or not at all, perceive. The relaxation function is a way of helping you relax and eliminate stress. You
should use this option particularly after a physical endurance training.
Connecting the relaxation sensor
1. Take the Velcro bands of the fingers' sensor out of the package and open them.
2. Place the open tape on one of your fingertip. Make sure there is good contact between the silver buttons and your skin.
The wire from the tape should lead away from the back of your hand.
Velcro tape
Sensor button
3. Put down the side of the Velcro tape with the sensor button on your index
finger and wrap the other side around it and press it firmly in place.
4. Wrap the other tape around your middle finger in the same fashion.
5. Plug the connector of the relaxation sensor
into the “relax” input socket no. 9 on the dashboard.
Relax sensor
connector no. 9
Relaxing
Relax program / process description
menu
menu
Press
menu key
Select
“Training”
(turn)
Press
Control
button
Press
Control
button
Select
“Relax”
(turn)
Display window nr. 5 switches from Watt to Relax.
A value is displayed, which starts at 199.
199
5.
The displayed value drops gradually as you relax after training, and increases with the stress
level.
Watt relax 5.
The Relax-value can drop all the way to almost zero. The user should therefore contribute to
his/her relaxing and avoid any other stress. You can support this process by getting off the
device and sit in a relaxed position, or lay down close to the training device and calm down.
0
The graphic screen supports the transparency of the relaxation function by displaying a curve
representing the relaxation process. The displayed line shows the transition from the
maximal value (199) to the minimum relax value (0). This process is visible in display window
nr. 5. The same process is presented in a graphical form in display window nr. 6
(see illustration to the right).
The actual relax level is indicated by a blinking bar in the display window.
The complete relaxing process is divided into 25 levels. A short beep sound signals
when each level is reached. The successive beeps are each lower in tonality.
watt
31
5.
Transport and storage
Transport
The rear standard feet are equipped with roller casters to ease moving the device. A
handle is located in the left front longitudinal bar, you can pull this handle out after
loosening the screw. Use this handle to lift and move the device (see illustration). Please
take care to keep your back straight and to avoid injuries.
Also move the device on flat floors to avoid damaging the bearings.
Storage
Store the device in dry and warm rooms, at a temperature range of 0 to +25°C. The
humidity ratio should not exceed 70%. If you store the device for an extended period in a
cold room you should let it warm up again before using it.
15
Accessories (sold separately)
The wireless chest belt
We recommend using a wireless not coded chest belt to achieve a better and more precise heart rate measurement.
The corresponding receiver is already built into the device.
ergo_memo-card 1
When it is inserted into the card reader in the
dashboard, the training data are saved automatically on
the ergo_memo-card1. The card can be loaded with
individual training instructions and personal data of the
user. These are then automatically read
by the dashboard, making unnecessary
to manually set the dashboard.
Multifunction serial/USB Bluetooth-Adapter
The serial/USB Bluetooth-Adapter is intended for wireless
connection, Standard Bluetooth 2.0, of the daum training
ergometer to a PC. Alternatively it can be used as a USB
/serial adapter between the training device and the PC.
Range about 10m
(depending on the
building conditions)
Order No.: 9091024
You will find more accessories on our Internet site at: www.daum-electronic.de
32
Specifications
120
Computer-controlled, full electronic eddy current brake
operating in the speed ranges shown in the diagram.
Load range:
25 to 400 watt
Speed range:
0 to 199 RPM
Loading precision:
Loading levels:
110
100
90
Rotational speed
Braking system:
+/- 10%
In 5-Watt increments, manually adjustable
80
70
60
50
40
30
25
100
200
Power
300
400
Watt
Drive:
Single-stage, maintenance-free steel-ribbed belt
drive in a spring supported drive unit.
Flywheel:
Machined
Bio Feedback Function:
Bio feedback based on the electrical resistance of the skin,
measurement via finger electrodes, approx. 100 KOhm to 3 MOhm,
self calibrating, display on LCD Panel in 255 levels and audible time controlled relaxing melody.
Fitness level:
Six fitness levels grading, displayed on LCD panel.
Displays:
2 liquid crystal panels for heart rate, distance, speed, time, load in Watt, kJoule burned,
pedal speed (RPM) and training time. 1 graphic display / 76 x 64 pixels / total of 4864 pixels.
Heart rate measurement:
On the ear, measuring range 50 to 199 pulses/min.;
telemetric using Cardio sensor chest belt. (optional accessory).
Limit values settings:
Heart rate, distance, training time, kJoule, maximum load in watt
Alarm signals:
Acoustic and optical
Weight:
Approx. 75 kg
Dimensions:
W / H / L 55 cm x 155 cm x 105 cm
Power supply:
230 V alternating current, 50 Hz, 55 W
Safety class:
2
Technical safety recommendations:
Compare the supply voltage on the nameplate on the housing with your local supply voltage prior to plugging the power cord
to the power supply. Contact you dealer If the values are not the same.
The device is completely disconnected from the power supply by pulling out the power cord, therefore it should always be
plugged into an easily accessible socket.
If the dashboard were subject to operational troubles due to static electricity turn the device OFF and then back ON again
using the main switch.
Areas of application:
The device is suitable for therapeutic utilisation at home. (it is manufactured in compliance with DIN EN 957-1/9 Class A)
Application class: class S, H, I
It does not meet the requirements of medical diagnostic applications (clinical use).
33
Technical data
EC Declaration of Conformity
We declare under our sole responsibility that the
product:
ellipse ergometer
model:
ergo_lyps 8080 TRS 3
article number:
9056282
complies with all applicable requirements of the following prescriptions:
2004/108/EG EMC Electromagnetic Compatibility
2006/95/EG
Low Voltage Directive
Applied standards:
EN 957-1:2005
EN 60601-1-2:2007
EN 60335-1:2007
daum electronic gmbh
Flugplatzst. 100
D-90768 Fürth
Tel.: ++49 (0)911 / 9 75 36-0
Fax: ++49 (0)911 / 9 75 36-96
Fürth, 18/12/2009
34
Glossary
Aerobic zone. The training phase during which the load on the muscles is enough to keep them supplied with oxygen,
but not enough to cause an overproduction of lactic acid (aching muscles). Aerobics also makes use of the aerobic zone.
BMI. Body Mass Index
Bio-Feedback. Acoustic and/or optical feedback on the metabolism and condition of the body.
Coaching. Automatic training control oriented towards predefined training objectives.
Distance. Distance covered in kilometres (km)
Energy balance. The balance between energy intake and energy usage. There can only be a “balance” if intake and output
are the same. For example, in Germany every person consumes on average 400 - 500 Kcal more than he or she can use.
Joule ( Abrev.: J ); kilojoules (Abrev.: kJ) = 1000 Joule; Mega Joule (Abrev.: MJ) = 1000000 Joule.
Energy unit named after the British physicist James Prescott Joule. (see Calorie)
Calorie (cal). Energy measurement unit. Officially obsolete, but still in common use. It refers to thermal energy in particular.
The conversion factor to the unit in use today (J): 1 cal = 4.1868 J, or the other way around 1 J = 0.2388 cal
LED. Light Emitting Diode: when current is passed through a LED it emits light, either visible or invisible.
It is used for indicator lamps or remote controls.
Sore muscles. Painful phenomenon of the muscles tissues, occurring when the aerobic zone is exceeded leading to an
overproduction of lactic acid. In order to avoid it, the ergo_bike compares measured data, input parameters and statistical
values and displays the resulting aerobic zone status.
Physiology. The science of life processes.
Physical kilojoules (Abbr. phys-kJ) / physical Mega Joule (Abbr. phys-MJ).
Represents only the mechanical work done on the ergometer; it is computed by mean of the following formula:
Power [Watt] * Time [Sec] = Work [Joule]. Example100 Watt * 60s = 6000 Joule = 6 kJoule.
This value does not cover the energy needed by the body to maintain its vital functions (e.g. respiration, blood circulation,
metabolism).
Realistic kilojoules (Abbr. real-kJ) realistic Mega Joule (Abbr. real-MJ). Using the data of the height, the weight,
the age, and the sex, the system computes the approximate basic and total quantity of burned energy. The system will
then display the approximate amount of kJoule actually burned during the training on the ergometer.
RPM. Pedal speed in Revolutions per Minute.
Self test. When switched on, the microprocessor checks the electronic circuits it uses to make sure everything functions
properly.
Virtual Reality. An illusion of reality generated by technical means that is influenced by external impulses or gives
impulses to its surrounding. The device uses these possibilities through an optional accessory set.
Watt (abbr. W).
Unit of measure of the work done per unit time:
1 W = 1 J / s = 1 Nm / s = 1 VA
WHO. World Health Organization
Eddy current brake.
Uses the fact that electric currents induced in a conductor by a fluctuating magnetic field produce joule-type energy which
can be used for an electronically controlled brake.
Time. Training time in minutes (for present training data) / in hours (for total training data)
35
?
What to do, if...?
In the case of a failure ................... what to do if?
All ergo_lyps undergo a detailed test before they are shipped.
Should you, in spite of this, face a functional failure, the following recommendations should tell you what to do.
General procedure to identify the cause of a failure
The ergo_lyps consists essentially of two functional units
the dashboard and the drive unit.
The drive unit is located inside the device, before the crank/pulley. It contains the power supply, the eddy current brake and
the related electronic circuits.
The dashboard contains the electronic circuits used for system control, display and data processing. The dashboard and
the drive unit communicate via a cable, which is routed through the dashboard support column, via a connector in the area
of the receptacle of the dashboard support column.
Should the assembled ergo_lyps fail to function, the defect would generally be found either on the dashboard, the drive
unit or the cable connecting them.
The most frequent cause of complaint turns out to be jamming the connecting cable during the assembly process
of the ergo_lyps, or not properly plugging the cable connector.
In the event of a failure, check carefully first if
The cable connector found on the lower end of the dashboard support column is properly connected, and that the cable
was not jammed or cut when the dashboard support column was mounted on the frame.
To do this you need to disassemble the dashboard support column.
The cable was not jammed or cut while mounting the dashboard on the support column, or if the cable connector to the
circuit board inside the dashboard is loose.
To do this you need to disassemble the dashboard.
Fastening screws
All the fastening screws must be tightened from time to time. We recommend tightening them at least after the first 50 km
and then once every 500 km.
Contacting your dealer or the service department of the ergo_lyps
If the cause of the failure could not be identified, you should contact your dealer or the repair hotline of daum electronic
gmbh (telephone number ++49 / (0) 911 / 97 536 - 0).
We need the following information:
1. The device number (this number is on the plate on the lower frame bar at the front left side)
2. The dashboard version number (you can access this number under the “Menu”, “Information”, “Version Data”, "Serial
Number” on the graphic display).
3. The proof of purchase and the device reference sheet.
4. ergo_lyps ergometers have a built-in failure diagnostic system, which signals device functionality using a red and a
yellow LED.
These LEDs are located on the small circuit board located on the drive unit inside the device. You can see this board from
above through the metal frame (to the right side looking in the front direction).
It is located on the front part of the drive unit before the big tensing spring. With the device switched on, the yellow LED
should blink when pedalling or turning the crank wheel slowly, and blink faster when pedalling fast.
With the device switched on, the red LED should light with high intensity when pedalling against a low load, and decrease
in intensity as the load increases.
Please inform us of the status of these LEDs for all complaints concerning “the device is not braking” or “the device is not
braking properly.” This enables us to draw relatively concrete conclusions about the cause of the failure.
If you wish to obtain more information on your device, please visit our service and repair hints web site on Internet
(www.daum-electronic.de). You can also call our service and repair hotline (telephone number ++49 / (0) 911 / 97 536 - 0).
36
?
What to do, if...?
RESET key
Software Failure / Loss of Dashboard Control
Recessed
All computer controlled appliances have one undesirable characteristic in
common that is that the normal software operation can sometime fail for
generally unknown reasons. This situation is generally described by the
expression “the system has frozen”. Should the dashboard operation fail and
cannot be restored by means of normal keys operations, then the solution
would be to press the recessed RESET key (No. 18) underneath the
dashboard with a pointed tool (e.g. a pencil or ball pen).
Noises
ergo_lyps ergometers are equipped with quality ball bearings and a silent
belt drive. However, it cannot be avoided that remaining noises be heard,
which are in the range of LpA 52 dB (decibel).
The squeaking or other disturbing noises generally
originate from:
- Wear of the V-belt
- Wear of the slipping coupling
- Wear of the bearings
or also
- Loosening of the crank arm fastening screws!
- The bearings of the oscillating poles.
- The fastening screws of the feet or dashboard support column!
These screws must be tightened from time to time, but in
any cases every 500 km!!
Drive / Braking unit (eddy current brake)
If a major failure is detected on the drive unit, it is possible to replace the
complete unit. The braking unit, which consists of the flywheel, a transformer,
a belt tensioning device and the mounting plate, is mounted with only three
screws.
You can order an exchange unit from daum electronic GmbH. The defective
unit can then be relatively easily replaced with the new one, without requiring
any adjustment, by your dealer or a bike mechanic.
The flywheel of the ergo_lyps is equipped with two journal bearings. These
bearings continue to run for a little while after you stop pedalling. Feeling a
light drag on the foot rods is then normal. The journal bearings should be
lubricated with Klüberplex BEM 34-132 grease every about 3000km (if the
drag on the foot rods increases and becomes uncomfortable), depending on
the load.
37
Warranty conditions
§
Warranty conditions
Please consult your dealer/retailer in the case of a failure or trouble. The manufacturer daum electronic GmbH
provides the warranty to your retailer according to the following conditions:
1.
We guarantee that our products are free of manufacturing and/or material defects.
2.
We will correct any problem pertaining to the above categories, with the exclusion of customer claims not related to
those categories through upgrading services provided by us. We reserve the right, upon returning of the product in
question, to exchange it with another product of the same type and value or, at our own discretion, to take it back
against repayment of the amount paid by the customer (deducting overhead costs).
3.
Our warranty covers a period of two years for parts and labour in the case of private utilisation of the product, and a
period of three months, for parts and labour, in the case of commercial utilisation of the product, in both cases
starting on the manufacturing date.
We will fulfil this warranty service provided the customer will pay all freight and transport costs, including those for
spare parts, and the cost of any packaging material we should possibly need to use.
Returned devices will only be accepted if in the original packaging.
(see illustration on page 44)
Advance replacement of parts under warranty will be invoiced and delivered against payment (COD). The amount
paid will be immediately refunded upon reception of the returned old part by us.
4.
All other warranty claims, specially claims for the compensation of direct or indirect damages, or damage to a third
party, or damages to other objects, as well as of damages due to failure, and of labour costs, are expressly
excluded to the extend authorised by law. Should the repair fail within a reasonable delay, the customer has the
right to demand a price reduction or the cancellation (modification) of the contract at his discretion.
5.
We decline any responsibility for any wear occurring through normal utilisation. The warranty will be considered null
and void if our instructions for mounting and utilising the device are not respected, or if the chemical products we
recommend and deliver are not used, or if any modification was made to the device without our prior approval.
6.
It is the customer's responsibility to check each one of our deliveries immediately upon reception. Any complaints
about missing or defective parts must each be immediately transmitted in writing.
7.
We do not guarantee that the delivered product will be suitable for the usage intended by our customer. Extended
agreements need to be expressly confirmed in writing.
8.
Any technical advice provided by us is formulated according to the best of our knowledge and in good faith, based
on our own experience and testing. We do not assume any responsibility for this service, unless serious negligence
can be proven on our part.
If you wish to obtain more information on your device, you can visit our service and repair hints web site on Internet
(www.daum-electronic.de).You can also call us on our repair hotline at daum electronic gmbh (telephone number
++49 / (0) 911 / 97 536 - 0).
daum electronic gmbh, Fürth
38
Menu diagram
1.1.1.1. Standard
1.1.1.2. Cool-down
1.1.1. Watt
1.1.1.3. Capacity test
menu
1.1.1.4. Manual
1.1. Programs
1.1.2.1. Built in programs
1.1.2. Heart rate
1.1.2.2. Manual
1.1.3. height profile
*)
1.1.4.1. Strength programs
1.1.4. Special
1.1.4.2. RPM
1. Training
1.1.5.1. Watt
1.1.5. Personal programs
1.1.5.2. Heart rate
1.1.5.3. Speed
1.2. ergo_memo
1.3. Coaching
1.4. Relax
2.1.1. Ø km/h, max-km/h, time distance
2.1. Actual
2.1.2. Ø RPM, Ø watt, Ø heart rate, max. heart rate
2.1.3. phys-kJ, real kJ, BMI, Fit. Mark
2.2. Total
2.5.1. min heart rate
2.3.1. 60 days
2.3. Weight
2.5.2. max heart rate
2. Training data
2.3.2. 1 year
2.5.3. Max. performance
2.4.1. 60 days
2.4. Fat content
2.5.4. week
2.4.2. 1 year
2.5. Coaching
2.5.5. unit
*) Not available for this model.
39
Menu diagram
3.1.1.1. Birth date
3.1.1.2. Gender
3.1.1. Physical data
menu
3.1.1.3. Size
3.1.1.4. Weight
3.1. Personal data
3.1.1.5. Fat content
3. Settings
3.1.2. Limit values
3.1.2.1. Watt
3.1.2.2. Heart rate
3.1.2.3. Duration
3.1.2.4. Distance
3.1.2.5. Phys. kJoule
3.1.3. Coaching
3.1.3.1. Evaluation
3.1.4. Erase
3.1.3.2. Frequency
3.1.5. Miscellaneous
3.1.3.3. Training type
3.1.3.4. Min. heart rate
3.2.1. Date
3.1.3.5. Max. heart rate
3.2.2. Time
3.2. Device data
3.1.3.6. Max. performance
3.2.3. Contrast
4.1. Service
4. Information
3.2.4. Language
1)
3.1.5.1. Start point
3.1.5.2. Cool-down
4.2. Version
3.2.5. RPM Adjust
3.1.5.3. switching on
4.3. TeamAward
3.1.5.4. Window 2
5.1. Guest
3.1.5.5. Window 4
5.2. User No. 1
3.1.5.6. Watt increase
5. User selection
5.3. User No. 2
3.1.5.7. Wattdecrease
5.4. User No. 3
3.1.5.8. Heart rate adjustment
5.5. User No. 4
1) See page 6 for the language selection
40
Ohjelmien
Sample
Diagrams
suunnittelu
- supplement
pohjat to the Individual Program
Use copies of the following diagrams to design your watt controlled individual programs
WATT
800
600
400
200
0
min
10
20
30
40
50
60
min
10
20
30
40
50
60
min
40
80
120
160
200
240
WATT
800
600
400
200
0
WATT
800
600
400
200
0
Use copies of the following diagrams to design your heart rate controlled individual programs.
Heart rate
200
150
100
60
0
min
10
20
30
40
50
60
min
10
20
30
40
50
60
Heart rate
200
150
100
60
0
22
41
Sample Diagrams - supplement to the Individual Program
Heart rate
200
150
100
60
0
min
40
80
120
160
200
240
Use copies of the following diagrams to design your speed controlled individual programs.
km/h
80
60
40
20
0
min
10
20
30
40
50
60
min
10
20
30
40
50
60
min
40
80
120
160
200
240
km/h
80
60
40
20
0
km/h
80
60
40
20
0
42
Assembly and maintenance
ergo_lyps
Installation hints
Miscellaneous
Install the ergo_lyps on a level floor. The manufacturer will not be held responsible for any damage done to the floor. We
thus recommend installing the device on a protective base.
The ergo_lyps is not intended for use in damp rooms. Rust could develop, which would damage parts of the device and
impair both the operating functions and the safety features.
The ergo_lyps uses a mains voltage of 230 Volt, 50/60 Hz and has a power consumption of 55 Watt. The power supply you
wish to use must fulfil these requirements!
Any fault or defect on the device that have an impact on safety must be repaired immediately. Defective or broken
parts must be replaced immediately (see spare parts list page 30). The device is not to be used until the repair is
complete.
top handle
(with coating and cover plug)
U shaped handle
Handle
(safety handle)
(with rubber coating)
Tension button
(U shaped handle)
Dashboard
Power switch
Oscillating pole
right side
(pre-installed)
Tube of the
dashboard housing
Swivel joint cap
(right and left)
On / Off
Drinking bottle
(with holder)
Dashboard support
Swivel joint cover
Sweat protection
(with protective cover)
Foot rods
(right and left)
Seal
M8 locking screws
Transparent plate
sweat protection
Step plates
(right and left)
(right and left)
Crank and pulley
Cover
(right and left)
Oscillating pole
left side
Swivel joints caps
(internal and external)
Handle
(extractable)
Swivel joint of
the oscillating poles
Front foot
(transverse bar with
adjustable feet)
Base frame with
(Steel frame with cover plates)
Drive unit / eddy current brake
Handle lock screw
43
Rear foot
(transverse bar with
caster feet)
Package Contents
The ergo_lyps can be assembled easily and swiftly by two persons. Small parts box
The device:
1 x ergo_lyps base frame with drive unit
1 x dashboard stand with dashboard & U shaped handle
2 x feet set
2 x Oscillating poles / right and left
2 x Top handle with coating and caps
2 x Foot rods / right and left
2 x Step plates with corresponding screws
2 x Bearing shafts for the oscillating poles (right and left)
2 x Bearing shafts / crank lever (right and left)
1 x Drinking bottle with holder and screws
Mounting hardware:
N / 8x
4 x Recessed head screws M 8x50 (A)
4 x Spacer sleeves 12 Ø x 37.5 mm (B)
11 x Hexagonal head screws M8 x 20 (C)
7 x Spring washers DIN 127 - 8.1 (D)
4 x Washers DIN 9021 8.4 (E)
4 x Flat head screws M5 x 40 (F)
4 x Washers DIN 125 5.3 (G)
4 x Hexagonal nuts M5 (H)
3 x Dome nut f. hex. head screws M8 (J)
4 x Curved spring washers Et3159 (K)
2 x Screws 3.5 x 25 (L)
2 x Foot stopper (M)
8 x Swivel joint caps (N)
Tools
1 x Wrench 8 mm
1 x Wrench 13/17 mm
1 x Allen wrench SW 6
ergo_lyps Package contents
B / 4x
A / 4x
F / 4x
L / 2x
H / 4x
G / 4x
M / 2x
13
17
Accessories
1 x Pulse sensor Ear clip
1 x Relaxation sensor
1 x Software update cable
1 x User manual
C / 11x
8
J / 3x
D / 7x
E / 4x
K / 4x
SW 6
Assembling the feet
Insert the four recessed head screws with
spacer sleeves (1) trough the two holes and
tighten them firmly.
A / 4x
B / 4x
SW 6
Foot with caster roller
to the rear.
1
Please respect the proper
positioning of the feet.
1
44
Installing the dashboard
Connect the two cables X and Y by mean of the connector. Then raise the dashboard
into position. Take care in doing so no to get the cables jammed or even severed. This
assembly step is more easily executed with the help of a second person since the
dashboard support column is heavy.
C / 3x
13
D / 3x
17
Screw in the screws with the washers without
tightening them for now.
X
Y
Be careful to avoid jamming or
separating the dashboard cable
X/Y in the receptacle.
Assembling the handles
Pull together the two halves of the handle's extensions and insert the extension in the oscillating poles.
Use a hammer, with a shock absorber (a piece of soft wood or
plastic) between the handle and the hammer, to insert the handle
into the oscillating pole until the pole's sleeve is even with the
handle's extension. Repeat the procedure with the other handle.
Be careful to hammer the handle in a perpendicular
direction to the pole!
It is mandatory to use a shock absorbing structure or a
plastic or rubber hammer to hammer the handle's
extension in place.
You should lean the oscillating poles against a wall or any
corner to keep them from slipping while hammering the
handles in place. To further protect the poles and the wall
you should place a soft material like e.g. a carpet or a
piece of cloth between the pole and the wall.
45
Installing the oscillating poles
13
17
K / 2x
Screw the hinge pins on the right and left sides of
the dashboard support column and tighten them in place.
E / 2x
13
C / 2x
17
Warning! Be careful to install the
oscillating poles on the right side
of the device. (see illustration).
Attach the oscillating pole with the
screw with washer and the curved
spring washer without tightening
them at this moment.
Installing the foot rods (front)
Attach the foot rods to the
oscillating poles by means of the
screws. Do not tighten the screws
at this moment.
D / 4x C / 4x
13
front
rear
right side
front
rear
left side
46
17
Installing the foot rods (rear)
Fit the curved spring washer
on the hinge pin.
K / 2x
E / 4x
C / 4x
13
Hinge pincrank lever
Watch for thread
direction!!
Left - / L
R
Right - / R
thread
17
Right
foot rod
Fit the hinge pins in the bearing carriers,
respect the L/R marking on the front of the
hinge pins.
R
L
Fit the bearing carrier with the
hinge pin on the crank lever. Both
hinge pins must point to the front.
Then attach them by means of a
screw with washer. Do not tighten
the screw at this moment.
Installing the step plates
The foot plates are attached with the two flat head screws. The side
retaining wall must be located to the side of the device and the line of
adjusting holes must point to the front.
front
Rear
right
front
Rear
left
F / 4x
H / 4x G / 4x
8
L / 2x
Screw the foot stop in place.
M / 2x
47
Installing the bottle holder
Mount the bottle holder to the
dashboard column using the
supplied screws
Installing the covers on the joints
At this point in the assembly process it is possible to test the movement of the ellipse trainer by hand to
evaluate the adjustment of the parts to one-another. If no visible defect and no unexpected friction or squeak
noises are detected then you should firmly tighten all swivel joints and attachment screws, including those of the
hinge pins (13mm or 17mm), and double check their seating position.
N / 8x
Once you are sure that all the screws are firmly tightened,
you can put on the corresponding joint covers.
J / 3x
13
One (1) cover on each side of the oscillating poles.
4 covers are used at the
connection of the oscillating
poles with the foot rods,
that's 2 on each side.
J / 3x
One (1) on each side
48
17
Changing the position of the crank hinge pin
The height of the foot rods can be adjusted, and thus the radius of the pedalling
circle, by moving the hinge pin on the crank lever.
13
17
Remove the cover of the hinge pin
position you wish to use.
Remove the hinge pin by turning
it backwards.
Move the hinge pin to the new position
and mount it by turning it to the front.
Reinstall the covers on the
unused positions.
Stand foot
If the ergo_lyps is installed on an uneven floor,
use a screwdriver to adjust the compensation
setting in the front feet to ensure a stable stand.
Front Foot
with compensation setting
for the floor distance
Adjusting the handlebars
Loosen the tensing button on the dashboard to
change the inclination angle of the handlebars.
After you bring the handlebars to the required
inclination retighten the tensing button back again.
49
Simple Maintenance and Service Activities
Miscellaneous
Every 500 km of cumulated running distance you should check whether all the screws
are still firmly set. Tighten them back as needed.
Care should be taken to remove sweat from the dashboard and the frame after every
training session to protect the paint against rust. Rust damage caused by sweat is not
covered by the warranty.
Use a soft cloth wetted with water to clean the outer surface of the device. A light soap
solution may also be used to wet the cloth.
Procedure to replace the V-belt:
Unplug the power cable from the main power supply before opening the device!
Take particular care to avoid damaging the internal parts of your ergo_lyps while you
are working.
The manufacturer will not be liable for, any damages arising as a result of negligence
while changing the V-belt!
V-belts are wearable parts and as such are not covered by the warranty.
The V-belt is located on the right side of the device
1.
Remove the foot rod on the right side. Use the wrench (17mm)
to loosen the hinge pin.
(See page 5)
2.
Remove the screws (9 units) fastening the side cover.
3.
Remove the side cover.
4.
The driving parts on the carrier plate / drive unit are now freely
accessible. Press on the belt tension lever against the tension
spring (9h) to release the V-belt tension, and then pull the belt
from the pulley (9a).
Follow the same steps (1 to 4) as described above in
reverse sequence to install the new V-belt.
9a
Before installing the new V-belt, you should clean the belt
slipping surfaces of all driving parts, as well as the belt itself,
with alcohol or cleaning petrol to remove the grease.
9c tension
9g lever
50
9p 9r
spring
9h
9
Exchanging the Dashboard / Replacing the Battery
Required tools: Phillips screwdriver / Blade 1 x 70 mm
X
X
1. Unplug the power cord! (For your personal safety and to protect the sensitive electronic parts
inside the dashboard)
A
2. The top part of the dashboard is secured to the bottom part by mean of 4 Phillips screws (A, B,
C, D). Use an appropriate screwdriver to unscrew these screws from underneath the dashboard.
(See the figure to the right) Please note that the screws C & D are located toward the outward
border and are deeply recessed in the dashboard bottom part. Do not unscrew the nearby located
screws (X)!
B
X C
X
D X
X
X
3. Then you can remove the top part of the dashboard very carefully. First open the dashboard
housing by raising it from the higher side slightly and grasp (hold) with both hands underneath the
top shell of the dashboard. Raise the higher part of the dashboard top shell further until the lower
side separates from the dashboard support. Be careful to raise the top shell of the dashboard
housing only until you feel a slight resistance from the cable that is connected from
underneath, and until you can reach the connectors on the circuit board with your thumb
+
and index finger.
X
X
X
+
4. You must unplug the connector. Never pull on the cable to unplug it!!
This would tear it off!
Never pull the cable!
It could tear off!
4.
Be careful when pulling the connector in order
to avoid damaging the circuit board and the
electronic parts!
Follow the same steps in reverse sequence to reassemble the dashboard top part
5. Plug the dashboard connector to the female connector of the corresponding colour until they lock in position. Then pull
carefully the cable through the opening of the bottom part of the dashboard and the dashboard support and take care not
to jam the cable when you reinstall the top part of the dashboard on the bottom part.
6. Screw the removed housing screws (A, B, C, D) from underneath the dashboard and tighten them until they attach to
the upper part of the dashboard.
7. You can know plug the power cord, turn on the device and test its operation.
Replacing the dashboard battery
A button cell battery (CR 2032) is located on the underside of the dashboard circuit board. This battery must be replaced when the
time and date keeping function fails. Problems when turning on the machine and display failures are also signs of an empty
battery.
Warning: The device must be switched OFF when replacing the battery.
Afterward you must set the date and time.
Unscrew and remove the 4 screws on the lower part of the dashboard.
Then tilt the upper part of the dashboard up carefully.
CAUTION! Failure to
correctly replace the
battery may create an
explosion risk.
Take care not to separate any cable connection. Never touch the electronic parts of the
dashboard with your fingers! Charges of static electricity can destroy the sensitive parts.
Press the clip holder outward with a pen to replace the battery, remove the battery
and insert a new one with the plus symbol up.
Reassemble the upper part of the dashboard carefully.
Caution! Do not pinch any cable!
+
Notes about used button cell batteries
- Keep batteries away from children, and do not swallow them!
- Do not recharge empty batteries and do not throw them in fire.
Please recycle used batteries by bringing them to the appropriate collect point,
or return them to your dealer.
51
Spare Parts List
Drive
3b
2
2b
2c
9g
2g
3h
3a
4b
1s
1m
1n
5b
1g
5
5a
8b
8
1c 1p
7
6a
6b
9c 9b
Left side
9
8a
6b
4g
4h
4d
7a
4e
right
14
15
13
No. Spare part
9d
6a
1a
4a
9k
5d
1d
4f
ergo_lyps 8080 TRS pro
When ordering parts,
please include the device
serial number with the part
number. You will find the
device serial number on
the specifications plate
located at the front on the
lower frame cross bar on
the left side.
No. Spare part
M80 56 600
00 38 950 A
06 50 949
00 37 155
12 10 801
12 10 803
00 37 351
07 05 186
03 00 035
07 50 090
00 38 170
00 38 175
00 21 412
00 37 150
2Dashboard housing including electronic parts
2bDashboard upper part
2cDashboard lower part
00 17 452
00 17 453
2gControl button
3Dashboard column
3aLocking lever / Handle positioning
3bU-shaped handle complete
3cHandle carrier complete (rear)
3dHandle clamp (front)
00 17 422
00 38 160
00 17 317
00 17 394 A
00 17 232 A
00 17 233 A
3gDrinking bottle holder with fastening screws
3hDrinking bottle
4Oscillating pole / right side with ball bearing
4aOscillating pole / left side with ball bearing
4bHandle set / oscillating poles extensions
4cPin bearing flange
01 00 050
01 00 045
00 38 105
00 38 100
M 80 50 800 A
00 37 120
ergo_lyps 8080 TRS pro
Order nr.
Order nr.
1ergo-lyps complete body
1aFrame
1bDecoration self sticking strips
1cCarrying handle
1dFrame cable
1eDashboard - frame connection cable
1fTransparent sweat protection cover
1gSealing / Sweat protection
1hMounting base for locking strip FTH 15
1kLocking strip 2.5 100
1mRight side cover
1nLeft side cover
1pFastening screws for the side cover
1sCover of the crank and pulley
10
9a
4d
4h
9m
11
5c
1f
3
left
9e
1s
1p
4c
4c
swing feet
9f
Right side
1b
4g-1
9n
9h
3d
3g
1e
4
12
3c
4dSet of swivel joint caps
4eFoot rod / left
4fFoot rod / right
4gStep plate left side (step plate right side /4g-1 order nr. 00 37 131)
4hPosition stopper
5Crank lever / left
5aCrank lever / right
5bShaft / Crank lever / left
5cShaft / Crank lever / right
5dCrank lever screw (washer / 00 05 571 )
6Hardware bag
6aSpacer sleeve for fastening the foot
6bScrew for fastening the foot
7Complete front foot
7aFoot with adjustable height (front)
8Complete rear foot
8aFoot with roller caster (rear)
8bSet SF = “swing feet” upgrade kit
9Complete drive unit for the ergo_lyps
9aPulley with shaft and ball bearing
9bBall bearing
9cDriving belt (V-belt)
9dBrake magnet
9eFlywheel complete
9fBearing carrier with pulley shaft and ball bearing
9gBelt tensing unit complete
9hPulley tensing spring
9kRubber pad D 25 x 10
9mRubber pad M6*18 25x30
9nSliding joint
10Power transformer / 230 V, 50 - 60 Hz
11Power part / Version 2002
12Power switch
13Pulse sensor
14Relaxation sensor
15Cardio Sensor chest belt
52
00 37 510
00 38 120
00 38 125
00 37 130 / 00 37 131
00 37 345
00 38 150 A
00 38 155 A
00 37 100
00 37 105
00 30 571
00 37 461
00 09 535
00 21 850
M 80 90 197
00 17 418
M 80 90 198
00 17 419
00 17 635
M 80 50 000
M 80 50 200 A
00 09 316 A
00 31 070
M 80 50 050
M 80 50 060
M 80 50 070
M 80 50 080
00 09 233
00 07 320
00 07335
M 60 50 100
18 20 150
E 80 90 050
M 80 50 150
00 17 900
E 80 90 080
E 90 91 015
The daum training community!
www.worldwidewebtraining.de
The daum internet training offer!
DAUM SERVER TRAINING OFFERS
Physician Hospital
Rehabilitation Trainer
Fitness Studio Trainer
Races
The daum internet training server offers interpreted
users and training specialists professional training
and communication possibilities.
Group trainings with up to 150 participants, image
and voice communication with up to 10 participants
favour motivation and team spirit.
Research University
-
daum connects people by training!
Web and email based registering
Login on the web
Entry and editing of personal data
Reserving group training
Detail view of group trainings
Ranking lists
Recording of the training data and parameters
Evaluation of the training data
Guest access with Live-Ticker
Image and voice transmission
Up to 150 participants per group training
Integrates the platforms of other training
providers
ergo_win premium pro PC software
PC training software for Daum bike, elliptic and
treadmill ergometers of the classic and premium series
Daum ergo_win premium pro connects training partners
world wide. With a PC and via Internet it is now possible to
train with friends, similarly minded persons, and training
specialists using a web cam and a headset it is also
possible to communicate with image and sound.
Webcam
Training Partner
The Daum training server www.worldwidewebtraining.de
connects interested users and training specialists. Sport
enthusiasts can participate to international online races and
online group rides.
Training Profile with
participants position
Talking by walking
-
Multi-user capable
Detailed personal setting possibilities
Supports the ergo_memo card
Participation to group training / network races
Presenting your own group training / network races
Supports Webcam / Headset
Detailed training overview
Detailed training evaluation with average and maximal
values, heart rate / watt graphs and display training
details with a precision of (up to) one second
- Generate your own training programs
- Controls four training devices simultaneously
- Simultaneous monitoring of the four training devices
- Superimposing of the training details of each training
device
- Visualising the limit values
- Supports the Daum TRS Relax system
- 4 picture and sound channels
- User friendly interface
- Training program manager
- Training data manager
- Memory card manager
- Backup manager
- Training program Import / Export
And much more...
Ready …
… Set …
… Go!!!
I'm there!!!
Hardware requirements:
- Windows XP
- DSL connection, USB connection
- Pentium III-1 GHz or better
- 200 MB free storage
- 256 MB RAM
- CD-ROM drive
- 1024 x 768 Pixels monitor resolution with 24 bits colour
depth
Box Content:
PC Software
Order No. 9091026
Tel. ++49 / (0) 911 / 97 536 - 0
Fax. ++49 / (0) 911 / 75 37 14
www.daum-electronic.de
ergo lyps
8080 trs 3
Order No. 90 56 282
daum electronic;
daum electronic;
Copying or using the contents
of this manual, as a whole or
in parts, is not authorised without
the written permission of daum
electronic GmbH.
Stand: 26012010 Artikelnummer: 0630419e.0006
daum electronic gmbh
Flugplatzstr. 100
D - 90768 Fürth