1
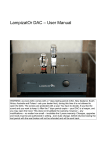
Lampizator DAC – User Manual
WARNING: as every DAC comes with a 7 days testing period (USA, New Zealand, South
Africa, Australia and Poland - ask your dealer first), during this time it is not allowed to
open the DAC. The screws are protected with a seal. You have to decide, if you like the
sound and you want to keep it. After the 7 days period expire – your DAC is a keeper, and
you may open the hood. This does not invalidate the warranty, however – any
modifications – no matter how small – invalidate the 5 years warranty. Changes, upgrades
and mods must be pre-authorized in writing , even tube change. DACS returned during the
test period with the seal broken will not be refunded and will be sent back.
Contents:
Introduction.....................................................................................................................................2
Data formats....................................................................................................................................2
Audio volume level.......................................................................................................................2
AC requirements and overseas operation.........................................................................3
The heat issue.................................................................................................................................4
Optimal placement........................................................................................................................4
Power on-off cycle........................................................................................................................4
Cabling and cable handling......................................................................................................5
Tube rolling and replacement................................................................................................5
Aging problems..............................................................................................................................5
Fuse Change....................................................................................................................................6
Volume control...............................................................................................................................6
PROGRAMMING THE MODULE!..............................................................................7
COOPERATION WITH THE PREAMP........................................................................................8
DIGITAL INPUTS...........................................................................................................................10
The RESET button.......................................................................................................................12
LISTENING TO THE MUSIC.......................................................................................................13
Analog part schematics...........................................................................................................14
Power supply schematics........................................................................................................14
LampizatOr DAC Manual
Introduction
Thank you for choosing Lampizator DAC. We created it with huge research effort to
deliver not only world class musical performance, rivaling the most expensive DACS
money can buy, but also to offer very long life of the product. Simply speaking – if you
adhere to some basic precautions listed below – the product should last a lifetime and
hopefully in this period – will never be outperformed by a competing product.
Whose lifetime one might ask – well – let’s not go into details – enough to say it should
work flawlessly for the foreseeable future.
The DAC should be future-proof. Shall we ever launch a major upgrade to the digital
part – you can get the upgrade at very reasonable cost. Shall you decide you need
some added features – you can also get them at reasonable cost anytime in the future.
Be it AES/EBU input, Toslink input, BNC input, XLR outputs, volume control,
information status LEDs – any option you initially forgot.
We can’t be 100% sure, but it is extremely unlikely that the market and the industry in
the future will embark any technology of music storage faster than 192 kHz and with
more resolution that 24 bits. We already hit the human ear limits, not to mention the
real needs of mass consumers (MP3).
Data formats
The DAC is capable of automatic recognition of all sampling rates from 44 to 192 kHz
and bit rates from 16 to 24. Since few if any transports offering SPDIF format of the 192
kHz exist in the consumer market, it is hard to guarantee the operation but on the
professional ones which we tried – it worked. From our experience the transmitters of
SPDIF are incapable of making good square wave over 48 kHz, so if you play a 192
kHz file, be aware that on one hand you “play” more detailed data, but at the same time
your signal is waaay more distorted so at the end of the day for this reason alone it
may not be worth it to chase the hi-rez rabbit.
Audio volume level
Tube technology allowes us to set practically unlimited volume level at the output, up to
100 x higher than from a normal CD player. We have decided to adhere to one
internally set standard: the test tone of 1 kHz at -20 dB produces an output of sine
wave 300 mV AC under the amp load of 47K. Thats equivalent of circa 3 V pp. Shall
this be inconvenient for some reason – it is adjustable in the range of 0-1800 mV by
2
LampizatOr DAC Manual
just one resistor change. The test tone is available from me via email in the form of
WAV or AIFF or FLAC or MP3 file.
Generally - we prefer the sound of the DAC with high output levels, and most amps
don’t have any problem with that. A simple potentiometer or stepped attenuator takes
care of that. Only solid state chip based preamps will saturate and distort thats why we
need to know in advance about such solid state chip volume system being driven by
the DAC. We will keep then the volume level at the “book” level of 2 V pp. Having said
that - chip volume systems and preamps with opamps belong in home theatre (cheap
one) and DEFINITELY not in high end.
LampizatOr DAC should not be used with opamp based preamp, no matter how good.
Because the op-amp feedback loops will remove the whole joy of music as delivered by
the tubed DAC.
AC requirements and overseas operation
The DAC has a multi-voltage power transformer.
In the TOROIDS: Looking from the top – the first wire in the bunch is neutral AC input
power and it is always engaged.
For 115 V operation the second wire looking clockwise is the AC phase. For
230-240-220 V operation the third wire replaces the second wire.
If your dac has a serial number lower than 20 – the second wire is formed by a twisted
pair. For 230 V this pair is joined together.
It is not necessary, but advisable that the power cable is a quality one, not simply a
computer cable. It is also advisable to use some kind of AC filter – in many cases this
brings nice results. Generally under-filtering is better than over-filtering.
The EI type transformers have their primary windings on the top. The two external of
the three pins are 230 VAC, one external and the center = 115 V primary.
The DACs with volume control, the green board which powers the volume unit has two
jumpers set for 230 V and in case of 115 V - these jumpers are open and one jumper is
added where it is written 115V.
3
LampizatOr DAC Manual
The heat issue
Many people are concerned about the heat inside the player.
We want you to relax about it - that this is NOT an issue. The DAC operates well below
half of its maximum allowed temperature. Tubes are DESIGNED to be hot, this is their
very nature. Thats why they have internal heaters and when they are not at optimal
operating temperature – they sound bad.
The other components are guaranteed up to 105C and we are expecting no more than
45 degrees Celsius in the air inside the DAC.
Our only advice is do not heat the box additionally by placing it for example on top of a
hot class A amplifier. Give it some space around to allow free air flow and adequate
cooling. Do not cover it with blankets or mats.
Optimal placement
Apart from the heat issue as described above, the DAC has no special placement
requirements. Just remember to keep the S/PDIF cable not longer than 1,5 m (5 feet)
and RCA chinch cables – not longer than that either. Since tubes are microphonic, they
hate vibrations. Therefore it is forbidden to place the dac on top of the speakers or a
sub. Choose least vibrating location, preferably one foot behind the plane of the
speakers.
Power on-off cycle
The tube lifetime, almost like the life of a car engine in polar climate – is determined
largely by the on-off cycle. The heat expansion coefficient of the glass is so much
different than that of the metal, that the air-tight seal of the metal pins can leak oxygen
inside the tube and eventually kill it. Even if it is just one molecule per day. So in other
words it is better to keep the DAC always on, than to switch it on and off more than
necessary.
The lampizator DAC (level 3 and up) has a slow start feature which brings the high
voltage supply gradually up, at the rate of two- to five volts per second. The PSU
reaches 300 V DC after 90 seconds. This helps to extend tube life. The DAC is also
equipped with voltage down feature (bleeders) which reduce the power voltage upon
switch-off at roughly the same rate.
On top of that – the tubes are operated always around 25% of full nominal power,
which greatly increases their life expectancy. Combining all the factors together, the
tube lifetime should be anywhere between 10 and 20 years, assuming the player is
switched off only once per day, for the night.
4
LampizatOr DAC Manual
Cabling and cable handling
Just to be sure that we know what we are doing:
-
AC cable can be freely plugged and unplugged during operation. It is OK for the
DAC but NOT OK for the amplifier and speakers. A loud thump may appear after
switch off. Please turn your volume fully down before switching off the DAC.
-
SPDIF cable should be plugged and unplugged when the transport is powered off.
The DAC can be on. However doing it on „hot” when all is working – is not
dangerous for the DAC as long as the AC power supply has the GND for all
products (DAC, transport, amps).
-
Signal cables can be plugged / unplugged with the amplifier volume turned fully
down.
-
Whatever you do – we strongly advice to use only chinch cables (analog and
digital) with Neutrik plugs. This GREATLY reduces risks associated with the
commonly found problem of HOT BEFORE COLD connection.
Please use a decent AC cable. We suggest spending around 100 Euro for a good AC
cable, not more but not less.
Please use a decent digital interconnect. In our DAC it is completely unimportant what
is the wave characteristic impedance of the cable (the famous 75 Ohms). Just use the
cable that sounds good to you. Analog as well as digital interconnects can be tried.
Best results are obtained with silver cables. Let your ears decide, not specs of the
cable.
Tube rolling and replacement
W took an expensive and painful decision to sell the DAC with the best tubes we can
find in consistent sustainable supply. Therefore we feel you should not be tempted to
change them for any reason.
If you feel that you MUST try other tubes – we need to pre-authorize it in writing.
Otherwise you loose warranty, sorry.
This does not concern 300B, which can be rolled freely.
It is possible to order the special version of DAC for tube rolling fans. It will have
specially configured multiple sockets to enable the use of almost all existing tubes from 6SN7GT to ecc83 or e182cc
Aging problems
As already explained above, the DAC should age very very slowly.
5
LampizatOr DAC Manual
The digital PCB should last a lifetime. The transformer, the paper in oil caps, the
cables, plugs, sockets – should last a lifetime. There are only 4 electrolyte caps which
we selected from premium brands and they should last circa 25-30 years. Other than
that we suggest to change tubes every 10 years.
So - short of a thunderstrike – we expect no failures or aging problems before 20-30
years.
Fuse Change
The DAC is equipped with a non-repairable glass fuse circuit breaker inside the IECAC socket at the back. There is also one spare fuse provided in the little drawer. The
fuses are 1A and overrated by the factor of 3. Therefore it is impossible for the fuse to
blow without a specific reason - a failure inside the player. Consequently, if the fuse
burns, it is a signal to send the dac for service and NOT change the fuse. Obviously the
second fuse will burn as well.
WE ABSOLUTELY DO NOT ALLOW changing the fuses for any larger size than 1A or
installing the “audiophile silver bolts” in place of the fuse. Fuses are there mainly to
SAVE YOUR LIFE. And we mean that.
Volume control
(This converns DACs equipped with TAIV volume control modules with display and
remote).
The volume control is an extremely nice module, that changes the way we use the
DAC. The module consists of 5 elements:
1. Power supply with the DAC power management relay, allowing to switchON/OFF
the whole DAC via the remote while keeping the volume module powered.
2. The display - amber backlit 2 x 16 alpha LCD, which is our GUI
3. The microprocessor board with memory, firmware and the chip that controls the
relays
4. Relay volume board with resistor ladder. The microprocessor connects the resistors
in such way that they form a resistive attenuation L-Pad with 63 steps of logarithmic
attenuation. The overall impedance is held at almost constant 25k and the steps are
calibrated in 1 db distances.
5. The virtual potentiometer with push action
The module is capable not only of volume adjustment but also of the input selection. It
means ANALOG input - like in a preamp. The module does not select digital signals.
6
LampizatOr DAC Manual
Using the volume module: Press the volume knob down for 3 seconds and the display
will show selection of 4 analog inputs . Turn the knob to select the desired input. Press
for 3 s again to exit this menu.
The input selection is available from the remote in direct mode - just press digit 1 to 4
to choose input or use left - right cursor buttons.
** in most DACS that we ship, this function of input selection is disabled because the
DAC is the only active input. You can bring it back by entering the PROGRAMMING
menu.
PROGRAMMING THE MODULE
Press the volume knob for 10 seconds continuously and the display will enter the
programming mode. turn the knob clockwise to go to next menu. Press the knob for 2 s
to enter the selected sub-menu. To exit the sub menu and go back to menu list - press
the knob for 2 s. To exit programming mode - turn the knob right till you choose EXIT
SETUP and press knob for 2 s.
1. Volume step speed: it is default set at 3 , the higher the number the slower is the
reaction of volume level to turning the knob. For example, choosing 6 means that it
takes 3 full turns 360 degrees to adjust the volume full scale. We like it at 6.
2. Number of inputs: choose a limitation of analog inputs to avoid having to deal with
non-existing inputs. The normal DACS have a limitation set to one.
3. Backlight display - choose a percentage of DIMMING - from full light intensity of
display that dims AFTER the period of inactivity. Setting 40 % means, that the
display will be lit 100% during any operation with knob or remote, but when we listen
- the display will dim to 40 % of the full level. We like it on 35 because we like
listening in the dark room.
4. IR Learning - you can program any remote control you want to perform the desired
actions. For example - if you use a CD transport remote, you can choose two
buttons on it that aren’t used for CD and program them to be Vol-Up and Vol-Down,
so you use just one remote. After entering this sub-menu the display will ask you to
press the remote button and you acknowledge the signal code by pressing the knob
for 2 s and proceeding to next function. The display will guide you. At the end choose
exit.
5. OUTPUTS: the module has 3 freely programmable latching or non latching outputs
activated by the remote control. They can be wired to perform a specific function
inside the DAC (say reset, change frequency, activate deemphase or something like
that.
6. Logo change: you can change the welcome logo to your own.
7
LampizatOr DAC Manual
7. Alphanumeric descriptors: you can add alpha descriptors to the 4 inputs. the first
input by default is DAC. Add Phono, Tuner, TV to the other inputs of analog stereo
signals. (The DAC must be equipped with the RCA inputs to use this function).
8. After reaching the end of menu list - the display will show EXIT SETUP. The options
we programmed will be written to a non volatile memory and stored forever. There is
no limit to how many times we can repeat this operation.
MUTE function: this is useful to use instead of turning the volume all the way down.
Available ONLY via remote.
POWER OFF - the DAC will be switched off fully but the remote module will be always
alive to enable you to power it ON again.
*** Do not be upset about the C2011 text - it means the date the firmware was written
for this module and not the year of manufacturing of the DAC.
0dB operation: at full volume - 0dB the DAC operates as if there was no volume
module. This position is recommended for systems with own volume control: preamp or
integrated amp.
COOPERATION WITH THE PREAMP
The DAC with volume control should sound audibly cleaner and more direct without
any preamp between the DAC and the amp. The preamp, however good, will veil a lot
of the DAC’s natural clarity, speed and directness. If you feel you need the preamp
nevertheless, use DAC at the full volume or order your DAC without volume module.
The load presented by the preamp or amp or simply the next analog component that
the DAC sees, should be as high as possible. It is measured in kilo-Ohms and 100Kilo
Ohms is a perfect ballpark value. More is VERY rarely seen. 47 K is next common
value, and it is great too. 20 K is kind of on a low side, but we can handle that. Lower
than 20 is bad news. We must configure the DAC with additional cathode follower
buffer stage.
The DAC will not be damaged in any way, but at around 10K of load the dynamics of
the dac will start to fade away.
Having said that - every properly designed amp or preamp keeps the load value above
40k. And if it doesn’t - we simply don’t choose such amp because it was not designed
with audiophiles in mind.
8
LampizatOr DAC Manual
9
LampizatOr DAC Manual
DIGITAL INPUTS
There are three data types that our DAC can read internally: biphase, i2s and USB.
The bi-phase can come in many forms, but the most common are:
S/PDIF (sony/Philips data inter face) by means of single ended square wave of
amplitude around 0,5 V pp
AES/EBU - the same as S/PDIF but the signal is a mirrored (balanced) pair of square
wave around 2,5 V pp (till 5 V pp)
TTL - just as S/PDIF but 5 V pp
TOSLINK - a fiber optic transmission of S/PDIF producing at the DAC the 5 V TTL
electrical signal.
RS422 - it is practically the same as AES/EBU
The i2S is the same as biphase but separated into 4 signals - each carrying only one
type of information. Biphase encodes 4 groups of informations in one signal stream.
Specifically they are: System Clock, Bit Clock, Left/Right Clock and Data. We can
install these four in any type of connector, because there is no standard. Most
customers use RJ45 LAN socket or simply four RCA sockets just like in TV RGB.
10
LampizatOr DAC Manual
I2S Pinouts The JKI2S uses a RJ45 connector to output I2S signals according to the following pin outs: 1
2
3
4
5
6
7
8
SLCK
SLCK GND
SDATA
SDATA GND
L/RCLK
L/RCLK GND
MCLK
MCLK GND
11
LampizatOr DAC Manual
USB data requires installation of additional converter module to convert the “packet”
data into a steady SPDIF stream. Our asynchronous converter not only has internal
RAM and own clock and own power supply and own transformer, but also it has three
simultaneous outputs we can use: S/PDIF, AES/EBU and i2s.
The USB module requires a driver for Windows to recognize it. MAC OS works without
any drivers.
the driver for Windows is available at www.lampizator.eu/USB.zip
Do not install windows driver with the DAC USB connected to PC.
USB module can be added as a paid option to existing DACs.
Our USB converter is capable of working with 32 bit files with 380kHz signal frequency.
Only USB2 rated cables will work. The USB standard printer cable will not work.
USB cables with ferrite filters (the “thing” on the cable ) will not work.
For best results please download the jPlay software to manage the Windows
parameters and optimize them for working with music via USB.
The RESET button.
The DAC automatically recognizes the frequency and file format of incoming data and
adjusts everything accordingly. But sometimes after power up cycle, the recognition is
not synchronized with the chip’s clock. Thats why we installed the RESET buttons at
the back of the unit. These buttons are monostable (not latching) and they have to be
pressed for circa one second. If there are two buttons we can try to depress them both
or one by one or only one. It does not matter. Usually, after the power up and resetting
- the DAC will play as long as it keeps being powered without a need to reset it again.
12
LampizatOr DAC Manual
LISTENING TO THE MUSIC
some practical tips
Please use good shelf for the DAC. Do not place it on speakers, subs, or even on
transports or amps. Again - tubes hate vibrations.
If you try the special devices for placement, we feel that: granite or marble is bad
(ringing). Cones are just plain ridiculous. Ceramic ball bearing feet are great. Good
wood is great if thick. Others - please try.
The way stereo sound is created inside the DAC can - under optimal condition - recreate the musical experience as it sounded live. It means that two speakers can cause
us listeners to hear sounds everywhere around us, above, below, far in front, almost
close to our face, and also behind us. This type of imaging is our goal. The sound must
be able to get detached from the speakers (so called disappearing act) and the more
our DAC helps doing it - the higher we value it (and price accordingly). We voice our
DACs to be as 3-D as possible.
From our experience speakers should be positioned following the basic rules of
LampizatOr Nirvana Room:
1. Speakers and listeners head form unilateral triangle (3 x 60 degrees) with the
distance between speakers being exactly equal to distance head-speaker.
2. Head must be in exactly middle of the speaker base and the speaker base must be
exactly symmetrical versus side walls. We place speakers and measure the distance
from side walls with 1 cm accuracy.
3. The distance of the speakers to the side walls and speakers to rear wall should not
be equal. We recommend 1,4 times smaller or 1,4 times larger distance- but not
equal. We measure that counting from the magnet of the bass driver.
4. Distance from rear wall of speaker and rear wall of the room should be no less than
0,5 m or 2 feet.
5. Ideally, the tweeter should be at the height of the ear or up to 10 cm higher, but nOT
LOWER. Speakers with tweeters lower than 90 cm sound terribly wrong.
6. The chair or sofa should not have the back support higher than the person’s
shoulders - in other words - should not be just behind the ears
7. Feet are the second ears of our body. They receive a lot of vibration stimulation and
the brain combines this with the hearing. So we advise to have a piece of floor
without any carpet directly where our feet are. Listening with feet (preferably bare)
on the hard floor greatly enhances our perception of music. It is advisable to have
rug or carper between listener and speakers but not under the feet.
8. It is advisable to put something soft directly on the wall behind the speakers
13
LampizatOr DAC Manual
9. The so called toe-in - the degree by which the speakers face the listener and not
alongside the walls straight - is very critical. The rule of thumb is to toe in half way
between standing straight and aiming at the listeners ear. Or slightly more straight,
but not more towards the head.
BURN IN PERIOD
The DAC comes straight from our factory after around 24 Hours of testing so it is not
exactly “new” but it is not burned-in enough. Our customers report back, that after 3
days of constant powering (playing or not) the DAC opens up significantly. Further
improvements are observed after up to 7 days when things stabilize.
Additional one day burn in is needed after every time the DAC: travels somewhere
(vibrations), or is disconnected for over a month or is subject to cold temperature - like
in the car trunk, when left overnight.
When the DAC is fully burned in, the sound quality is stable, and we only need to warm
it after powering every day.
The DAC starts to play after 20 seconds.
The tubes reach full parameters and stabilize after 40 s.
The whole system reaches operating temperature plateau after circa 20 minutes and it
is ready for serious listening.
ENJOY YOUR MUSIC LIKE NEVER BEFORE !
Analog part schematics
Power supply schematics
14