1
WIRELESS LAN
EXPRESSCARD ADAPTER
Quick Installation Guide
Package Contents .......................................................................….. Page 1
Network Card Installation ........................................................……..Page 2
Connect to Wireless Access Point...............................................…. Page 4
Package Contents
Before you starting to use this wireless network card, please check if there’s anything missing in
the package, and contact your dealer of purchase to claim for missing items:
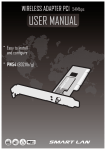
PCIe ExpressCard Wireless Network Card (1 pcs) ……..……………………… 1
Quick installation guide (1 pcs) ………………………………………………… 2
User manual / device driver CDROM (1 pcs) …………….…………………….. 3
3
2
1
Network Card Installation
Please follow the following instructions to install your new PCIe ExpressCard wireless
network card:
1. Please insert the wireless network card
into an empty PCIe ExpressCard slot of
your computer. You can insert the card
when the computer is power off or on.
(Don’t use force to insert the card into
PCIe ExpressCard slot; if you feel it get
stuck, remove it and flip the card upside
down, and then try again).
2. The following message will appear on
your computer, click ‘Cancel’.
3. Insert device driver CDROM into the
CD/DVD ROM drive of your computer,
and execute ‘Setup.exe’ program in
‘Driver’ folder. Please read the end user
license agreement and click ‘I accept the
terms of the license agreement’ and
‘Next’ to accept license agreement.
4. You can choose the configuration tool
used to configure the wireless network
card here. It’s recommended to select
‘Ralink Configuration Tool’, which
provides fully access to all function of
this wireless network card. If you prefer
to use the wireless configuration tool
provided by Windows XP or Vista,
please select ‘Microsoft Zero
Configuration Tool’, then click ‘Next’.
5. Please select ‘Optimize for WiFi
mode’ for wireless compatibility, then
click ‘Next’.
If you want to enhance wireless
performance, please select ‘Optimize for
performance mode’. However, wireless
compatibility is not guaranteed in this
mode. Please refer to user manual for
details of performance mode.
If you see ‘Found New Hardware’
message again, please ignore it and
wait.
6. When you see this message, please
click ‘Finish’ to complete the driver
installation process.
Connect to Wireless Access Point
Using Configuration Utility to Connect to Wireless Access Point
1. After installation is complete, wireless
configuration utility will be shown as an
icon at the lower-right corner of your
windows desktop. Please click the icon by
right mouse key, and select ‘Launch
Config Utilities’.
2. Configuration utility will scan for
wireless access points automatically, and
all found access points will be displayed.
Please select an access point you wish to
connect, and click ‘Connect’.
If the wireless access point you want to
connect does not show here, please click
‘Rescan’
3. If the wireless access point uses
encryption, you have to input WEP
passphrase or WPA preshared key. Please
ask the owner of the wireless access point
you want to connect, and input the correct
passphrase / preshared key here, then click
‘OK’. If the value you inputted here is
wrong, you will not be able to connect to
wireless access point.
Authentication type is selected
automatically, please don’t change it.
4. If the wireless access point is
successfully connected, you’ll see a
‘Connected’ message displayed at the
lower-left corner of wireless configuration
utility window. Click ‘OK’ to exit.
For advanced settings and other features of this PCIe wireless network card, please refer to user
manual enclosed in supplied CD-ROM.