1
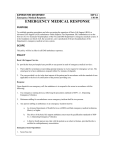
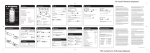
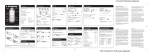
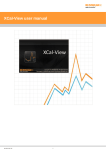
User’s Manual General Information Thank you for selecting SCT Hardware. This manual will outline the steps for the use of the XCalibrator 2. The SCT XCalibrator 2 will work with the following vehicles: 1996 – 2005 Mustang 1996 – 2005 F-Series SVT Focus Focus Escort Thunderbird 2003 – 2005 6.0L Diesel Lincoln LS 2005 Ford GT All OBD-II vehicles supported by the XCalibrator I The XCalibrator 2 is the one device that can tune virtually all OBD-II vehicles from 1996 to 2005 and datalog them as well. This includes vehicles with EEC V, PTEC or PowerPC processors. With a single flash device you can now flash all models of Ford with OBD 2 or CAN. You can also datalog all ODB 2 and the new CAN vehicles such as 2005 Mustang and late model F series pickups. The XCalibrator 2 can store up to three programs plus the stock tune from a vehicle. The dealer will create up to three different tunes for the vehicle and then upload these tunes to the XCalibrator 2. The first time it is used, it downloads the stock processor tune of the vehicle and the VIN. The XCalibrator 2 is then locked to that vehicle – it will not work on multiple vehicles. The dealer CAN re-use a XCalibrator 2 up to three different times on different vehicles, but before that can happen, the vehicle it is currently VIN-locked to, must be flashed back to stock configuration. The dealer can change tunes for a customer as many times as desired, as long as the XCalibrator will be used on the same vehicle. The XCalibrator 2 can also datalog all the necessary parameters for tuning with the addition of a laptop computer. Future firmware upgrades will include datalogging directly from the XCalibrator 2’s LCD screen. The XCalibrator 2 also has the capability of having it’s firmware (control program) updated so that any future enhancements are just a mouse click away. With the addition of Extreme Tune software, which is a free download for customers, customers will actually be able to make minor changes to their tunes themselves. Things like tire size, axle ratio, idle, minor air to fuel adjustments, minor timing adjustments, shift schedules, converter lock, shift pressure, rev limiter, speed limiter and on some vehicles a two step rev limiter can be configured by the customer. When Advantage 3.0 is released it will allow customer to make adjustments using the XCalibrator 2’s screen. The XCalibrator 2 is not legal for sale on pollution controlled vehicles or in the state of California Caution: On 1994-1997 vehicles that are flashed, it is necessary to remove the battery cable after reflashing to clear the PCM’s adaptive memory. Please email questions to: support@sctflash.com 1 Requirements for Custom Programming the XCalibrator 2 You will need the following items to program and use the XCalibrator 2: 1. Extreme Tune software available at: http://www.sctflash.com. 2. Windows based computer Pentium II or better, at least 64 megabytes of Ram, at least 5 megabytes of drive space. Recommended: at least a 1 Gz Pentium III with 256 Mb Ram. 3. Unused USB port. 4. Windows 98 Second Edition (SE) or newer. Recommended: Windows XP. 5. SCT XCalibrator 2. 6. USB Cable (A/B) 7. The .xtr file from your dealer. The XCalibrator 2 is supplied with a an integral vehicle diagnostic port cable and the user’s guide. 2 Using the XCalibrator 2 to Flash the Vehicle’s Processor It is a good idea to turn off all accessories such a stereo systems while flashing. You must also pull the fuel pump and fan fuses to prevent these from drawing vehicle power during a flashing session. This is especially helpful for vehicles that take a longer time to flash, such as the SVT Focus. If the vehicle’s battery is in question, you might wish to connect a battery charger during the flashing process. Plug the black OBD-II cable to the OBD-II port of the vehicle. The LCD screen will display the dealer info that was previously saved and then automatically go to the main menu screen. Use the keypad to scroll up and down the main menu, use the select button to select a choice and the Cancel button to ‘back out’ of an operation. Scroll Up Cancel Select Scroll Down Scroll down to the second menu item: Program Vehicle 3 Press Select If there is more than one tune saved, you can use the arrow keys to scroll up/down to select the tune. If the vehicle has been previously flashed, you have the option of returning it to stock. Assuming you will be flashing the ‘Base Performance’ tune, choose ‘Base Performance’ Press Select and the following screens will appear: 4 Turn the vehicle’s key on without starting the engine. Do Not disconnect 5 Press the select button. Turn the key off and press select again. The vehicle is now flashed with the custom program. The stock program is stored in the XCalibrator 2. To return the vehicle to stock, follow the above steps, which are similar except choose the Stock Vehicle program. 6 The XCalibrator 2 Menus Not only will the XCalibrator 2 flash your vehicle’s processor, but it will also allow you to datalog, to read and clear diagnostic trouble codes (DTCs). And when firmware is updated, will allow you to change a vehicle’s basic settings via the XCal 2’s screen. You can also update the XCal 2’s firmware online with a free downloadable program. When you first connect the XCal 2 to either a USB port on a computer or to the vehicle’s diagnostic port, the splash screen that the dealer prepared will be seen, followed by the main menu screen. From the main menu screen you have the option of navigating to the following sub-menus: 1) DTC Data Menu - You have the option of reading or clearing DTCs on these screens. 2) Program Vehicle - this allows you to flash the vehicle’s processor as previously outlined. 3) Display Dealer Info - this will display the splash screen the dealer has set into the XCal 2. 4) LCD Contrast - this allows adjustment of the screen’s contrast. 5) Device Info - this will display information about the firmware version installed on the XCal 2 and its current state. 7 Later firmware updates will add additional functionality. 8 Datalogging with the XCalibrator 2 The XCalibrator 2 can also be used as a datalogger. All that’s needed is a USB cable a computer and Live Link software, which is a free download. Live Link is the datalogging software used with the XCalibrator 2 to connect to the vehicle. Using a combination of numerical, graphical, and gauge displays. This program allows you to data log the necessary information to tune a vehicle correctly, as well as save the data so you can send it to the dealer, to refine the custom tune. Installing Live Link Software Download Live Link software from http://www.sctflash.com, save it on your desktop, then double click the icon and you will be presented with the following screens: 9 Live Link is installed once the installation operations have been completed. Installing USB Drivers Before you can use Live link Software and before you can upload tunes to the XCalibrator 2, you must first install the USB drivers. In most cases they come with the Live Link software but can be downloaded separately also. To begin, plug the XCalibrator 2 to the computer with an A/B USB cable (one ‘normal’ end, one smaller ‘square’ end - the same type of cable used by most USB printers, scanners, etc.). The following screens will pop up. Choose “No Not This Time. Click “Next” Choose “Install from a list or specific location”. Click “Next” Choose “Search for the Best Driver in These Locations”. Check mark “Include This Location in the Search”. Click on Browse. Browse to the location of where Live Link is installed. Click “Next” The process will repeat itself another time once the first set of drivers have been successfully installed. Follow the same steps as listed above. Once the drivers have been successfully installed, Windows will inform you that the new hardware is installed and ready for use. 10 Datalogging with the XCalibrator 2 To begin datalogging, you must first have installed Live Link software on your computer as well as the USB drivers. You’ll also need a USB A/B cable to connect the XCal 2 to your computer. Connect the XCal 2 to your vehicle via the diagnostic port, connect the XCal 2 to your computer via the USB cable and allow a few seconds for the device to be recognized by your computer, turn the vehicle’s key on and then run Live Link. You’ll see this screen: Click on this icon to begin. After a short delay, you will then be presented with the list of PIDs to choose from. Choose the PIDs you wish to log. Please Note: You will NOT be able to datalog with the XCal 2 and Live Link software if there is an SCT chip in the J3 Port of the car’s processor. The car will not operate in this configuration. In order to datalog with an XCal 2 and Live Link with an SCT chip in the J3 port, you must obtain a “blocker” cable from SCT which connects between the XCal 2 and the diagnostic port of the vehicle. 11 Open the various ‘trees’ that are available by clicking on them - then click in a check box to mark the PIDs you wish to log. You can interface most wideband 02 sensors to the XCal 2 via a 9 pin round mini DIN cable available from SCT. Choose one of the Analog Input PIDs when logging wide band data. This function will be added in later firmware updates. Trim Values Please note that trim values are expressed as 1.0 being stoichiometric (14.64). For short term trim values a value of greater than one means the engine is running rich and the ECU is removing fuel, e.g. a short term trim value of 1.10 means that the engine is 10% rich and you’d need to multiply the MAF curve in that area by 0.90. A trim value of 0.90 means that the engine is running too lean and the ECU is adding fuel. Now the confusing part – for long term trims it is just the opposite and the display is different as well. For long term trims you need to add 0.5 to the reading you see – if you see a long term trim of 0.53 displayed, then the actual value is (0.5 + 0.53) = 1.03. Long term fuel trims are displayed inversely to the short term trims – a value of 1.10 means the engine is running too lean and the ECU is adding fuel, a value of 0.90 means the engine is running too rich and 12 the ECU is pulling fuel. Click on the check boxes next to a PID to graph that item. Right click on the gauges to configure them for use. 13 Start the engine, and click on the green button to begin logging. When you are finished logging, click on the red button to stop logging, before you shut the engine off. You may then save the log file for future reference. Green Button Red Button Live Link Toolbar Select PIDs Expand Graph Start/stop logging Start/Pause/Stop Playback Zoom Out/In Scroll Left/Right 5 seconds Shift Up/Down Go to Previous/Next Bookmark Set Bookmark 14 Analog Cable Wiring PIn Number from analog DIN Connector 1 2 3 4 5 6 7 8 9 Description Ground Analog Ground (Used with analog inputs) LCD CAN + LCD CAN Power Output #1 Analog Input #1 LCD Power Output Power Output #2 Analog Input #2 Caution!! Signals to the XCal 2 from external sources must not exceed 5 volts. If voltage applied to the XCal 2’s analog inputs exceeds 5 volts analog port failure will result and will void your warranty. Please consult technical support if you have any questions. Using Live Update Live Update is a small, free program that allows you to update the firmware (controlling software) on the XCalibrator 2 so that updates and new features can be installed automatically. The program and updated firmware files are available at http://www.sctflash.com Live update firmware files have a *.luf suffix. To use it, download the free application AND the firmware update. Unzip the Live update program connect the XCal 2 to the computer via the USB cable and then run Live Update. Click Browse Then navigate to the location of the firmware update file. Then click OK 15 The installation progress will be shown, and it will automatically complete. Once it is completed, the XCal 2 is updated. . 16 Using Extreme Tune To use Extreme Tune, first download the free program from http://www.sctflash.com and install it. Then run the program. Check desired position of file. Navigate to the .xtr’s file location Use the ... button to bring up the file dialogue to choose the file Once the file is chosen, click the Customize button to open the tuning window After changes are made, and you have clicked on Accept, connect the Xcal 2 to the computer via the USB cable, allow time for the computer to recognize it, then click on Program XCal. It’s also a good idea to click on ‘Save Files also. You can adjust programs for all available memory slots in the XCal. Many different parameters can be adjusted, just be sure to make the adjustments and click on Accept or Apply for each item. Changes are made to each parameter. When all changes are completed, click on Accept. 17 Important Points to Remember 1. Remove the fuel pump fuse and fan fuse before flashing. Be sure heater fans, windshield wipers or any other current draw is minimized during flashing. 2. Do NOT interrupt the flashing process once it has begun, by disconnecting the cable of battery or pulling the diagnostic cable. Be sure the customer knows this. 3. The XCalibrator 2 will not operate if there is a chip or other aftermarket device in the J3 port. Remove all chips. 4. Never attempt to reflash ‘on the fly’ or with the engine running as this will damage the XCalibrator 2 and processor. 5. Accidentally using a ‘stock’ tune instead of a ‘nitrous’ tune with nitrous being injected will cause severe engine damage. 6. Running with lower octane fuel then was intended for the tune in use can result in engine damage. 7. The XCalibrator 2 becomes ‘VIN’ locked to the vehicle once it is used. 8. On 1994-1997 vehicles that are flashed, it is necessary to remove the battery cable after re-flashing to clear the PCM’s adaptive memory. 9. In the event that the XCalibrator 2 does not successfully flash the vehicle, it will display an error message on the screen. If this occurs, turn the key off and disconnect the XCalibrator. Reconnect it it, then follow the steps to return the stock program to the vehicle. You then may attempt to flash the vehicle again. 10. Never operate the motor vehicle and attempt to datalog. Have someone else drive the car if you need to do this. Obey all traffic laws. If you have problems, contact Superchips Custom Tuning at: Superchips Custom Tuning 134 Baywood Ave Longwood, FL 32750 (407) 774-2447 or support@sctflash.com Superchips Custom Tuning products are not lot legal for sale or use on pollution controlled vehicles. SCT product use in California is limited to: racing vehicles which may NOT be used on a highway. Rev: 6/13/05 18 Custom Tune Information Customer‛s Name Calibration Code Custom File Descriptions Program #1 Program #2 Program #3 Dealer‛s Name Date: