1
vty-ui User’s Manual
For vty-ui version 1.1
Jonathan Daugherty ([email protected])
March 20, 2011
Contents
1
2
3
Introduction
2
1.1
Getting Started . . . . . . . . . . . . . . . . . . . . . . . . . . . . . . . . . . .
2
1.2
Conventions and API Notes . . . . . . . . . . . . . . . . . . . . . . . . . . . .
5
Building Applications With vty-ui
6
2.1
Composing Widgets . . . . . . . . . . . . . . . . . . . . . . . . . . . . . . . .
6
2.2
Handling User Input . . . . . . . . . . . . . . . . . . . . . . . . . . . . . . . .
8
2.3
Focus Groups and Focus Changes . . . . . . . . . . . . . . . . . . . . . . . .
9
2.3.1
Top-Level Key Event Handlers . . . . . . . . . . . . . . . . . . . . . .
10
2.3.2
Container Widgets and Input Events . . . . . . . . . . . . . . . . . . .
10
2.3.3
Merging Focus Groups . . . . . . . . . . . . . . . . . . . . . . . . . . .
11
2.4
Collections . . . . . . . . . . . . . . . . . . . . . . . . . . . . . . . . . . . . . .
11
2.5
The vty-ui Event Loop . . . . . . . . . . . . . . . . . . . . . . . . . . . . . .
13
2.5.1
Skinning . . . . . . . . . . . . . . . . . . . . . . . . . . . . . . . . . . .
14
2.5.2
Attributes . . . . . . . . . . . . . . . . . . . . . . . . . . . . . . . . . .
14
2.5.3
vty-ui and Concurrency . . . . . . . . . . . . . . . . . . . . . . . . .
15
Implementing Your Own Widgets
17
3.1
17
Creating a New Widget Type . . . . . . . . . . . . . . . . . . . . . . . . . . .
1
CONTENTS
4
2
3.2
The WidgetImpl API . . . . . . . . . . . . . . . . . . . . . . . . . . . . . . .
20
3.3
Rendering . . . . . . . . . . . . . . . . . . . . . . . . . . . . . . . . . . . . . .
23
3.4
Growth Policy Functions . . . . . . . . . . . . . . . . . . . . . . . . . . . . . .
24
3.5
Deferring to Child Widgets . . . . . . . . . . . . . . . . . . . . . . . . . . . .
25
3.6
Widget Positioning . . . . . . . . . . . . . . . . . . . . . . . . . . . . . . . . .
27
3.7
Cursor Positioning . . . . . . . . . . . . . . . . . . . . . . . . . . . . . . . . .
28
3.8
Handling Events . . . . . . . . . . . . . . . . . . . . . . . . . . . . . . . . . .
28
3.9
Composite Widgets . . . . . . . . . . . . . . . . . . . . . . . . . . . . . . . . .
31
Guided Tour of Built-In vty-ui Widgets
34
4.1
Borders . . . . . . . . . . . . . . . . . . . . . . . . . . . . . . . . . . . . . . . .
34
4.2
Boxes . . . . . . . . . . . . . . . . . . . . . . . . . . . . . . . . . . . . . . . . .
36
4.3
Buttons . . . . . . . . . . . . . . . . . . . . . . . . . . . . . . . . . . . . . . . .
38
4.4
Checkboxes and Radio Buttons . . . . . . . . . . . . . . . . . . . . . . . . . .
38
4.4.1
Binary Checkboxes . . . . . . . . . . . . . . . . . . . . . . . . . . . . .
39
4.4.2
Radio Buttons . . . . . . . . . . . . . . . . . . . . . . . . . . . . . . . .
39
4.4.3
Generalized, Multi-State Checkboxes . . . . . . . . . . . . . . . . . .
41
4.4.4
Customizing a CheckBox’s Appearance . . . . . . . . . . . . . . . .
41
4.5
Collections . . . . . . . . . . . . . . . . . . . . . . . . . . . . . . . . . . . . . .
42
4.6
Dialogs . . . . . . . . . . . . . . . . . . . . . . . . . . . . . . . . . . . . . . . .
42
4.7
The Directory Browser . . . . . . . . . . . . . . . . . . . . . . . . . . . . . . .
44
4.7.1
Skinning . . . . . . . . . . . . . . . . . . . . . . . . . . . . . . . . . . .
45
4.7.2
Annotations . . . . . . . . . . . . . . . . . . . . . . . . . . . . . . . . .
46
4.7.3
Error Reporting . . . . . . . . . . . . . . . . . . . . . . . . . . . . . . .
46
4.8
Edit Widgets . . . . . . . . . . . . . . . . . . . . . . . . . . . . . . . . . . . . .
47
4.9
Text . . . . . . . . . . . . . . . . . . . . . . . . . . . . . . . . . . . . . . . . . .
48
CONTENTS
4.9.1
3
Formatters . . . . . . . . . . . . . . . . . . . . . . . . . . . . . . . . . .
49
4.10 Centering . . . . . . . . . . . . . . . . . . . . . . . . . . . . . . . . . . . . . . .
50
4.11 Fills . . . . . . . . . . . . . . . . . . . . . . . . . . . . . . . . . . . . . . . . . .
50
4.12 Fixed-Size Widgets . . . . . . . . . . . . . . . . . . . . . . . . . . . . . . . . .
51
4.13 Limits . . . . . . . . . . . . . . . . . . . . . . . . . . . . . . . . . . . . . . . . .
52
4.14 Lists . . . . . . . . . . . . . . . . . . . . . . . . . . . . . . . . . . . . . . . . . .
53
4.14.1 List Inspection . . . . . . . . . . . . . . . . . . . . . . . . . . . . . .
55
4.14.2 Scrolling a List . . . . . . . . . . . . . . . . . . . . . . . . . . . . . .
55
4.14.3 Handling Events . . . . . . . . . . . . . . . . . . . . . . . . . . . . . .
56
4.15 Padding . . . . . . . . . . . . . . . . . . . . . . . . . . . . . . . . . . . . . . .
57
4.16 Progress Bars . . . . . . . . . . . . . . . . . . . . . . . . . . . . . . . . . . . .
58
4.17 Tables . . . . . . . . . . . . . . . . . . . . . . . . . . . . . . . . . . . . . . . . .
59
4.17.1 Column Specifications: the ColumnSpec Type . . . . . . . . . . . . .
60
4.17.2 Border Settings . . . . . . . . . . . . . . . . . . . . . . . . . . . . . . .
61
4.17.3 Adding Rows . . . . . . . . . . . . . . . . . . . . . . . . . . . . . . . .
61
4.17.4 Default Cell Alignment and Padding . . . . . . . . . . . . . . . . . .
62
4.17.5 Customizing Cell Alignment and Padding . . . . . . . . . . . . . . .
62
Chapter 1
Introduction
The terminal emulator user interface is a good, lightweight alternative to fully graphical
interfaces such as those provided by GTK, QT, and the Windows and Macintosh OS X operating systems. Such interfaces are appealing because they can be used easily for remote
administration, and many users prefer them over graphical interfaces for their responsiveness.
Historically, terminal interfaces have been notoriously difficult to program. Libraries such
as Ncurses, CDK, Dialog, and Newt have appeared to aid in this task.
vty-ui provides a widget infrastructure for constructing user interfaces similar to that
provided by libraries such as QT and GTK. In addition to rendering infrastructure, vty-ui
provides infrastructure for managing user input events, changes in widget focus, box layout support, and a flexible API for binding event handlers to widget events. It is built on
the Vty library,1 which provides functionality similar to Ncurses.
1.1
Getting Started
To get started using the library, you’ll need to import the main library module:
import Graphics.Vty.Widgets.All
The All module exports everything exported by the library; if you prefer, you may import
specific modules depending on your needs.
1
Vty on Hackage: http://hackage.haskell.org/package/vty
4
CHAPTER 1. INTRODUCTION
5
As a demonstration, we’ll create a program which presents an editing widget in the middle
of the screen. You’ll be able to provide some text input and press Enter, at which point the
program will exit and will print what you entered. The code for this program is as follows:
main :: IO ()
main = do
e <- editWidget
ui <- centered e
fg <- newFocusGroup
addToFocusGroup fg e
c <- newCollection
addToCollection c ui fg
e ‘onActivate‘ \this ->
getEditText this >>= (error . ("You entered: " ++))
runUi c defaultContext
There are some interesting things to note about this program. First, it withstands changes
in your terminal size automatically, even though the size of the terminal is not an explicit
part of the program. Second, it only took a few lines of code to create a rich editing interface and position it in the terminal as desired. Now we’ll go into some depth on this
example.
e <- editWidget
This line creates an Edit widget. This type of widget provides an editing interface for a
single line of text and supports some Emacs-style editing keybindings. The Edit widget
also takes care of horizontal scrolling when its input doesn’t fit into the allowed space. For
more information on this widget type, see Section 4.8.
ui <- centered e
This creates a new Centered widget, ui, which centers the Edit widget vertically and
horizontally. This is a common pattern: create one widget and wrap it in another to affect
its behavior. For more information on the Centered widget type, see Section 4.10.
fg <- newFocusGroup
CHAPTER 1. INTRODUCTION
6
This creates a FocusGroup widget. A “focus group” is an ordered sequence of widgets
that will receive focus as you cycle between them. By default, this cycling is done with the
Tab key. Every vty-ui interface requires a focus group.
addToFocusGroup fg e
This adds the Edit widget to the FocusGroup. The first widget to be added to a FocusGroup automatically receives the initial focus, and widgets receive focus in the order in
which they are added to the group.
c <- newCollection
This creates a new Collection. A “collection” is group of widgets, each with its own
FocusGroup, and the Collection makes it possible to switch between these interfaces.
Think of an e-mail client whose initial interface might be listing the contents of the inbox;
subsequent interactions might change the interface to present only the selected message
on the screen, with different navigation keystrokes, one of which returns to the inbox
interface. Collections make it easy to switch between such interface modes. Every
vty-ui program requires a Collection.
addToCollection ui fg
This adds the top-level user interface widget, ui, to the Collection and sets its focus
group to fg. This means that the widgets to receive the users focus (and, consequently,
input) will be those in the focus group fg and the interface to be presented will be ui.
e ‘onActivate‘ \this -> getEditText this >>=
(error . ("You entered: " ++))
This binds an event handler to the “activation” of the Edit widget. Activation occurs
when the user focuses the Edit widget and presses Enter. The handler for this event is
an IO action which takes the Edit widget itself as its only parameter. The getEditText
function gets the current text of the Edit widget, and we use error to abort the program
and print the text.
runUi c defaultContext
CHAPTER 1. INTRODUCTION
7
This runs the main vty-ui event loop with the Collection we created above. We pass
a “default rendering context” which provides defaults for the rendering process, such as
the default foreground and background colors to be used for normal and focused widgets,
as well as a skin for line-drawing. The main event loop processes input events from the
Vty library and re-draws the interface after calling any event handlers. It also shuts down
Vty in the event of an exception.
We’ve now seen the general structure of a vty-ui program:
• Create and compose widgets,
• Create a FocusGroup and add input-receiving widgets to the group,
• Create a Collection and add the top-level widget(s) and FocusGroup(s) to the
Collection, and
• Invoke the main event loop with the Collection and some default rendering settings.
1.2
Conventions and API Notes
When you create a widget in vty-ui, the result with almost always have a type like
Widget a. The type variable a represents the specific type of state the widget can carry,
and therefore which operations can be performed on it. For example, a text widget has
type Widget FormattedText. Throughout this document, we’ll refer frequently to
widgets by their state type (e.g., “Edit widgets”). In most cases we are referring to a
value whose type is, e.g., Widget Edit. When in doubt, be sure to check the API documentation.
The Widget type is actually an IORef which wraps the real widget implementation type,
WidgetImpl a. So it’s best to use Widget a whenever you need to refer to a widget;
this makes it possible to mutate widget state when events occur in your application.
Regarding return values, even if a function is of type ... -> IO a, we say it is “in the
IO monad” and returns a. We won’t bother saying that a function returns IO a.
Lastly, we will refer to the many vty-ui library modules throughout this document. We
will almost always omit the Graphics.Vty.Widgets module namespace prefix and will
instead refer to the modules by their short names.
Chapter 2
Building Applications With vty-ui
This chapter will introduce various design aspects of the library and provide you with the
tools you’ll need to build your own applications with vty-ui.
2.1
Composing Widgets
As with any user interface toolkit, vty-ui lets you compose your widgets to create a user
interface that is laid out the way you want. Widgets fall into two basic categories:
• “Basic” widgets, such as text strings, ASCII decorations (e.g. vertical and horizontal
borders), and space-filling widgets.
• “Container” widgets, which hold other widgets and control how those widgets are
laid out and rendered. Most of these widgets influence layout; some modify other
behaviors.
The most important widgets used in interface layout are the box layout widgets:
vBox :: Widget a -> Widget b -> IO (Widget (Box a b))
hBox :: Widget a -> Widget b -> IO (Widget (Box a b))
The vBox returns a Box widget which lays out its two children vertically in the order in
which they are passed to the function. The hBox function does the same for horizontal
layout. These two widget types will probably be the most common in your applications.
8
CHAPTER 2. BUILDING APPLICATIONS WITH VTY-UI
9
vty-ui provides some combinators to make Boxes a bit eaiser to work with:
(<-->) :: IO (Widget a) -> IO (Widget b) -> IO (Widget (Box a b))
(<++>) :: IO (Widget a) -> IO (Widget b) -> IO (Widget (Box a b))
These functions are essentially aliases for vBox and hBox, respectively, with the important
difference being that they take IO arguments. You can use them to create nested boxes as
follows:
mainBox <- (hBox a b) <--> (hBox c d <++> vBox e f)
If you already have a reference to another widget, you can merely wrap it with return to
use it with these combinators:
box2 <- (return box1) <++> (hBox c d)
The box layout widgets do more than merely place their children next to each other. Box
widgets determine how to lay their children out depending on two primary factors:
• the amount of terminal space available to the box at the time it is rendered
• the size policies of the child widgets
Just as with graphical toolkits, when the terminal is resized, more space is available to
render the interface, so we need to use the space wisely. To determine how to use it,
vty-ui requires that the widgets declare their own policies for how to use the available
space. The default size policy for the Box itself is to expand to use all available space only
if that is true for either of its children. As a result, a Box containing two fixed-size widgets
will have a fixed size. For more details on how the Box widget is implemented, see the
API documentation.
Placing text widgets in Boxes may suffice for most purposes. See the documentation for
space-filling widgets for greater control over box layout.
There are many other examples of widgets which influence their children; we’ll see more
examples of these in Chapter 4.
CHAPTER 2. BUILDING APPLICATIONS WITH VTY-UI
2.2
10
Handling User Input
Many widgets in vty-ui can accept user input. A widget can accept user input if (1) it
has one or more key event handlers attached to it and (2) if it currently has the focus. The
concept of focus in vty-ui works the same as in other user interface toolkits: essentially,
only one widget has the focus and any user input is passed to that widget for handling.
Key event handlers can be added to any Widget a as follows:
w <- someWidget
w ‘onKeyPressed‘ \this key modifiers -> do
...
return False
The handler must return IO Bool; True indicates that the handler processed the key
event and took action and False indicates that the handler declined to handle the event.
The event handler is passed the keystoke itself along with any modifier keys detected by
the underlying Vty input processing.
Key event handlers are invoked in the order in which they are added to the widget. In the
following example, the first handler will decline the ’q’ key event but the second one will
process it:
w ‘onKeyPressed‘ \_ key _ ->
if key == KASCII ’f’ then
(launchTheMissiles >> return True) else
return False
w ‘onKeyPressed‘ \_ key _ ->
if key == KASCII ’q’ then
exitSuccess else return False
This functionality allows any widget to have its own ”default” input event handling while
still allowing you to add custom input event handling.
Although any widget – even a basic text widget – can accept input events in this way, the
events will only reach the widget if it has the focus. The way we manage focus is with
”focus groups.”
CHAPTER 2. BUILDING APPLICATIONS WITH VTY-UI
2.3
11
Focus Groups and Focus Changes
Graphical interfaces allow the user to change focus between all of the primary interface
input elements, usually with the Tab key. The same is true in vty-ui, except that because
any widget can accept events – and because you decide which widgets are “focusable”
– the library cannot automatically determine which widgets should get the focus, or the
order in which focus should be received. As a result, vty-ui provides a type called a
”focus group.”
A focus group is just an ordered sequence of widgets that should get the user’s focus as
the Tab key is pressed. Widgets receive focus in the order in which they are added to the
group, and the first widget to be added automatically gets the focus when it is added.
Creating a focus group is simple:
fg <- newFocusGroup
Adding widgets to focus groups is also straightforward:
w <- someWidget
addToFocusGroup fg w
A widget’s “focused behavior” depends entirely on the widget’s implementation. Some
widgets, when focused, provide a text cursor; others merely change foreground and background color. In any case, the widgets that the user can interact with should be in the
interface’s focus group.
Once widgets are added to the focus group, you won’t have to manage anything else; the
Tab key event is intercepted by the FocusGroup itself, and user input events are passed
to the focused widget until the focus is changed.
If, for some reason, you would like to be notified when a widget receives or loses focus,
you may register event handlers for these events on any widget:
w <- someWidget
w ‘onGainFocus‘ \this -> ...
w ‘onLoseFocus‘ \this -> ...
In both cases above, the this parameter to each event handler is just the widget to which
the event handler is being attached (in this case, w). Many event handlers follow this
pattern.
CHAPTER 2. BUILDING APPLICATIONS WITH VTY-UI
2.3.1
12
Top-Level Key Event Handlers
All user input is handled via a FocusGroup; the focus state of the group indicates which
widget will receive user input events. However, FocusGroups are widgets, too! Although
they cannot be rendered, they support the same key handler interface as other widgets.
This is how we create ”top-level” key event handlers for the entire interface. For example,
if you want to register a handler for a ”quit” key such as ’q’, the focus group itself is
where this key event handler belongs. This is because focus groups always try to handle
key events first, and only pass those events onto the focused widget if the FocusGroup
has no matching handler.
fg <- newFocusGroup
fg ‘onKeyPressed‘ \_ key _ ->
if key == KASCII ’q’ then
exitSuccess else return False
2.3.2
Container Widgets and Input Events
Most of the time you will probably end up adding key event handlers directly to interactive widgets, but it may be convenient to wrap those widgets in containers that affect their
behavior. For example, in the demonstration in Section 1.1, we used then centered function to center an edit widget. The result was a Centered widget, which is one of the many
built-in container widget types. This type of widget “relays” user input events and focus
events to the widget it contains. This means you can add key and focus event handlers to
the Centered widget and they will be passed on to the child widget for handling. Most
container widgets are implemented this way; when in doubt about event relaying behavior, consult the API documentation. Relaying of events is accomplished with the following
functions, defined in the Core module:
• relayFocusEvents – relays focus events from one widget to another. For example:
wRef ‘relayFocusEvents‘ someWidget. When wRef becomes focused, it will
focus someWidget.
• relayKeyEvents – relays keyboard input events from one widget to another. For
example: wRef ‘relayKeyEvents‘ someWidget. When wRef becomes unfocused, it will unfocus someWidget.
As we saw above, only focused widgets will ever be asked to process input events; this
means that if you add event handlers to a container such as Centered, you’ll need to add
that widget – not its child – to the FocusGroup.
CHAPTER 2. BUILDING APPLICATIONS WITH VTY-UI
13
You might wonder why this is useful. Consider a situation in which you want to add
some padding to an input widget, such as an Edit widget, but when the Edit widget is
focused you want to highlight the padding, too, to make them appear as a single widget.
Since padding widgets (see Section 4.15) relay events to their children, you could focus the
padding widget and the edit widget would automatically receive the focus as well as user
input events. This kind of focus and event “inheritance” makes it possible to create new,
composite widgets in a flexible way, while getting the desired visual results.
2.3.3
Merging Focus Groups
Some widgets, such as the “dialog” widget (Dialog, see Section 4.6), are composed of
a number of input widgets already; widgets like Dialog must create their own FocusGroups to provide coherent focus behavior, and they will return them to you when they
are created. In order to integrate these focus groups into your application, you must merge
them with your own focus group.
For example, consider the “directory browser” widget (DirBrowser, see Section 4.7). You
might want to place this alongside other widgets that should also accept input. When you
create the DirBrowser widget, you will get a reference to the widget and a reference to
its FocusGroup:
(browser, fg1) <- newDirBrowser defaultBrowserSkin
fg2 <- newFocusGroup
-- Add my own widgets to fg2
merged <- mergeFocusGroups fg1 fg2
The mergeFocusGroups function will merge the two focus groups and preserve the order of the widgets, such that widgets in the first group will come before widgets in the second group in the new group’s focus ordering. The merged group should then be passed
to the rest of the setup process that we introduced in Section 1.1; we’ll go into more detail
on that in the next section.
2.4
Collections
Traditional user interfaces present the user with a window for each task the user needs to
accomplish. Since we don’t have the option of presenting multiple ”windows” to users of a
CHAPTER 2. BUILDING APPLICATIONS WITH VTY-UI
14
terminal interface, we must present the user with one interface at a time. Then, through the
use of event handlers, the application will manage the transition between these interfaces.
Consider a text editor program in which we must present these top-level interfaces in the
following order:
• The user runs the program and is presented with an interface to select a file to edit;
• The user chooses a file to edit and is presented with the editing interface;
• After editing, the user chooses to exit and we present a dialog which asks the user
whether to save the file.
All three of these interfaces are separate and should be given the entire terminal window;
unlike other graphical toolkits, vty-ui does not provide a way to ”show” or ”hide” widgets. Instead, it provides the notion of a ”collection.” A Collection is a widget which
wraps a set of other widgets and maintains a pointer to the one that should be displayed
at any given time. The application then changes the current interface by changing the
Collection’s state.
But an interface is more than what is presented in the terminal; each interface should have
its own set of user input widgets and its own notion of focus. Therefore, a Collection
is a set of interfaces and their focus groups. When we change the state of the Collection,
we are really changing both the visual interface as well as the focus group used to interact
with it.
To create a Collection:
c <- newCollection
To add an interface and a FocusGroup to the Collection:
fg <- newFocusGroup
-- Add widgets to focus group fg
ui <- someWidget
changeToW <- addToCollection c ui fg
As a convenience, addToCollection returns a IO action which, when run, will switch
to the specified interface. In the example above, changeToW is an action which will switch
to the interface with ui as its top-level widget and fg as its focus group. You can use this
CHAPTER 2. BUILDING APPLICATIONS WITH VTY-UI
15
action in event handlers that change your interface state. If you prefer, you can use the
setCurrentEntry function instead, which allows you to set the Collection’s interface
by number. Use of setCurrentEntry is not recommended, however, since a bad index
can cause an exception to be thrown.
2.5
The vty-ui Event Loop
vty-ui manages the user input event loop for you, and once you have created and populated a Collection, you can invoke the main vty-ui event loop:
runUi c defaultContext
The first parameter is the Collection you have created; the second parameter is a RenderContext. Here we use the “default” rendering context provided by the library. The
“rendering context” provides three key pieces of functionality:
• The ”skin” to use when rendering ASCII lines, corners, and intersections
• The default “normal” (unfocused) attribute
• The default “focused” attribute
• The current “override” attribute
The event loop will run until one of two conditions occurs:
• An exception of any kind is thrown; if an exception is thrown, the event loop will
shut down Vty cleanly and re-throw the exception.
• An event handler or thread calls shutdownUi; the shutdownUi function sends a
signal to stop the event loop, at which point control will be returned to your program. The shutdown signal goes into a queue with all of the other signals processed
by the event loop, such as key input events and scheduled actions (see Section 2.5.3),
but it will preempt them. Note that there is no guarantee that there won’t be some
other signal placed into the queue before you run shutdownUi, such as when another thread is running in parallel with an event handler which calls shutdownUi.
CHAPTER 2. BUILDING APPLICATIONS WITH VTY-UI
2.5.1
16
Skinning
Some widgets, such as the Table widget (see Section 4.17) and the horizontal and vertical border widgets VBorder and HBorder (see Section 4.1), use line-drawing characters to draw borders between interface elements. Some terminal emulators are capable
of drawing Unicode characters, which make for nicer-looking line-drawing. Other terminal emulators work best only with ASCII. The default rendering context uses a Unicode
line-drawing skin, which you can change to any other skin (or your own) as follows:
runUi c $ defaultContext { skin = asciiSkin }
The library provides Skins in the Skins module.
2.5.2
Attributes
An attribute may consist of one or more settings of foreground and background color and
text style, such as underline or blink. The default attributes specified in the RenderContext control how widgets appear.
Every widget has the ability to store its own normal and focused attributes. When widgets
are rendered, they use these attributes; if they are not set, the widgets default to using
those specified by the rendering context. The only exception is the “override” attribute.
Instead of “falling back” to this attribute, the presence of this attribute reuqires widgets
to use it. For example, this attribute is used in the List widget so that the currentlyselected list item can be highlighted, which requires the List to override the item’s default
attribute configuration.
Widgets provide an API for setting these attributes using the HasNormalAttr and HasFocusAttr type classes. The reason we use type classes to provide this API is so that
third-party widgets may also provide this functionality. The API is defined in the Core
module and is as follows:
setNormalAttribute w attr
setFocusAttribute w attr
Convenience combinators also exist:
w <- someWidget
>>= withNormalAttribute attr
>>= withFocusAttribute attr
CHAPTER 2. BUILDING APPLICATIONS WITH VTY-UI
17
The attr value is a Vty attribute. A Vty attribute may provide any (but not necessarily
all!) of the settings that make up an attribute; any setting not specified (e.g. background
color) can fall back to the default. As a result, the attribute of a widget is the combination of
its attribute and the attribute from the rendering context. The widget’s settings will take
precedence, but any setting not provided will default to the rendering context.
Consider this example:
w <- someWidget
setNormalAttribute w (fgColor white)
runUi c $ defaultContext { normalAttr = yellow ‘on‘ blue }
In this example, the widget w will use a normal attribute of white on a blue background,
since it specified only a foreground color as its normal attribute. This kind of precedence
facilitates visual consistency across your entire interface.
In addition, container widgets are designed to pass their normal and focused attributes
onto their children during the rendering process; this way, unless a child specifies a default with setNormalAttribute or similar, it uses its parent’s attributes. Again, this facilitates consistency across the interface while only requiring the you to specify attributes
where you want to deviate from the default.
You can create attributes with varying levels of specificity by using the vty-ui API:
Expression
fgColor blue
bgColor blue
style underline
blue ‘on‘ red
someAttr ‘withStyle‘ underline
Resulting attribute
foreground only
background only
style only
foreground and background
adding a style
The Vty def attr value’s default configuration is used as a basis for all partially-specified
attributes. The functions described above are defined in the Util module.
2.5.3
vty-ui and Concurrency
So far we have only seen programs which modify widget state when user input events occur. Such changes in widget state are safe, because they are triggered by the vty-ui event
loop.1 However, your program will more than likely need to trigger some widget state
1
“Unsafe” updates are those that are not guaranteed to be reflected in the most-recently-rendered interface.
CHAPTER 2. BUILDING APPLICATIONS WITH VTY-UI
18
changes due to other external events – such as network events – and vty-ui provides a
mechanism for doing this in a safe way.
vty-ui provides a function in the Core module called schedule which takes an IO
action and “schedules” it to be run by the main event loop. It will be run as soon as
possible, i.e., once the program control flow has returned to the event loop. Since the
scheduled action will be run by the event loop, it’s important that the action not take very
long; if it’s important to block (e.g., by calling Control.Concurrent.threadDelay),
you should do that in a thread and only call schedule when you have work to do.
Consider this example, in which a text widget called timeText gets updated with the
current time every second:
forkIO $
forever $ do
schedule $ do
t <- getCurrentTime
setText timeText $
formatTime defaultTimeLocale rfc822DateFormat t
threadDelay 1000000
In this example the blocking occurs outside of the scheduled code, and only when we have
an update for the clock display do we schedule an action to run.
Some built-in widgets will almost always be used in this way; for an example, take a look
at the ProgressBar widget in the ProgressBar module (see Section 4.16).
Chapter 3
Implementing Your Own Widgets
While the built-in widgets may prove sufficient in most cases, sooner or later you’ll probably need to implement your own. This chapter describes the API you’ll need to implement
to do this, as well as design and implementation considerations relevant to building custom widgets correctly.
3.1
Creating a New Widget Type
The first step in creating a custom widget is deciding what kind of state the widget will
store. This decision is based on what behaviors the widget can have and it determines
what the widget’s API will be.
As an example, consider a widget that displays a numeric counter. The widget state will
be the value of the counter. We’ll start with the following state type:1
data Counter = Counter Int
The next step is to write a widget constructor function. This function will return a value
of type Widget Counter, which indicates that it is a Widget with state type Counter.
We’ll allow the constructor to take the counter’s initial value. Here’s what the function
will look like in full:
1
You might wonder why we don’t just use Int; the reason is because that’s too general. Other widgets
might represent the temperature with an Int, and then your counter API functions – taking a widget of type
Widget Int – would work on their widgets, which is probably not what you want!
19
CHAPTER 3. IMPLEMENTING YOUR OWN WIDGETS
20
newCounter :: Int -> IO (Widget Counter)
newCounter initialValue = do
wRef <- newWidget $ \w ->
w { state = Counter initialValue
, render_ =
\this size ctx -> do
(Counter v) <- getState this
return $ string (getNormalAttr ctx) (show v)
}
Now we have a constructor for a Counter widget. Let’s go through the code:
wRef <- newWidget $ \w -> ...
The Core module’s newWidget function creates a new IORef wrapping a WidgetImpl
a. The WidgetImpl type is where all of the widget logic is actually implemented. You
implement this logic by overriding the fields of the WidgetImpl type, such as render
and state. We call newWidget’s result wRef because it is a reference to a widget object,
and this helps distinguish it from the actual widget data in the next step.
The newWidget function takes a function WidgetImpl a -> WidgetImpl a and updates the widget implementation contained in the IORef. We use this to specify the behavior of the widget beyond the defaults, which are specified in the newWidget function.
state = Counter initialValue
Here we set the inital value of the counter and create the Counter state and store it in
the WidgetImpl. We’ll reference this state later on in the rendering code and in any API
functions that we want to implement to mutate it.
render_ =
\this size ctx -> do
(Counter v) <- getState this
let s = show v
width = fromEnum $ region_width size - length s
truncated = take width s
return $ string (getNormalAttr ctx) truncated
This actually does the job of rendering the counter value into a form that can be displayed in the terminal. The type of render is Widget a -> DisplayRegion ->
RenderContext -> IO Image. The types are as follows:
CHAPTER 3. IMPLEMENTING YOUR OWN WIDGETS
21
• Widget a - the widget being rendered, i.e., the Widget Counter reference. This
is passed to provide access to the widget’s state which will be used to render it.
• DisplayRegion - the size of the display region into which the widget should fit,
measured in rows and columns. The Image returned by render should never be
larger than this region, or the rendering process will raise an exception. The reason
is because if it were to violate the specified size, then the assumptions made by any
other widgets about layout would fail, and the interface would become garbled in
the terminal. In addition, widget sizes are used to compute widget positions, so sizes
must be accurate.
A widget may render to an Image smaller than the specified size; many do.
• RenderContext - the rendering context passed to runUi as explained in Section
2.5. In the render function, we use this to determine which screen attributes to
use. We don’t care about supporting a focused behavior in our Counter widgets, so
we just look at the “normal” attribute.
• Image - this is the type of Vty “images” that can be composed into a final terminal
representation. All widgets must be converted to this type during the rendering
process to be composed into the final result.
The implementation of the render function is as follows:
(Counter v) <- getState this
The getState function takes a Widget a and returns its state field. In this case, it
returns the Counter value.
let s = show v
width = fromEnum $ region_width size - length s
truncated = take width s
To ensure that the Image we generate does not exceed size as described above, we use
the width of the region to limit how many characters we take from the string representation of the counter.
return $ string (getNormalAttr ctx) truncated
CHAPTER 3. IMPLEMENTING YOUR OWN WIDGETS
22
The string function is a Vty library function which takes an attribute (Attr) and a
String and returns an Image. The getNormalAttr function returns the normal attribute from the RenderContext, merged with the “override” attribute from the RenderContext, if it is set. For more information on the override attribute, see Section 2.5.2 on
page 14.
This concludes the basic implementation requirements for a new widget type; to make it
useful, we’ll need to add some functions to manage its state:
setCounterValue :: Widget Counter -> Int -> IO ()
setCounterValue wRef val =
updateWidgetState wRef $ const $ Counter val
getCounterValue :: Widget Counter -> IO Int
getCounterValue wRef = do
Counter val <- getState wRef
return val
The setCounterValue function takes a Counter widget and sets its state to a new
counter value. The updateWidgetState function takes a Widget a and a state transformation function and updates the state field of the widget. The getCounterValue
function just reads the state and returns the counter’s value. Now you could write a program using these functions to create, manipulate, and display the counter.
3.2
The WidgetImpl API
The WidgetImpl type is the type of widget implementations. You have already seen
some of its fields in previous sections.
CHAPTER 3. IMPLEMENTING YOUR OWN WIDGETS
23
data WidgetImpl a = WidgetImpl {
state :: a
, render_ :: Widget a -> DisplayRegion -> RenderContext
-> IO Image
, growHorizontal_ :: a -> IO Bool
, growVertical_ :: a -> IO Bool
, setCurrentPosition_ :: Widget a -> DisplayRegion -> IO ()
, getCursorPosition_ :: Widget a -> IO (Maybe DisplayRegion)
, focused :: Bool
, currentSize :: DisplayRegion
, currentPosition :: DisplayRegion
, normalAttribute :: Attr
, focusAttribute :: Attr
, keyEventHandler :: Widget a -> Key -> [Modifier] -> IO Bool
, gainFocusHandlers :: Handlers (Widget a)
, loseFocusHandlers :: Handlers (Widget a)
}
The WidgetImpl functions are similar to many top-level functions. Whenever a WidgetImpl function ends with an underscore, there is a top-level function with the same
name without the underscore that you should use to invoke the respective functionality
on any widget reference you hold. We will see many examples of this convention in this
chapter.
The following fields are managed automatically and should not be overridden by widget
implementors but are explained here for completeness:
• focused – True if this widget is focused. As explained in Section 2.3, although one
widget has the user’s focus, internally many widgets may share it in a hierarchy.
• currentSize – the “current” size of the widget, i.e., the size of the Image after the
last time the widget was rendered.
• currentPosition – the “current” position of the widget’s upper-left corner, i.e.,
the position of the widget’s upper-left corner after the last time the widget was rendered. Sometimes used when positioning child widgets and when positioning the
cursor, if any.
• normalAttribute – the widget’s normal attribute. Defaults to Vty’s def attr
value, which merges transparently with the RenderContext’s normal attribute.
• focusAttribute – the widget’s focus attribute. Defaults to Vty’s def attr value,
which merges transparently with the RenderContext’s focus attribute.
CHAPTER 3. IMPLEMENTING YOUR OWN WIDGETS
24
• keyEventHandler – the action responsible for handling key events for this widget. The default implementation merely starts calling the sequence of user-registered
key event handlers; it is strongly recommended that you not replace this, but use
onKeyPressed to register key handlers instead.
• gainFocusHandlers – the actions responsible for handling the widget’s focus gain
event. You can add your own handlers with onGainFocus as described in Section
2.3. For more information about event handling and the Handlers type, see Section
3.8.
• loseFocusHandlers – the actions responisible for handling the widget’s focus loss
event. You can add your own handlers with onLoseFocus as described in Section
2.3. For more information about event handling and the Handlers type, see Section
3.8.
The following fields are important to widget implementors and, depending on widget
requirements, need to be overridden:
• state – the state of the widget as described in Section 3.1. Use the getState function to read this state and use the updateWidgetState function to modify it.
• render – the rendering routine for the widget. If this widget wraps child widgets,
this function is responsible for rendering them and composing the resulting Images
into a final Image.
• growHorizontal – the horizontal growth policy function. See Section 3.4.
• growVertical – the vertical growth policy function. See Section 3.4.
• setCurrentPosition – this function is used to set the current position – the position of the upper-left corner – of the widget. This is included in the WidgetImpl
API so that you can override it if your widget wraps others or has special logic for
setting their positions. See Section 3.6.
• getCursorPosition – this function may be used to indicate that this widget
should display a cursor when it has the focus. The way that it does this is by returning a DisplayRegion. The default implementation returns Nothing, which
indicates that the widget does not want to position the cursor. For implementations
which do show the cursor, the returned position should be relative to the position
returned by getCurrentPosition. See Section 3.7.
We’ve already introduced the state and render functions. Now we’ll go into detail on
the use of the other functions.
CHAPTER 3. IMPLEMENTING YOUR OWN WIDGETS
3.3
25
Rendering
The render function is responsible for generating a visual representation of the widget
based on various factors, including:
• The focus state of the widget
• The available space specified by the size parameter to the render function
• The widget’s own internal state in its state field
• All child widgets
• Attributes stored in the widget as well as those provided in the RenderContext
This involves constructing Images using the Vty library’s primitives. Some primitives
include:
• string – Creates an image from a string using the specified attribute.
• char – Creates an image from a character using the specified attribute.
• char fill – Creates an image with the specified width and height, filled with the
specified character and attribute.
• <-> – Vertical concatenation of images.
• <|> – Horizontal concatenation of images.
While these functions should be sufficient to render most widgets, if your widget wraps
other widgets, you’ll have to use the top-level render function provided by the Core
module. It has the following type:
render :: Widget a -> DisplayRegion -> RenderContext -> IO Image
This function looks a lot like the render function in the WidgetImpl type, and that’s
intentional; the difference is that render calls render on the widget that is passed to it,
and it does some other important things:
CHAPTER 3. IMPLEMENTING YOUR OWN WIDGETS
26
• It gets the normal and focus attributes stored in the widget, if any, and merges them
into the RenderContext. This means that the render function doesn’t have to
specifically look those attributes up; it just needs to use whatever is in the context.
• It invokes the render function to get the resulting Image.
• It measures the size of the resulting Image against the DisplayRegion given to it
and raises an exception (of type RenderError) if the image is too large.
• If the size check passes, it calls setCurrentSize on the widget with the size of the
generated Image.
All of this book-keeping is vital to ensuring that the rendering process works correctly; as
a result, whenever you are rendering other widgets inside your render implementation,
you must use render to do it instead of extracting and calling the render function on
your child widgets.
3.4
Growth Policy Functions
In order to lay widgets out in way that makes the best use of the available terminal space,
we need them to give us hints about how they use space. In this regard, widgets fall into
two basic categories:
• “Fixed-size” widgets which have the same size regardless of the amount of available
space, and
• “Variable-size” widgets which use all available space.
An example of a “fixed-size” widget is a text widget: the string “foobar” will always
require only one row and six columns’ worth of space. We could also render such a widget
in a much bigger space – an entire terminal window, say – but it would look the same;
there would still be plenty of room for other things in the interface. Such a widget does
not “grow” with the available space.
An example of a “variable-size” widget is one which centers a child widget vertically and
horizontally in the terminal. Such a widget will pad its child widget so that it is always
centered, and this behavior depends on how much space is available. For example, in a
100x100 terminal, the string “foobar” would need different padding to remain centered
CHAPTER 3. IMPLEMENTING YOUR OWN WIDGETS
27
than it would require in a 50x50 terminal. As a result, we say that the centering widget
“grows” with available space.
The WidgetImpl a type defines the following functions to provide these hints:
• growHorizontal :: a -> IO Bool
• growVertical :: a -> IO Bool
These functions should return True when the widget in question “grows” as described
above, and False otherwise. These hints may be used by parent widgets to make layout
decisions; concrete examples of such widgets are the Box and Centered widget types.
In situations where your widget wraps another – as with the Box and Centered types – it
is strongly recommended that you defer to the child widgets for these policy values unless
you have a good reason to override them. The Centered widget is a good example of
this: it overrides the growth policy of its child so that it grows in both dimensions, even
though its child may not. But the Box widget explicitly defers to its children to determine
its growth policy, since it is only responsible for layout and does not add anything to the
interface.
An example of a growHorizontal implementation which defers to a child widget is as
follows:
-- Assume getChildWidget gets the child widget reference
growHorizontal_ = growHorizontal . getChildWidget
Notice that we call the top-level function, growHorizontal, on the child widget; it does
the job of dereferencing the widget and calling its growHorizontal function. This is
another example of the API convention we mentioned in Section 3.2.
3.5
Deferring to Child Widgets
Widget-wrapping widget types are common in vty-ui, since we use this technique to
influence rendering and other behaviors. As a result, when implementing a wrapper widget it is important to decide which behaviors should be deferred to the child widget and
which behaviors should be overridden.
In this section we’ll create a wrapper widget type called Wrapper and we’ll implement all
of its behaviors to illustrate how the behaviors can be deferred in each case.
CHAPTER 3. IMPLEMENTING YOUR OWN WIDGETS
28
We’ll start with the type.
data Wrapper a = Wrapper (Widget a)
Then the implementation of the constructor:2
newWrapper :: Widget a -> IO (Widget (Wrapper a))
newWrapper child = do
wRef <- newWidget $ \w ->
w { state = Wrapper child
, growHorizontal_ = growHorizontal child
, growVertical_ = growVertical child
, setCurrentPosition_ =
\_ pos = setCurrentPosition child pos
, getCursorPosition_ =
const $ getCursorPosition child
, render_ =
\_ sz ctx = do
render child sz ctx
}
wRef ‘relayFocusEvents‘ child
wRef ‘relayKeyEvents‘ child
return wRef
This demonstration highlights some important features of container widget implementations:
• The state type of the wrapped widget, a, is preserved in the type of the wrapper
widget itself, Wrapper a.
• We referred directly to child instead of using getState in all of the functions;
the reason is because we don’t care about allowing the child to be replaced with a
different widget at a later time. If that is something you want to support, then you
must use getState to ensure that you have the latest version of the widget’s state
and, as a result, the correct child widget reference.
• We defer all behaviors to the child: growth policy, rendering, positioning, cursor
behavior, focus events, and key events. Most container widgets defer most of these
things.
2
This widget implementation uses the “relaying” functions we described in Section 2.3.2.
CHAPTER 3. IMPLEMENTING YOUR OWN WIDGETS
29
In some cases – such as with Centered widgets or anything that adds padding – the
growth policies will need to be changed to reflect how the final result should be laid out.
In those cases, it is sufficient to provide an implementation for the growth policy functions
that returns the desired value rather than calling that of the child widget.
3.6
Widget Positioning
Some widgets, such as the Edit widget, need to position a cursor in the terminal when
they have the focus. To support this, each widget stores its position after it is rendered.
The positioning of the widgets happens in a separate phase after rendering takes place
since the positions cannot be calculated until the sizes of all widgets’ Images are known.
The top-level function to set a widget’s position is called setCurrentPosition and is
defined in the Core module. It is called initially by the vty-ui event loop with a position of (0, 0). This function updates the currentPosition field of the widget’s
WidgetImpl structure and then calls its setCurrentPosition function to take care of
any widget-specific duties. For most widgets, setCurrentPosition need not be overridden from its default no-op implementation. However, container widgets must override
it to set the positions of their children.
Consider the Box widget type. This type contains two child widgets. The position of the
Box itself is the upper-left corner of the space in which it is rendered, and that position
is also the position of its first child widget. The second child widget, however, is offset
(vertically or horizontally, depending on the box type) by the size of the first child widget.
This is an example of a case in which implementing setCurrentPosition is necessary.
Here is an example implementation of setCurrentPosition for the Wrapper widget
that we examined in Section 3.5:
setCurrentPosition_ = \this pos -> do
-- Since the position of the wrapper has already been
-- set by setCurrentPosition, we just need to set the
-- position of the child.
(Wrapper child) <- getState this
setCurrentPosition child pos
The function calls the top-level setCurrentPosition on the child widget to ensure
that its position is set and that its setCurrentPosition function is called. It uses the
position of the wrapper, pos, as the position of the child because the wrapper has not done
anything to offset that position (e.g., by adding an ASCII art border or padding).
CHAPTER 3. IMPLEMENTING YOUR OWN WIDGETS
30
If you’re implementing a container widget with more than one child, you can use functions in the Util module to manage the DisplayRegions used to position your widgets.
For more information, see the withWidth, withHeight, plusWidth, and plusHeight
functions.
3.7
Cursor Positioning
Once a widget is properly positioned, the widget can display a cursor. This is especially
useful for edit widgets, since the user needs to know the cursor position. The Core module provides a top-level function to accomplish this called getCursorPosition; this
function calls the WidgetImpl type’s getCursorPosition function.
The getCursorPosition function returns Maybe DisplayRegion. A return value of
Nothing indicates that the widget does not want to show a cursor, so when it gains focus,
no cursor will be displayed. Otherwise, positioning the cursor at row r and column c is
accomplished by returning Just (DisplayRegion r c). The cursor is then shown at
that location by the event loop.
Typically, the position of the cursor is computed as an offset to the widget’s current position. In the Wrapper widget example in Section 3.5 we deferred to the child widget to
control the cursor, but we might instead specify our own position:
getCursorPosition_ = \this -> do
(Wrapper child) <- getState this
childCursor <- getCursorPosition child
case childCursor of
Nothing -> return Nothing
Just pos -> return $ Just $ pos ‘plusWidth‘ 1 ‘plusHeight‘ 1
Although contrived, this example shows how we can return a new cursor position based
on the child widget’s cursor position.
3.8
Handling Events
An interface is truly interactive only if we can express the relationship between various
events in the interface. User input and network events may affect the user interface, but
we also need to be define how the interface components interact with each other. vty-ui
CHAPTER 3. IMPLEMENTING YOUR OWN WIDGETS
31
provides a mechanism to address this called the Handlers type, defined in the Events
module.
For any given widget type, we must decide what events can occur as a result of the widget’s state change. For each type of event, we must decide what sort of data we should
pass to handlers of this event so they can take an appropriate action.
Imagine that you’ve implemented a “temperature monitor” widget, and you want to be
notified whenever the temperature changes so you can update other parts of your interface. In that case, the event data is a type containing the new temperature:
data TemperatureEvent = Temp Int
In your widget type definition, you’ll need a place to store the event handlers for this
temperature change event:
data TempMonitor =
TempMonitor { tempChangeHandlers :: Handlers TemperatureEvent
}
Notice that we use the event type as the type parameter to Handlers; this indicates
that we want to store a collection of handler functions which take an argument of type
TemperatureEvent. The Handlers a type is just an alias for IORef [a -> IO ()].
Once we’ve defined our storage type, we need to update our widget constructor to construct a Handlers list:
newTempMonitor :: IO (Widget TempMonitor)
newTempMonitor = do
handlers <- newHandlers
wRef <- newWidget $ \w ->
w { state = TempMonitor { tempChangeHandlers = handlers
}
}
return wRef
Now we have a place to store the handlers, a model for the event data itself, and an
updated constructor. Next, we need a nice API to register new event handlers. The
vty-ui convention is to use functions prefixed with “on”, such as onGainFocus and
onActivate. This convention makes it easy to write readable infix event handler registration functions. In the temperature monitor case, we might write something like this:
CHAPTER 3. IMPLEMENTING YOUR OWN WIDGETS
32
onTemperatureChange :: Widget TempMonitor
-> (TemperatureEvent -> IO ())
-> IO ()
onTemperatureChange wRef handler =
addHandler (tempChangeHandlers <˜˜) wRef handler
We’ve introduced a new operator here, <˜˜. This operator takes any Widget a and a
function on its state type, a -> b, and runs the function and returns the value, b, inside
calling monad. addHandler needs a value of type Handlers TemperatureEvent, and
to get that we must use <˜˜.
The addHandler function takes a Handlers a and a handler of type a -> IO () and
adds it to the Handlers list.
Here is a bogus but valid demonstration of this new function:
let maxTemp = 100
t <- newTempMonitor
t ‘onTemperatureChange‘ \(Temp newTemp) ->
when (newTemp > maxTemp) $ error "It’s too hot!"
The last thing it do is to actually “fire” the event that these handlers will handle; assuming the monitor widget has a setTemperature function and some internal state to store
the temperature, that function would create the TemperatureEvent and invoke the handlers as follows:
setTemperature :: Widget TempMonitor -> Int -> IO ()
setTemperature wRef newTemp = do
-- Set the internal widget state.
-- ...
-- Then invoke the handlers:
fireEvent wRef (tempChangeHandlers <˜˜) (TemperatureEvent newTemp)
Just as with addHandler, we pass a handler list lookup function to fireEvent. We also
pass it an event value which will be passed to all of the registered handler functions.
The functions newHandlers, addHandler, and fireEvent are defined along with the
Handlers type in the Events module. The widget state projection function <˜˜ is defined in the Core module along with its WidgetImpl state projection counterpart, <˜.
CHAPTER 3. IMPLEMENTING YOUR OWN WIDGETS
3.9
33
Composite Widgets
So far we have looked at single-purpose widgets which use the Widget type directly.
However, embedding widget state in the Widget type is not always appropriate or straightforward for more complex, composite widgets.
The vty-ui library provides some “widgets” which don’t fit this pattern: Dialog and
DirBrowser are two examples. Furthermore, as the base set of widgets provided by the
library becomes richer, fewer and fewer widgets should be implemented using the basic
Widget framework.
These composite widgets are actually entire interfaces, complete with multiple focusable
widgets and focus groups. These widgets don’t take the form of Widget Dialog or
Widget DirBrowser; they could be implemented that way, but we’d find that many of
the WidgetImpl functions would end up deferring to their child widgets anyway, and
their render implementations would be cumbersome at best.
Instead, we invert the widget organization: we create a type (e.g., Dialog) which contains
the actual widget(s) to be rendered, as well as other book-keeping internals, and we return
that from our constructor. This makes it easier to implement such widgets since we are less
concerned with their inner workings and more concerned with returning something highlevel that has the right behaviors.
The pattern we use in these situations is to write a constructor which does all of the widget creation, layout, and event handler registration, and returns the concrete type of the
interface along with a FocusGroup which the caller can use to integrate the interface into
an application.
For example: suppose we want to create a “phone number input” widget – PhoneInput,
say – which will allow users to input phone numbers. The PhoneInput will have three
Edit widgets and will manage tabbing between them and might even do such things as
data validation on the input. Here’s a suggestive example for how we might implement
such a thing without going to all the trouble of implementing WidgetImpl’s interface.
First we provide the types:
CHAPTER 3. IMPLEMENTING YOUR OWN WIDGETS
data PhoneNumber = PhoneNumber String String String
deriving (Show)
-- This type isn’t pretty, but we have to specify the type
-- of the complete interface. Initially you can let the
-- compiler tell you what it is.
type T = Box (Box
(Box (Box (HFixed Edit) FormattedText) (HFixed Edit))
FormattedText) (HFixed Edit)
data PhoneInput =
PhoneInput { phoneInputWidget :: Widget T
, edit1 :: Widget Edit
, edit2 :: Widget Edit
, edit3 :: Widget Edit
, activateHandlers :: Handlers PhoneNumber
}
Then, we provide the constructor:
newPhoneInput :: IO (PhoneInput, Widget FocusGroup)
newPhoneInput = do
ahs <- newHandlers
e1 <- editWidget
e2 <- editWidget
e3 <- editWidget
ui <- (hFixed 4 e1) <++>
(plainText "-") <++>
(hFixed 4 e2) <++>
(plainText "-") <++>
(hFixed 5 e3)
setEditMaxLength e1 3
setEditMaxLength e2 3
setEditMaxLength e3 4
e1 ‘onChange‘ \s -> when (length s == 3) $ focus e2
e2 ‘onChange‘ \s -> when (length s == 3) $ focus e3
let w = PhoneInput ui e1 e2 e3 ahs
doFireEvent = const $ do
num <- mkPhoneNumber
fireEvent w (return . activateHandlers) num
34
CHAPTER 3. IMPLEMENTING YOUR OWN WIDGETS
35
mkPhoneNumber = do
s1 <- getEditText e1
s2 <- getEditText e2
s3 <- getEditText e3
return $ PhoneNumber s1 s2 s3
e1 ‘onActivate‘ doFireEvent
e2 ‘onActivate‘ doFireEvent
e3 ‘onActivate‘ doFireEvent
fg <- newFocusGroup
mapM_ (addToFocusGroup fg) [e1, e2, e3]
return (w, fg)
Then we provide a function to register phone number handlers:
onPhoneInputActivate :: PhoneInput
-> (PhoneNumber -> IO ()) -> IO ()
onPhoneInputActivate input handler =
addHandler (return . activateHandlers) input handler
When the user presses Enter in one of the phone number input widgets, thus “activating”
it, we will invoke all phone number input handlers with a PhoneNumber value.3
In the calling environment, the caller can then add the phoneInputWidget to the interface and merge the returned FocusGroup as described in Section 2.3.3.
3
Assume that we would also do some kind of validation and decide whether to call the handlers accordingly. We might even consider supporting “error” event handlers for the widget to report validation errors to
be displayed elsewhere in the interface!
Chapter 4
Guided Tour of Built-In vty-ui
Widgets
vty-ui provides a broad set of widgets for controlling layout, presenting text, and interacting with the user. In this chapter we’ll cover these built-in widgets and their APIs at a
high level. With this knowledge you should be able to bring them together to build rich
interfaces. As always, consult the API documentation for some of the finer details.
Naturally, we may not be able to provide meaningful examples expressed purely in terms
of a single widget type and may need to mention other widgets; in those cases, see the
relevant sections.
4.1
Borders
The Borders module provides a number border widgets which can be created with the
following functions:
• vBorder – creates a vertical border of type Widget VBorder
• hBorder – creates a horizontal border of type Widget HBorder
• bordered – creates a bordered box of type Widget (Bordered a) around a widget of type Widget a
36
CHAPTER 4. GUIDED TOUR OF BUILT-IN VTY-UI WIDGETS
37
All border-drawing widgets use the RenderContext’s Skin as described in Section 2.5.1.
By default, all borders will use the RenderContext’s normal attribute, but all border
widget types are instances of the HasBorderAttr type class. This type class makes it
possible to specify the border attribute of these widgets with the setBorderAttribute
function.
The following example creates an interface using all three border widget types.
b1 <- (plainText "foo") <--> hBorder <--> (plainText "bar")
b2 <- (return b1) <++> vBorder <++> (plainText "baz")
b3 <- bordered b2
Using the Box combinators, we lay out text widgets separated by different kinds of borders and wrap the entire interface in a line-drawn box.
When drawn with the asciiSkin, this will result in the following interface:
+-------+
|foo|baz|
|---|
|
|bar|
|
+-------+
Horizontal and box borders support labels in their top borders. To set the label on an
HBorder, use the setHBorderLabel function; for Bordered widgets, use setBorderedLabel. Using the example above, we can set the label on b3 to "x" to achieve the
following result:
setBorderedLabel b3 "x"
+-- x --+
|foo|baz|
|---|
|
|bar|
|
+-------+
If the Bordered widget is not large enough to show the title, it is hidden and a horizontal
border is drawn instead.
CHAPTER 4. GUIDED TOUR OF BUILT-IN VTY-UI WIDGETS
38
Growth Policy
VBorders grow only vertically and are one column in width. HBorders grow only horizontally and are one row in height. Box borders created with bordered inherit the growth
policies of their children.
4.2
Boxes
The Box module provides two box layout widgets which can be created the following
functions:
• vBox – creates a box of type Widget (Box a b) which lays out two children of
types Widget a and Widget b vertically
• hBox – creates a box of type Widget (Box a b) which lays out two children of
types Widget a and Widget b horizontally
In addition, the box combinators <--> and <++> can be used to create vertical and horizontal boxes, respectively, using widgets in IO.
Box widgets have a child size policy which determines how space in the box is allocated to
the child widgets. The size policy type is ChildSizePolicy and defaults to PerChild
BoxAuto BoxAuto for new boxes. Each widget can have an individual policy whose
type is IndividualPolicy; this policy can be set to BoxAuto or BoxFixed Int. In the
former case, space will be allocated as needed; in the latter, the specified fixed number of
rows or columns (depending on the orientation of the Box) will be used.
Use the setBoxChildSizePolicy to change the box size policy to one of the following
kinds of values:
• PerChild IndividualPolicy IndividualPolicy – set the policies for each
child widget.
• Percentage Int – the total available space will be allocated as a percentage. The
number specified here is the percentage n (0 ≤ n ≤ 100) allocated to the first child;
the rest will be allocated to the second. The BoxError exception will be raised if an
invalid percentage value is specified.
CHAPTER 4. GUIDED TOUR OF BUILT-IN VTY-UI WIDGETS
39
Boxes may also be configured with a number of rows or columns of spacing in between
their child widgets; this is accomplished with the setBoxSpacing function. It takes
a number of rows or columns, depending on the orientation of the box. The function
withBoxSpacing is provided as a convenience for setting the box spacing in a monadic
construction.
The following example creates a box of each type to lay out some text widgets:
b1 <- (plainText "foo") <++> (plainText "bar") >>= withBoxSpacing 1
b2 <- (return b1) <--> (plainText "baz") >>= withBoxSpacing 1
The result is an inner horizontal box, b1, containing two FormattedText widgets separated by one column, laid out on top of another FormattedText widget and separated
by one row.
Growth Policy
Boxes grow in their respective dimensions if and only if:
• One or more children can also grow in that dimension, and
• The children which can grow are in box cells with the Percentage or BoxAuto size
policies set.
Boxes grow in other dimensions merely if any children grow in that dimension.
Consider these examples:
• A vertical Box with a default size policy of BoxAuto / BoxAuto will grow both
vertically and horizontally if either child grows respectively.
• A vertical Box with fixed-size cells will never grow vertically, but will grow horizontally if either child does.
• A horizontal Box with one fixed-size cell will grow horizontally if the child in the
flexible cell grows horizontally.
CHAPTER 4. GUIDED TOUR OF BUILT-IN VTY-UI WIDGETS
4.3
40
Buttons
The Button module provides a button-like widget, Button, which can accept the focus
and produce a “pressed” event when the user presses Enter.
Buttons can be created with the newButton function. The function takes the text to be
displayed on the button.
b <- newButton "OK"
To handle “button-press” events, use the onButtonPressed function. Event handlers
are passed a reference to the Button itself.
b ‘onButtonPressed‘ \this ->
...
To change the text of the button, use the setButtonText function. To “press” the button
programmatically, call pressButton.
When you are ready to add the Button to your interface, call its buttonWidget function:
box <- (plainText "Are you sure?") <--> (return (buttonWidget b))
Growth Policy
Buttons never grow in either dimension.
4.4
Checkboxes and Radio Buttons
The CheckBox module provides a rich API for creating “check box” and “radio button”
widgets. Radio button widgets can be grouped together into “radio groups” to determine
their collective exclusion behavior.
The CheckBox module provides generalized, “multi-state” checkboxes which may be in
one of an arbitrary number of states, each having its own “checked character” visible in
the checkbox. The “binary” checkbox provided by the module is of the traditional twostate variety that we usually mean when we say “check box.” Most of the CheckBox
module’s functions are polymorphic on the CheckBox’s value type.
CHAPTER 4. GUIDED TOUR OF BUILT-IN VTY-UI WIDGETS
41
Add a CheckBox to your interface and insert it into a FocusGroup to use it.
4.4.1
Binary Checkboxes
Binary checkboxes can be created with the newCheckbox function, which returns a Widget (CheckBox Bool). Each checkbox has a text label which is passed to the constructor:
cb <- newCheckbox "Fancy Graphics"
Binary CheckBoxes look like this:
[ ] Fancy Graphics
[x] Fancy Graphics
The user uses the Space key to change the CheckBox state.
Event handlers for checkbox state changes can be registered with onCheckboxChange
and take a single parameter, which is the value of the checkbox after the state change
occurs. In general, for a checkbox of type Widget (CheckBox a), the parameter to the
event handler is of type a.
cb ‘onCheckboxChange‘ \val ->
...
Binary CheckBoxes can be manipulated with the functions setCheckboxChecked, setCheckboxUnchecked, and toggleCheckbox.
4.4.2
Radio Buttons
A radio button is essentially a checkbox, but with restrictions. We use the CheckBox
implementation to create radio buttons and use a “radio group” type to enforce the mutual
exclusion required to make radio buttons work. As a result, only “binary” checkboxes (of
type Widget (CheckBox Bool)) may be used as radio buttons.
Radio buttons may be created by creating normal binary CheckBoxes and adding them
to RadioGroups. A RadioGroup can be created with the newRadioGroup function.
CHAPTER 4. GUIDED TOUR OF BUILT-IN VTY-UI WIDGETS
42
rg <- newRadioGroup
cb1 <- newCheckbox "Cake"
cb2 <- newCheckbox "Death"
Once you have created the checkboxes and RadioGroup, you can add the checkboxes to
the radio group with addToRadioGroup:
addToRadioGroup rg cb1
addToRadioGroup rg cb2
Once a CheckBox has been added to a RadioGroup, its appearance will be changed to
indicate that it has a different behavior. CheckBoxes in RadioGroups look like this:
( ) Cake
(*) Death
If you’d like to know when a RadioGroup’s currently-selected CheckBox changes, you
can register an event handler for this event with onRadioChange. Its parameter will be a
reference to the CheckBox that became selected:
rg ‘onRadioChange‘ \theCb ->
...
Once you have a reference to a CheckBox, you can get its state with getCheckboxState.
For example, for binary checkboxes this value will be a Bool.
rg ‘onRadioChange‘ \theCb -> do
st <- getCheckboxState theCb
...
A CheckBox’s state can be changed with the setCheckboxState function. If you attempt to set the state to an invalid value, a CheckBoxError exception (BadCheckboxState) will be thrown.
In addition to using an event handler to be notified when a RadioGroup changes state,
you can also use the getCurrentRadio function to get a RadioGroup’s current CheckBox at any time.
CHAPTER 4. GUIDED TOUR OF BUILT-IN VTY-UI WIDGETS
4.4.3
43
Generalized, Multi-State Checkboxes
Although binary checkboxes may serve most purposes, they are a specific case of generalized checkboxes which associated characters (like ’x’ and ’*’ above) with values of any
type. A multi-state checkbox can have any number of these states, and the user can toggle
between them in order.
To create a new multi-state checkbox, you must specify value-character mappings in addition to a text label. The checkbox’s initial state is the first one in the list passed to the
constructor.
-- cb :: Widget (CheckBox Int)
cb <- newMultiStateCheckbox "Number of Cakes" [ (1, ’1’)
, (2, ’2’)
, (3, ’3’)
]
When the user interacts with a multi-state CheckBox, repeated state changes will cycle
through the list of values specified in the constructor. In all other respects, multi-state
checkboxes are the same as binary checkboxes, and all polymorphic API functions can be
used on them.
4.4.4
Customizing a CheckBox’s Appearance
We saw in Section 4.4.2 that the appearance of a CheckBox can be changed. This is accomplished with the following functions:
• setStateChar – given a CheckBox and a state value, the character representation
of that state will be set. If the state value is invalid, CheckBoxError (BadStateArgument) will be thrown. As an example, the default state characters for binary
checkboxes for True and False, respectively, are ’x’ and ’ ’.
• setBracketChars – given a CheckBox and two Chars, this sets the left and right
characters, respectively, which surround the state character. The defaults are ’[’
and ’]’.
Growth Policy
All CheckBoxes are fixed-size and do not grow in either dimension.
CHAPTER 4. GUIDED TOUR OF BUILT-IN VTY-UI WIDGETS
4.5
44
Collections
The EventLoop module provides the Collection type, which is a container for multiple widgets and their FocusGroups with a pointer to a “currently-selected” widget and
FocusGroup. Collections are used to construct interfaces as described in Section 2.4.
To create a new collection:
c <- newCollection
A Collection is not a widget so it cannot be treated like one. However, the primary
operation of interest is the addToCollection function, which adds an arbitrary Widget
a and FocusGroup to the Collection and returns an IO action which, when run, will
switch to that interface and focus group.
switchToFoo <- addToCollection c fooUi fooFocusGroup
someWidget ‘onEvent‘ (const switchToFoo)
If you choose not to use the IO action returned by addToCollection, you may instead call setCurrentEntry. This function takes a Collection and a position and
sets the Collection’s current entry to the one at the specified position. The position
is an index into the Collection’s internal list of interfaces. If the position is invalid, a
CollectionError is thrown.
_ <- addToCollection c fooUi fooFocusGroup
someWidget ‘onEvent‘ (const $ setCurrentEntry c 0)
If an empty Collection is used in any way, a CollectionError will be thrown.
4.6
Dialogs
The Dialog module provides a basic accept/cancel dialog widget interface and is capable
of embedding arbitrary widgets.
Dialog creation is straightforward. The following example will create a new dialog with
an embedded Edit widget and will set the Dialog’s title:
CHAPTER 4. GUIDED TOUR OF BUILT-IN VTY-UI WIDGETS
45
fg1 <- newFocusGroup
e <- editWidget
addToFocusGroup fg e
(dlg, fg2) <- newDialog e "The Title"
fg <- mergeFocusGroups fg1 fg2
The newDialog function returns a Dialog and a FocusGroup. The Dialog includes
two Buttons – an “OK” button and a “Cancel” button – and the returned FocusGroup
contains those buttons in that order. You can merge the FocusGroup with your own or
use it directly as described in Section 2.3.
The Dialog itself is a composite type; the way to lay out a Dialog in your interface is by
laying out the Dialog’s widget:
let ui = dialogWidget dlg
The Dialog type provides two events: acceptance and cancellation. The following example registers handlers for both of these events. These events are triggered when the user
“presses” the buttons in the Dialog.
dlg ‘onDialogAccept‘ \this ->
...
dlg ‘onDialogCancel‘ \this ->
...
To programmatically trigger the acceptance or cancellation of a Dialog, use the acceptDialog and cancelDialog functions.
Growth Policy
A Dialog’s growth policy depends on the growth policy of the widget embedded in it.
The Dialog’s interface uses fixed-size widgets, so it will not grow in either dimension
unless you embed a widget which grows. In the example above, the Dialog will grow
horizontally due to the Edit widget but will not grow vertically.
CHAPTER 4. GUIDED TOUR OF BUILT-IN VTY-UI WIDGETS
4.7
46
The Directory Browser
The DirBrowser module provides a rich interface for browsing the filesystem to select
files. The user is presented with an interface in which different file types are given different colors, and a status bar shows some information about the currently-selected file or
directory. If the user attempts to browse an unreadable directory or get information about
an unreadable file, an error is displayed in the browser interface.
The DirBrowser uses a List widget for selecting files and directories, so the List keybindings apply here. In total, the directory browser supports the following key bindings:
• Enter – descends into a directory or selects a file.
• Left – ascends to the parent directory.
• Right – descends into a selected directory.
• Up, Down – changes the currently-selected entry.
• ’q’, Esc – cancels browsing.
• ’r’ – refreshes the browser’s state of the current directory.
DirBrowsers are created as follows:
browser <- newDirBrowser defaultBrowserSkin
The browser’s initial filesystem path will be the application’s current directory. You can
change it with the setDirBrowserPath function:
setDirBrowserPath browser "/"
To be notified when the user has selected a file, register an event handler with onBrowseAccept. The handler will be passed the FilePath to the file which was selected.
browser ‘onBrowseAccept‘ \path -> ...
Similarly, to be notified when the user has cancelled browsing, register an event handler
with onBrowseCancel. The handler will be passed the browser’s path at the time of
cancellation.
CHAPTER 4. GUIDED TOUR OF BUILT-IN VTY-UI WIDGETS
47
browser ‘onBrowseCancel‘ \path -> ...
To be notified when the user changes the browser’s current path, use onBrowserPathChange. The event handler will be passed the new browser path.
browser ‘onBrowserPathChange‘ \path -> ...
4.7.1
Skinning
When creating a DirBrowser, we pass it a BrowserSkin. This value affects how the
browser colors the different types of filesystem entries it displays in addition to how it
colors the rest of its interface. You can customize the browser skin by updating any of its
fields with Vty attributes of your choosing.
browser <- newDirBrowser $ defaultBrowserSkin { ... }
The attribute fields of the BrowserSkin type are as follows:
• browserHeaderAttr – used for the header and footer of the browser interface.
• browserUnfocusedSelAttr – used for the selected entry when the browser is not
focused.
• browserErrorAttr – used for the text widget which displays errors encountered
while browsing.
• browserDirAttr – used for directories.
• browserLinkAttr – used for symbolic links.
• browserBlockDevAttr – used for block device files.
• browserNamedPipeAttr – used for named pipes.
• browserCharDevAttr – used for character device files.
• browserSockAttr – used for sockets.
When the browser is focused, it uses the RenderContext’s focusAttr for the currentlyselected entry in the List.
CHAPTER 4. GUIDED TOUR OF BUILT-IN VTY-UI WIDGETS
4.7.2
48
Annotations
For each type of file on the filesystem, the browser displays the kind of file in addition
to some information about it. For example, for regular files, the size is displayed. For
symbolic links, the link target is displayed.
It may be important to add your own such enhancements to the browser. For example,
you may want to apply an attribute to files with a specific extension to make them easy to
see in the browser. In addition you may wish to generate a description about the file in the
status bar. To accomplish this, the DirBrowser provides annotations.
An annotation is made up of three components:
• A predicate to determine whether the annotation should apply to a given file,
• A function to generate a description of the file such as its size or application-specific
metadata, and
• An attribute to apply to files of this type in the browser listing.
Annotations are stored in the BrowserSkin itself since they are used to influence the
browser’s appearance. To add annotations to a skin, use withAnnotations. The following example adds an annotation for “emacs backup files,” which end in ’˜’:
let mySkin = defaultBrowserSkin ‘withAnnotations‘ myAnnotations
myAnnotations = [ ( \path _ -> "˜" ‘isSuffixOf‘ path
, \_ _ -> return "emacs backup file"
, green ‘on‘ blue
)
]
For the full specification of the annotation’s type, please see the API documentation.
4.7.3
Error Reporting
When a user selects a file in the browser, your application may determine that the file
does not meet certain requirements. At this point it may be useful to report an error to
the user without leaving the browser interface. The DirBrowser provides a function to
do just this called reportBrowserError. The function displays an error message in the
browser’s error message area.
CHAPTER 4. GUIDED TOUR OF BUILT-IN VTY-UI WIDGETS
49
browser ‘onBrowseAccept‘ \path ->
reportBrowserError browser $ "not a valid document: " ++ path
Growth Policy
A DirBrowser expands both vertically and horizontally.
4.8
Edit Widgets
The Edit module provides a line-editing widget, Widget Edit. This widget makes it
possible to edit a single line of text with some Emacs-style key bindings.
An Edit widget is simple to create:
e <- editWidget
Edit widgets can be laid out in the usual way:
e <- editWidget
b <- (plainText "Enter a string: ") <++> (return e)
To use an Edit widget, add it to your interface and FocusGroup.
Edit widgets support the following editing key bindings:
• Ctrl-a, Home – go to the beginning of the line.
• Ctrl-e, End – go to the end of the line.
• Ctrl-k – remove the text from the cursor position to the end of the line.
• Ctrl-d, Del – delete the character at the cursor position.
• Left, Right, Up, Down – change the cursor position.
• Backspace – delete the character just before the cursor position and move the cursor position back by one character.
• Enter – “activate” the Edit widget.
CHAPTER 4. GUIDED TOUR OF BUILT-IN VTY-UI WIDGETS
50
An Edit widget can be monitored for three events:
• “Activation” events – triggered when the user presses Enter in the Edit widget.
Handlers are registered with the onActivate function. Event handlers receive the
Edit widget as a parameter.
• Text change – when the contents of the Edit widget change. Handlers are registered
with the onChange function. Event handlers receive the new String value in the
Edit widget.
• Cursor movement – when the cursor position within the Edit widget changes. Handlers are registered with the onCursorMove function. Event handlers receive the
new cursor position as a parameter.
In addition to event handling, the Edit widget API also provides other functions. These
functions trigger the respective events automatically.
• setEditText, getEditText – change the current text content of the Edit widget.
• getEditCursorPosition, setEditCursorPosition – manipulate the cursor
position within the Edit widget.
• setEditMaxLength – set the maximum number of characters in the Edit widget.
Once set, the limit cannot be removed but it can be changed to a different value. If
setEditMaxLength is called with a limit which is less than the limit already set,
the content of the Edit widget will be truncated and any change event handlers will
be notified.
Growth Policy
Edit widgets grow only horizontally and are always one row high.
4.9
Text
The Text module provides a widget for rendering text strings in user interfaces. The text
widget type, Widget FormattedText, can be used to render simple strings or more
complex text arrangements.
CHAPTER 4. GUIDED TOUR OF BUILT-IN VTY-UI WIDGETS
51
A FormattedText widget can be created from a String with the plainText function
and can be laid out in the usual way:
t1 <- plainText "blue" >>= withNormalAttribute (fgColor blue)
t2 <- plainText "green" >>= withNormalAttribute (fgColor green)
ui <- (return t1) <++> (return t2)
4.9.1
Formatters
In addition to rendering plain text strings, we can use “formatters” to change the arrangement and attributes of text. Formatters can manipulate structure and attributes to change
the text layout and appearance.
To use a formatter with a text widget, we must use a different constructor function, textWidget:
t <- textWidget "foobar" wrap
When formatters are applied, the text is automatically broken up into “tokens,” each of
which indicates sequences of whitespace or non-whitespace characters. Each token stores
its own attribute and it is these tokens on which formatters operate.
The Text module provides two formatters: wrap and highlight. wrap wraps the
text to fit into the DisplayRegion available at rendering time. highlight uses the
pcre-light1 library to highlight text using “Perl-compatible” regular expressions. To
construct a highlighting formatter, we must provide the regular expression used to match
strings as well as the attribute that should be applied to the matches:2
let doHighlight = highlight (compile (pack "bar") [])
(fgColor bright_green)
t <- textWidget "Foo bar baz" doHighlight
Formatters can be composed with the &.& operator. This operator constructs a new formatter which will apply the operand formatters in the specified order. We can use this
operator to compose the built-in formatters on a single FormattedText widget:
t <- textWidget "Foo bar baz" (doHighlight &.& wrap)
1
pcre-light on Hackage: http://hackage.haskell.org/package/pcre-light-0.3.1.1
Since formatters operate on individual tokens, the highlight formatter applies its regular expression to
each token individually, so it will only ever match sequences of characters in each token rather than matching
more than one token.
2
CHAPTER 4. GUIDED TOUR OF BUILT-IN VTY-UI WIDGETS
52
Growth Policy
FormattedText widgets do not grow horizontally or vertically.
4.10
Centering
The Centering module provides widgets for centering other widgets horizontally and
vertically:
• hCentered – takes a Widget a and centers it horizontally. Returns a value of type
Widget (HCentered a).
• vCentered – takes a Widget a and centers it vertically. Returns a value of type
Widget (VCentered a).
• centered – takes a Widget a and centers it both horizontally and vertically using hCentered and vCentered. Returns a value of type Widget (VCentered
(HCentered a)).
Horizontal and vertical centering are only useful if the widget being centered doesn’t grow
to fill the available space on its own, since it would be as large as the available space and
thus would be centered implicitly. To constrain a growing widget to make it centerable,
see Sections 4.13 and 4.12.
Growth Policy
HCentered widgets always grow horizontally and defer to their children for vertical
growth policy. Likewise, VCentered widgets always grow vertically and defer to their
children for horizontal growth policy. The centered function returns a widget which
always grows in both directions.
4.11
Fills
The Fills module provides space-filling widgets which can be used to add “flexible”
space to control layout. Fixed-size widgets often need flexible space to fill the terminal, so
we use “fill” widgets to do this.
CHAPTER 4. GUIDED TOUR OF BUILT-IN VTY-UI WIDGETS
53
There are two types of fills:
• Horizontal, created by the hFill function. hFill takes a fill character and a height
and fills available space with that character using the current attribute settings.
• Vertical, created by the vFill function. vFill takes a fill character and fills available space with that character using the current attribute settings.
Growth Policy
HFills always grow horizontally but not vertically. VFills always grow vertically but
not horizontally.
4.12
Fixed-Size Widgets
The Fixed module provides widget containers which fix the amount of spaced used to
render the child. This can be useful when you know that an element of your interface has
the potential to fill available space but must be fixed to a specific size for some reason.
The module provides widget types for constraining the horizontal or vertical size of a
widget. The fixed-size widget containers are created with the following functions:
• hFixed – takes a widget Widget a and a width in columns and constrains the
widget to the specified width. Returns a widget of type Widget (HFixed a). If
the HFixed widget does not have enough space to enforce the specified width, the
available space is used instead.
• vFixed – takes a widget Widget a and a height in rows and constrains the widget to the specified height. Returns a widget of type Widget (VFixed a). If the
VFixed widget does not have enough space to enforce the specified height, the
available space is used instead.
• boxFixed – takes a widget Widget a, a width in columns, and a height in rows
and constrains the widget in both dimensions. Returns a widget of type Widget
(VFixed (HFixed a)).
In addition to widget creation, some manipulation functions are provided so that the fixedsize container settings can be manipulated as desired:
CHAPTER 4. GUIDED TOUR OF BUILT-IN VTY-UI WIDGETS
54
• setVFixed, setHFixed – sets the constraint value for a fixed-size widget.
• addToVFixed, addToHFixed – adds a value to the constraint value of a fixed-size
widget.
• getVFixedSize, getHFixedSize – returns the constraint value of a fixed-size
widget.
For example, the List widget type (Section 4.14) grows vertically but we may wish to
dedicate most of the terminal to the rest of the interface. We can use vFixed to constrain
the List in this way. Below, we constrain the List to five rows of height. Assuming the
List elements are each one row high, if the List has fewer than five elements to display
then the VFixed widget will automatically pad the List to ensure that it takes up the
specified number of rows. Fixed-size widgets thus guarantee that the specified space is
consumed.
lst <- newList (green ‘on‘ black)
ui <- vFixed 5 lst
Growth Policy
Since VFixed and HFixed widgets are designed to constrain their children in a specific
dimension, they never grow in the constrained dimension. For the other dimension, fixedsize widgets always defer to their children for the growth policy.
4.13
Limits
The Limits module provides widgets for setting upper bounds on the sizes of other widgets. These widgets differ from the Fixed module we saw in Section 4.12; “limit” widgets
do not pad their children if the children render to Images smaller than the specified space,
whereas fixed-size widgets pad their children, thus guaranteeing that the specified space
will be consumed.
The limiting widget API is similar to that of the Fixed module. Limiting widgets are
created as follows:
• hLimit – takes a widget Widget a and a width in columns and constrains the
widget to the specified width. Returns a widget of type Widget (HLimit a). If
CHAPTER 4. GUIDED TOUR OF BUILT-IN VTY-UI WIDGETS
55
the HLimit widget does not have enough space to enforce the specified width, the
child widget is not padded.
• vLimit – takes a widget Widget a and a height in rows and constrains the widget to the specified height. Returns a widget of type Widget (VLimit a). If the
VLimit widget does not have enough space to enforce the specified height, the child
widget is not padded.
• boxLimit – takes a widget Widget a, a width in columns, and a height in rows
and constrains the widget in both dimensions. Returns a widget of type Widget
(VLimit (HLimit a)). If the child widget is smaller, it is not padded.
In addition to widget creation, some manipulation functions are provided so that the limit
settings can be manipulated as desired:
• setVLimit, setHLimit – sets the constraint value for a limiting widget.
• addToVLimit, addToHLimit – adds a value to the constraint value of a limiting
widget.
• getVLimitSize, getHLimitSize – returns the constraint value of a limiting widget.
Growth Policy
Limiting widgets never grow in the constrained dimension and defer to their children for
growth policy otherwise.
4.14
Lists
The List module provides a rich interface for displaying, navigating, and selecting from
a list of elements.
Lists support the following key bindings:
• Up, Down – changes the currently-selected element by one element in the respective
direction.
CHAPTER 4. GUIDED TOUR OF BUILT-IN VTY-UI WIDGETS
56
• PageUp, PageDown – changes the currently-selected element by a page of elements,
which depends on the number of elements currently shown in the list.
• Enter – notifies event handlers that the currently-selected item has been “activated.”
Lists are implemented with the type List a b. Its two type parameters are as follows:
• internal item type, a – This is the type of the application-specific value stored in each
list item. This is the data that is represented by the visual aspect of the list element
and it will not necessarily have anything to do with the visual representation.
• item widget type, b – This is the type of the widget state of each element as it is represented in the interface. For example, a simple list of strings might use String as its
internal value type and Widget FormattedText (Section 4.9) as its widget type,
resulting in a list of type List String FormattedText.
Lists are created with the newList function:
lst <- newList attr
newList takes one parameter: the attribute of the currently-selected item to be used when
the list is not focused. The List uses its own focus attribute (Section 2.5.2) as the attribute
of the currently-selected item when it has the focus. The widget type of the list (b above)
won’t be chosen by the type system until you actually add something to the list.
Items may be added to a List with the addToList function, which takes an internal
value (e.g., String) and a widget of the appropriate type:
let s = "foobar"
addToList lst s =<< plainText s
In addition, items may be inserted into a List at any position with the insertIntoList
function.
There are two restrictions on the widget type that can be used with Lists:
• The Widget b type must not grow vertically. This is because all List item widgets
must take up a fixed amount of vertical space so the List can manage scrolling. If
the widget grows vertically, addToList will throw a ListError exception.
CHAPTER 4. GUIDED TOUR OF BUILT-IN VTY-UI WIDGETS
57
• All widgets added to the List must have the same height. This is because the list
uses the item height to calculate how many items can be displayed, given the space
available to the rendered List. If you specify a widget whose rendered size doesn’t
match that of the rest of the wigets of the list, layout problems are likely to ensue.
Items may be removed from Lists with the removeFromList function, which takes a
Widget (List a b) and an item position, removes the item at the specified position,
and returns the removed item:
(val, w) <- removeFromList lst 0
If the position is invalid, a ListError is thrown. removeFromList returns the internal
value (val) and the corresponding widget (w) of the removed list entry.
All of the items can be removed from a List with the clearList function. clearList
does not invoke any event handlers for the removed items.
In addition to addToList, the List API provides the setSelected function. This function takes a List widget and an index and scrolls the list so that the item at the specified
position is selected. If the position is out of bounds, the List is scrolled as much as possible.
4.14.1 List Inspection
The List module provides some functions to get information about the state of a List:
• getListSize – returns the number of elements in a List.
• getSelected – takes a Widget (List a b) and returns Nothing if the List is
empty or returns Just (pos, (val, widget)) corresponding to the list index,
internal item value, and widget of the currently-selected list item.
• getListItem – takes a Widget (List a b) and an index and returns Nothing
if the List has no item at the specified index item or returns Just (pos, (val,
widget)) corresponding to the list index.
4.14.2
Scrolling a List
Although the list key bindings are bound to the List’s scrolling behavior, the List module exports the scrolling functions for programmatic manipulation of Lists. Note that in
CHAPTER 4. GUIDED TOUR OF BUILT-IN VTY-UI WIDGETS
58
all cases, the scrolling functions change the position of the currently-selected item and, if
necessary, scroll the list in the terminal to reveal the newly-selected item.
• scrollUp – moves the selected item position toward the beginning of the List by
one position.
• scrollDown – moves the selected item position toward the end of the List by one
position.
• pageUp – moves the selected item position toward the beginning of the List by one
page; the size of a page depends on the height of the List’s widgets and the amount
of space available to the rendered List.
• pageDown – moves the selected item position toward the end of the List by one
page; the size of a page depends on the height of the List’s widgets and the amount
of space available to the rendered List.
• scrollBy – takes a number of positions and moves the selected item position in the
specified direction. If the number is negative, this scrolls toward the beginning of
the List, otherwise, it scrolls toward the end.
4.14.3
Handling Events
The List type produces a variety of events:
• scrolling events – events indicating that the position of the currently-selected item
has changed. Handlers are registered with onSelectionChange and receive an
event value of type SelectionEvent. A SelectionEvent describes whether the
selection has been turned “off”, which happens when the last element in the List is
removed, or whether it is on and corresponds to an item.
• item events – events indicating that an item has been added to or removed from the
List. Handlers for added items are registered with onitemAdded receive event
values of type NewItemEvent. Handlers for removed items are registered with
onItemRemoved and receive event values of type RemoveItemEvent.
• item activation – events indicating that the currently-selected item was activated, which
occurs when the user presses Enter on a focused List. Handlers for activation
events are registered with onItemActivated and receive event values of type
ActivateItemEvent.
CHAPTER 4. GUIDED TOUR OF BUILT-IN VTY-UI WIDGETS
59
Scrolling events are generated by the functions described in Section 4.14.2. Item activation
may be triggered programmatically with the activateCurrentItem function.
Growth Policy
Lists always grow both horizontally and vertically.
4.15
Padding
The Padding module provides a wrapper widget type, Padded, which wraps another
widget with a specified amount of padding on any or all four of its sides.
We create padded widgets with the padded function, which takes a child of type Widget
a and a padding value. In the following example we create a FormattedText widget
and pad it on all sides by two rows (or columns, where appropriate):
w <- plainText "foobar"
w2 <- padded w (padAll 2)
The padding itself is expressed with the Padding type, whose values store padding settings for the top, bottom, left, and right sides of an object in question. Padding values are
created with one of the following functions:
• padNone – creates a Padding value with no padding.
• padAll – takes a single parameter, p, and creates a Padding value with p rows or
columns of padding on all four sides.
• padLeft, padRight, padTop, padBottom – each takes a single parameter and
creates a Padding value with the specified amount of padding on the specified side
indicated by the function name.
• padLeftRight, padTopBottom – each takes a single parameter and creates a Padding value with the specified amount of padding on both sides indicated by the
function name.
With these basic Padding constructors we can construct more interesting Padding values
with the pad function:
CHAPTER 4. GUIDED TOUR OF BUILT-IN VTY-UI WIDGETS
60
let p = padNone ‘pad‘ (padAll 5) ‘pad‘ (padLeft 2)
The Padding type is an instance of the Paddable type class, of which pad is the only
method. The Padding instance of Paddable just adds the padding values together.
In addition to the padded function, the Padding module provides the withPadding
combinator to created a Padded widget in the following way:
w <- plainText "foobar" >>= withPadding (padAll 2)
Growth Policy
Padded widgets always defer to their children for both horizontal and vertical growth
policy.
4.16
Progress Bars
The ProgressBar module provides the ProgressBar type which you can use to indicate task progression in your applications.
ProgressBars can be created with the newProgressBar function. The function takes
two Color arguments indicating the colors to be used for the complete and incomplete
portions of the progress bar, respectively:
bar <- newProgressBar blue white
ProgressBars are composite widgets; to lay them out in your applications, use the
progressBarWidget function:
ui <- (plainText "Progress: ") <--> (return $ progressBarWidget bar)
A ProgressBar tracks progress as an Int n (0 ≤ n ≤ 100). To set a ProgressBar’s
progress value, use setProgress or addProgress:
setProgress bar 35
addProgress bar 1
CHAPTER 4. GUIDED TOUR OF BUILT-IN VTY-UI WIDGETS
61
Calls to setProgress and addProgress resulting in a progress value outside the allowable range will have no effect.
To be notified when a ProgressBar’s value changes, use the onProgressChange function. Handlers for this event will receive the new progress value:
bar ‘onProgressChange‘ \newVal -> ...
ProgressBars are best used with the schedule function described in Section 2.5.3.
Growth Policy
ProgressBars grow horizontally but do not grow vertically.
4.17
Tables
The Table module provides a table layout widget which embeds other widgets and provides full control over column and cell padding, alignment, and cell borders.
The Table creation function newTable requires two parameters which govern the overall
table behavior:
• column specifications – a list of values specifying how each column in the table is to
behave, including its width policy, alignment, and padding settings
• border configuration – a value specifying how the table’s borders are to be drawn (if
any)
Here is an example of a table with two columns and full borders:
tbl <- newTable [column (ColFixed 10), column ColAuto] BorderFull
To add rows to the table, we use the addRow function and the row constructor .|. to
construct rows:
n <- plainText "Name"
ph <- plainText "Phone Number"
addRow tbl $ n .|. ph
CHAPTER 4. GUIDED TOUR OF BUILT-IN VTY-UI WIDGETS
62
In the following sections we will go into more detail on the table API.
4.17.1
Column Specifications: the ColumnSpec Type
newTable’s column specification list dictates how many terminal columns the Table will
have and how they will behave. The column specification type, ColumnSpec, specifies
three properties of a column:
• Width – either a fixed number of columns, ColFixed, or automatically sized, ColAuto.
• Alignment – left-aligned by default.
• Padding – no padding by default.
The width of a column dictates how many columns will be allocated to it at rendering time.
A ColFixed column will be rendered in the specified number of columns. A column with
a ColAuto width will be allocated a flexible amount of width at rendering time.
For example, if a Table with no borders is rendered in a region with 80 columns and has
two ColFixed columns with 10 and 20 columns respectively and one ColAuto column,
the ColAuto column will be given 80 − (10 + 20) = 50 columns of space in the rendering
process. A Table may have any number of ColAuto columns; in general, the remaining
space is divided evenly between them.
The padding and alignment in the ColumnSpec serve as the default properties for each
cell in the column unless a cell has overridden either.
The ColumnSpec type is an instance of the Paddable type class we saw in Section 4.15,
so we can specify the default Padding for a column with the pad function:
newTable [column ColAuto ‘pad‘ (padAll 2)] BorderFull
The ColumnSpec type is also an instance of the Alignable type class provided by the
Table module. This type class provides an align function which we can use to set the
default cell alignment for the column:
newTable [column ColAuto ‘align‘ AlignRight] BorderFull
The align function takes an Alignment value. Valid values are AlignLeft, AlignCenter, and AlignRight.
CHAPTER 4. GUIDED TOUR OF BUILT-IN VTY-UI WIDGETS
4.17.2
63
Border Settings
Tables support three border configurations using the BorderStyle type. Valid values
are as follows:
• BorderNone – no borders of any kind.
• BorderFull – full borders on all sides of the table and in between all rows and
columns.
• BorderPartial – borders around or in between some elements of the table; this
constructor takes a list of BorderFlags, whose values are Rows, Columns, and
Edges.
A Table’s border style cannot be changed once the Table has been created.
4.17.3
Adding Rows
The addRow function provides a flexible API for adding various types of values to table
cells. The function expects an instance of the RowLike type class. This type class is intended to be instanced by any type that contains a value that can be embedded in a table
cell. Any Widget a is a RowLike, so any widget can be added to a table in a straightforward way:
t <- plainText "foobar"
addRow tbl t
In addition, empty cells can be created with the emptyCell function:
addRow tbl emptyCell
The above examples work in the case where the Table has only one column; to construct
rows for Tables with multiple columns, we use the row constructor, .|., which takes
any two RowLike values and constructs a row from them:
t1 <- plainText "foo"
t2 <- plainText "bar"
addRow tbl1 $ t1 .|. t2 -- tbl1 has two columns
t3 <- plainText "baz"
addRow tbl2 $ t1 .|. t2 .|. t3 -- tbl2 has three columns
CHAPTER 4. GUIDED TOUR OF BUILT-IN VTY-UI WIDGETS
64
The only restriction on table cell content is that any widget added to a table cell must not
grow vertically. If it does, addRow will throw a TableError exception.
4.17.4
Default Cell Alignment and Padding
The Table stores default cell alignment and padding settings which apply to all cells in
the table. These settings are set with the following functions:
• setDefaultCellAlignment – sets the default Alignment used for all cells in the
table.
• setDefaultCellPadding – sets the default Padding value used for all cells in
the table.
We can override these settings on a per-column basis by setting Alignment and Padding
on the ColumnSpec values as we saw in Section 4.17.1.
setDefaultCellPadding tbl (padLeft 1)
setDefaultCellAlignment tbl AlignCenter
As we will see in the following section, we can even override these settings on a per-cell
basis.
4.17.5
Customizing Cell Alignment and Padding
By default, each table cell uses its column’s alignment and padding settings. If the column’s ColumnSpec has no alignment or padding settings, the table-wide defaults will be
used instead. However, it is possible to customize these settings on a per-cell basis.
Every widget in a Table is ultimately embedded in the TableCell type. This type holds
the widget itself and any customized alignment and padding settings. The TableCell
type is an instance of the Paddable and Alignable type classes so we can use the familiar pad and align functions to pad and align the TableCell.
To customize a cell’s properties, we must first wrap the cell widget in a TableCell with
the customCell function:
t <- plainText "foobar"
addRow tbl $ customCell t
CHAPTER 4. GUIDED TOUR OF BUILT-IN VTY-UI WIDGETS
65
Then we can use pad and align on the TableCell:
t <- plainText "foobar"
addRow tbl $ customCell t ‘pad‘ (padAll 1) ‘align‘ AlignRight
How Cell Alignment Works
Cell alignment determines how remaining space will be used when a cell’s widget is rendered. The default poilcy, AlignLeft, indicates that when a cell’s widget is rendered,
it will be right-padded with a space-filling widget so that it takes up enough on-screen
columns to fill the width specified by the Table’s ColumnSpec. The AlignRight and
AlignCenter settings behave similarly.
What this means is that the alignment settings do not dictate how the contents of each cell
are laid out; they only dictate how the left-over space is used when a cell widget does
not fill the table’s column. In most cases this distinction is effectively unimportant, but in
some cases it may be helpful to understand.
Consider a table cell which contains an Edit widget. Edit widgets grow horizontall.
Any Edit widget placed in a table cell will always fill it, so alignment settings will not
affect the result. However, if the Edit widget is constrained with a “fixed” widget as
described in Section 4.12, if any space is left over, the widget will be padded according to
the alignment setting.
Growth Policy
Tables do not grow vertically but will grow horizontally if they contain any ColAuto
columns.


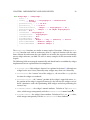
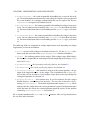
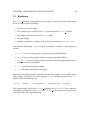

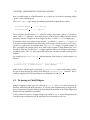
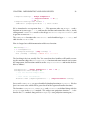
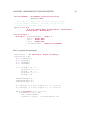
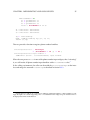


![Defining Event Handlers [Backbase Manual]](http://vs1.manualzilla.com/store/data/005692904_1-d6f01c41c66ce6049d8fb6a78592ae1b-150x150.png)