1
6-1 Configuring NT31/631 for Modicon
6-1 Configuring NT31/631 for Modicon
This section describes specific hardware configuration requirements and
equipment necessary for connecting NT31/631 to compatible Modicon
TSX Micro, Premium or Quantum PLCs.
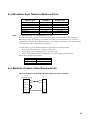
Note: Do not use 9 to 9 pin cable with 9 to 25 pin adapter when connecting the cable to 25 pin port on
the PT.
6-1-1 Connecting NT31/631 to Modicon TSX Micro or Premium
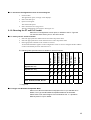
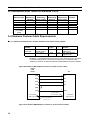
To connect the NT31/631 to the Modicon TSX Micro or Premium you will need the following
equipment:
• Modicon TSX Micro (TSX 37-21 or TSX 37-22) or Premium PLC
• Multiprotocol PCMCIA card : TSX SCP 111 for RS 232C or TSX SCP 114 for RS 422A.
• Connecting cable for PCMPIA card : TSX SCP CD 1030 for RS 232C or TSX SCP CM 4030 for
RS-422A communication.
• NT31/631 PT with serial cable to connect PT and PLC (please see Section 6-4 for appropriate cable)
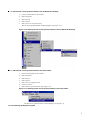
Q To connect NT31 (port B) to Modicon TSX Micro or Premium PLC:
1. Mount the connecting cable to PCMCIA card.
2.
Set the PCMCIA card to PCMCIA slot on TSX Micro or Premium PLC.
3.
Connect the 25 pin cable to the 25 pin end of connecting cable with PCMCIA card.
4. Connect the other 25 pin end to port B of NT31.
Q To connect NT31/631 (port A or B) or NT31 (port A) to Modicon 90-20 or 90-30 with built-in serial
port:
1. Mount the connecting cable to PCMCIA card.
2.
Set the PCMCIA card to PCMCIA slot on TSX Micro or Premium PLC.
3.
Connect the 25 pin cable to the 25 pin end of the connecting cable with PCMCIA card.
4. Connect the 9 pin cable to the 9 pin port of the NT31/631(port B is default).
Q To configure PCMCIA card for Modbus:
1. Configure the link of PCMCIA card for MODBUS/JBUS LINK.
2.
Set the type for Slave.
3.
Set the transmission speed for 9600 or 19,200.
4.
Set the data for RTU(8bit).
5.
Set the Stop for 0 or 1.
6.
Set the Parity for none, odd or even.
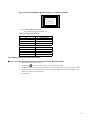
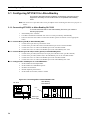
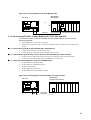
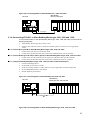
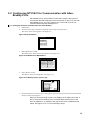
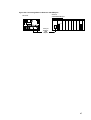
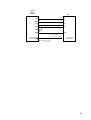
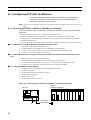
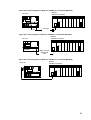
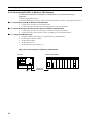
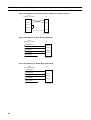
Figure 6-1 Connecting NT31 to Modicon TSX Micro or Premium (RS-232C)
Modicon
TSX Micro or Premium
NT 31 PT
PRINTER
PORT A
PORT B
OR
54
25 to 25 pin
Or 9 to 25 pin