1
Getting Started with Trace: Community Configuration
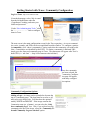
Log it to Trace: http://trace.tennessee.edu/
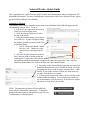
-From the homepage, select ―My Account‖
from the left-hand menu under the
―Contributors‖ heading, and enter your
NetID and password.
-Under ―Site Administration Tools,‖ select
the ―trace.tennesse.edu‖ link to configure
items in Trace.
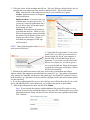
The next screen is the main configuration screen for the Trace repository. Access to communities, series, journals, and ETDs can be accomplished from this window. To configure a particular community, click ―show ir communitys‖ option, and select the community you with to edit.
Note: Communities are identified by their URL. To obtain a community‘s shortened URL,
simply go to the front-end community page in Trace. The short name will appear after Trace‘s
home URL (i.e. ‗utk-fami‘ — http://trace.tennessee.edu/utk-fami/)
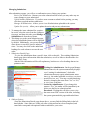
Once the community
has been selected, the
Community Configuration page will appear,
with many configuration options.
Community Configuration Options
Adding a Logo: An image can be uploaded to decorate the
top of a community page. The logo must be saved as a .gif,
and can be only 640px wide. You then have the option to
modify WIDTH and HEIGHT. If the image contains the
Community name (ex. a banner), you can select the ‗Only
show community logo?‘ box. Also, if you wish to have the
community title above the image, select the ‗Community Title and Community Logo are stacked’ option.