1
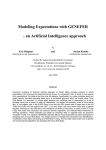
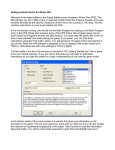
Internet Currency Trading System User Manual
INTRODUCTION
Welcome to the Internet Currency Trading System (ICTS®) User Manual. This
Manual is designed to introduce the ICTS® to a trader, to show how to use the
system to trade, and to provide a general overview of the features available to
traders using the ICTS®.
By reading this manual, you agree to release the provider and creators of this
manual from any liability directly or indirectly resulting from its use, or from any
possible errors found within.
Page 1 of 40
Internet Currency Trading System User Manual
TABLE OF CONTENTS
Logging In and Configuring the Interface
3
Login.........................................................................................................................3
Motifs........................................................................................................................4
Adjusting Windows ................................................................................................5
Help ..........................................................................................................................6
Placing Orders To Open Positions
8
Reviewing the Rates................................................................................................8
Selecting One or Multiple Accounts ....................................................................9
Setting the Default Trade Amount.....................................................................10
Placing a Market Order........................................................................................11
Order Confirmation .............................................................................................13
Order Negotiation & Processing........................................................................14
“Hedging” Positions.............................................................................................15
Placing Entry Stop and Entry Limit Orders .....................................................16
Managing Pending Orders
18
Viewing Pending Orders......................................................................................18
Changing the Rate of Pending Stop & Limit Orders ......................................20
Setting Stops and Limits for a Pending Entry Order ......................................21
Removing a Pending Order.................................................................................22
Managing & Closing Open Positions
23
View Open Positions............................................................................................23
Place a Stop or Limit on an Open Position ......................................................24
Close an Open Position from the Open Positions Window..........................26
Close a Open Positions from the Summary Window .....................................27
Close Position Order Confirmation...................................................................28
Close Position Order Negotiation & Processing .............................................29
“Hedge” Position..................................................................................................30
Close Position and Its Corresponding Hedging Position...............................31
Managing Your Account(s)
32
Viewing Account Information............................................................................33
Viewing Margin Call Prices .................................................................................34
Account Types ......................................................................................................35
Setting Group Names ..........................................................................................36
Viewing Managed Accounts................................................................................37
Creating and Viewing Reports
38
Generating Account Statement Reports............................................................39
Generating Trading History Reports .................................................................40
Page 2 of 40
Internet Currency Trading System User Manual
USING THE ICTS®
LOGGING IN AND CONFIGURING THE INTERFACE
Login
The Login dialog box appears when the Internet Currency Trading System
(ICTS®) starts. Enter your User Name, Password, then click the OK button.
The ICTS® trading applet will appear on the screen. To change your password,
open the File menu on the top bar of the trading applet and select Change
Password.
If you are satisfied with the layout and look of the windows of the trading applet,
proceed to the next section—Placing Orders. If not, there are several
adjustments that can be made to the look and feel of the trading interface.
Login Dialog Box
File, View, Window, and Help menus on the top bar of the trading applet.
Page 3 of 40
Internet Currency Trading System User Manual
Motifs
The ICTS® has several motifs available that change the look and feel of the
applet’s windows without affecting functionality. To select from available motifs,
open the View menu, select Look and Feel, and then choose from the available
motifs.
The ICTS® also has two options for viewing dealing rates: the standard table
layout, and a new user-friendly “box” layout. Open the Window menu, and click
on “New Dealing Rates Style” to toggle between the two modes. The change
will be immediately reflected in the “look and feel” of the Dealing Rates
Window. A checkmark in front of “New Dealing Rates Style” indicates that
the new “box” layout is selected.
TIP:
If you’ve arranged the trading screen windows inconveniently, there’s always the
“Arrange by Default” option in the “Window” menu!
Page 4 of 40
Internet Currency Trading System User Manual
Adjusting Windows
Use the Window menu to choose, save, and restore the arrangement of windows
on the screen. To choose which windows will appear, open the Windows menu.
You will see the names of the available windows. Click in front of the name to
place or remove a checkmark. Checked windows are shown, and unchecked ones
are hidden.
To show all windows on the trading screen, select “Show All” in the Window
menu.
To save your arrangement of windows, use the “Save Settings” option in the
File menu. To return to the system’s default arrangement, select the “Arrange
By Default” function in the Window menu.
Page 5 of 40
Internet Currency Trading System User Manual
Help
The Help menu need not be an item of last resort, as it connects you to
pertinent and updated information that will help you get the most out of the
trading interface.
To access the latest version of the User Manual, select the “User Manual”
option from the View menu. For information about the system name and
version—you will need when making technical support queries—select the
“About” option in the selfsame View menu. (Please make sure that pop-up
blocker tools in your browser are deactivated, as they will block these new
windows).
TIP:
Access the User Manual through “Help.”
Page 6 of 40
Internet Currency Trading System User Manual
NOTE:
The ICTS® trading screen is designed to make it easy to open, close, and control
your positions, as well as to track your positions’ value, view information about
the market, and reference your account information in real time.
In the following sections, you will learn to open positions—market orders—and
place stop/limit orders; then we will deal with pending orders, and finally manage
positions that are already open, for example placing stops and limits and closing
positions.
Please note that the instructions in the Placing Orders section are applicable to
opening, not closing, positions.
Page 7 of 40
Internet Currency Trading System User Manual
PLACING ORDERS TO OPEN POSITIONS
In this section, we will cover the act of placing a market order to open one or
multiple positions. Orders to close open positions, as well as the modification of
existing positions, will be covered in the Managing and Closing Open
Positions section.
Reviewing the Rates
Begin by reviewing the current rates. The Dealing Rates Window displays the
current live executable rates from the Dealing Desk, by instrument or currency
pair, as well as the time of the last update. Trades are executed from this window.
The Currency Reference Rates Window contains historical information per
instrument or currency pair, including the last executed bid/ask prices, daily high
bid/low ask price, and the overnight premium.
The Rates Monitor Window also displays both historical and current tick rates
for whatever instrument or currency pair is selected in that window.
Page 8 of 40
Internet Currency Trading System User Manual
Selecting One or Multiple Accounts
Before you place your order to open a position, select the account or accounts
that you will be using for this trade in the Account Information Window.
If you are trading multiple accounts, you can select the accounts you would like
to open positions for in the Account Information Window. To select adjoining
accounts, click on the first with your mouse, then hold and drag across the
accounts you wish to select. To select accounts one by one, or to de-select
accounts that have already been selected, hold the Control key and click on the
accounts you wish to select or deselect.
Account Information Window
Having chosen the proper account or group of accounts, you can proceed with
opening your position.
If you select multiple accounts, your order will be distributed between the
selected accounts based on the default trade amount set for each account. You
can only place orders for multiple accounts for a number of lots that is a multiple
of the sum of the default trade amounts for all the accounts. You will learn
to adjust the default amount in the next section.
For example, let’s say that you are opening a position for two accounts. The first
account has a default trade amount of 1 lot, and the second has a default trade
amount of 3 lots. You can only open a position for a multiple of 1+3 = 4 lots, so
you choose 8 lots—twice the default trade amounts. When the order is executed,
the first account will have opened a position for 2 lots, and the second for 6.
If one account of the several you are opening a position for does not have
sufficient usable margin to open the position, the order will be rejected for that
account, but will proceed for the other selected accounts.
Page 9 of 40
Internet Currency Trading System User Manual
Setting the Default Trade Amount
Every time you execute a Market Order, you are asked the amount of units, or
lots, that you would like to trade. The default quantity is 1 lot. If you would like
to set a different default amount, you can do so independently for each trading
account.
In the Account Information Window, left-click the “DA” field for the account
for which you wish to set the new default trade amount. The “Default Amount”
dialog box will appear.
Enter the amount of lots that will be traded on this account by default, then click
OK.
Default Amount dialog box
Page 10 of 40
Internet Currency Trading System User Manual
Placing a Market Order
To place a Market Order with the Dealing Desk at the current displayed market
price (shown in the Dealing Rates Window), left-click on a rate for the
instrument or currency pair that you wish to trade under the column that
corresponds to the trading action you wish to take, i.e. Bid/Sell or Ask/Buy. You
may also right-click anywhere within any currency record in the Dealing Rates
Window, and select the Market Order command from the pop-up menu.
NOTE:
A “Buy” or “Ask” Market Order on a currency pair buys the first currency in the
pair and sells the second. For example, a “Buy” order for the EURUSD pair buys
the Euro in exchange for the US Dollar.
Once the Market Order command is given (by clicking on a rate or selecting
Market Order from the pop-up menu), the Amount Input dialog box will
appear. You will see a confirmation of the type of trade you wish to execute (i.e.
Buying GBP / Selling USD).
Amount Input dialog box
NOTE:
The Trader Range is a trader’s tolerance for price change. When an order is
placed, the Dealer may reject it and offer a new price because the market has
shifted while the position was being placed. To prevent this negotiation for small
market moves, a trader can enter an amount—in pips—into the Trader Range
field in the Amount Input dialog box when opening a position. Then, if the
Dealer presents a new price that is within the Trader Range, in pips, of the
original order price, the order will go through at the Dealer’s new price,
automatically.
To place your Market Order, enter the size of the trade, in lots, in the Amount
field, and the maximum automatically allowable deviation in price, in pips, in the
Trader Range field. Then click OK. You may also click Cancel to cancel your
Market Order. If you are trading for multiple accounts, read the “Selecting One
Page 11 of 40
Internet Currency Trading System User Manual
or Multiple Accounts” and “Setting the Default Trade Amount” sections, found
above, first.
Once you press OK, your order is sent to the Dealer, who can confirm, reject,
or remove your order due to a change in market price.
While your order is being processed, it is shown in the Trader’s Orders
Window marked with the letter “I” for “Initiate.”
Page 12 of 40
Internet Currency Trading System User Manual
Order Confirmation
If the Dealer confirms the order you have just placed, the “I” record will
disappear from the Trader’s Orders Window, and the newly-opened position
will be added to the Open Positions Window. Your account information will be
updated.
Page 13 of 40
Internet Currency Trading System User Manual
Order Negotiation & Processing
If the position that is being opened is counter to, or “opposing,” an already open
position—for example an order to buy 5 lots of EURUSD when a position
already exists that sold 10 lots of EURUSD—then the opening of this
“opposing” position will not be reflected in the Open Positions Window as a
new position (unless “hedging” is in effect, see below under “Hedging
Positions”). Instead, the “opposing” position will be fully or partially closed. In
the above example, the already open position “sell 10 lots EURUSD” would be
partially closed by 5 lots.
If the order you have just placed is rejected due to changing market conditions,
the “I” order in the Trader’s Orders Window will be replaced by a new order
marked “R,” for Reject. This new order will show the new market price.
Unless the new price is within the Trader Range of the original price (see note,
right), you will then be presented with the “Order Rejected” dialog box, which
notifies you of a price change and displays the new price. You will have several
seconds to either accept this new price by clicking the “Accept New Price”
button, or to remove order by clicking the “Remove Order” button.
If no option is selected in the “Order Rejected” dialog box within the time
shown, the order will be removed by the system and you will be notified by the
Information prompt.
An order may be removed due to a change in the market conditions. If this
occurs, you will be notified by the Message from SYSTEM prompt.
Order Rejected dialog box
Information Prompt: Out of time
Message from SYSTEM prompt
Page 14 of 40
Internet Currency Trading System User Manual
“Hedging” Positions
The term “hedging” is used in this manual to refer to the ability to
simultaneously have both long and short positions open in the same instrument.
Depending on your agreement with the Dealing Desk, you may be allowed to
open positions that oppose ones that already exist. In this case, by placing the
trades from the Dealing Rates Window, you will not offset your existing open
positions, but will open new positions.
If hedging is allowed, open positions can be hedged by opening new positions
from the Dealing Rates Window in the opposite direction (i.e. Buy / Sell 5 lots
EURUSD when a position was already opened to Sell / Buy 5 lots EURUSD).
If hedging is not allowed, then a position opened counter to an existing one will
simply close or partially close the existing position (see above, under “Order
Confirmation”).
Page 15 of 40
Internet Currency Trading System User Manual
Placing Entry Stop and Entry Limit Orders
Entry Stop and Entry Limit Orders are “Conditional” orders that are aimed at
automatically “triggering” a Market Order to open or close a position at a certain
pre-set rate that is not the current market rate, if that rate is attained by the
market. If the exact rate is “skipped” between market ticks, Conditional orders
will be triggered when the pre-set rate is skipped or hit exactly.
Entry Stop and Entry Limit Orders allow traders to set up orders at desired
off-market rates to implement trading strategies without having to constantly
monitor the market.
The Entry Stop order is designed to execute at a rate that is “worse,” for the
trader, than the current market rate, while the Entry Limit order is designed to
execute at a rate that is “better,” for the trader, than the current market rate.
Amount Input dialog box
More specifically, a stop/limit will relate to the current price as follows:
Limit on a BUY position: will be greater than the current market price.
Limit on a SELL position: will be less than the current market price.
Stop on a BUY position:
will be less than the current market price.
Stop on a SELL position: will be greater than the current market price.
To initiate an Entry Stop or Entry Limit order, right-click anywhere within the
Dealing Rates Window and select the “Entry Stop Order” or “Entry Limit
Order” from the pop-up menu.
You will see the Amount Input dialog box; enter your desired price, and press
“OK.” You may press “Cancel” to cancel the order.
Once you have pressed “OK,” a new order marked “ES” (for Entry Stop) or
“EL” (for Entry Limit) will appear in the Trader’s Orders Window. If the
Page 16 of 40
Internet Currency Trading System User Manual
market rate reaches the rate specified in the order, the Dealer will execute this
order, and the order will move from the Trader’s Orders Window to a position
in the Open Positions Window. The rules of opposing positions apply to
triggered stops/limits in the same manner as to any other order to open a
position. See the “Hedging Positions” section, above, for more information.
Trader’s Orders Window.
You can remove Market and non-triggered entry orders, change prices, and set
stops and limits on non-triggered entry orders.
Page 17 of 40
Internet Currency Trading System User Manual
MANAGING PENDING ORDERS
Viewing Pending Orders
All orders that are pending, whether made by the Trader, Dealer, or the System,
including Market Orders awaiting Dealer approval, Entry Stop and Entry
Limit Orders, Margin Call Orders, and Stops / Limits on existing orders, are
displayed in the Trader’s Orders Window.
Orders in the Trader’s Orders Window are color-coded based on their status,
or “Condition.”
Reference
I
R
ES
EL
C
T
S
L
M
Condition
Color
Initiate
Green
Price changed on “open” Yellow
order
Entry stop
White
Entry limit
White
Close
Green
Price changed on “close” Yellow
order
Stop
Orange
Limit
Orange
Orders initiated by margin Red
call
The Trader’s Orders Window has four display modes for ease of use; in each
mode the Window displays a different set of orders:
Stop
Show All (+S/L): Shows all pending orders, including non-triggered
and Limit orders;
Show All: Shows all pending orders, except those Stop and Limit orders
that are not considered “Urgent” or “Imminent.”
Show Imminent: Shows all Urgent and Imminent orders only.
Show Urgent: Shows all Urgent orders only.
To select a mode, right-click on the Window’s header and select one of the four
above modes.
Page 18 of 40
Internet Currency Trading System User Manual
Orders are considered Urgent when they are awaiting Dealer interaction. This
includes orders to Open a Position (“I”), Close a Position, (“C”), as well as
triggered Entry Stop and Entry Limit Orders, and triggered Stops and Limits on
existing positions—i.e. all orders except non-triggered Stops and Limits.
Conditional orders (Stops, Limits, Entry Stop, Entry Limit) are considered
Imminent when the current market rate is less than or equal to a pre-set number
of pips away from the rate at which the order is set to be executed.
The number of pips, called the imminent distance, can be pre-set in the
Trader’s Orders Window by right-clicking the Window header and selecting the
“Set Imminent Distance” command. The “Enter Imminent Distance
Value” dialog box will appear. Enter the desired value for the imminent distance,
in pips, then press “OK” to save the value or “Cancel” to cancel the command.
Enter Imminent Distance Dialog
Page 19 of 40
Internet Currency Trading System User Manual
Changing the Rate of Pending Stop & Limit Orders
To change the order rate of a pending Entry Stop or Entry Limit Order, rightclick anywhere within that Order’s record in the Trader’s Orders Window, and
choose the “Change Price” command from the pop-up menu.
The “Change Price” dialog box will appear, marked with the Order number
for verification. To proceed, enter the new rate, and click OK. Click Cancel to
cancel the change.
Change Price Dialog
Page 20 of 40
Internet Currency Trading System User Manual
Setting Stops and Limits for a Pending Entry Order
To set a Stop or Limit Condition for a pending Entry Order (“ES” or
“EL”), right-click anywhere within that Entry Order’s record in the Trader’s
Orders Window and choose either the “Stop” or the “Limit” command from
the pop-up menu.
The Stop/Limit Price Input dialog box will appear. Enter a new Stop or Limit
price for this Order, and click Submit (to cancel the command, click Cancel).
Once a new Stop or Limit rate is entered, the pending order will be updated with
the new Stop or Limit, and will be triggered at that price.
Stop/Limit Price Input Dialog
Page 21 of 40
Internet Currency Trading System User Manual
Removing a Pending Order
If you wish to remove an order that has been placed but has not yet been
executed, right-click anywhere within that Order’s record in the Trader’s
Orders Window, and select the “Remove Order” command from the pop-up
menu. You will see the Confirmation Prompt. Press OK to remove the order,
or press No to cancel the action.
Confirmation Prompt
Orders that can be removed include: Market Orders (“I,” “C,”), Entry Stop
and Limit Orders (that have not yet been triggered), and Limits and Stops (that
have not yet been triggered).
Page 22 of 40
Internet Currency Trading System User Manual
MANAGING & CLOSING OPEN POSITIONS
View Open Positions
All open positions are displayed in the Open Positions Window, while the
Summary Window shows a summary of all open positions, grouped by selected
account(s).
From the Open Position Window, you can view the information for every open
position, including size, applicable rates, charges, stops/limits, profit and loss (on
this position), etc. For more information about the fields in this—and all other—
windows, please consult the Functionality Specifications.
By right-clicking on the Open Position Window’s headers, you can choose to
show or hide columns, choose how the positions are sorted, and refresh the
window. You can also choose to Show or Hide the positions of individual
managed accounts.
Open Positions Window
By default, positions that are opened for individual managed accounts are
shown for the group (“G,” light blue records) account only. Account IDs for
such accounts start with the letter “m.” To show individual managed positions,
right-click on the Open Position Window’s headers, and click on the Show
Managed Positions command in the pop-up menu to place or remove the
checkmark next to its name.
Page 23 of 40
Internet Currency Trading System User Manual
Place a Stop or Limit on an Open Position
In the Open Positions Window, right-click anywhere on the record for the
position you wish to add a Stop or Limit to, or left-click on the Stop or Limit
field for the position you wish to modify. If you left-clicked on the Stop or
Limit, you will immediately see the Stop or Limit dialog box. If you rightclicked on the position, select Stop or Limit from the pop-up menu, and you
will then be presented with the dialog box.
In the Stop or Limit dialog box, enter the desired Stop or Limit rate, and
press “Submit” to enter the new Stop or Limit, or Cancel to cancel the
command.
Stop dialog box
Limit dialog box
A Stop (also known as a “stop loss”) is used to close an open order at a price
that is “worse,” for the trader, than the current market price, while a Limit is
used to close an open position at a price that is “better,” for the trader, than the
current market price. More specifically, a stop/limit will relate to the current
price as follows:
Limit on a BUY position: will be greater than the current market price.
Limit on a SELL position: will be less than the current market price.
Stop on a BUY position:
will be less than the current market price.
Stop on a SELL position: will be greater than the current market price.
Page 24 of 40
Internet Currency Trading System User Manual
NOTE:
A combination of Stop and Limit Orders will create an OCO (one cancel other)
situation. Close an Open Position from the Dealing Rates Window
NOTE:
I
If “Hedging” is allowed within the system, closing open positions from the
Dealing Rates Window is not possible, as new opposing positions will be open.
Closing a position from the Dealing Rates window means opening an opposing
position to one that is already open. Begin by placing a Market Order with the
Dealing Desk at the current displayed market price (shown in the Dealing Rates
Window). Left-click on a rate for the instrument or currency pair that you wish
to trade under the column that corresponds to the trading action opposite to that of
the already-open position, i.e. Bid/Sell or Ask/Buy. You may also right-click
anywhere within any currency record in the Dealing Rates Window, and select
the Market Order command from the pop-up menu.
Once the Market Order command is given (by clicking on a rate or selecting
Market Order from the pop-up menu), the Amount Input dialog box will
appear. You will see a confirmation of the type of trade you wish to execute (i.e.
Buying GBP / Selling USD).
To place your Market Order, enter the size of the trade, in lots, in the Amount
field, and the maximum automatically allowable deviation in price, in pips, in the
Trader Range field. Then click OK. You may also click Cancel to cancel your
Market Order. If you are trading for multiple accounts, read the “Selecting One
or Multiple Accounts” and “Setting the Default Trade Amount” sections, found
above, first.
Once you press OK, your order is sent to the Dealer, who can confirm, reject,
or remove your order due to a change in market price.
While your order is being processed, it is shown in the Trader’s Orders
Window marked with the letter “C” for “Close.”
Page 25 of 40
Internet Currency Trading System User Manual
Close an Open Position from the Open Positions Window
Open positions can be closed from the Open Positions Window by leftclicking on the Close field within the record for a position, or by right-clicking
anywhere on a position and choosing the “Close Position” command from the
pop-up menu.
The "Close Position" dialog box will appear. The Default Amount field will
show the number of lots that this position was opened with. Enter a new
Default Amount for a partial close. Enter a Trader Range, or leave at 0. Press
“OK” to close the position, or “Cancel” to cancel the command.
Close Position Confirmation dialog box
While your order executes, it is shown in the Trader’s Orders Window marked
with the letter “C” for “Close.” Now the position can either be confirmed for
execution or be rejected due to market movement.
Page 26 of 40
Internet Currency Trading System User Manual
Close a Open Positions from the Summary Window
All positions in any instrument can also be closed from the Summary
Window, by right-clicking anywhere on the record for the position(s) you wish
to close, selecting “Close Position” from the pop-up menu, and clicking OK on
the Confirmation prompt.
Close Position Confirmation Window.
Page 27 of 40
Internet Currency Trading System User Manual
Close Position Order Confirmation
If the Dealer confirms the close position order you have just placed, the “C”
record will disappear from the Trader’s Orders Window, and the newly-closed
position will be removed from the Open Positions Window. Your account
information will be updated.
Page 28 of 40
Internet Currency Trading System User Manual
Close Position Order Negotiation & Processing
If the close position order you have just placed is rejected due to a change in
market conditions, the green “C” order in the Trader’s Orders Window will be
replaced by a new order marked “T,” and colored yellow. This new order will
show the new market price.
You will then be presented with the “Order Rejected” dialog box, which
notifies you of a price change and displays the new price. You will have several
seconds to either accept this new price by clicking the “Accept New Price”
button, or to remove the order by clicking the “Remove Order” button.
If the no option is selected in the “Order Rejected” dialog box within the time
shown, the order will be removed by the system and you will be notified by the
Information prompt, and the position will remain open.
An order may be removed due to a change in market conditions. If this occurs,
you will be notified by the Message from System prompt.
Order Rejected Prompt
Information Prompt
Message from System Prompt
Page 29 of 40
Internet Currency Trading System User Manual
“Hedge” Position
The term “hedging” is used in this manual to refer to the ability to
simultaneously have both long and short positions open in the same instrument.
Depending on your agreement with your Dealing Desk, you may be allowed to
hedge existing positions by right-clicking anywhere on a position in the Open
Position Window and selecting the “Hedge” command.
If hedging is allowed, then opening a position will not close its opposing
position; the only way to close an open position when hedging is allowed is to
left click on the “Close” field within the position record in the Open Positions
Window, to right click anywhere within the position record in the Open
Positions Window and choose the “Close Position” command from the popup menu, or to set a Stop/Limit on a position.
Page 30 of 40
Internet Currency Trading System User Manual
Close Position and Its Corresponding Hedging Position
The “Close With Hedge” option, available from the Open Positions Window
closes a position as well as its respective hedging position, and is available for
hedged pairs of positions only. To execute this command, right-click anywhere
on a position in the Open Positions Window and choose the “Close With
Hedge” command from the pop-up menu. You will be presented with the
“Close With Hedge” dialog box. Input your Trader Range and/or Amount
(in lots, for a partial close) and click OK to close both orders or Cancel to cancel
the command.
Close With Hedge Dialog
Page 31 of 40
Internet Currency Trading System User Manual
MANAGING YOUR ACCOUNT(S)
The main source of information about your account is the Account
Information Window. If you are trading multiple accounts, you can see open
positions by all or selected accounts in the Summary Window.
In addition to account information and position-by-account information, the
Account Information Window and Summary Window give you access to
grouping and reporting functionality.
Page 32 of 40
Internet Currency Trading System User Manual
Viewing Account Information
In the Account Information Window, you can view the details of every
account, including:
AcctID (Account ID): Account Number.
Own (Money Owner ID): Money Owner Name.
Balance (Balance): Account Balance.
Equity (Equity): Account equity (Balance +/- Unrealized Profit/Loss).
UsdMr (Used Margin): Amount, in base currency, used as margin for
existing positions.
UsblMr (Usable Margin): Amount, in base currency, that can be used as
Margin for opening future positions. (UsblMr = Equity - UsdMr) or
(UsblMr = Balance - UsdMr)
MC (Margin Call): Shows if a Margin Call was issued on the account
(Margin Call rates depend on Dealing Desk policy).
OP (Open Positions): Number of open positions (in Lots).
Prm (Premium): The amount of premium (overnight interest / rollover
fee) that has been paid to or charged from an account for currently open
positions not liquidated at the end of the trading day. The premium rate
for each instrument is shown in the Currency Reference Rates
Window.
NetP/L (Net Profit/Loss): Net profit or loss on this account (in base
currency) for open positions at the current moment. Net P/L = Gross
P/L - Com +/- Prm.
DA (Default Amount): Default number of lots in the New Positions
dialog box for this account.
Page 33 of 40
Internet Currency Trading System User Manual
Viewing Margin Call Prices
For each account, you can view the prices at which a Margin Call would be
generated by right-clicking on any account in the Account Information
Window and choosing “MC Rates” from the pop-up menu. The Margin Call
rate, in percent, is set by the Dealing Desk per account.
If you are trading only one instrument, then the price you will see displayed will
be accurate for your current account balance. If, however, you are trading
multiple instruments, then the Margin Call price for each instrument is calculated
ceteris paribus, i.e. with all other instruments’ prices frozen.
Page 34 of 40
Internet Currency Trading System User Manual
Account Types
In the Account Information Window, accounts are marked with a “T,” “M,” or
“G,” to represent one of the following account types:
T – Individual trading account.
G – An account that represents a group of managed accounts.
M – Individual managed account within a managed group.
Page 35 of 40
Internet Currency Trading System User Manual
Setting Group Names
If you are trading with multiple accounts, you can choose groups for these
accounts and sort by group name in the Account Information Window. To
enter a Group name, left-click on the Group field in an account’s record, and
enter the name in the Group dialog box that pops up.
Group dialog box
Page 36 of 40
Internet Currency Trading System User Manual
Viewing Managed Accounts
If you use the Managed Accounts feature that groups many accounts into one
group account, you can view the accounts being managed under the group
account in the Account Information Window. By default, the Account
Information Window does not show all of the individual managed accounts in a
managed accounts group. Instead, only the blue-colored Group account is
shown, representing all of the managed accounts within that group account.
To see all individual managed accounts, right-click on the Account Information
Window header, and choose the “Show Managed” command. You will see a
checkmark next to “Show Managed” when managed accounts are shown
individually, and vice versa.
Page 37 of 40
Internet Currency Trading System User Manual
CREATING AND VIEWING REPORTS
Two types of reports are available for traders: Account Statements and
Trading History reports. Both are accessible from the Account Information
Window.
Page 38 of 40
Internet Currency Trading System User Manual
Generating Account Statement Reports
To generate an Account Statement, either right-click on the account for which
you wish to generate the statement in the Account Information Window, and
select Reports from the pop-up menu, or click on the File menu and click on
Reports. A new page will open with options for generating your account
statement. (Please make sure that pop-up blocker tools in your browser are
deactivated, as they will block this new window).
In the new window, choose the desired account number from the account pulldown menu, set the reporting period (current for the day, week, month, quarter,
year, or since open, for previous month, or user-defined by the “from” and “till”
dates; if “till” field is left blank, the report will be generated up to the current
time). After you input the required criteria, click the “Report” button, and your
report will be generated. You can then save or print it for further reference.
Page 39 of 40
Internet Currency Trading System User Manual
Generating Trading History Reports
To generate a report of the last 30 closed positions, right-click anywhere within
an account’s record in the Account Information Window, choose “Trading
History Report” from the pop-up menu, and the report will be generated. Again,
make sure that pop-up blocking tools in your browser are deactivated, as the
report will open in a new window.
Page 40 of 40