1
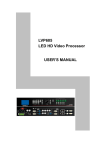
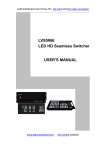
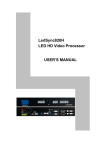
LedControlCard.com Focus On led card and led video processor LVP606 LED HD Video Processor USER’S MANUAL www.ledcontrolcard.com led control website. LVP606 User’s Manual TABLE OF CONTENTS I. Safety precautions 3 II. Packing list 4 III. Connections of hardware 1. Rear view 2. Port description 3. Connection diagram 5 5 6 IV. Frontal panel operations 1. Diagram of frontal panel 2. Button instructions (operation mode) 7 8 V. Setup 1. Enter setup of LVP606 2. Select language 3. Output image setup 4. Brightness / color / definition 5. Audio configurations 6. Exit setup 7. Factory district setup 13 13 14 16 17 18 18 VI. Specifications 19 VII.Copyright info………………………………………………………….20 --------------------------------------------------------------------------------------------------- LED VIDEO PROCESSOR 2 LVP606 User’s Manual I. Safety Precautions Danger! There is high voltage in the processor, to prevent any unexpected hazard, unless you are maintenance, please do not open the cover of the device. Warning! 1. This device shall not encounter water sprinkle or splash, please do not place anything containing water on this device. 2. To prevent fire, keep this device far from any fire source. 3. If this device gives out any strange noise, smoke or smell, please immediately unplug the power cord from receptacle, and contact local dealer. 4. Please do not plug or unplug DVI signal cable if the device is powered on. Caution! 1. Please thoroughly read this manual before using this device, and keep it well for future reference. 2. In the event of lighting or when you are not going to use the device for a long time, please pull the power plug out of receptacle. 3. Nobody other than professional technicians can operate the device, unless they have been appropriately trained or under guidance of technicians. 4. To prevent equipment damage or electric shock, please don’t fill in anything in the vent of the device. 5. Do not place the device near any water source or anywhere damp. 6. Do not place the device near any radiator or anywhere under high temperature. 7. To prevent rupture or damage of power cords, please handle and keep them properly. 8. Please immediately unplug power cord and have the device repaired, when 1) Liquid splashes to the device. 2) The device is dropped down or cabinet is damaged. 3) Obvious malpractice is found or performance degrades. --------------------------------------------------------------------------------------------------- LED VIDEO PROCESSOR 3 LVP606 User’s Manual II. Packing list Please unpack the product with care, then check whether all the following things are included in the package. If anything is found missing, please contact the dealer. Standard accessories The accessories supplied with this LED Video Processor may differ from the figures contained in the User’s Manual, but they are applicable for the regions where you live. LED video processor (LED transmitting card is optional) Power cord , DVI cable (150cm), 1pcs BNC-RCA adapter: 2 pcs, Cabinet stator: 2 pcs, Screws: 6 pcs --------------------------------------------------------------------------------------------------- LED VIDEO PROCESSOR 4 LVP606 User’s Manual III. Connections of hardware 1. Rear view Figure 1 2. Port description 1) Video Input LVP606 supports 7-channel signal input, including: Port name Description 2-channel PAL/NTSC composite video input V1~V2 VGA1~VGA4 4-channel computer analog signal input 1-channel computer DVI or HDMI digital HD signal DVI / HDMI input 2) Audio Input LVP606 supports 3-channel stereo audio switch. Of which, 1 channel is DVI/HDMI audio, the other 2 channels are AD1, AD2 external input audio. AD1 and AD2 can be mapped to the any one of all video inputs, and will be switched synchronous to the selection of video input signals. 3) Video Output (DVI) 3 same channels DVI digital graphic signal output. Of which, two can be connected with external LED transmission card or LED transmission box. The other can be connected to a local display device and used as monitor (it is strongly recommended to use this port when operating and setting LVP606). --------------------------------------------------------------------------------------------------- LED VIDEO PROCESSOR 5 LVP606 User’s Manual 4) Audio Output (AUDIO OUT) Corresponds to the selected video input signal, output this channel audio input signals. 5) Signals of other ports RS232 serial communication port 3. Connection diagram --------------------------------------------------------------------------------------------------- LED VIDEO PROCESSOR 6 LVP606 User’s Manual IV. Frontal panel operations 1. Diagram of frontal panel 2 3 9 1 4 5 1) Input preselecting button (Preselect): 6 7 While in non-PIP mode, this button is used to preselect the input signals, so as to display the status of current signal and preselected signal. While in PIP mode, this button is used for selecting PIP input signals. Besides, VGA PreSelect button can also be used to make phase adjustment for the current VGA input . 2) Input switching button (Take): While in non-PIP mode, those buttons are used to select input signals. 3) PIP Setup buttons: Window select: to define the location of the output window of input signals; Win Update: to confirm the location of windows PIP.X: to turn ON/OFF PIP function. When the indicator is ON, user can press PreSelect buttons to select group X signals as PIP. PIP.Y: to turn ON/OFF PIP function. When the indicator is ON, user can press PreSelect buttons to select group Y signals as PIP. 4) Setup buttons(Setup, Save, ↑,↓,←,→) To set the image output parameters of the processor. 5) VGA auto adjustment(VGA Auto) To autoadjust VGA input signals. 6) Cut / Fade switching buttons: (Cut,Fade) They are used to select signal switching effects, and to display current status. The Fade button can be used to set the switching time of fading in and fading out 7) PC signal bypass output(Bypass) It is used to switch full screen/partial screen display of PC signals, and the current input signal status of indicators. 8) Info: It is used to display current settings and information of processor. --------------------------------------------------------------------------------------------------- LED VIDEO PROCESSOR 7 8 9 LVP606 User’s Manual 9) Shortcut buttons (Mode.N,M1,M2,M3,M4,Ent,Save): Mode.N is applied to start/close user mode shortcut function. Indicator lights display the codition of the mode. And other buttons are used for mode setting or switching. 2. Button instructions (operation mode): There are 36 buttons on the frontal panel of LVP606, all these buttons will be operable after start. they have the following functions as described below: 1) Select input video source Port name V1~V2 VGA1~VGA4 DVI / HDMI Description 2-channel PAL/NTSC composite video input 4-channel computer analog signal input 1-channel computer DVI or HDMI digital HD signal input Input selecting buttons include Preselect buttons and Take buttons. Preselect button can be used to Preselect input signals, besides, it can also be used to display the status of current input signal and preselected signal. If there is no valid signal input, the indicator will blink; if the input signal is valid, the indicator will illuminate. When the preselected signal is confirmed valid, user can select the signal by pressing corresponding Take button. 2) VGA input auto adjustment (VGA Auto) & clock phase adjustment When the current VGA input source of LVP606 is a valid signal, press the “VGA Auto” button, LVP606 will automatically adjust the sampling parameters of the VGA signals, so as to make VGA picture complete. When the current VGA input source of LVP606 is a valid signal, continuously press corresponding “VGA Preselect” button for 5 times to manually adjust clock phase of VGA input port, make VGA picture look clear without interference. In general, the above operations are made only when new VGA signal source is to be connected in. Sometimes it may be necessary to repetitively make such adjustments for times till VGA picture looks clean, complete and stable. --------------------------------------------------------------------------------------------------- 8 LED VIDEO PROCESSOR LVP606 User’s Manual 3) Information display (Info) Press this button to view current settings and information of LVP606, it consists of 20 items. If you press “Info” again before LVP606 exit information display, LVP606 will continue to display the next item of information. 4) Select Cut / Fade mode LVP606 provide two special signal switching effects between any two input signals, i.e.: Cut (seamlessly switching) and Fade (fading in fading out). Cut (seamlessly switching): while in this mode, the system can seamlessly switch between different signals. It is also the default mode of LVP606 after startup. Fade (fading in fading out): while in this mode, the system can realize fading in fading out switching effect between different signals. Users can set the switching time of fading in and fading out though this button. The time can be 0.5 seconds,1.0 second or 1.5 seconds. 5) PIP / POP(PIP.X,PIP.Y) PIP mode of LVP606 allows user to insert a PIP window in current picture, and the size and location of the PIP window can be changed freely. The signals to be displayed in PIP window can be any signals other than current input signals. Here we call current picture “background”, and call the picture to be overlaid “PIP”. Due to the limits of hardware architecture, PIP function is subject to the following restrictions. 1. Group X signals allows for overlaying any signals other than current input signals. 2. Group Y signals only allows for overlaying any signal of Group Y other than current input signals. Operating procedures: Enter PIP display mode: Press PIP.X button PIP.Y button, their indicators will illuminate, LVP606 will enter PIP display mode, then use Preselect button to select PIP input signals, in the meantime, signals of background and PIP and their locations will appear in LCD (see Figure below): --------------------------------------------------------------------------------------------------- LED VIDEO PROCESSOR 9 LVP606 User’s Manual Source Master=DVI Sub X=V1 Sub Y=VGA3 Window 2→2 3→3 3→3 Change PIP: While in PIP mode, use Preselect button to select proper input signals, the preselected signals will be set as PIP and displayed in preset location Change the background: you must first turn off PIP mode. Press buttons to select appropriate input signal as background, then enter PIP mode again, and select a new PIP picture. Change size and location of PIP: LVP606 allows for presetting 4 PIP sizes and locations (namely 4 windows), including the locations of the output window for the LED display and 3 PIP windows. While in PIP mode, background signals, PIP.X and PIP.Y all can be changed to any location. Operating procedures: make the signals mapped to a certain area of windows by setting the windows, so as to switch the location of windows, then press WIN UPDATA to validate the settings. Caution: While in PIP mode, the window layers from the bottom to the top will be background, PIP.X, PIP.Y in turn. When you change the size and location of PIP, please avoid the bottom picture being overlapped by top picture. 6) Part / Full Press this button to switch between Part / Full display mode. This function is only available when the current input signal is PC (VGA / DVI / HDMI) signal, while other signals can only be displayed in the Full display mode. Mode Full Part Description Full screen display. Entire picture is compressed to display in LED screen, the moment the indicator above the button is OFF. Part screen display. The picture will not be compressed, but partly exported to entire LED screen, the moment the indicator above the button is ON. Caution: when the width and height of current input signals are less than the width or height of LED display (say the out_Hori_width --------------------------------------------------------------------------------------------------- 10 LED VIDEO PROCESSOR LVP606 User’s Manual or out_Vert_height), Part mode will not work. 7) Shortcut mode(Mode.N) LVP606 can set four custom modes. Each mode can save one current settings, including PIP conditions, output signals and corresponding window place. Mode.N button is applied to start/close user mode shortcut function. In Start condition (light on), press mode buttons(M1,M2,M3,M4) to adjust mode directly. Otherwise, mode can be adjusted pressing Ent button before the presentation (like”mode 1”) on the panel disappearing. Mode Save: when Mode.N indicator light was out, Press mode button (M1,M2,M3,M4). And then press Save button before the presentation (like”mode 1”) disappearing. The current PIP condition, output signals and corresponding window place are saved under this mode. --------------------------------------------------------------------------------------------------- LED VIDEO PROCESSOR 11 LVP606 User’s Manual V. Setup The following settings must be made by relevant qualified technicians. For ordinary users, unless they have received adequate technical training, they shouldn’t attempt to make the following settings! There are 28 items in 6 categories available for you to set in LVP606. Technicians can set these items as necessary, for details see the table below: Category 1 Language 3 Selection LED Output display Image Setup setup Window 2 setup Window 3 setup Window 4 setup 6 Brightness / Contrast / Saturation / Definition 7 Audio Configuration 8 Factory district Setup Items 1 Language 语言 2 Out Format 3 Out_Hori_Width 4 Out_Vert_Start 5 Out_Vert_Height 6 Out_Vert_Start 7 Win2_Hori_Width 8 Win2_Hori_Start 9 Win2_Vert_Height 10 Win2_Vert_Start 11 Win3_Hori_Width 12 Win3_Hori_Start 13 Win3_Vert_Height 14 Win3_Vert_Start 15 Win4_Hori_Width 16 Win4_Hori_Start 17 Win4_Vert_Height 18 Win4_Vert_Start 19 Brightness 20 Contrast 21 Saturation 22 Definition 23 Audio1 Config 24 Audio2 Config 25 Exit 26 De interlace 27 ADC Calibration 28 Device init --------------------------------------------------------------------------------------------------- LED VIDEO PROCESSOR 12 LVP606 User’s Manual 1. Enter Setup of LVP606 While in operation mode, continuously press “Setup” for 8 times, “Password: 8 Enter Setup …” will appear in LCD, LVP606 will enter No.1 setup item. After LVP606 enters setup mode, the 7 buttons on frontal panel will have the functions as listed in table below: Name Step ↑ ↓ ← → Save Setup Functions Select step value 2, 10 or 100 Move to next item Move to last item Decrease value or select last value Increase value or select next value Save the adjustment or selected values Enter or exit setup mode After LVP606 enters setting mode, the relevant setting information will be displayed in LCD as per the layout shown in the figure below: 2 : Out_Vert_Start ? 200 Step=10 1 2 4 Figure 3 3 5 As shown in above figure, LCD consists of five sectors: Sector Description 1 The No. of current setting item 2 ?: ask you whether to save the adjustment; !: The adjustment already be saved and takes effect. 3 Newly adjusted value 4 Step value 5 Name of current setting item 2. Select language --------------------------------------------------------------------------------------------------- LED VIDEO PROCESSOR 13 LVP606 User’s Manual Item 1: “Language 语言 ” After entering setting mode, LVP606 will enter the first setting item “Language 语言 ”. LVP606 supports Chinese and English display, press “←” or “→” to select either of them, then press “Save” to save it and make it valid. 3. Output image setup LVP606 outputs images from DVI DVI output ports. There are 7 output formats as listed in the table below. User can enter the No.2 setting item “Out Format” to select one of them. 1 2 3 4 5 6 7 Format 1024×768_60 1024×768_75 1280×1024_60 1280×1024_75 1600×1200_60 1920×1080_50 1920×1080_60 Item 2: “Output Format” For example, if you select “1280×1024_60”, it means that the output definition of LVP606 has been set as 1280×1024, and vertical refresh rate is 60Hz. Please select the output definition equal to or greater than the actual definition of LED screen. Items 2~18:“Output image setup” LVP606 allows for setting 4 output image windows: The output window for the LED display (Item 3~6) 3 PIP windows (Windows 2~4, the setup items are 7~18) The output window for the LED display exactly maps to LED screen, so LED display can display a complete picture, for details see the diagram below (take 1920x1080 60Hz for instance): --------------------------------------------------------------------------------------------------- LED VIDEO PROCESSOR 14 LVP606 User’s Manual (0,0) Out_Hori_Start Out_Width Out_Vert_Start LVP606 Out Image Area 1080 Out_Height LED Dispaly Screen LVP606 Out Format = 1920×1080 1920 As above figure shows: the size and location of the images in LVP606 output window for the LED display are defined by the following 4 groups of parameters: Item No. 2 3 4 5 Parameters Out_Width Out_Hori_Start Out_Height Out_Vert_Start Description Output width Output horizontal start Output height Output vertical start The window of PIP should be located within LED, see figure below: --------------------------------------------------------------------------------------------------- LED VIDEO PROCESSOR 15 LVP606 User’s Manual (0,0) Winx_Hori_Start Winx_Width Winx_Height 1080 PIP Window Winx_Vert_Start LED Display Screen LVP606 Out Format = 1920×1080 1920 Figure 5 As above figure shows: the size and location of the images of LVP606 PIP window are defined by the following 4 groups of parameters: Parameters Definition Window x width Winx_Width Winx_Hori_Start Window x horizontal start Window x height Winx_Height Winx_Vert_Start Window x vertical start x=2,3,4 In the adjustment, in order to distinguish windows 2, 3 and 4, they are marked in red, white and yellow respectively. Note: The initial coordinates (0, 0) of output image are defined on the left top of the output scope of 1920×1080 pixels output area. 4. Brightness / Contrast / Situration/ Definition LVP606 supports customized brightness, contrast, color Saturation and definition settings. For details see table below: --------------------------------------------------------------------------------------------------- 16 LED VIDEO PROCESSOR LVP606 User’s Manual Item No. Description Definition 19 Brightness Contrast Saturation Definition Range: 0~100, default value: 50 Range: 0~100, default value: 50 Range: 0~100, default value: 50 Option is “Sharp” or “Normal”, default value: Normal 20 21 22 Caution: (1). In order to ensure output images in complete gray, the output parameters are usually set as default values ! (2). The color parameters only apply to V1, V2 and HDMI signals. 5. Audio configurations LVP606 supports 3-channel dual-track audio switching. In the three channels, 1 channel is HDMI, the other 2 channels are AD1, AD2 external input audio. AD1 and AD2 can be respectively allocated to corresponding audio input of any input, and will be switched with the change of video input signals in synchrony. If DVI / HDMI is configured as external input audio, when audio signal is switched to DVI / HDMI, external audio will be chosen as input signals, otherwise the audio signals contained in DVI / HDMI signals will be chosen as input signals. Item No. Description Definition 23 Audio1 Config 24 Audio2 Config Audio configuration option for AD1 port Audio configuration option for AD2 port Notes: AD1, AD2 can’t be allocated to the video input signals in the same channel! --------------------------------------------------------------------------------------------------- LED VIDEO PROCESSOR 17 LVP606 User’s Manual 6. Exit setup Item 25: “Exit” Press “↑” to move to the last item: “ Exit setup ”, then press “ ←” or “ →” to select “ YES ”, then press “ Save” to exit setup mode. If you press “ Setup” key while in any setup mode, the system will skip to the No.25 item. 7. Factory district setup The following are factory district setups, users are recommended to make these setups under the guidance of manufacturer’s technicians, any improper setting or operation may result in abnormal happening to the processor. Item 26: “De interlace” When HDMI signal is interlace input signal (e.g.: 1080i) and used as PIP, due to limits of the processor, tremble may take place, it can be dispelled by setting the option “Video stabilization”. Operating procedures: After entering item No.25, press “Preselect V1” for 5 times, then press “↑” to move to Item No.26: “De interlace”, click “←” or “→” to select “Yes”, then click “Save” to reset the factory settings, the moment the system will remind you “please restart. ”, just follow the instruction. Item 27: “ADC Calibration” After inputting the analog signal to the video processor whose white balance has not been calibrated, the picture on the display may appear some bad phenomena, such as color cast, extreme-darkness. LVP606 can solve the above problems by automatically calibrating white balance based on the input analog signals (CVBS, VGA). Operating procedures: Switch to the corresponding analog input signal, enter Item No. 27 after the processor detects input signals and exports the signals to the display, press “ Save” to calibrate white balance. Caution: The white balance of all video processors has been calibrated using standard signals in the factory, please don’t set this item unless necessary! --------------------------------------------------------------------------------------------------- LED VIDEO PROCESSOR 18 LVP606 User’s Manual Item 28: “Device Init” After entering item No.25, press “Preselect V1” for 5 times, then press “↑” to move to Item No.28: “Device Init”, click “←” or “→” to select “Yes”, then click “Save” to reset the factory settings, the moment the system will remind you “Please restart.”, just follow the instruction. VII. Specifications Inputs Nums/Type Video System Composite Video Scope/Impedance VGA Format VGA Scope/Impedance DVI / HDMI Format ( HDCP ) Input Connectors Outputs Nums/Type DVI Format Output Connectors Others Control Power Operating Temp Humidity dimensions Weight 2×Composite video 4×VGA (RGBHV) 1×DVI / HDMI PAL/NTSC 1V (p_p) / 75Ω PC (VESA) ≤1600x1200 @60HZ R, G, B = 0.7 V (p_p) / 75Ω SD/HD(EIA-861B) ≤1920x1080P @60HZ PC(VESA) ≤1600x1200 @60HZ VGA:15pin D_Sub(Female) DVI:24+1 DVI_D Composite video:BNC 3×DVI 1024×768@60Hz/75Hz 1280×1024@60Hz/75Hz 1600×1200@60Hz 1920×1080p@50Hz/60Hz 24+1 DVI_D Panel Button,RS232 100-240VAC 60W 50/60Hz 5-40 ℃ 15-85% 158 mm (height) ×405mm (width) ×528mm (length) 4.2 Kg --------------------------------------------------------------------------------------------------- LED VIDEO PROCESSOR 19 LVP606 User’s Manual Dimensions: VIII. Copyright info The copyright of this Manual is owned by SHENZHEN VDWALL CO.,LTD., unless with prior consent of VDWALL, nobody is permitted to copy or use any part or all of the information contained herein. This Manual is provided for reference only, VDWALL reserves right to change the product appearance, dimensions and specifications from time to time without notice to users. --------------------------------------------------------------------------------------------------- LED VIDEO PROCESSOR 20